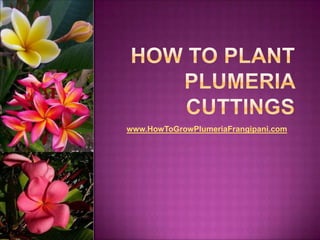
How To Plant Plumeria Cuttings
•Télécharger en tant que PPTX, PDF•
1 j'aime•4,405 vues

One of the quickest ways to enjoy plumeria flowers is to plant plumeria cuttings. One of the big advantages of propagating plumeria plants from cuttings is that the buyer is able to choose very specifically the plant he or she wants, based on the color, growth habits, fragrance or a number of other desirable traits that are present in any particular plumeria variety. Following tried and tested methods is the best insurance for one's own success in rooting plumeria cuttings, even the difficult ones.

Recommandé
Contenu connexe
Plus de Bob Walsh
Plus de Bob Walsh (6)
Dernier
Dernier (14)
How To Plant Plumeria Cuttings
- 2. One of the quickest ways to enjoy plumeria flowers is to plant plumeria cuttings. It cannot be emphasized enough to purchase plumeria cuttings only from reputable retailers to get good quality. Prices vary and prices do not always translate into quality. Higher prices though often reflect well known plumeria varieties. One of the big advantages of propagating plumeria plants from cuttings is that the buyer is able to choose very specifically the plant he/she wants, based on the color, growth habit, fragrance or a number of other desirable traits that are present in a particular plumeria variety.
- 3. Cuttings should be at least 12 inches in length and taken from mature wood. Immature cuttings taken from green wood are very hard to root even though it can be done. Certain varieties of Plumeria obtusa and some red colored plumerias are harder to root and may take longer to develop their root system. Discuss with the plumeria retailer the shipping arrangements that will guarantee that your quality plumeria cutting will arrive in good condition particularly during the colder months of the year.
- 4. While awaiting the arrival of your newly ordered cutting take the time to get all the necessary equipment to properly plant the plumeria cutting. Before planting the cutting it is recommended to have all necessary items prepared, including the pot, plant stake, rooting hormone which contains a fungicide, tie-ups, and premixed potting medium ready and available.
- 5. Based on the size of the plumeria cutting one ordered, one needs to have a container large enough to accommodate the cutting as well as allowing room for the roots to develop and grow. A proper size container is also needed for the stability of the cutting. The potting medium has to be premixed to provide excellent drainage. Otherwise, the cutting may rot if the medium retains too much moisture.
- 6. After the pot has been filled with the premixed potting medium, water it thoroughly and make sure all the water has drained prior to planting the cutting. Now it is time to plant the cutting. It is important not to plant the cutting too deep for a variety of reasons. Plumeria cuttings develop roots only at the very bottom of the cutting.
- 7. The next step is to wet the bottom of the cutting with lukewarm water, shake off any excess water, insert the cutting in the rooting hormone, and insert it into the potting medium. Add the plant stake next to the plumeria cutting and tie the cutting to the plant stake with tie-ups. The first step in the rooting process is the development of callus tissue through which the roots emerge. It is crucial at this time of the rooting process not to water the cutting to avoid stem rot.
- 8. Plumeria cuttings have such a strong life force in them that they start to develop leaves and inflorescenses without even having started the rooting process. One can find out if any roots have developed by giving the cutting a light tug to test for resistance. Any resistance indicates some root development. During this time instead of watering the cutting, mist the cutting daily to prevent it from dehydrating.
- 9. Plumeria cuttings may root within weeks or may take several months to develop roots depending on the particular plumeria variety. Following tried and tested methods is the best insurance for one's own success in rooting plumeria cuttings, even the difficult ones. Enjoy the fruits of your labors and the beauty and fragrance of your newly grown plumeria plant for years to come!
- 10. Copyright © Bob Walsh www.HowToGrowPlumeriaFrangipani.com