Subway tile designguide_0615_web
•
1 j'aime•4,712 vues

H e r i t a g e T i l e was created out of a need for tilework that embodies the same quality and craftsmanship as period architecture. Every Heritage Tile collection has been carefully designed to reproduce the specific time & place that defines your home to restore its original character and period authenticity. Heritage Tile collections each offer a complete solution for the period home, composed of the appropriate surface finishes, color palettes, trim and mouldings elements, floor mosaics, decorative designs, and ceramic accessories that define its period style.

Recommandé
Contenu connexe
Similaire à Subway tile designguide_0615_web
Similaire à Subway tile designguide_0615_web (20)
Plus de Flemington Granite
Plus de Flemington Granite (20)
Dernier
Dernier (20)
Subway tile designguide_0615_web
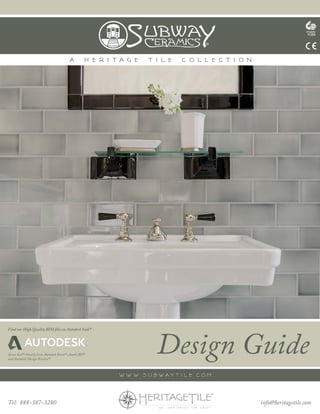
- 1. a h e r i t a g e t i l e c o l l e c t i o n w w w . s u bway t i l e . c o m Tel: 888-387-3280 info@heritagetile.com Design Guide Find our High Quality BIM files on Autodesk Seek® Access Seek® directly from Autodesk Revit®, AutoCAD® and Autodesk Design Review®
- 3. iiinfo@heritagetile.com Contents Our Mission . . . . . . . . . . . . . . . . . . . . . . . . . . . . . . . . . . . . . . . . . . . . . . . . . . . . . . . . . . . . . . . . . . . . . . . . . . . . . 2 Period Tilework Highlights . . . . . . . . . . . . . . . . . . . . . . . . . . . . . . . . . . . . . . . . . . . . . . . . . . . . . . . . . . . 3 - 4 Accent Glaze Information . . . . . . . . . . . . . . . . . . . . . . . . . . . . . . . . . . . . . . . . . . . . . . . . . . . . . . . . . . . . . 5 Glaze Palette . . . . . . . . . . . . . . . . . . . . . . . . . . . . . . . . . . . . . . . . . . . . . . . . . . . . . . . . . . . . . . . . . . . . . . . . . . . . . 6 - 9 Design Concepts . . . . . . . . . . . . . . . . . . . . . . . . . . . . . . . . . . . . . . . . . . . . . . . . . . . . . . . . . . . . . . . . . . . . . . . . 10 - 12 Products . . . . . . . . . . . . . . . . . . . . . . . . . . . . . . . . . . . . . . . . . . . . . . . . . . . . . . . . . . . . . . . . . . . . . . . . . . . . . . . . . . . 13 - 40 Field Tile & Liners Standard Field Tile & Liners . . . . . . . . . . . . . . . . . . . . . . . . . . . . . . . . . . . . . . . 13 - 14 Specialty Field Tile & Liners . . . . . . . . . . . . . . . . . . . . . . . . . . . . . . . . . . . . . . . 15 Cap Mouldings & Trim Classic Cap Mouldings & Trim . . . . . . . . . . . . . . . . . . . . . . . . . . . . . . . . . . . 16 Beveled Cap Mouldings & Trim . . . . . . . . . . . . . . . . . . . . . . . . . . . . . . . . . . 17 P-cap Mouldings (Conventional) . . . . . . . . . . . . . . . . . . . . . . . . . . . . . . . . . . 18 - 19 Smooth-top P-cap Mouldings (Conventional) . . . . . . . . . . . . . . . . . . . 20 - 21 Extended P-cap Mouldings (Traditional) . . . . . . . . . . . . . . . . . . . . . . . . . 22 Smooth-top Extended P-cap Mouldings (Traditional) . . . . . . . . . . 23 Box Cap Mouldings (Conventional) . . . . . . . . . . . . . . . . . . . . . . . . . . . . . . . 24 - 25 Box Cap Mouldings (Traditional) . . . . . . . . . . . . . . . . . . . . . . . . . . . . . . . . . 26 Mud Cap Elements . . . . . . . . . . . . . . . . . . . . . . . . . . . . . . . . . . . . . . . . . . . . . . . . . 27 Trim Elements Radius Trim Elements . . . . . . . . . . . . . . . . . . . . . . . . . . . . . . . . . . . . . . . . . . . . . . 28 - 30 Quarter Trim Elements . . . . . . . . . . . . . . . . . . . . . . . . . . . . . . . . . . . . . . . . . . . . . 31 - 32 Surface Trim Elements . . . . . . . . . . . . . . . . . . . . . . . . . . . . . . . . . . . . . . . . . . . . . 33 - 34 Base Mouldings & Trim Sanitary Cove Base Elements . . . . . . . . . . . . . . . . . . . . . . . . . . . . . . . . . . . . . . 35 Classic Base Mouldings & Trim (Ellis & Shoulder Cove) . . . . . . 36 Beveled Cap Mouldings & Trim . . . . . . . . . . . . . . . . . . . . . . . . . . . . . . . . . . 37 Integrated Ceramic Accessories . . . . . . . . . . . . . . . . . . . . . . . . . . . . . . . . . . . . . . . . . . . . . . 38 - 39 Coordinated Ceramic Cover Plates . . . . . . . . . . . . . . . . . . . . . . . . . . . . . . . . . . . . . . . . . 40 Subway Ceramics Installation Guide for Thinset Method . . . . . . . . . . . . . . . . . . . . . . 42
- 5. 2info@heritagetile.com H e r i t a g e T i l e was created out of a need for tilework that embodies the same quality and craftsmanship as period architecture. Every Heritage Tile collection has been carefully designed to reproduce the specific time & place that defines your home to restore its original character and period authenticity. Heritage Tile collections each offer a complete solution for the period home, composed of the appropriate surface finishes, color palettes, trim and mouldings elements, floor mosaics, decorative designs, and ceramic accessories that define its period style. Our Mission Guastavino tile vaulting in New York’s City Hall subway station.
- 6. Mitre-less installations with alternating radius trim Tel: 888-387-32803 Timeless design resulting from the faithful reproduction of an architectural period style. HISTORICALLY AUTHENTIC PLACE & TIME Produced to historical standards consistent with a specific place and time. Integrated Ceramic Accessories Historic Mosaic Design Premier Niche Elements 1 2 4 5 Coved Inside Corners 3 Period Tilework Highlights
- 7. 4info@heritagetile.com Part of the Subway Ceramics collection, sharing a mission to preserve our uniquely American tile heritage. ® QUICK SHIP In-stock items ready for immediate shipment to meet the most time- sensitive demands. Produced with the craftsmanship of experienced tilemakers who take pride in preserving our tile heritage. European CE product Thoroughly tested to the standard for ceramic tile, an internationally-recognized mark of quality. S u b w a y C e r a m i c s produces a complete collection of historically authentic subway tile,trim elements,classic mouldings, floor mosaics and ceramic accessories to coax an elegant, enduring quality that your space deserves. Reproduce the pencil-thin grout lines and a flat tile surface, the distinguishing characteristics of original, vintage tilework. Add reproduction mouldings, radius trim elements and a tiled-in ceramic towel bar or recessed soap dish to recreate the refined simplicity and elegant functionality for any commercial or residential kitchen, bathroom, fireplace, or feature wall. Complete your project with a made-to-order floor mosaic from our Subway Mosaics collection,featuring a vast assortment of historic patterns and colors that you craft into your own unique floor design. 3 1 2 4 5
- 8. 5 Tel: 888-387-3280 L ike a fingerprint, no one tile is the same. Variation is an inherent charm of our special crackle glazes. It is what gives a tiled field and its accessories life and a unique handcrafted look typical in the early 1900s. It is common for a tiled field in our accent colors to create a smooth gradient. The unique profiles of mouldings and trim retain more glaze which shows more definition. The curved surfaces offer a softer definition while depressions and edges are accentuated with pooling glaze (see above). Accent Glaze Information
- 9. 6info@heritagetile.com Glaze Palette Heather Grey 3” x 6” field tile with Gloss Black Box Cap mouldings and frame corners. 10 Gloss White 11 Gloss Bone 91 Crackle Black 92 Satin Black 14 Gloss Avalon15 Satin White 16 Satin Ivory 99 Gloss Black 21 Crackle White 33 Sky Blue 32 Butter 41 Heather Grey 43 Khaki 31 Blush 42 Celadon 52 Hunter Green 63 Ginger 61 Emerald Green 54 Leather 51 Marine Blue 53 Midnight Blue 62 Lagoon Blue 74 Concorde Blue Subway Ceramics takes pride in preserving our American tile heritage by faithfully reproducing the authentic tilework found in period homes and commercial construction from the late 1800’s through the pre-war era. Our Subway Tile glaze palette reproduces the classic Victorian-era colors in a deep, translucent, crackle finish. Use as a simple accent through your elegant, white field, or create a lavish surface when used as your field glaze. Truly timeless! by Subway Ceramics
- 10. Glaze Palette Tel: 888-387-32807 Satin Glaze 15 White 16 Ivory 44 Mockingbird Subway Ceramics introduces the Bungalow Tile glaze palette in a soft, satin finish and hues steeped in the Arts & Crafts tradition. Venerable colors like Seafoam, Sunbeam and Tea Rose were inspired by the chinaware sinks and ceramic accessories that we discov- ered in salvage yards. Essential tilework for restoring the American bungalow home. 34 Tea Rose 35 Sunbeam 45 Seafoam 54 Moonshine 55 Sageleaf 56 Pinecone 92 Black 36 Watercolor 46 Gunmetal Dard Hunter Poppy 4-1/4” x 4-1/4” decorative tiles with ceramic accessories - recessed soap dish, shelf supports, and cup holder in Seafoam glaze. Colorway 3Colorway 2 Colorway 3Colorway 2 Polychrome 1 Polychrome 2 Polychrome 3
- 11. Glaze Palette 8info@heritagetile.com The unique Cottage Tile palette developed by Subway Ceramics features a stained satin/crackle patina glaze finish that harmonizes perfectly with your Cottage style. Quintessentially charming! Satin Crackle Stain White Oyster Bluebell Orchid Seaside Sweet Cream Crackle Gloss Gloss White Gloss Black Leather Concorde Blue Crackle Black Emerald Green With our Carreaux du Metro palette, Subway Ceramics pays tribute to the Art Nouveau-inspired Paris Metropolitain subway system. Subway tile Paris-style! Combine this selected pallette with Beveled tile & Accessories to achieve a Carreaux Du Metro style. 2” x 6” Vine Field Accent in White, 2” x 6” Sunflower Field Accent in Sweet Cream, and 2-3/4” x 2-3/4” Bumblebee Hex Field Accent in Sweet Cream. 3” x 3” Bevel Field in Concorde Blue, 3” x 3” Bevel Field Logo Tile, 1” x 6” Radius Trim in Concorde Blue, and 2” x 6” Box Cap in Gloss White.
- 12. 9 Tel: 888-387-3280 Glaze Palette The Atomic Tile collection extends our timeline to the mid-century period in American architectural design. Featured in this collection are the iconic tile designs by notable American designers, with a color palette that recalls images of vibrant Fiestaware or classic Formica boomerang countertops. A low-luster satin finish deliers a surface with character and energy into your space. Satin Glaze White Ivory Black Atomic Mango Chartreuse Lucky Aqua Turqoise Storm Rose Powder Mango, Chartreuse and Turquoise glazes inspired by Fiestaware
- 13. 10 Design Concepts info@heritagetile.com Vintage restaurant bar in 6” x 6” Field Tile in Marine Blue (left). Designer furniture store bathroom in 2-3/4” Hex Dome & Flat mix in Satin White (right). Gloss White Subway Tile exterior and interior of restaurant in Dublin, Ireland complete with radius trim and 4” x 4” tile inset accents to emulate an authentic butchery.
- 14. 11 Design Concepts Tel: 888-387-3280 Mirror trimmed with 1/2” x 6” P-cap paired with 1/2” x 6” Accent Liner in Gloss Black (left).Tiled Niche in Avalon using Radius and Quarter Trim paired with 1/2” x 6” Accent Liner in Gloss Black (right). Early 1900s design with Gloss White Field Tile with vintage mosaic signage bordered with Gloss Black Mudcap components.
- 15. Design Concepts 12info@heritagetile.com Modern Classic bathroom with Radius Trim elements in Gloss White paired with 6” x 6” Shoulder Cove Base in Gloss Black. A classic spiral design in marble finishes the floor.
- 16. Field Tile & Liners Tel: 888-387-328013 26FT00 2” x 6” Field Tile 33FT00 3” x 3” Field Tile 16LN01 1” x 6” Bullnose Short 22FT00 2-1/8” x 2-1/8” Field Tile 06LN00 1/2” x 6” Flat Accent Liner 06LN01 1/2” x 6” Bullnose Short 36FT00 3” x 6” Field Tile 24FT00 2-1/8” x 4-1/4” Field Tile 16LN00 1” x 6” Flat Accent Liner Standard Field Tile & Liners
- 17. Field Tile & Liners (continued) 14 44FT00 4-1/4” x 4-1/4” Field Tile 66FT00 6”x 6” Field Tile 3” x 6” Field Tile with tiled-in-place Towel Bar ends in Gloss Avalon. info@heritagetile.com
- 18. Field Tile & Liners (continued) Tel: 888-387-328015 33BV00 3” x 3” Bevel Field 36BV00 3”x 6” Bevel Field 33HX00 2-3/4” x 2-3/4” Hex Flat 33HX4P Hex 4-point trim [for trimming edges of hex flat or dome fields] 33HX5P Hex 5-point trim [for trimming edges of hex flat or dome fields] 33HD00 2-3/4” x 2-3/4” Hex Dome Specialty Field Tile & Liners 36BW00 3” x 6” Basketweave Field/Border 66BW00 6” x 6” Basketweave Field/Border 69BB00 6” x 9” Beadboard tile
- 19. Cap Mouldings & Trim 16 36VC00 3”x 6” Victoria Cap 36VC01 3” Victoria Cap Outside Corner [for use with radius bullnose or quarter round trims] 36VC2R 3” Victoria Cap - end stop right [to be used with surface trim only] 36VC03 3” Victoria Cap Inside Corner [for use with radius cove or quarter cove trims] 36VC2L 3” Victoria Cap - end stop left [to be used with surface trim only] Classic Cap Mouldings & Trim 36VC04 3” Victoria Cap Inside Corner - Squared [for use with mitered or butt-jointed corner] 33VC06 3" x 3" Victoria Cap frame corner - Outside [for transitioning wainscot up-corners or picture framing within tile field] 33VC07 3" x 3" Victoria Cap frame corner - Inside [for transitioning wainscot vertically] info@heritagetile.com
- 20. Cap Mouldings & Trim (continued) Tel: 888-387-328017 26BC00 2-3/8" x 6" Beveled Cap moulding 26BC01 2-3/8" Beveled Cap moulding - outside corner [for use with radius bullnose or quarter round trims] 26BC02 2-3/8” Beveled Cap moulding - inside corner [for use with radius cove or quarter cove trims] Beveled Cap Mouldings & Trim Beveled Field Tile in 3” x 6” & 3” x 3” is paired with a Flat Liner to create a dynamic yet classic design.
- 21. Cap Mouldings & Trim (continued) 18info@heritagetile.com 16PC3R 1-1/2" x 6" P-cap inside corner - right [for use with quarter cove or radius cove trims] 16PC4L 1-1/2" x 6" P-cap bullnose stop - left [for use with surface trim only] 16PC2L 1-1/2" x 6" P-cap end stop - left [flat edge not glazed] 16PC2R 1-1/2" x 6" P-cap end stop - right [flat edge not glazed] 16PC00 1-1/2”x 6” P-cap moulding 16PC1L 1-1/2" x 6" P-cap conventional outside corner return - left [for use with surface trim only] 16PC4R 1-1/2" x 6" P-cap bullnose stop - right [for use with surface trim only] 16PC3L 1-1/2" x 6" P-cap inside corner - left [for use with quarter cove or radius cove trims] 16PC1R 1-1/2" x 6" P-cap conventional outside corner return - right [for use with surface trim only] Standard P-cap moulding (for conventional thin-set) * Radius Trim & Surface Trim radius dimensions differ
- 22. Cap Mouldings & Trim (continued) Tel: 888-387-328019 11PC08 2”x 2” P-cap Frame Corner - Inside [for transitioning wainscot vertically] 16PC6L 1-1/2" x 6" P-cap radius outside corner return - left [for use with radius bullnose or quarter round trims] 16PC6R 1-1/2" x 6" P-cap radius outside corner return -right [for use with radius bullnose or quarter round trims] 11PC07 2”x 2” P-cap Frame Corner - Outside [for transitioning wainscot up-corners or picture framing within tile field] 3” x 6” Field Tile is accented by P-cap Mouldings & Corners in Gloss Avalon which have been used to elegantly frame a bathroom mirror.Tiled-in Shelf Supports add a practical yet luxurious touch.
- 23. Cap Mouldings & Trim (continued) 20info@heritagetile.com Smooth-top P-cap moulding (for conventional thin-set) 16PS3R 1-1/2" x 6" P-cap inside corner - right [for use with radius cove or quarter cove trims] 16PS4L 1-1/2" x 6" P-cap bullnose stop - left [for use with surface trim only] 16PS2L 1-1/2" x 6" P-cap end stop - left 16PS2R 1-1/2" x 6" P-cap end stop - right 16PS00 1-1/2”x 6” P-cap moulding 16PS1L 1-1/2" x 6" P-cap conventional outside corner return - left [for use with surface trim only] 16PS4R 1-1/2" x 6" P-cap bullnose stop - right [for use with surface trim only] 16PS3L 1-1/2" x 6" P-cap inside corner - left [for use with radius cove or quarter cove trims] 16PS1R 1-1/2" x 6" P-cap conventional outside corner return - right [for use with surface trim only] * Radius Trim & Surface Trim radius dimensions differ
- 24. Tel: 888-387-328021 Cap Mouldings & Trim (continued) 11PS08 2”x 2” P-cap Frame Corner - Inside [for transitioning wainscot vertically] 1-1/2" x 6" P-cap radius outside corner return - left [for use with radius bullnose or quarter round trims] 16PS6R 1-1/2" x 6" P-cap radius outside corner return -right [for use with radius bullnose or quarter round trims] 11PS07 2”x 2” P-cap Frame Corner - Outside [for transitioning wainscot up-corners or picture framing within tile field] 16PS6L P-cap Mouldings & Radius Trim in Gloss Avalon round inside/outside corners with finesse paired with a 1/2” x 6” Accent Liner in Sky Blue.
- 25. 22 Cap Mouldings & Trim (continued) info@heritagetile.com Standard P-cap moulding - Extended (for traditional thick-set) 16PE3R 1-1/2" x 6" Extended P-cap inside corner - right [for use with radius cove or quarter cove trims] 16PE2L 1-1/2" x 6" Extended P-cap end stop - left 16PE2R 1-1/2" x 6" Extended P-cap end stop - right 16PE00 1-1/2”x 6” Extended P-cap moulding 16PE1L 1-1/2" x 6" Extended P-cap conventional outside corner return - left [for use with radius bullnose or quarter round trims] 16PE3L 1-1/2" x 6" Extended P-cap inside corner - left [for use with radius cove or quarter cove trims] 16PE1R 1-1/2" x 6" Extended P-cap conventional outside corner return - right [for use with radius bullnose or quarter round trims] * Top portion of profile extends 1/2” beyond conventional versions.
- 26. Tel: 888-387-328023 Cap Mouldings & Trim (continued) Smooth-top P-cap moulding - Extended (for traditional thick-set) 16PT3R 1-1/2" x 6" Extended P-cap inside corner - right [for use with radius cove or quarter cove trims] 16PT2L 1-1/2" x 6" Extended P-cap end stop - left 16PT2R 1-1/2" x 6" Extended P-cap end stop - right 16PT00 1-1/2”x 6” Extended P-cap moulding 16PT1L 1-1/2" x 6" Extended P-cap conventional outside corner return - left [for use with radius bullnose or quarter round trims] 16PT3L 1-1/2" x 6" Extended P-cap inside corner - left [for use with radius cove or quarter cove trims] 16PT1R 1-1/2" x 6" Extended P-cap conventional outside corner return - right [for use with radius bullnose or quarter round trims] * Top portion of profile extends 1/2” beyond conventional versions.
- 27. 24 Cap Mouldings & Trim (continued) info@heritagetile.com Box Cap moulding (for conventional thin-set) 26BX3R 2”x 6” Box Cap inside corner - right [for use with radius cove or quarter cove trims] 26BX4L 2”x 6” Box Cap bullnose stop - left [for use with surface trim only] 26BX2L 2”x 6” Box Cap end stop - left 26BX2R 2”x 6” Box Cap end stop - right 26BX00 2”x 6” Box Cap moulding 26BX1L 2”x 6” Box Cap conventional outside corner return - left [for use with surface trim only] 26BX4R 2”x 6” Box Cap bullnose stop - right [for use with surface trim only] 26BX3L 2”x 6” Box Cap inside corner - left [for use with radius cove or quarter cove trims] 26BX1R 2”x 6” Box Cap conventional outside corner return - right [for use with surface trim only] * Radius Trim & Surface Trim radius dimensions differ
- 28. Tel: 888-387-328025 Cap Mouldings & Trim (continued) 26BX6L 2”x 6” Box Cap radius outside corner return - left [for use with radius bullnose or quarter round trims] 26BX6R 2”x 6” Box Cap radius outside corner return -right [for use with radius bullnose or quarter round trims] 22BX08 2" x 2" Box Cap - inside corner [for transitioning wainscot vertically] 22BX07 2” x 2" Box Cap - outside corner [for transitioning wainscot up-corners or picture framing within tile field] 3” x 6” Field Tile in Heather Grey glaze creates a dynamic finish when paired with a mirror frame and Gloss Black Shelf Supports.
- 29. 26 Cap Mouldings & Trim (continued) info@heritagetile.com Box Cap Extended moulding (for traditional thick-set) 26BE3R 26BE2L 26BE2R 26BE00 26BE1L 26BE3L 26BE1R 2”x 6” Box Cap extended inside corner - right [for use with radius cove or quarter cove trims] 2”x 6” Box Cap extended end stop - left 2”x 6” Box Cap extended end stop - right 2”x 6” Box Cap extended moulding 2”x 6” Box Cap extended conventional corner return - left [for use with radius bullnose or quarter round trims] 2”x 6” Box Cap extended inside corner - left [for use with radius cove or quarter cove trims] 2”x 6” Box Cap extended conventional corner return - right [for use with radius bullnose or quarter round trims] * Top portion of profile extends 1/2” beyond conventional versions.
- 30. Tel: 888-387-328027 Cap Mouldings & Trim (continued) Mud Cap Elements 22RU22 2-1/2” x 2-1/2" Radius up corner 26RD26 2" x 6" left Radius down 26MC00 2" x 6" Mud Cap moulding22SU22 2-1/8” x 2-1/8" Square up corner 02MC02 2” Mud Cap inside corner 02QR01 2” Mud Cap outside corner 26RD62 2" x 6" right Radius down corner 22RD22 2" x 2" Radius down corner * All components shown possess consistent 7/8” radius which allows them to be composed together
- 31. 28 Trim Elements info@heritagetile.com 26RB02 2” x 6” Radius Bullnose 26RC02 2” x 6” Radius Cove 16RC01 1” x 6” Radius Cove 23RB02 2” x 3-7/8” Radius Bullnose 06RB00 1/2” x 6” Radius Bullnose 06RC00 1/2” x 6” Radius Cove 33RB03 3” x 3-7/8” Radius Bullnose 23RC02 2” x 3-7/8” Radius Cove 16RB01 1” x 6” Radius Bullnose Radius Trim Elements * All components shown possess consistent 7/8” radius which allows them to be composed together
- 32. Trim Elements (continued) Tel: 888-387-328029 44RC04 4-1/4” x 4-1/4” Radius Cove 66RB06 6” x 6” Radius Bullnose 36RB06 3-7/8” x 6” Radius Bullnose 36RC06 3-7/8” x 6” Radius Cove 33RC03 3” x 3-7/8” Radius Cove 36RB03 3” x 6” Radius Bullnose 66RC06 6” x 6” Radius Cove 44RB04 4-1/4” x 4-1/4” Radius Bullnose 36RC03 3” x 6” Radius Cove Radius Trim Elements (continued) * Radius ‘Bullnose’ is often used for outside corners while Radius ‘Cove’ is used for inside corner trimming
- 33. Trim Elements (continued) 30info@heritagetile.com 44RU44 44SU44 4-1/4” x 4-1/4” Square up corner 36RD63 3" x 6" right Radius down corner 44RD44 4-1/4" x 4-1/4” Radius down corner 36RD36 3" x 6" left Radius down corner Radius Trim Elements (continued) * All components shown available for glazing on opposite face [would require special order] 66RD66 6”x 6” Radius down corner 66RU66 6”x 6” Radius up corner4-1/4” x 4-1/4" Radius up corner
- 34. Tel: 888-387-328031 06QC01 6” Quarter Cove beak 06QC02 6” bullnose Quarter Cove [for use with surface trim only] 00QR02 1-3/8” x 1-3/8” Quarter Round - inside corner 02QR01 2” Quarter Round 3-way corner 00QC01 Quarter Cove 3-way corner [7/8” radius] 00QC02 1-3/8” x 1-3/8” Quarter Cove - outside corner 06QR00 6” Quarter Round 06QC00 6” Quarter Cove 00QR01 Quarter Round 3-way corner [7/8” radius] Quarter Trim Elements * All components shown possess consistent 7/8” radius which allows them to be composed together Trim Elements (continued)
- 35. 32info@heritagetile.com 06QR01 6” Quarter Round beak 06QR02 6” bullnose Quarter Round [for use with surface trim only] Quarter Trim Elements (continued) 06MC02 1-3/8” x 6” Quarter Cove - inside corner Countertop trimmed with 6” Quarter Round and 6” Quarter Round Beak in Avalon. Trim Elements (continued)
- 36. Tel: 888-387-328033 Trim Elements (continued) 36DB63 3” x 6” Bullnose down corner - right 36IB36 3” x 6” inside corner Bullnose - left 26SB06 2” x 6” Bullnose Long 33IB33 3” x 3” inside corner Bullnose 26DB26 2” x 6” Bullnose down corner - left 26DB62 2” x 6” Bullnose down corner - right 36IB63 3” x 6” inside corner Bullnose - right 36DB36 3” x 6” Bullnose down corner - left 26SB02 2” x 6” Bullnose Short Surface Bullnose Elements * All components shown possess consistent 3/8” radius which allows them to be composed together
- 37. 34info@heritagetile.com Trim Elements (continued) 66IB66 6” x 6” Bullnose inside corner 66SB06 6” x 6” Bullnose 44IB44 4-1/4” x 4-1/4” Bullnose inside corner 44SB04 4-1/4” x 4-1/4” Bullnose 36SB03 3” x 6” Bullnose Short 36SB06 3” x 6” Bullnose Long 66DB66 6” x 6” Bullnose down corner 44DB44 4-1/4” x 4-1/4” Bullnose down corner Surface Bullnose Elements (continued)
- 38. Base Mouldings & Trim Tel: 888-387-328035 06QC01 6” Sanitary Cove Base - inside corner 06CB01 6” Sanitary Cove Base - outside corner 66CB00 6” x 6” Sanitary Cove Base moulding [7/8” total piece profile width, protrudes 1/2” when tiled-in] Sanitary Cove Base Mouldings & Trim 6” x 6” Sanitary Cove Base in Gloss White with 1/2” x 6” Flat Accent Liner in Gloss Black.
- 39. Base Mouldings & Trim (continued) 36info@heritagetile.com 22EC04 2" x 2" Ellis Cove Base - inside corner [for use with Ellis Cove as vertical cove trim] 22EC01 2" x 2" Ellis Cove Base - outside corner [for use with radius bullnose or quarter round trims] 26EC00 2" x 6" Ellis Cove Base moulding [1-3/8” total piece profile width, protrudes 1” when tiled-in] 22EC02 2" x 2" Ellis Cove Base - inside corner [for use with radius cove or quarter cove trims] 66SC00 6" x 6" Shoulder Cove Base moulding [1” total piece profile width, protrudes 5/8” when tiled-in] 06SC02 6" Shoulder Cove Base - inside corner 22EC03 2" x 2" Ellis Cove Base - inside corner [for use with non-radius inside corner treatment] 06SC01 6" Shoulder Cove Base - outside corner Classic Base Mouldings & Trim
- 40. Base Mouldings & Trim (continued) Tel: 888-387-328037 Beveled Base Mouldings & Trim 46BB00 4-3/8” x 6” Bevel Base moulding 46BB01 4-3/8” x 6” Bevel Base moulding - outside corner [for use with radius bullnose or quarter round trims] 46BB02 4-3/8” x 6” Bevel Base moulding - inside corner [for use with radius cove or quarter cove trims] Beveled Base moulding in Concorde Blue glaze terminates a wall of 3” x 6” Beveled Field Tile in Gloss White.
- 41. Integrated Ceramic Accessories 38info@heritagetile.com 44SD00 4-1/4" x 4-1/4” recessed Soap Dish [2-7/8” interior depth] 44SS00 4-1/4" x 4-1/4" tile-in Shelf Support; sold as pair [protrudes 4-3/8” when tiled-in] 36TB00 3" x 6" tile-in Towel Bar end; sold as pair [protrudes 4-3/16” when tiled-in, rod insert radius is approx. 3/4”] 36CH00 3” x 6” tile-in Cup Holder [protrudes 3-1/8” when tiled-in, 2-7/8” holder diameter, holder recesses 1-1/8”] 36RH00 3" x 6" tile-in Robe Hook [protrudes 2-1/8” when tiled-in] 36SD00 3" x 6" recessed Soap Dish [2-5/8” interior depth] 44TB00 4-1/4" x 4-1/4" tile-inTowel Bar end; sold as pair [protrudes 4-3/16” when tiled-in, rod insert radius is approx. 3/4”] 44RH00 4-1/4” x 4-1/4" tile-in Robe Hook [protrudes 4-3/8” when tiled-in] 36SS00 3" x 6" tile-in Shelf Support; sold as pair [protrudes 4-3/8” when tiled-in] * Due to high demand, the following accessories may not be readily available. Consult our team for specific details Accessories
- 42. Integrated Ceramic Accessories (continued) Tel: 888-387-328039 66SD00 6" x 6" recessed Soap Dish [3” interior depth] Accessories (continued) 44CH00 4-1/4” x 4-1/4” tile-in Cup Holder [protrudes 2-7/8” when tiled-in] 66PH00 6" x 6" recessed Paper Holder; includes wood dowel when ordered [depth measures 2-5/8”] 6” x 6” Integrated Ceramic Soap Dish accessory within a field of 3” x 6” Subway Tile.
- 43. Coordinated Ceramic Cover Plates 40info@heritagetile.com 2C94SR 5” x 5” double switch & GFI/rocker switch combina- tion cover plate 3C92SS 6-7/8” x 5” triple standard switch cover plate 2C85SS 5” x 5” double standard switch cover plate 2C86SO 5” x 5” double switch & duplex outlet combination cover plate 1C82SX 3-1/2” x 5” single standard switch cover plate 1C83OX 3-1/2” x 5” single duplex outlet cover plate 3C93RR 6-7/8” x 5” triple GFI/rocker switch cover plate 2C89RR 5” x 5” double GFI/rocker switch cover plate 1C84RX 3-1/2” x 5” single GFI/rocker switch cover plate Cover Plates * Option to tile over or within the tile field. The latter would require additional buildout to be flush. Plates include screws when ordered.
- 45. 42info@heritagetile.com Installation Guide for Thinset MethodSubway Ceramics Prepare all surfaces to be completely flat & level to avoid irregularities. For any wet or humid areas the use of CBUs are recommended. For any other conditions, substrates made of gypsum board are appropriate. Tip: Soaking the tiles in clean water will help give an installer additional time when setting tiles. This will al- low the installer to adjust coursing or individual tiles as necessary and flexibility to beat-in the tiles flat before mortar sets. Note: Installation of Radius Trim or any other special- ized trim may require additional planning or alternate surface preparation. It is recommended these consider- ations are well planned prior to tiling. Plan your installation starting with the base, ensure the design is proportioned properly, indicate special treatments, and ensure proper joint alignment. For historically accuracy, use a nominal 1/16” spacing. Tip: Use a rubber mallet and wood beating block as cushion to gently beat the tile as it sets to ensure a flat finished surface. Preparation of the surface coupled with this technique will eliminate unwanted lippage. After the tile is set properly, carefully apply a premium unsanded grout. After the grout has fully cured, apply penetrating grout sealer. Note: Crackle glazes need to be sealed prior to grouting as well as after grouting. Cutting of tiles is done only with the use of a wet saw. To get a clean edge, we recommend using a premium quality ceramic tile blade. Apply mortar using a 1/4” trowel or larger. For en- hanced adhesion, backbutter tiles along with the wall or floor surfaces. Pre-mixed tile adhesive products are not recommended in any circumstances. 1 4 7 2 5 8 3 6 Please consult our staff for additional information.
- 48. w w w . h e r i ta g e t i l e . c o m Tel: 888-387-3280 info@heritagetile.com SCDG0515