SlideShare une entreprise Scribd logo
1  sur  24
Télécharger pour lire hors ligne
BeepComp User's Guide
Contents
About BeepComp
Getting Started
Tutorials
Basics
Main Editor
Writing Your First Track
Saving and Loading Your Work
Copying and Pasting Source
Exporting Your Work
Key Commands
Global Section in Detail
Music Section in Detail
Musical Notes
Note Length
Rests
Octave changes
Ties
Tuplets
Volume Changes
Repeats
Fall Effect
Rise Effect
Waveform Selection
"Beef-Up" Effect
Preset Selection
Volume Envelope Commands
LFO Commands
Astro Command
Ring Modulation
Drum Section in Detail
Drum Hits
Quieter Drum Hits
Note Length
Rests
Ties
Tuplets
Noise Type
Adjusting the Noise Mix
Drum Sound Shaping
Delay Effect
Volume Envelope
LFO Effect
Astro Effect
Waveforms
Beef Up!
Tone Presets
Ring Modultion
Bookmarking Your Start Position
Auto Saving
Syntax Reference
General
Global Section
Music Channel
Drum Channel
Uninstalling BeepComp
Staying Updated
If you found issues/bugs...
BeepComp on the Web
Contact Me!
About BeepComp
BeepComp lets you compose chiptune tracks with text files. It features a nice retro-sounding synthesizer
engine with 9 music channels and 1 drum channel.
BeepComp is an open-source project. This means that you're welcome to modify the source code
however you want. BeepComp is a also shareware that anyone can use freely. It is distributed under the
MIT license.
Getting Started
Use the latest installer package available on the Sourceforge top page. Run this set up file, and you'll be
all set for your journey!
Windows
Launch the MSI installer file, beepcomp_vx-x-x.msi, (x-x-x fills the version number) which you just
downloaded. Your program will be installed in the folder:
C:Program FilesBeepComp on 32-bit Windows
C:Program Files (x86)BeepComp on 64-bit Windows
After installation, BeepComp will be on the list of installed programs. On Windows XP & 7, go to Start-
>All Programs->BeepComp. You can also click the shortcut that has been created on your Desktop.
(Note: If you downloaded the portable version, the installation steps below are not required. To launch,
open the folder you extracted from the downloaded .zip file and double-click on
beepcomp_portable.exe.)
Mac / Linux
I'll be working on these versions soon :)
Tutorials
The BeepComp homepage has section named Your First Tutorial, which will be your great starting point.
The later section Writing Your First Track in this document has a similar content.
After exploring those tutorials, exploring the tutorial files included in the userdata folder (the program's
default save location) will be helpful. Simply load one of these files named _tutorial_---.txt, read and
play to see writing what produces what result. I recommend starting from _tutorial_basic_1.txt.
These files are located in:
C:Documents and Settings{USERNAME}My DocumentsBeepCompuserdata on XP
C:Users{USERNAME}DocumentsBeepCompuserdata on Vista and later
(Note: for the portable version, find the userdata folder inside the application top folder)
Basics
Main Editor
Editor Area ... You edit your music source text here.
Control Panel ... Play/pause/save/load/export the music you write and control other things.
Cursor ... Your point of control over the text.
Your Text ... This single text file is your whole track - simple, eh?
Gain Meter ... For visualizing each channel's activity in real time.
Progress Bar ... Keeps track your song's progress in time.
Master Volume ... Controls how loud the master output is. (Each channel has a separate volume
control, too)
Writing Your First Track
Let's write a very basic "Hello BeepComp" source. Start up BeepComp, press the NEW button, choose
"Yes", and type the folloing into the text editor:
// My first BeepCom p track! :)
@ G
TEMPO=100
MASTERVOLUME=80
@ 1
CDEFG
And press the play button (with a triangle). You heard an endless series of "do-re-mi-fa-sol...," right? Let
me explain the source.
Two forward slashes // adds a comment. Following two slashes, you can write anything to make a note
to yourself or others. The comment ends at the end of the line.
@ is used to declare the beginning of each "section." @ G starts the "global section" where you can set
parameters that affect your entire track. Your section declaration stays effective until you declare
another section (@ 1 in this case).
TEMPO= sets the tempo of the track. MASTERVOLUME= sets the master output gain. The volume knob will
change accordingly to the master volume when you play your track from the beginning.
@ 1 declares the start of the first music channel section. Everything you write thereafter will be written to
the first channel until you declare another section.
Then we have the musical notes CDEFG . Note that you have to write musical pitches in UPPERCASE.
You actually heard CDEFG over and over because BeepComp defaults the player to looping mode. (More
about looping later...)
Easy? Let's expand this a little:
// My first BeepCom p track! :)
@ G
TEMPO=100
MASTERVOLUME=80
@ 1
O5L4 CDEFG~
@ 2
O4L4 EFGAB~
@ D
L4 KKKSSS
Now play this. You now hear a mix of three channels.
O followed by a single digit number sets the octave. O4 is the default octave where the middle C is, so
O5 is just one above the default octave. L followed by a number ranging from 1 to 64 changes the note
length. L4 sets up the note length to 1/4 of the measure length (quarter notes).
~ is quite useful. It elongates a note by the currently set note length. You can actually chain multiple ~ s,
for instance, B~~~ .
Now we have @ 2 so commands after that goes to the second music channel. You can play up to 9 music
channels simultaneously, so you can declare sections up to @ 9 .
And you can use the drum channel by declaring @ D . Write K for kick, S for snare, H for high-hat. In fact,
you can use lower case k, s, h which will play a little quieter.
Note that you see some white spaces in above examples. You can insert any amount of white space
between commands because they're ignored by the interpreter.
Saving and Loading Your Work
Now let's save your work. Click the SAVE button (or F11), type in hellobeep.txt, and click the Save
button. Now open NotePad or any text editor of your choice, choose to open a file, navigate to the
userdata folder, the default user folder, and open up the hellobeep.txt file we just created.
(Note that default userdata folder will be at following locations:)
C:Documents and Settings{USERNAME}My DocumentsBeepCompuserdata on XP
C:Users{USERNAME}DocumentsBeepCompuserdata on Vista and later
(Note: for the portable version, find the userdata folder inside the application top folder)
See? Your BeepComp source is simply a text file. And you could even continue to work on your track in
your text editor if you want.
By the way, you can use the ALT + O shortcut from the main editor to open up your userdata folder
anytime.
Copying and Pasting Source
A nice thing about working with text is that you can easily copy and paste between BeepComp and other
sources!
Try this - Start a new file (NEW button or F9), Go to this page, copy all the code inside the grey box, and
press CTRL + V in BeepComp, and play.
I hope you see how easy it can be to share your work with others on the web :)
Of course, going the other way is easy, too. You can easily copy your work from BeepComp by pressing
CTRL + A (select all) then CTRL + C (copy), and paste what you just copied into your external
applications like your Outlook to email your music to a friend, for instance.
Exporting Your Work
You can create audio files of your work by pressing the EXPORT button(or F12). Currently supported
formats are: WAV, MP3 and OGG files. After you export your work, you can add fades and other
finishing touches on audio editors like Audacity.
Note that by default your music won't be looped when exported.
If you want your export to be looped, specify the total number the song should execute with the
command REPEAT=n in the global section. If you want your track to play through once and then fade out,
first write REPEAT=2 in the global section and export your song. This will output your song twice in
succession. Then load the exported file in an audio editor and apply fade-out around the middle of the
file briefly after where the song repeats.
Key Commands
Mouse Input
Mouse position ... Navigates cursor position
Mouse Wheel ... Helps scrolling text up/down
Left Button ... Presses button on screen / selects text
Right Button ... Clears text selection
Key Commands: Main Editor
F1 ... Play from beginning
F2 ... Pause / Unpause
F3 ... Rewind
F4 ... Fast Forward
F5 ... Show key commands
F6 ... Show Documentation
F7 ... Turn delay on/off
F9 ... Start a new file
F10 ... Load from a file
F11 ... Save to a file
F12 ... Export to an audio file
ARROW ... Move cursor
ESCAPE ... Quit
BACKSPACE ... Backspacing, delete selection
SHIFT ... Select text
SHIFT + ARROW ... Expand text selection
ALT ... Clear text selection
CTRL + Z ... Undo
CTRL + C ... Copy
CTRL + V ... Paste
CTRL + A ... Select all
CTRL + S ... Save
ALT + S ... Quick-save to last saved file
ALT + V ... Open the system volume control
ALT + D ... Open the audio device control
ALT + I ... Initialize the audio device
ALT + O ... Open "userdata" folder
HOME ... Go to the very top
END ... Go to the very bottom
Page Up ... Go up by one screen height
Page Down ... Go down by one screen height
Key Commands: File Dialog
ESCAPE ... Exits dialog
HOME ... Go back to the default starting folder
END ... Go back to previous folder
CTRL + Z ... Go back to previous folder
F1 ... Toggle file types to display
F2 ... Display keyboard shortcuts
F12 ... Load/Save/Export (as indicated)
UP/DOWN ... Navigate through the list of files in the current directory
RIGHT ... Selects a file name, Go to child folder (when over <<<)
LEFT ... Go to parent folder (when over <<<)
BACKSPACE ... Backspacing in the file name input
CTRL + G ... Go to a particular drive or special folders (Desktop and Documents)
ALT + O ... Open the currently selected directory in Explorer
ALT + D ... Go to the 'Desktop'
CTRL + R ... Refresh the currently viewing directory
Global Section in Detail
The global section, defined by @ G , is where you write commands that influence the entire track. The
elements you can control in the global section are:
Master volume ... MASTERVOLUME=n
Initial channel volume ... V1=n, V2=n, VD=n etc...
Tempo ... TEMPO=n
Delay ... DELAY=ON / OFF, DELAYTIME=n, DELAYLEVEL=n
Looping ... LOOP=ON / OFF
The master volume is also manually controllable with the volume knob in the control panel. Note that at
the start of track, the master volume gets initialized to the declared value by MASTERVOLUME= (or default
value 80 if none specified) so the volume knob position gets reset.
The tempo, measured by beats per measure (BPM), determines how fast your track is played. The
TEMPO= command takes a value between 30 and 300.
The delay effect is applied to the whole track (not to inidividual track). See the Delay Effect section for
more.
By default, your track is set to play in an infinite loop. You can turn off track looping by LOOP=OFF. If you
want to loop your track a certain number of times, you could first set LOOP=OFF in your global section
and then enclose the entire real time data with {} in each channel.
Here is an example of using the global section to set up the volume, tempo and looping for your track:
@ G
MASTERVOLUME=50 // not too loud
TEMPO=80 // kind of slow
LOOP=OFF
REPEAT=3 // song plays 3 tim es in succession
DELAYTIME=750 // adjust delay tim ing
@ 1
GFEDC
Music Section in Detail
Each section for a music is defined with @ n. Your first channel section will start with @ 1, your second with
@ 2 and so forth.
Musical Notes
Musical notes are written with note names C, D , E, F, G , A and B in UPPERCASE. The following
example plays an ascending C major scale:
@ 1
CDEFGAB
A note with a sharp is written with # following its pitch name - C#, for example. A note with a flat is written
with b, for example, Ab. A chromatic scale can be played this way:
@ 1
CC#DD#EFF#GG#AA#BBbAAbGGbFEEbDDbC
Note Length
To specify the current note length, use the L command. The letter L should be followed by a number
ranging from 1 to 64, the factor which should divide the measure length. L4 sets the 1/4 of the measure
length, so you get the quarter note length. L8 gives you the eighth note length. Your length definition
stays effective until the next L command.
The below example plays a few long half notes followed by a series of fast 32nd notes:
@ 1
L2 CDE L32 GABAGFED
Rests
Rests can be easily inserted with a symbol :. The length of the rest is determined by the current note
length.
@ 1
L4 C:CDE:EFG:G:E:::
The above example should show you how rests can be inserted intuitively.
Octave Changes
To specify the current octave range, use the O command followed by a number. The middle octave
where the middle C sits is O4 , and it's the default starting octave of each channel. The example below
plays some notes in a high octave range O6 then plays low notes in the octave O2.
@ 1
O5 GG:G:DE:C::: O2 C:::
Another way to navigate through octave ranges is to use the < and > symbols. < means go down by
one octave, and > means go up by one octave. The example below sweeps up and down the entire
possible octave ranges:
@ 1
O1 C>C>C>C>C>C>C>C<C<C<C<C<C<C<C
Ties
You can elongate a note quite easily by the multiple of the current note length. To do that, use the ~
symbol after the note you want to elongate. For example, try this example:
@ 1
L8 C~~DE~~CE~C~E~~~
You can be pretty liberal with chaining ~ symbols if you want, for example try L8C~~~~~~~ :)
Tuplets
Tuplets are useful when you have to insert triplets or any other notes in non-standard subdivisions.
Tuplets can be entered using the [] symbols. You simply enclose the notes you want to group in the
space of the current note length:
@ 1
L4 C [EDC] D [FED] E [GFE]
You should have heard the notes enclosed in brackets as triplets in the space of a quarter note.
You can specify this grouping space, also. For example, if you want to write a quintuplets in a quarter
note space in the midst of 8th notes:
@ 1
L8 C~~~ [4CDbC<B>C] >C<BbAbGFE
Volume changes
You can specify the volume of a channel at any point by using the V command. Write V followed by a
value from 0 to 10, like V10 or V4 .
@ 1
V10 CDEFG V5 CDEFG
The above source will play the first phrase in full volume and the second half as loud.
If you want to make many gradual changes in your channel, symbols ^ and _ will come in handy. ^
increases the volume by 10%, and _ decreases by 10%. Try this:
@ 1
V0 L32
AEFD ^ AEFD ^ AEFD ^ AEFD ^ AEFD ^ AEFD ^ AEFD ^ AEFD ^ AEFD ^
AEFD _ AEFD _ AEFD _ AEFD _ AEFD _ AEFD _ AEFD _ AEFD _ AEFD
Repeats
If you want to repeat a phrase or a section of your music, you can use the {} symbols. Anything
enclosed in these symbols are repeated.
@ 1
{EbDD:} EbDD: Bb~~~
You can actually nest a repeat inside another repeat. For example:
@ 1
{CDEF{GFEF}ED} {{{C~}}}
Note that nesting makes the total number of repeats grow exponentially. The latter part of the above
example is repeated 2 x 2 x 2 = 8 times.
You can also specify a certain number of times which a phrase should repeat by adding a single digit
number just after the left curly brace like this:
@ 1
{5CDE}{3FGA}
Fall Effect
If a musical note is followed by comma ,, the Fall effect is added, causing it to decrease its pitch in time.
Here is an example where you can observe how this effect works:
@ 1
FALLSPEED=1200
FALLWAIT=500
L1
C,D,E,
FALLSPEED is how many 100ths of a semitone the pitch decreases in a second. 1200 means a range of
one octave per second. FALLWAIT= specifies the time in milliseconds before the effect starts.
The Fall point can be set in the middle of a tie series. This makes rhythmical timing of the effect easy.
Try this example:
@ 1
FALLSPEED=1200
FALLWAIT=0
L16 O5
FECD~~~~ ~,~~~ <A>CDC
FECD~~ ~,~ <A~G~F~E~ ::::
Rise Effect
Placing an asterisk * is before a note causes that note to scoop up to its pitch, producing a similar effect
of a synthesizer pitch-bend wheel. RISESPEED= sets the speed for the rise in 100ths of a semitone per
second. RISERANGE= determines how wide the pitch change should span. This effect can nicely add
liveliness to your musical lines:
@ G TEMPO=160
@ 1
RISESPEED=2400
RISERANGE=200
L8 O4 *EGA> *CCC *CCC *CC *C <AGD#EC<AG>
*CCC *CCC *CC ::::::::
Waveform Selection
You can choose a waveform other than the default square wave for each channel by declaring
WAVEFORM=n. See Waveforms.
"Beef-Up" Effect
Each channel comes with a mild overdrive effect you can use to give it a boost by declaring BEEFUP=n.
See Beef Up!
Preset Selection
You may choose a preset to for a quick tone shaping by declaring PRESET=(presetnam e). See Tone
Presets.
Volume Envelope Commands
Each channel has a volume envelope filter to help shape a unique sound. See Volume Envelope.
LFO Commands
The pitch LFO filter adds a vibrato effect. See LFO Effect.
Astro Command
The "Astro" effect is a unique 80's-ish wobble effect. See Astro Effect.
Ring Modulation
You can use two music channels to create a ring modulation effect similar to the effect Commodore 64's
SID chip produced. see Ring Modulation.
Drum Section in Detail
Writing @ D starts the drum section.
Drum Hits
You can write a snare hit with S , and a kick with K. These normal hits come in UPPERCASE alphabets.
With : giving a rest, a basic kick-and-snare groove can be written:
@ D
K:S: KKS:
The hi-hat is written with H. A disco groove pattern can be played like this:
@ D
K:H: S:H: K:H: S:HH
Quieter Drum Hits
If you write the drum hits in lower case, you get quieter drum hits. These can be added to give rich
dynamics to your groove:
@ D
K::k S::k :kK: S:HH K:hh S:kk :shh hsSS
Note Length
Just as we did for a music channel, we can specify the note length as you go in the drum channel as
well. Use the L command with a number ranging from 1 to 64, with the number being the subdivision
factor of the measure. For example:
@ D
L2 S L4 S L8 S L16 SS L32 SSSS L64 SSSSSSSS
But you might want to set to the smallest subdivision once at the beginning and rely more on using rests
and ties. You'll find this way much easier especially when working with groove-based music :)
Rests
A rest is indicated with a : as illustrated above. The length of a rest is determined by the currently set
note length by the L command.
Ties
Instead of using a rest to fill a gap, you can use a tie symbol ~ to elongate a hit. The difference is that
the tie ensures that the note gets played through the elongated space. When you hit and rest, if the note
length is set very short, the abrupt cut-off of the hit might become obvious. Try this example to hear the
difference:
@ D
L64
S::: S::: S::: S:::
S~~~ S~~~ S~~~ S~~~
Tuplets
Tuplets make it possible to express quite complicated timings. Just as you saw in tuplets used in a music
channel, you have two ways of expressing tuplets. The first way is to enclose hits simply with [] where
the total length of grouped hits is the currently set note length. The second way is specifying the total
length of grouped hits in the format [n(hits)].
Using the both methods, let's illustrate some interesting things you can do to your groove with tuplets:
@ D
L16
K::[KK] S~~~ K::: [4SSS]
K[KK]K[KK] KK[8HHHH] ss[8sss][8SSSS][8SSSSSSSS]
Noise Type
There are two types of noise available to use for your drum sounds: white noise and pink noise. The
default noise type is bright-sounding white noise. Pink noise gives you a darker color. To change the
noise type on all drums at once, use the commands WHITENOISE or PINKNOISE. To change the noise
type individually on a drum, use the commands KICKNOISE=, SNARENOISE= or HIHATNOISE= and specify
PINK or WHITE following the equal sign. Try the following example to explore the different noise types:
@ D
PINKNOISE // darker
{ K:HKS~~s hsKKS~Hs }
WHITENOISE // brighter (default)
{ K:HKS~~s hsKKS~Hs }
KICKNOISE=PINK // pink noise only for kick
{ KKS~ KKS~ KHS[HH] HSSS }
Adjusting the Noise Mix
The drum channel combines two audio sources: a noise oscillator and a square wave oscillator. You can
adjust how loud each source's output is by commands NOISELEVEL= and SQUAREWAVE= with values
ranging from 0 to 100. The following example decreases the noise oscillator's output volume gradually:
@ D
SQUARELEVEL=100 // 100 is default
NOISELEVEL=100 { K:HHS~HH }
NOISELEVEL=70 { K:HHS~HH }
NOISELEVEL=40 { K:HHS~HH }
NOISELEVEL=0 { K:HHS~HH } // you won't hear hi-hat
The Hi-hat only uses the noise output. That's why you didn't hear the hihat in the last line where the
noise output was set to zero.
Drum sound shaping
One way you can change how your drums sound is to change the tuning pitch of the snare or the kick.
Use SNAREPITCH= and KICKPITCH= with values from 0 to 100 to adjust the pitches. The default value is
50 for the both drums. Hear how pitch adjustment affects how your drum kit sounds:
@ D
RESETDRUMS // set all param eters back to default
{3 KhKS~h} [ss]SS[ss]SS
SNAREPITCH=20 KICKPITCH=30 // lower than default value 50
{3 KhKS~h} [ss]SS[ss]SS
Another way to shape your drum sounds is to change the time length value of each drum by writing
commands KICKLENGTH=, SNARELENGTH=, HIHATLENGTH= with values in milliseconds. The default time
length values of kick, snare, hi-hat are 40, 140, 20, respectively.
@ D
L8 RESETDRUMS // all back to default
K:::S~H~ K:::S~H~
KICKLENGTH=70
SNARELENGTH=200
HIHATLENGTH=100
K:::S~H~ K:::S~H~ // all drum s are longer
Delay Effect
There is a nice stereo delay effect that is added to your track by default. You can turn off the delay by
pushing the DELAY button or pressing F7.
You can set the delay parameters in your source. Your commands will go in the Global section. For
instance:
@ G
DELAY=ON
DELAYTIME=200
DELAYLEVEL=50
@ 1
CDEFG
This gives you a pretty prominent delay effect with a short timing. Play around with DELAYTIME= (in
milliseconds) and DELAYLEVEL= (scale of 100). You can turn off delay for the whole track by saying
DELAY=OFF. You can use DELAYTIME=AUTO to automatically set the delay timing according to the tempo.
Please note that you cannot change the settings for the delay effect not separately on each channel.
Volume Envelope
For each channel, you can shape your sound using the volume envelope. The chart below shows the
parameters you can set and how they will shape the volume changes in time.
Attack Time ... Defined with ATTACKTIME=n (n=0 to 9999). The time, in milliseconds, that takes to
get to the initial peak stage. A small or no attack time results in a sharp sound. A large attack time
gets a soft sound.
Peak Time ... Defined with PEAKTIME=n (n=0 to 9999). The time, in milliseconds, that the sound
stays in its peak.
Peak Level ... Defined with PEAKLEVEL=n (n=0 to 100). How loud the sound is in its peak.
Decay Time ... Definied with DECAYTIME=n (n=0 to 9999). Determines how fast it goes downs to the
plateau of the sustain stage.
Sustain Level ... Defined with SUSTAINLEVEL=n (n=0 to 100). How loud the sound stays in its last
plateau stage until the note turns off.
Release Time .... Defined with RELEASETIME=n (n=0 to 9999). If the channel rests after a note is
turned off, you get into the release stage where the note gradually fades away.
Let's experiment with these parameters.
@ 1
ATTACKTIME=1000
L1 CDE
Each note starts very slowly.
@ 1
ATTACKTIME=0
DECAYTIME=1000
SUSTAINLEVEL=0
L1 CDE
Now you get a hard, bell-like tone. The volume will decay all the way to 0 because the level of the
sustain stage is set to 0.
Note that if you don't set one of these parameters, it'll come in its default value. The default set values
are:
ATTACKTIME=22
PEAKTIME=18
PEAKLEVEL=90
DECAYTIME=250
SUSTAINLEVEL=50
RELEASETIME=40
I invite you to play around with different settings for each parameter. By the way, you could get a "pure
PC beep" tone with an unprocessed square waveform like this:
ATTACKTIME=0
PEAKTIME=0
PEAKLEVEL=70
DECAYTIME=0
SUSTAINLEVEL=70
RELEASETIME=0
LFO Effect
You can use this pitch LFO effect for each channel to give it a nice vibrato. Here is an example to try:
@ 1
LFO=ON
LFOSPEED=6
LFORANGE=30
LFOWAIT=300
L2 CDEFG
LFO= turns on the pitch LFO effect. It's turned off by default. LFOSPEED= sets the number of cycles per
second for the pitch change. LFORANGE= determines how big the pitch change should occur, specified by
the cent of semitones (so 100 will set it to one semitone). LFOWAIT= sets the time to wait to start the LFO
effect, specified in milliseconds.
You could even use this LFO effect to get really wacky results. Try setting LFOSPEED=1 and
LFORANGE=2400 :)
Astro Effect
This is a very fun effect you can add to your music. The name comes from a game titled Astro Wars,
which I used to play on a little TV game console. (search with "Astro Wars SCV" on YouTube :)) What
this effect does is to add a square wave LFO to the pitches. The resulting sound is an out-of-world,
funky and wobbly sound. Try:
@ 1
ASTRO=14
L4 CDEFG
The number you specify after ASTRO= is the number of times that the wobble happens. Between 10 and
20 is good to start with, but try different values to see which value works for you.
Waveforms
Each music channel is by default set to play a square wave tone. But you can change to different a wave
form to work with, by declaring WAVEFORM=n in each channel. The currently available waveforms and
their assigned numbers (n) are:
sine (n=0)
square (n=1, default)
sawtooth (n=2)
triangle (n=3)
hybrid sine A(n=4)
hybrid sine B(n=5)
pulse with 12.5% cycle (n=6)
pulse with 25% cycle (n=7)
pulse with 33% cycle (n=8)
The most frequent waveforms used in old PCs and early game consoles were perhaps square waves.
The hybrid sine waves combine a basic sign wave with a few additional upper harmonics. Pulse waves
(n=6 through 8) are kinds of sounds used a lot in the old Nintendo NES games.
Here is an example where a different waveform than the default form is selected:
@ 1
DEFAULTTONE // resets the tone to plain beep with no envelope
WAVEFORM=2 // sets up a saw tooth wave
F~:G~:Ab~:>C~:<Ab:G:F~:Eb~:F~~~~~::::
If you overlay multiple pulse wave tracks, the mixed waveform will start to get heavier on one side. This
can take away the audio headroom if you want to raise the track volume after exporting. You can help
balance your mixed output by using WAVEFLIP in some of your tracks using pulse waves to filp the
waveform vertically.
Beef Up!
For each channel, you can use a mild overdrive effect if you want to boost up a soft waveform. The
overdrive is turned off by default. To use it, simply declare BEEFUP=n where n is a number from 0 to 100
that specifies the strength. Setting to zero turns off the effect. Try the following example to see what
BEEFUP does:
@ 1
PRESET=POPPY // attacky shape
WAVEFORM=3 // triangle wave (soft)
L8
BEEFUP=0 CDEFG~ // BEEFUP is off
BEEFUP=10 CDEFG~
BEEFUP=50 CDEFG~
BEEFUP=100 CDEFG~
The beef-up effect is available also available for the drum channel, but be careful because too much of
this effect can lessen the crispness of the drum hits.
Tone Presets
With one line of the command PRESET=, you can set your channel to a set of predetermined tone
parameters. You are welcome to try out the currently registered presets by declaring one of the
following at the top of a channel:
DEFAULTTONE ... (Square wave) Resets to flat envelope shaping.
PRESET=BEEP ... (Square wave) Straight PC Beep tone.
PRESET=POPPY ... (Square wave) Sustained tone with a strong attack.
PRESET=POPPYVIB ... (Square wave) Preset POPPY with vibrato.
PRESET=BELL ... (Square wave) Hard tone that decays in time.
Ring Modulation
Ring modulation is an effect where the inputs of two audio source are multiplied. The resulting sounds
can be very unique and futuristic, and they're sure to amuse your ears. You can use this effect to
produce metallic percussive sounds or Sci-Fi sound effects. To use this effect, within a music channel,
designate another channel as the modulator source by using the command RINGMOD=n where n is the
modulator channel number. The direct output of the modulator channel will not be audible.
In the following example, Channel 1 is set to take Channel 2 as its modulator input. Channel 2 feeds a
signal with the ASTRO and Fall effect into Channel 1:
@ 1
RINGMOD=2 // channel 2 m odulates channel 1
DEFAULTTONE
L1 O3 C~
@ 2
ASTRO=10
L1 O6 D#~,
Experiment further changing Channel 2's output using various effects, envelope settings and
waveforms. Additionally, you can route any of the nine music channels to modulate any other channel.
Ring modulation offers a huge range of tonal possibilities. You can read more about the ring modulation
effect here.
Bookmarking Your Start Position
When you compose a long song, you can take advantage of the bookmarking feature. Placing two
percent signs %%in your source forces the player to start from where those percent signs are. Here is an
example:
@ 1 L8
// verse
{E~G~G~A~G~G~E~~~}
%%
// chorus
F~G~A~F~>C~C~<G~~~
Let's say you have just finished working on the verse in the above example - since the bookmark is
placed at the top of the chorus, you can now focus on writing the chorus without having to go back to the
top every time you press the play button.
Note that the bookmark will not be effective when you export to an audio file.
Auto Saving
Your work gets automatically saved to a hidden file named "__AUTOSAVED__.txt" in your userdata
folder every 5 minutes and also when you quit the application. If something unexpected ever happens,
you can load this file to retrieve your work.
Syntax Reference
General
// ... Commenting
@ G ... Declares the global section
@ n ... Declares a music channel section (n=1,2,3...9)
@ D ... Declares the drum channel section
%% ... Bookmarks the player's starting point (Note: not effective when exporting)
Global Section
MASTERVOLUME=n ... Sets the master output gain (n=1 to 100)
TEMPO=n ... Sets the track tempo (n=40 to 400)
Vn=v ... Sets the volume (v=0 to 10) for channel n (n=1 to 9, m=0 to 100)
VD=v ... Sets the volume (v=0 to 10) for the drum channel
LOOP=? ... Turns track looping on or off (?=ON or OFF)
REPEAT=n ... Play or export the song n times in succession (automatically sets LOOP=OFF)
DELAY=? ... Turns the delay effect on or off (?=ON or OFF)
DELAYLEVEL=n ... Sets the delay output level (n=0 to 100)
DELAYTIME=n ... Sets the delay timing in milliseconds (n=0 to 999)
DELAYTIME=AUTO ... Sets the delay timing according to the tempo.
DELAYTIME=AUTO3 ... Sets the delay time to 8th triplets according to the tempo.
Music channel
ATTACKTIME=n ... Sets the envelope attack time in milliseconds (n=1 to 9999)
PEAKTIME=n ... Sets the envelope peak time in milliseconds (n=1 to 9999)
PEAKLEVEL=n ... Sets the envelope peak level (n=0 to 100)
DECAYTIME=n ... Sets the envelope decay time in milliseconds (n=1 to 9999)
SUSTAINLEVEL=n ... Sets the envelope sustain level (n=0 to 100)
RELEASETIME=n ... Sets the envelope release time in milliseconds (n=1 to 9999)
LFO=? ... Turns the pitch LFO effect on or off (?=ON or OFF)
LFORANGE=n ... Sets the LFO range to cents of a semitone (n=1 to 2400)
LFOSPEED=n ... Sets the LFO speed by cycles per second (n=0 to 100)
LFOWAIT=n ... Sets the time in milliseconds before the LFO effect starts (n=0 to 9999)
ASTRO=n ... Turns on the Astro effect and sets the number of wobbles per second (n=0 to 100, 0 for
OFF)
ASTRO=OFF ... Turns off the Astro effect
PRESET=? ... Sets up at once for a predetermined set of tone parameters
DEFAULTTONE ... Sets up a straight square wave tone
WAVEFORM=n ... Chooses the waveform that the channel uses (n=0 to 5)
WAVEFLIP ... Flips the channel's audio output waveform vertically
FALLSPEED=n ... Speed of the Fall effect in 100ths of a semitone per second (n=0 to 9600)
FALLWAIT=n ... Wait time in milliseconds before the Fall effect starts (n=0 to 9999)
RISESPEED=n ... Speed of the Rise effect in 100ths of a semitone per second (n=0 to 9600)
RISERANGE=n ... Pitch width for the Rise effect in 100ths of a semitone (n=0 to 9600)
BEEFUP=n .... Add a mild overdrive effect to the channel (n=0 to 100, 0=off)
Vn ... Sets channel volume (n=0,1,2...10)
Ln ... Sets the current note length (n=1 to 64)
C ... Musical note
D ... Musical note
E ... Musical note
F ... Musical note
G ... Musical note
A ... Musical note
B ... Musical note
# ... Sharp
b ... Flat
~ ... Elongates note by current note length
: ... Rest for the current note length
[---] ... Tuplet - groups notes --- in the space of current note length
[n---] ... Tuplet - groups notes --- in the space of note length specified by n
{---} ... Repeats the enclosed snippet ---
{n---} ... Repeats the enclosed snippet --- n times
^ ... Increase channel volume by 10%
_ ... Decrease channel volume by 10%
, ... Fall effect, works on the pitch commanded just before
* ... Rise effect, works on the pitch that comes right after
Drum Channel
RESETDRUMS ... Resets all drum tone settings to default
WHITENOISE ... Set all drums to use white noise
PINKNOISE ... Set all drums to use pink noise
NOISELEVEL= ... Set the noise element's volume (n=0 to 100, default=100)
SQUARELEVEL= ... Set the square wave element's volume (n=0 to 100, default=100)
KICKNOISE=? ... Set the kick's noise type (?=WHITE or PINK)
SNARENOISE=? ... Set the snare's noise type (?=WHITE or PINK)
HIHATNOISE=? ... Set the Hi-hat's noise type (?=WHITE or PINK)
KICKPITCH=n ... Sets the kick's pitch tuning (n=0 to 100, default=50)
SNAREPITCH=n ... Sets the snare's pitch tuning (n=0 to 100, default=50)
KICKLENGTH=n ... Sets the kick's duration in milliseconds (n=0 to 400)
SNARELENGTH=n ... Sets the kick's duration in milliseconds (n=0 to 1000)
HIHATLENGTH=n ... Sets the kick's duration in milliseconds (n=0 to 1000)
BEEFUP=n ... Add a mild overdrive effect to the channel (n=0 to 100, 0=off)
Vn ... Sets channel volume (n=0,1,2...10)
Ln ... Sets the current note length (n=1 to 64)
K ... Kick
k ... Kick, quieter
S ... Snare
s ... Snare, quieter
H ... Hi-hat
h ... Hi-hat, quieter
~ ... Elongates note by current note length
: ... Rest for the current note length
[---] ... Tuplet - groups notes --- in the space of current note length
[n---] ... Tuplet - groups notes --- in the space of note length specified by n
{---} ... Repeats the enclosed snippet ---
{n---} ... Repeats the enclosed snippet --- n times
^ ... Increase channel volume by 10%
_ ... Decrease channel volume by 10%
Uninstalling BeepComp
You can uninstall the application by using the "Programs and Features" under the Control Panel /
Programs menu to uninstall BeepComp. Typing in "appwiz.cpl" in the command prompt or in the search
box will direct you to this dialog, also. You can also find a shortcut to uninstall in the Start menu.
Please note that your "userdata" folder inside your "Documents" (or "My Documents" on XP) folder will
not be removed, just in case you still have some of your work left in this folder. If you no longer need
your "userdata" folder, please manually delete it along with its parent folder named BeepComp.
Staying Updated
New updates of BeepComp come out often. I ask every user to stay updated since updated versions fix
the bugs and improve on the issues found on the previous versions. I announce new versions through
the SourceForge Blog page. I also upload patches whenever there is a critical issue.
Alternatively, you can scroll down the SourceForge project top page to below the feature list and press
the button that says "Follow" to receive automatic updates. But be alerted that you might receive third-
party mail from SourceForge. I will also be sending out update notifications via Twitter and Google+.
You can find out the version of BeepComp you're using by clicking the logo in the main editor screen.
When you update to a new release, you will have to first uninstall your current version.
If you found issues/bugs...
BeepComp is still in its development stage... so I really appreciate you letting me know about any issues
you experience. You're welcome to write in our forum page or email me at beepcomp-at-hiromorozumi-
dot-com. I really want to make a program that is reliable and enjoyable to anyone :)
I am also documenting the issues as they get identified on the Known Issues page on sourceForge.
BeepComp on the Web
The home page for BeepComp is at: http://hiromorozumi.com/beepcomp.
Also, there is a forum page where you can join our discussion. I have also set up a Facebook page.
The source code is publicly available at the SourceForge repository. I will also welcome patches if you
spot issues. The address of the repository is: https://sourceforge.net/p/beepcomp/code/ci/master/tree/.
Also, I have been developing a game audio engine library API for game developers to incorporate music
made with BeepComp into their projects. This library is available at Github.
Contact Me!
I welcome anyone using BeepComp and also anyone interested in getting involved in this project to
getting in touch. Feature suggestions are great. Bug reports are welcome. If you are a coder interested
in working together to make this a better application, that's great, too! Just letting me hear the tracks you
create with BeepComp will make my day :) You can contact me by emailing me at beepcomp-at-
hiromorozumi-dot-com.

Contenu connexe

Tendances

production reflection
production reflectionproduction reflection
production reflectionVeltalGaming
 
Audacity voice over sound
Audacity voice over soundAudacity voice over sound
Audacity voice over soundjceldred
 
Using Audacity to Record and Edit Audio Files
Using Audacity to Record and Edit Audio FilesUsing Audacity to Record and Edit Audio Files
Using Audacity to Record and Edit Audio FilesMatthew J. Kushin, Ph.D.
 
Advantage Audio (Part II): Audacity
Advantage Audio (Part II): AudacityAdvantage Audio (Part II): Audacity
Advantage Audio (Part II): AudacityNorbert Herrmann
 
Audacity study guide
Audacity study guideAudacity study guide
Audacity study guideshannyboo18
 
The importance of sound editing
The importance of sound editingThe importance of sound editing
The importance of sound editingJakeRose8
 
5. pre production(4)
5. pre production(4)5. pre production(4)
5. pre production(4)joe manship
 
File Naming Conventions and Creating Stems and Mixes
File Naming Conventions and Creating Stems and MixesFile Naming Conventions and Creating Stems and Mixes
File Naming Conventions and Creating Stems and MixesMagic Finger Lounge
 
Manuale Karaoke5 En
Manuale Karaoke5 EnManuale Karaoke5 En
Manuale Karaoke5 EnRafael R.
 
Using The Field Recorder
Using The Field RecorderUsing The Field Recorder
Using The Field RecorderSamuel Edsall
 
Dvd menu creation_guide
Dvd menu creation_guideDvd menu creation_guide
Dvd menu creation_guideharysbg
 
Radio Trailer Production Process
Radio Trailer Production ProcessRadio Trailer Production Process
Radio Trailer Production ProcessDaniel Williams
 
Prepare a project in Logic 9
Prepare a project in Logic 9Prepare a project in Logic 9
Prepare a project in Logic 9Roope Anttinen
 
How To Ustream Your Computer Mic Or Computer
How To Ustream Your Computer Mic Or ComputerHow To Ustream Your Computer Mic Or Computer
How To Ustream Your Computer Mic Or ComputerVic Divecha
 
Manufaktoried jueboxes goes to sell
Manufaktoried jueboxes goes to sellManufaktoried jueboxes goes to sell
Manufaktoried jueboxes goes to sellRoweleas s.r.o.
 
Audacity
AudacityAudacity
Audacityjean
 

Tendances (20)

North pole audio affects
North pole audio affectsNorth pole audio affects
North pole audio affects
 
production reflection
production reflectionproduction reflection
production reflection
 
Audacity voice over sound
Audacity voice over soundAudacity voice over sound
Audacity voice over sound
 
Using Audacity to Record and Edit Audio Files
Using Audacity to Record and Edit Audio FilesUsing Audacity to Record and Edit Audio Files
Using Audacity to Record and Edit Audio Files
 
Advantage Audio (Part II): Audacity
Advantage Audio (Part II): AudacityAdvantage Audio (Part II): Audacity
Advantage Audio (Part II): Audacity
 
Audacity study guide
Audacity study guideAudacity study guide
Audacity study guide
 
The importance of sound editing
The importance of sound editingThe importance of sound editing
The importance of sound editing
 
5. pre production(4)
5. pre production(4)5. pre production(4)
5. pre production(4)
 
File Naming Conventions and Creating Stems and Mixes
File Naming Conventions and Creating Stems and MixesFile Naming Conventions and Creating Stems and Mixes
File Naming Conventions and Creating Stems and Mixes
 
Manuale Karaoke5 En
Manuale Karaoke5 EnManuale Karaoke5 En
Manuale Karaoke5 En
 
Using The Field Recorder
Using The Field RecorderUsing The Field Recorder
Using The Field Recorder
 
Dvd menu creation_guide
Dvd menu creation_guideDvd menu creation_guide
Dvd menu creation_guide
 
Change Log
Change LogChange Log
Change Log
 
Radio Trailer Production Process
Radio Trailer Production ProcessRadio Trailer Production Process
Radio Trailer Production Process
 
Prepare a project in Logic 9
Prepare a project in Logic 9Prepare a project in Logic 9
Prepare a project in Logic 9
 
Brief
BriefBrief
Brief
 
How To Ustream Your Computer Mic Or Computer
How To Ustream Your Computer Mic Or ComputerHow To Ustream Your Computer Mic Or Computer
How To Ustream Your Computer Mic Or Computer
 
Manufaktoried jueboxes goes to sell
Manufaktoried jueboxes goes to sellManufaktoried jueboxes goes to sell
Manufaktoried jueboxes goes to sell
 
Main Project Print Screens
Main Project Print ScreensMain Project Print Screens
Main Project Print Screens
 
Audacity
AudacityAudacity
Audacity
 

En vedette

Elm Street Blues - Score for string ensemble (PDF)
Elm Street Blues - Score for string ensemble (PDF)Elm Street Blues - Score for string ensemble (PDF)
Elm Street Blues - Score for string ensemble (PDF)Hiro Morozumi
 
Big Blowfish - String Quintet
Big Blowfish - String QuintetBig Blowfish - String Quintet
Big Blowfish - String QuintetHiro Morozumi
 
Biện pháp thi công hệ thống thông gió , điều hòa thông gió
Biện pháp thi công hệ thống thông gió , điều hòa thông gióBiện pháp thi công hệ thống thông gió , điều hòa thông gió
Biện pháp thi công hệ thống thông gió , điều hòa thông giócanh0988
 
Biện pháp thi công hệ thống ống gió
Biện pháp thi công hệ thống ống gióBiện pháp thi công hệ thống ống gió
Biện pháp thi công hệ thống ống giócanh0988
 
Cách tính toán hệ thống thông gió
Cách tính toán hệ thống thông gióCách tính toán hệ thống thông gió
Cách tính toán hệ thống thông giócanh0988
 
The Biggest Contact Center Trends of 2016
The Biggest Contact Center Trends of 2016The Biggest Contact Center Trends of 2016
The Biggest Contact Center Trends of 2016Erica Marois
 
Expert Insight on Implementing New Service Channels
Expert Insight on Implementing New Service ChannelsExpert Insight on Implementing New Service Channels
Expert Insight on Implementing New Service ChannelsErica Marois
 

En vedette (9)

Guitar Hero Live
Guitar Hero LiveGuitar Hero Live
Guitar Hero Live
 
Elm Street Blues - Score for string ensemble (PDF)
Elm Street Blues - Score for string ensemble (PDF)Elm Street Blues - Score for string ensemble (PDF)
Elm Street Blues - Score for string ensemble (PDF)
 
Final Project
Final ProjectFinal Project
Final Project
 
Big Blowfish - String Quintet
Big Blowfish - String QuintetBig Blowfish - String Quintet
Big Blowfish - String Quintet
 
Biện pháp thi công hệ thống thông gió , điều hòa thông gió
Biện pháp thi công hệ thống thông gió , điều hòa thông gióBiện pháp thi công hệ thống thông gió , điều hòa thông gió
Biện pháp thi công hệ thống thông gió , điều hòa thông gió
 
Biện pháp thi công hệ thống ống gió
Biện pháp thi công hệ thống ống gióBiện pháp thi công hệ thống ống gió
Biện pháp thi công hệ thống ống gió
 
Cách tính toán hệ thống thông gió
Cách tính toán hệ thống thông gióCách tính toán hệ thống thông gió
Cách tính toán hệ thống thông gió
 
The Biggest Contact Center Trends of 2016
The Biggest Contact Center Trends of 2016The Biggest Contact Center Trends of 2016
The Biggest Contact Center Trends of 2016
 
Expert Insight on Implementing New Service Channels
Expert Insight on Implementing New Service ChannelsExpert Insight on Implementing New Service Channels
Expert Insight on Implementing New Service Channels
 

Similaire à BeepComp - Chiptune Creator - User's Guide (v0.2.2)

Can You Hear Me Now? Exercises
Can You Hear Me Now? ExercisesCan You Hear Me Now? Exercises
Can You Hear Me Now? ExercisesAlison Aldrich
 
Audacity Workshop
Audacity WorkshopAudacity Workshop
Audacity WorkshopThomas S.
 
Apple Garage Band
Apple Garage BandApple Garage Band
Apple Garage Bandjobb
 
Audacity tutorial
Audacity tutorialAudacity tutorial
Audacity tutorialslaidsherin
 
Using Audacity for audio recordings
Using Audacity for audio recordingsUsing Audacity for audio recordings
Using Audacity for audio recordingsNives Torresi
 
Podcasting 101
Podcasting 101Podcasting 101
Podcasting 101coolemath
 
Assistive and Learning Technics
Assistive and Learning TechnicsAssistive and Learning Technics
Assistive and Learning TechnicsEva Gyarmathy
 
FLStudio12QuickStartGuide
FLStudio12QuickStartGuideFLStudio12QuickStartGuide
FLStudio12QuickStartGuideMarcus Britt
 
From Hardware To Live
From Hardware To LiveFrom Hardware To Live
From Hardware To LiveRudy
 
Schiel direct teach
Schiel direct teachSchiel direct teach
Schiel direct teachT.J. Schiel
 
Digitalrecorders
DigitalrecordersDigitalrecorders
Digitalrecordersjean
 
Audacity tutorial
Audacity tutorialAudacity tutorial
Audacity tutorialslaidsherin
 
How To Create A Song Using Garage Band Without
How To Create A Song Using Garage Band Without How To Create A Song Using Garage Band Without
How To Create A Song Using Garage Band Without Luke
 
Audacity To Podcast
Audacity To PodcastAudacity To Podcast
Audacity To Podcastamccord
 

Similaire à BeepComp - Chiptune Creator - User's Guide (v0.2.2) (20)

Audio
AudioAudio
Audio
 
Can You Hear Me Now? Exercises
Can You Hear Me Now? ExercisesCan You Hear Me Now? Exercises
Can You Hear Me Now? Exercises
 
Audacity Workshop
Audacity WorkshopAudacity Workshop
Audacity Workshop
 
Apple Garage Band
Apple Garage BandApple Garage Band
Apple Garage Band
 
Adobe auditiontutorial
Adobe auditiontutorialAdobe auditiontutorial
Adobe auditiontutorial
 
Audacity tutorial
Audacity tutorialAudacity tutorial
Audacity tutorial
 
Using Audacity for audio recordings
Using Audacity for audio recordingsUsing Audacity for audio recordings
Using Audacity for audio recordings
 
Podcasting 101
Podcasting 101Podcasting 101
Podcasting 101
 
Assistive and Learning Technics
Assistive and Learning TechnicsAssistive and Learning Technics
Assistive and Learning Technics
 
Podcasting
PodcastingPodcasting
Podcasting
 
FLStudio12QuickStartGuide
FLStudio12QuickStartGuideFLStudio12QuickStartGuide
FLStudio12QuickStartGuide
 
From Hardware To Live
From Hardware To LiveFrom Hardware To Live
From Hardware To Live
 
Schiel direct teach
Schiel direct teachSchiel direct teach
Schiel direct teach
 
AUDOCITY MANUAL - AUDIO EDITING SOFTWARE
AUDOCITY MANUAL - AUDIO EDITING SOFTWARE AUDOCITY MANUAL - AUDIO EDITING SOFTWARE
AUDOCITY MANUAL - AUDIO EDITING SOFTWARE
 
Digitalrecorders
DigitalrecordersDigitalrecorders
Digitalrecorders
 
Syl smpk8858 en
Syl smpk8858 enSyl smpk8858 en
Syl smpk8858 en
 
Audacity tutorial
Audacity tutorialAudacity tutorial
Audacity tutorial
 
How To Create A Song Using Garage Band Without
How To Create A Song Using Garage Band Without How To Create A Song Using Garage Band Without
How To Create A Song Using Garage Band Without
 
Midi
MidiMidi
Midi
 
Audacity To Podcast
Audacity To PodcastAudacity To Podcast
Audacity To Podcast
 

Dernier

Precise and Complete Requirements? An Elusive Goal
Precise and Complete Requirements? An Elusive GoalPrecise and Complete Requirements? An Elusive Goal
Precise and Complete Requirements? An Elusive GoalLionel Briand
 
Intelligent Home Wi-Fi Solutions | ThinkPalm
Intelligent Home Wi-Fi Solutions | ThinkPalmIntelligent Home Wi-Fi Solutions | ThinkPalm
Intelligent Home Wi-Fi Solutions | ThinkPalmSujith Sukumaran
 
CRM Contender Series: HubSpot vs. Salesforce
CRM Contender Series: HubSpot vs. SalesforceCRM Contender Series: HubSpot vs. Salesforce
CRM Contender Series: HubSpot vs. SalesforceBrainSell Technologies
 
Software Coding for software engineering
Software Coding for software engineeringSoftware Coding for software engineering
Software Coding for software engineeringssuserb3a23b
 
Alfresco TTL#157 - Troubleshooting Made Easy: Deciphering Alfresco mTLS Confi...
Alfresco TTL#157 - Troubleshooting Made Easy: Deciphering Alfresco mTLS Confi...Alfresco TTL#157 - Troubleshooting Made Easy: Deciphering Alfresco mTLS Confi...
Alfresco TTL#157 - Troubleshooting Made Easy: Deciphering Alfresco mTLS Confi...Angel Borroy López
 
What is Fashion PLM and Why Do You Need It
What is Fashion PLM and Why Do You Need ItWhat is Fashion PLM and Why Do You Need It
What is Fashion PLM and Why Do You Need ItWave PLM
 
KnowAPIs-UnknownPerf-jaxMainz-2024 (1).pptx
KnowAPIs-UnknownPerf-jaxMainz-2024 (1).pptxKnowAPIs-UnknownPerf-jaxMainz-2024 (1).pptx
KnowAPIs-UnknownPerf-jaxMainz-2024 (1).pptxTier1 app
 
What is Advanced Excel and what are some best practices for designing and cre...
What is Advanced Excel and what are some best practices for designing and cre...What is Advanced Excel and what are some best practices for designing and cre...
What is Advanced Excel and what are some best practices for designing and cre...Technogeeks
 
Dealing with Cultural Dispersion — Stefano Lambiase — ICSE-SEIS 2024
Dealing with Cultural Dispersion — Stefano Lambiase — ICSE-SEIS 2024Dealing with Cultural Dispersion — Stefano Lambiase — ICSE-SEIS 2024
Dealing with Cultural Dispersion — Stefano Lambiase — ICSE-SEIS 2024StefanoLambiase
 
Ahmed Motair CV April 2024 (Senior SW Developer)
Ahmed Motair CV April 2024 (Senior SW Developer)Ahmed Motair CV April 2024 (Senior SW Developer)
Ahmed Motair CV April 2024 (Senior SW Developer)Ahmed Mater
 
Unveiling Design Patterns: A Visual Guide with UML Diagrams
Unveiling Design Patterns: A Visual Guide with UML DiagramsUnveiling Design Patterns: A Visual Guide with UML Diagrams
Unveiling Design Patterns: A Visual Guide with UML DiagramsAhmed Mohamed
 
GOING AOT WITH GRAALVM – DEVOXX GREECE.pdf
GOING AOT WITH GRAALVM – DEVOXX GREECE.pdfGOING AOT WITH GRAALVM – DEVOXX GREECE.pdf
GOING AOT WITH GRAALVM – DEVOXX GREECE.pdfAlina Yurenko
 
Comparing Linux OS Image Update Models - EOSS 2024.pdf
Comparing Linux OS Image Update Models - EOSS 2024.pdfComparing Linux OS Image Update Models - EOSS 2024.pdf
Comparing Linux OS Image Update Models - EOSS 2024.pdfDrew Moseley
 
PREDICTING RIVER WATER QUALITY ppt presentation
PREDICTING  RIVER  WATER QUALITY  ppt presentationPREDICTING  RIVER  WATER QUALITY  ppt presentation
PREDICTING RIVER WATER QUALITY ppt presentationvaddepallysandeep122
 
Automate your Kamailio Test Calls - Kamailio World 2024
Automate your Kamailio Test Calls - Kamailio World 2024Automate your Kamailio Test Calls - Kamailio World 2024
Automate your Kamailio Test Calls - Kamailio World 2024Andreas Granig
 
SensoDat: Simulation-based Sensor Dataset of Self-driving Cars
SensoDat: Simulation-based Sensor Dataset of Self-driving CarsSensoDat: Simulation-based Sensor Dataset of Self-driving Cars
SensoDat: Simulation-based Sensor Dataset of Self-driving CarsChristian Birchler
 
Unveiling the Future: Sylius 2.0 New Features
Unveiling the Future: Sylius 2.0 New FeaturesUnveiling the Future: Sylius 2.0 New Features
Unveiling the Future: Sylius 2.0 New FeaturesŁukasz Chruściel
 
Taming Distributed Systems: Key Insights from Wix's Large-Scale Experience - ...
Taming Distributed Systems: Key Insights from Wix's Large-Scale Experience - ...Taming Distributed Systems: Key Insights from Wix's Large-Scale Experience - ...
Taming Distributed Systems: Key Insights from Wix's Large-Scale Experience - ...Natan Silnitsky
 

Dernier (20)

Precise and Complete Requirements? An Elusive Goal
Precise and Complete Requirements? An Elusive GoalPrecise and Complete Requirements? An Elusive Goal
Precise and Complete Requirements? An Elusive Goal
 
Intelligent Home Wi-Fi Solutions | ThinkPalm
Intelligent Home Wi-Fi Solutions | ThinkPalmIntelligent Home Wi-Fi Solutions | ThinkPalm
Intelligent Home Wi-Fi Solutions | ThinkPalm
 
2.pdf Ejercicios de programación competitiva
2.pdf Ejercicios de programación competitiva2.pdf Ejercicios de programación competitiva
2.pdf Ejercicios de programación competitiva
 
CRM Contender Series: HubSpot vs. Salesforce
CRM Contender Series: HubSpot vs. SalesforceCRM Contender Series: HubSpot vs. Salesforce
CRM Contender Series: HubSpot vs. Salesforce
 
Software Coding for software engineering
Software Coding for software engineeringSoftware Coding for software engineering
Software Coding for software engineering
 
Alfresco TTL#157 - Troubleshooting Made Easy: Deciphering Alfresco mTLS Confi...
Alfresco TTL#157 - Troubleshooting Made Easy: Deciphering Alfresco mTLS Confi...Alfresco TTL#157 - Troubleshooting Made Easy: Deciphering Alfresco mTLS Confi...
Alfresco TTL#157 - Troubleshooting Made Easy: Deciphering Alfresco mTLS Confi...
 
What is Fashion PLM and Why Do You Need It
What is Fashion PLM and Why Do You Need ItWhat is Fashion PLM and Why Do You Need It
What is Fashion PLM and Why Do You Need It
 
KnowAPIs-UnknownPerf-jaxMainz-2024 (1).pptx
KnowAPIs-UnknownPerf-jaxMainz-2024 (1).pptxKnowAPIs-UnknownPerf-jaxMainz-2024 (1).pptx
KnowAPIs-UnknownPerf-jaxMainz-2024 (1).pptx
 
What is Advanced Excel and what are some best practices for designing and cre...
What is Advanced Excel and what are some best practices for designing and cre...What is Advanced Excel and what are some best practices for designing and cre...
What is Advanced Excel and what are some best practices for designing and cre...
 
Dealing with Cultural Dispersion — Stefano Lambiase — ICSE-SEIS 2024
Dealing with Cultural Dispersion — Stefano Lambiase — ICSE-SEIS 2024Dealing with Cultural Dispersion — Stefano Lambiase — ICSE-SEIS 2024
Dealing with Cultural Dispersion — Stefano Lambiase — ICSE-SEIS 2024
 
Ahmed Motair CV April 2024 (Senior SW Developer)
Ahmed Motair CV April 2024 (Senior SW Developer)Ahmed Motair CV April 2024 (Senior SW Developer)
Ahmed Motair CV April 2024 (Senior SW Developer)
 
Unveiling Design Patterns: A Visual Guide with UML Diagrams
Unveiling Design Patterns: A Visual Guide with UML DiagramsUnveiling Design Patterns: A Visual Guide with UML Diagrams
Unveiling Design Patterns: A Visual Guide with UML Diagrams
 
GOING AOT WITH GRAALVM – DEVOXX GREECE.pdf
GOING AOT WITH GRAALVM – DEVOXX GREECE.pdfGOING AOT WITH GRAALVM – DEVOXX GREECE.pdf
GOING AOT WITH GRAALVM – DEVOXX GREECE.pdf
 
Comparing Linux OS Image Update Models - EOSS 2024.pdf
Comparing Linux OS Image Update Models - EOSS 2024.pdfComparing Linux OS Image Update Models - EOSS 2024.pdf
Comparing Linux OS Image Update Models - EOSS 2024.pdf
 
PREDICTING RIVER WATER QUALITY ppt presentation
PREDICTING  RIVER  WATER QUALITY  ppt presentationPREDICTING  RIVER  WATER QUALITY  ppt presentation
PREDICTING RIVER WATER QUALITY ppt presentation
 
Automate your Kamailio Test Calls - Kamailio World 2024
Automate your Kamailio Test Calls - Kamailio World 2024Automate your Kamailio Test Calls - Kamailio World 2024
Automate your Kamailio Test Calls - Kamailio World 2024
 
SensoDat: Simulation-based Sensor Dataset of Self-driving Cars
SensoDat: Simulation-based Sensor Dataset of Self-driving CarsSensoDat: Simulation-based Sensor Dataset of Self-driving Cars
SensoDat: Simulation-based Sensor Dataset of Self-driving Cars
 
Advantages of Odoo ERP 17 for Your Business
Advantages of Odoo ERP 17 for Your BusinessAdvantages of Odoo ERP 17 for Your Business
Advantages of Odoo ERP 17 for Your Business
 
Unveiling the Future: Sylius 2.0 New Features
Unveiling the Future: Sylius 2.0 New FeaturesUnveiling the Future: Sylius 2.0 New Features
Unveiling the Future: Sylius 2.0 New Features
 
Taming Distributed Systems: Key Insights from Wix's Large-Scale Experience - ...
Taming Distributed Systems: Key Insights from Wix's Large-Scale Experience - ...Taming Distributed Systems: Key Insights from Wix's Large-Scale Experience - ...
Taming Distributed Systems: Key Insights from Wix's Large-Scale Experience - ...
 

BeepComp - Chiptune Creator - User's Guide (v0.2.2)

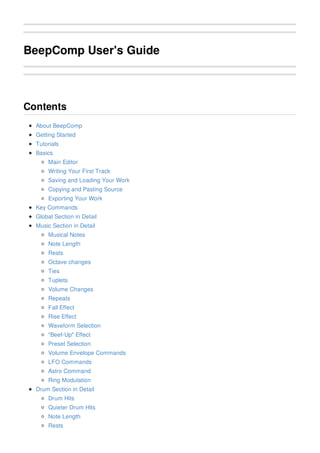
  • 1. BeepComp User's Guide Contents About BeepComp Getting Started Tutorials Basics Main Editor Writing Your First Track Saving and Loading Your Work Copying and Pasting Source Exporting Your Work Key Commands Global Section in Detail Music Section in Detail Musical Notes Note Length Rests Octave changes Ties Tuplets Volume Changes Repeats Fall Effect Rise Effect Waveform Selection "Beef-Up" Effect Preset Selection Volume Envelope Commands LFO Commands Astro Command Ring Modulation Drum Section in Detail Drum Hits Quieter Drum Hits Note Length Rests
  • 2. Ties Tuplets Noise Type Adjusting the Noise Mix Drum Sound Shaping Delay Effect Volume Envelope LFO Effect Astro Effect Waveforms Beef Up! Tone Presets Ring Modultion Bookmarking Your Start Position Auto Saving Syntax Reference General Global Section Music Channel Drum Channel Uninstalling BeepComp Staying Updated If you found issues/bugs... BeepComp on the Web Contact Me! About BeepComp BeepComp lets you compose chiptune tracks with text files. It features a nice retro-sounding synthesizer engine with 9 music channels and 1 drum channel. BeepComp is an open-source project. This means that you're welcome to modify the source code however you want. BeepComp is a also shareware that anyone can use freely. It is distributed under the MIT license. Getting Started Use the latest installer package available on the Sourceforge top page. Run this set up file, and you'll be all set for your journey! Windows Launch the MSI installer file, beepcomp_vx-x-x.msi, (x-x-x fills the version number) which you just downloaded. Your program will be installed in the folder: C:Program FilesBeepComp on 32-bit Windows C:Program Files (x86)BeepComp on 64-bit Windows
  • 3. After installation, BeepComp will be on the list of installed programs. On Windows XP & 7, go to Start- >All Programs->BeepComp. You can also click the shortcut that has been created on your Desktop. (Note: If you downloaded the portable version, the installation steps below are not required. To launch, open the folder you extracted from the downloaded .zip file and double-click on beepcomp_portable.exe.) Mac / Linux I'll be working on these versions soon :) Tutorials The BeepComp homepage has section named Your First Tutorial, which will be your great starting point. The later section Writing Your First Track in this document has a similar content. After exploring those tutorials, exploring the tutorial files included in the userdata folder (the program's default save location) will be helpful. Simply load one of these files named _tutorial_---.txt, read and play to see writing what produces what result. I recommend starting from _tutorial_basic_1.txt. These files are located in: C:Documents and Settings{USERNAME}My DocumentsBeepCompuserdata on XP C:Users{USERNAME}DocumentsBeepCompuserdata on Vista and later (Note: for the portable version, find the userdata folder inside the application top folder) Basics Main Editor
  • 4. Editor Area ... You edit your music source text here. Control Panel ... Play/pause/save/load/export the music you write and control other things. Cursor ... Your point of control over the text. Your Text ... This single text file is your whole track - simple, eh? Gain Meter ... For visualizing each channel's activity in real time. Progress Bar ... Keeps track your song's progress in time. Master Volume ... Controls how loud the master output is. (Each channel has a separate volume control, too) Writing Your First Track Let's write a very basic "Hello BeepComp" source. Start up BeepComp, press the NEW button, choose "Yes", and type the folloing into the text editor: // My first BeepCom p track! :) @ G TEMPO=100 MASTERVOLUME=80 @ 1 CDEFG And press the play button (with a triangle). You heard an endless series of "do-re-mi-fa-sol...," right? Let me explain the source. Two forward slashes // adds a comment. Following two slashes, you can write anything to make a note
  • 5. to yourself or others. The comment ends at the end of the line. @ is used to declare the beginning of each "section." @ G starts the "global section" where you can set parameters that affect your entire track. Your section declaration stays effective until you declare another section (@ 1 in this case). TEMPO= sets the tempo of the track. MASTERVOLUME= sets the master output gain. The volume knob will change accordingly to the master volume when you play your track from the beginning. @ 1 declares the start of the first music channel section. Everything you write thereafter will be written to the first channel until you declare another section. Then we have the musical notes CDEFG . Note that you have to write musical pitches in UPPERCASE. You actually heard CDEFG over and over because BeepComp defaults the player to looping mode. (More about looping later...) Easy? Let's expand this a little: // My first BeepCom p track! :) @ G TEMPO=100 MASTERVOLUME=80 @ 1 O5L4 CDEFG~ @ 2 O4L4 EFGAB~ @ D L4 KKKSSS Now play this. You now hear a mix of three channels. O followed by a single digit number sets the octave. O4 is the default octave where the middle C is, so O5 is just one above the default octave. L followed by a number ranging from 1 to 64 changes the note length. L4 sets up the note length to 1/4 of the measure length (quarter notes). ~ is quite useful. It elongates a note by the currently set note length. You can actually chain multiple ~ s, for instance, B~~~ . Now we have @ 2 so commands after that goes to the second music channel. You can play up to 9 music channels simultaneously, so you can declare sections up to @ 9 . And you can use the drum channel by declaring @ D . Write K for kick, S for snare, H for high-hat. In fact, you can use lower case k, s, h which will play a little quieter. Note that you see some white spaces in above examples. You can insert any amount of white space
  • 6. between commands because they're ignored by the interpreter. Saving and Loading Your Work Now let's save your work. Click the SAVE button (or F11), type in hellobeep.txt, and click the Save button. Now open NotePad or any text editor of your choice, choose to open a file, navigate to the userdata folder, the default user folder, and open up the hellobeep.txt file we just created. (Note that default userdata folder will be at following locations:) C:Documents and Settings{USERNAME}My DocumentsBeepCompuserdata on XP C:Users{USERNAME}DocumentsBeepCompuserdata on Vista and later (Note: for the portable version, find the userdata folder inside the application top folder) See? Your BeepComp source is simply a text file. And you could even continue to work on your track in your text editor if you want. By the way, you can use the ALT + O shortcut from the main editor to open up your userdata folder anytime. Copying and Pasting Source A nice thing about working with text is that you can easily copy and paste between BeepComp and other sources! Try this - Start a new file (NEW button or F9), Go to this page, copy all the code inside the grey box, and press CTRL + V in BeepComp, and play. I hope you see how easy it can be to share your work with others on the web :) Of course, going the other way is easy, too. You can easily copy your work from BeepComp by pressing CTRL + A (select all) then CTRL + C (copy), and paste what you just copied into your external applications like your Outlook to email your music to a friend, for instance. Exporting Your Work You can create audio files of your work by pressing the EXPORT button(or F12). Currently supported formats are: WAV, MP3 and OGG files. After you export your work, you can add fades and other finishing touches on audio editors like Audacity. Note that by default your music won't be looped when exported. If you want your export to be looped, specify the total number the song should execute with the command REPEAT=n in the global section. If you want your track to play through once and then fade out, first write REPEAT=2 in the global section and export your song. This will output your song twice in succession. Then load the exported file in an audio editor and apply fade-out around the middle of the file briefly after where the song repeats.
  • 7. Key Commands Mouse Input Mouse position ... Navigates cursor position Mouse Wheel ... Helps scrolling text up/down Left Button ... Presses button on screen / selects text Right Button ... Clears text selection Key Commands: Main Editor F1 ... Play from beginning F2 ... Pause / Unpause F3 ... Rewind F4 ... Fast Forward F5 ... Show key commands F6 ... Show Documentation F7 ... Turn delay on/off F9 ... Start a new file F10 ... Load from a file F11 ... Save to a file F12 ... Export to an audio file ARROW ... Move cursor ESCAPE ... Quit BACKSPACE ... Backspacing, delete selection SHIFT ... Select text SHIFT + ARROW ... Expand text selection ALT ... Clear text selection CTRL + Z ... Undo CTRL + C ... Copy CTRL + V ... Paste CTRL + A ... Select all CTRL + S ... Save ALT + S ... Quick-save to last saved file ALT + V ... Open the system volume control ALT + D ... Open the audio device control ALT + I ... Initialize the audio device ALT + O ... Open "userdata" folder HOME ... Go to the very top END ... Go to the very bottom Page Up ... Go up by one screen height Page Down ... Go down by one screen height Key Commands: File Dialog
  • 8. ESCAPE ... Exits dialog HOME ... Go back to the default starting folder END ... Go back to previous folder CTRL + Z ... Go back to previous folder F1 ... Toggle file types to display F2 ... Display keyboard shortcuts F12 ... Load/Save/Export (as indicated) UP/DOWN ... Navigate through the list of files in the current directory RIGHT ... Selects a file name, Go to child folder (when over <<<) LEFT ... Go to parent folder (when over <<<) BACKSPACE ... Backspacing in the file name input CTRL + G ... Go to a particular drive or special folders (Desktop and Documents) ALT + O ... Open the currently selected directory in Explorer ALT + D ... Go to the 'Desktop' CTRL + R ... Refresh the currently viewing directory Global Section in Detail The global section, defined by @ G , is where you write commands that influence the entire track. The elements you can control in the global section are: Master volume ... MASTERVOLUME=n Initial channel volume ... V1=n, V2=n, VD=n etc... Tempo ... TEMPO=n Delay ... DELAY=ON / OFF, DELAYTIME=n, DELAYLEVEL=n Looping ... LOOP=ON / OFF The master volume is also manually controllable with the volume knob in the control panel. Note that at the start of track, the master volume gets initialized to the declared value by MASTERVOLUME= (or default value 80 if none specified) so the volume knob position gets reset. The tempo, measured by beats per measure (BPM), determines how fast your track is played. The TEMPO= command takes a value between 30 and 300. The delay effect is applied to the whole track (not to inidividual track). See the Delay Effect section for more. By default, your track is set to play in an infinite loop. You can turn off track looping by LOOP=OFF. If you want to loop your track a certain number of times, you could first set LOOP=OFF in your global section and then enclose the entire real time data with {} in each channel. Here is an example of using the global section to set up the volume, tempo and looping for your track:
  • 9. @ G MASTERVOLUME=50 // not too loud TEMPO=80 // kind of slow LOOP=OFF REPEAT=3 // song plays 3 tim es in succession DELAYTIME=750 // adjust delay tim ing @ 1 GFEDC Music Section in Detail Each section for a music is defined with @ n. Your first channel section will start with @ 1, your second with @ 2 and so forth. Musical Notes Musical notes are written with note names C, D , E, F, G , A and B in UPPERCASE. The following example plays an ascending C major scale: @ 1 CDEFGAB A note with a sharp is written with # following its pitch name - C#, for example. A note with a flat is written with b, for example, Ab. A chromatic scale can be played this way: @ 1 CC#DD#EFF#GG#AA#BBbAAbGGbFEEbDDbC Note Length To specify the current note length, use the L command. The letter L should be followed by a number ranging from 1 to 64, the factor which should divide the measure length. L4 sets the 1/4 of the measure length, so you get the quarter note length. L8 gives you the eighth note length. Your length definition stays effective until the next L command. The below example plays a few long half notes followed by a series of fast 32nd notes: @ 1 L2 CDE L32 GABAGFED Rests Rests can be easily inserted with a symbol :. The length of the rest is determined by the current note length.
  • 10. @ 1 L4 C:CDE:EFG:G:E::: The above example should show you how rests can be inserted intuitively. Octave Changes To specify the current octave range, use the O command followed by a number. The middle octave where the middle C sits is O4 , and it's the default starting octave of each channel. The example below plays some notes in a high octave range O6 then plays low notes in the octave O2. @ 1 O5 GG:G:DE:C::: O2 C::: Another way to navigate through octave ranges is to use the < and > symbols. < means go down by one octave, and > means go up by one octave. The example below sweeps up and down the entire possible octave ranges: @ 1 O1 C>C>C>C>C>C>C>C<C<C<C<C<C<C<C Ties You can elongate a note quite easily by the multiple of the current note length. To do that, use the ~ symbol after the note you want to elongate. For example, try this example: @ 1 L8 C~~DE~~CE~C~E~~~ You can be pretty liberal with chaining ~ symbols if you want, for example try L8C~~~~~~~ :) Tuplets Tuplets are useful when you have to insert triplets or any other notes in non-standard subdivisions. Tuplets can be entered using the [] symbols. You simply enclose the notes you want to group in the space of the current note length: @ 1 L4 C [EDC] D [FED] E [GFE] You should have heard the notes enclosed in brackets as triplets in the space of a quarter note. You can specify this grouping space, also. For example, if you want to write a quintuplets in a quarter note space in the midst of 8th notes: @ 1 L8 C~~~ [4CDbC<B>C] >C<BbAbGFE
  • 11. Volume changes You can specify the volume of a channel at any point by using the V command. Write V followed by a value from 0 to 10, like V10 or V4 . @ 1 V10 CDEFG V5 CDEFG The above source will play the first phrase in full volume and the second half as loud. If you want to make many gradual changes in your channel, symbols ^ and _ will come in handy. ^ increases the volume by 10%, and _ decreases by 10%. Try this: @ 1 V0 L32 AEFD ^ AEFD ^ AEFD ^ AEFD ^ AEFD ^ AEFD ^ AEFD ^ AEFD ^ AEFD ^ AEFD _ AEFD _ AEFD _ AEFD _ AEFD _ AEFD _ AEFD _ AEFD _ AEFD Repeats If you want to repeat a phrase or a section of your music, you can use the {} symbols. Anything enclosed in these symbols are repeated. @ 1 {EbDD:} EbDD: Bb~~~ You can actually nest a repeat inside another repeat. For example: @ 1 {CDEF{GFEF}ED} {{{C~}}} Note that nesting makes the total number of repeats grow exponentially. The latter part of the above example is repeated 2 x 2 x 2 = 8 times. You can also specify a certain number of times which a phrase should repeat by adding a single digit number just after the left curly brace like this: @ 1 {5CDE}{3FGA} Fall Effect If a musical note is followed by comma ,, the Fall effect is added, causing it to decrease its pitch in time. Here is an example where you can observe how this effect works:
  • 12. @ 1 FALLSPEED=1200 FALLWAIT=500 L1 C,D,E, FALLSPEED is how many 100ths of a semitone the pitch decreases in a second. 1200 means a range of one octave per second. FALLWAIT= specifies the time in milliseconds before the effect starts. The Fall point can be set in the middle of a tie series. This makes rhythmical timing of the effect easy. Try this example: @ 1 FALLSPEED=1200 FALLWAIT=0 L16 O5 FECD~~~~ ~,~~~ <A>CDC FECD~~ ~,~ <A~G~F~E~ :::: Rise Effect Placing an asterisk * is before a note causes that note to scoop up to its pitch, producing a similar effect of a synthesizer pitch-bend wheel. RISESPEED= sets the speed for the rise in 100ths of a semitone per second. RISERANGE= determines how wide the pitch change should span. This effect can nicely add liveliness to your musical lines: @ G TEMPO=160 @ 1 RISESPEED=2400 RISERANGE=200 L8 O4 *EGA> *CCC *CCC *CC *C <AGD#EC<AG> *CCC *CCC *CC :::::::: Waveform Selection You can choose a waveform other than the default square wave for each channel by declaring WAVEFORM=n. See Waveforms. "Beef-Up" Effect Each channel comes with a mild overdrive effect you can use to give it a boost by declaring BEEFUP=n. See Beef Up! Preset Selection You may choose a preset to for a quick tone shaping by declaring PRESET=(presetnam e). See Tone Presets.
  • 13. Volume Envelope Commands Each channel has a volume envelope filter to help shape a unique sound. See Volume Envelope. LFO Commands The pitch LFO filter adds a vibrato effect. See LFO Effect. Astro Command The "Astro" effect is a unique 80's-ish wobble effect. See Astro Effect. Ring Modulation You can use two music channels to create a ring modulation effect similar to the effect Commodore 64's SID chip produced. see Ring Modulation. Drum Section in Detail Writing @ D starts the drum section. Drum Hits You can write a snare hit with S , and a kick with K. These normal hits come in UPPERCASE alphabets. With : giving a rest, a basic kick-and-snare groove can be written: @ D K:S: KKS: The hi-hat is written with H. A disco groove pattern can be played like this: @ D K:H: S:H: K:H: S:HH Quieter Drum Hits If you write the drum hits in lower case, you get quieter drum hits. These can be added to give rich dynamics to your groove: @ D K::k S::k :kK: S:HH K:hh S:kk :shh hsSS Note Length Just as we did for a music channel, we can specify the note length as you go in the drum channel as well. Use the L command with a number ranging from 1 to 64, with the number being the subdivision factor of the measure. For example:
  • 14. @ D L2 S L4 S L8 S L16 SS L32 SSSS L64 SSSSSSSS But you might want to set to the smallest subdivision once at the beginning and rely more on using rests and ties. You'll find this way much easier especially when working with groove-based music :) Rests A rest is indicated with a : as illustrated above. The length of a rest is determined by the currently set note length by the L command. Ties Instead of using a rest to fill a gap, you can use a tie symbol ~ to elongate a hit. The difference is that the tie ensures that the note gets played through the elongated space. When you hit and rest, if the note length is set very short, the abrupt cut-off of the hit might become obvious. Try this example to hear the difference: @ D L64 S::: S::: S::: S::: S~~~ S~~~ S~~~ S~~~ Tuplets Tuplets make it possible to express quite complicated timings. Just as you saw in tuplets used in a music channel, you have two ways of expressing tuplets. The first way is to enclose hits simply with [] where the total length of grouped hits is the currently set note length. The second way is specifying the total length of grouped hits in the format [n(hits)]. Using the both methods, let's illustrate some interesting things you can do to your groove with tuplets: @ D L16 K::[KK] S~~~ K::: [4SSS] K[KK]K[KK] KK[8HHHH] ss[8sss][8SSSS][8SSSSSSSS] Noise Type There are two types of noise available to use for your drum sounds: white noise and pink noise. The default noise type is bright-sounding white noise. Pink noise gives you a darker color. To change the noise type on all drums at once, use the commands WHITENOISE or PINKNOISE. To change the noise type individually on a drum, use the commands KICKNOISE=, SNARENOISE= or HIHATNOISE= and specify PINK or WHITE following the equal sign. Try the following example to explore the different noise types:
  • 15. @ D PINKNOISE // darker { K:HKS~~s hsKKS~Hs } WHITENOISE // brighter (default) { K:HKS~~s hsKKS~Hs } KICKNOISE=PINK // pink noise only for kick { KKS~ KKS~ KHS[HH] HSSS } Adjusting the Noise Mix The drum channel combines two audio sources: a noise oscillator and a square wave oscillator. You can adjust how loud each source's output is by commands NOISELEVEL= and SQUAREWAVE= with values ranging from 0 to 100. The following example decreases the noise oscillator's output volume gradually: @ D SQUARELEVEL=100 // 100 is default NOISELEVEL=100 { K:HHS~HH } NOISELEVEL=70 { K:HHS~HH } NOISELEVEL=40 { K:HHS~HH } NOISELEVEL=0 { K:HHS~HH } // you won't hear hi-hat The Hi-hat only uses the noise output. That's why you didn't hear the hihat in the last line where the noise output was set to zero. Drum sound shaping One way you can change how your drums sound is to change the tuning pitch of the snare or the kick. Use SNAREPITCH= and KICKPITCH= with values from 0 to 100 to adjust the pitches. The default value is 50 for the both drums. Hear how pitch adjustment affects how your drum kit sounds: @ D RESETDRUMS // set all param eters back to default {3 KhKS~h} [ss]SS[ss]SS SNAREPITCH=20 KICKPITCH=30 // lower than default value 50 {3 KhKS~h} [ss]SS[ss]SS Another way to shape your drum sounds is to change the time length value of each drum by writing commands KICKLENGTH=, SNARELENGTH=, HIHATLENGTH= with values in milliseconds. The default time length values of kick, snare, hi-hat are 40, 140, 20, respectively.
  • 16. @ D L8 RESETDRUMS // all back to default K:::S~H~ K:::S~H~ KICKLENGTH=70 SNARELENGTH=200 HIHATLENGTH=100 K:::S~H~ K:::S~H~ // all drum s are longer Delay Effect There is a nice stereo delay effect that is added to your track by default. You can turn off the delay by pushing the DELAY button or pressing F7. You can set the delay parameters in your source. Your commands will go in the Global section. For instance: @ G DELAY=ON DELAYTIME=200 DELAYLEVEL=50 @ 1 CDEFG This gives you a pretty prominent delay effect with a short timing. Play around with DELAYTIME= (in milliseconds) and DELAYLEVEL= (scale of 100). You can turn off delay for the whole track by saying DELAY=OFF. You can use DELAYTIME=AUTO to automatically set the delay timing according to the tempo. Please note that you cannot change the settings for the delay effect not separately on each channel. Volume Envelope For each channel, you can shape your sound using the volume envelope. The chart below shows the parameters you can set and how they will shape the volume changes in time.
  • 17. Attack Time ... Defined with ATTACKTIME=n (n=0 to 9999). The time, in milliseconds, that takes to get to the initial peak stage. A small or no attack time results in a sharp sound. A large attack time gets a soft sound. Peak Time ... Defined with PEAKTIME=n (n=0 to 9999). The time, in milliseconds, that the sound stays in its peak. Peak Level ... Defined with PEAKLEVEL=n (n=0 to 100). How loud the sound is in its peak. Decay Time ... Definied with DECAYTIME=n (n=0 to 9999). Determines how fast it goes downs to the plateau of the sustain stage. Sustain Level ... Defined with SUSTAINLEVEL=n (n=0 to 100). How loud the sound stays in its last plateau stage until the note turns off. Release Time .... Defined with RELEASETIME=n (n=0 to 9999). If the channel rests after a note is turned off, you get into the release stage where the note gradually fades away. Let's experiment with these parameters. @ 1 ATTACKTIME=1000 L1 CDE Each note starts very slowly. @ 1 ATTACKTIME=0 DECAYTIME=1000 SUSTAINLEVEL=0 L1 CDE Now you get a hard, bell-like tone. The volume will decay all the way to 0 because the level of the sustain stage is set to 0. Note that if you don't set one of these parameters, it'll come in its default value. The default set values are:
  • 18. ATTACKTIME=22 PEAKTIME=18 PEAKLEVEL=90 DECAYTIME=250 SUSTAINLEVEL=50 RELEASETIME=40 I invite you to play around with different settings for each parameter. By the way, you could get a "pure PC beep" tone with an unprocessed square waveform like this: ATTACKTIME=0 PEAKTIME=0 PEAKLEVEL=70 DECAYTIME=0 SUSTAINLEVEL=70 RELEASETIME=0 LFO Effect You can use this pitch LFO effect for each channel to give it a nice vibrato. Here is an example to try: @ 1 LFO=ON LFOSPEED=6 LFORANGE=30 LFOWAIT=300 L2 CDEFG LFO= turns on the pitch LFO effect. It's turned off by default. LFOSPEED= sets the number of cycles per second for the pitch change. LFORANGE= determines how big the pitch change should occur, specified by the cent of semitones (so 100 will set it to one semitone). LFOWAIT= sets the time to wait to start the LFO effect, specified in milliseconds. You could even use this LFO effect to get really wacky results. Try setting LFOSPEED=1 and LFORANGE=2400 :) Astro Effect This is a very fun effect you can add to your music. The name comes from a game titled Astro Wars, which I used to play on a little TV game console. (search with "Astro Wars SCV" on YouTube :)) What this effect does is to add a square wave LFO to the pitches. The resulting sound is an out-of-world, funky and wobbly sound. Try: @ 1 ASTRO=14 L4 CDEFG
  • 19. The number you specify after ASTRO= is the number of times that the wobble happens. Between 10 and 20 is good to start with, but try different values to see which value works for you. Waveforms Each music channel is by default set to play a square wave tone. But you can change to different a wave form to work with, by declaring WAVEFORM=n in each channel. The currently available waveforms and their assigned numbers (n) are: sine (n=0) square (n=1, default) sawtooth (n=2) triangle (n=3) hybrid sine A(n=4) hybrid sine B(n=5) pulse with 12.5% cycle (n=6) pulse with 25% cycle (n=7) pulse with 33% cycle (n=8) The most frequent waveforms used in old PCs and early game consoles were perhaps square waves. The hybrid sine waves combine a basic sign wave with a few additional upper harmonics. Pulse waves (n=6 through 8) are kinds of sounds used a lot in the old Nintendo NES games. Here is an example where a different waveform than the default form is selected: @ 1 DEFAULTTONE // resets the tone to plain beep with no envelope WAVEFORM=2 // sets up a saw tooth wave F~:G~:Ab~:>C~:<Ab:G:F~:Eb~:F~~~~~:::: If you overlay multiple pulse wave tracks, the mixed waveform will start to get heavier on one side. This can take away the audio headroom if you want to raise the track volume after exporting. You can help balance your mixed output by using WAVEFLIP in some of your tracks using pulse waves to filp the waveform vertically. Beef Up! For each channel, you can use a mild overdrive effect if you want to boost up a soft waveform. The overdrive is turned off by default. To use it, simply declare BEEFUP=n where n is a number from 0 to 100 that specifies the strength. Setting to zero turns off the effect. Try the following example to see what BEEFUP does:
  • 20. @ 1 PRESET=POPPY // attacky shape WAVEFORM=3 // triangle wave (soft) L8 BEEFUP=0 CDEFG~ // BEEFUP is off BEEFUP=10 CDEFG~ BEEFUP=50 CDEFG~ BEEFUP=100 CDEFG~ The beef-up effect is available also available for the drum channel, but be careful because too much of this effect can lessen the crispness of the drum hits. Tone Presets With one line of the command PRESET=, you can set your channel to a set of predetermined tone parameters. You are welcome to try out the currently registered presets by declaring one of the following at the top of a channel: DEFAULTTONE ... (Square wave) Resets to flat envelope shaping. PRESET=BEEP ... (Square wave) Straight PC Beep tone. PRESET=POPPY ... (Square wave) Sustained tone with a strong attack. PRESET=POPPYVIB ... (Square wave) Preset POPPY with vibrato. PRESET=BELL ... (Square wave) Hard tone that decays in time. Ring Modulation Ring modulation is an effect where the inputs of two audio source are multiplied. The resulting sounds can be very unique and futuristic, and they're sure to amuse your ears. You can use this effect to produce metallic percussive sounds or Sci-Fi sound effects. To use this effect, within a music channel, designate another channel as the modulator source by using the command RINGMOD=n where n is the modulator channel number. The direct output of the modulator channel will not be audible. In the following example, Channel 1 is set to take Channel 2 as its modulator input. Channel 2 feeds a signal with the ASTRO and Fall effect into Channel 1: @ 1 RINGMOD=2 // channel 2 m odulates channel 1 DEFAULTTONE L1 O3 C~ @ 2 ASTRO=10 L1 O6 D#~, Experiment further changing Channel 2's output using various effects, envelope settings and waveforms. Additionally, you can route any of the nine music channels to modulate any other channel. Ring modulation offers a huge range of tonal possibilities. You can read more about the ring modulation
  • 21. effect here. Bookmarking Your Start Position When you compose a long song, you can take advantage of the bookmarking feature. Placing two percent signs %%in your source forces the player to start from where those percent signs are. Here is an example: @ 1 L8 // verse {E~G~G~A~G~G~E~~~} %% // chorus F~G~A~F~>C~C~<G~~~ Let's say you have just finished working on the verse in the above example - since the bookmark is placed at the top of the chorus, you can now focus on writing the chorus without having to go back to the top every time you press the play button. Note that the bookmark will not be effective when you export to an audio file. Auto Saving Your work gets automatically saved to a hidden file named "__AUTOSAVED__.txt" in your userdata folder every 5 minutes and also when you quit the application. If something unexpected ever happens, you can load this file to retrieve your work. Syntax Reference General // ... Commenting @ G ... Declares the global section @ n ... Declares a music channel section (n=1,2,3...9) @ D ... Declares the drum channel section %% ... Bookmarks the player's starting point (Note: not effective when exporting) Global Section MASTERVOLUME=n ... Sets the master output gain (n=1 to 100) TEMPO=n ... Sets the track tempo (n=40 to 400) Vn=v ... Sets the volume (v=0 to 10) for channel n (n=1 to 9, m=0 to 100) VD=v ... Sets the volume (v=0 to 10) for the drum channel LOOP=? ... Turns track looping on or off (?=ON or OFF) REPEAT=n ... Play or export the song n times in succession (automatically sets LOOP=OFF) DELAY=? ... Turns the delay effect on or off (?=ON or OFF)
  • 22. DELAYLEVEL=n ... Sets the delay output level (n=0 to 100) DELAYTIME=n ... Sets the delay timing in milliseconds (n=0 to 999) DELAYTIME=AUTO ... Sets the delay timing according to the tempo. DELAYTIME=AUTO3 ... Sets the delay time to 8th triplets according to the tempo. Music channel ATTACKTIME=n ... Sets the envelope attack time in milliseconds (n=1 to 9999) PEAKTIME=n ... Sets the envelope peak time in milliseconds (n=1 to 9999) PEAKLEVEL=n ... Sets the envelope peak level (n=0 to 100) DECAYTIME=n ... Sets the envelope decay time in milliseconds (n=1 to 9999) SUSTAINLEVEL=n ... Sets the envelope sustain level (n=0 to 100) RELEASETIME=n ... Sets the envelope release time in milliseconds (n=1 to 9999) LFO=? ... Turns the pitch LFO effect on or off (?=ON or OFF) LFORANGE=n ... Sets the LFO range to cents of a semitone (n=1 to 2400) LFOSPEED=n ... Sets the LFO speed by cycles per second (n=0 to 100) LFOWAIT=n ... Sets the time in milliseconds before the LFO effect starts (n=0 to 9999) ASTRO=n ... Turns on the Astro effect and sets the number of wobbles per second (n=0 to 100, 0 for OFF) ASTRO=OFF ... Turns off the Astro effect PRESET=? ... Sets up at once for a predetermined set of tone parameters DEFAULTTONE ... Sets up a straight square wave tone WAVEFORM=n ... Chooses the waveform that the channel uses (n=0 to 5) WAVEFLIP ... Flips the channel's audio output waveform vertically FALLSPEED=n ... Speed of the Fall effect in 100ths of a semitone per second (n=0 to 9600) FALLWAIT=n ... Wait time in milliseconds before the Fall effect starts (n=0 to 9999) RISESPEED=n ... Speed of the Rise effect in 100ths of a semitone per second (n=0 to 9600) RISERANGE=n ... Pitch width for the Rise effect in 100ths of a semitone (n=0 to 9600) BEEFUP=n .... Add a mild overdrive effect to the channel (n=0 to 100, 0=off) Vn ... Sets channel volume (n=0,1,2...10) Ln ... Sets the current note length (n=1 to 64) C ... Musical note D ... Musical note E ... Musical note F ... Musical note G ... Musical note A ... Musical note B ... Musical note # ... Sharp b ... Flat ~ ... Elongates note by current note length : ... Rest for the current note length [---] ... Tuplet - groups notes --- in the space of current note length [n---] ... Tuplet - groups notes --- in the space of note length specified by n
  • 23. {---} ... Repeats the enclosed snippet --- {n---} ... Repeats the enclosed snippet --- n times ^ ... Increase channel volume by 10% _ ... Decrease channel volume by 10% , ... Fall effect, works on the pitch commanded just before * ... Rise effect, works on the pitch that comes right after Drum Channel RESETDRUMS ... Resets all drum tone settings to default WHITENOISE ... Set all drums to use white noise PINKNOISE ... Set all drums to use pink noise NOISELEVEL= ... Set the noise element's volume (n=0 to 100, default=100) SQUARELEVEL= ... Set the square wave element's volume (n=0 to 100, default=100) KICKNOISE=? ... Set the kick's noise type (?=WHITE or PINK) SNARENOISE=? ... Set the snare's noise type (?=WHITE or PINK) HIHATNOISE=? ... Set the Hi-hat's noise type (?=WHITE or PINK) KICKPITCH=n ... Sets the kick's pitch tuning (n=0 to 100, default=50) SNAREPITCH=n ... Sets the snare's pitch tuning (n=0 to 100, default=50) KICKLENGTH=n ... Sets the kick's duration in milliseconds (n=0 to 400) SNARELENGTH=n ... Sets the kick's duration in milliseconds (n=0 to 1000) HIHATLENGTH=n ... Sets the kick's duration in milliseconds (n=0 to 1000) BEEFUP=n ... Add a mild overdrive effect to the channel (n=0 to 100, 0=off) Vn ... Sets channel volume (n=0,1,2...10) Ln ... Sets the current note length (n=1 to 64) K ... Kick k ... Kick, quieter S ... Snare s ... Snare, quieter H ... Hi-hat h ... Hi-hat, quieter ~ ... Elongates note by current note length : ... Rest for the current note length [---] ... Tuplet - groups notes --- in the space of current note length [n---] ... Tuplet - groups notes --- in the space of note length specified by n {---} ... Repeats the enclosed snippet --- {n---} ... Repeats the enclosed snippet --- n times ^ ... Increase channel volume by 10% _ ... Decrease channel volume by 10% Uninstalling BeepComp You can uninstall the application by using the "Programs and Features" under the Control Panel / Programs menu to uninstall BeepComp. Typing in "appwiz.cpl" in the command prompt or in the search
  • 24. box will direct you to this dialog, also. You can also find a shortcut to uninstall in the Start menu. Please note that your "userdata" folder inside your "Documents" (or "My Documents" on XP) folder will not be removed, just in case you still have some of your work left in this folder. If you no longer need your "userdata" folder, please manually delete it along with its parent folder named BeepComp. Staying Updated New updates of BeepComp come out often. I ask every user to stay updated since updated versions fix the bugs and improve on the issues found on the previous versions. I announce new versions through the SourceForge Blog page. I also upload patches whenever there is a critical issue. Alternatively, you can scroll down the SourceForge project top page to below the feature list and press the button that says "Follow" to receive automatic updates. But be alerted that you might receive third- party mail from SourceForge. I will also be sending out update notifications via Twitter and Google+. You can find out the version of BeepComp you're using by clicking the logo in the main editor screen. When you update to a new release, you will have to first uninstall your current version. If you found issues/bugs... BeepComp is still in its development stage... so I really appreciate you letting me know about any issues you experience. You're welcome to write in our forum page or email me at beepcomp-at-hiromorozumi- dot-com. I really want to make a program that is reliable and enjoyable to anyone :) I am also documenting the issues as they get identified on the Known Issues page on sourceForge. BeepComp on the Web The home page for BeepComp is at: http://hiromorozumi.com/beepcomp. Also, there is a forum page where you can join our discussion. I have also set up a Facebook page. The source code is publicly available at the SourceForge repository. I will also welcome patches if you spot issues. The address of the repository is: https://sourceforge.net/p/beepcomp/code/ci/master/tree/. Also, I have been developing a game audio engine library API for game developers to incorporate music made with BeepComp into their projects. This library is available at Github. Contact Me! I welcome anyone using BeepComp and also anyone interested in getting involved in this project to getting in touch. Feature suggestions are great. Bug reports are welcome. If you are a coder interested in working together to make this a better application, that's great, too! Just letting me hear the tracks you create with BeepComp will make my day :) You can contact me by emailing me at beepcomp-at- hiromorozumi-dot-com.