Build-It: Dimmable LED lantern
•
1 j'aime•327 vues

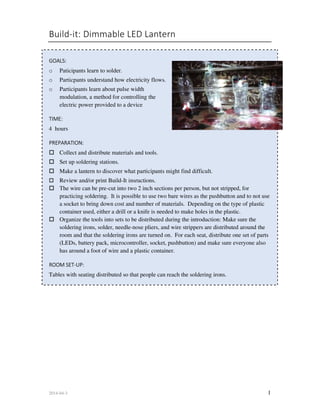
Made of a simple microcontroller, plastic bottle, and other basic electronic components, this lantern can help moderate battery usage for lighting.

Recommandé
Contenu connexe
En vedette
En vedette (13)
Similaire à Build-It: Dimmable LED lantern
Similaire à Build-It: Dimmable LED lantern (20)
Dernier
Dernier (20)
Build-It: Dimmable LED lantern
- 1. 2014-04-3 1 Build-it: Dimmable LED Lantern GOALS: o Paticipants learn to solder. o Particpants understand how electricity flows. o Participants learn about pulse width modulation, a method for controlling the electric power provided to a device TIME: 4 hours PREPARATION: Collect and distribute materials and tools. Set up soldering stations. Make a lantern to discover what participants might find difficult. Review and/or print Build-It insructions. The wire can be pre-cut into two 2 inch sections per person, but not stripped, for practicing soldering. It is possible to use two bare wires as the pushbutton and to not use a socket to bring down cost and number of materials. Depending on the type of plastic container used, either a drill or a knife is needed to make holes in the plastic. Organize the tools into sets to be distributed during the introduction: Make sure the soldering irons, solder, needle-nose pliers, and wire strippers are distributed around the room and that the soldering irons are turned on. For each seat, distribute one set of parts (LEDs, battery pack, microcontroller, socket, pushbutton) and make sure everyone also has around a foot of wire and a plastic container. ROOM SET-UP: Tables with seating distributed so that people can reach the soldering irons.
- 2. 2014-04-3 2 TOOLS MATERIALS* Item Amount Cost Wire Strippers Solder ~ 12 mm minimal Needle-nose pliers Wire ~ 300 mm minimal Drill or Knife or Box cutter AA batteries 2 $1 Soldering Iron AA Battery Holder 1 $1 Hot Glue Gun Microcontroller 1 PIC 10f200 $0.50 (optional) Drill with various bits Electrical tape ~5 in minimal (optional) Pencils and Paper Pushbutton* 1 $0.50 (optional) String White LEDs 3 $1 (optional) Putty for hanging things on walls Plastic bottles 1 Free Socket* 1 $0.10 Total cost = $4.10 *optional
- 3. 2014-04-3 3 1. What is a Build-It? A Build-It is a lesson where people make a small technology and learn some workshop skills. Everyone will build together, step by step. As you build the technology, you will learn good techniques for handling metal and wood. Each member will have an opportunity to learn these hands-on skills by using some tools and materials. At the end of the Build-It, you will have had some practice using tools and also have a technology for you to take home. A NOTE ON DESIGN: These instructions will describe one way to make a lantern. As long as the conections in the circuit are preserved, you can arrange the components in any way and make them fit in a variety of containers. Encourage particpants who want to devote more time (an extra two hours) to choose a container they want and design the circuit to fit inside. Some examples are shown at the end of the document. 2. What is a dimmable LED lantern? When a light gives more light, it uses more power from the battery. This means that you waste power if you only need a little bit of light for the task, but you use a lot of light. By having different brightness modes, you can increase the battery life. This lantern uses a microcontroller to manage the different brightness modes of the LEDs. • Inform participants that the microcontroller fits in the socket, so all their soldering should be to the socket. • Explain that the LEDs and the microcontroller/socket will not work if they are backwards, so participants should be sure to pay attention to the long and short legs of the LEDs and to which way is ‘up’ on the socket, as shown by the half circle notch. • Explain that the socket’s pins are fragile. If you bend, twist, or pull them, they will break, and you will have to start over.
- 4. 2014-04-3 4 3. Setting up the Build-It • Introduce each major part: Batteries, LEDs, microcontroller, switch, container. • Encourage participants to engage fully. Ask, “Why?” “Where?” “What?” “How?” at any time during the session • Work slowly and carefuly, take the time to set up each solder joint with the wall putty, and double check that you are making the right connection. • Be careful of the hot glue guns and soldering irons. They can burn you, and will burn the table if you put them down no in their holder. • If particapants want to experiment with designing the light to fit in a container other than a water bottle, encourage them to do so! • Review how the technology works by explaining how to use it and what the major parts are. 4. Practice Soldering (15 minutes) Tools Materials Steps 1. Strip one end of each 2’’ wire piece. SHOW THE PARTICIPANTS HOW TO PROPERLY STRIP WIRE o Explain that they must use the hole that corresponds to the wire size we are using, and specify the wire size. o Explain that you want to strip 1 to 2 cm of wire. o Demonstrate how you insert the wire into the hole, squeeze, and strip off the plastic coating. 2. Twist the wires together
- 5. 2014-04-3 5 SHOW THE PARTICIPANTS HOW TO MAKE A MECHANICAL WIRE CONNECTION. o Explain that you can twist the wires together, enough that they hold together on their own. o You can also make two hooks with the wire ends, and hook them together. This concept is easily shown using two fingers. o As you walk around, make sure everyones wires are secured together, not just touching. 3. Secure the joint to be soldered. STRESS THE IMPORTANCE OF THIS STEP. o To stabilize the wires, add some wall putty to the table and place the wires in it o Explain that you will need one hand to hold the soldering iron and one hand to hold the solder, so the wires need to already be secured. 4. Solder the joint EXPLAIN HOW TO SOLDER: o The first step is to get a little bit on solder on the tip of the iron. o Then touch the soldering iron tip to one side of the joint. o Touch the solder to the other side of the joint. o The solder and iron should not be touching at this time. o The solder should flow towards the tip, encasing the joint in shiny metal. o Check to see if anyone has a dull joint. This means the solder was not hot enough and they need to reheat their wires.
- 6. 2014-04-3 6 5. Understanding the basic circuit (15 minutes) Once everyone is done soldering, bring the group back together to hear the explanation of how the circuit works. EXPLAIN THE BASIC CIRCUIT o People will build more carefully when they understand how the circuit works and why short circuits should be avoided o Electricity must travel in a circle. o The electricity begins its journey at the positive end of the battery. It flows through the wire and arrives at the microcontroller. It exists the microcontroller and goes into the LED where it makes light. o Now, the electricity must return to the battery. It travels through the wire and into the negative terminal of the battery, finishing its circular journey! LED DETAILS o Explain again that the LEDs cannot be put in backwards. The short leg must be connceted to the negative terminal of the battery by wires. o The two legs of the LED must not touch. If they do, the electricity will flow through the connection without ever making any light MICROCONTROLLER DETAILS o The legs of the microcontroller must not touch eachother o The microcontroller cannot be placed in backwards, so pay attenetion to the half circle indent. POTENTIAL WAYS FOR THE CIRCUIT/CIRCLE TO BREAK: THESE DETAILS ARE NOT NECESSARY TO SHARE, BUT FOR YOUR REFERENCE o Short circuit – the circuit is closed before it is supposed to be. This could damage the batteries, leds, and microcontroller. o Loose connection – the circuit has simply been broken. This often occurs when the pin of a socket breaks off. There is no way to repair this, and the participant must begin again with a fresh socket o LEDs or Microcontroller are backwards. o Dead battery – check the voltage of the battery to ensure it is still good. o Batteries inserted into the holder backwards.
- 7. 2014-04-3 7 6. Building the Circuit (3 hours) All the components except the plastic bottle will be used in this section. Tools Materials Steps: 1. Bend the short leg of one LED 2. Bend both of the legs out. 3. Repeat with the other LEDS and solder the short legs together. 4. Touch the black wire from the battery pack to the short leg of the LED’s and the red wire to their free leg to test them. When you are done testing, remove the batteries Make sure to insert your batteries properly- the negative terminal touches the spring.
- 8. 2014-04-3 8 5. Bend the pins on the socket so they are flat. Cut off pins one and six on the socket. Pins are numbered clockwise starting to the right of the indentation. Pay careful attention to the indentation and which way is up. You will not be using these pins. 6. Solder the free, long leg of one LED to pin four of the socket. Be sure to set up your joint carefully with the wall putty before soldering. 7. Attach the free, long legs of the last two LEDs to pins three and five of the socket. 8. Strip a section in the middle of the black wire. Be careful when stripping the wire as not to break it. If it breaks, that is fine; you will just have to make two solder connections. In step 10.
- 9. 2014-04-3 9 9. Solder the red wire to pin 2 of the socket. 10. Solder the stripped section of the black wire to the short legs of the LEDs. 11. Solder the end of the black wire to pin 7 of the socket.
- 10. 2014-04-3 10 12. Cut a piece of spare wire to around 2 inches, and solder it to pin 8 of the socket. 13. Cut a second, 2 inch piece of wire, and solder it to the short legs of the LEDs. 14. If you are using a switch, solder the switch to the two wires you just cut. You can also just touch the metal parts of these wires together briefly, and it will work as a switch. NOTES ON SWITCHES If the switches have four legs, the participants should solder to legs that are diagonal from eachother.
- 11. 2014-04-3 11 15. Insert the microcontroller. Makes sure it is not upside down. 16. Insert the batteries and test the lantern using the switch. Make sure to insert your batteries properly- the negative terminal touches the spring. 17. Hot glue the circuit onto the outside of the battery pack. If hot glue is not available, use electrical tape to secure the circuit. NOTES ON SECURING THE CIRCUIT The pins on the socket are very fragile. When securing the circuit, we want to ensure that the pins are fasted down to the plastic battery pack so that they won’t twist or bend if the light is shaken around.
- 12. 2014-04-3 12 7. Preparing the Water bottle (30 minutes) Ensure that the waterbottles being used are mostly dry on the inside. Tools Materials NOTES ON SAFETY Remind particpands that the knives/scissors being used are sharp and encourage them to point the blades away from themselves while cutting the plastic. The cut plastic edges can also be sharp, so particpants should handle the bottles with care. Steps: 1. Cut the top of the water bottle, making a hole big enough the easily insert the circuit. Please be careful. 2. Have paricipants decide where in the bottle they want the circuit to go. Some examples are shown at the end of the instructions. 3. Cut a hole for the switch, if nessicary for your design, in the bottle.
- 13. 2014-04-3 13 4. If they want their circuit to be secured in a certain place, they can poke holes in the bottle, and weave a net of string to secure it. They can also use string to hang the bottle up. Be creative, but remember that you will have to take the circuit out to change batteries at some point. 5. Secure the circuit inside the bottle and thread the switch out. Congratulations, you have finished your lantern! TIPS FOR MORE CREATIVE DESIGNS OR CONTAINERS o If you are using harder plastic, a drill will make things easier. o Have participants sketch out their design before building it, make sure to keep the dimensions of their container in mind. o Check in with them frequently to make sure their connections are following the diagram. o It is especially important to set up solder joints before soldering. o Electrical tape can be used to prevent two wires that are close to eachother from touching. o They should still encase the base of their socket in hot glue to secure it. o Remember there are different colors of LEDs you can use o As you beuild the lantern, be aware that LEDs give light in a particular direction Build-Its are published by IDIN. The International Development Innovation Network (IDIN) is a consortium funded through USAID’s Higher Education Solutions Network (HESN) that supports leading universities to catalyze the development and application of innovative science, technology, and engineering approaches and tools to solve some of the world’s most challenging development problems. The dimmable LED lantern featured here was designed with contributions from participants in the International Development Design Summit. The document was created by Erin Pierce in collaboration with IDIN representatives at UC-Davis and MIT.
- 14. 2014-04-3 14 Examples of other Lantern Designs