SalesDesktop Quick Tour
•
1 j'aime•884 vues

This is a quick User Guide for SalesDesktop users. SalesDesktop is an InvisibleCRM product that seemlessly integrates Salesforce CRM with Microsoft Outlook.

Recommandé
Recommandé
Contenu connexe
Tendances
Similaire à SalesDesktop Quick Tour
Similaire à SalesDesktop Quick Tour (20)
Plus de InvisibleCRM
Dernier
Dernier (20)
SalesDesktop Quick Tour
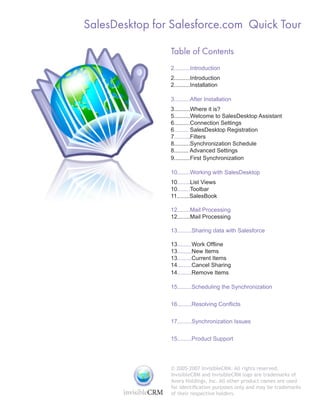
- 1. SalesDesktop for Salesforce.com Quick Tour Table of Contents 2..........Introduction 2..........Introduction 2..........Installation 3..........After Installation 3..........Where it is? 5..........Welcome to SalesDesktop Assistant 6..........Connection Settings 6......... SalesDesktop Registration 7..........Filters 8..........Synchronization Schedule 8......... Advanced Settings 9..........First Synchronization 10........Working with SalesDesktop 10........List Views 10........Toolbar 11........SalesBook 12........Mail Processing 12........Mail Processing 13.........Sharing data with Salesforce 13.........Work Offline 13.........New Items 13.........Current Items 14.........Cancel Sharing 14.........Remove Items 15.........Scheduling the Synchronization 16.........Resolving Conflicts 17.........Synchronization Issues 15.........Product Support © 2005-2007 InvisibleCRM. All rights reserved. InvisibleCRM and InvisibleCRM logo are trademarks of Avora Holdings, Inc. All other product names are used for identification purposes only and may be trademarks of their respective holders.
- 2. Introduction Introduction SalesDesktop for Salesforce drives user adoption by melding Salesforce functionality into the native Outlook environment, encouraging greater Salesforce usage. It allows users to process emails easily and effectively and offers all customer information, contact, calendar and task lists in one slot. SalesDesktop’s Benefits (fig.1) Installation To get the SalesDesktop installation package, go to www.invisiblecrm.com/buy.php, select the option with SalesDesktop for Salesforce and fill in the registration form (fig. 2). You will receive an email with the link to the installation package and setup instruction. Download the installation package, run it InvisibleCRM Try and Buy page (fig.2) and then follow the installation wizard’s instructions. • Check boxes with the products you wish to download Send questions to support@invisiblecrm.com Page 2
- 3. After Installation After Installation Where Is It? When installed, SalesDesktop is loaded as an Outlook add-in every time you start the Outlook. There is no self-running application for SalesDesktop that you can open and close. Once the Outlook is opened, please, note that SalesDesktop Tray Icon and Menu (fig. 3) the SalesDesktop taskbar icon will appear next to the Outlook icon (fig. 3). • The SalesDesktop icon represents the application’s On the first run, SalesDesktop will require you activity and status. to select an Outlook folder for downloading • The SalesDesktop taskbar menu is the only way to Salesforce items (fig. 4). operate the application. • Use SalesDesktop Options dialogue to change SalesDesktop settings, check license information or send a feedback to the InvisibleCRM Support Team. First Run Dialog (fig. 4) Send questions to support@invisiblecrm.com Page 3
- 4. After Installation When the folder is selected, SalesDesktop creates a structure for common Salesforce items. Subfolders for Accounts, Documents, Leads, Opportunities and Products now exist. This structure is entirely exposed in the Folder. view of Outlook (fig. 5). SalesDesktop Items Allocation (fig. 5) • Switch to Folders to see the Salesforce items • SalesDesktop creates new folders for Accounts, Documents, Leads, Opportunities and Products and uses the existing Calendar, Contacts and Tasks to store Salesforce items in Outlook Send questions to support@invisiblecrm.com Page 4
- 5. After Installation Welcome to SalesDesktop Assistant In order to fill SalesDesktop folders with Salesforce data, you need to enter your Salesforce login information, set up filters to reduce the amount of downloaded Salesforce records and run the synchronization. The SalesDesktop Assistant friendly guides you through all the steps that are necessary to setup the initial SalesDesktop settings and run the first synchronization (fig.6). Note that all the settings are also available through the SalesDesktop taskbar menu. SalesDesktop Assistant welcome page (fig.6) • Click mouse on Assistant’s screen to start the SalesDesktop settings SalesDesktop Options Dialog (fig.7) • To change SalesDesktop settings any time you need them, call the Options from the SalesDesktop taskbar menu Send questions to support@invisiblecrm.com Page 5
- 6. After Installation Connection Settings SalesDesktop requires an Internet connection to register you the first time and connect to your Salesforce account in order to synchronize SalesDesktop folders with Salesforce. SalesDesktop tries to use the Internet Explorer settings for proxy server to establish a connection. If it is not possible to establish an Internet connection using these settings, Connection Settings Options (fig.8) SalesDesktop will ask you to specify the connection settings manually (fig.8). • Ask your system administrator for the correct Internet connection settings used in your organization SalesDesktop Registration In order for SalesDesktop to connect to your Salesforce account, you need to enter your Salesforce username and password. On the first login, you will also be prompted to register. This is required to identify you along with the other SalesDesktop users. We guarantee that all your personal information will be kept safe and confidential and that under no circumstances will it be shared with or disclosed to third parties. If you do not want to fill all the required fields manually, you can click the button and use the SalesDesktop Registration (fig. 9) copy of your Salesforce information (fig. 9). • Enter the user name and password that you use to sign in to Caution: You can change your login any Salesforce and press the Login button. time while working with SalesDesktop from the taskbar menu. In such case, all your Salesforce contents will be removed and the new items downloaded from Salesforce after the next synchronization. This could lead to a loss of unsynchronized documents. To avoid this, SalesDesktop makes a backup of your SalesDesktop content before switching the account. Send questions to support@invisiblecrm.com Page 6
- 7. After Installation Filters It is a good idea to setup the local data filters before the synchronization. The filters are made to reduce and control the amount of Salesforce items, which are accessible by SalesDesktop. The bigger the number and the larger the volume of data that will be allocated to your computer, the slower SalesDesktop works. Our experience has shown that the “normal” number should be within 5,000 records. Right after the registration, the SalesDesktop Assistant will show you how many Salesforce records are currently accessible with default filters and enable you to change the filter settings (fig.10). Filter dialog (fig. 10) The filter contains a set of rules, which apply to the Salesforce categories of records. • The total number of Salesforce records that SalesDesktop can These rules select the records to work with access with filters defined SalesDesktop. The rule consists of record • The criteria used to select the records of current category field, criteria and value to match (fig. 11). To bypass a filter, the record must comply with every rule assigned to the record type. Please, note that changing filters will reduce the amount of displayed Salesforce records, which are already present in SalesDesktop, only in case if you’ve selected “Remove local records not matching filtering criteria” at the Filter Rule (fig.11) Filters section of Options dialogue. Filters work in a single direction only: from • The fields available for the selected type of record Salesforce to SalesDesktop. This means • The comparison criteria list, depending on the field type that all changes made to any record in SalesDesktop regardless of the filter settings • The value to select from the list or enter will be uploaded to Salesforce during the next synchronization session. Rule examples: ◊ To include your colleagues’ records into scope, change the Owner criteria from “equal” to “in” and select the required users from the list. ◊ To limit your Customers by location, add Billing or Shipping Country or State/Province with equal criteria and type in the required value. ◊ To select only important Opportunities, set the rule for Amount, Stage or Close Date to correspond to your company’s values from Salesforce. ◊ To exclude records of current category from synchronization at all select “I don’t need items of this category at all” option”. Send questions to support@invisiblecrm.com Page 7
- 8. After Installation Synchronization Schedule To get the items available on Salesforce, you have to run the synchronization. The SalesDesktop synchronization is designed to work silently when you are working. Set up the frequency of automatic synchronization using the Assistant’s initial settings or select the Synchronization tab from the SalesDesktop Options to change it later (fig.12). Synchronization Options (fig. 12) • Sets the period between the synchronization automatic starts • Sets the number of changed documents that will automatically start the synchronization process Advanced Settings SalesDesktop automatically shares every Account, Lead or Opportunity that is created in Outlook. You can change this option if you do not want such action (fig.13). SalesDesktop Advanced Options (fig. 13) • When enabled, this option will share the new items with Salesforce as they are created • Select this option to include attachments when saving mails Send questions to support@invisiblecrm.com Page 8
- 9. After Installation First Synchronization Now SalesDesktop is ready to start the synchronization process. Synchronization checks Salesforce for the appropriate items and downloads them to your computer. The progress dialog will show both the total number of accessible data as well as the total number of the recently (or currently) synchronized items (fig.14). Synchronization Progress Dialogue (fig. 14) You can close the progress dialog and • Stages of synchronization continue your work while performing the synchronization. Every time synchronization is • Icon of the record type that is being currently in progress, you can open the dialog window processed from the menu (fig.15). • Progress of synchronization Caution: Depending on the speed of your Internet connection, the number of the accessible records and the size of the documents, the first synchronization could take about one hour or even more. So, if needed, you can start the first synchronization any other time from the menu (fig.16). Warning: Although we have designed the synchronization mechanism to be reliable, it is very important to make sure the first synchronization is smooth and stressless. Show Progress Menu Command (fig. 15) Synchronize Now! Menu Command (fig.16) Send questions to support@invisiblecrm.com Page 9
- 10. Working with SalesDesktop Working with SalesDesktop List Views The Outlook lists are the most comprehensive form of representing the salesforce.com items. To switch to the list view, use the Outlook Advanced toolbar (fig. 17). Outlook List View (fig. 17) • SalesDesktop synchronizes your views from salesforce.com • You can manage the columns with the standard Outlook tools: Field Chooser and Group By Box, selecting the Salesforce.com fields, which you want to be presented from the “user-defined fields in the folder” list • Salesforce.com items have distinctive icons to differentiate your personal data in the standard Outlook folders like Contacts Toolbar The SalesDesktop toolbar provides the most frequently used Salesforce.com actions Outlook Toolbar (fig. 18) (fig. 18). • Opens the selected records on your Salesforce home page without the need to login each time • Saves email messages to Salesforce and enables users to select the item to which to assign the message • Creates a new item of the selected type • Opens the Select Attachments dialog to attach the selected file to the current item • Creates a new note and attaches it to the current item Send questions to support@invisiblecrm.com Page 10
- 11. Working with SalesDesktop SalesBook All Salesforce.com items are present in the Salesforce Book – the analog of your Address Book, where your personal contacts are located. The salesforce Book is subject to use, when selecting a Salesforce.com item to complete the operation (e.g. to select an Account for the Contact) (fig. 19). Salesforce Book (fig. 19) • Click to open the Salesforce Book • Select the Salesforce.com item • If the required item is not present, then, you can create it from here Send questions to support@invisiblecrm.com Page 11
- 12. Mail Processing Mail Processing With SalesDesktop, you can attach e-mail messages to salesforce.com items, including the attachments, manually and automatically. To attach an e-mail manually, select the message from the list, click the Save Mail icon on the SalesDesktop toolbar and note the list of the suggested items. If you did not find the Save Mail Menu Items (fig. 20) required item in the list, then click the Save • Select the e-mail message Mail icon to open the Salesforce Book and select the required item or create a new one • Check the suggested items (fig. 20). • If no item is present, click the Save Mail icon to select it from Outbound mail can be saved right before the the Salesforce Book send (fig. 21). SalesDesktop automatically submits the e–mail conversation with particular contacts to salesforce.com (fig. 22). Tip: Adding a Track Conversation field to the Contacts list view makes it easier to control Save and Send (fig. 21) the automatic processing of e-mail. By default, SalesDesktop includes the attachments to be saved in the Salesforce. com e-mail. You can turn this option off from the application settings (fig. 23). Save Attachments Option (fig. 23) Save Correspondence to Salesforce.com (fig. 22) • If the attachments waste space on Salesforce. com, then you can turn this option off • When an option is enabled, all inbound and outbound messages for this contact will be automatically submitted to salesforce.com Send questions to support@invisiblecrm.com Page 12
- 13. Sharing data with Salesforce Work Offline Working offline feature allows you to continue working on your SalesDesktop items in case there is no connection to salesforce.com. For example, when you are traveling or there is no or very slow internet connection. Similar, to working offline with emails, contacts, and calendar events in MS Outlook without connection to the Exchange server. New Items SalesDesktop automatically shares every Account, Lead or Opportunity that is created New Items Sharing Options (fig. 24) in Outlook. To share new Contact, Task or • When enabled, this option will share the new items with Calendar Event automatically, you can set Salesforce.com as they are created the properties in the SalesDesktop options (fig. 24). Note: In order to find the item you have shared on Salesforce.com, you have to launch the synchronization first. Salesforce Sharing Bar (fig. 25) Current Items • This bar allows you to share the item with salesforce.com To share any specific Contact, Task or • When shared, the appearance of the bar will change. Calendar event with Salesforce.com, you can use the Salesforce.com Sharing bar, which is displayed on top of the item form (fig. 25). Several items can be shared from the list view, if the Salesforce Shared user-defined field is displayed (fig. 26). Sharing Field in Outlook View (fig. 26) • Use this field to share the items without opening their forms Send questions to support@invisiblecrm.com Page 13
- 14. Sharing data with Salesforce Cancel Sharing To stop sharing an item with Salesforce.com, you can press the Salesforce.com Sharing bar one more time or clear the Salesforce Shared checkmark item in the list view. Caution: Stopping of sharing causes item deletion from salesforce.com, and at the next synchronization, you will be asked to confirm this deletion. Do not confirm it if you do not want to remove the item from Salesforce.com. If you need to save your personal version of the item, then create a copy and mark it “not to be shared with salesforce.com.” Remove Items Every time you delete a salesforce.com item from Outlook, SalesDesktop informs salesforce.com to delete this item as well. To protect your company’s data from accidental and unwanted removals, SalesDesktop will always require your confirmation to delete the items. Note: If you have accidentally deleted an item, despite all the precautions you have taken, you can restore it by using the salesforce.com Recycle Bin (fig. 27). Salesforce.com Recycle Bin (fig. 27) Send questions to support@invisiblecrm.com Page 14
- 15. Scheduling the Synchronization Scheduling the Synchronization To get the items available on salesforce.com, you have to run the synchronization. The SalesDesktop synchronization is designed to work silently when you are working. Select the Synchronization tab from Options to set up the main properties (fig. 28). Synchronization Options (fig. 28) • Sets the period between the synchronization automatic starts • Sets the number of changed documents that will automatically start the synchronization process Send questions to support@invisiblecrm.com Page 15
- 16. Resolving Conflicts Resolving Conflicts If synchronization finds that an item has been changed both on your computer and Salesforce.com since your last synchronization session, a collision will occur. Collision Warning Balloon (fig. 29) SalesDesktop notifies about the appearance • When a collision is detected, the notification balloon will appear of collisions with a popup balloon and an exclamation mark over its taskbar icon • The SalesDesktop icon with the exclamation will remain until all (fig. 29). the conflicts are resolved To resolve the collisions, you pick the copy of the item, which you want to stay with. The other copy will be replaced. Or, you can select those fields that you want to save in result. (fig. 30). You can skip the collision and resolve it later by opening the dialog window from the menu (fig. 31). Caution: Note that collision resolution takes effect only after the next synchronization. Sync Conflict Resolution Dialog (fig. 30) • Item name • Click on the header to select the whole copy… • …or pick the values you want to save • Click Apply to solve the conflict • Run synchronization when all the conflicts are resolved Resolve Collision Menu (fig. 31) Send questions to support@invisiblecrm.com Page 16
- 17. Synchronization Issues Synchronization Issues As synchronization starts, SalesDesktop finds synchronization issues for irreversible operations such as, for example, the deletion Sync Issues Balloon (fig. 32) of items. The synchronization then pauses and requires you to resolve the issues: either revert the deletions or confirm them (fig. 32, fig. 33). Confirm Synchronization Dialogue (fig.33) • Click to open the synchronization issues dialog • You will see the items which have caused the synchronization issues that require your confirmation • The action to confirm Send questions to support@invisiblecrm.com Page 17
- 18. Product Support Sending Feedback We, at InvisibleCRM value our customers, therefore please let us know if you experience any inconvenience with the application. We also welcome comments or suggestions on how to enhance the product. Please use Feedback form in Option dialog (fig. 34). When informing us about the problem, we kindly ask you to attach the log to your feedback that allows our team to pinpoint the possible reasons for the issue. Feedback form in Options dialog (fig. 34) Note: The data collected in this form will be used strictly for solving technical issues. No personal information will be recorded and sent out to InvisibleCRM. Product updates Our product is constantly evolving, therefore we recommend using AutoUpdate feature to stay up to date with the latest improvements and enhancements. Auto Update feature can automatically check for product updates and AutoUpdate in Options dialog (fig. 35) install them, if desired (fig. 35). License Information SalesFolder is distributed on a subscription basis. You may find your license information in Options dialog on About page (fig. 36). To purchase or extend the license please contact us sales@ invisiblecrm.com or visit our website http://www.invisiblecrm.com/buy.php License Information in Options dialog (fig. 36) Send questions to support@invisiblecrm.com Page 18