
Recommandé
Contenu connexe
Tendances
Tendances (20)
Similaire à Negative space Drawing
Similaire à Negative space Drawing (20)
Plus de Jason Eoff
Dernier
Dernier (20)
Negative space Drawing
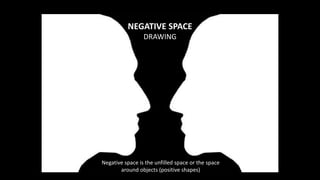
- 1. NEGATIVE SPACE DRAWING Negative space is the unfilled space or the space around objects (positive shapes)
- 3. The Basic Approach • Notice the image on the right and the negative shapes that are being focused on. • Capturing negative form accurately will reveal the positive form. Finally, on the left, a white silhouette of a ram (positive shape) is revealed.
- 4. Negative Space Project Due: May 15th Materials: (2) 15” x 20” white illustration boards, 2H or 4H pencil, ruler, black sharpie marker, a bottle of ink, and finally a brush or brushes. • Using your ruler and pencil, draw a light border 2” from the edges of your illustration board. • Observe a still life with different shapes and draw, with pencil, ONLY the negative shapes. • Your composition must have large, medium, small and tiny shapes. • Shapes should go off all four edges of your border. • After accomplishing your drawing, carefully outline the negative shapes with your black sharpie. • With your brush and bottle of ink carefully paint the negative shapes so that they are black and opaque.
- 5. Your final work will be similar to these beautiful student drawings. Notice the variety of shapes and how shapes go off all 4 edges of the border.
- 6. This composition is not very good because it is too sparse and feels contrived (forced and arranged). Nothing overlaps. This composition is better because it is more spontaneous. It’s also more challenging because of the smaller shapes. Choose a composition carefully.
- 7. Scatter a variety of small objects randomly over a colored piece of paper. Use a rectangle view finder or cut-out to find a composition.
- 8. With your pencil begin drawing the negative space (the unfilled space). In this composition we are drawing only the yellow shapes in the background. On your illustration board lightly draw a 2” border with your pencil and ruler. Through your view finder, study your composition very carefully to make sure you have large, medium, small and tiny shapes. Make sure shapes go off every edge of the border.
- 9. Outline the negative shapes with your sharpie. Draw right over your pencil lines. However, did you notice in the image that there are lines on the border that I didn’t outline? Why? Because they are part of the positive shapes or objects. Afterwards you can erase the border pencil marks that are showing. You can erase these border lines because they are part of the positive shape. Notice I didn’t outline this part of the border because it isn’t a negative shape!
- 10. The sharpie outline gives us a safety buffer for our inking! Open ink bottle slowly and beware of splatters! Take your brush, dip it in the bottle and carefully begin painting the negative areas. Try to make them opaque. We don’t want to see brush marks or painterly flourishes. We want this to look very flat and graphic. You may have to apply a few layers of ink.
- 11. The negative space should be flat black without distracting marks and translucency. The white should be crisp. This way the image has maximum graphic force! I will grade down if I see pencil marks or erased pencil marks in the middle of your positive shape. Marks in the middle of your positive shapes demonstrate you do not understand, so make sure to follow directions!
- 12. Notice the descriptive subtly of these masterful drawings!
- 13. Check out these wonderful Negative Space Projects!
- 14. You can even add color to your board before you begain the drawing process. Using diluted food coloring to let it streak around wildly can give a wonderful unexpected quality to your work. Don’t put food coloring directly onto the illustration board as it will be too dark.