Libguides 2012 boxes
•Télécharger en tant que PPTX, PDF•
2 j'aime•1,873 vues

How to put content into boxes, using different kinds of boxes

Recommandé
Recommandé
Contenu connexe
Similaire à Libguides 2012 boxes
Similaire à Libguides 2012 boxes (20)
Plus de UCT
Plus de UCT (20)
Dernier
Dernier (20)
Libguides 2012 boxes
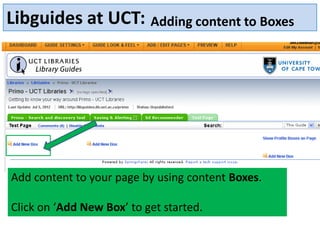
- 1. Libguides at UCT: Adding content to Boxes Add content to your page by using content Boxes. Click on ‘Add New Box’ to get started.
- 2. Libguides at UCT: Adding content to Boxes In the ‘Add New Box’ screen, use the ‘Create New Box’ tab to get started.
- 3. Libguides at UCT: Adding content to Boxes This is the most versatile box type, for any type of formatted Select the type of box you want to use from text, HTML, or the drop down menu. JavaScript code, or embedded Choose ‘Rich text/dynamic content/scripts’ widgets…..
- 4. Libguides at UCT: Adding content to Boxes Choose the position of the box on the page
- 5. Libguides at UCT: Adding content to Boxes A box has been added to the page….. Now add some content. Click on ‘Add text’.
- 6. Libguides at UCT: Adding content to Boxes Add text in the ‘Rich Text Editor’ ‘Save changes’
- 7. Libguides at UCT: Adding content to Boxes Add a hyperlink: Highlight the words you want to hyperlink. Click the hyperlink icon on the toolbar. Fill in the URL (web address). Target: Choose ‘Open Link in New Window’ if you want the linked page to open in a new window. This is the default. Title: Give your link a description. Click ‘Insert’
- 8. Libguides at UCT: Adding content to Boxes Add an email address: Highlight the words you want to hyperlink. Click the hyperlink icon on the toolbar. Fill in the email in the ‘Link URL’ field as follows: mailto:your.name@uct.ac.za Title: Give your link a description. Click ‘Insert’
- 9. Libguides at UCT: Adding content to Boxes The ‘Plain-text Editor’ tab will show the HTML coding. You can add your own coding here. For example the coding for an email link is: <a href="mailto:your.name@uct.ac.za">Your Name</a>
- 10. Libguides at UCT: Adding content to Boxes Content has been added to the box Click on “Edit Text” to add more content – we will now add a picture….
- 11. Libguides at UCT: Adding content to Boxes Click on the Picture Icon in the toolbar. Now we have to fill in the URL of the image………
- 12. Libguides at UCT: Adding content to Boxes Choose the picture that you want from your computer. Copy the file.
- 14. Login…… If you do not know what this is please check with your section head or email jen.eidelman@uct.ac.za You must be a Libguide user to have rights here……
- 15. Find your library folder where you will store all your images. PLEASE NOTE: The law here is – do not delete or mess with anyone else’s folder!!
- 16. Paste your file in the folder where you have chosen to store your images. In this instance the SciTech folder has been chosen. Your URL will be the address you find in the toolbar plus the name of your file. http://legacy.lib.uct.ac.za/scitech/images/law_bookshx_.png Copy this address into the Libguide ‘Image URL’
- 17. Libguides at UCT: Adding content to Boxes Paste your URL here Click ‘Insert’ http://legacy.lib.uct.ac.za/scitech/images/law_bookshx_.png
- 18. Libguides at UCT: Adding content to Boxes Your image has been inserted – you can play with the size of your image by clicking on the image and then dragging the handles to the size that you want. Click ‘Save and Close’
- 19. Libguides at UCT: Adding content to Boxes Now let’s add another box……. Your image has been inserted in the Box
- 20. Libguides at UCT: Adding content to Boxes Create a box with Links and Lists
- 21. Libguides at UCT: Adding content to Boxes Fill in a title for your new box and choose the position you want for the box. Choose ‘Create Box’
- 22. Libguides at UCT: Adding content to Boxes A new box has been created. Click on ‘Add New Link’
- 23. Libguides at UCT: Adding content to Boxes Fill in the Link title Link URL (web address) Add a description of the link. Choose ‘Create Link’
- 24. Libguides at UCT: Adding content to Boxes The link has been added to the box. You can add as many links as you like. Remember that text in front of the Now let’s add link can always another new be added by box……. clicking on ‘add text’.
- 25. Libguides at UCT: Adding content to Boxes Now we are going to add a box for ‘Embedded Media & Widgets’
- 26. Libguides at UCT: Adding content to Boxes “Display a video, audio or any widget inside the box.“ Give the box a title, choose the position and then click on ‘Create Box.’
- 27. Libguides at UCT: Adding content to Boxes A new box has been added. Click ‘Add Media/Widget Code’
- 28. Libguides at UCT: Adding content to Boxes Choose any widget from an internet source. Download the file with the code. Save the file.
- 29. Libguides at UCT: Adding content to Boxes The coding for the widget. Copy the code and paste it into the ‘Embedded Media & Widgets’ Libguide template. Click ‘Embed it’.
- 30. Libguides at UCT: Adding content to Boxes The widget has been embedded in the Box
- 31. Libguides at UCT: Adding content to Boxes Click on the ‘Edit’ button to edit the box information.
- 32. Libguides at UCT: Edit content to Boxes Here you can change the heading (box title) of your box. You may also wish to change the type of box here.
- 33. Libguides at UCT: Edit content to Boxes Edit ‘Box colours’ – allows you to make changes to the colours of your box. Edit ‘Box Link & Embed Code’ – allows you to make changes to the code or links in your box.
- 34. Libguides at UCT: Reorder Boxes Go to ‘Add Edit Pages’ and click on Reorder Boxes to change the order in which the boxes appear on the page.
- 35. Libguides at UCT: Reorder Boxes This screen shows the order in which boxes appear on the page
- 36. Libguides at UCT: Reorder Boxes Swop the order of the boxes by clicking on the box you want to move and dragging it into the position you want. When you see the green + icon the item has been successfully moved.
- 37. Libguides at UCT: Reorder Boxes ‘Search HeinOnline’is now in the centre of the page and ‘Resources’ has moved to the right of the page.
- 38. Libguides at UCT: Adding content to Boxes You can also put the boxes underneath each other in the same way.
- 39. Libguides at UCT: Reorder Boxes Boxes now appear one underneath the other on the page.
- 40. Libguides at UCT: Resize Columns Choose ‘Add/Edit Pages’ and click on ‘Resize Columns’
- 41. Libguides at UCT: Resize Columns Drag the handles to resize the left, centre or right columns Left columns have been successfully enlarged.
- 42. Libguides at UCT: Resize Columns Choose to hide one of the three columns. In this instance choose to hide the right column Left and Centre columns are shown. No right column is shown.