
Recommandé
Recommandé
Contenu connexe
Similaire à Multi language support for salesforce community portal
Similaire à Multi language support for salesforce community portal (20)
Plus de KadharBashaJ
Plus de KadharBashaJ (20)
Dernier
Dernier (20)
Multi language support for salesforce community portal
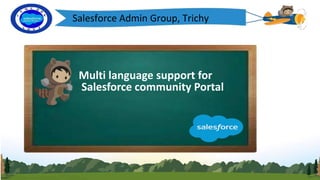
- 1. Salesforce Admin Group, Trichy Multi language support for Salesforce community Portal
- 2. Kadhar Basha J Salesforce Admin Group, Trichy Trailblazer Community Group Leader MST Solutions Sundaravel J Salesforce Admin Group, Trichy Trailblazer Community Group Co-Leader MST Solutions Salesforce Admin Group, Trichy
- 3. Salesforce Admin Group, Trichy Speaker Kathiravan R MST Solutions
- 4. Today’s Agenda • Introduction • Multi language setup • Modification in Lightning component • How to retrieve and deploy • Demo • Questions & Answers
- 5. Introduction Logo • Multi-Language support is mainly focused to show the community pages in a multi language view for the end user • Most of the client needs multiple language access to attract and get more user in the org wide. • It will be a simple change in the custom label to add the additional language even after the deployment to production
- 6. Multi Language Setup Logo • In Setup --> Click 'Translation Language Settings' under Translation workbench, • Click --> Enable. • Then, under Supported Languages: • Add Languages using “Add” button , we can include languages which given in the picklist to your salesforce community portal and inside salesforce. • make sure “Active” checkbox is checked.
- 7. Community Portal setup Logo • In Setup --> Search 'All Sites' under Digital experiences, • Click on the Builder for your community. • Click -> 'Settings' on the left side floating icon. • Select --> ”Language” and click --> 'Add Language' button.
- 8. Continue… Logo • select your required languages and move to the right side . • then click--> save. • Enable 'Active on Live Site’. • Select Fallback Language 'English' or your client default language. • then close the popup.
- 10. After completion of setup Logo • After completion of the multi language setup in the community and inside salesforce. • we need to create a component and make it available for the community user.
- 11. creation and modification in Lightning component Logo <aura:component implements="force:appHostable,flexipage:availableForAllPageTypes,flexipage:availableForRecordHome,force:hasRecordId,forceCommunity:availableForAllPageTypes,force:lightningQu ickAction,lightning:isUrlAddressable" access="global" > <div class="slds-col slds-size_1-of-1 slds-large-size_12-of-12 slds-show_inline-block centeredDiv"> <div class="headFontSizes slds-text-align_center slds-text-color_inverse"> <b> Trailblazer Community Groups </b> </div> <div class="headFontSize slds-text-align_center slds-text-color_inverse"> <b> Join groups to learn Salesforce with peers, build your network, and find mentors. </b> </div> <div class="slds-text-heading_small slds-text-align_center slds-text-color_inverse slds-p-top_xx-large"> <b> Salesforce is a customer relationship management solution that brings companies and customers together. It's one integrated CRM platform that gives all your departments — including marketing, sales, commerce, and service — a single, shared view of every customer. </b> </div> <div class="slds-col slds-size_1-of-1 slds-large-size_12-of-12 slds-align_absolute-center slds-p-top_x-large"> <lightning:button class="{!v.isIndividualAcc ? 'slds-p-horizontal_medium slds-p-vertical_xx-small slds-m-right_small viewActive' : 'slds-p-horizontal_medium slds-p- vertical_xx-small slds-m-right_small viewInActive'}" variant="brand" label="Admin Community" title="Individual View" onclick="{!c.onIndividualView}" /> <lightning:button class="{!v.isBusinessAcc ? 'slds-p-horizontal_medium slds-p-vertical_xx-small viewActive' : 'slds-p-horizontal_medium slds-p-vertical_xx-small viewInActive'}" variant="brand" label="Women In Tech" title="Business View" onclick="{!c.onBusinessView}" /> </div> </div> </div> </div>
- 12. creation of custom label Logo creation of custom label: • In Setup --> Search 'Custom Labels' under User Interface,then • click --> New Custom Label. • Enter the short description and values to the custom label,then click save. • you will see the option 'Translation information', which helps you to include multi language values for your single custom label. • search the translation value on other languages and paste it in the Translation Text field by selecting corresponding language picklist. • Note: you can add more number of additional languages.
- 13. Continue… Logo
- 14. Continue… Logo • once after creating all the custom labels we need to place it in the component on the respective places. • Syntax to include the custom label in the component: • $Label.namespace.labelName
- 15. Continue… Logo • example: • {!$Label.c.HomePage_Paragraph1} • after completion of the component drag and drop the component in the community page and publish the community.
- 16. Modified Component with Custom Label Logo • <aura:component implements="force:appHostable,flexipage:availableForAllPageTypes,flexipage:availableForRecordHome,force:hasRecordId,forceCommunity:availabl eForAllPageTypes,force:lightningQuickAction,lightning:isUrlAddressable" access="global" > • <div class="slds-col slds-size_1-of-1 slds-large-size_12-of-12 slds-show_inline-block centeredDiv"> • <div class="headFontSizes slds-text-align_center slds-text-color_inverse"> • <b> • {!$Label.c.HomePage_paragraph1} • </b> • </div> • <div class="headFontSize slds-text-align_center slds-text-color_inverse"> • <b> • {!$Label.c.HomePage_paragraph2} • </b> • </div> • <div class="slds-text-heading_small slds-text-align_center slds-text-color_inverse slds-p-top_xx-large"> • <b> • {!$Label.c.HomePage_paragraph3} • </b> • </div> • <div class="slds-col slds-size_1-of-1 slds-large-size_12-of-12 slds-align_absolute-center slds-p-top_x-large"> • <lightning:button class="{!v.isIndividualAcc ? 'slds-p-horizontal_medium slds-p-vertical_xx-small slds-m-right_small viewActive' : 'slds-p- horizontal_medium slds-p-vertical_xx-small slds-m-right_small viewInActive'}" variant="brand" label="{!$Label.c.HomePage_AdminButton}" title="Admin Community" onclick="{!c.onIndividualView}" /> • <lightning:button class="{!v.isBusinessAcc ? 'slds-p-horizontal_medium slds-p-vertical_xx-small viewActive' : 'slds-p-horizontal_medium slds-p-vertical_xx-small viewInActive'}" variant="brand" label="Women In Tech" title="{!$Label.c.HomePage_WomenButton}" onclick="{!c.onBusinessView}" /> • </div> • </div> • </div> • </div> • </aura:component>
- 17. Continue… Logo • After the modification in the lightning component. • In the Builder edit page. • Click -> ‘Components' on the left side floating icon. • search --> ”Language Selector”, drag and drop in the content header section.
- 18. How to Retrieve and deploy Logo • After completion of custom label creation and component modification • Get the custom label and translation values from the workbench or Visual studio code using the below package.xml Enable the setup Package.xml: <types> <name>CustomLabel</name> <members>*</members> </types> <types> <name>Translations</name> <members>es</members> </types>
- 19. How to Add another Language Logo • Now, we are going to see about how to add another language without touching the component Steps: 1. Add your language in the translation language settings(In supported Languages) 2. Add your language in the community portal language section 3. Search for the corresponding custom label values in your language and add it in the ‘Translation text’ below the custom label section
- 20. Launch DEMO