SlideShare une entreprise Scribd logo
1  sur  64
LMI   Roytronic ® Troubleshooting LMI  and   LMI  Roytronic ®  Pumps LMI
Introduction ,[object Object],[object Object],[object Object],[object Object],[object Object],Helping your customers when their pump stops working.
Troubleshooting Overview ,[object Object],[object Object],[object Object],[object Object],[object Object],[object Object]
Protective Clothing and Eye Protection Wear protective clothing and  eye protection Check MSDS sheet for other precautions
[object Object],[object Object],[object Object],[object Object],[object Object],STROKE LENGTH KNOB SPEED KNOB
I. Pump Will Not Prime or Loses Prime ,[object Object],[object Object],[object Object],[object Object],Foot valve Filter screen Ceramic weight
[object Object],[object Object],[object Object],[object Object],[object Object],Keep Suction Lift < 5 FT
I. Pump Will Not Prime or Loses Prime ,[object Object],[object Object],[object Object],[object Object]
[object Object],[object Object],[object Object],[object Object],[object Object],Parts Item # 32293
[object Object],[object Object],[object Object],[object Object],[object Object]
[object Object],[object Object],[object Object],[object Object],[object Object],[object Object]
[object Object],[object Object],[object Object],[object Object],[object Object],[object Object]
[object Object],[object Object],[object Object],[object Object],AutoPrime Valve
LMI Roytronic: Liquid Ends Mach AutoPrime Head Molded FastPrime Head Mach FastPrime Head 7X8 NI 7X8 SI 8XX SI 9XX SI 9XX HI ALL NEW!!
I.  Pump Will Not Prime or Loses Prime ,[object Object],Features: Improved compact design  Addition of second ball in the  de-gassing valve prevents back-flow 4FV can be added for yet more features Machined Acrylic and PVC Head Only (No molded version ) One-Way Degassing Valve  Suction Check Valve Spring-Loaded Discharge Check Valve  ALL NEW!!
II .   Leakage at Tubing or Fitting ,[object Object],[object Object],[object Object],[object Object]
II. Leakage at Tubing or Fitting ,[object Object],[object Object],[object Object],[object Object],[object Object],[object Object],[object Object]
[object Object],DO NOT use  Teflon ®  tape or pipe dope to seal threads.  Teflon ®  tape may only be used on the ½ &quot;  NPT thread side of the Injection Check Valve as well as stainless steel liquid end connections.
[object Object]
II .   Leakage at Tubing or Fitting ,[object Object],[object Object],[object Object],[object Object],[object Object],[object Object],[object Object],[object Object]
II. Leakage at Tubing or Fitting Compression washers are located in fittings and function valves  If necessary, remove the washer  Push washer into fitting  by  to avoid damage How to :   Replace a Compression Washer
II. Leakage at Tubing or Fitting BOTTOM TOP Direction of Flow CORRECT INCORRECT Smooth side Ball seat side TOP BOTTOM How to:   Correctly  Install  Cartridge Valves
II. Leakage at Tubing or Fitting Install new cartridge valves or check valve balls and seal rings in pump head O-ring How to:   Replace Suction and Discharge Cartridge Valves (Check Valve)
II. Leakage at Tubing or Fitting Direction of Flow Configuration 2 FOOTVALVE FOR  LARGER PUMPS (WITHOUT  CARTRIDGE) Configuration 1 FOOTVALVE FOR  SMALLER PUMPS (WITH  CARTRIDGE ) CARTRIDGE VALVE SHOWN DIS-ASSEMBLED { SEAL RING BALL Foot Valves come in TWO basic configurations
Place O-ring on cartridge valve Position  ball seat side  of cartridge valve toward floor II. Leakage at Tubing   or Fitting CARTRIDGE VALVE O-RING How to:   Install new cartridge valve and O-ring (Floor) (Ceiling) Position ball seat side this surface down. - tighten
II. Leakage at Tubing or Fitting SPRING BALL PTFE SEAT O-RING Install New Injection Check Valve Components Flapper Valve - tighten
III. Low Output/Fails to Pump Against Pressure ,[object Object],[object Object],[object Object],[object Object]
Replace worn  parts every  6-12 months carries parts  and kits III. Low Output/Fails to Pump Against Pressure
[object Object],[object Object],[object Object],[object Object],[object Object],[object Object],[object Object],[object Object],III. Low Output/Fails to Pump Against Pressure
III. Low Output/Fails to Pump Against Pressure ,[object Object],[object Object],[object Object],9 Series Pump Note: Pressure level  ranges from 0 – 5 Press the Mode Key and Up Key simultaneously and hold for 2 seconds Alter the pressure using Up and Down  Keys P5 Pressure level control Mode Key Up Key Down Key
III. Low Output/Fails to Pump Against Pressure ,[object Object],Solution Change pressure setting Adjust with  screw driver B/C & 7 Series Pump
[object Object],[object Object],[object Object],[object Object],[object Object],III. Low Output/Fails to Pump Against Pressure
Replacing the Liquifram™ TURN THE PUMP OFF! Twisting the pressure relief knob (black) 1/4 turn will de-pressurize the line Step 1 :  De-pressurize the Liquid End   III.  Low Output/Fails to Pump Against Pressure
Replacing the Liquifram™ Turn the coupling nut  and remove the tubing from the fitting by pulling up . Step 2: Remove the Discharge Tubing III.  Low Output/Fails to Pump Against Pressure
Turn the coupling nut to remove and pull the tubing out of the valve  Step 3:  Remove the Return Line Tubing Replacing the Liquifram™ III.  Low Output/Fails to Pump Against Pressure
Turn the 4-FV to remove Replacing the Liquifram™ Step 4: Remove the 4-FV   III.  Low Output/Fails to Pump Against Pressure
Remove the suction tubing by unscrewing it Remove the cartridge valve or check valve ball and seal ring from the pump head Step 5:  Remove the suction fitting Replacing the Liquifram™ III.  Low Output/Fails to Pump Against Pressure
Remove the four screws that mount the pump head Step 6: Remove the pump head Replacing the Liquifram™ III.  Low Output/Fails to Pump Against Pressure
Remove the pump Liquifram ™  by turning it Replacing the Liquifram™ Step 7: Remove the pump  Liquifram™   III.  Low Output/Fails to Pump Against Pressure
Discard the Liquifram ™  and inspect the backing disk for damage Step 8: Remove the  Liquifram™  and the backing disk Replacing the Liquifram™ Liquifram™ Backing disk III.  Low Output/Fails to Pump Against Pressure
Remove used shaft seal Step 9:  Remove the shaft seal   Replacing the Liquifram™ III.  Low Output/Fails to Pump Against Pressure
Push the seal in place by using a large hollow pen cap or wrench socket large enough to clear the Liquifram ™  shaft Step 10:  Install the new shaft Replacing the Liquifram™ III.  Low Output/Fails to Pump Against Pressure
Replacing the Liquifram™ Step 10 (cont.) III.  Low Output/Fails to Pump Against Pressure
Replacing the Liquifram™ Step 10 (cont.) Before starting the pump, match the pump series with the stroke knob setting on this chart.  III.  Low Output/Fails to Pump Against Pressure 70% C13, C14, C73, C74, C77, C93, C94,  E73, E74 50% C78 90% All A, B, J and P Series C10, C11, C12, C70, C71, C72, C76,  C90, C91, C92, E70, E71, E72 Stroke Knob Setting Pump Series Liquifram ™  Stroke Setting Chart
Turn both the disk and new Liquifram ™   moving the Liquifram ™  until its center is flush with the outside housing Step 11: Install the disk and new Liquifram™ Replacing the Liquifram™ III.  Low Output/Fails to Pump Against Pressure
Replacing the Liquifram™ III.  Low Output/Fails to Pump Against Pressure
Lightly re-install the four mounting screws and then tighten gradually in a crisscross pattern until tight Step 12: Re-install the Pump Head   Replacing the Liquifram™ You’re done replacing the Liquifram™ . . .   III.  Low Output/Fails to Pump Against Pressure
[object Object],[object Object],III. Low Output/Fails to Pump Against Pressure
III. Low Output/Fails to Pump Against Pressure ,[object Object],[object Object],[object Object],[object Object],[object Object],[object Object],[object Object]
[object Object],[object Object],[object Object],[object Object],[object Object],HOW TO:  Re-Zero Type I Pump -- Push-On Knob III. Low Output/Fails to Pump Against Pressure
HOW TO:  Re-Zero Type I Pump -- Push-On Knob (Cont.) With the pump running, zero the pump as before Push down on the outer section (a snap sound indicates parts are locked together) Replace the yellow cap over the outer section of the knob, aligning the tabs on the cap with the slots inside the knob III. Low Output/Fails to Pump Against Pressure
[object Object],[object Object],[object Object],[object Object],[object Object],[object Object],[object Object],[object Object],III. Low Output/Fails to Pump Against Pressure
III. Low Output/Fails to Pump Against Pressure ALL NEW!! Stroke Adjustment for the Roytronic® pump ,[object Object],[object Object],[object Object],[object Object],Roytronic ® TO AVOID PUMP DAMAGE be sure the Stroke Shaft is contacting the plunger before turning on pump
[object Object],[object Object],[object Object],[object Object],[object Object],[object Object],[object Object],[object Object],III. Low Output/Fails to Pump Against Pressure
[object Object],[object Object],[object Object],[object Object],[object Object],Foot Valve Strainer III. Low Output/Fails to Pump Against Pressure
IV.  Excessive Pump Output ,[object Object],[object Object],[object Object],[object Object]
IV.   Excessive Pump Output ,[object Object],[object Object],[object Object],[object Object]
IV.  Excessive Pump Output ,[object Object],[object Object],Secure return line to ensure pumped solution returns to supply tank Multi-Function (4-FV) Valve Tubing Connection
IV.  Excessive Pump Output ALL NEW!! 4FV Improves diaphragm sealing Double ball design Roytronic ® Encapsulated Hardware Ergonomic Knobs FEATURE RICH Mates onto discharge  check  valve  giving  customer control of rotational alignment
IV.  Excessive Pump Output ALL NEW!! 4FV NEW TUBING CONNECTIONS Roytronic ®
IV.  Excessive Pump Output ALL NEW!! 4FV DO NOT OVER TIGHTEN STEP 1  Thread the 4FV fitting onto the head STEP 2.  Insert ¼&quot; tubing through Bleed Nut DO NOT SUBMERGE TUBING IN SOLUTION Assemble   4FV Fitting and Coupling Nut with appropriate cartridges into the discharge  port of the pump. Use 13/16” or 20mm socket wrench to tighten to 50  inch -pounds. STEP 3.  - t i g ht e n   Bl e ed   Nu t NOTE Roytronic ® O-Ring O-Ring
IV.   Excessive Pump Output ,[object Object],[object Object],[object Object],[object Object],[object Object]
V.  Failure to Run ,[object Object],[object Object],[object Object],[object Object],[object Object],[object Object],[object Object],[object Object],[object Object]
TROUBLESHOOTING LMI and ROYTRONIC ®  PUMPS THE END

Contenu connexe

Tendances

Carta nº 03 hualhuas
Carta nº 03  hualhuasCarta nº 03  hualhuas
Carta nº 03 hualhuastituja
 
VALORIZACIÓN Y LIQUIDACIÓN DE CONTRATOS EN OBRAS CIVILES 2.pdf
VALORIZACIÓN Y LIQUIDACIÓN DE CONTRATOS EN OBRAS CIVILES 2.pdfVALORIZACIÓN Y LIQUIDACIÓN DE CONTRATOS EN OBRAS CIVILES 2.pdf
VALORIZACIÓN Y LIQUIDACIÓN DE CONTRATOS EN OBRAS CIVILES 2.pdfFcmFelipeConce
 
Tuberia hdpe especificaicones tecnicas
Tuberia hdpe especificaicones tecnicasTuberia hdpe especificaicones tecnicas
Tuberia hdpe especificaicones tecnicasgustavo833454
 
Ppt formato 12 b asistencia 23.08.2019
Ppt formato 12 b asistencia 23.08.2019Ppt formato 12 b asistencia 23.08.2019
Ppt formato 12 b asistencia 23.08.2019wilder Hinojosa
 

Tendances (7)

Carta nº 03 hualhuas
Carta nº 03  hualhuasCarta nº 03  hualhuas
Carta nº 03 hualhuas
 
02.pptx
02.pptx02.pptx
02.pptx
 
VALORIZACIÓN Y LIQUIDACIÓN DE CONTRATOS EN OBRAS CIVILES 2.pdf
VALORIZACIÓN Y LIQUIDACIÓN DE CONTRATOS EN OBRAS CIVILES 2.pdfVALORIZACIÓN Y LIQUIDACIÓN DE CONTRATOS EN OBRAS CIVILES 2.pdf
VALORIZACIÓN Y LIQUIDACIÓN DE CONTRATOS EN OBRAS CIVILES 2.pdf
 
Tuberia hdpe especificaicones tecnicas
Tuberia hdpe especificaicones tecnicasTuberia hdpe especificaicones tecnicas
Tuberia hdpe especificaicones tecnicas
 
Ppt formato 12 b asistencia 23.08.2019
Ppt formato 12 b asistencia 23.08.2019Ppt formato 12 b asistencia 23.08.2019
Ppt formato 12 b asistencia 23.08.2019
 
Plan anual segu_salu_traba_2015
Plan anual segu_salu_traba_2015Plan anual segu_salu_traba_2015
Plan anual segu_salu_traba_2015
 
Unidad 2 ejercicios
Unidad 2 ejerciciosUnidad 2 ejercicios
Unidad 2 ejercicios
 

En vedette

How to install centrifugal water pump
How to install centrifugal water pumpHow to install centrifugal water pump
How to install centrifugal water pumpSoni Sharma
 
Centrifugal process pump
Centrifugal process pumpCentrifugal process pump
Centrifugal process pumpsujalpumps
 
Nfpa20 standard for the installation of stationary pumps for fire protection ...
Nfpa20 standard for the installation of stationary pumps for fire protection ...Nfpa20 standard for the installation of stationary pumps for fire protection ...
Nfpa20 standard for the installation of stationary pumps for fire protection ...Bowen Ngo
 
How to Install Water Pump | Water Pump Installation - Pumpkart.com
How to Install Water Pump | Water Pump Installation - Pumpkart.comHow to Install Water Pump | Water Pump Installation - Pumpkart.com
How to Install Water Pump | Water Pump Installation - Pumpkart.comSoni Sharma
 
Aspe Presentation 02 17 09
Aspe Presentation 02 17 09Aspe Presentation 02 17 09
Aspe Presentation 02 17 09ARSacco
 
Water cleani̇ng wi̇th ozone
Water cleani̇ng wi̇th ozoneWater cleani̇ng wi̇th ozone
Water cleani̇ng wi̇th ozoneNevroz Gösterici
 
Power Plant Chemistry FEED WATER TREATMENT
Power Plant Chemistry FEED WATER TREATMENTPower Plant Chemistry FEED WATER TREATMENT
Power Plant Chemistry FEED WATER TREATMENTDilip Kumar
 
Introduction to Pumps
Introduction to PumpsIntroduction to Pumps
Introduction to Pumpsmohdalaamri
 
Dosing Presentation 2012
Dosing Presentation 2012Dosing Presentation 2012
Dosing Presentation 2012Sekhar Ramani
 

En vedette (12)

How to install centrifugal water pump
How to install centrifugal water pumpHow to install centrifugal water pump
How to install centrifugal water pump
 
Centrifugal process pump
Centrifugal process pumpCentrifugal process pump
Centrifugal process pump
 
Nfpa20 standard for the installation of stationary pumps for fire protection ...
Nfpa20 standard for the installation of stationary pumps for fire protection ...Nfpa20 standard for the installation of stationary pumps for fire protection ...
Nfpa20 standard for the installation of stationary pumps for fire protection ...
 
How to Install Water Pump | Water Pump Installation - Pumpkart.com
How to Install Water Pump | Water Pump Installation - Pumpkart.comHow to Install Water Pump | Water Pump Installation - Pumpkart.com
How to Install Water Pump | Water Pump Installation - Pumpkart.com
 
Aspe Presentation 02 17 09
Aspe Presentation 02 17 09Aspe Presentation 02 17 09
Aspe Presentation 02 17 09
 
Modular growth
Modular growthModular growth
Modular growth
 
Water cleani̇ng wi̇th ozone
Water cleani̇ng wi̇th ozoneWater cleani̇ng wi̇th ozone
Water cleani̇ng wi̇th ozone
 
Ozone - Ohio AWWA 2011
Ozone - Ohio AWWA 2011Ozone - Ohio AWWA 2011
Ozone - Ohio AWWA 2011
 
Power Plant Chemistry FEED WATER TREATMENT
Power Plant Chemistry FEED WATER TREATMENTPower Plant Chemistry FEED WATER TREATMENT
Power Plant Chemistry FEED WATER TREATMENT
 
Introduction to Pumps
Introduction to PumpsIntroduction to Pumps
Introduction to Pumps
 
Centrifugal pump
Centrifugal pump Centrifugal pump
Centrifugal pump
 
Dosing Presentation 2012
Dosing Presentation 2012Dosing Presentation 2012
Dosing Presentation 2012
 

Similaire à How to Fix LMI and Roytronic Metering Pumps

Válvula Flexiprene Milton Roy
Válvula Flexiprene Milton RoyVálvula Flexiprene Milton Roy
Válvula Flexiprene Milton RoyVibropac
 
Instalação em terminais _ Milton Roy
Instalação em terminais _ Milton RoyInstalação em terminais _ Milton Roy
Instalação em terminais _ Milton RoyVibropac
 
Válvula de 3 funções Milton Roy
Válvula de 3 funções Milton RoyVálvula de 3 funções Milton Roy
Válvula de 3 funções Milton RoyVibropac
 
Hyster e004 (s80 xm) forklift service repair manual
Hyster e004 (s80 xm) forklift service repair manualHyster e004 (s80 xm) forklift service repair manual
Hyster e004 (s80 xm) forklift service repair manualfujjsefjkskem
 
Hyster e004 (s80 xm) forklift service repair manual
Hyster e004 (s80 xm) forklift service repair manualHyster e004 (s80 xm) forklift service repair manual
Hyster e004 (s80 xm) forklift service repair manualfujsefkksekfm
 
Hyster e004 (s120 xm) forklift service repair manual
Hyster e004 (s120 xm) forklift service repair manualHyster e004 (s120 xm) forklift service repair manual
Hyster e004 (s120 xm) forklift service repair manualvvcauswe274kkkmm
 
Hyster e004 (s100 xm) forklift service repair manual
Hyster e004 (s100 xm) forklift service repair manualHyster e004 (s100 xm) forklift service repair manual
Hyster e004 (s100 xm) forklift service repair manualfsefkksefmme
 
Hyster e004 (s120 xm) forklift service repair manual
Hyster e004 (s120 xm) forklift service repair manualHyster e004 (s120 xm) forklift service repair manual
Hyster e004 (s120 xm) forklift service repair manualfjskkkdmem
 
Hyster e004 (s100 xmbcs) forklift service repair manual
Hyster e004 (s100 xmbcs) forklift service repair manualHyster e004 (s100 xmbcs) forklift service repair manual
Hyster e004 (s100 xmbcs) forklift service repair manualfusjefjsekksemm
 
Hyster e004 (s100 xmbcs) forklift service repair manual
Hyster e004 (s100 xmbcs) forklift service repair manualHyster e004 (s100 xmbcs) forklift service repair manual
Hyster e004 (s100 xmbcs) forklift service repair manualfujsjfjkskekmm
 
Hyster e004 (s100 xmbcs) forklift service repair manual
Hyster e004 (s100 xmbcs) forklift service repair manualHyster e004 (s100 xmbcs) forklift service repair manual
Hyster e004 (s100 xmbcs) forklift service repair manualfjsjekkdmmemm
 
Hyster e004 (s3.50 xm) forklift service repair manual
Hyster e004 (s3.50 xm) forklift service repair manualHyster e004 (s3.50 xm) forklift service repair manual
Hyster e004 (s3.50 xm) forklift service repair manualfujsejfksekkme
 
Hyster e004 (s4.00 xm) forklift service repair manual
Hyster e004 (s4.00 xm) forklift service repair manualHyster e004 (s4.00 xm) forklift service repair manual
Hyster e004 (s4.00 xm) forklift service repair manualfjjskekdmmem
 
Hyster e004 (s4.00 xm) forklift service repair manual
Hyster e004 (s4.00 xm) forklift service repair manualHyster e004 (s4.00 xm) forklift service repair manual
Hyster e004 (s4.00 xm) forklift service repair manualjfksekmmdme
 
Hyster e004 (s5.50 xm) forklift service repair manual
Hyster e004 (s5.50 xm) forklift service repair manualHyster e004 (s5.50 xm) forklift service repair manual
Hyster e004 (s5.50 xm) forklift service repair manualfujsjejfkskemm
 
Hyster e004 (s4.50 xm) forklift service repair manual
Hyster e004 (s4.50 xm) forklift service repair manualHyster e004 (s4.50 xm) forklift service repair manual
Hyster e004 (s4.50 xm) forklift service repair manualufjjsjefkskekmme
 
Hyster e004 (s4.50 xm) forklift service repair manual
Hyster e004 (s4.50 xm) forklift service repair manualHyster e004 (s4.50 xm) forklift service repair manual
Hyster e004 (s4.50 xm) forklift service repair manualfjsqazkekdmme
 
Hyster c007 (h7.00 12.50 hp7.00-9.00 b europe) forklift service repair manual
Hyster c007 (h7.00 12.50 hp7.00-9.00 b europe) forklift service repair manualHyster c007 (h7.00 12.50 hp7.00-9.00 b europe) forklift service repair manual
Hyster c007 (h7.00 12.50 hp7.00-9.00 b europe) forklift service repair manualfujsefkksekfm
 
Hyster c007 (h7.00 12.50 hp7.00-9.00 b europe) forklift service repair manual
Hyster c007 (h7.00 12.50 hp7.00-9.00 b europe) forklift service repair manualHyster c007 (h7.00 12.50 hp7.00-9.00 b europe) forklift service repair manual
Hyster c007 (h7.00 12.50 hp7.00-9.00 b europe) forklift service repair manualfujjsefjkskem
 
Hyster c008 (h570 c) forklift service repair manual
Hyster c008 (h570 c) forklift service repair manualHyster c008 (h570 c) forklift service repair manual
Hyster c008 (h570 c) forklift service repair manualfuksfemmeme
 

Similaire à How to Fix LMI and Roytronic Metering Pumps (20)

Válvula Flexiprene Milton Roy
Válvula Flexiprene Milton RoyVálvula Flexiprene Milton Roy
Válvula Flexiprene Milton Roy
 
Instalação em terminais _ Milton Roy
Instalação em terminais _ Milton RoyInstalação em terminais _ Milton Roy
Instalação em terminais _ Milton Roy
 
Válvula de 3 funções Milton Roy
Válvula de 3 funções Milton RoyVálvula de 3 funções Milton Roy
Válvula de 3 funções Milton Roy
 
Hyster e004 (s80 xm) forklift service repair manual
Hyster e004 (s80 xm) forklift service repair manualHyster e004 (s80 xm) forklift service repair manual
Hyster e004 (s80 xm) forklift service repair manual
 
Hyster e004 (s80 xm) forklift service repair manual
Hyster e004 (s80 xm) forklift service repair manualHyster e004 (s80 xm) forklift service repair manual
Hyster e004 (s80 xm) forklift service repair manual
 
Hyster e004 (s120 xm) forklift service repair manual
Hyster e004 (s120 xm) forklift service repair manualHyster e004 (s120 xm) forklift service repair manual
Hyster e004 (s120 xm) forklift service repair manual
 
Hyster e004 (s100 xm) forklift service repair manual
Hyster e004 (s100 xm) forklift service repair manualHyster e004 (s100 xm) forklift service repair manual
Hyster e004 (s100 xm) forklift service repair manual
 
Hyster e004 (s120 xm) forklift service repair manual
Hyster e004 (s120 xm) forklift service repair manualHyster e004 (s120 xm) forklift service repair manual
Hyster e004 (s120 xm) forklift service repair manual
 
Hyster e004 (s100 xmbcs) forklift service repair manual
Hyster e004 (s100 xmbcs) forklift service repair manualHyster e004 (s100 xmbcs) forklift service repair manual
Hyster e004 (s100 xmbcs) forklift service repair manual
 
Hyster e004 (s100 xmbcs) forklift service repair manual
Hyster e004 (s100 xmbcs) forklift service repair manualHyster e004 (s100 xmbcs) forklift service repair manual
Hyster e004 (s100 xmbcs) forklift service repair manual
 
Hyster e004 (s100 xmbcs) forklift service repair manual
Hyster e004 (s100 xmbcs) forklift service repair manualHyster e004 (s100 xmbcs) forklift service repair manual
Hyster e004 (s100 xmbcs) forklift service repair manual
 
Hyster e004 (s3.50 xm) forklift service repair manual
Hyster e004 (s3.50 xm) forklift service repair manualHyster e004 (s3.50 xm) forklift service repair manual
Hyster e004 (s3.50 xm) forklift service repair manual
 
Hyster e004 (s4.00 xm) forklift service repair manual
Hyster e004 (s4.00 xm) forklift service repair manualHyster e004 (s4.00 xm) forklift service repair manual
Hyster e004 (s4.00 xm) forklift service repair manual
 
Hyster e004 (s4.00 xm) forklift service repair manual
Hyster e004 (s4.00 xm) forklift service repair manualHyster e004 (s4.00 xm) forklift service repair manual
Hyster e004 (s4.00 xm) forklift service repair manual
 
Hyster e004 (s5.50 xm) forklift service repair manual
Hyster e004 (s5.50 xm) forklift service repair manualHyster e004 (s5.50 xm) forklift service repair manual
Hyster e004 (s5.50 xm) forklift service repair manual
 
Hyster e004 (s4.50 xm) forklift service repair manual
Hyster e004 (s4.50 xm) forklift service repair manualHyster e004 (s4.50 xm) forklift service repair manual
Hyster e004 (s4.50 xm) forklift service repair manual
 
Hyster e004 (s4.50 xm) forklift service repair manual
Hyster e004 (s4.50 xm) forklift service repair manualHyster e004 (s4.50 xm) forklift service repair manual
Hyster e004 (s4.50 xm) forklift service repair manual
 
Hyster c007 (h7.00 12.50 hp7.00-9.00 b europe) forklift service repair manual
Hyster c007 (h7.00 12.50 hp7.00-9.00 b europe) forklift service repair manualHyster c007 (h7.00 12.50 hp7.00-9.00 b europe) forklift service repair manual
Hyster c007 (h7.00 12.50 hp7.00-9.00 b europe) forklift service repair manual
 
Hyster c007 (h7.00 12.50 hp7.00-9.00 b europe) forklift service repair manual
Hyster c007 (h7.00 12.50 hp7.00-9.00 b europe) forklift service repair manualHyster c007 (h7.00 12.50 hp7.00-9.00 b europe) forklift service repair manual
Hyster c007 (h7.00 12.50 hp7.00-9.00 b europe) forklift service repair manual
 
Hyster c008 (h570 c) forklift service repair manual
Hyster c008 (h570 c) forklift service repair manualHyster c008 (h570 c) forklift service repair manual
Hyster c008 (h570 c) forklift service repair manual
 

Dernier

WOMEN EMPOWERMENT women empowerment.pptx
WOMEN EMPOWERMENT women empowerment.pptxWOMEN EMPOWERMENT women empowerment.pptx
WOMEN EMPOWERMENT women empowerment.pptxpadhand000
 
2k Shots ≽ 9205541914 ≼ Call Girls In Mukherjee Nagar (Delhi)
2k Shots ≽ 9205541914 ≼ Call Girls In Mukherjee Nagar (Delhi)2k Shots ≽ 9205541914 ≼ Call Girls In Mukherjee Nagar (Delhi)
2k Shots ≽ 9205541914 ≼ Call Girls In Mukherjee Nagar (Delhi)Delhi Call girls
 
Call Girls In Mumbai Just Genuine Call ☎ 7738596112✅ Call Girl Andheri East G...
Call Girls In Mumbai Just Genuine Call ☎ 7738596112✅ Call Girl Andheri East G...Call Girls In Mumbai Just Genuine Call ☎ 7738596112✅ Call Girl Andheri East G...
Call Girls In Mumbai Just Genuine Call ☎ 7738596112✅ Call Girl Andheri East G...mitaliverma221
 
2k Shots ≽ 9205541914 ≼ Call Girls In Jasola (Delhi)
2k Shots ≽ 9205541914 ≼ Call Girls In Jasola (Delhi)2k Shots ≽ 9205541914 ≼ Call Girls In Jasola (Delhi)
2k Shots ≽ 9205541914 ≼ Call Girls In Jasola (Delhi)Delhi Call girls
 
call Now 9811711561 Cash Payment乂 Call Girls in Dwarka Mor
call Now 9811711561 Cash Payment乂 Call Girls in Dwarka Morcall Now 9811711561 Cash Payment乂 Call Girls in Dwarka Mor
call Now 9811711561 Cash Payment乂 Call Girls in Dwarka Morvikas rana
 
call Now 9811711561 Cash Payment乂 Call Girls in Dwarka
call Now 9811711561 Cash Payment乂 Call Girls in Dwarkacall Now 9811711561 Cash Payment乂 Call Girls in Dwarka
call Now 9811711561 Cash Payment乂 Call Girls in Dwarkavikas rana
 
Pokemon Go... Unraveling the Conspiracy Theory
Pokemon Go... Unraveling the Conspiracy TheoryPokemon Go... Unraveling the Conspiracy Theory
Pokemon Go... Unraveling the Conspiracy Theorydrae5
 
2k Shots ≽ 9205541914 ≼ Call Girls In Palam (Delhi)
2k Shots ≽ 9205541914 ≼ Call Girls In Palam (Delhi)2k Shots ≽ 9205541914 ≼ Call Girls In Palam (Delhi)
2k Shots ≽ 9205541914 ≼ Call Girls In Palam (Delhi)Delhi Call girls
 
LC_YouSaidYes_NewBelieverBookletDone.pdf
LC_YouSaidYes_NewBelieverBookletDone.pdfLC_YouSaidYes_NewBelieverBookletDone.pdf
LC_YouSaidYes_NewBelieverBookletDone.pdfpastor83
 
2k Shots ≽ 9205541914 ≼ Call Girls In Dashrath Puri (Delhi)
2k Shots ≽ 9205541914 ≼ Call Girls In Dashrath Puri (Delhi)2k Shots ≽ 9205541914 ≼ Call Girls In Dashrath Puri (Delhi)
2k Shots ≽ 9205541914 ≼ Call Girls In Dashrath Puri (Delhi)Delhi Call girls
 
the Husband rolesBrown Aesthetic Cute Group Project Presentation
the Husband rolesBrown Aesthetic Cute Group Project Presentationthe Husband rolesBrown Aesthetic Cute Group Project Presentation
the Husband rolesBrown Aesthetic Cute Group Project Presentationbrynpueblos04
 
KLINIK BATA Jual obat penggugur kandungan 087776558899 ABORSI JANIN KEHAMILAN...
KLINIK BATA Jual obat penggugur kandungan 087776558899 ABORSI JANIN KEHAMILAN...KLINIK BATA Jual obat penggugur kandungan 087776558899 ABORSI JANIN KEHAMILAN...
KLINIK BATA Jual obat penggugur kandungan 087776558899 ABORSI JANIN KEHAMILAN...Cara Menggugurkan Kandungan 087776558899
 

Dernier (14)

WOMEN EMPOWERMENT women empowerment.pptx
WOMEN EMPOWERMENT women empowerment.pptxWOMEN EMPOWERMENT women empowerment.pptx
WOMEN EMPOWERMENT women empowerment.pptx
 
2k Shots ≽ 9205541914 ≼ Call Girls In Mukherjee Nagar (Delhi)
2k Shots ≽ 9205541914 ≼ Call Girls In Mukherjee Nagar (Delhi)2k Shots ≽ 9205541914 ≼ Call Girls In Mukherjee Nagar (Delhi)
2k Shots ≽ 9205541914 ≼ Call Girls In Mukherjee Nagar (Delhi)
 
(Anamika) VIP Call Girls Navi Mumbai Call Now 8250077686 Navi Mumbai Escorts ...
(Anamika) VIP Call Girls Navi Mumbai Call Now 8250077686 Navi Mumbai Escorts ...(Anamika) VIP Call Girls Navi Mumbai Call Now 8250077686 Navi Mumbai Escorts ...
(Anamika) VIP Call Girls Navi Mumbai Call Now 8250077686 Navi Mumbai Escorts ...
 
Call Girls In Mumbai Just Genuine Call ☎ 7738596112✅ Call Girl Andheri East G...
Call Girls In Mumbai Just Genuine Call ☎ 7738596112✅ Call Girl Andheri East G...Call Girls In Mumbai Just Genuine Call ☎ 7738596112✅ Call Girl Andheri East G...
Call Girls In Mumbai Just Genuine Call ☎ 7738596112✅ Call Girl Andheri East G...
 
2k Shots ≽ 9205541914 ≼ Call Girls In Jasola (Delhi)
2k Shots ≽ 9205541914 ≼ Call Girls In Jasola (Delhi)2k Shots ≽ 9205541914 ≼ Call Girls In Jasola (Delhi)
2k Shots ≽ 9205541914 ≼ Call Girls In Jasola (Delhi)
 
call Now 9811711561 Cash Payment乂 Call Girls in Dwarka Mor
call Now 9811711561 Cash Payment乂 Call Girls in Dwarka Morcall Now 9811711561 Cash Payment乂 Call Girls in Dwarka Mor
call Now 9811711561 Cash Payment乂 Call Girls in Dwarka Mor
 
call Now 9811711561 Cash Payment乂 Call Girls in Dwarka
call Now 9811711561 Cash Payment乂 Call Girls in Dwarkacall Now 9811711561 Cash Payment乂 Call Girls in Dwarka
call Now 9811711561 Cash Payment乂 Call Girls in Dwarka
 
Pokemon Go... Unraveling the Conspiracy Theory
Pokemon Go... Unraveling the Conspiracy TheoryPokemon Go... Unraveling the Conspiracy Theory
Pokemon Go... Unraveling the Conspiracy Theory
 
2k Shots ≽ 9205541914 ≼ Call Girls In Palam (Delhi)
2k Shots ≽ 9205541914 ≼ Call Girls In Palam (Delhi)2k Shots ≽ 9205541914 ≼ Call Girls In Palam (Delhi)
2k Shots ≽ 9205541914 ≼ Call Girls In Palam (Delhi)
 
LC_YouSaidYes_NewBelieverBookletDone.pdf
LC_YouSaidYes_NewBelieverBookletDone.pdfLC_YouSaidYes_NewBelieverBookletDone.pdf
LC_YouSaidYes_NewBelieverBookletDone.pdf
 
(Aarini) Russian Call Girls Surat Call Now 8250077686 Surat Escorts 24x7
(Aarini) Russian Call Girls Surat Call Now 8250077686 Surat Escorts 24x7(Aarini) Russian Call Girls Surat Call Now 8250077686 Surat Escorts 24x7
(Aarini) Russian Call Girls Surat Call Now 8250077686 Surat Escorts 24x7
 
2k Shots ≽ 9205541914 ≼ Call Girls In Dashrath Puri (Delhi)
2k Shots ≽ 9205541914 ≼ Call Girls In Dashrath Puri (Delhi)2k Shots ≽ 9205541914 ≼ Call Girls In Dashrath Puri (Delhi)
2k Shots ≽ 9205541914 ≼ Call Girls In Dashrath Puri (Delhi)
 
the Husband rolesBrown Aesthetic Cute Group Project Presentation
the Husband rolesBrown Aesthetic Cute Group Project Presentationthe Husband rolesBrown Aesthetic Cute Group Project Presentation
the Husband rolesBrown Aesthetic Cute Group Project Presentation
 
KLINIK BATA Jual obat penggugur kandungan 087776558899 ABORSI JANIN KEHAMILAN...
KLINIK BATA Jual obat penggugur kandungan 087776558899 ABORSI JANIN KEHAMILAN...KLINIK BATA Jual obat penggugur kandungan 087776558899 ABORSI JANIN KEHAMILAN...
KLINIK BATA Jual obat penggugur kandungan 087776558899 ABORSI JANIN KEHAMILAN...
 

How to Fix LMI and Roytronic Metering Pumps

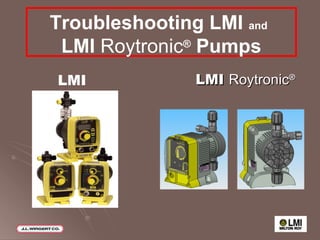
  • 1. LMI Roytronic ® Troubleshooting LMI and LMI Roytronic ® Pumps LMI
  • 2.
  • 3.
  • 4. Protective Clothing and Eye Protection Wear protective clothing and eye protection Check MSDS sheet for other precautions
  • 5.
  • 6.
  • 7.
  • 8.
  • 9.
  • 10.
  • 11.
  • 12.
  • 13.
  • 14. LMI Roytronic: Liquid Ends Mach AutoPrime Head Molded FastPrime Head Mach FastPrime Head 7X8 NI 7X8 SI 8XX SI 9XX SI 9XX HI ALL NEW!!
  • 15.
  • 16.
  • 17.
  • 18.
  • 19.
  • 20.
  • 21. II. Leakage at Tubing or Fitting Compression washers are located in fittings and function valves If necessary, remove the washer Push washer into fitting by to avoid damage How to : Replace a Compression Washer
  • 22. II. Leakage at Tubing or Fitting BOTTOM TOP Direction of Flow CORRECT INCORRECT Smooth side Ball seat side TOP BOTTOM How to: Correctly Install Cartridge Valves
  • 23. II. Leakage at Tubing or Fitting Install new cartridge valves or check valve balls and seal rings in pump head O-ring How to: Replace Suction and Discharge Cartridge Valves (Check Valve)
  • 24. II. Leakage at Tubing or Fitting Direction of Flow Configuration 2 FOOTVALVE FOR LARGER PUMPS (WITHOUT CARTRIDGE) Configuration 1 FOOTVALVE FOR SMALLER PUMPS (WITH CARTRIDGE ) CARTRIDGE VALVE SHOWN DIS-ASSEMBLED { SEAL RING BALL Foot Valves come in TWO basic configurations
  • 25. Place O-ring on cartridge valve Position ball seat side of cartridge valve toward floor II. Leakage at Tubing or Fitting CARTRIDGE VALVE O-RING How to: Install new cartridge valve and O-ring (Floor) (Ceiling) Position ball seat side this surface down. - tighten
  • 26. II. Leakage at Tubing or Fitting SPRING BALL PTFE SEAT O-RING Install New Injection Check Valve Components Flapper Valve - tighten
  • 27.
  • 28. Replace worn parts every 6-12 months carries parts and kits III. Low Output/Fails to Pump Against Pressure
  • 29.
  • 30.
  • 31.
  • 32.
  • 33. Replacing the Liquifram™ TURN THE PUMP OFF! Twisting the pressure relief knob (black) 1/4 turn will de-pressurize the line Step 1 : De-pressurize the Liquid End III. Low Output/Fails to Pump Against Pressure
  • 34. Replacing the Liquifram™ Turn the coupling nut and remove the tubing from the fitting by pulling up . Step 2: Remove the Discharge Tubing III. Low Output/Fails to Pump Against Pressure
  • 35. Turn the coupling nut to remove and pull the tubing out of the valve Step 3: Remove the Return Line Tubing Replacing the Liquifram™ III. Low Output/Fails to Pump Against Pressure
  • 36. Turn the 4-FV to remove Replacing the Liquifram™ Step 4: Remove the 4-FV III. Low Output/Fails to Pump Against Pressure
  • 37. Remove the suction tubing by unscrewing it Remove the cartridge valve or check valve ball and seal ring from the pump head Step 5: Remove the suction fitting Replacing the Liquifram™ III. Low Output/Fails to Pump Against Pressure
  • 38. Remove the four screws that mount the pump head Step 6: Remove the pump head Replacing the Liquifram™ III. Low Output/Fails to Pump Against Pressure
  • 39. Remove the pump Liquifram ™ by turning it Replacing the Liquifram™ Step 7: Remove the pump Liquifram™ III. Low Output/Fails to Pump Against Pressure
  • 40. Discard the Liquifram ™ and inspect the backing disk for damage Step 8: Remove the Liquifram™ and the backing disk Replacing the Liquifram™ Liquifram™ Backing disk III. Low Output/Fails to Pump Against Pressure
  • 41. Remove used shaft seal Step 9: Remove the shaft seal Replacing the Liquifram™ III. Low Output/Fails to Pump Against Pressure
  • 42. Push the seal in place by using a large hollow pen cap or wrench socket large enough to clear the Liquifram ™ shaft Step 10: Install the new shaft Replacing the Liquifram™ III. Low Output/Fails to Pump Against Pressure
  • 43. Replacing the Liquifram™ Step 10 (cont.) III. Low Output/Fails to Pump Against Pressure
  • 44. Replacing the Liquifram™ Step 10 (cont.) Before starting the pump, match the pump series with the stroke knob setting on this chart. III. Low Output/Fails to Pump Against Pressure 70% C13, C14, C73, C74, C77, C93, C94, E73, E74 50% C78 90% All A, B, J and P Series C10, C11, C12, C70, C71, C72, C76, C90, C91, C92, E70, E71, E72 Stroke Knob Setting Pump Series Liquifram ™ Stroke Setting Chart
  • 45. Turn both the disk and new Liquifram ™ moving the Liquifram ™ until its center is flush with the outside housing Step 11: Install the disk and new Liquifram™ Replacing the Liquifram™ III. Low Output/Fails to Pump Against Pressure
  • 46. Replacing the Liquifram™ III. Low Output/Fails to Pump Against Pressure
  • 47. Lightly re-install the four mounting screws and then tighten gradually in a crisscross pattern until tight Step 12: Re-install the Pump Head Replacing the Liquifram™ You’re done replacing the Liquifram™ . . . III. Low Output/Fails to Pump Against Pressure
  • 48.
  • 49.
  • 50.
  • 51. HOW TO: Re-Zero Type I Pump -- Push-On Knob (Cont.) With the pump running, zero the pump as before Push down on the outer section (a snap sound indicates parts are locked together) Replace the yellow cap over the outer section of the knob, aligning the tabs on the cap with the slots inside the knob III. Low Output/Fails to Pump Against Pressure
  • 52.
  • 53.
  • 54.
  • 55.
  • 56.
  • 57.
  • 58.
  • 59. IV. Excessive Pump Output ALL NEW!! 4FV Improves diaphragm sealing Double ball design Roytronic ® Encapsulated Hardware Ergonomic Knobs FEATURE RICH Mates onto discharge check valve giving customer control of rotational alignment
  • 60. IV. Excessive Pump Output ALL NEW!! 4FV NEW TUBING CONNECTIONS Roytronic ®
  • 61. IV. Excessive Pump Output ALL NEW!! 4FV DO NOT OVER TIGHTEN STEP 1 Thread the 4FV fitting onto the head STEP 2. Insert ¼&quot; tubing through Bleed Nut DO NOT SUBMERGE TUBING IN SOLUTION Assemble 4FV Fitting and Coupling Nut with appropriate cartridges into the discharge port of the pump. Use 13/16” or 20mm socket wrench to tighten to 50 inch -pounds. STEP 3. - t i g ht e n Bl e ed Nu t NOTE Roytronic ® O-Ring O-Ring
  • 62.
  • 63.
  • 64. TROUBLESHOOTING LMI and ROYTRONIC ® PUMPS THE END