SlideShare une entreprise Scribd logo
1  sur  27
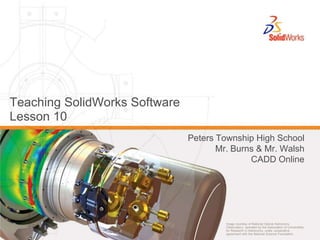
Teaching SolidWorks Software Lesson 10 Peters Township High School Mr. Burns & Mr. Walsh CADD Online
Loft Feature Overview Blends multiple profiles together. A Loft feature can be a base, boss, or cut. To Create a Simple Loft Feature: Create the planes required for the profile sketches.Each sketch should be on a different plane. Sketch a profile on the first plane.
Creating a Simple Loft Feature: Sketch the remaining profiles on their corresponding planes. Click Lofted Boss/Base       on the Features toolbar.
Creating a Simple Loft Feature: Select each profile. Examine the preview curve and the connectors. Click OK     . Preview curve Connectors
Additional Information About Lofts: Neatness counts! Select the profiles in order. Click corresponding points on each profile. The vertex closest to the selection point is used. Drag the connectors to improve if necessary. A preview curve connecting the profiles is displayed. Review the curve in order to address adjustments.
Neatness Counts! Unexpected results occur when you don’t pick corresponding points on each profile.
Neatness Counts! Rebuild errors can occur if you select the profiles in the wrong order.
To Create an Offset Plane: Hold down Ctrl and drag the Front plane in the direction you want the offset to go.NOTE:Ctrl-drag is a common Windows technique for copying objects. The Plane PropertyManager appears. Enter 25mm for Distance. Click OK      .
Creating an Offset Plane – Results
Setting up the Planes Additional offset planes are required. Plane2 is offset 25mm from Plane1. Plane3 is offset 40mm from Plane2. Verify the positions of the planes. Click View, Planes. Double-click the planes to see their offset dimensions.
Sketch the Profiles The Loft feature is created with 4 profiles. Each profile is on a separate plane. To Create the First Profile: Open a sketch on the Front plane. Sketch a square. Exit the sketch.
Best Practice There is a better way to sketch a centered square: Sketch a Center Rectangle starting at the origin. This keepsthe rectangle centered. Add an Equal relation to one  horizontal and one vertical line. This makes the rectangle a square. Dimension one side of the square.
Sketch the Remaining Profiles: Open a sketch on Plane1. Sketch a circle and dimension it. Exit the sketch. Open sketch on Plane2. Sketch a circle whose circumference is coincident with the corners of the square. Exit the sketch.
To Copy a Sketch: Select Sketch3 in the FeatureManager design tree or graphics area. Click Edit, Copy or click Copy       on the Standard toolbar. Select Plane3 in the FeatureManager design tree or graphics area. Click Edit, Paste or click Paste      on the Standard toolbar .A new sketch, Sketch4, is created on Plane3.
More About Copying Sketches External relations are deleted. For example, when you copied Sketch3, the geometric relations locating the center and defining the circumference were deleted. Therefore, Sketch4 is underdefined. To fully define Sketch4, add a Coradial relation between the copied circle and the original. If you sketch a profile on the wrong plane, move it to the correct plane using Edit Sketch Plane. Do not copy it.
To Move a Sketch to a Different Plane: Right-click the sketch in the FeatureManager design tree. Select Edit Sketch Plane from the shortcut menu. Select a different plane. Click OK      .
Loft Feature The Loft feature blends the 4 profiles to create the handle of the chisel. Click Lofted Boss / Base      on the Features toolbar.
Creating the Loft Feature: Select each profile.Click on each sketch in the same relative location – the right side. Examine the preview curve.The preview curve shows how the profiles will be connected when the loft feature is created. Preview curve
Creating the Loft Feature: The sketches are listed in the Profiles box.The Up/Down arrows      are used to rearrange the order of the profiles.
Creating the Loft Feature: Click OK      .
The second Loft feature is composed of two profiles: Sketch5 and Sketch6. To Create Sketch5: Select the square face. Open a sketch. Click Convert Entities      . Exit the sketch. A Second Loft Feature Creates the Bit of the Chisel:
To Create Sketch6: Offset Plane4behind the Front plane.Hold down Ctrl and drag the Front plane in the direction you want the offset to go. The Plane PropertyManager appears. Enter 200mm for Distance. Click OK      .
To Create Sketch6: Open a sketch on Plane4. Sketch a narrow rectangle. Dimension the rectangle. Exit the sketch.
To Create the Second Loft Feature: Click Lofted Boss / Baseon the Features toolbar. Select Sketch5 in the lower right corner of the square. Select Sketch6 in the lower right corner of the rectangle. Examine the preview curve. Click OK. Sketch 6 Preview  Sketch 5
Lofted Chisel
Tips and Tricks Remember best practices: Only two dimensions are required for the narrow rectangle. Use a Center Rectangle to center the rectangle. This technique eliminates two dimensions and it captures the design inte
Tips and Tricks You do not need Sketch5 (the sketch with the converted edges of the square face). Lofts can use the face as a profile. Select the face near the corner. OR, you can re-use Sketch1 instead of creating Sketch5.

Contenu connexe

Tendances (19)

Fusion 360 training course
Fusion 360 training courseFusion 360 training course
Fusion 360 training course
 
Lesson 7 123 design
Lesson 7 123 designLesson 7 123 design
Lesson 7 123 design
 
Lesson 11
Lesson 11Lesson 11
Lesson 11
 
Lesson 9
Lesson 9Lesson 9
Lesson 9
 
Lesson revolve
Lesson revolveLesson revolve
Lesson revolve
 
Drawing perspective
Drawing perspectiveDrawing perspective
Drawing perspective
 
Pictorial Drawing
Pictorial DrawingPictorial Drawing
Pictorial Drawing
 
Cdi pd fusion 360 hyperloop
Cdi pd fusion 360 hyperloopCdi pd fusion 360 hyperloop
Cdi pd fusion 360 hyperloop
 
2.1.a isometric obliquepictorials
2.1.a  isometric obliquepictorials2.1.a  isometric obliquepictorials
2.1.a isometric obliquepictorials
 
Auxiliary
AuxiliaryAuxiliary
Auxiliary
 
Dwg 106 module 2 part 1
Dwg 106 module 2 part 1Dwg 106 module 2 part 1
Dwg 106 module 2 part 1
 
RULERS
RULERSRULERS
RULERS
 
ViceGripFem
ViceGripFemViceGripFem
ViceGripFem
 
ABISOLA CUBE upload
ABISOLA CUBE uploadABISOLA CUBE upload
ABISOLA CUBE upload
 
Dwg 106 module 2 part 2
Dwg 106 module 2 part 2Dwg 106 module 2 part 2
Dwg 106 module 2 part 2
 
Class 12 presentation
Class 12 presentationClass 12 presentation
Class 12 presentation
 
Pictorial Drawings
Pictorial DrawingsPictorial Drawings
Pictorial Drawings
 
Oblique drawing
Oblique drawingOblique drawing
Oblique drawing
 
Vice Grip Soldiworks Project
Vice Grip Soldiworks ProjectVice Grip Soldiworks Project
Vice Grip Soldiworks Project
 

Similaire à Lesson loft

revit architecture basics
revit architecture basicsrevit architecture basics
revit architecture basicsali lemssefer
 
Molds design in solid works
Molds design in solid worksMolds design in solid works
Molds design in solid worksLong Nguyen
 
Importing Survey Data | ACAD Civil 3D | Total Station |
Importing Survey Data | ACAD Civil 3D | Total Station |Importing Survey Data | ACAD Civil 3D | Total Station |
Importing Survey Data | ACAD Civil 3D | Total Station |Zakaria Yahya
 
SW 2013 beginners guide
SW 2013 beginners guideSW 2013 beginners guide
SW 2013 beginners guideRahman Hakim
 
Solidworks 2012-basic-tutorials compress
Solidworks 2012-basic-tutorials compressSolidworks 2012-basic-tutorials compress
Solidworks 2012-basic-tutorials compressMahdi Zatout
 
Sketchup basic course by Eng. Khalid A. Mter
Sketchup basic course by Eng. Khalid A. MterSketchup basic course by Eng. Khalid A. Mter
Sketchup basic course by Eng. Khalid A. Mterkhalid mter
 
Nx basics 2014 unfnished
Nx basics 2014 unfnishedNx basics 2014 unfnished
Nx basics 2014 unfnishedMiguele Davila
 
Civil 3d Workflow_NOLOGO
Civil 3d Workflow_NOLOGOCivil 3d Workflow_NOLOGO
Civil 3d Workflow_NOLOGOGary Cassidy
 
Viva Questions for Engineering Dawing and Graphics
Viva Questions for Engineering Dawing and GraphicsViva Questions for Engineering Dawing and Graphics
Viva Questions for Engineering Dawing and Graphicsshyamranjan2006
 

Similaire à Lesson loft (20)

Lessonloft
LessonloftLessonloft
Lessonloft
 
revit architecture basics
revit architecture basicsrevit architecture basics
revit architecture basics
 
Molds design in solid works
Molds design in solid worksMolds design in solid works
Molds design in solid works
 
Importing Survey Data | ACAD Civil 3D | Total Station |
Importing Survey Data | ACAD Civil 3D | Total Station |Importing Survey Data | ACAD Civil 3D | Total Station |
Importing Survey Data | ACAD Civil 3D | Total Station |
 
solidworks
solidworkssolidworks
solidworks
 
solidworks
solidworkssolidworks
solidworks
 
SW 2013 beginners guide
SW 2013 beginners guideSW 2013 beginners guide
SW 2013 beginners guide
 
Solidworks 2012-basic-tutorials compress
Solidworks 2012-basic-tutorials compressSolidworks 2012-basic-tutorials compress
Solidworks 2012-basic-tutorials compress
 
Cad cam lab 2016 2017
Cad cam lab 2016 2017Cad cam lab 2016 2017
Cad cam lab 2016 2017
 
Lessonrevolve
Lessonrevolve Lessonrevolve
Lessonrevolve
 
Sketchup basic course by Eng. Khalid A. Mter
Sketchup basic course by Eng. Khalid A. MterSketchup basic course by Eng. Khalid A. Mter
Sketchup basic course by Eng. Khalid A. Mter
 
Nx basics 2014 unfnished
Nx basics 2014 unfnishedNx basics 2014 unfnished
Nx basics 2014 unfnished
 
Nx basics 2014
Nx basics 2014 Nx basics 2014
Nx basics 2014
 
Civil 3d workflow
Civil 3d workflowCivil 3d workflow
Civil 3d workflow
 
Civil 3d Workflow_NOLOGO
Civil 3d Workflow_NOLOGOCivil 3d Workflow_NOLOGO
Civil 3d Workflow_NOLOGO
 
Viva Questions for Engineering Dawing and Graphics
Viva Questions for Engineering Dawing and GraphicsViva Questions for Engineering Dawing and Graphics
Viva Questions for Engineering Dawing and Graphics
 
978 1-58503-754-4-1 (1)
978 1-58503-754-4-1 (1)978 1-58503-754-4-1 (1)
978 1-58503-754-4-1 (1)
 
Lesson02
Lesson02Lesson02
Lesson02
 
FEA Final Project
FEA Final ProjectFEA Final Project
FEA Final Project
 
Ig proe-wf-5.0
Ig proe-wf-5.0Ig proe-wf-5.0
Ig proe-wf-5.0
 

Dernier

social pharmacy d-pharm 1st year by Pragati K. Mahajan
social pharmacy d-pharm 1st year by Pragati K. Mahajansocial pharmacy d-pharm 1st year by Pragati K. Mahajan
social pharmacy d-pharm 1st year by Pragati K. Mahajanpragatimahajan3
 
SOCIAL AND HISTORICAL CONTEXT - LFTVD.pptx
SOCIAL AND HISTORICAL CONTEXT - LFTVD.pptxSOCIAL AND HISTORICAL CONTEXT - LFTVD.pptx
SOCIAL AND HISTORICAL CONTEXT - LFTVD.pptxiammrhaywood
 
CARE OF CHILD IN INCUBATOR..........pptx
CARE OF CHILD IN INCUBATOR..........pptxCARE OF CHILD IN INCUBATOR..........pptx
CARE OF CHILD IN INCUBATOR..........pptxGaneshChakor2
 
Organic Name Reactions for the students and aspirants of Chemistry12th.pptx
Organic Name Reactions  for the students and aspirants of Chemistry12th.pptxOrganic Name Reactions  for the students and aspirants of Chemistry12th.pptx
Organic Name Reactions for the students and aspirants of Chemistry12th.pptxVS Mahajan Coaching Centre
 
Disha NEET Physics Guide for classes 11 and 12.pdf
Disha NEET Physics Guide for classes 11 and 12.pdfDisha NEET Physics Guide for classes 11 and 12.pdf
Disha NEET Physics Guide for classes 11 and 12.pdfchloefrazer622
 
The byproduct of sericulture in different industries.pptx
The byproduct of sericulture in different industries.pptxThe byproduct of sericulture in different industries.pptx
The byproduct of sericulture in different industries.pptxShobhayan Kirtania
 
1029 - Danh muc Sach Giao Khoa 10 . pdf
1029 -  Danh muc Sach Giao Khoa 10 . pdf1029 -  Danh muc Sach Giao Khoa 10 . pdf
1029 - Danh muc Sach Giao Khoa 10 . pdfQucHHunhnh
 
Nutritional Needs Presentation - HLTH 104
Nutritional Needs Presentation - HLTH 104Nutritional Needs Presentation - HLTH 104
Nutritional Needs Presentation - HLTH 104misteraugie
 
The basics of sentences session 2pptx copy.pptx
The basics of sentences session 2pptx copy.pptxThe basics of sentences session 2pptx copy.pptx
The basics of sentences session 2pptx copy.pptxheathfieldcps1
 
POINT- BIOCHEMISTRY SEM 2 ENZYMES UNIT 5.pptx
POINT- BIOCHEMISTRY SEM 2 ENZYMES UNIT 5.pptxPOINT- BIOCHEMISTRY SEM 2 ENZYMES UNIT 5.pptx
POINT- BIOCHEMISTRY SEM 2 ENZYMES UNIT 5.pptxSayali Powar
 
Accessible design: Minimum effort, maximum impact
Accessible design: Minimum effort, maximum impactAccessible design: Minimum effort, maximum impact
Accessible design: Minimum effort, maximum impactdawncurless
 
A Critique of the Proposed National Education Policy Reform
A Critique of the Proposed National Education Policy ReformA Critique of the Proposed National Education Policy Reform
A Critique of the Proposed National Education Policy ReformChameera Dedduwage
 
Presentation by Andreas Schleicher Tackling the School Absenteeism Crisis 30 ...
Presentation by Andreas Schleicher Tackling the School Absenteeism Crisis 30 ...Presentation by Andreas Schleicher Tackling the School Absenteeism Crisis 30 ...
Presentation by Andreas Schleicher Tackling the School Absenteeism Crisis 30 ...EduSkills OECD
 
Web & Social Media Analytics Previous Year Question Paper.pdf
Web & Social Media Analytics Previous Year Question Paper.pdfWeb & Social Media Analytics Previous Year Question Paper.pdf
Web & Social Media Analytics Previous Year Question Paper.pdfJayanti Pande
 
BAG TECHNIQUE Bag technique-a tool making use of public health bag through wh...
BAG TECHNIQUE Bag technique-a tool making use of public health bag through wh...BAG TECHNIQUE Bag technique-a tool making use of public health bag through wh...
BAG TECHNIQUE Bag technique-a tool making use of public health bag through wh...Sapna Thakur
 
Beyond the EU: DORA and NIS 2 Directive's Global Impact
Beyond the EU: DORA and NIS 2 Directive's Global ImpactBeyond the EU: DORA and NIS 2 Directive's Global Impact
Beyond the EU: DORA and NIS 2 Directive's Global ImpactPECB
 
Sports & Fitness Value Added Course FY..
Sports & Fitness Value Added Course FY..Sports & Fitness Value Added Course FY..
Sports & Fitness Value Added Course FY..Disha Kariya
 
Arihant handbook biology for class 11 .pdf
Arihant handbook biology for class 11 .pdfArihant handbook biology for class 11 .pdf
Arihant handbook biology for class 11 .pdfchloefrazer622
 

Dernier (20)

social pharmacy d-pharm 1st year by Pragati K. Mahajan
social pharmacy d-pharm 1st year by Pragati K. Mahajansocial pharmacy d-pharm 1st year by Pragati K. Mahajan
social pharmacy d-pharm 1st year by Pragati K. Mahajan
 
SOCIAL AND HISTORICAL CONTEXT - LFTVD.pptx
SOCIAL AND HISTORICAL CONTEXT - LFTVD.pptxSOCIAL AND HISTORICAL CONTEXT - LFTVD.pptx
SOCIAL AND HISTORICAL CONTEXT - LFTVD.pptx
 
Código Creativo y Arte de Software | Unidad 1
Código Creativo y Arte de Software | Unidad 1Código Creativo y Arte de Software | Unidad 1
Código Creativo y Arte de Software | Unidad 1
 
CARE OF CHILD IN INCUBATOR..........pptx
CARE OF CHILD IN INCUBATOR..........pptxCARE OF CHILD IN INCUBATOR..........pptx
CARE OF CHILD IN INCUBATOR..........pptx
 
Organic Name Reactions for the students and aspirants of Chemistry12th.pptx
Organic Name Reactions  for the students and aspirants of Chemistry12th.pptxOrganic Name Reactions  for the students and aspirants of Chemistry12th.pptx
Organic Name Reactions for the students and aspirants of Chemistry12th.pptx
 
Disha NEET Physics Guide for classes 11 and 12.pdf
Disha NEET Physics Guide for classes 11 and 12.pdfDisha NEET Physics Guide for classes 11 and 12.pdf
Disha NEET Physics Guide for classes 11 and 12.pdf
 
The byproduct of sericulture in different industries.pptx
The byproduct of sericulture in different industries.pptxThe byproduct of sericulture in different industries.pptx
The byproduct of sericulture in different industries.pptx
 
1029 - Danh muc Sach Giao Khoa 10 . pdf
1029 -  Danh muc Sach Giao Khoa 10 . pdf1029 -  Danh muc Sach Giao Khoa 10 . pdf
1029 - Danh muc Sach Giao Khoa 10 . pdf
 
Nutritional Needs Presentation - HLTH 104
Nutritional Needs Presentation - HLTH 104Nutritional Needs Presentation - HLTH 104
Nutritional Needs Presentation - HLTH 104
 
The basics of sentences session 2pptx copy.pptx
The basics of sentences session 2pptx copy.pptxThe basics of sentences session 2pptx copy.pptx
The basics of sentences session 2pptx copy.pptx
 
POINT- BIOCHEMISTRY SEM 2 ENZYMES UNIT 5.pptx
POINT- BIOCHEMISTRY SEM 2 ENZYMES UNIT 5.pptxPOINT- BIOCHEMISTRY SEM 2 ENZYMES UNIT 5.pptx
POINT- BIOCHEMISTRY SEM 2 ENZYMES UNIT 5.pptx
 
Accessible design: Minimum effort, maximum impact
Accessible design: Minimum effort, maximum impactAccessible design: Minimum effort, maximum impact
Accessible design: Minimum effort, maximum impact
 
A Critique of the Proposed National Education Policy Reform
A Critique of the Proposed National Education Policy ReformA Critique of the Proposed National Education Policy Reform
A Critique of the Proposed National Education Policy Reform
 
Presentation by Andreas Schleicher Tackling the School Absenteeism Crisis 30 ...
Presentation by Andreas Schleicher Tackling the School Absenteeism Crisis 30 ...Presentation by Andreas Schleicher Tackling the School Absenteeism Crisis 30 ...
Presentation by Andreas Schleicher Tackling the School Absenteeism Crisis 30 ...
 
Web & Social Media Analytics Previous Year Question Paper.pdf
Web & Social Media Analytics Previous Year Question Paper.pdfWeb & Social Media Analytics Previous Year Question Paper.pdf
Web & Social Media Analytics Previous Year Question Paper.pdf
 
BAG TECHNIQUE Bag technique-a tool making use of public health bag through wh...
BAG TECHNIQUE Bag technique-a tool making use of public health bag through wh...BAG TECHNIQUE Bag technique-a tool making use of public health bag through wh...
BAG TECHNIQUE Bag technique-a tool making use of public health bag through wh...
 
Beyond the EU: DORA and NIS 2 Directive's Global Impact
Beyond the EU: DORA and NIS 2 Directive's Global ImpactBeyond the EU: DORA and NIS 2 Directive's Global Impact
Beyond the EU: DORA and NIS 2 Directive's Global Impact
 
Sports & Fitness Value Added Course FY..
Sports & Fitness Value Added Course FY..Sports & Fitness Value Added Course FY..
Sports & Fitness Value Added Course FY..
 
Arihant handbook biology for class 11 .pdf
Arihant handbook biology for class 11 .pdfArihant handbook biology for class 11 .pdf
Arihant handbook biology for class 11 .pdf
 
INDIA QUIZ 2024 RLAC DELHI UNIVERSITY.pptx
INDIA QUIZ 2024 RLAC DELHI UNIVERSITY.pptxINDIA QUIZ 2024 RLAC DELHI UNIVERSITY.pptx
INDIA QUIZ 2024 RLAC DELHI UNIVERSITY.pptx
 

Lesson loft

  • 1. Teaching SolidWorks Software Lesson 10 Peters Township High School Mr. Burns & Mr. Walsh CADD Online
  • 2. Loft Feature Overview Blends multiple profiles together. A Loft feature can be a base, boss, or cut. To Create a Simple Loft Feature: Create the planes required for the profile sketches.Each sketch should be on a different plane. Sketch a profile on the first plane.
  • 3. Creating a Simple Loft Feature: Sketch the remaining profiles on their corresponding planes. Click Lofted Boss/Base on the Features toolbar.
  • 4. Creating a Simple Loft Feature: Select each profile. Examine the preview curve and the connectors. Click OK . Preview curve Connectors
  • 5. Additional Information About Lofts: Neatness counts! Select the profiles in order. Click corresponding points on each profile. The vertex closest to the selection point is used. Drag the connectors to improve if necessary. A preview curve connecting the profiles is displayed. Review the curve in order to address adjustments.
  • 6. Neatness Counts! Unexpected results occur when you don’t pick corresponding points on each profile.
  • 7. Neatness Counts! Rebuild errors can occur if you select the profiles in the wrong order.
  • 8. To Create an Offset Plane: Hold down Ctrl and drag the Front plane in the direction you want the offset to go.NOTE:Ctrl-drag is a common Windows technique for copying objects. The Plane PropertyManager appears. Enter 25mm for Distance. Click OK .
  • 9. Creating an Offset Plane – Results
  • 10. Setting up the Planes Additional offset planes are required. Plane2 is offset 25mm from Plane1. Plane3 is offset 40mm from Plane2. Verify the positions of the planes. Click View, Planes. Double-click the planes to see their offset dimensions.
  • 11. Sketch the Profiles The Loft feature is created with 4 profiles. Each profile is on a separate plane. To Create the First Profile: Open a sketch on the Front plane. Sketch a square. Exit the sketch.
  • 12. Best Practice There is a better way to sketch a centered square: Sketch a Center Rectangle starting at the origin. This keepsthe rectangle centered. Add an Equal relation to one horizontal and one vertical line. This makes the rectangle a square. Dimension one side of the square.
  • 13. Sketch the Remaining Profiles: Open a sketch on Plane1. Sketch a circle and dimension it. Exit the sketch. Open sketch on Plane2. Sketch a circle whose circumference is coincident with the corners of the square. Exit the sketch.
  • 14. To Copy a Sketch: Select Sketch3 in the FeatureManager design tree or graphics area. Click Edit, Copy or click Copy on the Standard toolbar. Select Plane3 in the FeatureManager design tree or graphics area. Click Edit, Paste or click Paste on the Standard toolbar .A new sketch, Sketch4, is created on Plane3.
  • 15. More About Copying Sketches External relations are deleted. For example, when you copied Sketch3, the geometric relations locating the center and defining the circumference were deleted. Therefore, Sketch4 is underdefined. To fully define Sketch4, add a Coradial relation between the copied circle and the original. If you sketch a profile on the wrong plane, move it to the correct plane using Edit Sketch Plane. Do not copy it.
  • 16. To Move a Sketch to a Different Plane: Right-click the sketch in the FeatureManager design tree. Select Edit Sketch Plane from the shortcut menu. Select a different plane. Click OK .
  • 17. Loft Feature The Loft feature blends the 4 profiles to create the handle of the chisel. Click Lofted Boss / Base on the Features toolbar.
  • 18. Creating the Loft Feature: Select each profile.Click on each sketch in the same relative location – the right side. Examine the preview curve.The preview curve shows how the profiles will be connected when the loft feature is created. Preview curve
  • 19. Creating the Loft Feature: The sketches are listed in the Profiles box.The Up/Down arrows are used to rearrange the order of the profiles.
  • 20. Creating the Loft Feature: Click OK .
  • 21. The second Loft feature is composed of two profiles: Sketch5 and Sketch6. To Create Sketch5: Select the square face. Open a sketch. Click Convert Entities . Exit the sketch. A Second Loft Feature Creates the Bit of the Chisel:
  • 22. To Create Sketch6: Offset Plane4behind the Front plane.Hold down Ctrl and drag the Front plane in the direction you want the offset to go. The Plane PropertyManager appears. Enter 200mm for Distance. Click OK .
  • 23. To Create Sketch6: Open a sketch on Plane4. Sketch a narrow rectangle. Dimension the rectangle. Exit the sketch.
  • 24. To Create the Second Loft Feature: Click Lofted Boss / Baseon the Features toolbar. Select Sketch5 in the lower right corner of the square. Select Sketch6 in the lower right corner of the rectangle. Examine the preview curve. Click OK. Sketch 6 Preview Sketch 5
  • 26. Tips and Tricks Remember best practices: Only two dimensions are required for the narrow rectangle. Use a Center Rectangle to center the rectangle. This technique eliminates two dimensions and it captures the design inte
  • 27. Tips and Tricks You do not need Sketch5 (the sketch with the converted edges of the square face). Lofts can use the face as a profile. Select the face near the corner. OR, you can re-use Sketch1 instead of creating Sketch5.