SlideShare une entreprise Scribd logo
1  sur  169
Télécharger pour lire hors ligne
Leica Magnus Zielfernrohr
Anleitung | Instructions
Notice d’utilisation | Gebruiksaanwijzing
Istruzioni | Instrucciones
Bruksanvisning |
Инструкция по эксплуатации
4 5
8
8a 4c
6
7
1
1a
2
3
3b
3a
3c
5c
4d
5d5b 5e5a 5f
4e 4f4a 4b
3c
99a
3
3d
3e
1
VORWORT
Sehr geehrte Kundin, sehr geehrter Kunde,
Der Name Leica steht weltweit für höchste Qualität, fein-
mechanische Präzision bei äußerster Zuverlässigkeit und
lange Lebensdauer.
Wir wünschen Ihnen viel Freude und Erfolg mit Ihrem
neuen Leica Magnus Zielfernrohr.
Ihr Leica Magnus Zielfernrohr ist mit einer hervorra-
genden Optik ausgestattet, die auch unter schwierigsten
Bedingungen ein klares, helles und brillantes Bild liefert,
so dass stets ein sicheres Abkommen möglich ist. Darü-
ber hinaus ist es einfach und funktional zu bedienen.
Damit Sie alle Möglichkeiten dieses hochwertigen Ziel-
fernrohres richtig nutzen können, empfehlen wir Ihnen,
zunächst diese Anleitung zu lesen.
INHALTSVERZEICHNIS
Vorwort.............................................................................. 1
Bezeichnung der Teile ........................................................ 2
Lieferumfang...................................................................... 2
Entsorgung elektrischer und elektronischer Geräte............. 3
Einsetzen und Auswechseln der Batterie............................. 4
Anzeige der Batterie-Kapazität............................................ 5
Montage............................................................................ 6
Dioptrien-Ausgleich............................................................ 6
Wechseln der Vergrößerung ............................................... 7
Parallaxe-Ausgleich............................................................ 7
Höhen- und Seitenjustierung.............................................. 8
„Nullen“ der Turmskalen .................................................. 10
Anwenden des Leucht-Absehens...................................... 11
Abschalt-Automatik.......................................................... 12
Pflege/Reinigung............................................................. 12
Ersatzteile........................................................................ 14
Technische Daten ............................................................ 15
Leica Product Support...................................................... 16
Leica Customer Care ....................................................... 17Achtung:
Vermeiden Sie, wie auch bei Ferngläsern, den direkten
Blick mit Ihrem Leica Magnus Zielfernrohr in helle Licht-
quellen, um Augenverletzungen auszuschließen.
Magnus komplett.indb 1 17.08.2015 08:41:33
2
BEZEICHNUNG DER TEILE
1. Okular mit
a. Dreh-Augenmuschel
2. Index für Dioptrien-Einstellung
3. Batteriefach-Deckel / Leuchtabsehen-Dreh-/
Wippschalter mit
a. Betriebsarten-Schaltstellungen
b. Indexpunkt für Betriebsarten
c. Symbole für Helligkeits-Einstellrichtung
d. Batteriefach
e. Dichtring
4. Höhenverstellungsturm
5. Seitenverstellungsturm
6. Objektiv
7. Filtergewinde
8. Vergrößerungs-Stellring mit
a. Nocken
9. Parallaxe-Stellring mit
a. Skala
4./5. Höhen-/Seitenverstellungsturm
(Abdeckkappe abgeschraubt) mit
a. Index
b. Klemmschraube
c. Abdeckkappe
d. Rändelrad
e. Skala
f. Dichtring
LIEFERUMFANG
– Zielfernrohr
– 1 Lithium-Knopfzelle 3V Typ CR 2032
– Schutzdeckel für Okular/Objektiv
– Anleitung
– Garantiekarte
– Reinigungstuch
– Abdeckung für Montageschiene
(nur bei entspr. ausgestatteten Modellen)
Magnus komplett.indb 2 17.08.2015 08:41:33
3
ENTSORGUNG ELEKTRISCHER
UND ELEKTRONISCHER GERÄTE
(Gilt für die EU, sowie andere europäische
Länder mit getrennten Sammelsystemen)
Dieses Gerät enthält elektrische und/oder elektronische
Bauteile und darf daher nicht im normalen Hausmüll ent-
sorgt werden!
Stattdessen muss es zwecks Recycling an entsprechen-
den, von den Gemeinden bereitgestellten Sammelstellen
abgegeben werden. Dies ist für Sie kostenlos.
Falls das Gerät selbst wechselbare Batterien oder Akkus
enthält, müssen diese vorher entnommen werden und
ggf. ihrerseits vorschriftsmäßig entsorgt werden (siehe
dazu die Angaben in der Anleitung des Geräts).
Weitere Informationen zum Thema bekommen Sie bei
Ihrer Gemeindeverwaltung, Ihrem Entsorgungsunter-
nehmen, oder dem Geschäft, in dem Sie dieses Gerät
erworben haben.
Magnus komplett.indb 3 17.08.2015 08:41:33
4
EINSETZEN UND AUSWECHSELN
DER BATTERIE
Die Leica Zielfernrohre mit Leucht-Absehen werden zur
Energieversorgung mit einer 3 Volt Lithium-Knopfzelle,
Typ CR 2032 bestückt.
Hinweis:
Die Lebensdauer einer Batterie ist neben dem Nutzungs-
profil auch von vielen anderen Faktoren abhängig und
kann daher sehr unterschiedlich sein.
1. Öffnen Sie den Deckel (3) des Batteriefachs (3d) in-
dem Sie ihn gegen den Uhrzeigersinn drehen (A).
2. Legen Sie die Batterie mit ihrem Pluskontakt nach
oben zeigend ein (B).
3. Schließen Sie den Deckel wieder. Drehen Sie ihn dazu
im Uhrzeigersinn, bis Sie den durch die Gummi-Ringdich-
tung (3e) verursachten Widerstand fühlen.
Wichtig:
Wenden Sie beim Schließen des Deckels keine
Gewalt an!
A B
Magnus komplett.indb 4 17.08.2015 08:41:33
5
ANZEIGE DER BATTERIE-KAPAZITÄT
Zur Anzeige dient der
Leuchtpunkt des Leucht-
Absehens. Die Anzeige
erfolgt während der ers-
ten 10s nach dem Ein-
schalten:
Kapazität Anzeige
Ausreichend Leuchtpunkt leuchtet dauerhaft
Niedrig Leuchtpunkt erlischt
regelmäßig kurzzeitig
Schwach Leuchtpunkt blinkt gleichmäßig
Hinweis:
• Die Anzeige wird nach einer automatischen Aus- und
wieder Einschaltung des Leucht-Absehens (s.
S. 12) nicht wiederholt.
• In der Werkseinstellung, d.h. bei Auslieferung des
Zielfernrohres, ist diese Anzeige eingeschaltet, Sie
können sie aber auch ausschalten (s. u.).
Ein- und Ausschalten der Kapazitätsanzeige
1. Stellen Sie den Dreh-/Wippschalter (3) auf Tagbetrieb
(„Sonne“-Stellung) (a).
2. Stellen Sie mit dem Dreh-/Wippschalter die geringste
Helligkeit ein (s. S. 11) und lassen Sie ihn anschlie-
ßend wieder los (b).
3. Halten Sie die linke Seite des Dreh-/Wippschalters
mindestens 20s gedrückt fest (c).
• Zur Bestätigung Ihrer Einstellung blinkt der Leucht-
punkt (während der ersten 10s nach dem Einstell-
vorgang):
Zustand Anzeige
Ein Leuchtpunkt blinkt regelmäßig kurz
auf
Aus Leuchtpunkt blinkt regelmäßig
2x kurz auf
Hinweis:
Ihre Einstellung bleibt sowohl nach dem manuellen Aus-
und Einschalten des Leucht-Absehens, als auch nach
einem Batteriewechsel erhalten.
a
b c
Magnus komplett.indb 5 17.08.2015 08:41:34
6
MONTAGE
Die erste Voraussetzung für eine perfekte Trefferlage ist
eine fachgerechte Montage des Zielfernrohres auf der
Waffe. Hierzu gibt es im Fachhandel eine Vielzahl von
unterschiedlichen Montageteilen.
Wir empfehlen, für die Montage eine Fachwerkstatt zu
beauftragen, und dort unbedingt auf einen fluchtenden
und spannungsfreien Aufbau achten zu lassen. Zur Mon-
tage sollte die Werkstatt nur hochwertige Bauteile von
renommierten Herstellern verwenden, die den qualita-
tiven Eigenschaften Ihres Leica Magnus Zielfernrohres
gerecht werden.
DIOPTRIEN-AUSGLEICH
Durch den Dioptrien-Ausgleich stellen Sie Ihr Leica Ma-
gnus Zielfernrohr auf Ihr Auge ein. Drehen Sie dazu die
Augenmuschel (1a) des Okulars (1) so, dass Sie das Abse-
hen in höchster Schärfe sehen können. Für eine möglichst
genaue Einstellung empfiehlt es sich dabei
- das Zielfernrohr auf einen neutralen, hellen Hintergrund
zu richten, und
- zunächst die Augenmuschel ganz nach links zu drehen,
um anschließend von dieser Stellung aus nach rechts
zurückzudrehen und die beste Schärfe für das Absehen
zu finden. Diese Vorgehensweise berücksichtigt die Ak-
kommodationsfähigkeit des Auges und sichert so eine
optimale Einstellung.
Magnus komplett.indb 6 17.08.2015 08:41:34
7
WECHSELN DER VERGRÖSSERUNG
Durch Drehen des Stellrings (8) verändern Sie die Ver-
größerung – nach rechts für geringere Vergrößerungen,
nach links für stärkere. Der Nocken (8a) erleichtert die
Orientierung in der Dunkelheit: Zeigt er nach oben, ist
jeweils etwa die mittlere Vergrößerung eingestellt.
PARALLAXE-AUSGLEICH
Leica Magnus Zielfernrohre bis zu einer Maximal-Vergrö-
ßerung von 12-fach sind auf eine Entfernung von 100m
parallaxefrei abgestimmt, so dass Sie gleichzeitig das
Absehen und ein Ziel in dieser Entfernung perfekt scharf
sehen können.
Etwaige Abweichungen der Treffpunktlage bei nicht ge-
nau zentrischer Lage des Auges sind in aller Regel ver-
nachlässigbar.
Bei höheren Vergrößerungen müssen die Abweichungen
jedoch berücksichtigt werden. Daher besitzen Zielfern-
rohre mit Vergrößerungsbereichen, die über 12-fach hin-
ausgehen, einen Parallaxe-Ausgleich.
Drehen Sie dazu am entsprechenden Stellring (9) des
Turms links am Tubus, bis Sie das Bild des Ziels absolut
scharf sehen können. Es empfiehlt sich zwecks mög-
lichst genauer Einstellung, dabei stets die stärkste Ver-
größerung zu verwenden. Eine optimale Einstellung ist
dann erreicht, wenn sich Absehen und Bild nicht gegen-
einander bewegen, wenn Sie die Position des Auges ge-
genüber dem Okular verändern.
Magnus komplett.indb 7 17.08.2015 08:41:34
8
HÖHEN- UND SEITENJUSTIERUNG
1. Montieren sie das Zielfernrohr auf die Waffe (s. S. 6).
2. Richten Sie Absehen und Laufachse der Waffe
mit den beiden Verstelltürmen auf die von ihnen
gewählte Einschussentfernung aufeinander aus
(z. B. 100m). Dies kann z. B. mit einer Laserpatrone
erfolgen.
3. Geben Sie zur Feststellung der Treffpunkt-Lage einen
Probeschuss ab. Hierbei ist es von Vorteil, die Waffe
auf einem Anschießgestell oder mit Sandsäcken in ih-
rer Lage zu fixieren.
4. Justieren Sie - ohne die Lage der Waffe zu verändern -
das Absehen mit den beiden Verstelltürmen (4/5) ex-
akt auf den Treffpunkt.
Dies erfolgt an den zwei Verstelltürmen – (4) für die
Höhe, (5) für die Seite, und für beide auf gleiche Art:
5. Schrauben Sie dazu zunächst die Abdeckkappe
(4c/5c) gegen den Uhrzeigersinn ab. Bei entfernter
Kappe wird das Rändelrad (4d/5d) sichtbar, sowie der
dazugehörige Skalenring (4e/5e), und der entspre-
chende Indexpunkt (4a/5a).
6. Anschließend nehmen Sie die Einstellungen mit dem
Rändelrad vor.
Die Rändel besitzen eine sehr feine Rastung, ein Klick
entspricht einer Abweichung der Treffpunktlage um
ca.10mm/ 1
/3 MOA auf 100m (ohne jede Berück-
sichtigung ballistischer Bedingungen).
Magnus komplett.indb 8 17.08.2015 08:41:34
9
Liegt die Treffpunktlage hoch (Hochschuss), wird dazu
das Rändelrad (4d) gegen den Uhrzeigersinn gedreht,
bei tiefer Treffpunktlage (Tiefschuss) im Uhrzeigersinn.
Analog dazu bei seitlichen Korrekturen:
Liegt die Treffpunktlage rechts (Rechtsschuss), wird dazu
das Rändelrad (5d) gegen den Uhrzeigersinn gedreht,
bei Treffpunktlage links (Linksschuss) im Uhrzeigersinn.
Magnus komplett.indb 9 17.08.2015 08:41:38
10
„NULLEN“ DER TURMSKALEN
(Vorgehensweise bei beiden Türmen gleich)
Der Vorgang erfolgt zunächst wie im vorangegangenen
Abschnitt beschrieben (1./2.).
Dann wird,
1. während das Rändelrad (4d/5d) gehalten wird, mit
einer Münze die Klemmschraube (4b/5b) gelöst (A),
und
2. der Skalenring (4e/5e) so gedreht, dass die Null dem
Indexpunkt (4a/5a) gegenüber steht (B).
3. Schließlich wird diese Einstellung, während das Rän-
delrad (4d/5d) gehalten wird, durch festziehen der
Klemmschraube fixiert.
Nachdem Sie dies mit beiden Skalenringen durchge-
führt haben, können Sie die Grundeinstellung auf die
Einschussentfernung nach jedweder Verstellung durch
Zurückstellen auf die 0-Positionen immer wieder sicher
vornehmen, ohne sich etwas merken oder notieren zu
müssen.
A
B
Magnus komplett.indb 10 17.08.2015 08:41:39
11
ANWENDEN DES LEUCHT-ABSEHENS
Das Leucht-Element der Leica Magnus Zielfernrohre
besteht bei allen Absehen-Typen aus einem mittigen
Leuchtpunkt.
Hinweis:
Details zu den verschiedenen Absehen-Typen finden
Sie unter: http://de.leica-camera.com/sport_optics/
rifle_scopes_magnus/Absehen/
Mit dem Dreh-/Wippschalter (3) können Sie zwischen
drei, durch entsprechende Markierungen gekennzeich-
nete Betriebsarten wählen:
Mittige Schalterstellung = Aus
„Mond“-Stellung = Nachtbetrieb
„Sonne“-Stellung = Tagbetrieb
Tag- und Nachtbetrieb unterscheiden sich durch die Hel-
ligkeits-Einstellbereiche für den Leuchtpunkt. Bei beiden
Betriebsarten können Sie die Helligkeit in 60 Stufen den
Einsatzbedingungen, bzw. Ihren Wünschen anpassen.
Auch dazu dient der Dreh-/Wippschalter: Drücken auf
die linke Seite verringert die Helligkeit, drücken auf die
rechte Seite erhöht sie. Einfaches Drücken bewirkt eine
Veränderung um eine Stufe, gedrückt Halten zu einer
kontinuierlichen Veränderung
Hinweis:
Ihre Einstellungen bleiben auch nach dem Aus- und Ein-
schalten erhalten.
-
+
Magnus komplett.indb 11 17.08.2015 08:41:39
12
ABSCHALT-AUTOMATIK
Unabhängig von der gewählten Betriebsart schaltet sich
das Leucht-Absehen zur Schonung der Batterie in ver-
schiedenen Situationen selbsttätig ab, die in der jagdli-
chen Praxis dem Nichtgebrauch entsprechen:
- wenn das Zielfernrohr länger als 3 Minuten nicht be-
wegt wird (beispielsweise beim Ansitz)
- wenn das Zielfernrohr um mehr als 45° zur Seite ge-
kippt wird (beispielsweise wenn die Waffe vorüberge-
hend abgelegt wird)
- wenn das Zielfernrohr um mehr als ca. 80° nach oben
oder ca. 65° nach unten geneigt wird, bzw. senkrecht
steht (beispielsweise beim Schultern der Waffe) Sobald
diese Bedingungen nicht mehr gegeben sind, wird der
Leuchtpunkt automatisch mit der zuvor eingestellten
Helligkeit wieder eingeschaltet.
PFLEGE/REINIGUNG
Eine besondere Pflege Ihres Leica Magnus Zielfernroh-
res ist nicht notwendig. Grobe Schmutzteilchen, wie z.
B. Sand sollten mit einem Haarpinsel entfernt oder weg-
geblasen werden. Fingerabdrücke u. ä. auf Objektiv- und
Okularlinsen können mit einem feuchten Tuch vorgerei-
nigt und mit einem weichen, sauberen Leder oder staub-
freien Tuch abgewischt werden. Üben Sie auch beim
Abwischen stark verschmutzter Linsenoberflächen kei-
nen großen Druck aus. Die Vergütung ist zwar hoch ab-
riebfest, durch Sand oder Salzkristalle kann sie dennoch
beschädigt werden.
Das Gehäuse sollte nur mit einem feuchten Leder gerei-
nigt werden. Bei Verwendung von trockenen Tüchern be-
steht die Gefahr der statischen Aufladung.
Alkohol und andere chemische Lösungen dürfen nicht
zur Reinigung der Optik oder des Gehäuses verwendet
werden.
Magnus komplett.indb 12 17.08.2015 08:41:39
13
Wichtig:
• Achten Sie darauf, Ihr Zielfernrohr vor Stößen zu
schützen.
• Lagern Sie Ihr Zielfernrohr am einem gut belüfteten,
trockenen und kühlen Ort, insbesondere um in feuch-
ten klimatischen Verhältnissen Pilzbefall zu vermeiden.
• Leica Zielfernrohre sind bis 4m Wassertiefe (0,4 bar)
dicht. Voraussetzung dafür ist eine einwandfreie Ab-
dichtung, die dann gewährleistet ist, wenn die Abdeck-
kappen von Höhen- und Seitenverstellung, sowie ggf.
der Batteriefach-Deckel (3/4c/5c) fest gegen die je-
weiligen Dichtungen (3e/4f/5f) aufgeschraubt sind.
Achten Sie darauf, dass diese Dichtungen unbeschä-
digt sind. Sind sie beschädigt, sollten sie unbedingt
ausgewechselt werden.
• Versuchen Sie nicht, das Gerät zu demontieren. Re-
paraturen sollten ausschließlich von Leica Customer
Care Einrichtungen durchgeführt werden.
• Jedes Leica Zielfernrohr trägt außer der Typbezeich-
nung seine „persönliche“ Fabrikationsnummer. No-
tieren Sie sich diese Nummer zur Sicherheit in Ihren
Unterlagen.
Magnus komplett.indb 13 17.08.2015 08:41:39
14
ERSATZTEILE
Falls sie einmal Ersatzteile für Ihr Leica Zielfernrohr be-
nötigen sollten, wie z.B. Schraubdeckel, Dichtungen
oder Abdeckkappen, wenden Sie sich bitte an unseren
Kundendienst (Adresse s. S. 17) oder Ihre Leica Landes-
vertretung (Adressen siehe Garantiekarte).
Magnus komplett.indb 14 17.08.2015 08:41:39
15
TECHNISCHE DATEN
Leica Magnus-Modelle 1 – 6.31 x 242 1.5 – 101 x 422 1.8 – 12 x 50 2.4 – 161 x 562
Austrittspupille 12,4 – 3,8mm 12,4 – 4,2mm 12,6 - 4,2mm 12,4 – 3,5mm
Sehfeld bei max. / min.
Vergrößerung (m/100m)
6,5 /43,2m 4,1 / 26m 3,5/22,5m 2,6 /17m
Parallaxeneinstellung 100m 100m 100m 50m - ∞, einstellbar
Austrittspupillen-Längsabstand 90mm
Vergütung Aqua Dura™
Transmissionsgrad TD/TN ≥91%
Dioptrienausgleich – 4/+3 dpt.
Absehen-Verstellweg pro Click ca. 10mm (1/3 MOA) pro Click / 100m
Verstellbereich Treffpunktlage 200 x 140cm 150 x 140cm 150 x 140cm 150 x 140cm
Mittelrohrdurchmesser 30mm, Zeiss-Innenschiene
Filtergewinde, objektivseitig - M46 x 0,75mm M52 x 0,75mm M58 x 0,75mm
Wasserdichtigkeit bis 4m, Stickstoff-gefüllt
Gehäusematerial Aluminium
Absehen-Beleuchtung Leuchtpunkt, ein- und ausschaltbar, wahlweise Tag-, bzw. Nachtbetrieb,
Helligkeit jeweils in 60 Stufen einstellbar, automatisches Ab- und Einschalten
Länge 272mm 317mm 335mm 360mm
Gewicht 570g 620g 710g 785g
1
Vergrößerung 2
Objektivdurchmesser
Magnus komplett.indb 15 17.08.2015 08:41:39
16
LEICA PRODUCT SUPPORT
Anwendungstechnische Fragen zum Leica Programm be-
antwortet Ihnen, schriftlich, telefonisch, per Fax oder per
e-mail der Leica Infodienst:
Leica Camera AG
Product Support / Software Support
Am Leitz-Park 5
D-35578 Wetzlar
Tel.: +49(0)6441-2080-111 /-108
Fax: +49(0)6441-2080-490
info@leica-camera.com /
software-support@leica-camera.com
Magnus komplett.indb 16 17.08.2015 08:41:40
17
LEICA CUSTOMER CARE
Für die Wartung Ihrer Leica Ausrüstung sowie in Scha-
densfällen steht Ihnen die Customer Care der Leica Ca-
mera AG oder der Reparatur-Service einer Leica Landes-
vertretung zur Verfügung (Adressenliste siehe
Garantiekarte).
Leica Camera AG
Customer Care
Am Leitz-Park 5
D-35578 Wetzlar
Tel.: +49(0)6441-2080-189
Fax: +49(0)6441-2080-339
customer.care@leica-camera.com
Magnus komplett.indb 17 17.08.2015 08:41:40
18
Magnus komplett.indb 18 17.08.2015 08:41:40
19
FOREWORD
Dear Customer,
Throughout the world, the name Leica stands for premi-
um quality, accurate precision mechanics, optimum reli-
ability and long service life.
We wish you a lot of enjoyment and every success with
your new Leica Magnus telescopic sight.
Your Leica Magnus telescopic sight is equipped with an
outstanding optical system, which delivers a clear, bright
and brilliant image even under the toughest conditions,
ensuring a reliable reticule at all times. It is also easy to
operate and functional.
To enable you to make the best possible use of this high
performance telescopic sight's features, we recommend
that you read these instructions before use.
CONTENTS
Foreword ......................................................................... 19
Designation of parts......................................................... 20
Package contents ............................................................ 20
Disposal of electrical and electronic equipment................ 21
Inserting and changing the batteries................................. 22
Battery capacity display ................................................... 23
Mounting ......................................................................... 24
Diopter compensation...................................................... 24
Changing the magnification.............................................. 25
Parallax compensation ..................................................... 25
Elevation and lateral adjustment....................................... 26
"Zeroing" the tower scales................................................ 28
Using the illuminated reticle............................................. 29
Automatic shutdown ........................................................ 30
Maintenance / cleaning................................................... 30
Spare parts...................................................................... 32
Technical data ................................................................. 33
Leica Product Support...................................................... 34
Leica Customer Care ....................................................... 35Attention:
As with binoculars, avoid looking directly at bright sources
of light when using your Leica Magnus telescopic sight, to
prevent eye injury.
Magnus komplett.indb 19 17.08.2015 08:41:40
20
DESIGNATION OF PARTS
1. Eyepiece with
a. Rotating eye cup
2. Index for diopter setting
3. Battery compartment cover / illuminated reticle
rotary rocker switch with
a. Mode settings
b. Index point for modes
c. Symbols for brightness adjustment direction
d. Battery compartment
e. Sealing ring
4. Elevation adjustment tower
5. Lateral adjustment tower
6. Lens
7. Filter thread
8. Magnification dial with
a. Cam
9. Parallax dial with
a. Scale
4./5. Elevation/lateral adjustment tower
(cover unscrewed) with
a. Index
b. Adjusting screw
c. Cover
d. Knurled dial
e. Scale
f. Sealing ring
PACKAGE CONTENTS
- Telescopic sight
- 1 lithium button cell, 3V, type CR 2032
- Protective cover for eyepiece/lens
- Instructions
- Warranty card
- Cleaning cloth
- Cover for mounting rail
(models with corresponding equipment only)
Magnus komplett.indb 20 17.08.2015 08:41:40
21
DISPOSAL OF ELECTRICAL AND
ELECTRONIC EQUIPMENT
(Applies within theEC,andforotherEuropeancoun-
tries with segregatedwastecollectionsystems)
This device contains electrical and/or electronic compo-
nents and should therefore not be disposed of in general
household waste!
Instead it should be disposed of at a recycling collec-
tion point provided by the local authority. This costs you
nothing.
If the device itself contains removable batteries or re-
chargeable batteries, these should first be removed and,
if necessary, properly disposed of (refer to the specifica-
tions in the manual for your device).
Further information on this point is available at your local
administration, your local waste collection company, or
in the store where you purchased this device.
Magnus komplett.indb 21 17.08.2015 08:41:40
22
INSERTING AND CHANGING
THE BATTERY
Leica telescopic sights with illuminated reticle are fit-
ted with a 3 Volt lithium button cell, type CR 2032 to
save energy.
Note:
The life of a battery depends not just on the usage pro-
file but on many other factors and can therefore differ
widely.
1. Open the cover (3) on the battery compartment (3d)
by turning it anticlockwise (A).
2. Insert the battery with the positive contact pointing
upwards (B).
3. Close the cover again. To do this, turn it clockwise until
you feel resistance from the rubber sealing ring (3e).
Important:
Do not exert force when closing the
cover.
A B
Magnus komplett.indb 22 17.08.2015 08:41:40
23
BATTERY CAPACITY DISPLAY
The illuminated dot from
the reticle is used for the
display. The display ap-
pears for the first 10s af-
ter turning on:
Capacity Display
Sufficient Illuminated dot lit continuously
Low Illuminated dot goes out
regularly for a short time
Weak Illuminated point flashes evenly
Note:
• After the illuminated reticle is automatically turned off
and back on (see p. 30), the display is not repeated.
• With the factory default settings, i.e. when the
telescopic sight is delivered, this display is turned on.
However, you can turn it off (see below).
Turning the capacity display on and off
1. Set the rotary rocker switch (3) to day mode ("sun"
setting) (a).
2. Use the rotary rocker switch to set the minimum
brightness (see p. 29) and then release it (b).
3. Hold down the left of the rotary rocker switch for at
least 20s (c).
• The illuminated dot flashes to confirm your setting
(for the first 10s after adjustment):
Status Display
On Illuminated dot briefly lights up reg-
ularly
Off Illuminated dot briefly lights up
twice regularly
Note:
Your setting is retained both after manually turning the
illuminated reticle off and on, and after changing the
battery.
a
b c
Magnus komplett.indb 23 17.08.2015 08:41:40
24
MOUNTING
The first requirement for perfect targeting is proper
mounting of the telescopic sight on the weapon. There
are a variety of different fittings available in specialist re-
tailers for this purpose.
We recommend consulting a specialist workshop for ad-
vice on mounting, making sure that they achieve a flush
and stress-free construction. The workshop should only
use high quality components from well-known manufac-
turers for mounting, which offer the same quality as your
Leica Magnus telescopic sight.
DIOPTER COMPENSATION
The diopter compensation allows you to adjust your Leica
Magnus telescopic sight to your eye. To do this, turn the
eye cup (1a) on the eyepiece (1) so that you can see the
reticle with the maximum sharpness. To achieve the most
accurate setting possible, we recommend
- pointing the telescopic sight at a neutral, light back-
ground, and
- first turning the eye cup all the way to the left, so that
you can then turn it back from this position to the right
until you find the best sharpness for the reticle. This
method takes into account the accommodative capacity
of the eye, thus ensuring an optimum setting.
Magnus komplett.indb 24 17.08.2015 08:41:40
25
CHANGING THE MAGNIFICATION
To change the magnification, turn the dial (8) - to the
right to reduce the magnification and to the left to in-
crease it. The cam (8a) improves orientation in darkness:
If it is pointing upwards, approximately the middle mag-
nification is set.
PARALLAX COMPENSATION
Leica Magnus telescopic sights up to a maximum mag-
nification of 12x are calibrated to a range of 100m with-
out parallax, which means that you can simultaneously
see the reticle and a target with perfect sharpness at
this range.
Any variations in the point of impact due to the eye be-
ing not precisely centered are usually negligible.
At higher magnifications, however, these variations need
to be taken into account. Therefore, telescopic sights
with magnification ranges above 12x feature parallax
compensation.
To use this feature, on the corresponding dial (9) for
the tower on the left of the barrel until you can see the
target with absolute sharpness. To ensure that the set-
ting is as accurate as possible, we recommend always
using the strongest magnification. An optimum setting
is achieved when the reticle and image do not move
against each other when you change the position of the
eye relative to the eyepiece.
Magnus komplett.indb 25 17.08.2015 08:41:40
26
ELEVATION AND LATERAL ADJUSTMENT
1. Mount the telescopic sight on the weapon
(see p. 24).
2. Point the reticle and the weapon's running axis
with the two adjusting towers at the selected zero-
ing range
(e.g. 100m). This can be done using a laser cartridge,
for example.
3. Fire a test shot to establish the point of impact. It is
beneficial to fix the weapon in position on a shooting
rest or sandbags.
4. Without changing the position of the weapon, adjust
the reticle using the two adjusting towers (4/5) pre-
cisely to the target.
This is done using the two adjusting towers - (4) for the
elevation, (5) for lateral, and in the same way in both
cases:
5. First unscrew the cover (4c/5c) anticlockwise. When
the cover is removed, the knurled dial (4d/5d) is vis-
ible, along with the associated scale ring (4e/5e) and
the corresponding index point (4a/5a).
6. Then make the settings with the knurled dial.
The dial has very fine graduations, and a click corre-
sponds to a variation in the point of impact of around
10mm/ 1
/3 MOA at 100m (not taking account of bal-
listic conditions).
Magnus komplett.indb 26 17.08.2015 08:41:40
27
If the point of impact is high (high shot), turn the knurled
dial (4d) anticlockwise,
or turn clockwise for a low point of impact (low shot).
Make the lateral adjustments in the same way:
If the point of impact is right (right shot), turn the
knurled dial (5d) anticlockwise,
or turn clockwise if the point of impact is left (left shot).
Magnus komplett.indb 27 17.08.2015 08:41:43
28
"ZEROING" THE TOWER SCALES
(same procedure for both towers)
The process is initially the same as that described in the
previous section (points 1 and 2).
Then,
1. While holding the knurled dial (4d/5d), unscrew the
adjusting screw (4b/5b) with a coin (A), and
2. Turn the scale dial (4e/5e) until the zero is lined up
with the index point (4a/5a) (B).
3. Finally, the setting is fixed by tightening the adjusting
screw while holding the knurled dial (4d/5d)..
Once you have done this for both scale dials, you can
reliably make the initial setting at the zeroing range af-
ter any kind of adjustment by returning to the 0 posi-
tions, without the need to remember or make a note of
anything.
A
B
Magnus komplett.indb 28 17.08.2015 08:41:44
29
USING THE ILLUMINATED RETICLE
The illuminated element of Leica Magnus telescopic sights
consists of a central illuminated dot for all reticle types.
Note:
Details of the different reticle types can be found at:
http://de.leica-camera.com/sport_optics/rifle_scopes_
magnus/Absehen/
You can use the rotary rocker switch (3) to choose be-
tween three modes, indicated by corresponding mark-
ings:
Central switch position = Off
"Moon" setting = Night mode
"Sun" setting = Day mode
Day and night mode differ in terms of the brightness ad-
justing ranges for the illuminated dot. In both modes,
you can adjust the brightness in 60 increments to the
conditions or use or your own preferences.
This is also done using the rotary rocker switch: Pressing
to the left reduces the brightness, pressing to the right
increases it. Press once for a single increment or hold
down to increment continuously.
Note:
Your settings are retained even after turning off and on
again.
-
+
Magnus komplett.indb 29 17.08.2015 08:41:44
30
AUTOMATIC SHUTDOWN
Regardless of the selected mode, the illuminated reticle
is deactivated automatically to conserve the battery in
various situations, which correspond to not being used
when hunting:
- If the telescopic sight is not moved for longer than 3
minutes (for example in a hide)
- If the telescopic sight is tilted to the side by more than
45° (for example when the weapon is laid down tem-
porarily)
- If the telescopic sight is tilted more than around 80°
upwards or around 65° downwards or is vertical (for
example when shouldering the weapon). As soon as
these conditions no longer apply, the illuminated dot is
reactivated with the brightness set previously.
MAINTENANCE / CLEANING
Your Leica Magnus telescopic sight does not require any
special maintenance. Coarse dirt particles, such as sand,
should be removed with a fine hair brush or blown away.
Marks such as fingerprints on the front lens and eye-
piece lenses can be cleaned with a damp cloth and then
wiped off with a soft, clean leather or dust-free cloth. Do
not exert heavy pressure when wiping highly soiled lens
surfaces. Although the coating is highly abrasion resist-
ant, it can be damaged by sand or salt crystals.
The housing should only be cleaned with a moist leather
cloth. Using dry cloths brings a risk of static charge.
Alcohol and other chemical solutions must not be used
to clean the optical system or the housing.
Magnus komplett.indb 30 17.08.2015 08:41:44
31
Important:
• Make sure you protect your telescopic sight from im-
pacts.
• Store your telescopic sight in a well ventilated, dry and
cool location, particularly to prevent the formation of
fungus in humid climates.
• Leica telescopic sights are water tight to a depth of
4m (0.4 bar). This is the case if the seals are perfect,
which is guaranteed if the covers on the elevation and
lateral adjustment and the battery compartment cover
(3/4c/5c) are screwed tightly against the respec-
tive seals (3e/4f/5f). Make sure that these seals are
undamaged. If they are damaged, they should be re-
placed immediately.
• Do not attempt to dismantle the product. Repairs
should be carried out exclusively by Leica Customer
Care centers.
• In addition to the type designation, every Leica tel-
escopic sight has its “personal” serial number. Note
this number in your documentation for security.
Magnus komplett.indb 31 17.08.2015 08:41:44
32
SPARE PARTS
If you should require any spare parts for your Leica tel-
escopic sight, e.g. screw-on cap, seals or covers, please
contact our Customer Care department (see p. 35 for
address) or the Leica office in your country (see warran-
ty card for addresses).
Magnus komplett.indb 32 17.08.2015 08:41:44
33
TECHNICAL DATA
Leica Magnus models 1 – 6.31 x 242 1.5 – 101 x 422 1.8 – 12 x 50 2.4 – 161 x 562
Exit pupil 12.4 – 3.8mm 12.4 – 4.2mm 12.6 - 4.2mm 12.4 – 3.5mm
Field of vision at max./min.
Magnification (m/100m)
6.5 /43.2m 4.1 / 26m 3.5/22.5m 2.6 /17m
Parallax adjustment 100m 100m 100m 50m - ∞, adjustable
Exit pupil longitudinal distance 90mm
Coating Aqua Dura™
Transmission factor TD/TN ≥91%
Diopter compensation – 4/+3 dpt.
Reticle adjust. distance per click Approx. 10mm (1
/3 MOA) per click / 100m
Point of impact adjustment range 200 x 140cm 150 x 140cm 150 x 140cm 150 x 140cm
Center tube diameter 30mm, Zeiss internal rail
Filter thread, lens side - M46 x 0.75mm M52 x 0.75mm M58 x 0.75mm
Water tightness To 4m, nitrogen filled
Housing material Aluminum
Reticle illumination Illuminated dot, turned on and off, choice of day and night mode,
brightness adjustable in 60 increments for each, automatic shutdown and activation
Length 272mm 317mm 335mm 360mm
Weight 570g 620g 710g 785g
1 Magnification 2 Lens diameter
Magnus komplett.indb 33 17.08.2015 08:41:44
34
LEICA PRODUCT SUPPORT
The Leica information service can provide you with an
answer to any technical application questions relating
to the Leica range either in writing, on the telephone or
by e-mail.
Leica Camera AG
Product Support / Software Support
Am Leitz-Park 5
D-35578 Wetzlar
Tel.: +49(0)6441-2080-111 /-108
Fax: +49(0)6441-2080-490
info@leica-camera.com /
software-support@leica-camera.com
Magnus komplett.indb 34 17.08.2015 08:41:44
35
LEICA CUSTOMER CARE
Leica AG’s customer care centre, or the repair service
of the Leica national offices, is available to assist you in
maintaining your Leica equipment or in case of damage.
Leica Camera AG
Customer Care
Am Leitz-Park 5
D-35578 Wetzlar
Tel.: +49(0)6441-2080-189
Fax: +49(0)6441-2080-339
customer.care@leica-camera.com
Magnus komplett.indb 35 17.08.2015 08:41:44
36
Magnus komplett.indb 36 17.08.2015 08:41:44
37
AVANT-PROPOS
Chère cliente, cher client,
Partout dans le monde, le nom de Leica est synonyme
de qualité optimale, de haute précision, de grande fiabi-
lité et de durabilité.
Nous espérons que vous prendrez grand plaisir à utiliser
votre nouvelle lunette de visée Leica Magnus.
La lunette de visée Leica Magnus est équipée d'une
optique exceptionnelle qui assure une image claire et
nette, même dans les conditions les plus difficiles, afin
de toujours garantir un résultat sûr. En outre, elle est
simple d'emploi et fonctionnelle.
Afin que vous puissiez exploiter toutes les fonctionnali-
tés de cette lunette de visée hautes performances, nous
vous recommandons de lire d'abord ce mode d'emploi.
TABLE DES MATIÈRES
Avant-propos ................................................................... 36
Description des pièces..................................................... 38
Livraison.......................................................................... 38
Elimination des appareils électriques et électroniques ...... 39
Insertion et changement des piles.................................... 40
Affichage du niveau de charge des piles ........................... 41
Montage.......................................................................... 42
Compensation dioptrique................................................. 42
Modification du grossissement......................................... 43
Correction de parallaxe.................................................... 43
Réglage en hauteur et latéral............................................ 44
"Réinitialisation" des échelles de tourelle.......................... 46
Utilisation du réticule lumineux......................................... 47
Mise hors tension automatique ........................................ 48
Entretien/nettoyage ........................................................ 48
Pièces de rechange.......................................................... 50
Caractéristiques techniques............................................. 51
Leica Product Support...................................................... 52
Leica Customer Care ....................................................... 53
Attention:
Eviter, comme avec des jumelles, de regarder avec la
lunette de visée Leica Magnus directement dans des
sources de lumière claires afin d'écarter tout risque de
lésion oculaire.
Magnus komplett.indb 37 17.08.2015 08:41:44
38
DESCRIPTION DES PIÈCES
1. Oculaire avec
a. Œillère rotative
2. Index pour le réglage dioptrique
3. Couvercle du compartiment à piles / Commuta-
teur à bascule/rotatif du réticule lumineux avec
a. Positions des modes de fonctionnement
b. Point d'index pour les modes de fonctionne-
ment
c. Symboles de réglage de la luminosité
d. Compartiment à piles
e. Joint d'étanchéité
4. Tourelle de réglage en hauteur
5. Tourelle de réglage latéral
6. Objectif
7. Filetage du filtre
8. Bague de réglage du grossissement avec
a. Ergot
9. Bague de réglage de parallaxe avec
a. Echelle
4./5. Tourelle de réglage latéral/en hauteur
(capuchon de protection vissé) avec
a. Index
b. Vis de fixation
c. Capuchon de protection
d. Molette
e. Echelle
f. Joint d'étanchéité
EQUIPEMENT FOURNI
- Lunette de visée
- 1 pile ronde lithium 3 V type CR 2032
- Capuchon de protection pour oculaire/objectif
- Mode d'emploi
- Carte de garantie
- Lingette de nettoyage
- Cache pour rails de montage
(uniquement sur les modèles équipés en conséquence)
Magnus komplett.indb 38 17.08.2015 08:41:44
39
ELIMINATIONDESAPPAREILS
ÉLECTRIQUESETÉLECTRONIQUES
(applicable à l'UE ainsi qu'aux autres pays
européens avec des systèmes de collecte
distincts)
Cet appareil contient des composants électriques et/
ou électroniques et ne peut donc pas être jeté dans les
ordures ménagères ordinaires!
Il doit être déposé à un point de collecte municipal adap-
té afin d'être recyclé. Ce dépôt est gratuit.
Si l'appareil contient des piles ou des accumulateurs
remplaçables, ils doivent être préalablement retirés et,
le cas échéant, éliminés séparément conformément aux
règlements en vigueur (à cet égard, voir les instructions
correspondantes dans le mode d'emploi de l'appareil).
D'autres informations à ce sujet sont disponibles auprès
de l'administration municipale, de la société de traite-
ment des déchets ou du magasin dans lequel vous avez
acheté cet appareil.
Magnus komplett.indb 39 17.08.2015 08:41:44
40
INSERTION ET REMPLACEMENT
DE LA PILE
Les lunettes de visée Leica avec réticule lumineux sont
alimentées par une pile ronde lithium 3 V, type CR 2032.
Remarque:
L'autonomie d'une pile dépend du profil d'utilisation,
ainsi que de nombreux autres facteurs, et peut donc être
très variable. 1. Ouvrez le couvercle (3) du compartiment des piles
(3d) en le faisant tourner dans le sens inverse des ai-
guilles d'une montre (A).
2. Insérez la pile avec la borne positive orientée vers le
haut (B).
3. Replacez le couvercle du compartiment. Faites-le tourner
dans le sens des aiguilles d'une montre jusqu'à ce que
vous sentiez une résistance du joint en caoutchouc (3e).
Important:
Ne forcez pas lorsque vous refermez le couvercle!
A B
Magnus komplett.indb 40 17.08.2015 08:41:45
41
AFFICHAGEDUNIVEAUDECHARGEDELAPILE
Le point lumineux du
réticule lumineux sert à
l'affichage. L'affichage
s'effectue dans les 10s
suivant la mise sous ten-
sion:
Affichage de l'autonomie
Suffisante Le point lumineux reste allumé
Réduite Le point lumineux s'éteint
brièvement à intervalles réguliers
Faible Lepointlumineuxclignoterégulièrement
Remarque:
• Après une désactivation et une réactivation automa-
tiques du réticule lumineux (voir p. 48), l'affichage
n'est pas répété.
• Par défaut, c'est-à-dire à la livraison des lunettes de
visée, cet affichage est activé, mais vous pouvez le
désactiver (voir ci-dessous).
Activation et désactivation de l'affichage de l'auto-
nomie
1. Placez le commutateur à bascule/rotatif (3) en mode
Jour (position "Soleil") (a).
2. A l'aide du commutateur à bascule/rotatif, sélection-
nez la luminosité la plus faible (voir p. 47) et relâchez
le commutateur (b).
3. Maintenez le côté gauche du commutateur à bas-
cule/rotatif enfoncé pendant au moins 20s (c).
•Pourconfirmerleréglage,lepointlumineuxclignote(pendant
les10premièressecondessuivantleréglage):
Etat Affichage
Activé Le point lumineux clignote briève-
ment et régulièrement
Désactivé Le point lumineux clignote briève-
ment 2x et régulièrement
Remarque:
Votre réglage est conservé après la désactivation
et l'activation manuelles du réticule lumineux, ainsi
qu'après le remplacement de la pile.
a
b c
Magnus komplett.indb 41 17.08.2015 08:41:45
42
MONTAGE
Pour une visée parfaite, il est avant tout essentiel de
monter correctement la lunette de visée sur l'arme. Pour
ce faire, il existe un vaste éventail de pièces de montage
dans le commerce spécialisé.
Nous recommandons de faire appel à un atelier spécia-
lisé pour le montage et d'être attentif à un bon aligne-
ment et à une absence de tension. Pour le montage,
nous conseillons de n'utiliser que des pièces de qualité
provenant de fabricants renommés, appropriées aux ca-
ractéristiques de la lunette de visée Leica Magnus.
COMPENSATION DIOPTRIQUE
Pour la compensation dioptrique, placez la lunette de
visée Leica Magnus devant votre œil. Faites alors tourner
l'œillère (1a) de l'oculaire (1) de manière à voir le réticule
avec une grande netteté. Pour un réglage d'une précision
optimale, il est recommandé
- de diriger la lunette de visée vers un fond clair et neutre,
puis de
- tourner d'abord l'œilleton entièrement vers la gauche
pour ensuite le tourner de nouveau vers la droite et re-
chercher la netteté optimale du réticule. Cette opération
tient compte de la faculté d'adaptation de l'œil et per-
met ainsi un réglage optimal.
Magnus komplett.indb 42 17.08.2015 08:41:45
43
REGLAGE DU GROSSISSEMENT
Vous pouvez modifier le grossissement en faisant tour-
ner la bague de réglage (8) : vers la droite pour un gros-
sissement inférieur et vers la gauche pour un grossisse-
ment supérieur. L'ergot (8a) facilite l'orientation dans
l'obscurité : s'il est dirigé vers le haut, il est réglé sur un
grossissement intermédiaire.
CORRECTION DE PARALLAXE
La lunette de visée Leica Magnus dotée d'un grossis-
sement maximal 12x est ajustée pour une distance de
100m sans parallaxe afin d'assurer une netteté parfaite
pour l'observation et la visée à cette distance.
Une déviation éventuelle du point d'impact est générale-
ment négligeable si l'œil n'est pas parfaitement centré.
Les déviations doivent toutefois être prises en compte
en cas de grossissements supérieurs. Les lunettes de
visée disposant d'un grossissement supérieur à 12x sont
donc équipées d'une correction de parallaxe.
Pour ce faire, faites tourner la bague de réglage corres-
pondante (9) de la tourelle, à gauche du tube, jusqu'à ce
que la cible apparaisse avec une grande netteté. Pour
un réglage aussi précis que possible, il est conseillé de
toujours régler le grossissement maximum lors de cette
opération. Un réglage optimal est ainsi atteint lorsque le
réticule et l'image ne se déplacent pas dans des direc-
tions opposées en cas de changement de position de
l'œil par rapport à l'oculaire.
Magnus komplett.indb 43 17.08.2015 08:41:45
44
RÉGLAGE EN HAUTEUR ET LATÉRAL
1. Montez la lunette de visée sur l'arme
(voir p. 42).
2. A l'aide des deux tourelles de réglage,
réglez le réticule et l'axe de barillet de l'arme sur la
distance de tir sélectionnée
(p. ex. 100m). Vous pouvez notamment utiliser un
collimateur laser.
3. Effectuez un tir d'essai pour vérifier la position du point
d'impact. A cet égard, il est utile de fixer l'arme en po-
sition sur un trépied ou à l'aide de sacs de sable.
4. Sans modifier la position de l'arme, ajustez le réticule
précisément sur le point d'impact à l'aide des deux
tourelles de réglage (4/5).
Cette opération s'effectue à l'aide des deux tourelles de
réglage (4 pour la hauteur et 5 pour le réglage latéral),
qui fonctionnent de manière identique:
5. Dévissez d'abord le capuchon de protection (4c/5c)
en le faisant tourner dans le sens inverse des aiguilles
d'une montre. Une fois le capuchon ôté, la molette
(4d/5d) est visible, ainsi que la bague de réglage
(4e/5e) correspondante et le point d'index (4a/5a).
6. Ensuite, effectuez les réglages à l'aide de la molette.
Les molettes sont dotées d'incréments très fins, un
clic correspondant à une déviation du point d'im-
pact d'environ 10mm/ 1
/3 MOA à 100m (sans tenir
compte de toutes les conditions balistiques).
Magnus komplett.indb 44 17.08.2015 08:41:45
45
Si le point d'impact est en hauteur (tir haut), la molette
(4d) est tournée dans le sens inverse des aiguilles d'une
montre,
s'il est plus bas (tir bas), elle est tournée dans le sens
des aiguilles d'une montre.
Procédezdelamêmemanièrepourlescorrectionslatérales:
Si le point d'impact est à droite (tir droit), la molette
(5d) est tournée dans le sens inverse des aiguilles d'une
montre,
s'il est à gauche (tir gauche), elle est tournée dans le
sens des aiguilles d'une montre.
Magnus komplett.indb 45 17.08.2015 08:41:48
46
"RÉINITIALISATION" DES ÉCHELLES DE
TOURELLE
(Procédure identique pour les deux tourelles)
La procédure suit d'abord les indications de la section
précédente (1./2.).
Ensuite,
1. pendant que vous maintenez la molette (4d/5d), des-
serrez la vis de fixation (4b/5b) à l'aide d'une pièce
de monnaie (A), et
2. tournez la bague de réglage (4e/5e) de manière à ce
que le zéro se trouve face au point d'index (4a/5a)
(B).
3. Enfin, ce réglage est fixé par le serrage de la vis de
fixation pendant que la molette (4d/5d) est main-
tenue.
Une fois que vous avez effectué ces opérations sur les
deux bagues de réglage, vous pouvez rétablir précisé-
ment le réglage de base de la distance de tir après tout
autre réglage en effectuant une remise à zéro, et ce
sans devoir prendre de note.
A
B
Magnus komplett.indb 46 17.08.2015 08:41:48
47
UTILISATION DU RETICULE LUMINEUX
Tous les types de réticules de la lunette de visée Leica
Magnus disposent d'un point lumineux central.
Remarque:
Pour plus d'informations sur les différents types de
réticules, visitez le site: http://de.leica-camera.com/
sport_optics/rifle_scopes_magnus/Absehen/
Le commutateur à bascule/rotatif (3) permet de choisir
entre trois modes de fonctionnement désignés par diffé-
rents symboles:
Position intermédiaire = Hors tension
Position "Lune" = Mode Nuit
Position "Soleil" = Mode Jour
Les modes Jour et Nuit se distinguent par le degré de lu-
minosité du point lumineux. Dans ces deux modes, vous
pouvez régler la luminosité selon 60 incréments en fonc-
tion des conditions d'utilisation et de vos préférences.
Vous pouvez également utiliser le commutateur à bas-
cule/rotatif: appuyer sur le côté gauche réduit la lumino-
sité, appuyer sur le côté droit l'augmente. Une pression
simple entraîne une modification d'un incrément, une
pression continue provoque une modification continue
Remarque:
Vos réglages sont conservés après la mise sous et hors
tension.
-
+
Magnus komplett.indb 47 17.08.2015 08:41:49
48
MISE HORS TENSION AUTOMATIQUE
Indépendamment du mode de fonctionnement sélection-
né, le réticule lumineux se met automatiquement hors
tension afin d'économiser la pile dans différentes situa-
tions où il n'est pas utilisé lors de la chasse:
- lorsque la lunette de visée n'est pas déplacée pendant
plus de 3 minutes (par exemple, lors de l'affût)
- lorsque la lunette de visée est inclinée à plus de 45°
(par exemple lorsque l'arme est posée momentané-
ment)
- lorsque la lunette de visée est inclinée à plus de 80°
vers le haut ou 65° vers le bas environ ou lorsqu'elle
est placée à la verticale (par exemple près de l'épaule
de l'arme). Dès que ces conditions ne sont plus rem-
plies, le point lumineux est automatiquement rallumé
avec la luminosité préalablement réglée.
ENTRETIEN/NETTOYAGE
Il n'est pas nécessaire de prendre des précautions
d'entretien particulières avec la lunette de visée Leica
Magnus. Enlever les particules grossières, telles que le
sable, avec un pinceau fin ou en soufflant dessus. Traiter
les empreintes digitales, etc. sur les lentilles d'objectif
et d'oculaire d'abord avec un chiffon humide puis les
essuyer avec une peau de chamois douce propre ou
avec un chiffon non pelucheux. Veillez à ne pas exercer
de pression importante sur la surface de la lentille lors
de son nettoyage, même si elle est très sale. Bien que la
couche anti-reflet soit résistante aux rayures, elle peut
être endommagée par le sable ou les cristaux de sel.
Le boîtier ne doit être nettoyé qu'à l'aide d'une peau de
chamois humide. L'utilisation d'une lingette sèche risque
de générer une charge statique.
Il est interdit d'utiliser de l'alcool ou d'autres substances
chimiques pour le nettoyage du boîtier ou de l'optique.
Magnus komplett.indb 48 17.08.2015 08:41:49
49
Important:
• Protégez la lunette de visée contre les chocs.
• Rangez votre lunette de visée dans un endroit sec,
frais et bien aéré, en particulier dans des climats hu-
mides, afin d'éviter l'apparition de moisissures.
• Les lunettes de visée Leica sont étanches jusqu'à 4m
(0,4 bar) de profondeur, mais l'étanchéité parfaite
n'est garantie que si les capuchons de protection des
tourelles de réglage en hauteur et latéral et le cou-
vercle du compartiment des piles (3/4c/5c) sont
hermétiquement fermés contre les joints correspon-
dants (3e/4f/5f). Vérifiez que ces joints sont en bon
état. S'ils sont endommagés, vous devez absolument
les remplacer.
• N'essayez pas de démonter la lunette. Les réparations
doivent être exclusivement réalisées par le Service
après-vente Leica.
• Chaque lunette de visée Leica porte, outre la désigna-
tion de son type, son numéro de fabrication "person-
nel". Veuillez, par mesure de sécurité, noter ce numé-
ro dans votre documentation.
Magnus komplett.indb 49 17.08.2015 08:41:49
50
PIÈCES DE RECHANGE
Si vous avez besoin d'une pièce de rechange pour votre
lunette de visée Leica, p. ex. un capuchon à visser, des
joints ou un capuchon de protection, contactez notre
service après-vente (adresse, voir p. 53) ou votre repré-
sentant national Leica (adresse, voir carte de garantie).
Magnus komplett.indb 50 17.08.2015 08:41:49
51
CARACTÉRISTIQUES TECHNIQUES
Modèles Leica Magnus 1 – 6.31 x 242 1.5 – 101 x 422 1.8 – 12 x 50 2.4 – 161 x 562
Pupille de sortie 12,4 – 3,8mm 12,4 – 4,2mm 12,6 - 4,2mm 12,4 – 3,5mm
Champ de vision à max. / min.
Grossissement (m/100m)
6,5 /43,2m 4,1 / 26m 3,5/22,5m 2,6 /17m
Correction de parallaxe 100m 100m 100m 50m - ∞, réglable
Dist. longitudinale de la pupille de sortie 90mm
Couche anti-reflet Aqua Dura™
Facteur de transmission TD/TN ≥91%
Compensation dioptrique – 4/+3 dpt.
Plage de réglage du réticule par clic env. 10mm (1
/3 MOA) par clic / 100m
Plage de réglage du point d‘impact 200 x 140cm 150 x 140cm 150 x 140cm 150 x 140cm
Diamètre du tube médian 30mm, rails intérieurs Zeiss
Filetage pour filtre, côté objectif - M46 x 0,75mm M52 x 0,75mm M58 x 0,75mm
Etanchéité jusqu‘à 4m de profondeur, rempli d‘azote
Matériau du boîtier Aluminium
Eclairage du réticule Point lumineux, activable et désactivable, mode Jour et Nuit au choix,
luminosité réglable en 60 incréments, mise sous et hors tension automatique
Longueur 272mm 317mm 335mm 360mm
Poids 570g 620g 710g 785g
1
Grossissement 2
Diamètre de l‘objectif
Magnus komplett.indb 51 17.08.2015 08:41:49
52
LEICA PRODUCT SUPPORT
Le service d'information Leica répondra volontiers
par écrit, par téléphone, fax ou e-mail à vos questions
d'ordre technique se rapportant à la gamme de produits
Leica:
Leica Camera AG
Product Support / Software Support
Am Leitz-Park 5
D-35578 Wetzlar
Tél.: +49(0)6441-2080-111 /-108
Fax: +49(0)6441-2080-490
info@leica-camera.com /
software-support@leica-camera.com
Magnus komplett.indb 52 17.08.2015 08:41:49
53
LEICA CUSTOMER CARE
Le Service après-vente de la société Leica Camera AG
et les services après-vente des divers représentants Leica
(liste des adresses sur le bon de garantie) se tiennent à
votre disposition pour entretenir et réparer vos équipe-
ments Leica.
Leica Camera AG
Customer Care
Am Leitz-Park 5
D-35578 Wetzlar
Tél.: +49(0)6441-2080-189
Fax: +49(0)6441-2080-339
customer.care@leica-camera.com
Magnus komplett.indb 53 17.08.2015 08:41:49
54
Magnus komplett.indb 54 17.08.2015 08:41:49
55
VOORWOORD
Geachte klant
De naam Leica staat wereldwijd voor hoogste kwaliteit,
fijnmechanische precisie in combinatie met buitengewo-
ne betrouwbaarheid en lange levensduur.
Wij wensen u veel plezier en succes met uw nieuwe Lei-
ca Magnus richtkijker.
Uw Leica Magus richtkijker is uitgevoerd met een voor-
treffelijk lenzensysteem, dat ook in de meest ongunstige
situaties een helder beeld levert, zodat u altijd met ze-
kerheid kunt richten. Bovendien is deze eenvoudig en
functioneel te bedienen.
Om alle mogelijkheden van deze hoogwaardige richtkij-
ker goed te kunnen benutten, adviseren wij u eerst deze
handleiding door te lezen.
INHOUDSOPGAVE
Voorwoord....................................................................... 55
Aanduiding van de onderdelen.......................................... 56
Leveringsomvang ............................................................. 56
Milieuvriendelijk afvoeren elektrische
en elektronische apparatuur............................................. 57
Plaatsen en vervangen van de batterij .............................. 58
Weergave van de batterijcapaciteit................................... 59
Montage.......................................................................... 60
Dioptrie-compensatie....................................................... 60
Van vergroting wisselen.................................................... 61
Parallax-compensatie....................................................... 61
Hoogte- en zijdelingse verstelling ..................................... 62
Torenschaal "nullen"......................................................... 64
Toepassen van het verlicht draadkruis.............................. 65
Uitschakelautomaat ......................................................... 66
Onderhoud/reiniging ....................................................... 66
Vervangende onderdelen.................................................. 68
Technische gegevens....................................................... 69
Leica Product Support...................................................... 70
Leica Customer Care ....................................................... 71
Opgelet:
Zoals bij elke verrekijker, dient u te vermijden met de
Leica Magnus richtkijker direct in heldere lichtbronnen te
kijken om oogletsel uit te sluiten.
Magnus komplett.indb 55 17.08.2015 08:41:49
56
AANDUIDING VAN DE ONDERDELEN
1. Oculair met
a. draai-oogschelp
2. Index voor dioptrie-instelling
3. Deksel van het batterijvak / verlicht draadkruis-
draai-/wipschakelaar met
a. schakelstanden gebruiksmodi
b. indexpunt voor bedrijfsmodi
c. symbolen voor instelrichting helderheid
d. batterijvak
e. afdichtring
4. Hoogteverstellingstoren
5. Toren voor zijdelingse verstelling
6. Objectief
7. Filterschroefdraad
8. Vergrotings-instelring met
a. nok
9. Parallax-instelring met
a. Schaal
4./5. Hoogte-/zijdelingse verstellingstoren
(afdekkap verwijderd) met
a. Index
b. Klemschroef
c. Afdekkap
d. Kartelwieltje
e. Schaal
f. Afdichtring
LEVERINGSOMVANG
- Richtkijker
- 1 Lithium knoopcel batterij 3V type CR 2032
- Beschermdeksel voor oculair/objectief
- Handleiding
- Garantiekaart
- Reinigingsdoek
- Afdekking voor montagerails
(alleen bij overeenkomstig uitgeruste modellen)
Magnus komplett.indb 56 17.08.2015 08:41:49
57
MILIEUVRIENDELIJK AFVOEREN
ELEKTRISCHE EN ELEKTRONI-
SCHE APPARATUUR
(geldt voor de EU en overige Europese landen
met gescheiden inzameling)
Dit toestel bevat elektrische en/of elektronische onder-
delen en mag daarom niet met het normale huisvuil wor-
den meegegeven!
In plaats daarvan moet het voor recycling op door de ge-
meenten beschikbaar gestelde inzamelpunten worden
afgegeven. Dit is voor u gratis.
Indien het apparaat verwisselbare batterijen of accu‘s
bevat, moeten deze eerst worden verwijderd en evt. vol-
gens de voorschriften worden afgevoerd (zie hiervoor de
aanwijzingen in de handleiding van het apparaat).
Meer informatie over dit onderwerp ontvangt u bij uw
gemeentelijke instantie, uw afvalverwerkingsbedrijf of de
zaak waar u het toestel hebt gekocht.
Magnus komplett.indb 57 17.08.2015 08:41:49
58
PLAATSEN EN VERVANGEN
VAN DE BATTERIJ
De Leica richtkijkers met verlicht draadkruis worden
voor de voeding van een 3 volt lithium-knoopcel, type CR
2032 voorzien.
Tip:
De levensduur van een batterij is niet alleen afhankelijk
van het gebruiksprofiel maar ook van veel andere facto-
ren en kan daarom zeer verschillend zijn.
1. Open het deksel (3) van het batterijvak (3d) door dit
tegen de wijzers van de klok in te draaien (A).
2. Plaats de batterij met het pluscontact naar boven wij-
zend (B).
3. Sluit het deksel weer. Draai daarbij het deksel met de
wijzers van de klok mee, totdat u een door de rubberen
ringafdichting (3e) veroorzaakte weerstand voelt.
Belangrijk:
Gebruik bij het sluiten van het deksel geen kracht!
A B
Magnus komplett.indb 58 17.08.2015 08:41:49
59
WEERGAVEVANDEBATTERIJCAPACITEIT
Voor indicatie dient het
lichtpunt van het verlichte
draadkruis. De indicatie
licht op tijdens de eerste
10sec. na het inscha-
kelen:
Capaciteit Indicatie
Voldoende Lichtpunt brandt continu
Laag Lichtpunt gaat uit
regelmatig kortstondig
Zwak Lichtpunt knippert gelijkmatig
Tip:
• De indicatie wordt na het automatisch uit- en weer
inschakelen van het verlichte draadkruis (z.
pag. 66) niet herhaald.
• In de fabrieksinstelling, d.w.z. bij uitlevering van de
richtkijker, is deze indicatie ingeschakeld, maar u kunt
deze ook uitschakelen (zie hieronder).
In- en uitschakelen van de capaciteitsindicator
1. Plaats de draai-/wipschakelaar (3) op dagmodus
("zon"-stand) (a).
2. Stel met de draai-/wipschakelaar de geringste helderheid in
(z. pag. 65) en laat hem vervolgens weer los (b).
3. Houd de linkerkant van de draai-/wipschakelaar ten-
minste 20 sec (c) ingedrukt.
• Ter bevestiging van uw instelling knippert het licht-
punt (tijdens de eerste 10 sec. na de instelproce-
dure):
Toestand Indicatie
Aan Lichtpunt knippert regelmatig kort
Uit Lichtpunt knippert regelmatig
2x kort
Tip:
Uw instelling blijft zowel na het handmatig in-en
uitschakelen van het verlichte draadkruis, alsook na het
vervangen van de batterij behouden.
a
b c
Magnus komplett.indb 59 17.08.2015 08:41:49
60
MONTAGE
De eerste vereiste voor perfect raken is de vakkundige
montage van de richtkijker op het wapen. Hiervoor vindt
u in de vakhandel een groot aantal verschillende monta-
geonderdelen.
Wij adviseren om de montage door een vakman uit te
laten voeren, waarbij dan vooral op een goede uitlijning
en montage zonder spanning dient te worden gelet. Voor
de montage moet de werkplaats alleen hoogwaardige
componenten van gerenommeerde merken gebruiken,
die bij de kwaliteitseigenschappen van uw Leica Magnus
richtkijker passen.
DIOPTRIE-COMPENSATIE
M.b.v. de dioptrie-compensatie stelt u uw Leica Magnus
richtkijker op uw oog in. Draai de oogschelp (1a) van het
oculair (1) zodanig dat u het draadkruis maximaal scherp
ziet. Om deze zo precies mogelijk in te stellen, is het zin-
vol
- de richtkijker op een neutrale, heldere achtergrond te
richten en
- eerst de oogschelp volledig naar links te draaien om
daarna van dit punt uit weer in richting rechts terug te
draaien en zo het draadkruis met de beste scherpte in te
stellen. Op deze manier wordt er zoveel mogelijk met het
oogaanpassingsvermogen rekening gehouden, waardoor
de instelling optimaal zal zijn.
Magnus komplett.indb 60 17.08.2015 08:41:49
61
VAN VERGROTING WISSELEN
Door aan instelring 8 te draaien, wijzigt u de vergroting
– naar rechts voor zwakkere vergroting, naar links voor
sterkere. Dankzij het nokje (8a) is de oriëntatie in het
donker eenvoudiger: Wijst het naar boven, dan is onge-
veer de middelste vergroting ingesteld.
PARALLAX-COMPENSATIE
Leica Magnus richtkijkers zijn met een maximale vergro-
ting van 12-voudig, op een afstand van 100m parallaxvrij
afgestemd, zodat u gelijktijdig het draadkruis en het doel
op deze afstand perfect scherp kunt zien.
Eventuele afwijkingen van de afstand van het trefpunt bij
een niet precies centrisch geplaatst oog zijn over het al-
gemeen te verwaarlozen.
Bij hogere vergrotingen moet er echter met afwijkin-
gen rekening worden gehouden. Om deze reden hebben
richtkijkers met vergrotingen van meer dan 12-voudig
een parallax-compensatie.
Draai aan de betreffende instelring (9) van het torentje
links op de buis tot u het doel absoluut scherp ziet. Om
de instelling zo exact mogelijk uit te voeren, dient u hier
de sterkste vergroting voor te gebruiken. U heeft de op-
timale instelling gevonden als draadkruis en beeld niet
meer t.o.v. elkaar bewegen als u de positie van uw oog
t.o.v. het oculair verandert.
Magnus komplett.indb 61 17.08.2015 08:41:49
62
HOOGTE- EN ZIJDELINGSE VERSTELLING
1. Monteer de richtkijker op het wapen
(z. pag. 60).
2. Richt draadkruis en loopas van het wapen
met de beide versteltorens op de gewenste schot-
afstand
(bijv. 100m) op elkaar uit. Dit kan bijv. met een laser-
patroon gebeuren.
3. Vuur een proefschot af om de positie van het trefpunt
te bepalen. Het is aan te bevelen het wapen op een
bok of met zandzakken in een vaste stand te fixeren.
4. Corrigeer - zonder de positie van het wapen te ver-
anderen - het draadkruis met de twee versteltorens
(4/5) precies op het trefpunt.
Dit doet u met de twee versteltorens – (4) voor hoogte,
(5) voor zijdelings, beide op dezelfde manier:
5. Schroef eerst het afdekkapje los (4c/5c), tegen de
wijzers van de klok in. Bij verwijderde kap wordt het
kartelwieltje (4d/5d) zichtbaar, de bijbehorende
schaalring (4e/5e) en het overeenkomstige indexpunt
(4a/5a).
6. Vervolgens voert u de instellingen met het kartelwiel-
tje uit.
De kartelwieltjes hebben een bijzonder fijne afstem-
ming, één klik is ongeveer een afwijking van de van
circa 10mm/ 1
/3 MOA op 100m (zonder met ballisti-
sche omstandigheden rekening te houden).
Magnus komplett.indb 62 17.08.2015 08:41:50
63
Is het trefpunt hoog (hoogschot), dan wordt het kartel-
wieltje (4d) tegen de wijzers van de klok in gedraaid,
bij een laag trefpunt (laagschot) met de wijzers van de
klok mee.
Op dezelfde wijze bij zijdelingse correctie:
Is het trefpunt rechts (rechtsschot), dan wordt het kar-
telwieltje (5d) tegen de wijzers van de klok in gedraaid,
bij trefpunt links (linksschot) met de wijzers van de klok
mee.
Magnus komplett.indb 63 17.08.2015 08:41:52
64
TORENSCHAAL "NULLEN"
(Procedure is gelijk voor beide torens)
De procedure verloopt in het begin zoals in het vorige
gedeelte beschreven staat (1./2.).
Daarna dient u,
1. terwijl u het kartelwieltje (4d/5d) vasthoudt, met een
muntstuk de klemschroef (4b/5b) los te maken (A) en
2. de schaalring (4e/5e) zodanig te draaien, dat de nul
tegenover indexpunt (4a/5a) staat (B).
3. Tot slot fixeert u deze instelling, terwijl u het kartel-
wieltje (4d/5d) vasthoudt, d.m.v. het aandraaien van
de klemschroef.
Als u dit met beide schaalringen heeft gedaan, kunt u de
basisinstelling op de schietafstand na elke wijziging van
de verstelling betrouwbaar weer op de 0-positie terug-
zetten zonder iets te hoeven onthouden of noteren.
A
B
Magnus komplett.indb 64 17.08.2015 08:41:53
65
GEBRUIK VAN HET VERLICHTE DRAADKRUIS
Het verlichtingselement van de Leica Magnus richtkij-
kers bestaat bij alle draadkruis-typen uit een centraal
lichtpunt.
Tip:
Details over de verschillende draadkruis-typen vindt
u op: http://de.leica-camera.com/sport_optics/rifle_
scopes_magnus/Absehen/
Met de draai-/wipschakelaar (3) kunt u uit drie, door
overeenkomstige markeringen geïdentificeerde modi
kiezen:
Centrale schakelaar positie = Uit
"Maan"-stand = Nachtmodus
"Zon"-stand = Dagmodus
Dag- en nachtmodus verschillen van elkaar in de instel-
bereiken voor de helderheid van het lichtpunt. In beide
modi kunt u de helderheid in 60 trappen aan de omstan-
digheden of naar uw wensen aanpassen.
Ook hiervoor dient de draai-/wipschakelaar: door op
de linkerkant te drukken, vermindert u de helderheid
en door op de rechterkant te drukken verhoogt u deze.
Een enkele druk op de schakelaar wijzigt de instelling
met één stap en ingedrukt houden wijzigt de instelling
continu
Tip:
Uw instellingen blijven ook na het uit- en inschakelen
behouden.
-
+
Magnus komplett.indb 65 17.08.2015 08:41:53
66
UITSCHAKEL-AUTOMAAT
Onafhankelijk van de geselecteerde modus schakelt het
verlichte draadkruis in verschillende situaties - die in de
jachtpraktijk overeenkomen met "niet in gebruik" - auto-
matisch uit om de batterij te sparen.
- indien de richtkijker meer dan 3 minuten niet wordt be-
wogen (bijvoorbeeld bij de wachtplaats)
- indien de richtkijker meer dan 45 ° zijwaarts wordt
gekanteld (bijvoorbeeld als het wapen tijdelijk wordt
weggelegd)
- indien de richtkijker om meer dan ca. 80° omhoog of
ca. 65° omlaag wordt gekanteld, ofwel als hij rechtop
staat (bijvoorbeeld bij het over de schouder dragen van
het wapen). Als aan deze voorwaarden niet meer wordt
voldaan, wordt het lichtpunt automatisch weer inge-
schakeld met de eerder ingestelde helderheid.
ONDERHOUD/REINIGING
Bijzonder onderhoud van uw Leica Magnus richtkijker
is niet vereist. Grove vuildeeltjes, zoals bijv. zand, dient
met een haarborstel te worden verwijderd of weggebla-
zen. Vingerafdrukken op o.a. objectief- en oculairlens
kunnen eerst met een vochtige doek en daarna met een
zacht en schoon zeemleer of pluisvrije doek worden af-
geveegd. Oefen geen grote druk uit bij het reinigen van
sterk vervuilde lenzen. De coatings zijn wel goed tegen
slijtage bestand, maar zand- en zoutkristallen zouden
deze toch kunnen beschadigen.
De behuizing dient alleen met een vochtige zemen lap te
worden gereinigd. Droge doeken kunnen statische lading
veroorzaken.
Gebruik nooit alcohol of andere chemische oplosmidde-
len voor de reiniging van de lenzen of de behuizing.
Magnus komplett.indb 66 17.08.2015 08:41:53
67
Belangrijk:
• Denkt u eraan uw richtkijker tegen schokken te be-
schermen.
• Berg uw richtkijker op een goed geventileerde, droge,
koele plaats op, vooral ook om in een vochtig klimaat
schimmel te voorkomen.
• Leica richtkijkers zijn waterdicht t/m 4m diepte (0,4
bar). Dit vereist een correcte afdichting die alleen ge-
garandeerd is, als de afdekkapjes van de hoogte- en
zijdelingse afstelling en eventueel het deksel van het
batterijvak (3/4c/5c)) goed tegen de afdichtringen
(3e/4f/5f) aan zijn geschroefd. Let erop dat deze af-
dichtringen altijd onbeschadigd blijven. Als deze toch
beschadigd raken, dienen ze te worden vervangen.
• Probeer niet het apparaat te demonteren. Reparaties
mogen uitsluitend door Leica Customer Care-facilitei-
ten worden uitgevoerd.
• Elke Leica richtkijker heeft behalve een typenummer
ook een „persoonlijk“ productienummer. Noteer dit
nummer en berg het voor de veiligheid bij uw docu-
mentatie op.
Magnus komplett.indb 67 17.08.2015 08:41:53
68
VERVANGENDE ONDERDELEN
Als u vervangende onderdelen voor uw Leica richtkijker
nodig zou hebben, zoals bijv. schroefdeksels, afdichtrin-
gen of afdekkapjes, neem dan contact op met onze klan-
tenservice (adres z. pag. 71) of de vertegenwoordiging
van Leica in uw land (zie garantiekaart voor adres).
Magnus komplett.indb 68 17.08.2015 08:41:53
69
TECHNISCHE GEGEVENS
Leica Magnus-modellen 1 – 6.31 x 242 1.5 – 101 x 422 1.8 – 12 x 50 2.4 – 161 x 562
Uittrede pupil 12,4 – 3,8mm 12,4 – 4,2mm 12,6 - 4,2mm 12,4 – 3,5mm
Gezichtsveld bij max. / min.
Vergroting (m/100m)
6,5 /43,2m 4,1 / 26m 3,5/22,5m 2,6 /17m
Parallaxinstelling 100m 100m 100m 50m - ∞, instelbaar
Uitrede pupillen - lengteafstand 90mm
Coating Aqua Dura™
Transmissiegraad TD/TN ≥91%
Dioptrie-compensatie – 4/+3 dpt.
Draadkruis-instelmarges per klik ca. 10mm (1
/3 MOA) per klik / 100m
Instelbereik trefpuntpositie 200 x 140cm 150 x 140cm 150 x 140cm 150 x 140cm
Middenbuisdiameter 30mm, Zeiss-binnenrails
Filterdraad aan objectiefzijde - M46 x 0,75mm M52 x 0,75mm M58 x 0,75mm
Waterdichtheid tot 4m, stikstof-gevuld
Materiaal behuizing Aluminium
Draadkruisverlichting Lichtpunt, in- en uitschakelbaar, naar keuze dag- of nachtmodus,
helderheid instelbaar in 60 trappen, automatisch in- en uitschakelen
Lengte 272mm 317mm 335mm 360mm
Gewicht 570g 620g 710g 785g
1
Vergroting 2
Diameter objectief
Magnus komplett.indb 69 17.08.2015 08:41:53
70
LEICA PRODUCT SUPPORT
Technische vragen over het Leica-programma worden
schriftelijk, telefonisch, per fax of per e-mail beantwoord
door de Leica informatiedienst:
Leica Camera AG
Product Support / Software Support
Am Leitz-Park 5
D-35578 Wetzlar
Tel.: +49(0)6441-2080-111 /-108
Fax: +49(0)6441-2080-490
info@leica-camera.com /
software-support@leica-camera.com
Magnus komplett.indb 70 17.08.2015 08:41:53
71
LEICA CUSTOMER CARE
Voor het onderhoud van uw Leica-uitrusting en in geval
vanschade kunt u gebruik maken van de Customer Care
van Leica Camera AG of de reparatieservice van een
Leica vertegenwoordiging in uw land (voor adressenlijst
zie garantiekaart).
Leica Camera AG
Customer Care
Am Leitz-Park 5
D-35578 Wetzlar
Tel.: +49(0)6441-2080-189
Fax: +49(0)6441-2080-339
customer.care@leica-camera.com
Magnus komplett.indb 71 17.08.2015 08:41:53
72
Magnus komplett.indb 72 17.08.2015 08:41:53
73
PREFAZIONE
Gentile Cliente,
in tutto il mondo il nome Leica è sinonimo di altissima
qualità e precisione meccanica unite a un'estrema affi-
dabilità e a una lunga durata di vita.
Le auguriamo di ottenere il massimo piacere e le migliori
soddisfazioni con il suo nuovo cannocchiale da punta-
mento Leica Magnus. Il cannocchiale da puntamento
Leica Magnus è dotato di un'ottica eccezionale ed è in
grado di ottenere immagini nitide e luminose anche nelle
condizioni più difficili, per un risultato sempre affidabile.
Il suo utilizzo è inoltre semplice e funzionale. Per poter
sfruttare pienamente tutte le possibilità che Le offre
questo cannocchiale da puntamento ad alte prestazio-
ni, Le consigliamo di leggere attentamente le istruzioni
prima dell'uso.
INDICE
Prefazione........................................................................ 73
Denominazione dei componenti ....................................... 74
Materiale in dotazione...................................................... 74
Smaltimento dei dispositivi elettrici ed elettronici ............. 75
Inserimento e sostituzione della batteria........................... 76
Indicazione della capacità della batteria ........................... 77
Montaggio ....................................................................... 78
Correzione diottrica ......................................................... 78
Modifica dell'ingrandimento ............................................. 79
Correzione della parallasse............................................... 79
Regolazione in altezza e laterale....................................... 80
„Azzeramento“ della scala graduata della torretta............. 82
Impiego del reticolo di accensione ................................... 83
Disinserimento automatico............................................... 84
Cura e manutenzione ....................................................... 84
Ricambi ........................................................................... 86
Caratteristiche tecniche................................................... 87
Leica Product Support...................................................... 88
Leica Customer Care ....................................................... 89Attenzione:
Come per ogni binocolo, anche con il cannocchiale da
puntamento Leica Magnus evitare l'osservazione diretta
delle sorgenti luminose per non danneggiare gli occhi.
Magnus komplett.indb 73 17.08.2015 08:41:53
74
DENOMINAZIONE DEI COMPONENTI
1. Oculare con
a. conchiglia girevole
2. Indice per la regolazione delle diottrie
3. Coperchio vano batterie / interruttore a bilico/
girevole reticolo di accensione con
a. Posizioni modalità operative
b. Punto indicatore per modalità operative
c. Simboli per la direzione di impostazione della
luminosità
d. Vano batterie
e. Guarnizione ad anello
4. Torretta di regolazione dell'altezza
5. Torretta per la regolazione laterale
6. Obiettivo
7. Filtro
8. Ghiera d'ingrandimento con
a. Camma
9. Ghiera di regolazione della parallasse con
a. Scala
4./5. Torretta per la regolazione dell'altezza e laterale
(coperchio di chiusura svitato) con
a. Indice
b. Vite di serraggio
Coperchio di chiusura
d. Rotella zigrinata
e. Scala
f. Guarnizione ad anello
MATERIALE IN DOTAZIONE
- Cannocchiale da puntamento
- 1 batteria a bottone al litio da 3 V tipo CR 2032
- Cappuccio di protezione per oculare/obiettivo
- Istruzioni
- Certificato di garanzia
- Panno per pulizia
- Copertura per guide di montaggio
(solo per modelli compatibili)
Magnus komplett.indb 74 17.08.2015 08:41:53
75
SMALTIMENTO DEI DISPOSITIVI
ELETTRICI ED ELETTRONICI
(Vale per l’UE e per gli altri paesi europei con
sistemi di raccolta differenziata)
Il presente apparecchio contiene componenti elettrici
e/o elettronici. Non può quindi essere smaltito come un
normale rifiuto domestico.
Ma va depositato presso gli appositi centri di raccolta
allestiti dalle autorità municipali per essere riciclato. La
procedura è gratuita per chi la esegue.
Qualora il dispositivo contenga batterie sostituibili o ri-
caricabili, queste devono essere rimosse ed eventual-
mente smaltite in conformità alle normative vigenti (ved.
a riguardo quanto riportato nelle Istruzioni per l’uso del
dispositivo).
Per ulteriori informazioni sull'argomento rivolgersi presso
l'amministrazione comunale, l'azienda addetta allo
smaltimento o il rivenditore dell'apparecchio.
Magnus komplett.indb 75 17.08.2015 08:41:53
76
INSERIMENTO E SOSTITUZIONE
DELLA BATTERIA
Per l'alimentazione dei cannocchiali Leica con reticolo di
accensione si impiegano batterie a bottone al litio da 3
Volt, tipo CR 2032.
Nota:
La durata di una batteria dipende, oltre al profilo di utiliz-
zo, da tanti diversi fattori e può variare notevolmente. 1. Aprire il coperchio (3) del vano batterie (3d) ruotando-
lo in senso antiorario (A).
2. Inserire la batteria con il contatto positivo rivolto ver-
so l'alto (B).
3. Chiudere nuovamente il coperchio. Ruotarlo in senso
orario fino a percepire la resistenza provocata dalla guar-
nizione ad anello in gomma (3e).
Importante:
Non forzare la chiusura del coperchio!
A B
Magnus komplett.indb 76 17.08.2015 08:41:54
77
INDICAZIONEDELLACAPACITÀDELLABATTERIA
Il punto di illuminazione è
l'indicazione del reticolo
di accensione. L'indica-
zione avviene nei primi 10
s dopo l'accensione:
Capacità Indicazione
Sufficiente Ilpuntodiilluminazionesiilluminaalucefissa
Scarsa Il punto di illuminazione scompare
di norma brevemente
Debole Il punto di illuminazione lampeggia
in modo uniforme
Nota:
• L'indicazione non viene ripetuta dopo uno spegni-
mento e un'accensione automatica del reticolo di
acensione (vedere pag. 84).
• Nell'impostazione di fabbrica, ovvero nella consegna del
cannocchiale da puntamento, si accende l'indicatore, è
possibile però anche spegnerlo (vedere sotto).
Accensione e spegnimento dell'indicazione di ca-
pacità
1. Impostare l'interruttore a bilico/ girevole (3) sul fun-
zionamento diurno (impostazione „sole“) (a).
2. Conl'interruttoreabilico/girevoleimpostarelaluminositàpiù
ridotta(vederepag.83)erilasciarlonuovamente(b).
3. Tenere premuto il lato sinistro dell'interruttore a bili-
co/ girevole per almeno 20 s (c).
• Per confermare l'impostazione il punto di illumina-
zione lampeggia (nei primi 10 s dopo la procedura
di impostazione):
Stato Indicazione
On Il punto di illuminazione si illumina
di norma brevemente
Off Il punto di illuminazione si illumina
due volte di norma brevemente
Nota:
L'impostazione viene conservata sia dopo lo spegnimen-
to e l'accesione manuale del reticolo di accensione, sia
dopo un cambio di batteria.
a
b c
Magnus komplett.indb 77 17.08.2015 08:41:54
78
MONTAGGIO
Per ottenere un punto d'impatto perfetto innanzitutto è
fondamentale montare correttamente il cannocchiale da
puntamento sull'arma. Presso i rivenditori specializzati
è disponibile una grande quantità di pezzi di montag-
gio diversi.
Consigliamo di far eseguire il montaggio da un labora-
torio specializzato, e di prestare la massima attenzione
nell'allineare i pezzi senza applicare troppa forza. Per
il montaggio si devono utilizzare esclusivamente com-
ponenti di noti produttori che soddisfino gli elevati re-
quisiti qualitativi dei cannocchiali da puntamento Leica
Magnus.
CORREZIONE DIOTTRICA
Con la correzione diottrica il cannocchiale da puntamen-
to Leica Magnus viene regolato in base all'acuità visiva
dell'utente. Girare la conchiglia (1a) dell'oculare (1) di
modo da poter visualizzare il reticolo con la massima niti-
dezza. Per una regolazione il più precisa possibile consi-
gliamo di puntare
- il cannocchiale su uno sfondo chiaro e neutro e
- prima ruotare la conchiglia a sinistra, per poi tornare in-
dietro a destra e individuare così la migliore messa a fuo-
co del reticolo. Questa procedura tiene conto della capa-
cità di adattamento dell'occhio alle situazioni e assicura
quindi una regolazione ottimale.
Magnus komplett.indb 78 17.08.2015 08:41:54
79
MODIFICA DELL'INGRANDIMENTO
Ruotando la ghiera (8) si regola l'ingrandimento – verso
destra per ridurre l'ingrandimento e verso sinistra per
aumentarlo. La camma (8a) facilita l'orientamento nell'o-
scurità: se punta verso l'alto significa che è impostato
l'ingrandimento medio.
CORREZIONE DELLA PARALLASSE
I cannocchiali da puntamento Leica Magnus sono svi-
luppati fino ad un ingrandimento massimo di 12 volte ad
una distanza di 100m privo di parallasse, così possono
mettere contemporaneamente a fuoco il reticolo e il ber-
saglio in modo perfettamente centrato.
Eventuali scostamenti nella posizione del punto d'impat-
to quando non si mira in modo perfettamente centrato
sono di norma trascurabili.
Con elevati ingrandimenti si devono però tenere presen-
te queste variazioni. Per questo motivo i cannocchiali da
puntamento con range d'ingrandimento oltre il fattore
12 volte sono dotati di una correzione della parallas-
se. Girare la ghiera corrispondente della torretta a sini-
stra sul tubo fino a quando l'immagine del bersaglio è
completamente a fuoco. Per ottenere una regolazione
il più precisa possibile consigliamo di utilizzare sempre
l'ingrandimento maggiore. La regolazione ottimale si ha
quando il reticolo e l'immagine non si muovono l'uno
contro l'altro cambiando la posizione dell'occhio rispet-
to all'oculare.
Magnus komplett.indb 79 17.08.2015 08:41:54
80
REGOLAZIONE IN ALTEZZA E LATERALE
1. Montare il cannocchiale da puntamento sull'arma
(vedere pag. 78).
2. Servendosi di entrambe le torrette di regolazione
allineare il reticolo con l'asse dell'arma alla distanza
di tiro desiderata
(ad es. 100 m). Questo può avvenire ad es. con una
cartuccia laser.
3. Per determinare la posizione del punto di impatto si
consiglia di effettuare un tiro di prova. A tal scopo può
risultare utile fissare l‘arma in posizione su un‘apposi-
ta struttura o con sacchi di sabbia.
4. Senza modificare la posizione dell‘arma regolare il re-
ticolo con entrambe le torrette di regolazione (4/5)
esattamente sul punto di impatto.
Questo avviene sulle due torrette di regolazione – (4) per
l'altezza, (5) per la regolazione laterale e in entrambe le
direzioni.
5. Svitare dapprima il coperchio di chiusura (4c/5c) in
senso antiorario. Una volta rimosso il coperchio si
possono vedere la rotella zigrinata (4d/5d), la relativa
ghiera graduata (4e/5e) e il punto indicatore corri-
spondente (4a/5a).
6. Effettuare infine la regolazione con la rotella zigrinata.
Le rotelle zigrinate hanno incastri di grande precisione,
un clic corrisponde a uno scostamento nella posizione
del punto di impatto da ca. 10mm/ 1
/3 MOA a 100 m
(senza tenere conto delle condizioni balistiche).
Magnus komplett.indb 80 17.08.2015 08:41:54
81
Se la posizione del punto d'impatto è alta (tiro alto) la
rotella zigrinata (4d) dovrà quindi essere ruotata in sen-
so antiorario,
in caso di posizione del punto d'impatto bassa (tiro bas-
so) dovrà essere ruotata in senso orario.
Allo stesso modo occorre procedere per la regolazione
laterale: Se la posizione del punto d'impatto è a destra
(tiro a destra) la rotella zigrinata (5d) dovrà quindi essere
ruotata in senso antiorario,
in caso di posizione del punto d'impatto a sinistra (tiro a
sinistra) dovrà essere ruotata in senso orario.
Magnus komplett.indb 81 17.08.2015 08:41:57
82
„AZZERAMENTO“ DELLA SCALA
GRADUATA DELLA TORRETTA
(stessa procedura per entrambe le torrette)
Procedere dapprima come descritto nel capitolo prece-
dente (1./2.).
Quindi,
1. quando viene mantenuta la rotella zigrinata (4d/5d),
viene allentata la vite di serraggio (4b/5b) con una
moneta (A), e
2. ruotata la ghiera graduata (4e/5e), in modo da far
corrispondere il punto indicatore (4a/5a) al valore
zero (B).
3. Questa impostazione viene infine bloccata quando
viene mantenuta la rotella zigrinata (4d/5d) e fissata
serrando la vite di arresto.
Dopo aver eseguito questa operazione su entrambe le
ghiere graduate sarà sempre possibile tornare all‘impo-
stazione base della distanza di tiro ripristinando le posi-
zioni 0, senza che sia necessario annotare qualcosa.
A
B
Magnus komplett.indb 82 17.08.2015 08:41:58
83
IMPIEGODELRETICOLO DIACCENSIONE
L'elemento di accensione dei cannocchiali da punta-
mento Leica Magnus consiste in tutti i tipi di reticolo
composti da un punto di illuminazione centrale.
Nota:
I dettagli sui diversi tipi di reticolo sono disponibili
alla pagina: http://de.leica-camera.com/sport_optics/
rifle_scopes_magnus/Absehen/
Con l'interruttore a bilico/ girevole (3) si possono sele-
zionare tre modalità operative contrassegnate da relativi
riferimenti:
Impostazione interruttore centrale = Off
Impostazione „Luna“ = funzionamento notturno
Impostazione „sole“ = funzionamento diurno
Il funzionamento diurno e notturno si differenziano per
i campi di regolazione di luminosità relativi al punto di
illuminazione. In entrambe le modalità operative la lumi-
nosità può essere adattata alle condizioni ambientali se-
condo le preferenze secondo 60 livelli.
L'interruttore a bilico/ girevole serve anche per: Pre-
mendo sul lato sinistro la luminosità diminuisce, premen-
do sul lato destro, aumenta. Una semplice pressione
consente la modifica di un livello, mantenere premuto
per una modifica continua
Nota:
Le impostazioni vengono conservate anche dopo lo spe-
gnimento e l'accensione.
-
+
Magnus komplett.indb 83 17.08.2015 08:41:58
84
DISINSERIMENTO AUTOMATICO
Indipendentemente della modalità operativa seleziona-
ta, il reticolo di accensone di spegne automaticamente
per il risparmio delle batterie nelle diverse situazioni che
corrispondono ad inattività nelle applicazioni pratiche
della caccia:
- quando il cannocchiale da puntamento non viene spo-
stato per 3 minuti (ad esempio durante un apposta-
mento)
- quando il cannocchiale da puntamento viene ribaltato
su un lato di oltre 45° (ad esempio quando l'arma vie-
ne temporaneamente archiviata)
- quando il cannocchiale da puntamento viene inclinato
di oltre 80° ca. verso l'alto oppure di ca. 65° verso il
basso, ossia è in posizione verticale (ad esempio con
l'arma sulla spalla) Quando queste condizioni non sono
più fornite, il punto di illuminazione viene automatica-
mente riacceso con la luminosità impostata in prece-
denza.
CURA E MANUTENZIONE
Il cannocchiale da puntamento Leica Magnus non richie-
de particolari cure. Eliminare lo sporco più grossolano
come ad es. la sabbia con un pennello naturale o soffiar-
lo via. Rimuovere impronte digitali o altre macchie sulle
lenti prima con un panno di cotone inumidito, poi asciu-
gare con cautela utilizzando un panno morbido e pulito
di cuoio o cotone. Anche quando si strofinano le super-
fici molto sporche delle lenti evitare di esercitare una
pressione elevata. Il trattamento antiriflesso possiede
un'alta resistenza all'abrasione, ma può comunque esse-
re danneggiato dalla sabbia o dai cristalli di sale.
Pulire il corpo del cannocchiale solo con un panno di
pelle umido. L'utilizzo di panni asciutti potrebbe causare
cariche statiche.
Non impiegare alcol o altre soluzioni chimiche per pulire
l'ottica o il corpo dello strumento.
Magnus komplett.indb 84 17.08.2015 08:41:58
85
Importante:
• Proteggere il cannocchiale da puntamento dagli urti.
• Conservare il cannocchiale da puntamento in un luogo
fresco, asciutto e ben areato, in particolare evitando
luoghi umidi dove si possono formare funghi.
• I cannocchiali da puntamento Leica sono imperme-
abili fino a 4m di profondità (0,4 bar). Il presupposto
è una perfetta tenuta, che poi viene garantita, se il
coperchio di chiusura della regolazione in altezza e la-
terale e il relativo coperchio vano batterie (3/4c/5c)
sono avvitati saldamento con le relative guarnizioni
(3e/4f/5f). Controllare che le guarnizioni non siano
danneggiate. Sostituirle se danneggiate.
• Non cercare di smontare l'apparecchio. Le riparazioni
possono essere eseguite solo dai punti del servizio di
assistenza clienti Leica.
• Oltre alla denominazione del tipo, su ogni cannocchia-
le da puntamento Leica è indicato un codice di fabbri-
cazione "personale". Per sicurezza annotare il codice
sulla documentazione.
Magnus komplett.indb 85 17.08.2015 08:41:58
86
RICAMBI
Per ordinare eventuali ricambi per il cannocchiale Leica,
come ad es. coperchi a vite, guarnizioni o coperchi di
chiusura, rivolgersi al nostro servizio di assistenza (per
gli indirizzi vedere a pag. 89) o al rappresentante Leica
del proprio paese (per gli indirizzi vedere il certificato di
garanzia).
Magnus komplett.indb 86 17.08.2015 08:41:58
87
CARATTERISTICHE TECNICHE
Modelli Leica Magnus 1 – 6.31 x 242 1.5 – 101 x 422 1.8 – 12 x 50 2.4 – 161 x 562
Pupilla di uscita 12,4 – 3,8mm 12,4 – 4,2mm 12,6 - 4,2mm 12,4 – 3,5mm
SCampo visivo a max. / min.
Ingrandimento (m/100m)
6,5 /43,2m 4,1 / 26m 3,5/22,5m 2,6 /17m
Impostazione parallasse 100m 100m 100m 50m - ∞, impostabile
Distanza longitudinale tra le pupille di uscita 90mm
Trattamento Aqua Dura™
Grado di trasmissione TD/TN ≥91%
Correzione diottrica – 4/+3 dpt.
Corse di spostamento reticolo per clic ca. 10mm (1
/3 MOA) per clic / 100m
Campodireg.posizionedelpuntod‘impatto 200 x 140cm 150 x 140cm 150 x 140cm 150 x 140cm
Diametro tubo centrale 30mm, guide interne Zeiss
Filettatura, lato obiettivo - M46 x 0,75mm M52 x 0,75mm M58 x 0,75mm
Tenuta stagna fino a 4m, riempito di azoto
Materiale del corpo Alluminio
Illuminazione reticolo Punto di illuminazione, attivabile e disattivabile, a scelta funzionamento diurno e notturno,
Luminosità impostabile in 60 livelli, spegimento e accensione automatica
Lunghezza 272mm 317mm 335mm 360mm
Peso 570g 620g 710g 785g
1
Ingrandimento 2
Diametro dell‘obiettivo
Magnus komplett.indb 87 17.08.2015 08:41:58
88
LEICA PRODUCT SUPPORT
Il Leica Infoservice risponde alle domande sulle tecniche
applicative relative al programma Leica per iscritto, tele-
fonicamente, via fax o per posta elettronica:
Leica Camera AG
Product Support / Software Support
Am Leitz-Park 5
D-35578 Wetzlar
Tel.: +49(0)6441-2080-111 /-108
Fax: +49(0)6441-2080-490
info@leica-camera.com /
software-support@leica-camera.com
Magnus komplett.indb 88 17.08.2015 08:41:58
89
LEICA CUSTOMER CARE
Per la manutenzione della Vostra attrezzatura Leica e in
caso di eventuali anomalie è a completa disposizione il
Servizio Clienti della Leica Camera AG o il Centro Ripa-
razioni Leica Autorizzato del Suo paese (per gli indirizzi
vedere il tagliando di garanzia).
Leica Camera AG
Customer Care
Am Leitz-Park 5
D-35578 Wetzlar
Tel.: +49(0)6441-2080-189
Fax: +49(0)6441-2080-339
customer.care@leica-camera.com
Magnus komplett.indb 89 17.08.2015 08:41:58
90
Magnus komplett.indb 90 17.08.2015 08:41:58
91
PRÓLOGO
Estimada clienta, estimado cliente:
El nombre de Leica representa la máxima calidad a es-
cala mundial, una precisión mecánica fina con una extre-
mada fiabilidad y una larga duración.
Deseamos que disfrute y tenga mucho éxito con su nue-
va mira telescópica Leica Magnus.
Su mira telescópica Leica Magnus está equipada con
una óptica excepcional que proporciona una imagen cla-
ra y luminosa, incluso en las condiciones más desfavora-
bles, de forma que siempre es posible apuntar con segu-
ridad. Además, su manejo es sencillo y funcional.
Para que usted pueda aplicar correctamente todas las
opciones de esta mira telescópica de alta calidad, le re-
comendamos leer primero estas instrucciones.
ÍNDICE
Prólogo............................................................................ 91
Descripción de los componentes...................................... 92
Volumen de suministro..................................................... 92
Eliminación de aparatos eléctricos y electrónicos
como residuos ................................................................. 93
Colocación y sustitución de la pila.................................... 94
Indicador de la capacidad de la pila.................................. 95
Montaje........................................................................... 96
Graduación de dioptrías ................................................... 96
Cambio de aumento......................................................... 97
Compensación de paralaje............................................... 97
Ajuste de altura y lateral................................................... 98
"Puesta a cero" de las escalas de las torres.................... 100
Aplicación de la retícula iluminada.................................. 101
Dispositivo automático de desconexión.......................... 102
Cuidados/limpieza......................................................... 102
Piezas de recambio........................................................ 104
Especificaciones técnicas .............................................. 105
Leica Product Support.................................................... 106
Leica Customer Care ..................................................... 107
Atención:
Evite, del mismo modo que en todos los instrumentos
ópticos de observación, mirar directamente a través
su mira telescópica Leica Magnus hacia fuentes de luz
claras, con el fin de evitar lesiones en los ojos.
Magnus komplett.indb 91 17.08.2015 08:41:58
92
DESCRIPCIÓN DE LOS COMPONENTES
1. Ocular con
a. Concha del ocular giratoria
2. Índice para el ajuste de las dioptrías
3. Tapa del compartimiento de la pila/interruptor gira-
torio/basculante de la retícula iluminada con
a. Posiciones de conexión de modos de
funcionamiento
b. Punto de índice para modos de
funcionamiento
c. Símbolos para el sentido de ajuste de la
luminosidad
d. Compartimiento de la pila
e. Anillo obturador
4. Torre de ajuste de altura
5. Torre de ajuste lateral
6. Objetivo
7. Rosca del filtro
8. Anillo de ajuste del aumento con
a. Saliente
9. Anillo de ajuste del paralaje con
a. Escala
4./5. Torre de ajuste de altura/de ajuste lateral
(cubierta de protección desenroscada) con
a. Índice
b. Tornillo de sujeción
c. Cubierta de protección
d. Rueda moleteada
e. Escala
f. Anillo obturador
MATERIAL ENTREGADO
- Mira telescópica
- 1 pila de botón de litio de 3 V tipo CR 2032
- Tapa protectora para ocular/objetivo
- Instrucciones
- Tarjeta de garantía
- Paño de limpieza
- Cubierta para la guía de montaje
(solo en modelos correspondientemente equipados)
Magnus komplett.indb 92 17.08.2015 08:41:58
93
ELIMINACIÓN DE APARATOS
ELÉCTRICOS Y ELECTRÓNICOS
COMO RESIDUOS
(es válido para la UE, así como para otros paí-
ses europeos con sistemas de recogida sepa-
rada de residuos)
¡Este aparato contiene componentes eléctricos y/o
electrónicos y, por ello, no debe eliminarse con la basu-
ra doméstica normal!
En su lugar se deberá entregar a los centros de recogida
correspondientes puestos a disposición por las comuni-
dades con fines de reciclaje. Esto es gratuito para usted.
En el caso de que el aparato incluya pilas o acumula-
dores recambiables, estos deberán ser retirados pre-
viamente y, si es necesario, eliminarse por su parte
conforme con las disposiciones (véase al respecto las in-
dicaciones en las instrucciones del aparato).
En su administración local, en la empresa de eliminación
de residuos, o en el comercio en el que haya adquirido
este aparato recibirá otras informaciones relativas al
tema.
Magnus komplett.indb 93 17.08.2015 08:41:58
94
COLOCACIÓN Y SUSTITUCIÓN
DE LA PILA
La energía de las miras telescópicas Leica con retícula
iluminada se suministra mediante una pila de botón de
litio de 3 voltios, tipo CR 2032.
Nota:
La vida útil de una pila no solo depende del perfil de uti-
lización, sino también de muchos otros factores, por lo
que puede variar considerablemente.
1. Abra la tapa (3) del compartimiento de la pila (3d)
haciéndola girar en sentido contrario a las agujas del
reloj (A).
2. Introduzca la pila con su contacto positivo hacia arri-
ba (B).
3. Vuelva a cerrar la tapa. Para ello, hágala girar en el sen-
tido de las agujas del reloj hasta que note la resistencia
debida al anillo obturador de goma (3e).
Importante:
¡No aplique la fuerza al cerrar la tapa!
A B
Magnus komplett.indb 94 17.08.2015 08:41:58
95
INDICADORDELACAPACIDADDELAPILA
El punto luminoso de la
retícula iluminada sirve de
indicador. La indicación
tiene lugar durante los
primeros 10s tras encen-
der el aparato:
Capacidad Indicación
Suficiente El punto luminoso brilla con luz fija
Baja El punto luminoso se apaga
brevemente a intervalos regulares
Débil El punto luminoso parpadea de
modo uniforme
Nota:
• La indicación nose repite tras un proceso automático de
apagado y encendido de la retícula iluminada (v. pág. 102).
• En el ajuste de fábrica, es decir, cuando se entrega la
mira telescópica, está activado este indicador, pero
puede desconectarlo (v. abajo.).
Conectar y desconectar el indicador de capacidad
1. Sitúe el interruptor giratorio/basculante (3) en funcio-
namiento diurno (posición "Sol") (a).
2. Ajuste la luminosidad mínima con el interruptor gira-
torio/basculante (v. pág. 101) y vuelva a soltarlo a
continuación (b).
3. Mantenga presionado el lado izquierdo del interruptor gira-
torio/basculante durante 20 s como mínimo (c).
• Para confirmar su ajuste parpadeará el punto lu-
minoso (durante los primeros 10 s tras el proceso
de ajuste):
Estado Indicación
Conectado El punto luminoso parpadea breve-
mente a intervalos regulares
Des El punto luminoso parpadea
2 veces a intervalos regulares
Nota:
Su ajuste se mantendrá tanto tras la desconexión y
conexión automática de la retícula iluminada como tras
un cambio de pila.
a
b c
Magnus komplett.indb 95 17.08.2015 08:41:59
96
MONTAJE
El primer requisito para un blanco perfecto es un monta-
je técnicamente correcto de la mira telescópica sobre el
arma. Para ello, están disponibles en el comercio espe-
cializado una gran diversidad de piezas de montaje.
Recomendamos que se encomiende el montaje a un ta-
ller especializado, en el que será imprescindible que se
haga alineado y sin tensiones. Para el montaje, el taller
solo debe utilizar piezas de alta calidad de fabricantes
prestigiosos, que estén a la altura de las propiedades
cualitativas de su mira telescópica Leica Magnus.
GRADUACIÓN DE DIOPTRÍAS
Utilice la graduación de dioptrías para ajustar la mira te-
lescópica Leica Magnus a su ojo. Haga girar para ello la
concha (1a) del ocular (1) hasta que pueda ver la retícula
con la máxima nitidez. Para lograr un ajuste lo más preci-
so posible se recomienda
- dirigir la mira telescópica a un fondo neutro, claro, y
- hacer girar primero la concha por completo a la izquier-
da, para seguidamente volver a girarla desde esta posi-
ción hacia la derecha hasta encontrar la máxima nitidez
para la retícula. Este modo de proceder tiene en cuenta
la capacidad de acomodación del ojo y asegura así un
ajuste óptimo.
Magnus komplett.indb 96 17.08.2015 08:41:59
97
CAMBIO DE AUMENTO
Haciendo girar el anillo de ajuste (8) se modifica el au-
mento: hacia la derecha para reducirlo y hacia la iz-
quierda para incrementarlo. El saliente (8a) facilita la
orientación en la oscuridad: Si apunta hacia arriba, está
siempre ajustado aproximadamente el aumento medio.
COMPENSACIÓN DE PARALAJE
Las miras telescópicas Leica Magnus con un aumento
máximo de hasta 12 x están adaptadas a una distancia
de 100m libres de paralaje, de modo que puede ver a
la vez con perfecta nitidez la retícula y un objetivo a esa
distancia.
Las posibles desviaciones del punto de impacto en caso
de que el ojo no se encuentre en posición exactamen-
te centrada se pueden considerar despreciables por lo
general.
Sin embargo, sí que se han de tener en cuenta las des-
viaciones en caso de aumentos relativamente eleva-
dos. Por este motivo, las miras con rangos de aumento
superiores a 12 x disponen de una compensación de
paralaje.
Para ello, haga girar el anillo de ajuste (9) correspon-
diente de la torre a la izquierda del tubo hasta que pue-
da ver la imagen del objetivo con absoluta nitidez. Con
objeto de conseguir un ajuste lo más preciso posible, se
recomienda emplear en este proceso el aumento máxi-
mo. Se consigue un ajuste óptimo si la retícula y la ima-
gen no se mueven entre sí cuando varía la posición del
ojo con respecto al ocular.
Magnus komplett.indb 97 17.08.2015 08:41:59
Instructions | Leica Magnus Riflescopes | Optics Trade

Contenu connexe

Tendances

Tendances (10)

Instructions ZEISS Victory V8 Rifle Scope | Optics Trade
Instructions ZEISS Victory V8 Rifle Scope | Optics TradeInstructions ZEISS Victory V8 Rifle Scope | Optics Trade
Instructions ZEISS Victory V8 Rifle Scope | Optics Trade
 
Instruction manual | Noblex N6 Rifle Scopes | Optics Trade
Instruction manual | Noblex N6 Rifle Scopes | Optics TradeInstruction manual | Noblex N6 Rifle Scopes | Optics Trade
Instruction manual | Noblex N6 Rifle Scopes | Optics Trade
 
Instructions LEICA Magnus Rifle Scopes 24, 42, 56mm | Optics Trade
Instructions LEICA Magnus Rifle Scopes 24, 42, 56mm | Optics TradeInstructions LEICA Magnus Rifle Scopes 24, 42, 56mm | Optics Trade
Instructions LEICA Magnus Rifle Scopes 24, 42, 56mm | Optics Trade
 
Instruction manual | Noblex Inception Rifle Scopes | Optics Trade
Instruction manual | Noblex Inception Rifle Scopes | Optics TradeInstruction manual | Noblex Inception Rifle Scopes | Optics Trade
Instruction manual | Noblex Inception Rifle Scopes | Optics Trade
 
Instruction manual | Zeiss Conquest V4 | Optics Trade
Instruction manual | Zeiss Conquest V4 | Optics TradeInstruction manual | Zeiss Conquest V4 | Optics Trade
Instruction manual | Zeiss Conquest V4 | Optics Trade
 
Instructions | Zeiss Victory RF Binoculars | Optics Trade
Instructions | Zeiss Victory RF Binoculars | Optics TradeInstructions | Zeiss Victory RF Binoculars | Optics Trade
Instructions | Zeiss Victory RF Binoculars | Optics Trade
 
Instructions ZEISS Victory Diarange M Rifle Scope | Optics Trade
Instructions ZEISS Victory Diarange M Rifle Scope | Optics TradeInstructions ZEISS Victory Diarange M Rifle Scope | Optics Trade
Instructions ZEISS Victory Diarange M Rifle Scope | Optics Trade
 
Instruction manual | Leica Noctivid Binoculars | Optics Trade
Instruction manual | Leica Noctivid Binoculars | Optics TradeInstruction manual | Leica Noctivid Binoculars | Optics Trade
Instruction manual | Leica Noctivid Binoculars | Optics Trade
 
Instruction manual LEICA ERi 2,5-10x42, 3-12x50 | Optics Trade
Instruction manual LEICA ERi 2,5-10x42, 3-12x50 | Optics TradeInstruction manual LEICA ERi 2,5-10x42, 3-12x50 | Optics Trade
Instruction manual LEICA ERi 2,5-10x42, 3-12x50 | Optics Trade
 
Fiets computer 20110623991baseline50097
Fiets computer 20110623991baseline50097Fiets computer 20110623991baseline50097
Fiets computer 20110623991baseline50097
 

Plus de Optics-Trade

Plus de Optics-Trade (20)

Technical Data | Sig Sauer Easy6 BDX 1-6x24 | Optics Trade
Technical Data | Sig Sauer Easy6 BDX 1-6x24 | Optics TradeTechnical Data | Sig Sauer Easy6 BDX 1-6x24 | Optics Trade
Technical Data | Sig Sauer Easy6 BDX 1-6x24 | Optics Trade
 
Technical Data | ThermTec Wild 650L | Optics Trade
Technical Data | ThermTec Wild 650L | Optics TradeTechnical Data | ThermTec Wild 650L | Optics Trade
Technical Data | ThermTec Wild 650L | Optics Trade
 
Technical Data | ThermTec Wild 635L | Optics Trade
Technical Data | ThermTec Wild 635L | Optics TradeTechnical Data | ThermTec Wild 635L | Optics Trade
Technical Data | ThermTec Wild 635L | Optics Trade
 
Technical Data | ThermTec Wild 650 | Optics Trade
Technical Data | ThermTec Wild 650 | Optics TradeTechnical Data | ThermTec Wild 650 | Optics Trade
Technical Data | ThermTec Wild 650 | Optics Trade
 
Technical Data | ThermTec Wild 635 | Optics Trade
Technical Data | ThermTec Wild 635 | Optics TradeTechnical Data | ThermTec Wild 635 | Optics Trade
Technical Data | ThermTec Wild 635 | Optics Trade
 
Technical Data | ThermTec Wild 335 | Optics Trade
Technical Data | ThermTec Wild 335 | Optics TradeTechnical Data | ThermTec Wild 335 | Optics Trade
Technical Data | ThermTec Wild 335 | Optics Trade
 
Technical Data | ThermTec Wild 325 | Optics Trade
Technical Data | ThermTec Wild 325 | Optics TradeTechnical Data | ThermTec Wild 325 | Optics Trade
Technical Data | ThermTec Wild 325 | Optics Trade
 
Instruction Manual | ThermTec Wild Thermal Monoculars | Optics Trade
Instruction Manual | ThermTec Wild Thermal Monoculars | Optics TradeInstruction Manual | ThermTec Wild Thermal Monoculars | Optics Trade
Instruction Manual | ThermTec Wild Thermal Monoculars | Optics Trade
 
Technical Data | ThermTec Hunt 335 | Optics Trade
Technical Data | ThermTec Hunt 335 | Optics TradeTechnical Data | ThermTec Hunt 335 | Optics Trade
Technical Data | ThermTec Hunt 335 | Optics Trade
 
Instruction Manual | ThermTec Hunt Thermal Clip-On Series | Optics Trade
Instruction Manual | ThermTec Hunt Thermal Clip-On Series | Optics TradeInstruction Manual | ThermTec Hunt Thermal Clip-On Series | Optics Trade
Instruction Manual | ThermTec Hunt Thermal Clip-On Series | Optics Trade
 
Instruction Manual | Steiner eRanger LRF 10x42 | Optics Trade
Instruction Manual | Steiner eRanger LRF 10x42 | Optics TradeInstruction Manual | Steiner eRanger LRF 10x42 | Optics Trade
Instruction Manual | Steiner eRanger LRF 10x42 | Optics Trade
 
Flyer | Guide DN Series Handheld Digital Binoculars | Optics Trade
Flyer | Guide DN Series Handheld Digital Binoculars | Optics TradeFlyer | Guide DN Series Handheld Digital Binoculars | Optics Trade
Flyer | Guide DN Series Handheld Digital Binoculars | Optics Trade
 
Quick Start Guide | Guide TB Series | Optics Trade
Quick Start Guide | Guide TB Series | Optics TradeQuick Start Guide | Guide TB Series | Optics Trade
Quick Start Guide | Guide TB Series | Optics Trade
 
Instruction Manual | Pard FD1 Digital NV Front Attachment | Optics Trade
Instruction Manual | Pard FD1 Digital NV Front Attachment | Optics TradeInstruction Manual | Pard FD1 Digital NV Front Attachment | Optics Trade
Instruction Manual | Pard FD1 Digital NV Front Attachment | Optics Trade
 
Instruction Manual | EOTech Vudu X 2-12x40 | Optics Trade
Instruction Manual | EOTech Vudu X 2-12x40 | Optics TradeInstruction Manual | EOTech Vudu X 2-12x40 | Optics Trade
Instruction Manual | EOTech Vudu X 2-12x40 | Optics Trade
 
Instruction Manual | EOTech Vudu X 1-6x24 | Optics Trade
Instruction Manual | EOTech Vudu X 1-6x24 | Optics TradeInstruction Manual | EOTech Vudu X 1-6x24 | Optics Trade
Instruction Manual | EOTech Vudu X 1-6x24 | Optics Trade
 
Instruction Manual | Nightforce CFS 6-36x50 F1 | Optics Trade
Instruction Manual | Nightforce CFS 6-36x50 F1 | Optics TradeInstruction Manual | Nightforce CFS 6-36x50 F1 | Optics Trade
Instruction Manual | Nightforce CFS 6-36x50 F1 | Optics Trade
 
Instruction Manual | Athlon Cronus Tactical G2 ED 7-42x60 | Optics Trade
Instruction Manual | Athlon Cronus Tactical G2 ED 7-42x60 | Optics TradeInstruction Manual | Athlon Cronus Tactical G2 ED 7-42x60 | Optics Trade
Instruction Manual | Athlon Cronus Tactical G2 ED 7-42x60 | Optics Trade
 
Insrtuction Manual | Swarovski CL Companion Habicht | Optics Trade
Insrtuction Manual | Swarovski CL Companion Habicht | Optics TradeInsrtuction Manual | Swarovski CL Companion Habicht | Optics Trade
Insrtuction Manual | Swarovski CL Companion Habicht | Optics Trade
 
Technical Data | Swarovski CL Companion Habicht | Optics Trade
Technical Data | Swarovski CL Companion Habicht | Optics TradeTechnical Data | Swarovski CL Companion Habicht | Optics Trade
Technical Data | Swarovski CL Companion Habicht | Optics Trade
 

Instructions | Leica Magnus Riflescopes | Optics Trade

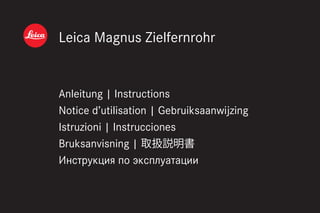
  • 1. Leica Magnus Zielfernrohr Anleitung | Instructions Notice d’utilisation | Gebruiksaanwijzing Istruzioni | Instrucciones Bruksanvisning | Инструкция по эксплуатации
  • 4.
  • 5. 1 VORWORT Sehr geehrte Kundin, sehr geehrter Kunde, Der Name Leica steht weltweit für höchste Qualität, fein- mechanische Präzision bei äußerster Zuverlässigkeit und lange Lebensdauer. Wir wünschen Ihnen viel Freude und Erfolg mit Ihrem neuen Leica Magnus Zielfernrohr. Ihr Leica Magnus Zielfernrohr ist mit einer hervorra- genden Optik ausgestattet, die auch unter schwierigsten Bedingungen ein klares, helles und brillantes Bild liefert, so dass stets ein sicheres Abkommen möglich ist. Darü- ber hinaus ist es einfach und funktional zu bedienen. Damit Sie alle Möglichkeiten dieses hochwertigen Ziel- fernrohres richtig nutzen können, empfehlen wir Ihnen, zunächst diese Anleitung zu lesen. INHALTSVERZEICHNIS Vorwort.............................................................................. 1 Bezeichnung der Teile ........................................................ 2 Lieferumfang...................................................................... 2 Entsorgung elektrischer und elektronischer Geräte............. 3 Einsetzen und Auswechseln der Batterie............................. 4 Anzeige der Batterie-Kapazität............................................ 5 Montage............................................................................ 6 Dioptrien-Ausgleich............................................................ 6 Wechseln der Vergrößerung ............................................... 7 Parallaxe-Ausgleich............................................................ 7 Höhen- und Seitenjustierung.............................................. 8 „Nullen“ der Turmskalen .................................................. 10 Anwenden des Leucht-Absehens...................................... 11 Abschalt-Automatik.......................................................... 12 Pflege/Reinigung............................................................. 12 Ersatzteile........................................................................ 14 Technische Daten ............................................................ 15 Leica Product Support...................................................... 16 Leica Customer Care ....................................................... 17Achtung: Vermeiden Sie, wie auch bei Ferngläsern, den direkten Blick mit Ihrem Leica Magnus Zielfernrohr in helle Licht- quellen, um Augenverletzungen auszuschließen. Magnus komplett.indb 1 17.08.2015 08:41:33
  • 6. 2 BEZEICHNUNG DER TEILE 1. Okular mit a. Dreh-Augenmuschel 2. Index für Dioptrien-Einstellung 3. Batteriefach-Deckel / Leuchtabsehen-Dreh-/ Wippschalter mit a. Betriebsarten-Schaltstellungen b. Indexpunkt für Betriebsarten c. Symbole für Helligkeits-Einstellrichtung d. Batteriefach e. Dichtring 4. Höhenverstellungsturm 5. Seitenverstellungsturm 6. Objektiv 7. Filtergewinde 8. Vergrößerungs-Stellring mit a. Nocken 9. Parallaxe-Stellring mit a. Skala 4./5. Höhen-/Seitenverstellungsturm (Abdeckkappe abgeschraubt) mit a. Index b. Klemmschraube c. Abdeckkappe d. Rändelrad e. Skala f. Dichtring LIEFERUMFANG – Zielfernrohr – 1 Lithium-Knopfzelle 3V Typ CR 2032 – Schutzdeckel für Okular/Objektiv – Anleitung – Garantiekarte – Reinigungstuch – Abdeckung für Montageschiene (nur bei entspr. ausgestatteten Modellen) Magnus komplett.indb 2 17.08.2015 08:41:33
  • 7. 3 ENTSORGUNG ELEKTRISCHER UND ELEKTRONISCHER GERÄTE (Gilt für die EU, sowie andere europäische Länder mit getrennten Sammelsystemen) Dieses Gerät enthält elektrische und/oder elektronische Bauteile und darf daher nicht im normalen Hausmüll ent- sorgt werden! Stattdessen muss es zwecks Recycling an entsprechen- den, von den Gemeinden bereitgestellten Sammelstellen abgegeben werden. Dies ist für Sie kostenlos. Falls das Gerät selbst wechselbare Batterien oder Akkus enthält, müssen diese vorher entnommen werden und ggf. ihrerseits vorschriftsmäßig entsorgt werden (siehe dazu die Angaben in der Anleitung des Geräts). Weitere Informationen zum Thema bekommen Sie bei Ihrer Gemeindeverwaltung, Ihrem Entsorgungsunter- nehmen, oder dem Geschäft, in dem Sie dieses Gerät erworben haben. Magnus komplett.indb 3 17.08.2015 08:41:33
  • 8. 4 EINSETZEN UND AUSWECHSELN DER BATTERIE Die Leica Zielfernrohre mit Leucht-Absehen werden zur Energieversorgung mit einer 3 Volt Lithium-Knopfzelle, Typ CR 2032 bestückt. Hinweis: Die Lebensdauer einer Batterie ist neben dem Nutzungs- profil auch von vielen anderen Faktoren abhängig und kann daher sehr unterschiedlich sein. 1. Öffnen Sie den Deckel (3) des Batteriefachs (3d) in- dem Sie ihn gegen den Uhrzeigersinn drehen (A). 2. Legen Sie die Batterie mit ihrem Pluskontakt nach oben zeigend ein (B). 3. Schließen Sie den Deckel wieder. Drehen Sie ihn dazu im Uhrzeigersinn, bis Sie den durch die Gummi-Ringdich- tung (3e) verursachten Widerstand fühlen. Wichtig: Wenden Sie beim Schließen des Deckels keine Gewalt an! A B Magnus komplett.indb 4 17.08.2015 08:41:33
  • 9. 5 ANZEIGE DER BATTERIE-KAPAZITÄT Zur Anzeige dient der Leuchtpunkt des Leucht- Absehens. Die Anzeige erfolgt während der ers- ten 10s nach dem Ein- schalten: Kapazität Anzeige Ausreichend Leuchtpunkt leuchtet dauerhaft Niedrig Leuchtpunkt erlischt regelmäßig kurzzeitig Schwach Leuchtpunkt blinkt gleichmäßig Hinweis: • Die Anzeige wird nach einer automatischen Aus- und wieder Einschaltung des Leucht-Absehens (s. S. 12) nicht wiederholt. • In der Werkseinstellung, d.h. bei Auslieferung des Zielfernrohres, ist diese Anzeige eingeschaltet, Sie können sie aber auch ausschalten (s. u.). Ein- und Ausschalten der Kapazitätsanzeige 1. Stellen Sie den Dreh-/Wippschalter (3) auf Tagbetrieb („Sonne“-Stellung) (a). 2. Stellen Sie mit dem Dreh-/Wippschalter die geringste Helligkeit ein (s. S. 11) und lassen Sie ihn anschlie- ßend wieder los (b). 3. Halten Sie die linke Seite des Dreh-/Wippschalters mindestens 20s gedrückt fest (c). • Zur Bestätigung Ihrer Einstellung blinkt der Leucht- punkt (während der ersten 10s nach dem Einstell- vorgang): Zustand Anzeige Ein Leuchtpunkt blinkt regelmäßig kurz auf Aus Leuchtpunkt blinkt regelmäßig 2x kurz auf Hinweis: Ihre Einstellung bleibt sowohl nach dem manuellen Aus- und Einschalten des Leucht-Absehens, als auch nach einem Batteriewechsel erhalten. a b c Magnus komplett.indb 5 17.08.2015 08:41:34
  • 10. 6 MONTAGE Die erste Voraussetzung für eine perfekte Trefferlage ist eine fachgerechte Montage des Zielfernrohres auf der Waffe. Hierzu gibt es im Fachhandel eine Vielzahl von unterschiedlichen Montageteilen. Wir empfehlen, für die Montage eine Fachwerkstatt zu beauftragen, und dort unbedingt auf einen fluchtenden und spannungsfreien Aufbau achten zu lassen. Zur Mon- tage sollte die Werkstatt nur hochwertige Bauteile von renommierten Herstellern verwenden, die den qualita- tiven Eigenschaften Ihres Leica Magnus Zielfernrohres gerecht werden. DIOPTRIEN-AUSGLEICH Durch den Dioptrien-Ausgleich stellen Sie Ihr Leica Ma- gnus Zielfernrohr auf Ihr Auge ein. Drehen Sie dazu die Augenmuschel (1a) des Okulars (1) so, dass Sie das Abse- hen in höchster Schärfe sehen können. Für eine möglichst genaue Einstellung empfiehlt es sich dabei - das Zielfernrohr auf einen neutralen, hellen Hintergrund zu richten, und - zunächst die Augenmuschel ganz nach links zu drehen, um anschließend von dieser Stellung aus nach rechts zurückzudrehen und die beste Schärfe für das Absehen zu finden. Diese Vorgehensweise berücksichtigt die Ak- kommodationsfähigkeit des Auges und sichert so eine optimale Einstellung. Magnus komplett.indb 6 17.08.2015 08:41:34
  • 11. 7 WECHSELN DER VERGRÖSSERUNG Durch Drehen des Stellrings (8) verändern Sie die Ver- größerung – nach rechts für geringere Vergrößerungen, nach links für stärkere. Der Nocken (8a) erleichtert die Orientierung in der Dunkelheit: Zeigt er nach oben, ist jeweils etwa die mittlere Vergrößerung eingestellt. PARALLAXE-AUSGLEICH Leica Magnus Zielfernrohre bis zu einer Maximal-Vergrö- ßerung von 12-fach sind auf eine Entfernung von 100m parallaxefrei abgestimmt, so dass Sie gleichzeitig das Absehen und ein Ziel in dieser Entfernung perfekt scharf sehen können. Etwaige Abweichungen der Treffpunktlage bei nicht ge- nau zentrischer Lage des Auges sind in aller Regel ver- nachlässigbar. Bei höheren Vergrößerungen müssen die Abweichungen jedoch berücksichtigt werden. Daher besitzen Zielfern- rohre mit Vergrößerungsbereichen, die über 12-fach hin- ausgehen, einen Parallaxe-Ausgleich. Drehen Sie dazu am entsprechenden Stellring (9) des Turms links am Tubus, bis Sie das Bild des Ziels absolut scharf sehen können. Es empfiehlt sich zwecks mög- lichst genauer Einstellung, dabei stets die stärkste Ver- größerung zu verwenden. Eine optimale Einstellung ist dann erreicht, wenn sich Absehen und Bild nicht gegen- einander bewegen, wenn Sie die Position des Auges ge- genüber dem Okular verändern. Magnus komplett.indb 7 17.08.2015 08:41:34
  • 12. 8 HÖHEN- UND SEITENJUSTIERUNG 1. Montieren sie das Zielfernrohr auf die Waffe (s. S. 6). 2. Richten Sie Absehen und Laufachse der Waffe mit den beiden Verstelltürmen auf die von ihnen gewählte Einschussentfernung aufeinander aus (z. B. 100m). Dies kann z. B. mit einer Laserpatrone erfolgen. 3. Geben Sie zur Feststellung der Treffpunkt-Lage einen Probeschuss ab. Hierbei ist es von Vorteil, die Waffe auf einem Anschießgestell oder mit Sandsäcken in ih- rer Lage zu fixieren. 4. Justieren Sie - ohne die Lage der Waffe zu verändern - das Absehen mit den beiden Verstelltürmen (4/5) ex- akt auf den Treffpunkt. Dies erfolgt an den zwei Verstelltürmen – (4) für die Höhe, (5) für die Seite, und für beide auf gleiche Art: 5. Schrauben Sie dazu zunächst die Abdeckkappe (4c/5c) gegen den Uhrzeigersinn ab. Bei entfernter Kappe wird das Rändelrad (4d/5d) sichtbar, sowie der dazugehörige Skalenring (4e/5e), und der entspre- chende Indexpunkt (4a/5a). 6. Anschließend nehmen Sie die Einstellungen mit dem Rändelrad vor. Die Rändel besitzen eine sehr feine Rastung, ein Klick entspricht einer Abweichung der Treffpunktlage um ca.10mm/ 1 /3 MOA auf 100m (ohne jede Berück- sichtigung ballistischer Bedingungen). Magnus komplett.indb 8 17.08.2015 08:41:34
  • 13. 9 Liegt die Treffpunktlage hoch (Hochschuss), wird dazu das Rändelrad (4d) gegen den Uhrzeigersinn gedreht, bei tiefer Treffpunktlage (Tiefschuss) im Uhrzeigersinn. Analog dazu bei seitlichen Korrekturen: Liegt die Treffpunktlage rechts (Rechtsschuss), wird dazu das Rändelrad (5d) gegen den Uhrzeigersinn gedreht, bei Treffpunktlage links (Linksschuss) im Uhrzeigersinn. Magnus komplett.indb 9 17.08.2015 08:41:38
  • 14. 10 „NULLEN“ DER TURMSKALEN (Vorgehensweise bei beiden Türmen gleich) Der Vorgang erfolgt zunächst wie im vorangegangenen Abschnitt beschrieben (1./2.). Dann wird, 1. während das Rändelrad (4d/5d) gehalten wird, mit einer Münze die Klemmschraube (4b/5b) gelöst (A), und 2. der Skalenring (4e/5e) so gedreht, dass die Null dem Indexpunkt (4a/5a) gegenüber steht (B). 3. Schließlich wird diese Einstellung, während das Rän- delrad (4d/5d) gehalten wird, durch festziehen der Klemmschraube fixiert. Nachdem Sie dies mit beiden Skalenringen durchge- führt haben, können Sie die Grundeinstellung auf die Einschussentfernung nach jedweder Verstellung durch Zurückstellen auf die 0-Positionen immer wieder sicher vornehmen, ohne sich etwas merken oder notieren zu müssen. A B Magnus komplett.indb 10 17.08.2015 08:41:39
  • 15. 11 ANWENDEN DES LEUCHT-ABSEHENS Das Leucht-Element der Leica Magnus Zielfernrohre besteht bei allen Absehen-Typen aus einem mittigen Leuchtpunkt. Hinweis: Details zu den verschiedenen Absehen-Typen finden Sie unter: http://de.leica-camera.com/sport_optics/ rifle_scopes_magnus/Absehen/ Mit dem Dreh-/Wippschalter (3) können Sie zwischen drei, durch entsprechende Markierungen gekennzeich- nete Betriebsarten wählen: Mittige Schalterstellung = Aus „Mond“-Stellung = Nachtbetrieb „Sonne“-Stellung = Tagbetrieb Tag- und Nachtbetrieb unterscheiden sich durch die Hel- ligkeits-Einstellbereiche für den Leuchtpunkt. Bei beiden Betriebsarten können Sie die Helligkeit in 60 Stufen den Einsatzbedingungen, bzw. Ihren Wünschen anpassen. Auch dazu dient der Dreh-/Wippschalter: Drücken auf die linke Seite verringert die Helligkeit, drücken auf die rechte Seite erhöht sie. Einfaches Drücken bewirkt eine Veränderung um eine Stufe, gedrückt Halten zu einer kontinuierlichen Veränderung Hinweis: Ihre Einstellungen bleiben auch nach dem Aus- und Ein- schalten erhalten. - + Magnus komplett.indb 11 17.08.2015 08:41:39
  • 16. 12 ABSCHALT-AUTOMATIK Unabhängig von der gewählten Betriebsart schaltet sich das Leucht-Absehen zur Schonung der Batterie in ver- schiedenen Situationen selbsttätig ab, die in der jagdli- chen Praxis dem Nichtgebrauch entsprechen: - wenn das Zielfernrohr länger als 3 Minuten nicht be- wegt wird (beispielsweise beim Ansitz) - wenn das Zielfernrohr um mehr als 45° zur Seite ge- kippt wird (beispielsweise wenn die Waffe vorüberge- hend abgelegt wird) - wenn das Zielfernrohr um mehr als ca. 80° nach oben oder ca. 65° nach unten geneigt wird, bzw. senkrecht steht (beispielsweise beim Schultern der Waffe) Sobald diese Bedingungen nicht mehr gegeben sind, wird der Leuchtpunkt automatisch mit der zuvor eingestellten Helligkeit wieder eingeschaltet. PFLEGE/REINIGUNG Eine besondere Pflege Ihres Leica Magnus Zielfernroh- res ist nicht notwendig. Grobe Schmutzteilchen, wie z. B. Sand sollten mit einem Haarpinsel entfernt oder weg- geblasen werden. Fingerabdrücke u. ä. auf Objektiv- und Okularlinsen können mit einem feuchten Tuch vorgerei- nigt und mit einem weichen, sauberen Leder oder staub- freien Tuch abgewischt werden. Üben Sie auch beim Abwischen stark verschmutzter Linsenoberflächen kei- nen großen Druck aus. Die Vergütung ist zwar hoch ab- riebfest, durch Sand oder Salzkristalle kann sie dennoch beschädigt werden. Das Gehäuse sollte nur mit einem feuchten Leder gerei- nigt werden. Bei Verwendung von trockenen Tüchern be- steht die Gefahr der statischen Aufladung. Alkohol und andere chemische Lösungen dürfen nicht zur Reinigung der Optik oder des Gehäuses verwendet werden. Magnus komplett.indb 12 17.08.2015 08:41:39
  • 17. 13 Wichtig: • Achten Sie darauf, Ihr Zielfernrohr vor Stößen zu schützen. • Lagern Sie Ihr Zielfernrohr am einem gut belüfteten, trockenen und kühlen Ort, insbesondere um in feuch- ten klimatischen Verhältnissen Pilzbefall zu vermeiden. • Leica Zielfernrohre sind bis 4m Wassertiefe (0,4 bar) dicht. Voraussetzung dafür ist eine einwandfreie Ab- dichtung, die dann gewährleistet ist, wenn die Abdeck- kappen von Höhen- und Seitenverstellung, sowie ggf. der Batteriefach-Deckel (3/4c/5c) fest gegen die je- weiligen Dichtungen (3e/4f/5f) aufgeschraubt sind. Achten Sie darauf, dass diese Dichtungen unbeschä- digt sind. Sind sie beschädigt, sollten sie unbedingt ausgewechselt werden. • Versuchen Sie nicht, das Gerät zu demontieren. Re- paraturen sollten ausschließlich von Leica Customer Care Einrichtungen durchgeführt werden. • Jedes Leica Zielfernrohr trägt außer der Typbezeich- nung seine „persönliche“ Fabrikationsnummer. No- tieren Sie sich diese Nummer zur Sicherheit in Ihren Unterlagen. Magnus komplett.indb 13 17.08.2015 08:41:39
  • 18. 14 ERSATZTEILE Falls sie einmal Ersatzteile für Ihr Leica Zielfernrohr be- nötigen sollten, wie z.B. Schraubdeckel, Dichtungen oder Abdeckkappen, wenden Sie sich bitte an unseren Kundendienst (Adresse s. S. 17) oder Ihre Leica Landes- vertretung (Adressen siehe Garantiekarte). Magnus komplett.indb 14 17.08.2015 08:41:39
  • 19. 15 TECHNISCHE DATEN Leica Magnus-Modelle 1 – 6.31 x 242 1.5 – 101 x 422 1.8 – 12 x 50 2.4 – 161 x 562 Austrittspupille 12,4 – 3,8mm 12,4 – 4,2mm 12,6 - 4,2mm 12,4 – 3,5mm Sehfeld bei max. / min. Vergrößerung (m/100m) 6,5 /43,2m 4,1 / 26m 3,5/22,5m 2,6 /17m Parallaxeneinstellung 100m 100m 100m 50m - ∞, einstellbar Austrittspupillen-Längsabstand 90mm Vergütung Aqua Dura™ Transmissionsgrad TD/TN ≥91% Dioptrienausgleich – 4/+3 dpt. Absehen-Verstellweg pro Click ca. 10mm (1/3 MOA) pro Click / 100m Verstellbereich Treffpunktlage 200 x 140cm 150 x 140cm 150 x 140cm 150 x 140cm Mittelrohrdurchmesser 30mm, Zeiss-Innenschiene Filtergewinde, objektivseitig - M46 x 0,75mm M52 x 0,75mm M58 x 0,75mm Wasserdichtigkeit bis 4m, Stickstoff-gefüllt Gehäusematerial Aluminium Absehen-Beleuchtung Leuchtpunkt, ein- und ausschaltbar, wahlweise Tag-, bzw. Nachtbetrieb, Helligkeit jeweils in 60 Stufen einstellbar, automatisches Ab- und Einschalten Länge 272mm 317mm 335mm 360mm Gewicht 570g 620g 710g 785g 1 Vergrößerung 2 Objektivdurchmesser Magnus komplett.indb 15 17.08.2015 08:41:39
  • 20. 16 LEICA PRODUCT SUPPORT Anwendungstechnische Fragen zum Leica Programm be- antwortet Ihnen, schriftlich, telefonisch, per Fax oder per e-mail der Leica Infodienst: Leica Camera AG Product Support / Software Support Am Leitz-Park 5 D-35578 Wetzlar Tel.: +49(0)6441-2080-111 /-108 Fax: +49(0)6441-2080-490 info@leica-camera.com / software-support@leica-camera.com Magnus komplett.indb 16 17.08.2015 08:41:40
  • 21. 17 LEICA CUSTOMER CARE Für die Wartung Ihrer Leica Ausrüstung sowie in Scha- densfällen steht Ihnen die Customer Care der Leica Ca- mera AG oder der Reparatur-Service einer Leica Landes- vertretung zur Verfügung (Adressenliste siehe Garantiekarte). Leica Camera AG Customer Care Am Leitz-Park 5 D-35578 Wetzlar Tel.: +49(0)6441-2080-189 Fax: +49(0)6441-2080-339 customer.care@leica-camera.com Magnus komplett.indb 17 17.08.2015 08:41:40
  • 22. 18 Magnus komplett.indb 18 17.08.2015 08:41:40
  • 23. 19 FOREWORD Dear Customer, Throughout the world, the name Leica stands for premi- um quality, accurate precision mechanics, optimum reli- ability and long service life. We wish you a lot of enjoyment and every success with your new Leica Magnus telescopic sight. Your Leica Magnus telescopic sight is equipped with an outstanding optical system, which delivers a clear, bright and brilliant image even under the toughest conditions, ensuring a reliable reticule at all times. It is also easy to operate and functional. To enable you to make the best possible use of this high performance telescopic sight's features, we recommend that you read these instructions before use. CONTENTS Foreword ......................................................................... 19 Designation of parts......................................................... 20 Package contents ............................................................ 20 Disposal of electrical and electronic equipment................ 21 Inserting and changing the batteries................................. 22 Battery capacity display ................................................... 23 Mounting ......................................................................... 24 Diopter compensation...................................................... 24 Changing the magnification.............................................. 25 Parallax compensation ..................................................... 25 Elevation and lateral adjustment....................................... 26 "Zeroing" the tower scales................................................ 28 Using the illuminated reticle............................................. 29 Automatic shutdown ........................................................ 30 Maintenance / cleaning................................................... 30 Spare parts...................................................................... 32 Technical data ................................................................. 33 Leica Product Support...................................................... 34 Leica Customer Care ....................................................... 35Attention: As with binoculars, avoid looking directly at bright sources of light when using your Leica Magnus telescopic sight, to prevent eye injury. Magnus komplett.indb 19 17.08.2015 08:41:40
  • 24. 20 DESIGNATION OF PARTS 1. Eyepiece with a. Rotating eye cup 2. Index for diopter setting 3. Battery compartment cover / illuminated reticle rotary rocker switch with a. Mode settings b. Index point for modes c. Symbols for brightness adjustment direction d. Battery compartment e. Sealing ring 4. Elevation adjustment tower 5. Lateral adjustment tower 6. Lens 7. Filter thread 8. Magnification dial with a. Cam 9. Parallax dial with a. Scale 4./5. Elevation/lateral adjustment tower (cover unscrewed) with a. Index b. Adjusting screw c. Cover d. Knurled dial e. Scale f. Sealing ring PACKAGE CONTENTS - Telescopic sight - 1 lithium button cell, 3V, type CR 2032 - Protective cover for eyepiece/lens - Instructions - Warranty card - Cleaning cloth - Cover for mounting rail (models with corresponding equipment only) Magnus komplett.indb 20 17.08.2015 08:41:40
  • 25. 21 DISPOSAL OF ELECTRICAL AND ELECTRONIC EQUIPMENT (Applies within theEC,andforotherEuropeancoun- tries with segregatedwastecollectionsystems) This device contains electrical and/or electronic compo- nents and should therefore not be disposed of in general household waste! Instead it should be disposed of at a recycling collec- tion point provided by the local authority. This costs you nothing. If the device itself contains removable batteries or re- chargeable batteries, these should first be removed and, if necessary, properly disposed of (refer to the specifica- tions in the manual for your device). Further information on this point is available at your local administration, your local waste collection company, or in the store where you purchased this device. Magnus komplett.indb 21 17.08.2015 08:41:40
  • 26. 22 INSERTING AND CHANGING THE BATTERY Leica telescopic sights with illuminated reticle are fit- ted with a 3 Volt lithium button cell, type CR 2032 to save energy. Note: The life of a battery depends not just on the usage pro- file but on many other factors and can therefore differ widely. 1. Open the cover (3) on the battery compartment (3d) by turning it anticlockwise (A). 2. Insert the battery with the positive contact pointing upwards (B). 3. Close the cover again. To do this, turn it clockwise until you feel resistance from the rubber sealing ring (3e). Important: Do not exert force when closing the cover. A B Magnus komplett.indb 22 17.08.2015 08:41:40
  • 27. 23 BATTERY CAPACITY DISPLAY The illuminated dot from the reticle is used for the display. The display ap- pears for the first 10s af- ter turning on: Capacity Display Sufficient Illuminated dot lit continuously Low Illuminated dot goes out regularly for a short time Weak Illuminated point flashes evenly Note: • After the illuminated reticle is automatically turned off and back on (see p. 30), the display is not repeated. • With the factory default settings, i.e. when the telescopic sight is delivered, this display is turned on. However, you can turn it off (see below). Turning the capacity display on and off 1. Set the rotary rocker switch (3) to day mode ("sun" setting) (a). 2. Use the rotary rocker switch to set the minimum brightness (see p. 29) and then release it (b). 3. Hold down the left of the rotary rocker switch for at least 20s (c). • The illuminated dot flashes to confirm your setting (for the first 10s after adjustment): Status Display On Illuminated dot briefly lights up reg- ularly Off Illuminated dot briefly lights up twice regularly Note: Your setting is retained both after manually turning the illuminated reticle off and on, and after changing the battery. a b c Magnus komplett.indb 23 17.08.2015 08:41:40
  • 28. 24 MOUNTING The first requirement for perfect targeting is proper mounting of the telescopic sight on the weapon. There are a variety of different fittings available in specialist re- tailers for this purpose. We recommend consulting a specialist workshop for ad- vice on mounting, making sure that they achieve a flush and stress-free construction. The workshop should only use high quality components from well-known manufac- turers for mounting, which offer the same quality as your Leica Magnus telescopic sight. DIOPTER COMPENSATION The diopter compensation allows you to adjust your Leica Magnus telescopic sight to your eye. To do this, turn the eye cup (1a) on the eyepiece (1) so that you can see the reticle with the maximum sharpness. To achieve the most accurate setting possible, we recommend - pointing the telescopic sight at a neutral, light back- ground, and - first turning the eye cup all the way to the left, so that you can then turn it back from this position to the right until you find the best sharpness for the reticle. This method takes into account the accommodative capacity of the eye, thus ensuring an optimum setting. Magnus komplett.indb 24 17.08.2015 08:41:40
  • 29. 25 CHANGING THE MAGNIFICATION To change the magnification, turn the dial (8) - to the right to reduce the magnification and to the left to in- crease it. The cam (8a) improves orientation in darkness: If it is pointing upwards, approximately the middle mag- nification is set. PARALLAX COMPENSATION Leica Magnus telescopic sights up to a maximum mag- nification of 12x are calibrated to a range of 100m with- out parallax, which means that you can simultaneously see the reticle and a target with perfect sharpness at this range. Any variations in the point of impact due to the eye be- ing not precisely centered are usually negligible. At higher magnifications, however, these variations need to be taken into account. Therefore, telescopic sights with magnification ranges above 12x feature parallax compensation. To use this feature, on the corresponding dial (9) for the tower on the left of the barrel until you can see the target with absolute sharpness. To ensure that the set- ting is as accurate as possible, we recommend always using the strongest magnification. An optimum setting is achieved when the reticle and image do not move against each other when you change the position of the eye relative to the eyepiece. Magnus komplett.indb 25 17.08.2015 08:41:40
  • 30. 26 ELEVATION AND LATERAL ADJUSTMENT 1. Mount the telescopic sight on the weapon (see p. 24). 2. Point the reticle and the weapon's running axis with the two adjusting towers at the selected zero- ing range (e.g. 100m). This can be done using a laser cartridge, for example. 3. Fire a test shot to establish the point of impact. It is beneficial to fix the weapon in position on a shooting rest or sandbags. 4. Without changing the position of the weapon, adjust the reticle using the two adjusting towers (4/5) pre- cisely to the target. This is done using the two adjusting towers - (4) for the elevation, (5) for lateral, and in the same way in both cases: 5. First unscrew the cover (4c/5c) anticlockwise. When the cover is removed, the knurled dial (4d/5d) is vis- ible, along with the associated scale ring (4e/5e) and the corresponding index point (4a/5a). 6. Then make the settings with the knurled dial. The dial has very fine graduations, and a click corre- sponds to a variation in the point of impact of around 10mm/ 1 /3 MOA at 100m (not taking account of bal- listic conditions). Magnus komplett.indb 26 17.08.2015 08:41:40
  • 31. 27 If the point of impact is high (high shot), turn the knurled dial (4d) anticlockwise, or turn clockwise for a low point of impact (low shot). Make the lateral adjustments in the same way: If the point of impact is right (right shot), turn the knurled dial (5d) anticlockwise, or turn clockwise if the point of impact is left (left shot). Magnus komplett.indb 27 17.08.2015 08:41:43
  • 32. 28 "ZEROING" THE TOWER SCALES (same procedure for both towers) The process is initially the same as that described in the previous section (points 1 and 2). Then, 1. While holding the knurled dial (4d/5d), unscrew the adjusting screw (4b/5b) with a coin (A), and 2. Turn the scale dial (4e/5e) until the zero is lined up with the index point (4a/5a) (B). 3. Finally, the setting is fixed by tightening the adjusting screw while holding the knurled dial (4d/5d).. Once you have done this for both scale dials, you can reliably make the initial setting at the zeroing range af- ter any kind of adjustment by returning to the 0 posi- tions, without the need to remember or make a note of anything. A B Magnus komplett.indb 28 17.08.2015 08:41:44
  • 33. 29 USING THE ILLUMINATED RETICLE The illuminated element of Leica Magnus telescopic sights consists of a central illuminated dot for all reticle types. Note: Details of the different reticle types can be found at: http://de.leica-camera.com/sport_optics/rifle_scopes_ magnus/Absehen/ You can use the rotary rocker switch (3) to choose be- tween three modes, indicated by corresponding mark- ings: Central switch position = Off "Moon" setting = Night mode "Sun" setting = Day mode Day and night mode differ in terms of the brightness ad- justing ranges for the illuminated dot. In both modes, you can adjust the brightness in 60 increments to the conditions or use or your own preferences. This is also done using the rotary rocker switch: Pressing to the left reduces the brightness, pressing to the right increases it. Press once for a single increment or hold down to increment continuously. Note: Your settings are retained even after turning off and on again. - + Magnus komplett.indb 29 17.08.2015 08:41:44
  • 34. 30 AUTOMATIC SHUTDOWN Regardless of the selected mode, the illuminated reticle is deactivated automatically to conserve the battery in various situations, which correspond to not being used when hunting: - If the telescopic sight is not moved for longer than 3 minutes (for example in a hide) - If the telescopic sight is tilted to the side by more than 45° (for example when the weapon is laid down tem- porarily) - If the telescopic sight is tilted more than around 80° upwards or around 65° downwards or is vertical (for example when shouldering the weapon). As soon as these conditions no longer apply, the illuminated dot is reactivated with the brightness set previously. MAINTENANCE / CLEANING Your Leica Magnus telescopic sight does not require any special maintenance. Coarse dirt particles, such as sand, should be removed with a fine hair brush or blown away. Marks such as fingerprints on the front lens and eye- piece lenses can be cleaned with a damp cloth and then wiped off with a soft, clean leather or dust-free cloth. Do not exert heavy pressure when wiping highly soiled lens surfaces. Although the coating is highly abrasion resist- ant, it can be damaged by sand or salt crystals. The housing should only be cleaned with a moist leather cloth. Using dry cloths brings a risk of static charge. Alcohol and other chemical solutions must not be used to clean the optical system or the housing. Magnus komplett.indb 30 17.08.2015 08:41:44
  • 35. 31 Important: • Make sure you protect your telescopic sight from im- pacts. • Store your telescopic sight in a well ventilated, dry and cool location, particularly to prevent the formation of fungus in humid climates. • Leica telescopic sights are water tight to a depth of 4m (0.4 bar). This is the case if the seals are perfect, which is guaranteed if the covers on the elevation and lateral adjustment and the battery compartment cover (3/4c/5c) are screwed tightly against the respec- tive seals (3e/4f/5f). Make sure that these seals are undamaged. If they are damaged, they should be re- placed immediately. • Do not attempt to dismantle the product. Repairs should be carried out exclusively by Leica Customer Care centers. • In addition to the type designation, every Leica tel- escopic sight has its “personal” serial number. Note this number in your documentation for security. Magnus komplett.indb 31 17.08.2015 08:41:44
  • 36. 32 SPARE PARTS If you should require any spare parts for your Leica tel- escopic sight, e.g. screw-on cap, seals or covers, please contact our Customer Care department (see p. 35 for address) or the Leica office in your country (see warran- ty card for addresses). Magnus komplett.indb 32 17.08.2015 08:41:44
  • 37. 33 TECHNICAL DATA Leica Magnus models 1 – 6.31 x 242 1.5 – 101 x 422 1.8 – 12 x 50 2.4 – 161 x 562 Exit pupil 12.4 – 3.8mm 12.4 – 4.2mm 12.6 - 4.2mm 12.4 – 3.5mm Field of vision at max./min. Magnification (m/100m) 6.5 /43.2m 4.1 / 26m 3.5/22.5m 2.6 /17m Parallax adjustment 100m 100m 100m 50m - ∞, adjustable Exit pupil longitudinal distance 90mm Coating Aqua Dura™ Transmission factor TD/TN ≥91% Diopter compensation – 4/+3 dpt. Reticle adjust. distance per click Approx. 10mm (1 /3 MOA) per click / 100m Point of impact adjustment range 200 x 140cm 150 x 140cm 150 x 140cm 150 x 140cm Center tube diameter 30mm, Zeiss internal rail Filter thread, lens side - M46 x 0.75mm M52 x 0.75mm M58 x 0.75mm Water tightness To 4m, nitrogen filled Housing material Aluminum Reticle illumination Illuminated dot, turned on and off, choice of day and night mode, brightness adjustable in 60 increments for each, automatic shutdown and activation Length 272mm 317mm 335mm 360mm Weight 570g 620g 710g 785g 1 Magnification 2 Lens diameter Magnus komplett.indb 33 17.08.2015 08:41:44
  • 38. 34 LEICA PRODUCT SUPPORT The Leica information service can provide you with an answer to any technical application questions relating to the Leica range either in writing, on the telephone or by e-mail. Leica Camera AG Product Support / Software Support Am Leitz-Park 5 D-35578 Wetzlar Tel.: +49(0)6441-2080-111 /-108 Fax: +49(0)6441-2080-490 info@leica-camera.com / software-support@leica-camera.com Magnus komplett.indb 34 17.08.2015 08:41:44
  • 39. 35 LEICA CUSTOMER CARE Leica AG’s customer care centre, or the repair service of the Leica national offices, is available to assist you in maintaining your Leica equipment or in case of damage. Leica Camera AG Customer Care Am Leitz-Park 5 D-35578 Wetzlar Tel.: +49(0)6441-2080-189 Fax: +49(0)6441-2080-339 customer.care@leica-camera.com Magnus komplett.indb 35 17.08.2015 08:41:44
  • 40. 36 Magnus komplett.indb 36 17.08.2015 08:41:44
  • 41. 37 AVANT-PROPOS Chère cliente, cher client, Partout dans le monde, le nom de Leica est synonyme de qualité optimale, de haute précision, de grande fiabi- lité et de durabilité. Nous espérons que vous prendrez grand plaisir à utiliser votre nouvelle lunette de visée Leica Magnus. La lunette de visée Leica Magnus est équipée d'une optique exceptionnelle qui assure une image claire et nette, même dans les conditions les plus difficiles, afin de toujours garantir un résultat sûr. En outre, elle est simple d'emploi et fonctionnelle. Afin que vous puissiez exploiter toutes les fonctionnali- tés de cette lunette de visée hautes performances, nous vous recommandons de lire d'abord ce mode d'emploi. TABLE DES MATIÈRES Avant-propos ................................................................... 36 Description des pièces..................................................... 38 Livraison.......................................................................... 38 Elimination des appareils électriques et électroniques ...... 39 Insertion et changement des piles.................................... 40 Affichage du niveau de charge des piles ........................... 41 Montage.......................................................................... 42 Compensation dioptrique................................................. 42 Modification du grossissement......................................... 43 Correction de parallaxe.................................................... 43 Réglage en hauteur et latéral............................................ 44 "Réinitialisation" des échelles de tourelle.......................... 46 Utilisation du réticule lumineux......................................... 47 Mise hors tension automatique ........................................ 48 Entretien/nettoyage ........................................................ 48 Pièces de rechange.......................................................... 50 Caractéristiques techniques............................................. 51 Leica Product Support...................................................... 52 Leica Customer Care ....................................................... 53 Attention: Eviter, comme avec des jumelles, de regarder avec la lunette de visée Leica Magnus directement dans des sources de lumière claires afin d'écarter tout risque de lésion oculaire. Magnus komplett.indb 37 17.08.2015 08:41:44
  • 42. 38 DESCRIPTION DES PIÈCES 1. Oculaire avec a. Œillère rotative 2. Index pour le réglage dioptrique 3. Couvercle du compartiment à piles / Commuta- teur à bascule/rotatif du réticule lumineux avec a. Positions des modes de fonctionnement b. Point d'index pour les modes de fonctionne- ment c. Symboles de réglage de la luminosité d. Compartiment à piles e. Joint d'étanchéité 4. Tourelle de réglage en hauteur 5. Tourelle de réglage latéral 6. Objectif 7. Filetage du filtre 8. Bague de réglage du grossissement avec a. Ergot 9. Bague de réglage de parallaxe avec a. Echelle 4./5. Tourelle de réglage latéral/en hauteur (capuchon de protection vissé) avec a. Index b. Vis de fixation c. Capuchon de protection d. Molette e. Echelle f. Joint d'étanchéité EQUIPEMENT FOURNI - Lunette de visée - 1 pile ronde lithium 3 V type CR 2032 - Capuchon de protection pour oculaire/objectif - Mode d'emploi - Carte de garantie - Lingette de nettoyage - Cache pour rails de montage (uniquement sur les modèles équipés en conséquence) Magnus komplett.indb 38 17.08.2015 08:41:44
  • 43. 39 ELIMINATIONDESAPPAREILS ÉLECTRIQUESETÉLECTRONIQUES (applicable à l'UE ainsi qu'aux autres pays européens avec des systèmes de collecte distincts) Cet appareil contient des composants électriques et/ ou électroniques et ne peut donc pas être jeté dans les ordures ménagères ordinaires! Il doit être déposé à un point de collecte municipal adap- té afin d'être recyclé. Ce dépôt est gratuit. Si l'appareil contient des piles ou des accumulateurs remplaçables, ils doivent être préalablement retirés et, le cas échéant, éliminés séparément conformément aux règlements en vigueur (à cet égard, voir les instructions correspondantes dans le mode d'emploi de l'appareil). D'autres informations à ce sujet sont disponibles auprès de l'administration municipale, de la société de traite- ment des déchets ou du magasin dans lequel vous avez acheté cet appareil. Magnus komplett.indb 39 17.08.2015 08:41:44
  • 44. 40 INSERTION ET REMPLACEMENT DE LA PILE Les lunettes de visée Leica avec réticule lumineux sont alimentées par une pile ronde lithium 3 V, type CR 2032. Remarque: L'autonomie d'une pile dépend du profil d'utilisation, ainsi que de nombreux autres facteurs, et peut donc être très variable. 1. Ouvrez le couvercle (3) du compartiment des piles (3d) en le faisant tourner dans le sens inverse des ai- guilles d'une montre (A). 2. Insérez la pile avec la borne positive orientée vers le haut (B). 3. Replacez le couvercle du compartiment. Faites-le tourner dans le sens des aiguilles d'une montre jusqu'à ce que vous sentiez une résistance du joint en caoutchouc (3e). Important: Ne forcez pas lorsque vous refermez le couvercle! A B Magnus komplett.indb 40 17.08.2015 08:41:45
  • 45. 41 AFFICHAGEDUNIVEAUDECHARGEDELAPILE Le point lumineux du réticule lumineux sert à l'affichage. L'affichage s'effectue dans les 10s suivant la mise sous ten- sion: Affichage de l'autonomie Suffisante Le point lumineux reste allumé Réduite Le point lumineux s'éteint brièvement à intervalles réguliers Faible Lepointlumineuxclignoterégulièrement Remarque: • Après une désactivation et une réactivation automa- tiques du réticule lumineux (voir p. 48), l'affichage n'est pas répété. • Par défaut, c'est-à-dire à la livraison des lunettes de visée, cet affichage est activé, mais vous pouvez le désactiver (voir ci-dessous). Activation et désactivation de l'affichage de l'auto- nomie 1. Placez le commutateur à bascule/rotatif (3) en mode Jour (position "Soleil") (a). 2. A l'aide du commutateur à bascule/rotatif, sélection- nez la luminosité la plus faible (voir p. 47) et relâchez le commutateur (b). 3. Maintenez le côté gauche du commutateur à bas- cule/rotatif enfoncé pendant au moins 20s (c). •Pourconfirmerleréglage,lepointlumineuxclignote(pendant les10premièressecondessuivantleréglage): Etat Affichage Activé Le point lumineux clignote briève- ment et régulièrement Désactivé Le point lumineux clignote briève- ment 2x et régulièrement Remarque: Votre réglage est conservé après la désactivation et l'activation manuelles du réticule lumineux, ainsi qu'après le remplacement de la pile. a b c Magnus komplett.indb 41 17.08.2015 08:41:45
  • 46. 42 MONTAGE Pour une visée parfaite, il est avant tout essentiel de monter correctement la lunette de visée sur l'arme. Pour ce faire, il existe un vaste éventail de pièces de montage dans le commerce spécialisé. Nous recommandons de faire appel à un atelier spécia- lisé pour le montage et d'être attentif à un bon aligne- ment et à une absence de tension. Pour le montage, nous conseillons de n'utiliser que des pièces de qualité provenant de fabricants renommés, appropriées aux ca- ractéristiques de la lunette de visée Leica Magnus. COMPENSATION DIOPTRIQUE Pour la compensation dioptrique, placez la lunette de visée Leica Magnus devant votre œil. Faites alors tourner l'œillère (1a) de l'oculaire (1) de manière à voir le réticule avec une grande netteté. Pour un réglage d'une précision optimale, il est recommandé - de diriger la lunette de visée vers un fond clair et neutre, puis de - tourner d'abord l'œilleton entièrement vers la gauche pour ensuite le tourner de nouveau vers la droite et re- chercher la netteté optimale du réticule. Cette opération tient compte de la faculté d'adaptation de l'œil et per- met ainsi un réglage optimal. Magnus komplett.indb 42 17.08.2015 08:41:45
  • 47. 43 REGLAGE DU GROSSISSEMENT Vous pouvez modifier le grossissement en faisant tour- ner la bague de réglage (8) : vers la droite pour un gros- sissement inférieur et vers la gauche pour un grossisse- ment supérieur. L'ergot (8a) facilite l'orientation dans l'obscurité : s'il est dirigé vers le haut, il est réglé sur un grossissement intermédiaire. CORRECTION DE PARALLAXE La lunette de visée Leica Magnus dotée d'un grossis- sement maximal 12x est ajustée pour une distance de 100m sans parallaxe afin d'assurer une netteté parfaite pour l'observation et la visée à cette distance. Une déviation éventuelle du point d'impact est générale- ment négligeable si l'œil n'est pas parfaitement centré. Les déviations doivent toutefois être prises en compte en cas de grossissements supérieurs. Les lunettes de visée disposant d'un grossissement supérieur à 12x sont donc équipées d'une correction de parallaxe. Pour ce faire, faites tourner la bague de réglage corres- pondante (9) de la tourelle, à gauche du tube, jusqu'à ce que la cible apparaisse avec une grande netteté. Pour un réglage aussi précis que possible, il est conseillé de toujours régler le grossissement maximum lors de cette opération. Un réglage optimal est ainsi atteint lorsque le réticule et l'image ne se déplacent pas dans des direc- tions opposées en cas de changement de position de l'œil par rapport à l'oculaire. Magnus komplett.indb 43 17.08.2015 08:41:45
  • 48. 44 RÉGLAGE EN HAUTEUR ET LATÉRAL 1. Montez la lunette de visée sur l'arme (voir p. 42). 2. A l'aide des deux tourelles de réglage, réglez le réticule et l'axe de barillet de l'arme sur la distance de tir sélectionnée (p. ex. 100m). Vous pouvez notamment utiliser un collimateur laser. 3. Effectuez un tir d'essai pour vérifier la position du point d'impact. A cet égard, il est utile de fixer l'arme en po- sition sur un trépied ou à l'aide de sacs de sable. 4. Sans modifier la position de l'arme, ajustez le réticule précisément sur le point d'impact à l'aide des deux tourelles de réglage (4/5). Cette opération s'effectue à l'aide des deux tourelles de réglage (4 pour la hauteur et 5 pour le réglage latéral), qui fonctionnent de manière identique: 5. Dévissez d'abord le capuchon de protection (4c/5c) en le faisant tourner dans le sens inverse des aiguilles d'une montre. Une fois le capuchon ôté, la molette (4d/5d) est visible, ainsi que la bague de réglage (4e/5e) correspondante et le point d'index (4a/5a). 6. Ensuite, effectuez les réglages à l'aide de la molette. Les molettes sont dotées d'incréments très fins, un clic correspondant à une déviation du point d'im- pact d'environ 10mm/ 1 /3 MOA à 100m (sans tenir compte de toutes les conditions balistiques). Magnus komplett.indb 44 17.08.2015 08:41:45
  • 49. 45 Si le point d'impact est en hauteur (tir haut), la molette (4d) est tournée dans le sens inverse des aiguilles d'une montre, s'il est plus bas (tir bas), elle est tournée dans le sens des aiguilles d'une montre. Procédezdelamêmemanièrepourlescorrectionslatérales: Si le point d'impact est à droite (tir droit), la molette (5d) est tournée dans le sens inverse des aiguilles d'une montre, s'il est à gauche (tir gauche), elle est tournée dans le sens des aiguilles d'une montre. Magnus komplett.indb 45 17.08.2015 08:41:48
  • 50. 46 "RÉINITIALISATION" DES ÉCHELLES DE TOURELLE (Procédure identique pour les deux tourelles) La procédure suit d'abord les indications de la section précédente (1./2.). Ensuite, 1. pendant que vous maintenez la molette (4d/5d), des- serrez la vis de fixation (4b/5b) à l'aide d'une pièce de monnaie (A), et 2. tournez la bague de réglage (4e/5e) de manière à ce que le zéro se trouve face au point d'index (4a/5a) (B). 3. Enfin, ce réglage est fixé par le serrage de la vis de fixation pendant que la molette (4d/5d) est main- tenue. Une fois que vous avez effectué ces opérations sur les deux bagues de réglage, vous pouvez rétablir précisé- ment le réglage de base de la distance de tir après tout autre réglage en effectuant une remise à zéro, et ce sans devoir prendre de note. A B Magnus komplett.indb 46 17.08.2015 08:41:48
  • 51. 47 UTILISATION DU RETICULE LUMINEUX Tous les types de réticules de la lunette de visée Leica Magnus disposent d'un point lumineux central. Remarque: Pour plus d'informations sur les différents types de réticules, visitez le site: http://de.leica-camera.com/ sport_optics/rifle_scopes_magnus/Absehen/ Le commutateur à bascule/rotatif (3) permet de choisir entre trois modes de fonctionnement désignés par diffé- rents symboles: Position intermédiaire = Hors tension Position "Lune" = Mode Nuit Position "Soleil" = Mode Jour Les modes Jour et Nuit se distinguent par le degré de lu- minosité du point lumineux. Dans ces deux modes, vous pouvez régler la luminosité selon 60 incréments en fonc- tion des conditions d'utilisation et de vos préférences. Vous pouvez également utiliser le commutateur à bas- cule/rotatif: appuyer sur le côté gauche réduit la lumino- sité, appuyer sur le côté droit l'augmente. Une pression simple entraîne une modification d'un incrément, une pression continue provoque une modification continue Remarque: Vos réglages sont conservés après la mise sous et hors tension. - + Magnus komplett.indb 47 17.08.2015 08:41:49
  • 52. 48 MISE HORS TENSION AUTOMATIQUE Indépendamment du mode de fonctionnement sélection- né, le réticule lumineux se met automatiquement hors tension afin d'économiser la pile dans différentes situa- tions où il n'est pas utilisé lors de la chasse: - lorsque la lunette de visée n'est pas déplacée pendant plus de 3 minutes (par exemple, lors de l'affût) - lorsque la lunette de visée est inclinée à plus de 45° (par exemple lorsque l'arme est posée momentané- ment) - lorsque la lunette de visée est inclinée à plus de 80° vers le haut ou 65° vers le bas environ ou lorsqu'elle est placée à la verticale (par exemple près de l'épaule de l'arme). Dès que ces conditions ne sont plus rem- plies, le point lumineux est automatiquement rallumé avec la luminosité préalablement réglée. ENTRETIEN/NETTOYAGE Il n'est pas nécessaire de prendre des précautions d'entretien particulières avec la lunette de visée Leica Magnus. Enlever les particules grossières, telles que le sable, avec un pinceau fin ou en soufflant dessus. Traiter les empreintes digitales, etc. sur les lentilles d'objectif et d'oculaire d'abord avec un chiffon humide puis les essuyer avec une peau de chamois douce propre ou avec un chiffon non pelucheux. Veillez à ne pas exercer de pression importante sur la surface de la lentille lors de son nettoyage, même si elle est très sale. Bien que la couche anti-reflet soit résistante aux rayures, elle peut être endommagée par le sable ou les cristaux de sel. Le boîtier ne doit être nettoyé qu'à l'aide d'une peau de chamois humide. L'utilisation d'une lingette sèche risque de générer une charge statique. Il est interdit d'utiliser de l'alcool ou d'autres substances chimiques pour le nettoyage du boîtier ou de l'optique. Magnus komplett.indb 48 17.08.2015 08:41:49
  • 53. 49 Important: • Protégez la lunette de visée contre les chocs. • Rangez votre lunette de visée dans un endroit sec, frais et bien aéré, en particulier dans des climats hu- mides, afin d'éviter l'apparition de moisissures. • Les lunettes de visée Leica sont étanches jusqu'à 4m (0,4 bar) de profondeur, mais l'étanchéité parfaite n'est garantie que si les capuchons de protection des tourelles de réglage en hauteur et latéral et le cou- vercle du compartiment des piles (3/4c/5c) sont hermétiquement fermés contre les joints correspon- dants (3e/4f/5f). Vérifiez que ces joints sont en bon état. S'ils sont endommagés, vous devez absolument les remplacer. • N'essayez pas de démonter la lunette. Les réparations doivent être exclusivement réalisées par le Service après-vente Leica. • Chaque lunette de visée Leica porte, outre la désigna- tion de son type, son numéro de fabrication "person- nel". Veuillez, par mesure de sécurité, noter ce numé- ro dans votre documentation. Magnus komplett.indb 49 17.08.2015 08:41:49
  • 54. 50 PIÈCES DE RECHANGE Si vous avez besoin d'une pièce de rechange pour votre lunette de visée Leica, p. ex. un capuchon à visser, des joints ou un capuchon de protection, contactez notre service après-vente (adresse, voir p. 53) ou votre repré- sentant national Leica (adresse, voir carte de garantie). Magnus komplett.indb 50 17.08.2015 08:41:49
  • 55. 51 CARACTÉRISTIQUES TECHNIQUES Modèles Leica Magnus 1 – 6.31 x 242 1.5 – 101 x 422 1.8 – 12 x 50 2.4 – 161 x 562 Pupille de sortie 12,4 – 3,8mm 12,4 – 4,2mm 12,6 - 4,2mm 12,4 – 3,5mm Champ de vision à max. / min. Grossissement (m/100m) 6,5 /43,2m 4,1 / 26m 3,5/22,5m 2,6 /17m Correction de parallaxe 100m 100m 100m 50m - ∞, réglable Dist. longitudinale de la pupille de sortie 90mm Couche anti-reflet Aqua Dura™ Facteur de transmission TD/TN ≥91% Compensation dioptrique – 4/+3 dpt. Plage de réglage du réticule par clic env. 10mm (1 /3 MOA) par clic / 100m Plage de réglage du point d‘impact 200 x 140cm 150 x 140cm 150 x 140cm 150 x 140cm Diamètre du tube médian 30mm, rails intérieurs Zeiss Filetage pour filtre, côté objectif - M46 x 0,75mm M52 x 0,75mm M58 x 0,75mm Etanchéité jusqu‘à 4m de profondeur, rempli d‘azote Matériau du boîtier Aluminium Eclairage du réticule Point lumineux, activable et désactivable, mode Jour et Nuit au choix, luminosité réglable en 60 incréments, mise sous et hors tension automatique Longueur 272mm 317mm 335mm 360mm Poids 570g 620g 710g 785g 1 Grossissement 2 Diamètre de l‘objectif Magnus komplett.indb 51 17.08.2015 08:41:49
  • 56. 52 LEICA PRODUCT SUPPORT Le service d'information Leica répondra volontiers par écrit, par téléphone, fax ou e-mail à vos questions d'ordre technique se rapportant à la gamme de produits Leica: Leica Camera AG Product Support / Software Support Am Leitz-Park 5 D-35578 Wetzlar Tél.: +49(0)6441-2080-111 /-108 Fax: +49(0)6441-2080-490 info@leica-camera.com / software-support@leica-camera.com Magnus komplett.indb 52 17.08.2015 08:41:49
  • 57. 53 LEICA CUSTOMER CARE Le Service après-vente de la société Leica Camera AG et les services après-vente des divers représentants Leica (liste des adresses sur le bon de garantie) se tiennent à votre disposition pour entretenir et réparer vos équipe- ments Leica. Leica Camera AG Customer Care Am Leitz-Park 5 D-35578 Wetzlar Tél.: +49(0)6441-2080-189 Fax: +49(0)6441-2080-339 customer.care@leica-camera.com Magnus komplett.indb 53 17.08.2015 08:41:49
  • 58. 54 Magnus komplett.indb 54 17.08.2015 08:41:49
  • 59. 55 VOORWOORD Geachte klant De naam Leica staat wereldwijd voor hoogste kwaliteit, fijnmechanische precisie in combinatie met buitengewo- ne betrouwbaarheid en lange levensduur. Wij wensen u veel plezier en succes met uw nieuwe Lei- ca Magnus richtkijker. Uw Leica Magus richtkijker is uitgevoerd met een voor- treffelijk lenzensysteem, dat ook in de meest ongunstige situaties een helder beeld levert, zodat u altijd met ze- kerheid kunt richten. Bovendien is deze eenvoudig en functioneel te bedienen. Om alle mogelijkheden van deze hoogwaardige richtkij- ker goed te kunnen benutten, adviseren wij u eerst deze handleiding door te lezen. INHOUDSOPGAVE Voorwoord....................................................................... 55 Aanduiding van de onderdelen.......................................... 56 Leveringsomvang ............................................................. 56 Milieuvriendelijk afvoeren elektrische en elektronische apparatuur............................................. 57 Plaatsen en vervangen van de batterij .............................. 58 Weergave van de batterijcapaciteit................................... 59 Montage.......................................................................... 60 Dioptrie-compensatie....................................................... 60 Van vergroting wisselen.................................................... 61 Parallax-compensatie....................................................... 61 Hoogte- en zijdelingse verstelling ..................................... 62 Torenschaal "nullen"......................................................... 64 Toepassen van het verlicht draadkruis.............................. 65 Uitschakelautomaat ......................................................... 66 Onderhoud/reiniging ....................................................... 66 Vervangende onderdelen.................................................. 68 Technische gegevens....................................................... 69 Leica Product Support...................................................... 70 Leica Customer Care ....................................................... 71 Opgelet: Zoals bij elke verrekijker, dient u te vermijden met de Leica Magnus richtkijker direct in heldere lichtbronnen te kijken om oogletsel uit te sluiten. Magnus komplett.indb 55 17.08.2015 08:41:49
  • 60. 56 AANDUIDING VAN DE ONDERDELEN 1. Oculair met a. draai-oogschelp 2. Index voor dioptrie-instelling 3. Deksel van het batterijvak / verlicht draadkruis- draai-/wipschakelaar met a. schakelstanden gebruiksmodi b. indexpunt voor bedrijfsmodi c. symbolen voor instelrichting helderheid d. batterijvak e. afdichtring 4. Hoogteverstellingstoren 5. Toren voor zijdelingse verstelling 6. Objectief 7. Filterschroefdraad 8. Vergrotings-instelring met a. nok 9. Parallax-instelring met a. Schaal 4./5. Hoogte-/zijdelingse verstellingstoren (afdekkap verwijderd) met a. Index b. Klemschroef c. Afdekkap d. Kartelwieltje e. Schaal f. Afdichtring LEVERINGSOMVANG - Richtkijker - 1 Lithium knoopcel batterij 3V type CR 2032 - Beschermdeksel voor oculair/objectief - Handleiding - Garantiekaart - Reinigingsdoek - Afdekking voor montagerails (alleen bij overeenkomstig uitgeruste modellen) Magnus komplett.indb 56 17.08.2015 08:41:49
  • 61. 57 MILIEUVRIENDELIJK AFVOEREN ELEKTRISCHE EN ELEKTRONI- SCHE APPARATUUR (geldt voor de EU en overige Europese landen met gescheiden inzameling) Dit toestel bevat elektrische en/of elektronische onder- delen en mag daarom niet met het normale huisvuil wor- den meegegeven! In plaats daarvan moet het voor recycling op door de ge- meenten beschikbaar gestelde inzamelpunten worden afgegeven. Dit is voor u gratis. Indien het apparaat verwisselbare batterijen of accu‘s bevat, moeten deze eerst worden verwijderd en evt. vol- gens de voorschriften worden afgevoerd (zie hiervoor de aanwijzingen in de handleiding van het apparaat). Meer informatie over dit onderwerp ontvangt u bij uw gemeentelijke instantie, uw afvalverwerkingsbedrijf of de zaak waar u het toestel hebt gekocht. Magnus komplett.indb 57 17.08.2015 08:41:49
  • 62. 58 PLAATSEN EN VERVANGEN VAN DE BATTERIJ De Leica richtkijkers met verlicht draadkruis worden voor de voeding van een 3 volt lithium-knoopcel, type CR 2032 voorzien. Tip: De levensduur van een batterij is niet alleen afhankelijk van het gebruiksprofiel maar ook van veel andere facto- ren en kan daarom zeer verschillend zijn. 1. Open het deksel (3) van het batterijvak (3d) door dit tegen de wijzers van de klok in te draaien (A). 2. Plaats de batterij met het pluscontact naar boven wij- zend (B). 3. Sluit het deksel weer. Draai daarbij het deksel met de wijzers van de klok mee, totdat u een door de rubberen ringafdichting (3e) veroorzaakte weerstand voelt. Belangrijk: Gebruik bij het sluiten van het deksel geen kracht! A B Magnus komplett.indb 58 17.08.2015 08:41:49
  • 63. 59 WEERGAVEVANDEBATTERIJCAPACITEIT Voor indicatie dient het lichtpunt van het verlichte draadkruis. De indicatie licht op tijdens de eerste 10sec. na het inscha- kelen: Capaciteit Indicatie Voldoende Lichtpunt brandt continu Laag Lichtpunt gaat uit regelmatig kortstondig Zwak Lichtpunt knippert gelijkmatig Tip: • De indicatie wordt na het automatisch uit- en weer inschakelen van het verlichte draadkruis (z. pag. 66) niet herhaald. • In de fabrieksinstelling, d.w.z. bij uitlevering van de richtkijker, is deze indicatie ingeschakeld, maar u kunt deze ook uitschakelen (zie hieronder). In- en uitschakelen van de capaciteitsindicator 1. Plaats de draai-/wipschakelaar (3) op dagmodus ("zon"-stand) (a). 2. Stel met de draai-/wipschakelaar de geringste helderheid in (z. pag. 65) en laat hem vervolgens weer los (b). 3. Houd de linkerkant van de draai-/wipschakelaar ten- minste 20 sec (c) ingedrukt. • Ter bevestiging van uw instelling knippert het licht- punt (tijdens de eerste 10 sec. na de instelproce- dure): Toestand Indicatie Aan Lichtpunt knippert regelmatig kort Uit Lichtpunt knippert regelmatig 2x kort Tip: Uw instelling blijft zowel na het handmatig in-en uitschakelen van het verlichte draadkruis, alsook na het vervangen van de batterij behouden. a b c Magnus komplett.indb 59 17.08.2015 08:41:49
  • 64. 60 MONTAGE De eerste vereiste voor perfect raken is de vakkundige montage van de richtkijker op het wapen. Hiervoor vindt u in de vakhandel een groot aantal verschillende monta- geonderdelen. Wij adviseren om de montage door een vakman uit te laten voeren, waarbij dan vooral op een goede uitlijning en montage zonder spanning dient te worden gelet. Voor de montage moet de werkplaats alleen hoogwaardige componenten van gerenommeerde merken gebruiken, die bij de kwaliteitseigenschappen van uw Leica Magnus richtkijker passen. DIOPTRIE-COMPENSATIE M.b.v. de dioptrie-compensatie stelt u uw Leica Magnus richtkijker op uw oog in. Draai de oogschelp (1a) van het oculair (1) zodanig dat u het draadkruis maximaal scherp ziet. Om deze zo precies mogelijk in te stellen, is het zin- vol - de richtkijker op een neutrale, heldere achtergrond te richten en - eerst de oogschelp volledig naar links te draaien om daarna van dit punt uit weer in richting rechts terug te draaien en zo het draadkruis met de beste scherpte in te stellen. Op deze manier wordt er zoveel mogelijk met het oogaanpassingsvermogen rekening gehouden, waardoor de instelling optimaal zal zijn. Magnus komplett.indb 60 17.08.2015 08:41:49
  • 65. 61 VAN VERGROTING WISSELEN Door aan instelring 8 te draaien, wijzigt u de vergroting – naar rechts voor zwakkere vergroting, naar links voor sterkere. Dankzij het nokje (8a) is de oriëntatie in het donker eenvoudiger: Wijst het naar boven, dan is onge- veer de middelste vergroting ingesteld. PARALLAX-COMPENSATIE Leica Magnus richtkijkers zijn met een maximale vergro- ting van 12-voudig, op een afstand van 100m parallaxvrij afgestemd, zodat u gelijktijdig het draadkruis en het doel op deze afstand perfect scherp kunt zien. Eventuele afwijkingen van de afstand van het trefpunt bij een niet precies centrisch geplaatst oog zijn over het al- gemeen te verwaarlozen. Bij hogere vergrotingen moet er echter met afwijkin- gen rekening worden gehouden. Om deze reden hebben richtkijkers met vergrotingen van meer dan 12-voudig een parallax-compensatie. Draai aan de betreffende instelring (9) van het torentje links op de buis tot u het doel absoluut scherp ziet. Om de instelling zo exact mogelijk uit te voeren, dient u hier de sterkste vergroting voor te gebruiken. U heeft de op- timale instelling gevonden als draadkruis en beeld niet meer t.o.v. elkaar bewegen als u de positie van uw oog t.o.v. het oculair verandert. Magnus komplett.indb 61 17.08.2015 08:41:49
  • 66. 62 HOOGTE- EN ZIJDELINGSE VERSTELLING 1. Monteer de richtkijker op het wapen (z. pag. 60). 2. Richt draadkruis en loopas van het wapen met de beide versteltorens op de gewenste schot- afstand (bijv. 100m) op elkaar uit. Dit kan bijv. met een laser- patroon gebeuren. 3. Vuur een proefschot af om de positie van het trefpunt te bepalen. Het is aan te bevelen het wapen op een bok of met zandzakken in een vaste stand te fixeren. 4. Corrigeer - zonder de positie van het wapen te ver- anderen - het draadkruis met de twee versteltorens (4/5) precies op het trefpunt. Dit doet u met de twee versteltorens – (4) voor hoogte, (5) voor zijdelings, beide op dezelfde manier: 5. Schroef eerst het afdekkapje los (4c/5c), tegen de wijzers van de klok in. Bij verwijderde kap wordt het kartelwieltje (4d/5d) zichtbaar, de bijbehorende schaalring (4e/5e) en het overeenkomstige indexpunt (4a/5a). 6. Vervolgens voert u de instellingen met het kartelwiel- tje uit. De kartelwieltjes hebben een bijzonder fijne afstem- ming, één klik is ongeveer een afwijking van de van circa 10mm/ 1 /3 MOA op 100m (zonder met ballisti- sche omstandigheden rekening te houden). Magnus komplett.indb 62 17.08.2015 08:41:50
  • 67. 63 Is het trefpunt hoog (hoogschot), dan wordt het kartel- wieltje (4d) tegen de wijzers van de klok in gedraaid, bij een laag trefpunt (laagschot) met de wijzers van de klok mee. Op dezelfde wijze bij zijdelingse correctie: Is het trefpunt rechts (rechtsschot), dan wordt het kar- telwieltje (5d) tegen de wijzers van de klok in gedraaid, bij trefpunt links (linksschot) met de wijzers van de klok mee. Magnus komplett.indb 63 17.08.2015 08:41:52
  • 68. 64 TORENSCHAAL "NULLEN" (Procedure is gelijk voor beide torens) De procedure verloopt in het begin zoals in het vorige gedeelte beschreven staat (1./2.). Daarna dient u, 1. terwijl u het kartelwieltje (4d/5d) vasthoudt, met een muntstuk de klemschroef (4b/5b) los te maken (A) en 2. de schaalring (4e/5e) zodanig te draaien, dat de nul tegenover indexpunt (4a/5a) staat (B). 3. Tot slot fixeert u deze instelling, terwijl u het kartel- wieltje (4d/5d) vasthoudt, d.m.v. het aandraaien van de klemschroef. Als u dit met beide schaalringen heeft gedaan, kunt u de basisinstelling op de schietafstand na elke wijziging van de verstelling betrouwbaar weer op de 0-positie terug- zetten zonder iets te hoeven onthouden of noteren. A B Magnus komplett.indb 64 17.08.2015 08:41:53
  • 69. 65 GEBRUIK VAN HET VERLICHTE DRAADKRUIS Het verlichtingselement van de Leica Magnus richtkij- kers bestaat bij alle draadkruis-typen uit een centraal lichtpunt. Tip: Details over de verschillende draadkruis-typen vindt u op: http://de.leica-camera.com/sport_optics/rifle_ scopes_magnus/Absehen/ Met de draai-/wipschakelaar (3) kunt u uit drie, door overeenkomstige markeringen geïdentificeerde modi kiezen: Centrale schakelaar positie = Uit "Maan"-stand = Nachtmodus "Zon"-stand = Dagmodus Dag- en nachtmodus verschillen van elkaar in de instel- bereiken voor de helderheid van het lichtpunt. In beide modi kunt u de helderheid in 60 trappen aan de omstan- digheden of naar uw wensen aanpassen. Ook hiervoor dient de draai-/wipschakelaar: door op de linkerkant te drukken, vermindert u de helderheid en door op de rechterkant te drukken verhoogt u deze. Een enkele druk op de schakelaar wijzigt de instelling met één stap en ingedrukt houden wijzigt de instelling continu Tip: Uw instellingen blijven ook na het uit- en inschakelen behouden. - + Magnus komplett.indb 65 17.08.2015 08:41:53
  • 70. 66 UITSCHAKEL-AUTOMAAT Onafhankelijk van de geselecteerde modus schakelt het verlichte draadkruis in verschillende situaties - die in de jachtpraktijk overeenkomen met "niet in gebruik" - auto- matisch uit om de batterij te sparen. - indien de richtkijker meer dan 3 minuten niet wordt be- wogen (bijvoorbeeld bij de wachtplaats) - indien de richtkijker meer dan 45 ° zijwaarts wordt gekanteld (bijvoorbeeld als het wapen tijdelijk wordt weggelegd) - indien de richtkijker om meer dan ca. 80° omhoog of ca. 65° omlaag wordt gekanteld, ofwel als hij rechtop staat (bijvoorbeeld bij het over de schouder dragen van het wapen). Als aan deze voorwaarden niet meer wordt voldaan, wordt het lichtpunt automatisch weer inge- schakeld met de eerder ingestelde helderheid. ONDERHOUD/REINIGING Bijzonder onderhoud van uw Leica Magnus richtkijker is niet vereist. Grove vuildeeltjes, zoals bijv. zand, dient met een haarborstel te worden verwijderd of weggebla- zen. Vingerafdrukken op o.a. objectief- en oculairlens kunnen eerst met een vochtige doek en daarna met een zacht en schoon zeemleer of pluisvrije doek worden af- geveegd. Oefen geen grote druk uit bij het reinigen van sterk vervuilde lenzen. De coatings zijn wel goed tegen slijtage bestand, maar zand- en zoutkristallen zouden deze toch kunnen beschadigen. De behuizing dient alleen met een vochtige zemen lap te worden gereinigd. Droge doeken kunnen statische lading veroorzaken. Gebruik nooit alcohol of andere chemische oplosmidde- len voor de reiniging van de lenzen of de behuizing. Magnus komplett.indb 66 17.08.2015 08:41:53
  • 71. 67 Belangrijk: • Denkt u eraan uw richtkijker tegen schokken te be- schermen. • Berg uw richtkijker op een goed geventileerde, droge, koele plaats op, vooral ook om in een vochtig klimaat schimmel te voorkomen. • Leica richtkijkers zijn waterdicht t/m 4m diepte (0,4 bar). Dit vereist een correcte afdichting die alleen ge- garandeerd is, als de afdekkapjes van de hoogte- en zijdelingse afstelling en eventueel het deksel van het batterijvak (3/4c/5c)) goed tegen de afdichtringen (3e/4f/5f) aan zijn geschroefd. Let erop dat deze af- dichtringen altijd onbeschadigd blijven. Als deze toch beschadigd raken, dienen ze te worden vervangen. • Probeer niet het apparaat te demonteren. Reparaties mogen uitsluitend door Leica Customer Care-facilitei- ten worden uitgevoerd. • Elke Leica richtkijker heeft behalve een typenummer ook een „persoonlijk“ productienummer. Noteer dit nummer en berg het voor de veiligheid bij uw docu- mentatie op. Magnus komplett.indb 67 17.08.2015 08:41:53
  • 72. 68 VERVANGENDE ONDERDELEN Als u vervangende onderdelen voor uw Leica richtkijker nodig zou hebben, zoals bijv. schroefdeksels, afdichtrin- gen of afdekkapjes, neem dan contact op met onze klan- tenservice (adres z. pag. 71) of de vertegenwoordiging van Leica in uw land (zie garantiekaart voor adres). Magnus komplett.indb 68 17.08.2015 08:41:53
  • 73. 69 TECHNISCHE GEGEVENS Leica Magnus-modellen 1 – 6.31 x 242 1.5 – 101 x 422 1.8 – 12 x 50 2.4 – 161 x 562 Uittrede pupil 12,4 – 3,8mm 12,4 – 4,2mm 12,6 - 4,2mm 12,4 – 3,5mm Gezichtsveld bij max. / min. Vergroting (m/100m) 6,5 /43,2m 4,1 / 26m 3,5/22,5m 2,6 /17m Parallaxinstelling 100m 100m 100m 50m - ∞, instelbaar Uitrede pupillen - lengteafstand 90mm Coating Aqua Dura™ Transmissiegraad TD/TN ≥91% Dioptrie-compensatie – 4/+3 dpt. Draadkruis-instelmarges per klik ca. 10mm (1 /3 MOA) per klik / 100m Instelbereik trefpuntpositie 200 x 140cm 150 x 140cm 150 x 140cm 150 x 140cm Middenbuisdiameter 30mm, Zeiss-binnenrails Filterdraad aan objectiefzijde - M46 x 0,75mm M52 x 0,75mm M58 x 0,75mm Waterdichtheid tot 4m, stikstof-gevuld Materiaal behuizing Aluminium Draadkruisverlichting Lichtpunt, in- en uitschakelbaar, naar keuze dag- of nachtmodus, helderheid instelbaar in 60 trappen, automatisch in- en uitschakelen Lengte 272mm 317mm 335mm 360mm Gewicht 570g 620g 710g 785g 1 Vergroting 2 Diameter objectief Magnus komplett.indb 69 17.08.2015 08:41:53
  • 74. 70 LEICA PRODUCT SUPPORT Technische vragen over het Leica-programma worden schriftelijk, telefonisch, per fax of per e-mail beantwoord door de Leica informatiedienst: Leica Camera AG Product Support / Software Support Am Leitz-Park 5 D-35578 Wetzlar Tel.: +49(0)6441-2080-111 /-108 Fax: +49(0)6441-2080-490 info@leica-camera.com / software-support@leica-camera.com Magnus komplett.indb 70 17.08.2015 08:41:53
  • 75. 71 LEICA CUSTOMER CARE Voor het onderhoud van uw Leica-uitrusting en in geval vanschade kunt u gebruik maken van de Customer Care van Leica Camera AG of de reparatieservice van een Leica vertegenwoordiging in uw land (voor adressenlijst zie garantiekaart). Leica Camera AG Customer Care Am Leitz-Park 5 D-35578 Wetzlar Tel.: +49(0)6441-2080-189 Fax: +49(0)6441-2080-339 customer.care@leica-camera.com Magnus komplett.indb 71 17.08.2015 08:41:53
  • 76. 72 Magnus komplett.indb 72 17.08.2015 08:41:53
  • 77. 73 PREFAZIONE Gentile Cliente, in tutto il mondo il nome Leica è sinonimo di altissima qualità e precisione meccanica unite a un'estrema affi- dabilità e a una lunga durata di vita. Le auguriamo di ottenere il massimo piacere e le migliori soddisfazioni con il suo nuovo cannocchiale da punta- mento Leica Magnus. Il cannocchiale da puntamento Leica Magnus è dotato di un'ottica eccezionale ed è in grado di ottenere immagini nitide e luminose anche nelle condizioni più difficili, per un risultato sempre affidabile. Il suo utilizzo è inoltre semplice e funzionale. Per poter sfruttare pienamente tutte le possibilità che Le offre questo cannocchiale da puntamento ad alte prestazio- ni, Le consigliamo di leggere attentamente le istruzioni prima dell'uso. INDICE Prefazione........................................................................ 73 Denominazione dei componenti ....................................... 74 Materiale in dotazione...................................................... 74 Smaltimento dei dispositivi elettrici ed elettronici ............. 75 Inserimento e sostituzione della batteria........................... 76 Indicazione della capacità della batteria ........................... 77 Montaggio ....................................................................... 78 Correzione diottrica ......................................................... 78 Modifica dell'ingrandimento ............................................. 79 Correzione della parallasse............................................... 79 Regolazione in altezza e laterale....................................... 80 „Azzeramento“ della scala graduata della torretta............. 82 Impiego del reticolo di accensione ................................... 83 Disinserimento automatico............................................... 84 Cura e manutenzione ....................................................... 84 Ricambi ........................................................................... 86 Caratteristiche tecniche................................................... 87 Leica Product Support...................................................... 88 Leica Customer Care ....................................................... 89Attenzione: Come per ogni binocolo, anche con il cannocchiale da puntamento Leica Magnus evitare l'osservazione diretta delle sorgenti luminose per non danneggiare gli occhi. Magnus komplett.indb 73 17.08.2015 08:41:53
  • 78. 74 DENOMINAZIONE DEI COMPONENTI 1. Oculare con a. conchiglia girevole 2. Indice per la regolazione delle diottrie 3. Coperchio vano batterie / interruttore a bilico/ girevole reticolo di accensione con a. Posizioni modalità operative b. Punto indicatore per modalità operative c. Simboli per la direzione di impostazione della luminosità d. Vano batterie e. Guarnizione ad anello 4. Torretta di regolazione dell'altezza 5. Torretta per la regolazione laterale 6. Obiettivo 7. Filtro 8. Ghiera d'ingrandimento con a. Camma 9. Ghiera di regolazione della parallasse con a. Scala 4./5. Torretta per la regolazione dell'altezza e laterale (coperchio di chiusura svitato) con a. Indice b. Vite di serraggio Coperchio di chiusura d. Rotella zigrinata e. Scala f. Guarnizione ad anello MATERIALE IN DOTAZIONE - Cannocchiale da puntamento - 1 batteria a bottone al litio da 3 V tipo CR 2032 - Cappuccio di protezione per oculare/obiettivo - Istruzioni - Certificato di garanzia - Panno per pulizia - Copertura per guide di montaggio (solo per modelli compatibili) Magnus komplett.indb 74 17.08.2015 08:41:53
  • 79. 75 SMALTIMENTO DEI DISPOSITIVI ELETTRICI ED ELETTRONICI (Vale per l’UE e per gli altri paesi europei con sistemi di raccolta differenziata) Il presente apparecchio contiene componenti elettrici e/o elettronici. Non può quindi essere smaltito come un normale rifiuto domestico. Ma va depositato presso gli appositi centri di raccolta allestiti dalle autorità municipali per essere riciclato. La procedura è gratuita per chi la esegue. Qualora il dispositivo contenga batterie sostituibili o ri- caricabili, queste devono essere rimosse ed eventual- mente smaltite in conformità alle normative vigenti (ved. a riguardo quanto riportato nelle Istruzioni per l’uso del dispositivo). Per ulteriori informazioni sull'argomento rivolgersi presso l'amministrazione comunale, l'azienda addetta allo smaltimento o il rivenditore dell'apparecchio. Magnus komplett.indb 75 17.08.2015 08:41:53
  • 80. 76 INSERIMENTO E SOSTITUZIONE DELLA BATTERIA Per l'alimentazione dei cannocchiali Leica con reticolo di accensione si impiegano batterie a bottone al litio da 3 Volt, tipo CR 2032. Nota: La durata di una batteria dipende, oltre al profilo di utiliz- zo, da tanti diversi fattori e può variare notevolmente. 1. Aprire il coperchio (3) del vano batterie (3d) ruotando- lo in senso antiorario (A). 2. Inserire la batteria con il contatto positivo rivolto ver- so l'alto (B). 3. Chiudere nuovamente il coperchio. Ruotarlo in senso orario fino a percepire la resistenza provocata dalla guar- nizione ad anello in gomma (3e). Importante: Non forzare la chiusura del coperchio! A B Magnus komplett.indb 76 17.08.2015 08:41:54
  • 81. 77 INDICAZIONEDELLACAPACITÀDELLABATTERIA Il punto di illuminazione è l'indicazione del reticolo di accensione. L'indica- zione avviene nei primi 10 s dopo l'accensione: Capacità Indicazione Sufficiente Ilpuntodiilluminazionesiilluminaalucefissa Scarsa Il punto di illuminazione scompare di norma brevemente Debole Il punto di illuminazione lampeggia in modo uniforme Nota: • L'indicazione non viene ripetuta dopo uno spegni- mento e un'accensione automatica del reticolo di acensione (vedere pag. 84). • Nell'impostazione di fabbrica, ovvero nella consegna del cannocchiale da puntamento, si accende l'indicatore, è possibile però anche spegnerlo (vedere sotto). Accensione e spegnimento dell'indicazione di ca- pacità 1. Impostare l'interruttore a bilico/ girevole (3) sul fun- zionamento diurno (impostazione „sole“) (a). 2. Conl'interruttoreabilico/girevoleimpostarelaluminositàpiù ridotta(vederepag.83)erilasciarlonuovamente(b). 3. Tenere premuto il lato sinistro dell'interruttore a bili- co/ girevole per almeno 20 s (c). • Per confermare l'impostazione il punto di illumina- zione lampeggia (nei primi 10 s dopo la procedura di impostazione): Stato Indicazione On Il punto di illuminazione si illumina di norma brevemente Off Il punto di illuminazione si illumina due volte di norma brevemente Nota: L'impostazione viene conservata sia dopo lo spegnimen- to e l'accesione manuale del reticolo di accensione, sia dopo un cambio di batteria. a b c Magnus komplett.indb 77 17.08.2015 08:41:54
  • 82. 78 MONTAGGIO Per ottenere un punto d'impatto perfetto innanzitutto è fondamentale montare correttamente il cannocchiale da puntamento sull'arma. Presso i rivenditori specializzati è disponibile una grande quantità di pezzi di montag- gio diversi. Consigliamo di far eseguire il montaggio da un labora- torio specializzato, e di prestare la massima attenzione nell'allineare i pezzi senza applicare troppa forza. Per il montaggio si devono utilizzare esclusivamente com- ponenti di noti produttori che soddisfino gli elevati re- quisiti qualitativi dei cannocchiali da puntamento Leica Magnus. CORREZIONE DIOTTRICA Con la correzione diottrica il cannocchiale da puntamen- to Leica Magnus viene regolato in base all'acuità visiva dell'utente. Girare la conchiglia (1a) dell'oculare (1) di modo da poter visualizzare il reticolo con la massima niti- dezza. Per una regolazione il più precisa possibile consi- gliamo di puntare - il cannocchiale su uno sfondo chiaro e neutro e - prima ruotare la conchiglia a sinistra, per poi tornare in- dietro a destra e individuare così la migliore messa a fuo- co del reticolo. Questa procedura tiene conto della capa- cità di adattamento dell'occhio alle situazioni e assicura quindi una regolazione ottimale. Magnus komplett.indb 78 17.08.2015 08:41:54
  • 83. 79 MODIFICA DELL'INGRANDIMENTO Ruotando la ghiera (8) si regola l'ingrandimento – verso destra per ridurre l'ingrandimento e verso sinistra per aumentarlo. La camma (8a) facilita l'orientamento nell'o- scurità: se punta verso l'alto significa che è impostato l'ingrandimento medio. CORREZIONE DELLA PARALLASSE I cannocchiali da puntamento Leica Magnus sono svi- luppati fino ad un ingrandimento massimo di 12 volte ad una distanza di 100m privo di parallasse, così possono mettere contemporaneamente a fuoco il reticolo e il ber- saglio in modo perfettamente centrato. Eventuali scostamenti nella posizione del punto d'impat- to quando non si mira in modo perfettamente centrato sono di norma trascurabili. Con elevati ingrandimenti si devono però tenere presen- te queste variazioni. Per questo motivo i cannocchiali da puntamento con range d'ingrandimento oltre il fattore 12 volte sono dotati di una correzione della parallas- se. Girare la ghiera corrispondente della torretta a sini- stra sul tubo fino a quando l'immagine del bersaglio è completamente a fuoco. Per ottenere una regolazione il più precisa possibile consigliamo di utilizzare sempre l'ingrandimento maggiore. La regolazione ottimale si ha quando il reticolo e l'immagine non si muovono l'uno contro l'altro cambiando la posizione dell'occhio rispet- to all'oculare. Magnus komplett.indb 79 17.08.2015 08:41:54
  • 84. 80 REGOLAZIONE IN ALTEZZA E LATERALE 1. Montare il cannocchiale da puntamento sull'arma (vedere pag. 78). 2. Servendosi di entrambe le torrette di regolazione allineare il reticolo con l'asse dell'arma alla distanza di tiro desiderata (ad es. 100 m). Questo può avvenire ad es. con una cartuccia laser. 3. Per determinare la posizione del punto di impatto si consiglia di effettuare un tiro di prova. A tal scopo può risultare utile fissare l‘arma in posizione su un‘apposi- ta struttura o con sacchi di sabbia. 4. Senza modificare la posizione dell‘arma regolare il re- ticolo con entrambe le torrette di regolazione (4/5) esattamente sul punto di impatto. Questo avviene sulle due torrette di regolazione – (4) per l'altezza, (5) per la regolazione laterale e in entrambe le direzioni. 5. Svitare dapprima il coperchio di chiusura (4c/5c) in senso antiorario. Una volta rimosso il coperchio si possono vedere la rotella zigrinata (4d/5d), la relativa ghiera graduata (4e/5e) e il punto indicatore corri- spondente (4a/5a). 6. Effettuare infine la regolazione con la rotella zigrinata. Le rotelle zigrinate hanno incastri di grande precisione, un clic corrisponde a uno scostamento nella posizione del punto di impatto da ca. 10mm/ 1 /3 MOA a 100 m (senza tenere conto delle condizioni balistiche). Magnus komplett.indb 80 17.08.2015 08:41:54
  • 85. 81 Se la posizione del punto d'impatto è alta (tiro alto) la rotella zigrinata (4d) dovrà quindi essere ruotata in sen- so antiorario, in caso di posizione del punto d'impatto bassa (tiro bas- so) dovrà essere ruotata in senso orario. Allo stesso modo occorre procedere per la regolazione laterale: Se la posizione del punto d'impatto è a destra (tiro a destra) la rotella zigrinata (5d) dovrà quindi essere ruotata in senso antiorario, in caso di posizione del punto d'impatto a sinistra (tiro a sinistra) dovrà essere ruotata in senso orario. Magnus komplett.indb 81 17.08.2015 08:41:57
  • 86. 82 „AZZERAMENTO“ DELLA SCALA GRADUATA DELLA TORRETTA (stessa procedura per entrambe le torrette) Procedere dapprima come descritto nel capitolo prece- dente (1./2.). Quindi, 1. quando viene mantenuta la rotella zigrinata (4d/5d), viene allentata la vite di serraggio (4b/5b) con una moneta (A), e 2. ruotata la ghiera graduata (4e/5e), in modo da far corrispondere il punto indicatore (4a/5a) al valore zero (B). 3. Questa impostazione viene infine bloccata quando viene mantenuta la rotella zigrinata (4d/5d) e fissata serrando la vite di arresto. Dopo aver eseguito questa operazione su entrambe le ghiere graduate sarà sempre possibile tornare all‘impo- stazione base della distanza di tiro ripristinando le posi- zioni 0, senza che sia necessario annotare qualcosa. A B Magnus komplett.indb 82 17.08.2015 08:41:58
  • 87. 83 IMPIEGODELRETICOLO DIACCENSIONE L'elemento di accensione dei cannocchiali da punta- mento Leica Magnus consiste in tutti i tipi di reticolo composti da un punto di illuminazione centrale. Nota: I dettagli sui diversi tipi di reticolo sono disponibili alla pagina: http://de.leica-camera.com/sport_optics/ rifle_scopes_magnus/Absehen/ Con l'interruttore a bilico/ girevole (3) si possono sele- zionare tre modalità operative contrassegnate da relativi riferimenti: Impostazione interruttore centrale = Off Impostazione „Luna“ = funzionamento notturno Impostazione „sole“ = funzionamento diurno Il funzionamento diurno e notturno si differenziano per i campi di regolazione di luminosità relativi al punto di illuminazione. In entrambe le modalità operative la lumi- nosità può essere adattata alle condizioni ambientali se- condo le preferenze secondo 60 livelli. L'interruttore a bilico/ girevole serve anche per: Pre- mendo sul lato sinistro la luminosità diminuisce, premen- do sul lato destro, aumenta. Una semplice pressione consente la modifica di un livello, mantenere premuto per una modifica continua Nota: Le impostazioni vengono conservate anche dopo lo spe- gnimento e l'accensione. - + Magnus komplett.indb 83 17.08.2015 08:41:58
  • 88. 84 DISINSERIMENTO AUTOMATICO Indipendentemente della modalità operativa seleziona- ta, il reticolo di accensone di spegne automaticamente per il risparmio delle batterie nelle diverse situazioni che corrispondono ad inattività nelle applicazioni pratiche della caccia: - quando il cannocchiale da puntamento non viene spo- stato per 3 minuti (ad esempio durante un apposta- mento) - quando il cannocchiale da puntamento viene ribaltato su un lato di oltre 45° (ad esempio quando l'arma vie- ne temporaneamente archiviata) - quando il cannocchiale da puntamento viene inclinato di oltre 80° ca. verso l'alto oppure di ca. 65° verso il basso, ossia è in posizione verticale (ad esempio con l'arma sulla spalla) Quando queste condizioni non sono più fornite, il punto di illuminazione viene automatica- mente riacceso con la luminosità impostata in prece- denza. CURA E MANUTENZIONE Il cannocchiale da puntamento Leica Magnus non richie- de particolari cure. Eliminare lo sporco più grossolano come ad es. la sabbia con un pennello naturale o soffiar- lo via. Rimuovere impronte digitali o altre macchie sulle lenti prima con un panno di cotone inumidito, poi asciu- gare con cautela utilizzando un panno morbido e pulito di cuoio o cotone. Anche quando si strofinano le super- fici molto sporche delle lenti evitare di esercitare una pressione elevata. Il trattamento antiriflesso possiede un'alta resistenza all'abrasione, ma può comunque esse- re danneggiato dalla sabbia o dai cristalli di sale. Pulire il corpo del cannocchiale solo con un panno di pelle umido. L'utilizzo di panni asciutti potrebbe causare cariche statiche. Non impiegare alcol o altre soluzioni chimiche per pulire l'ottica o il corpo dello strumento. Magnus komplett.indb 84 17.08.2015 08:41:58
  • 89. 85 Importante: • Proteggere il cannocchiale da puntamento dagli urti. • Conservare il cannocchiale da puntamento in un luogo fresco, asciutto e ben areato, in particolare evitando luoghi umidi dove si possono formare funghi. • I cannocchiali da puntamento Leica sono imperme- abili fino a 4m di profondità (0,4 bar). Il presupposto è una perfetta tenuta, che poi viene garantita, se il coperchio di chiusura della regolazione in altezza e la- terale e il relativo coperchio vano batterie (3/4c/5c) sono avvitati saldamento con le relative guarnizioni (3e/4f/5f). Controllare che le guarnizioni non siano danneggiate. Sostituirle se danneggiate. • Non cercare di smontare l'apparecchio. Le riparazioni possono essere eseguite solo dai punti del servizio di assistenza clienti Leica. • Oltre alla denominazione del tipo, su ogni cannocchia- le da puntamento Leica è indicato un codice di fabbri- cazione "personale". Per sicurezza annotare il codice sulla documentazione. Magnus komplett.indb 85 17.08.2015 08:41:58
  • 90. 86 RICAMBI Per ordinare eventuali ricambi per il cannocchiale Leica, come ad es. coperchi a vite, guarnizioni o coperchi di chiusura, rivolgersi al nostro servizio di assistenza (per gli indirizzi vedere a pag. 89) o al rappresentante Leica del proprio paese (per gli indirizzi vedere il certificato di garanzia). Magnus komplett.indb 86 17.08.2015 08:41:58
  • 91. 87 CARATTERISTICHE TECNICHE Modelli Leica Magnus 1 – 6.31 x 242 1.5 – 101 x 422 1.8 – 12 x 50 2.4 – 161 x 562 Pupilla di uscita 12,4 – 3,8mm 12,4 – 4,2mm 12,6 - 4,2mm 12,4 – 3,5mm SCampo visivo a max. / min. Ingrandimento (m/100m) 6,5 /43,2m 4,1 / 26m 3,5/22,5m 2,6 /17m Impostazione parallasse 100m 100m 100m 50m - ∞, impostabile Distanza longitudinale tra le pupille di uscita 90mm Trattamento Aqua Dura™ Grado di trasmissione TD/TN ≥91% Correzione diottrica – 4/+3 dpt. Corse di spostamento reticolo per clic ca. 10mm (1 /3 MOA) per clic / 100m Campodireg.posizionedelpuntod‘impatto 200 x 140cm 150 x 140cm 150 x 140cm 150 x 140cm Diametro tubo centrale 30mm, guide interne Zeiss Filettatura, lato obiettivo - M46 x 0,75mm M52 x 0,75mm M58 x 0,75mm Tenuta stagna fino a 4m, riempito di azoto Materiale del corpo Alluminio Illuminazione reticolo Punto di illuminazione, attivabile e disattivabile, a scelta funzionamento diurno e notturno, Luminosità impostabile in 60 livelli, spegimento e accensione automatica Lunghezza 272mm 317mm 335mm 360mm Peso 570g 620g 710g 785g 1 Ingrandimento 2 Diametro dell‘obiettivo Magnus komplett.indb 87 17.08.2015 08:41:58
  • 92. 88 LEICA PRODUCT SUPPORT Il Leica Infoservice risponde alle domande sulle tecniche applicative relative al programma Leica per iscritto, tele- fonicamente, via fax o per posta elettronica: Leica Camera AG Product Support / Software Support Am Leitz-Park 5 D-35578 Wetzlar Tel.: +49(0)6441-2080-111 /-108 Fax: +49(0)6441-2080-490 info@leica-camera.com / software-support@leica-camera.com Magnus komplett.indb 88 17.08.2015 08:41:58
  • 93. 89 LEICA CUSTOMER CARE Per la manutenzione della Vostra attrezzatura Leica e in caso di eventuali anomalie è a completa disposizione il Servizio Clienti della Leica Camera AG o il Centro Ripa- razioni Leica Autorizzato del Suo paese (per gli indirizzi vedere il tagliando di garanzia). Leica Camera AG Customer Care Am Leitz-Park 5 D-35578 Wetzlar Tel.: +49(0)6441-2080-189 Fax: +49(0)6441-2080-339 customer.care@leica-camera.com Magnus komplett.indb 89 17.08.2015 08:41:58
  • 94. 90 Magnus komplett.indb 90 17.08.2015 08:41:58
  • 95. 91 PRÓLOGO Estimada clienta, estimado cliente: El nombre de Leica representa la máxima calidad a es- cala mundial, una precisión mecánica fina con una extre- mada fiabilidad y una larga duración. Deseamos que disfrute y tenga mucho éxito con su nue- va mira telescópica Leica Magnus. Su mira telescópica Leica Magnus está equipada con una óptica excepcional que proporciona una imagen cla- ra y luminosa, incluso en las condiciones más desfavora- bles, de forma que siempre es posible apuntar con segu- ridad. Además, su manejo es sencillo y funcional. Para que usted pueda aplicar correctamente todas las opciones de esta mira telescópica de alta calidad, le re- comendamos leer primero estas instrucciones. ÍNDICE Prólogo............................................................................ 91 Descripción de los componentes...................................... 92 Volumen de suministro..................................................... 92 Eliminación de aparatos eléctricos y electrónicos como residuos ................................................................. 93 Colocación y sustitución de la pila.................................... 94 Indicador de la capacidad de la pila.................................. 95 Montaje........................................................................... 96 Graduación de dioptrías ................................................... 96 Cambio de aumento......................................................... 97 Compensación de paralaje............................................... 97 Ajuste de altura y lateral................................................... 98 "Puesta a cero" de las escalas de las torres.................... 100 Aplicación de la retícula iluminada.................................. 101 Dispositivo automático de desconexión.......................... 102 Cuidados/limpieza......................................................... 102 Piezas de recambio........................................................ 104 Especificaciones técnicas .............................................. 105 Leica Product Support.................................................... 106 Leica Customer Care ..................................................... 107 Atención: Evite, del mismo modo que en todos los instrumentos ópticos de observación, mirar directamente a través su mira telescópica Leica Magnus hacia fuentes de luz claras, con el fin de evitar lesiones en los ojos. Magnus komplett.indb 91 17.08.2015 08:41:58
  • 96. 92 DESCRIPCIÓN DE LOS COMPONENTES 1. Ocular con a. Concha del ocular giratoria 2. Índice para el ajuste de las dioptrías 3. Tapa del compartimiento de la pila/interruptor gira- torio/basculante de la retícula iluminada con a. Posiciones de conexión de modos de funcionamiento b. Punto de índice para modos de funcionamiento c. Símbolos para el sentido de ajuste de la luminosidad d. Compartimiento de la pila e. Anillo obturador 4. Torre de ajuste de altura 5. Torre de ajuste lateral 6. Objetivo 7. Rosca del filtro 8. Anillo de ajuste del aumento con a. Saliente 9. Anillo de ajuste del paralaje con a. Escala 4./5. Torre de ajuste de altura/de ajuste lateral (cubierta de protección desenroscada) con a. Índice b. Tornillo de sujeción c. Cubierta de protección d. Rueda moleteada e. Escala f. Anillo obturador MATERIAL ENTREGADO - Mira telescópica - 1 pila de botón de litio de 3 V tipo CR 2032 - Tapa protectora para ocular/objetivo - Instrucciones - Tarjeta de garantía - Paño de limpieza - Cubierta para la guía de montaje (solo en modelos correspondientemente equipados) Magnus komplett.indb 92 17.08.2015 08:41:58
  • 97. 93 ELIMINACIÓN DE APARATOS ELÉCTRICOS Y ELECTRÓNICOS COMO RESIDUOS (es válido para la UE, así como para otros paí- ses europeos con sistemas de recogida sepa- rada de residuos) ¡Este aparato contiene componentes eléctricos y/o electrónicos y, por ello, no debe eliminarse con la basu- ra doméstica normal! En su lugar se deberá entregar a los centros de recogida correspondientes puestos a disposición por las comuni- dades con fines de reciclaje. Esto es gratuito para usted. En el caso de que el aparato incluya pilas o acumula- dores recambiables, estos deberán ser retirados pre- viamente y, si es necesario, eliminarse por su parte conforme con las disposiciones (véase al respecto las in- dicaciones en las instrucciones del aparato). En su administración local, en la empresa de eliminación de residuos, o en el comercio en el que haya adquirido este aparato recibirá otras informaciones relativas al tema. Magnus komplett.indb 93 17.08.2015 08:41:58
  • 98. 94 COLOCACIÓN Y SUSTITUCIÓN DE LA PILA La energía de las miras telescópicas Leica con retícula iluminada se suministra mediante una pila de botón de litio de 3 voltios, tipo CR 2032. Nota: La vida útil de una pila no solo depende del perfil de uti- lización, sino también de muchos otros factores, por lo que puede variar considerablemente. 1. Abra la tapa (3) del compartimiento de la pila (3d) haciéndola girar en sentido contrario a las agujas del reloj (A). 2. Introduzca la pila con su contacto positivo hacia arri- ba (B). 3. Vuelva a cerrar la tapa. Para ello, hágala girar en el sen- tido de las agujas del reloj hasta que note la resistencia debida al anillo obturador de goma (3e). Importante: ¡No aplique la fuerza al cerrar la tapa! A B Magnus komplett.indb 94 17.08.2015 08:41:58
  • 99. 95 INDICADORDELACAPACIDADDELAPILA El punto luminoso de la retícula iluminada sirve de indicador. La indicación tiene lugar durante los primeros 10s tras encen- der el aparato: Capacidad Indicación Suficiente El punto luminoso brilla con luz fija Baja El punto luminoso se apaga brevemente a intervalos regulares Débil El punto luminoso parpadea de modo uniforme Nota: • La indicación nose repite tras un proceso automático de apagado y encendido de la retícula iluminada (v. pág. 102). • En el ajuste de fábrica, es decir, cuando se entrega la mira telescópica, está activado este indicador, pero puede desconectarlo (v. abajo.). Conectar y desconectar el indicador de capacidad 1. Sitúe el interruptor giratorio/basculante (3) en funcio- namiento diurno (posición "Sol") (a). 2. Ajuste la luminosidad mínima con el interruptor gira- torio/basculante (v. pág. 101) y vuelva a soltarlo a continuación (b). 3. Mantenga presionado el lado izquierdo del interruptor gira- torio/basculante durante 20 s como mínimo (c). • Para confirmar su ajuste parpadeará el punto lu- minoso (durante los primeros 10 s tras el proceso de ajuste): Estado Indicación Conectado El punto luminoso parpadea breve- mente a intervalos regulares Des El punto luminoso parpadea 2 veces a intervalos regulares Nota: Su ajuste se mantendrá tanto tras la desconexión y conexión automática de la retícula iluminada como tras un cambio de pila. a b c Magnus komplett.indb 95 17.08.2015 08:41:59
  • 100. 96 MONTAJE El primer requisito para un blanco perfecto es un monta- je técnicamente correcto de la mira telescópica sobre el arma. Para ello, están disponibles en el comercio espe- cializado una gran diversidad de piezas de montaje. Recomendamos que se encomiende el montaje a un ta- ller especializado, en el que será imprescindible que se haga alineado y sin tensiones. Para el montaje, el taller solo debe utilizar piezas de alta calidad de fabricantes prestigiosos, que estén a la altura de las propiedades cualitativas de su mira telescópica Leica Magnus. GRADUACIÓN DE DIOPTRÍAS Utilice la graduación de dioptrías para ajustar la mira te- lescópica Leica Magnus a su ojo. Haga girar para ello la concha (1a) del ocular (1) hasta que pueda ver la retícula con la máxima nitidez. Para lograr un ajuste lo más preci- so posible se recomienda - dirigir la mira telescópica a un fondo neutro, claro, y - hacer girar primero la concha por completo a la izquier- da, para seguidamente volver a girarla desde esta posi- ción hacia la derecha hasta encontrar la máxima nitidez para la retícula. Este modo de proceder tiene en cuenta la capacidad de acomodación del ojo y asegura así un ajuste óptimo. Magnus komplett.indb 96 17.08.2015 08:41:59
  • 101. 97 CAMBIO DE AUMENTO Haciendo girar el anillo de ajuste (8) se modifica el au- mento: hacia la derecha para reducirlo y hacia la iz- quierda para incrementarlo. El saliente (8a) facilita la orientación en la oscuridad: Si apunta hacia arriba, está siempre ajustado aproximadamente el aumento medio. COMPENSACIÓN DE PARALAJE Las miras telescópicas Leica Magnus con un aumento máximo de hasta 12 x están adaptadas a una distancia de 100m libres de paralaje, de modo que puede ver a la vez con perfecta nitidez la retícula y un objetivo a esa distancia. Las posibles desviaciones del punto de impacto en caso de que el ojo no se encuentre en posición exactamen- te centrada se pueden considerar despreciables por lo general. Sin embargo, sí que se han de tener en cuenta las des- viaciones en caso de aumentos relativamente eleva- dos. Por este motivo, las miras con rangos de aumento superiores a 12 x disponen de una compensación de paralaje. Para ello, haga girar el anillo de ajuste (9) correspon- diente de la torre a la izquierda del tubo hasta que pue- da ver la imagen del objetivo con absoluta nitidez. Con objeto de conseguir un ajuste lo más preciso posible, se recomienda emplear en este proceso el aumento máxi- mo. Se consigue un ajuste óptimo si la retícula y la ima- gen no se mueven entre sí cuando varía la posición del ojo con respecto al ocular. Magnus komplett.indb 97 17.08.2015 08:41:59