
Recommandé
Contenu connexe
Tendances
Tendances (20)
Similaire à Pranavi verma-class-9-word-processing
Similaire à Pranavi verma-class-9-word-processing (20)
Plus de PranaviVerma
Plus de PranaviVerma (20)
Dernier
Dernier (20)
Pranavi verma-class-9-word-processing
- 2. This Unit Covers: Basics of Word Processor Introduction to MS Word 2010 User Interface of MS Word 2010 Spell and Grammar Check Document Editing and Formatting Bullets and Numbering Creating Tables in MS Word 2010 Different Views of a Document Printing a Document Adding Borders and Shades in a Document Learning Objectives
- 3. Word Processing is the process to create, edit, save and print the text documents on the computer using a word processor, such as Microsoft Word, OpenOffice Writer and WordPad. In the current technology-driven world, activities such as creating, managing and maintaining documents have become an integral part of our day-to-day business. These documents serve as the source of information for an organization and help in conducting various business activities such as decision-making, planning, knowledge sharing and information analysis. You can use a word processor to cater your needs for creating and managing documents required for your day-to-day business. Introduction
- 4. Microsoft Word (MS Word) is a word processor developed by Microsoft. The default extension of the MS Word 2010 document is .docx. Some major features of a word processor are: Fast speed: Enables you to type much faster as compared to any conventional typewriter. Easy editing: Allows you to perform all types of editing tasks in a text document, such as insertion, deletion and modification. Permanent storage: Allows you to save your text document and also access your saved document whenever required. Simple formatting: Enables you to format your document easily, for example, you can change the text of your document to bold, italic or different fonts. Adding graphics: Facilitates insertion of pictures, diagrams and other visual elements into text documents. Session 1: Getting Started with a MS Word 2010
- 5. You can start MS Word 2010 by clicking the Start button on the Task bar and then selecting All Programs Microsoft Office Microsoft Word 2010 in the Start menu, as shown in the given figure. Now, a blank document opens in MS Word 2010, as shown in following figure: Starting Microsoft Word 2010
- 6. When you start MS Word 2010, a blank document is automatically created and opened. To create a blank document from the already opened MS Word 2010 window, you need to click the File tab and then select the New option in the Backstage view. Opening a New Document Now, select the Blank document template under Available Templates category and click the Create button in the Backstage view, as shown in given figure. A new blank document gets opened on your screen.
- 7. By default, an MS Word 2010 document is saved as a file with the .docx extension. You can save a document by specifying the location where you want to save your document, the name of the document, the format in which you want to save your document, and then click the Save button in the Save as dialog box, as shown in the following figure: You can access this dialog box by clicking the File tab and then selecting the Save As option from the Backstage view. Saving the Document
- 8. After you have finished working with the MS Word 2010 document, you can close the document by clicking the Close button at the top right corner of the document window. You can also close the currently open document by first clicking the File tab and then selecting the Close option from the Backstage view, as shown in the following figure: Closing the Document
- 9. Quitting from MS Word means we are closing all the currently open word documents. To exit from the MS Word 2010 application, you need to first click the File tab and then select the Exit option from the Backstage view, as shown in the following figure: Quitting from Microsoft Word 2010
- 10. The document created in the MS Word application is editable, which means you can make any kind of modifications in it. To edit a document, you need to first open a document and then edit the document. Session 2: Editing and Saving a Document You can open an existing document by first selecting the document from the desired location and then clicking the Open button in the Open dialog box, as shown in the given figure. You can access this dialog box by clicking the File tab and then selecting the Open option from the Backstage view.
- 11. The selected document gets opened, as shown in the given figure. Now, edit the text in the opened document by entering some text in it, as shown in given figure. Now, save the document by using one of the following ways: By click the File tab and then select the Save option from the Backstage view. By pressing the CTRL+S keys By clicking the Save button in the Quick Access Toolbar. Session 2: Editing and Saving a Document Displaying the Opened Document Displaying the Document after Editing
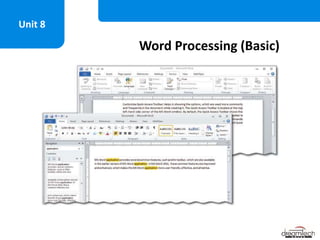
- 12. The user Interface of MS Word 2010 is shown in the following figure: Session 3: Identifying Elements of User Interface
- 13. The Home tab contains all the basic editing and formatting commands, such as font size, font face; alignment of the text, namely, left, right, center and justify; bullets; styles; indent settings; and sort. These commands are clubbed to form groups and these groups are further clubbed to form tabs. The Home tab in MS Word 2010 is shown in the following figure: The Home tab also contains various groups and these groups have their respective purpose to perform certain actions in a document. These groups are Clipboard, Font, Paragraph, Styles and Editing. Exploring Home Tab in Ribbon
- 14. You can make the text bold, italic or underline text in a document by selecting the text on which you want to apply bold, italic or underline and then clicking the Bold (B), Italic (I) or Underline (U) button under the Font group of the Home tab. The following figure shows the bold text: Session 4: Formatting a Document- Bold, Italics & Underline
- 15. The following figure shows the italicized text: The following figure shows the underlined text: Session 4: Formatting a Document- Bold, Italics & Underline
- 16. MS Word contains built-in dictionaries that allow you to carry out automatic spelling and grammar checks in a document. To check spelling errors in a document, you need to click the Spelling & Grammar button in the Proofing group of the Review tab, as shown in the following figure: Now, the Spelling and Grammar dialog box appears. It shows some suggestions of correct words for the wrong word. To correct the word, the Spelling And Grammar dialog box offers the following options: You can click any suggested word and then the Change button. You can edit the sentence under Not in Dictionary text area and then click the Change button to accept this editing. You can also add the new word in the dictionary by clicking the Add to Dictionary button. Session 5: Checking Spelling in a Document
- 17. The given figure shows the first suggested word remove to correct the spelling. The misspelt word gets corrected in the document and a Microsoft Word message box appears. Click the OK button in the Microsoft Word message box to close it, as shown in the given figure. Session 5: Checking Spelling in a Document
- 18. MS Word allows you to carry out automatic grammar check to correct language errors in a document. It contains built-in dictionaries that help spell check a document. To check grammar in the document, you need to click the Spelling & Grammar button in the Proofing group of the Review tab, Now, the Spelling and Grammar dialog box appears. It shows some suggestions of correct words for the wrong word such as helps, as shown in following figure: Session 6: Checking Grammar and Using Thesaurus
- 19. Now, select any suggested word and click the Change button in the Spelling and Grammar dialog box . The grammar of the sentence gets corrected in the document, as shown in the following figure: Session 6: Checking Grammar and Using Thesaurus
- 20. Suppose you are writing a paragraph and need an appropriate word with similar meaning to the word that you want to use in the paragraph. In such a case, you can use thesaurus to find synonyms (different words with the same meaning) and antonyms (words with the opposite meaning) of the word. To use thesaurus in the document, you need to select the word on which you want to apply thesaurus and then click the Thesaurus button in the Proofing group of the Review tab. Now, the Research task pane appears. In this pane, the list of words similar to the word you are looking for is displayed. Thesaurus
- 21. Place the mouse pointer on the word that you want to insert in the document. Now, click the arrow of the desired word and then select the Insert option from the drop-down list, as shown in the following figure: Thesaurus
- 22. To copy and paste some text in a document, you need to first select the text that you want to copy and then click the Copy button in the Clipboard group of the Home tab, as shown in the following figure: Now, place the mouse cursor at the location where you want to paste the copied text and the click the Paste button under the Clipboard group of the Home tab. The copied text is in the document at the current location of the cursor, as shown in the following figure: Session 7: Performing Copy-Paste and Cut-Paste Operations
- 23. To copy and paste some text in a document, you need to first select the text that you want to cut and then click the Cut button in the Clipboard group of the Home tab, as shown in the following figure: Now, place the mouse cursor at the location where you want to paste the cut text and the click the Paste button under the Clipboard group of the Home tab. The text is pasted in the document at the current position of the cursor, as shown in the following figure: Session 7: Performing Copy-Paste and Cut-Paste Operations
- 24. In a Word document, you may want to find out whether a particular word or text is in the document or not. In addition, you may also want to replace a particular word or text with some other word. It would be a cumbersome, time-consuming, monotonous and error-prone process to go through the entire document word by word, search for the particular word or text and then delete and replace it with a new word. MS Word 2010 provides an easy option to automatically find a word and replace it with a new word. Session 8: Finding and Replacing Text in a Document
- 25. The Find feature helps you search a particular word, phrase or sentence in your document. To find a word in an MS Word 2010 document, you need to click the Find button in the Editing group of the Home tab. The Navigation pane on the left side of the screen appears. Now, type the desired word to find in the search box, as shown in the following figure: If the desired word is found in the document, it gets highlighted in yellow and a preview appears in the Navigation pane. If you find more occurrences of the word, click the up and down arrow to navigate through results Finding Text
- 26. The Replace feature enables you to replace a word or phrase in your document at all occurrences with another word or phrase. To replace some text in a document, you need to click the Replace button in the Editing group of the Home tab. The Find and Replace dialog box appears. Now, type the text that you want to replace in the Find what text box and type the new text (the text with which you want to replace the existing text) in the Replace with text box. Click the Find Next button in the Find and Replace dialog box to find the first occurrence of the existing text, as shown in the following figure: Replacing Text
- 27. Now, click the Replace button in the Find and Replace dialog box. The existing text is replaced with the new text, as shown in the following figure: This process continues when the last occurrence of the existing text has been replaced. Replacing Text
- 28. Suppose you want to elaborate on the various parts of an equipment or device, or you want to explain a sequential process in a document. In such cases, you can use bulleted or numbered lists to present the information in an eye-catching and easily readable manner. You can create bulleted lists whenever you want to present a set of independent options or parts of a device. You can create numbered lists whenever you want to explain a sequential or procedural activity. In an MS Word 2010 document, a bulleted list starts with an asterisk or some other character and a numbered lists starts with the number 1, the letter a and the Roman numeral I. You can create a new bulleted or numbered list or make the existing text a bulleted or numbered list as per your requirement. Session 9: Creating List of Items Using Bullets & Numbering
- 29. To create a bulleted list in a document, you need to select the text that you want to make as bulleted list and then click the down-arrow of the Bullets button under the Paragraph group of the Home tab. Now, select the desired bullet format that you want for the bulleted list from the drop-down list, as shown in the given figure. Now, the document appears with the bulleted list. Session 9: Creating List of Items Using Bullets & Numbering
- 30. To create a numbered list in a document, you need to select the text that you want to make as numbered list and then click the down-arrow of the Numbering button in the Paragraph group of the Home tab. Now, select the desired number format that you want for the numbered list from the drop-down list, as shown in the given figure. Now, the document appears with the numbered list. Session 9: Creating List of Items Using Bullets & Numbering
- 31. You can change the font and font size of the text in MS Word 2010 documents through a few mouse clicks. There are several fonts and font sizes that you can choose to apply on a particular text. To change the font of the text, you need to select the text whose font you want to change. Session 10: Applying Font Style Now, click the down- arrow of the Font combo box in the Font group of the Home tab and then select the desired font face from the drop-down list, as shown in the given figure. The font of the selected text changes.
- 32. To change the font size of the text, you need to select the text whose font size you want to change. Now, click the down-arrow of the Font Size combo box in the Font group of the Home tab and then select the desired font size from the drop-down list, as shown in the following figure: The font size of the selected text changes. Session 10: Applying Font Style
- 33. In a MS Word, while adding text in a document, you will find that each line of the text appears uniformly at an equal distance from the left margin of the page by default. Such a uniform setting of the text with respect to the page margins is called alignment. The text alignment is of four types: Left Alignment: Aligns the selected text with respect to the left margins. This is the default alignment. Right Alignment: Aligns the selected text with respect to the right margins. Centre Alignment: Aligns the selected text between the left and right margins. Justified Alignment: Aligns the selected text with respect to both left and right margins. Session 11: Aligning the Text
- 34. To adjust alignment of the text in a document, you need to select the text which you want to align in the document, as shown in the following figure: Now, click the desired text alignment button(in our case Justify) in the Paragraph group of the Home tab. The selected text alignment is applied to text, as shown in the following figure: Session 11: Aligning the Text
- 35. In MS Word 2010, there are various views with which you can work in different ways with the same document. Each document view displays a distinct picture of the document to enable you to focus on different aspects of an MS Word 2010 document at different times. The document views that are available in MS Word 2010 are as follows: Print Layout view: Allows you to view how the document will look when you print it. You can view and work with the text, pictures, headers and footers, page borders and page margins. This is the default view of the document. Full Screen Reading view: Allows you to focus primarily on the text, pictures and other contents of the document. Web Layout view: Allows you to view how the document will look as a Web page. Outline view: Allows you to view an outline of the organization of text in the document. The document is divided into various levels, for instance, Heading 1 is level one and Heading 2 is level two. Draft view: Allows you to focus only on the text in the document. This view facilitates easy and quick writing and editing of text. Session 12: Views of a Document
- 36. Printing is one of the most important features of MS Word application. To perform the printing operation, you have to first preview the document. Previewing of the document is done so that if there is any inconsistency in the presentation of the document, it is corrected before it goes for print. You can print a document by clicking the File tab and then selecting the Print option in the Backstage view. Session 13: Printing a Document The print-related options appear in the Backstage view. Now, specify the printer and number of copies you want to print, and finally click the Print button in the Backstage view, as shown in the given figure.
- 37. A table is a grid of cells created by the intersections of corresponding rows and columns. A table can be used for a variety of tasks– from presenting numerical data to creating unique layouts. To add a table in the document, you need to first click the Table button in the Tables group of the Insert tab. Session 14: Creating a Table Now, select the Insert Table option from the drop-down list. Now, specify the number of columns and rows in the Number of columns and Number of rows spin boxes respectively and then click the OK button in the Insert Table dialog box, as shown in the given figure.
- 38. A table with specified number of rows and columns is inserted in the document, as shown in the following figure: After creating a table, you can also move from one cell to another by using the mouse or a keyboard. It is required to enter data in a cell or to manipulate the cell data. The following keys help you to move in a table: Tab: Press the Tab key to move one cell to the right. Shift + Tab: Press the Shift + Tab to move one cell to the left. Up Arrow: Press the up arrow button to move up by one row. Down Arrow: Press the down arrow button to move down by one row. Left Arrow: Press the Left arrow key to move one cell to left in the table. Right Arrow: Press the Right arrow key to move one cell to right in the table. Session 14: Creating a Table
- 39. MS Word allows you to add more rows and columns in a table. To insert columns to an existing table, you need to select the column where you want to insert a new column. Now, click the Insert Left button in the Rows and Columns group of the Layout tab to insert the column on the left- hand side of the selected column. The new column inserted on the left-hand side of the selected column, as shown in the following figure: Similarly, if you want to insert a column on the right -hand side of the selected column, then click the Insert Right button in the Rows and Columns group of the Layout tab. Adding a Row and Column in a Table
- 40. To insert row to an existing table, you need to select the row above or below which you want to insert a row. Now, click the Insert Above button in the Rows and Columns group of the Layout tab to insert the row above the selected row. The new row inserted above the selected column, as shown in the following figure: Similarly, if you want to insert a row below a selected row, then click the Insert Below button under the Rows and Columns group of the Layout tab. Adding a Row and Column in a Table
- 41. You can delete a row by first select the row that you want to delete and then click the Delete button Rows and Columns group of the Layout tab. Now, click the Delete Rows option from the drop-down list, as shown in the following figure: The selected row gets deleted. Deleting a Row and Column in a Table
- 42. You can delete a column by first selecting the column that you want to delete and then click the Delete button Rows and Columns group of the Layout tab. Now, click the Delete Columns option from the drop-down list, as shown in the following figure: The selected column gets deleted. Deleting a Row and Column in a Table
- 43. Formatting refers to the appearance and arrangement of the text in the document. You can change the appearance of a table by changing the border and colour of cells. To format a table in the document, you need to first select the table and then select the desired format of the table in the Table Styles group of the Design tab, as shown in the following figure: Now, the selected format applies to the table, as shown in the following figure: Session 15: Formatting a Table
- 44. Using the convert text into table feature, you can convert text into a table to organize it in the form of rows and columns to analyze it effectively. You can convert text into table by first selecting the text that you want to convert into a table and then clicking the Table button under the Tables group of the Insert tab. Now, select the Convert Text to Table option from the drop-down list. Now, select one separate character option under the Separate text at section and click the OK button in the Convert Table to Text dialog box, as shown in the following figure: Session 16: Converting Text to Table and Table to Text
- 45. Session 16: Converting Text to Table and Table to Text A table gets created with specified rows and columns in the document. To convert the table to text, you need to first select the table in the document and then click the Convert to Text button in the Data group of the Layout tab.
- 46. Now, select the Other radio button, press the spacebar key in the text box adjacent to the Other radio button and then click the OK button in the Convert Table to Text dialog box, as shown in the following figure: The table gets converted into text separated by space , as shown in the following figure: Session 16: Converting Text to Table and Table to Text
- 47. By default, there are no pages, paragraphs or text borders in a blank MS Word 2010 document. However, you can add borders to the paragraphs as well as to the pages in a document. You can add a border to a single page, more than one page, or all the pages in the document. You can add different types of borders to the pages; for instance, the border can be a solid line or a broken line. In MS Word 2010, you can select the type, style, width and color of the page border. Session 17: Adding Borders to Pages and Paragraphs
- 48. You can add a border to page by using the Border and Shading dialog box. You can access this dialog box by clicking the Page Borders button in the Page Background group of the Page Layout tab. In this dialog box, you need to select the desired border from the Setting section, select the desired line style, border color and width and then click the OK button, as shown in the following figure: Session 17: Adding Borders to Pages and Paragraphs
- 49. Session 17: Adding Borders to Pages and Paragraphs Now, the page border gets added in the document, as shown in the following figure:
- 50. Adding Borders to a Paragraph You can also add border to a paragraph to make a document attractive and eye-catching. To add border to a paragraph, you need to first select the paragraph on which you add the border and then click the Page Borders button in the Page Background group of the Page Layout tab. Now, select the desired border from the Setting section, select the desired line style, border color and width and then click the OK button in the Borders and Shading dialog box, as shown in the given figure.
- 51. Now, the border gets added to a paragraph, as shown in the following figure: Adding Borders to a Paragraph
- 52. In an MS Word 2010 document, you can apply solid colors as the shade to a paragraph. There are numerous predefined solid colors that you can choose to apply to the paragraphs of a document. To add a shade to the Paragraph, you need to first select the paragraph and then click the Page Borders button in the Page Background group of the Page Layout tab. Session 18: Applying Shadings to Paragraphs Now, select the Shading tab in the Borders and Shading dialog box. Now, specify the desired colour in the Fill section , the style of shading in the Patterns section and then click the OK button in the Borders and Shading dialog box, as shown in the given figure.
- 53. . Session 18: Applying Shadings to Paragraphs Now, the specified shading is applied to the selected paragraph, as shown in the following figure:
- 54. Before printing the MS Word 2010 document, you need to first set the page margin. The page margins help in specifying the white area in the document. In page margins, you have to set the top, bottom, left and right margin in a document. After setting the page margins, you need to set the page orientation, which can either be portrait or landscape. At last, previewing of the document is done so that if there is any inconsistency in the presentation of the document, it is corrected before it goes for print. Session 19: Previewing a Document, Adjusting its Margins & Orientation
- 55. Page margins refer to the blank white areas near the edges of a page. Every page has top, bottom, left and right margins. The area surrounded by these four margins, where you write, edit and format the text is known as text area. Therefore, if you increase or decrease the margins of a page, you get less or more space for writing text. Margins You can set the margins of a page, by clicking the down- arrow of the Margins button under the Page Setup group of the Page Layout tab and then selecting the appropriate margin from the drop-down list, as shown in the given figure.
- 56. The margins of all the pages of the document change accordingly, as shown in the following figure: If you want to set the page margins according to your requirement, then select the Custom Margins option from the list of margin types. Margins
- 57. MS Word 2010 offers the portrait and the landscape page orientations. By default, the pages of an MS Word 2010 document have the portrait orientation. To change the page orientation to landscape, you need to click the down- arrow of the Orientation button in the Page Setup group of the Page Layout tab and then select the Landscape option from the drop-down list, as shown in the following figure: Orientation
- 58. . Orientation Now, the pages of the document now appear horizontally, as shown in the following figure:
- 59. Previewing a document allows you to visualize the document in its printable format before actually executing the Print command. To preview a document, you need to first click the File tab and then select the Print option in the Backstage view. The print-related options are visible in the Backstage view. In the right pane, the preview of the document is displayed. In the right bottom of the right pane, the Zoom control button is available. The + (plus) button is used to increase the preview document and the – (minus) button is used to decrease the preview document. On the left bottom of the right pane, there are also two buttons, such as Next ( ⊳) and Previous ( ⊲). The Next button is used to move to the print preview of the next page and the Previous button is used to move to the print preview of the previous page. Previewing a Document
- 60. Tabs are often used to align the text in the documents. Adding tabs and tabs stops can make text alignment a lot easier especially while creating things such as a table of contents. A tab stop gets aligned basically somewhere on the ruler that will allow you to press the tab key and align the text with tab stop in the following ways: Left Tab Stop: Refers to the starting position of the text Centre Tab Stop: Refers to the middle position of the text Right Tab Stop: Refers to the right end position of the text Decimal: Refers to the centers text over decimal point for a list of numbers Bar: Refers to the vertical line through a selected paragraph at the tab stop To set tabs in a document, click the dialog box launcher of the Paragraph group in the Home tab and then click the Tabs button in the Paragraph dialog box. Session 20: Aligning Text Using Tabs
- 61. Now, specify the tab stop position, alignment and leaders in the Tabs dialog box. After that, first click the Set button and then click the OK button in the Tabs dialog box, as shown in the given figure. The given figure displays the uses of tab in the document: Session 20: Aligning Text Using Tabs Displaying the uses of Tab Setting Tab
- 62. Thank You