SlideShare une entreprise Scribd logo
1  sur  17
Télécharger pour lire hors ligne
Handle transaction workloads and data mart loads with better performance	 June 2017 (Revised)
Handle transaction workloads
and data mart loads with better
performance
The Dell EMC Unity 400F All-Flash storage
array offered solid performance compared
to the HPE 3PAR 8400
When your company’s work demands a new storage array,
you have the opportunity to invest in a solution that can
support demanding workloads simultaneously—such as
online transaction processing (OLTP) and data mart loading.
At Principled Technologies, we compared Dell EMC™
PowerEdge™
R930 servers1
with the Dell EMC Unity 400F All-
Flash storage array to HPE ProLiant DL580 Gen9 servers with
the HPE 3PAR 8400 array in three hands-on tests to determine
how well each solution could serve a company during these
database-intensive tasks.
When we ran an OLTP workload and data mart load in
tandem, the Unity array performed better than the HPE 3PAR.
In our data mart load test, the Unity array allowed us to import
a large set of data in less time than with the 3PAR—an ability
that could help companies gather data for analysis in less
time. Finally, in our online transaction processing test, the
Unity array offered comparable database performance to
the 3PAR array, enabling database applications to process a
similar volume of customer orders.
Dell EMC Unity 400F
All-Flash storage
Keep work moving during
large data writes
Up to 29% more orders per
minute while also loading data
Save time on data imports
Load files into a data mart
up to 22% faster
A Principled Technologies report: Hands-on testing. Real-world results.
Handle transaction workloads and data mart loads with better performance	 June 2017 (Revised)
Keep your work going through intensive data mart loads
Writing files to a data mart database is a task usually left to
the late hours of the night, or one that involves separate
hardware. But what happens if your company needs to run
both online transaction and data mart workloads from the
same storage environment? With such heavy stress on a
system, you might expect a large dip in performance here—
large enough to force you to purchase completely separate
systems in order to get your work done in a reasonable time.
However, in our dual workload test, the Unity array was better
able to handle the added stress.
For this test, we measured how long it took for each array
to put data from many large text files into a single database
while simultaneously fulfilling customer orders as part of an
OLTP workload. The Unity array enabled the PowerEdge
R930 server to process an average of 96,976 orders per
minute—29 percent more than the 74,977 orders per minute
the ProLiant DL380 Gen9 processed with the 3PAR array.
Save time during large data mart writes
While it’s good to know how much stress your system can handle, you
may also choose to run your data mart and OLTP workloads separately.
Loading data from various sources into a data mart is a critical step
in gathering and organizing data for analysis, and this process often
involves loading from flat files. The Dell EMC Unity loaded three
terabytes’ worth of data into a data mart in 1 hour, 2 minutes—22
percent faster than the 1 hour, 16 minutes it took for the HPE array.
Saving time here can speed up the time it takes to start analyzing your
data, so you can get business insights sooner.
29% more orders per minute during the data load
Dell EMC 96,976
74,977HPE
22% faster
to import
a large
data set
Less time
is better
Dell EMC
1h 2m
1h 16m
HPE
What’s a data mart?
Your enterprise business collects
data from many different departments.
Whether it's sales, marketing, or research
and development, you will often want to
bundle data from these disparate sources
and load it into a single location for analysis
and reporting. The data mart is a convenient
place to store different departments’
information for processing and analysis.
Handle transaction workloads and data mart loads with better performance	 June 2017 (Revised)
Handle demanding online transaction processing (OLTP) work
Even without the added stress of a simultaneous data mart
workload, OLTP work is one of the most stressful types for a
storage array to handle—especially if it has to satisfy a large
volume of users simultaneously. We used an OLTP workload
benchmark called DVD Store 2 to test how well the Dell
EMC and HPE storage arrays could handle many simulated
users completing tasks such as browsing an online catalog
and making final purchases.
The solutions handled a comparable number of database
orders per minute (OPM); the Dell EMC Unity array
enabled the PowerEdge R930 server to process 112,725
OPM, whereas the HPE ProLiant DL380 Gen9 fulfilled
111,761 OPM with the 3PAR array. Being able to process a
large volume of customer requests in a timely manner can
result in a better experience for the end user.
	
DVD Store 2
We used a benchmark called DVD Store 2
to test each storage array’s capabilities while
handling OLTP workloads. DVD Store simulates
an online video marketplace, mimicking the
way thousands of users might shop in a real-
life scenario. The more user-initiated orders a
server can fulfill, the better its performance.
To learn more about DVD Store, visit
http://linux.dell.com/dvdstore.
Storage fabric using Brocade® Gen 6 hardware
In our tests, we used Connectrix® DS-6620B
switches, built on Brocade Gen 6 hardware,
known as the Dell EMC Connectrix B-Series Gen
6 Fibre Channel by Brocade. The Connectrix
B Series provides out-of-the box tools for SAN
monitoring, management, and diagnostics that
simplify administration and troubleshooting for
administrators.
Brocade Fibre offers Brocade Fabric Vision®
Technology, which can provide further visibility
into the storage network with monitoring and
diagnostic tools. With Monitoring and Alerting
Policy Suite (MAPS), admins can proactively
monitor the health of all connected storage using
policy-based monitoring.
Brocade offers another tool to simplify SAN
management for Gen 6 hardware: Connectrix
Manager Converged Network Edition (CMCNE).
This tool uses an intuitive GUI to help admins
automate repetitive tasks and further simplify SAN
fabric management in the datacenter.
To learn more about what Brocade Gen 6 has to
offer, visit www.brocade.com.
The value of compression
Both the Unity and the 3PAR arrays employ a variety of techniques to save
space so you can fit more data on your hardware. One of these techniques
is compression. Compression algorithms reduce the number of bits
needed to represent a set of data—the higher the compression ratio, the
more space this particular data reduction technique saves.
During our OLTP test, the Unity array achieved a compression ratio of 3.2-
to-1 on the database volumes, whereas the 3PAR array averaged a 1.3-to-
1 ratio. In our data mart loading test, the 3PAR achieved a ratio of 1.4-to-1
on the database volumes, whereas the Unity array got 1.3 to 1.
Handle transaction workloads and data mart loads with better performance	 June 2017 (Revised)
Conclusion
Database work is a big deal—in terms of its importance to your company, and the sheer magnitude of the work.
Our tests with the Dell EMC PowerEdge R930 server and Unity 400F All-Flash storage array demonstrated that it
could perform comparably to an HPE ProLiant DL380 Gen9 server and 3PAR array during OLTP workloads, with
a better compression ratio (3.2-to-1 vs. 1.3-to-1). For loading large sets of data, the Dell EMC Unity finished 22
percent faster than the HPE 3PAR, which can result in less hassle for the administrator in charge of data marts.
When running both OLTP and data mart workloads in tandem, the Unity array outperformed the HPE 3PAR in
terms of orders processed per minute by 29 percent. For additional product information concerning the Unity
400F storage array, visit DellEMC.com/Unity.
1	 http://www.dell.com/en-us/work/shop/productdetails/poweredge-r930 http://www.principledtechnologies.com
Handle transaction workloads and data mart loads with better performance	 June 2017 (Revised)
On April 18, 2017, we finalized the hardware and software configurations we tested. Updates for current and
recently released hardware and software appear often, so unavoidably these configurations may not represent
the latest versions available when this report appears. For older systems, we chose configurations representative
of typical purchases of those systems. We concluded hands-on testing on May 4, 2017.
Appendix A: System configuration information
Servers under test
Server configuration information Dell EMC PowerEdge R930 HPE ProLiant DL580 Gen9
BIOS name and version Dell EMC 2.2.0 U17 v2.30
Non-default BIOS settings N/A N/A
Operating system name and
version/build number
VMware®
ESXi™
6.5.0 4564106 VMware ESXi 6.5.0 4564106
Date of last OS updates/patches
applied
03/31/2017 03/31/2017
Power management policy Maximum performance Maximum performance
Processor
Number of processors 4 4
Vendor and model Intel®
Xeon®
E7-8860 v4 Intel Xeon E7-8860 v4
Core count (per processor) 18 18
Core frequency (GHz) 2.20 2.20
Stepping B0 B0
Memory module(s)
Total memory in system (GB) 512 512
Number of memory modules 32 32
Vendor and model Samsung®
M393A2G40DB0-CPB Samsung M393A2G40DB0-CPB
Size (GB) 16 16
Type PC4-17000 PC4-17000
Speed (MHz) 2,133 2,133
Speed running in the server (MHz) 2,133 2,133
Local storage
Number of drives 2 2
Drive vendor and model Seagate®
ST300MM0006 Seagate ST300MM0006
Drive size (GB) 300 300
Drive information (speed, interface) 6Gbps, SAS 6Gbps, SAS
Handle transaction workloads and data mart loads with better performance	 June 2017 (Revised)
Server configuration information Dell EMC PowerEdge R930 HPE ProLiant DL580 Gen9
Network adapter
Vendor and model Intel Ethernet 10GbE 2P X520 Adapter HP Ethernet 10Gb 2-port 560SFP+
Number and type of ports 2 x 10GbE 2 x 10GbE
Driver version 17.5.10 0x8000088b
Fibre Channel HBA
Vendor and model Emulex LightPulse LPe31002-M6 2-Port Emulex LightPulse LPe31002-M6 2-Port
Number and type of ports 2 x 16Gb Fibre Channel 2 x 16Gb Fibre Channel
Firmware version 11.1.212.0 11.1.212.0
Power supplies
Vendor and model Dell EMC 0V1YJ6A00 HPE 656364-B21
Number of power supplies 2 2
Wattage of each (W) 900 1,200
Storage solution
Storage configuration information Dell EMC Unity 400F HPE 3PAR 8400
Controller firmware revision UnityOS 4.1.1.9121942 HPE 3PAR OS 3.3.1.215
Number of storage controllers 2 2
Number of storage shelves 2 4
Drive vendor and model number 24 x Dell EMC V4-2S6FXL-800 24 x HPE DOPM3840S5xnNMRI
Drive size (GB) 800 3,840
Drive information
(speed, interface, type)
12Gbps, SAS, SSD 12Gbps, SAS, SSD
Handle transaction workloads and data mart loads with better performance	 June 2017 (Revised)
Appendix B: How we tested
Our Dell EMC testbed consisted of two Dell EMC PowerEdge R930 servers. Our HPE testbed consisted of two HPE ProLiant DL580 Gen9
servers. On both testbeds, one server hosted each of the OLTP VMs, while the other hosted the data mart VM. We also used a two-socket,
2U server to host our client and infrastructure VMs. Each server had two 10Gb connections to a Dell Networking X1052 for network traffic.
Each server under test had two 16Gb Fibre connections to a redundant set of Dell EMC DS6620B Fibre Channel switches. Each array had two
16Gb connections to each fibre channel switch.
Configuring the Fibre Channel switches
We created Fibre Channel zones according to best practices for each all-flash array. We placed each server port in a zone with all storage
ports. We used two Dell EMC DS6620B Fibre Channel switches for redundancy and multipathing.
Creating the Fibre Channel zones
1.	 Log into the Brocade switch GUI.
2.	 Click ConfigureZone Admin
3.	 Click the Zone tab.
4.	 Click New Zone, and enter a zone name.
5.	 Select all storage WWNs and a single server port WWN.
6.	 Click the right arrow to add the WWNs to the zone.
7.	 Repeat steps 4-6 for all remaining server ports.
8.	 Click the Zone Config tab.
9.	 Click New Zone Config, and enter a zone configuration name.
10.	 Select all newly created zones.
11.	 Click the right arrow to add the zones to the zone config.
12.	 Click Zoning ActionsSave Config to save the changes.
13.	 Click Zoning ActionsEnable Config.
14.	 Click Yes.
Configuring the storage
On each storage array, we created a variety of LUNs to be used in testing. Each OLTP VM had its own LUN for the OS, eight separate LUNs
for SQL data (two for each SQL instance), and four separate LUNs for SQL log data (one for each SQL instance). The data mart VM had its
own LUN for the OS, eight separate LUNs for SQL data, and a single LUN for SQL logs. The data mart VM also had three PCIe NVMe SSDs
on the data mart host to hold the source data. We enabled compression on both arrays for all tests, so all SQL database and log LUNs were
compressed on both arrays.
Configuring the Unity 400F array
We created a single RAID 5 storage pool using all available drives. We created one LUN per drive (see Table 1 for drive counts) sized to fit
each drive. For each VM, we created a Consistency Group that contained all the LUNs necessary for each VM.
Creating the storage pool
1.	 Log into the Unity 400F array Unisphere GUI.
2.	 In the left-hand column, in the Storage category, click Pools.
3.	 To create a new storage pool, click the plus sign.
4.	 Enter a name and description, and click Next.
5.	 Choose Extreme Performance Tier, and check the box for Use FAST Cache.
6.	 Set the Extreme Performance Tier to RAID 5, and click Next.
7.	 Leave Create VMware Capability Profile for the Pool unchecked, and click Next.
8.	 Review your selection, and click Finish.
Creating the block LUNs
1.	 In the left-hand column, in the Storage category, click Block.
2.	 To create a new LUN, click the plus sign.
3.	 Select the number of LUNs to create, give them a name, choose the pool you created in the previous step, leave the Tiering Policy to
Extreme Performance Tier.
4.	 Check the box for Compression for all OLTP LUNs, or leave unchecked for data mart LUNs. Click Next.
Handle transaction workloads and data mart loads with better performance	 June 2017 (Revised)
5.	 You will configure access at the Consistency Group level, so leave this blank, and click Next.
6.	 Leave Enable Automatic Snapshot Creation unchecked, and click Next.
7.	 Leave Enable Replication unchecked, and click Next.
8.	 Review your selection, and click Finish.
9.	 Repeat steps 1 through 8 as necessary to create all LUNs for the environment.
Adding ESXi hosts
1.	 Complete setup for Installing VMware vCenter 6.5 before proceeding the with storage setup.
2.	 In the left-hand column, in the Access category, click VMware.
3.	 To add the vCenter server managing the hosts, click the plus sign.
4.	 Enter the IP address, username, and password for the vCenter server appliance, and click Find.
5.	 Check the boxes next to the hosts in the Dell EMC testbed, and click Next.
6.	 Verify the correct hosts have been selected, and click Finish.
Creating the Consistency Groups
1.	 In the left-hand column, in the Storage category, click Block.
2.	 Click the Consistency Groups tab.
3.	 To create a new Consistency Group, click the plus sign.
4.	 Add a name, and click Next.
5.	 Click the plus sign, click Add Existing LUNs to add the LUNs related to the Consistency Group, and click OK. Click Next.
6.	 Click the plus sign, add the host(s) to connect to, and click Next.
7.	 Leave Enable Automatic Snapshot Creation unchecked, and click Next.
8.	 Leave Enable Replication unchecked, and click Next.
9.	 Review your selection, and click Finish.
10.	 Repeat steps 1 through 9 until you have a Consistency Group for all three VMs on the servers under test (SUTs).
Configuring the HPE 3PAR 8400 array
We created a single RAID 5 CPG using all available drives. We created one LUN per drive (see Table 1 for drive counts) sized to fit each drive.
For each VM, we created a Virtual Volume Set that contained all the LUNs necessary to each VM.
Creating the storage pool
1.	 Log into the HPE 3PAR SSMC GUI.
2.	 At the top, click 3PAR StoreServ, and click Common Provisioning Groups under Block Persona.
3.	 In the left-hand column, under Common Provisioning Groups, click Create CPG.
4.	 Under the General heading, enter a name, and verify the correct system is selected in the System drop-down menu.
5.	 Under the Allocation Settings heading, ensure the Device type is set to SSD 100K.
6.	 Verify the RAID type is set to RAID 5.
7.	 Change Availability to Cage (Default)
8.	 Click Create.
Creating the Virtual Volumes
1.	 At the top, click 3PAR StoreServ, and click Virtual Volumes under Block Persona.
2.	 In the left-hand column, under Virtual Volumes, click Create virtual volume.
3.	 Under the General heading, enter a name for the VVol.
4.	 Verify the correct system is selected in the System drop-down menu.
5.	 Set the size of the VVol in the Size field, and click Create.
6.	 Repeat steps 1 through 5 as necessary to create all VVols for the environment.
Creating the Virtual Volume Sets
1.	 At the top, click 3PAR StoreServ, and click Virtual Volume Sets under Block Persona.
2.	 In the left-hand column, under Virtual Volume Sets, click Create virtual volume set.
3.	 Under the General heading, enter a name for the Virtual Volume Set.
4.	 Verify the correct system is selected in the System drop-down menu.
5.	 Click Add virtual volumes.
6.	 Select all the virtual volumes created for the first VM, and click Add.
7.	 Click Create.
8.	 Repeat steps 1 through 7 until you have a virtual volume set for all three VMs on the SUTs.
Handle transaction workloads and data mart loads with better performance	 June 2017 (Revised)
Adding the ESXi hosts
1.	 Complete setup for installing VMware vCenter 6.5 before proceeding with the storage setup.
2.	 At the top, click 3PAR StoreServ, and click Hosts under Block Persona.
3.	 In the left-hand column, under Hosts, click Create host.
4.	 Under the General heading, enter a name for the host in the Name field.
5.	 Verify the correct system is selected in the System drop-down menu.
6.	 Set the Host OS to VMware (ESXi)
7.	 Under the Paths heading, click Add FC.
8.	 In the Add FC window, select the WWNs associated with the first host, and click Add.
9.	 Click Create.
10.	 Repeat steps 1 through 9 to add the second host.
Creating the host sets
1.	 At the top, click 3PAR StoreServ, and click Host Sets under Block Persona.
2.	 In the left-hand column, under Host Sets, click Create host set.
3.	 Under the General heading, enter a name for the host set in the Name field.
4.	 Under the Host Set Members heading, click on Add hosts.
5.	 Select both hosts, and click Add.
6.	 Click Create.
Assigning Virtual Volume Sets to Host Sets
1.	 At the top, click 3PAR StoreServ, and click Virtual Volume Sets under Block Persona.
2.	 In the left-hand column, under Virtual Volume Sets, select the first VVol set.
3.	 On the right-hand side, click Actions, and click Export.
4.	 Under the Export To heading, click Add.
5.	 At the top of the window, select the Host set option.
6.	 Select the Host set, and click Add.
7.	 Leave the Export With section at default values, and click Export.
VM and storage summary
OLTP workload VMs Data mart workload VMs
vCPUs 32 64
Memory 64 GB 130 GB
OS drive 1x 40 GB 1x 60 GB
Database drives 8x 210 GB 8x 1 TB
Log drives 4x 110 GB 1x 550 GB
PCIe NVMe drives N/A 3x 1.8 TB
Table 1: VM and storage summary
Installing VMware vSphere 6.5
We installed the VMware vSphere 6.5 hypervisor to a local RAID 1 disk pair. The RAID 1 virtual disk was created using the BIOS utilities on
each server.
1.	 Boot the server to the installation media.
2.	 At the boot menu screen, choose the standard installer.
3.	 Press Enter.
4.	 Press F11 to accept the license terms.
5.	 Press Enter to install to the local virtual disk.
6.	 Press Enter to select the US Default keyboard layout.
7.	 Create a password for the root user, and press Enter.
8.	 Press F11 to begin the installation.
Handle transaction workloads and data mart loads with better performance	 June 2017 (Revised)
Installing VMware vCenter®
6.5
1.	 Mount the VCSA ISO to a Windows server that has connectivity to the target vCenter host.
2.	 Browse to <mount location>vcsa-ui-installerwin32 and run installer.exe.
3.	 Click Install.
4.	 Click Next.
5.	 Check I accept the terms of the license agreement, and click Next.
6.	 Leave vCenter Server with an Embedded Platform Services Controller checked, and click Next.
7.	 Enter the IP address and credentials for the target vCenter host, and click Next.
8.	 Enter a name and password for the VCSA appliance, and click Next.
9.	 Select Tiny for the deployment size, and click Next.
10.	 Select a datastore to store the appliance, and click Next.
11.	 Enter network settings for the appliance, and click Next.
12.	 Review the summary, and click Finish.
13.	 Once the deployment is complete, click Continue.
14.	 Click Next.
15.	 Select Synchronize time with NTP servers from the drop-down menu, and enter the IP address or hostnames of your NTP servers. Select
Enabled from the SSH drop-down menu. Click Next.
16.	 Enter a username and password for the vCenter SSO, and click Next.
17.	 Uncheck Join the VMware’s Customer Experience Improvement Program (CEIP), and click Next.
18.	 Review the summary, and click Finish.
Installing Microsoft®
Windows Server®
2016 Datacenter Edition
1.	 Boot the VM to the installation media.
2.	 Press any key when prompted to boot from DVD.
3.	 When the installation screen appears, leave language, time/currency format, and input method as default, and click Next.
4.	 Click Install now.
5.	 When the installation prompts you, enter the product key.
6.	 Check I accept the license terms, and click Next.
7.	 Click Custom: Install Windows only (advanced).
8.	 Select Windows Server 2016 Datacenter Edition (Desktop Experience), and click Next.
9.	 Select Drive 0 Unallocated Space, and click Next, at which point Windows begins automatically, and restarts automatically after
completing.
10.	 When the Settings page appears, fill in the Password and Reenter Password fields with the same password.
11.	 Log in with the password you set up previously.
Installing SQL Server®
2016
1.	 Prior to installing, add the .NET Framework 3.5 feature to the server.
2.	 Mount the installation DVD for SQL Server 2016.
3.	 Click Run SETUP.EXE. If Autoplay does not begin the installation, navigate to the SQL Server 2016 DVD, and double-click it.
4.	 In the left pane, click Installation.
5.	 Click New SQL Server stand-alone installation or add features to an existing installation.
6.	 Select the Enter the product key radio button, and enter the product key. Click Next.
7.	 Click the checkbox to accept the license terms, and click Next.
8.	 Click Use Microsoft Update to check for updates, and click Next.
9.	 Click Install to install the setup support files.
10.	 If there are no failures displayed, click Next.
11.	 At the Setup Role screen, choose SQL Server Feature Installation, and click Next.
12.	 At the Feature Selection screen, select Database Engine Services, Full-Text and Semantic Extractions for Search, Client Tools
Connectivity, Client Tools Backwards Compatibility. Click Next.
13.	 At the Installation Rules screen, after the check completes, click Next.
14.	 At the Instance configuration screen, leave the default selection of default instance, and click Next.
15.	 At the Server Configuration screen, choose NT ServiceSQLSERVERAGENT for SQL Server Agent, and choose NT Service
MSSQLSERVER for SQL Server Database Engine. Change the Startup Type to Automatic. Click Next.
16.	 At the Database Engine Configuration screen, select the authentication method you prefer. For our testing purposes, we selected Mixed
Mode.
17.	 Enter and confirm a password for the system administrator account.
18.	 Click Add Current user. This may take several seconds.
Handle transaction workloads and data mart loads with better performance	 June 2017 (Revised)
19.	 Click Next.
20.	 At the Error and usage reporting screen, click Next.
21.	 At the Installation Configuration Rules screen, check that there are no failures or relevant warnings, and click Next.
22.	 At the Ready to Install screen, click Install.
23.	 After installation completes, click Close.
24.	 Close the installation window.
25.	 Shut down the VM, and create a clone to be used for the data mart workload.
26.	 Power on the VM.
27.	 Repeat steps 2-26 for instances 2, 3, and 4, replacing the default instance name at the Instance configuration screen with
MSSQLSERVER2, MSSQLSERVER3, and MSSQLSERVER4 at step 14.
28.	 Shut down the VM, and create another clone to be used for the second OLTP workload.
Configuring the DVD Store 2 benchmark
Data generation overview
We generated our data using the Install.pl script included with DVD Store version 2.1 (DS2), providing the parameters for our 250GB
database size and the Microsoft SQL Server 2016 platform. We ran the Install.pl script on a utility system running Linux®. The Install.pl script
also generated the database schema.
After processing the data generation, we transferred the data files and schema creation files to a Windows-based system running SQL Server
2016. We built the 250GB database in SQL Server 2016, and then performed a full backup, storing the backup file on the C: drive for quick
access. We used that backup file to restore the server between test runs.
The only modifications we made to the schema creation scripts were the specified file sizes for our database. We explicitly set the file
sizes higher than necessary to ensure that no file-growth activity would affect the outputs of the test. Besides this file size modification, the
database schema was created and loaded according to the DVD Store documentation. Specifically, we followed the steps below:
1.	 We generated the data and created the database and file structure using database creation scripts in the DS2 download. We made size
modifications specific to our 250GB database and the appropriate changes to drive letters.
2.	 We transferred the files from our Linux data generation system to a Windows system running SQL Server.
3.	 We created database tables, stored procedures, and objects using the provided DVD Store scripts.
4.	 We set the database recovery model to bulk-logged to prevent excess logging.
5.	 We loaded the data we generated into the database. For data loading, we used the import wizard in SQL Server Management Studio.
Where necessary, we retained options from the original scripts, such as Enable Identity Insert.
6.	 We created indices, full-text catalogs, primary keys, and foreign keys using the database-creation scripts.
7.	 We updated statistics on each table according to database-creation scripts, which sample 18 percent of the table data.
8.	 On the SQL Server instance, we created a ds2user SQL Server login using the following Transact-SQL (T-SQL) script:
USE [master]
GO
CREATE LOGIN [ds2user] WITH PASSWORD=N’’,
DEFAULT_DATABASE=[master],
DEFAULT_LANGUAGE=[us_english],
CHECK_EXPIRATION=OFF,
CHECK_POLICY=OFF
GO
9.	 We set the database recovery model back to full.
10.	 We created the necessary full text index using SQL Server Management Studio.
11.	 We created a database user and mapped this user to the SQL Server login.
12.	 We then performed a full backup of the database. This backup allowed us to restore the databases to a pristine state relatively quickly
between tests.
Logical name Filegroup Initial size (MB)
Database files
primary PRIMARY 8
cust1 DS_CUST_FG 50,776
cust2 DS_CUST_FG 50,776
Handle transaction workloads and data mart loads with better performance	 June 2017 (Revised)
Logical name Filegroup Initial size (MB)
cust3 DS_CUST_FG 50,776
cust4 DS_CUST_FG 50,776
ind1 DS_IND_FG 20,118
ind2 DS_IND_FG 20,118
ind3 DS_IND_FG 20,118
ind4 DS_IND_FG 20,118
ds_misc DS_MISC_FG 392
orders1 DS_ORDERS 25,004
orders2 DS_ORDERS 25,004
orders3 DS_ORDERS 25,004
orders4 DS_ORDERS 25,004
Log files
ds_log Not applicable 90,152
Table 2: DS2 initial file size modifications
Configuring the database workload client
For our testing, we used a virtual client for the Microsoft SQL Server client. To create this client, we installed Windows Server 2012 R2,
assigned a static IP address, and installed .NET 3.5.
Running the DVD Store tests
We created a series of batch files, SQL scripts, and shell scripts to automate the complete test cycle. DVD Store outputs an orders-per-minute
metric, which is a running average calculated through the test. In this report, we report the last OPM reported by each client/target pair.
Each complete test cycle consisted of general steps:
1.	 Clean up prior outputs from the target system and the client driver system.
2.	 Drop the databases from the target.
3.	 Restore the databases on the target.
4.	 Shut down the target.
5.	 Reboot the host and client system.
6.	 Wait for a ping response from the server under test and the client system.
7.	 Let the test server idle for 10 minutes.
8.	 Start the DVD Store driver on the client.
We used the following DVD Store parameters for testing:
ds2sqlserverdriver.exe --target=<target_IP> --ramp_rate=10 --run_time=180 --n_threads=32 --db_size=250GB
--think_time=0.1 --detailed_view=Y --warmup_time=15 --report_rate=1 --csv_output=<drive path>
Configuring the bulk load data mart
We used HammerDB to generate TPCH-compliant source data at scale factor 3000, for a total of 3.31TB of raw data. The generated data
exists in the form of pipe-delimited text files, which we placed on NVMe PCIe SSDs for fast reads. We split the six largest tables into 32
separate files for parallel loading. Each chunk had its own table in SQL Server, for a total of 6x32 one-to-one streams. We used batch
scripting and SQLCMD to start 32 simultaneous SQL scripts. Each script contained BULK INSERT statements to load the corresponding
chunk for each table. For example, the 17th SQL script loaded ORDERS_17.txt into table ORDERS_17, and upon finishing, began loading
LINEITEM_17.txt into table LINEITEM_17, and so on through each table.
Generating the data
1.	 Download HammerDB v2.21, and run hammerdb.bat.
2.	 Click OptionsBenchmark.
3.	 Select the radio buttons for MSSQL Server and TPC-H, and click OK.
4.	 In the left pane, expand SQL ServerTPC-HDatagen, and double-click Options.
Handle transaction workloads and data mart loads with better performance	 June 2017 (Revised)
5.	 Select the radio button for 3000, enter a target location for the TPC-H data, and select 32 for the number of virtual users. Click OK.
6.	 Double-click Generate, and click Yes.
Creating the target database
We used the following SQL script to create the target database (some lines have been removed and replaced with an ellipsis for clarity):
IF EXISTS (SELECT name FROM master.dbo.sysdatabases WHERE name = ‘tpch3000’)
DROP DATABASE tpch3000
GO
CREATE DATABASE tpch3000
ON PRIMARY
( NAME = tpch3000_root,
FILENAME = ‘F:tpchtpch_root.mdf’,
SIZE = 100MB,
FILEGROWTH = 100MB),
FILEGROUP DATA_FG_MISC
( NAME		= tpch3000_data_ms,
FILENAME = ‘F:tpchtpch_data_ms.mdf’,
SIZE = 500MB,
FILEGROWTH = 100MB),
FILEGROUP DATA_FG_01 (NAME = tpch3000_data_01, FILENAME = ‘F:tpchtpch_data_01.mdf’, SIZE = 112640MB,
FILEGROWTH = 100MB),
FILEGROUP DATA_FG_02 (NAME = tpch3000_data_02, FILENAME = ‘G:tpchtpch_data_02.mdf’, SIZE = 112640MB,
FILEGROWTH = 100MB),
FILEGROUP DATA_FG_03 (NAME = tpch3000_data_03, FILENAME = ‘H:tpchtpch_data_03.mdf’, SIZE = 112640MB,
FILEGROWTH = 100MB),
FILEGROUP DATA_FG_04 (NAME = tpch3000_data_04, FILENAME = ‘I:tpchtpch_data_04.mdf’, SIZE = 112640MB,
FILEGROWTH = 100MB),
FILEGROUP DATA_FG_05 (NAME = tpch3000_data_05, FILENAME = ‘J:tpchtpch_data_05.mdf’, SIZE = 112640MB,
FILEGROWTH = 100MB),
FILEGROUP DATA_FG_06 (NAME = tpch3000_data_06, FILENAME = ‘K:tpchtpch_data_06.mdf’, SIZE = 112640MB,
FILEGROWTH = 100MB),
FILEGROUP DATA_FG_07 (NAME = tpch3000_data_07, FILENAME = ‘L:tpchtpch_data_07.mdf’, SIZE = 112640MB,
FILEGROWTH = 100MB),
FILEGROUP DATA_FG_08 (NAME = tpch3000_data_08, FILENAME = ‘M:tpchtpch_data_08.mdf’, SIZE = 112640MB,
FILEGROWTH = 100MB),
FILEGROUP DATA_FG_09 (NAME = tpch3000_data_09, FILENAME = ‘F:tpchtpch_data_09.mdf’, SIZE = 112640MB,
FILEGROWTH = 100MB),
FILEGROUP DATA_FG_10 (NAME = tpch3000_data_10, FILENAME = ‘G:tpchtpch_data_10.mdf’, SIZE = 112640MB,
FILEGROWTH = 100MB),
FILEGROUP DATA_FG_11 (NAME = tpch3000_data_11, FILENAME = ‘H:tpchtpch_data_11.mdf’, SIZE = 112640MB,
FILEGROWTH = 100MB),
FILEGROUP DATA_FG_12 (NAME = tpch3000_data_12, FILENAME = ‘I:tpchtpch_data_12.mdf’, SIZE = 112640MB,
FILEGROWTH = 100MB),
FILEGROUP DATA_FG_13 (NAME = tpch3000_data_13, FILENAME = ‘J:tpchtpch_data_13.mdf’, SIZE = 112640MB,
FILEGROWTH = 100MB),
FILEGROUP DATA_FG_14 (NAME = tpch3000_data_14, FILENAME = ‘K:tpchtpch_data_14.mdf’, SIZE = 112640MB,
FILEGROWTH = 100MB),
FILEGROUP DATA_FG_15 (NAME = tpch3000_data_15, FILENAME = ‘L:tpchtpch_data_15.mdf’, SIZE = 112640MB,
FILEGROWTH = 100MB),
FILEGROUP DATA_FG_16 (NAME = tpch3000_data_16, FILENAME = ‘M:tpchtpch_data_16.mdf’, SIZE = 112640MB,
FILEGROWTH = 100MB),
FILEGROUP DATA_FG_17 (NAME = tpch3000_data_17, FILENAME = ‘F:tpchtpch_data_17.mdf’, SIZE = 112640MB,
FILEGROWTH = 100MB),
FILEGROUP DATA_FG_18 (NAME = tpch3000_data_18, FILENAME = ‘G:tpchtpch_data_18.mdf’, SIZE = 112640MB,
FILEGROWTH = 100MB),
FILEGROUP DATA_FG_19 (NAME = tpch3000_data_19, FILENAME = ‘H:tpchtpch_data_19.mdf’, SIZE = 112640MB,
FILEGROWTH = 100MB),
FILEGROUP DATA_FG_20 (NAME = tpch3000_data_20, FILENAME = ‘I:tpchtpch_data_20.mdf’, SIZE = 112640MB,
FILEGROWTH = 100MB),
FILEGROUP DATA_FG_21 (NAME = tpch3000_data_21, FILENAME = ‘J:tpchtpch_data_21.mdf’, SIZE = 112640MB,
FILEGROWTH = 100MB),
FILEGROUP DATA_FG_22 (NAME = tpch3000_data_22, FILENAME = ‘K:tpchtpch_data_22.mdf’, SIZE = 112640MB,
FILEGROWTH = 100MB),
FILEGROUP DATA_FG_23 (NAME = tpch3000_data_23, FILENAME = ‘L:tpchtpch_data_23.mdf’, SIZE = 112640MB,
FILEGROWTH = 100MB),
FILEGROUP DATA_FG_24 (NAME = tpch3000_data_24, FILENAME = ‘M:tpchtpch_data_24.mdf’, SIZE = 112640MB,
Handle transaction workloads and data mart loads with better performance	 June 2017 (Revised)
FILEGROWTH = 100MB),
FILEGROUP DATA_FG_25 (NAME = tpch3000_data_25, FILENAME = ‘F:tpchtpch_data_25.mdf’, SIZE = 112640MB,
FILEGROWTH = 100MB),
FILEGROUP DATA_FG_26 (NAME = tpch3000_data_26, FILENAME = ‘G:tpchtpch_data_26.mdf’, SIZE = 112640MB,
FILEGROWTH = 100MB),
FILEGROUP DATA_FG_27 (NAME = tpch3000_data_27, FILENAME = ‘H:tpchtpch_data_27.mdf’, SIZE = 112640MB,
FILEGROWTH = 100MB),
FILEGROUP DATA_FG_28 (NAME = tpch3000_data_28, FILENAME = ‘I:tpchtpch_data_28.mdf’, SIZE = 112640MB,
FILEGROWTH = 100MB),
FILEGROUP DATA_FG_29 (NAME = tpch3000_data_29, FILENAME = ‘J:tpchtpch_data_29.mdf’, SIZE = 112640MB,
FILEGROWTH = 100MB),
FILEGROUP DATA_FG_30 (NAME = tpch3000_data_30, FILENAME = ‘K:tpchtpch_data_30.mdf’, SIZE = 112640MB,
FILEGROWTH = 100MB),
FILEGROUP DATA_FG_31 (NAME = tpch3000_data_31, FILENAME = ‘L:tpchtpch_data_31.mdf’, SIZE = 112640MB,
FILEGROWTH = 100MB),
FILEGROUP DATA_FG_32 (NAME = tpch3000_data_32, FILENAME = ‘M:tpchtpch_data_32.mdf’, SIZE = 112640MB,
FILEGROWTH = 100MB)
LOG ON
( NAME = tpch3000_log,
FILENAME = ‘N:LOGtpch3000tpch3000_log.ldf’,
SIZE = 360000MB,
FILEGROWTH = 100MB)
GO
/*set db options*/
ALTER DATABASE tpch3000 SET RECOVERY SIMPLE
ALTER DATABASE tpch3000 SET AUTO_CREATE_STATISTICS OFF
ALTER DATABASE tpch3000 SET AUTO_UPDATE_STATISTICS OFF
ALTER DATABASE tpch3000 SET PAGE_VERIFY NONE
USE tpch3000
GO
create table CUSTOMER_1 ([c_custkey] [bigint] NOT NULL,[c_mktsegment] [char](10) NULL,[c_nationkey] [int]
NULL,[c_name] [varchar](25) NULL,[c_address] [varchar](40) NULL,[c_phone] [char](15) NULL,[c_acctbal]
[money] NULL,[c_comment] [varchar](118) NULL) on DATA_FG_01
create table CUSTOMER_2 ([c_custkey] [bigint] NOT NULL,[c_mktsegment] [char](10) NULL,[c_nationkey] [int]
NULL,[c_name] [varchar](25) NULL,[c_address] [varchar](40) NULL,[c_phone] [char](15) NULL,[c_acctbal]
[money] NULL,[c_comment] [varchar](118) NULL) on DATA_FG_02
…
create table CUSTOMER_32 ([c_custkey] [bigint] NOT NULL,[c_mktsegment] [char](10) NULL,[c_nationkey]
[int] NULL,[c_name] [varchar](25) NULL,[c_address] [varchar](40) NULL,[c_phone] [char](15) NULL,[c_
acctbal] [money] NULL,[c_comment] [varchar](118) NULL) on DATA_FG_32
create table LINEITEM_1 ([l_shipdate] [date] NULL,[l_orderkey] [bigint] NOT NULL,[l_discount] [money] NOT
NULL,[l_extendedprice] [money] NOT NULL,[l_suppkey] [int] NOT NULL,[l_quantity] [bigint] NOT NULL,[l_
returnflag] [char](1) NULL,[l_partkey] [bigint] NOT NULL,[l_linestatus] [char](1) NULL,[l_tax] [money] NOT
NULL,[l_commitdate] [date] NULL,[l_receiptdate] [date] NULL,[l_shipmode] [char](10) NULL,[l_linenumber]
[bigint] NOT NULL,[l_shipinstruct] [char](25) NULL,[l_comment] [varchar](44) NULL) on DATA_FG_01
create table LINEITEM_2 ([l_shipdate] [date] NULL,[l_orderkey] [bigint] NOT NULL,[l_discount] [money] NOT
NULL,[l_extendedprice] [money] NOT NULL,[l_suppkey] [int] NOT NULL,[l_quantity] [bigint] NOT NULL,[l_
returnflag] [char](1) NULL,[l_partkey] [bigint] NOT NULL,[l_linestatus] [char](1) NULL,[l_tax] [money] NOT
NULL,[l_commitdate] [date] NULL,[l_receiptdate] [date] NULL,[l_shipmode] [char](10) NULL,[l_linenumber]
[bigint] NOT NULL,[l_shipinstruct] [char](25) NULL,[l_comment] [varchar](44) NULL) on DATA_FG_02
…
create table LINEITEM_32 ([l_shipdate] [date] NULL,[l_orderkey] [bigint] NOT NULL,[l_discount] [money]
NOT NULL,[l_extendedprice] [money] NOT NULL,[l_suppkey] [int] NOT NULL,[l_quantity] [bigint] NOT NULL,[l_
returnflag] [char](1) NULL,[l_partkey] [bigint] NOT NULL,[l_linestatus] [char](1) NULL,[l_tax] [money] NOT
NULL,[l_commitdate] [date] NULL,[l_receiptdate] [date] NULL,[l_shipmode] [char](10) NULL,[l_linenumber]
[bigint] NOT NULL,[l_shipinstruct] [char](25) NULL,[l_comment] [varchar](44) NULL) on DATA_FG_32
create table ORDERS_1 ([o_orderdate] [date] NULL,[o_orderkey] [bigint] NOT NULL,[o_custkey] [bigint]
NOT NULL,[o_orderpriority] [char](15) NULL,[o_shippriority] [int] NULL,[o_clerk] [char](15) NULL,[o_
orderstatus] [char](1) NULL,[o_totalprice] [money] NULL,[o_comment] [varchar](79) NULL) on DATA_FG_01
create table ORDERS_2 ([o_orderdate] [date] NULL,[o_orderkey] [bigint] NOT NULL,[o_custkey] [bigint]
NOT NULL,[o_orderpriority] [char](15) NULL,[o_shippriority] [int] NULL,[o_clerk] [char](15) NULL,[o_
orderstatus] [char](1) NULL,[o_totalprice] [money] NULL,[o_comment] [varchar](79) NULL) on DATA_FG_02
…
create table ORDERS_32 ([o_orderdate] [date] NULL,[o_orderkey] [bigint] NOT NULL,[o_custkey] [bigint]
NOT NULL,[o_orderpriority] [char](15) NULL,[o_shippriority] [int] NULL,[o_clerk] [char](15) NULL,[o_
Handle transaction workloads and data mart loads with better performance	 June 2017 (Revised)
orderstatus] [char](1) NULL,[o_totalprice] [money] NULL,[o_comment] [varchar](79) NULL) on DATA_FG_32
create table PART_1 ([p_partkey] [bigint] NOT NULL,[p_type] [varchar](25) NULL,[p_size] [int] NULL,[p_
brand] [char](10) NULL,[p_name] [varchar](55) NULL,[p_container] [char](10) NULL,[p_mfgr] [char](25)
NULL,[p_retailprice] [money] NULL,[p_comment] [varchar](23) NULL) on DATA_FG_01
create table PART_2 ([p_partkey] [bigint] NOT NULL,[p_type] [varchar](25) NULL,[p_size] [int] NULL,[p_
brand] [char](10) NULL,[p_name] [varchar](55) NULL,[p_container] [char](10) NULL,[p_mfgr] [char](25)
NULL,[p_retailprice] [money] NULL,[p_comment] [varchar](23) NULL) on DATA_FG_02
…
create table PART_32 ([p_partkey] [bigint] NOT NULL,[p_type] [varchar](25) NULL,[p_size] [int] NULL,[p_
brand] [char](10) NULL,[p_name] [varchar](55) NULL,[p_container] [char](10) NULL,[p_mfgr] [char](25)
NULL,[p_retailprice] [money] NULL,[p_comment] [varchar](23) NULL) on DATA_FG_32
create table PARTSUPP_1 ([ps_partkey] [bigint] NOT NULL,[ps_suppkey] [int] NOT NULL,[ps_supplycost]
[money] NOT NULL,[ps_availqty] [int] NULL,[ps_comment] [varchar](199) NULL) on DATA_FG_01
create table PARTSUPP_2 ([ps_partkey] [bigint] NOT NULL,[ps_suppkey] [int] NOT NULL,[ps_supplycost]
[money] NOT NULL,[ps_availqty] [int] NULL,[ps_comment] [varchar](199) NULL) on DATA_FG_02
…
create table PARTSUPP_32 ([ps_partkey] [bigint] NOT NULL,[ps_suppkey] [int] NOT NULL,[ps_supplycost]
[money] NOT NULL,[ps_availqty] [int] NULL,[ps_comment] [varchar](199) NULL) on DATA_FG_32
create table SUPPLIER_1 ([s_suppkey] [int] NOT NULL,[s_nationkey] [int] NULL,[s_comment] [varchar]
(102) NULL,[s_name] [char](25) NULL,[s_address] [varchar](40) NULL,[s_phone] [char](15) NULL,[s_acctbal]
[money] NULL) on DATA_FG_01
create table SUPPLIER_2 ([s_suppkey] [int] NOT NULL,[s_nationkey] [int] NULL,[s_comment] [varchar]
(102) NULL,[s_name] [char](25) NULL,[s_address] [varchar](40) NULL,[s_phone] [char](15) NULL,[s_acctbal]
[money] NULL) on DATA_FG_02
…
create table SUPPLIER_32 ([s_suppkey] [int] NOT NULL,[s_nationkey] [int] NULL,[s_comment] [varchar]
(102) NULL,[s_name] [char](25) NULL,[s_address] [varchar](40) NULL,[s_phone] [char](15) NULL,[s_acctbal]
[money] NULL) on DATA_FG_32
Handle transaction workloads and data mart loads with better performance	 June 2017 (Revised)
Inserting the data into Microsoft SQL Server
We used 32 individual SQL scripts to create a BULK INSERT process on each filegroup. The first script is shown here as an example:
bulk insert tpch3000..CUSTOMER_1 from ‘O:CUSTOMER_1.tbl’ with
(TABLOCK,DATAFILETYPE=’char’,CODEPAGE=’raw’,FieldTerminator=’|’,BATCHSIZE=14062500)
bulk insert tpch3000..LINEITEM_1 from ‘O:LINEITEM_1.tbl’ with
(TABLOCK,DATAFILETYPE=’char’,CODEPAGE=’raw’,FieldTerminator=’|’,BATCHSIZE=562500000)
bulk insert tpch3000..ORDERS_1 from ‘O:ORDERS_1.tbl’ with
(TABLOCK,DATAFILETYPE=’char’,CODEPAGE=’raw’,FieldTerminator=’|’,BATCHSIZE=140625000)
bulk insert tpch3000..PART_1 from ‘O:PART_1.tbl’ with
(TABLOCK,DATAFILETYPE=’char’,CODEPAGE=’raw’,FieldTerminator=’|’,BATCHSIZE=18750000)
bulk insert tpch3000..PARTSUPP_1 from ‘O:PARTSUPP_1.tbl’ with
(TABLOCK,DATAFILETYPE=’char’,CODEPAGE=’raw’,FieldTerminator=’|’,BATCHSIZE=75000000)
bulk insert tpch3000..SUPPLIER_1 from ‘O:SUPPLIER_1.tbl’ with
(TABLOCK,DATAFILETYPE=’char’,CODEPAGE=’raw’,FieldTerminator=’|’,BATCHSIZE=937500)
Starting the SQL BULK INSERT scripts
We used Windows CMD and SQLCMD to start the 32 BULK INSERT scripts with CPU affinity:
start /node 0 /affinity 1 sqlcmd -S localhost -d tpch3000 -U sa -P ****** -i C:UsersAdministrator
Documentsgen_1.sql
start /node 0 /affinity 2 sqlcmd -S localhost -d tpch3000 -U sa -P ****** -i C:UsersAdministrator
Documentsgen_2.sql
start /node 0 /affinity 4 sqlcmd -S localhost -d tpch3000 -U sa -P ****** -i C:UsersAdministrator
Documentsgen_3.sql
start /node 0 /affinity 8 sqlcmd -S localhost -d tpch3000 -U sa -P ****** -i C:UsersAdministrator
Documentsgen_4.sql
start /node 0 /affinity 10 sqlcmd -S localhost -d tpch3000 -U sa -P ****** -i C:UsersAdministrator
Documentsgen_5.sql
start /node 0 /affinity 20 sqlcmd -S localhost -d tpch3000 -U sa -P ****** -i C:UsersAdministrator
Documentsgen_6.sql
start /node 0 /affinity 40 sqlcmd -S localhost -d tpch3000 -U sa -P ****** -i C:UsersAdministrator
Documentsgen_7.sql
start /node 0 /affinity 80 sqlcmd -S localhost -d tpch3000 -U sa -P ****** -i C:UsersAdministrator
Documentsgen_8.sql
start /node 0 /affinity 100 sqlcmd -S localhost -d tpch3000 -U sa -P ****** -i C:UsersAdministrator
Documentsgen_9.sql
start /node 0 /affinity 200 sqlcmd -S localhost -d tpch3000 -U sa -P ****** -i C:UsersAdministrator
Documentsgen_10.sql
start /node 0 /affinity 400 sqlcmd -S localhost -d tpch3000 -U sa -P ****** -i C:UsersAdministrator
Documentsgen_11.sql
start /node 0 /affinity 800 sqlcmd -S localhost -d tpch3000 -U sa -P ****** -i C:UsersAdministrator
Documentsgen_12.sql
start /node 0 /affinity 1000 sqlcmd -S localhost -d tpch3000 -U sa -P ****** -i C:UsersAdministrator
Documentsgen_13.sql
start /node 0 /affinity 2000 sqlcmd -S localhost -d tpch3000 -U sa -P ****** -i C:UsersAdministrator
Documentsgen_14.sql
start /node 0 /affinity 4000 sqlcmd -S localhost -d tpch3000 -U sa -P ****** -i C:UsersAdministrator
Documentsgen_15.sql
start /node 0 /affinity 8000 sqlcmd -S localhost -d tpch3000 -U sa -P ****** -i C:UsersAdministrator
Documentsgen_16.sql
start /node 1 /affinity 1 sqlcmd -S localhost -d tpch3000 -U sa -P ****** -i C:UsersAdministrator
Documentsgen_17.sql
start /node 1 /affinity 2 sqlcmd -S localhost -d tpch3000 -U sa -P ****** -i C:UsersAdministrator
Documentsgen_18.sql
start /node 1 /affinity 4 sqlcmd -S localhost -d tpch3000 -U sa -P ****** -i C:UsersAdministrator
Documentsgen_19.sql
start /node 1 /affinity 8 sqlcmd -S localhost -d tpch3000 -U sa -P ****** -i C:UsersAdministrator
Documentsgen_20.sql
start /node 1 /affinity 10 sqlcmd -S localhost -d tpch3000 -U sa -P ****** -i C:UsersAdministrator
Documentsgen_21.sql
start /node 1 /affinity 20 sqlcmd -S localhost -d tpch3000 -U sa -P ****** -i C:
UsersAdministratorDocumentsgen_22.sql
start /node 1 /affinity 40 sqlcmd -S localhost -d tpch3000 -U sa -P ****** -i C:UsersAdministrator
Documentsgen_23.sql
start /node 1 /affinity 80 sqlcmd -S localhost -d tpch3000 -U sa -P ****** -i C:UsersAdministrator
Handle transaction workloads and data mart loads with better performance	 June 2017 (Revised)
Principled Technologies is a registered trademark of Principled Technologies, Inc.
All other product names are the trademarks of their respective owners.
DISCLAIMER OF WARRANTIES; LIMITATION OF LIABILITY:
Principled Technologies, Inc. has made reasonable efforts to ensure the accuracy and validity of its testing, however, Principled Technologies, Inc. specifically disclaims
any warranty, expressed or implied, relating to the test results and analysis, their accuracy, completeness or quality, including any implied warranty of fitness for any
particular purpose. All persons or entities relying on the results of any testing do so at their own risk, and agree that Principled Technologies, Inc., its employees and its
subcontractors shall have no liability whatsoever from any claim of loss or damage on account of any alleged error or defect in any testing procedure or result.
In no event shall Principled Technologies, Inc. be liable for indirect, special, incidental, or consequential damages in connection with its testing, even if advised of the
possibility of such damages. In no event shall Principled Technologies, Inc.’s liability, including for direct damages, exceed the amounts paid in connection with Principled
Technologies, Inc.’s testing. Customer’s sole and exclusive remedies are as set forth herein.
This project was commissioned by Dell EMC.
Principled
Technologies®
Facts matter.®Principled
Technologies®
Facts matter.®
Documentsgen_24.sql
start /node 1 /affinity 100 sqlcmd -S localhost -d tpch3000 -U sa -P ****** -i C:UsersAdministrator
Documentsgen_25.sql
start /node 1 /affinity 200 sqlcmd -S localhost -d tpch3000 -U sa -P ****** -i C:UsersAdministrator
Documentsgen_26.sql
start /node 1 /affinity 400 sqlcmd -S localhost -d tpch3000 -U sa -P ****** -i C:UsersAdministrator
Documentsgen_27.sql
start /node 1 /affinity 800 sqlcmd -S localhost -d tpch3000 -U sa -P ****** -i C:UsersAdministrator
Documentsgen_28.sql
start /node 1 /affinity 1000 sqlcmd -S localhost -d tpch3000 -U sa -P ****** -i C:UsersAdministrator
Documentsgen_29.sql
start /node 1 /affinity 2000 sqlcmd -S localhost -d tpch3000 -U sa -P ****** -i C:UsersAdministrator
Documentsgen_30.sql
start /node 1 /affinity 4000 sqlcmd -S localhost -d tpch3000 -U sa -P ****** -i C:UsersAdministrator
Documentsgen_31.sql
start /node 1 /affinity 8000 sqlcmd -S localhost -d tpch3000 -U sa -P ****** -i C:UsersAdministrator
Documentsgen_32.sql

Contenu connexe

Tendances

Demartek Lenovo Storage S3200 MS Exchange Evaluation_2016-01
Demartek Lenovo Storage S3200 MS Exchange Evaluation_2016-01Demartek Lenovo Storage S3200 MS Exchange Evaluation_2016-01
Demartek Lenovo Storage S3200 MS Exchange Evaluation_2016-01Lenovo Data Center
 
The Dell EMC PowerMax 8000 outperformed another vendor's array on an OLTP-lik...
The Dell EMC PowerMax 8000 outperformed another vendor's array on an OLTP-lik...The Dell EMC PowerMax 8000 outperformed another vendor's array on an OLTP-lik...
The Dell EMC PowerMax 8000 outperformed another vendor's array on an OLTP-lik...Principled Technologies
 
Consolidating Oracle database servers onto Dell PowerEdge R920 running Oracle...
Consolidating Oracle database servers onto Dell PowerEdge R920 running Oracle...Consolidating Oracle database servers onto Dell PowerEdge R920 running Oracle...
Consolidating Oracle database servers onto Dell PowerEdge R920 running Oracle...Principled Technologies
 
A single-socket Dell EMC PowerEdge R7515 solution delivered better value on a...
A single-socket Dell EMC PowerEdge R7515 solution delivered better value on a...A single-socket Dell EMC PowerEdge R7515 solution delivered better value on a...
A single-socket Dell EMC PowerEdge R7515 solution delivered better value on a...Principled Technologies
 
IMCSummit 2015 - Day 2 Developer Track - The NVM Revolution
IMCSummit 2015 - Day 2 Developer Track - The NVM RevolutionIMCSummit 2015 - Day 2 Developer Track - The NVM Revolution
IMCSummit 2015 - Day 2 Developer Track - The NVM RevolutionIn-Memory Computing Summit
 
IMCSummit 2015 - Day 2 IT Business Track - Drive IMC Efficiency with Flash E...
IMCSummit 2015 - Day 2  IT Business Track - Drive IMC Efficiency with Flash E...IMCSummit 2015 - Day 2  IT Business Track - Drive IMC Efficiency with Flash E...
IMCSummit 2015 - Day 2 IT Business Track - Drive IMC Efficiency with Flash E...In-Memory Computing Summit
 
Watch your transactional database performance climb with Intel Optane DC pers...
Watch your transactional database performance climb with Intel Optane DC pers...Watch your transactional database performance climb with Intel Optane DC pers...
Watch your transactional database performance climb with Intel Optane DC pers...Principled Technologies
 
Run more applications without expanding your datacenter
Run more applications without expanding your datacenterRun more applications without expanding your datacenter
Run more applications without expanding your datacenterPrincipled Technologies
 
Demartek lenovo s3200_mixed_workload_environment_2016-01
Demartek lenovo s3200_mixed_workload_environment_2016-01Demartek lenovo s3200_mixed_workload_environment_2016-01
Demartek lenovo s3200_mixed_workload_environment_2016-01Lenovo Data Center
 
Data Domain Architecture
Data Domain ArchitectureData Domain Architecture
Data Domain Architecturekoesteruk22
 
Get more I/O performance on fewer servers with Intel Optane DC SSDs
Get more I/O performance on fewer servers with Intel Optane DC SSDsGet more I/O performance on fewer servers with Intel Optane DC SSDs
Get more I/O performance on fewer servers with Intel Optane DC SSDsPrincipled Technologies
 
Boosting performance with the Dell Acceleration Appliance for Databases
Boosting performance with the Dell Acceleration Appliance for DatabasesBoosting performance with the Dell Acceleration Appliance for Databases
Boosting performance with the Dell Acceleration Appliance for DatabasesPrincipled Technologies
 
Consolidating Oracle database servers on the Dell PowerEdge R930
Consolidating Oracle database servers on the Dell PowerEdge R930Consolidating Oracle database servers on the Dell PowerEdge R930
Consolidating Oracle database servers on the Dell PowerEdge R930Principled Technologies
 
OLTP with Dell EqualLogic hybrid arrays: A comparative study with an industry...
OLTP with Dell EqualLogic hybrid arrays: A comparative study with an industry...OLTP with Dell EqualLogic hybrid arrays: A comparative study with an industry...
OLTP with Dell EqualLogic hybrid arrays: A comparative study with an industry...Principled Technologies
 
Hardware upgrades to improve database, SharePoint, Exchange, and file server ...
Hardware upgrades to improve database, SharePoint, Exchange, and file server ...Hardware upgrades to improve database, SharePoint, Exchange, and file server ...
Hardware upgrades to improve database, SharePoint, Exchange, and file server ...Principled Technologies
 
Technical Report NetApp Clustered Data ONTAP 8.2: An Introduction
Technical Report NetApp Clustered Data ONTAP 8.2: An IntroductionTechnical Report NetApp Clustered Data ONTAP 8.2: An Introduction
Technical Report NetApp Clustered Data ONTAP 8.2: An IntroductionNetApp
 
Dell PowerEdge R820 and R910 servers: Performance and reliability
Dell PowerEdge R820 and R910 servers: Performance and reliabilityDell PowerEdge R820 and R910 servers: Performance and reliability
Dell PowerEdge R820 and R910 servers: Performance and reliabilityPrincipled Technologies
 
Using SAS GRID v 9 with Isilon F810
Using SAS GRID v 9 with Isilon F810Using SAS GRID v 9 with Isilon F810
Using SAS GRID v 9 with Isilon F810Boni Bruno
 
20+ Million Records a Second - Running Kafka on Isilon F800
20+ Million Records a Second - Running Kafka on Isilon F800 20+ Million Records a Second - Running Kafka on Isilon F800
20+ Million Records a Second - Running Kafka on Isilon F800 Boni Bruno
 
Watch your transactional database performance climb with Intel Optane DC pers...
Watch your transactional database performance climb with Intel Optane DC pers...Watch your transactional database performance climb with Intel Optane DC pers...
Watch your transactional database performance climb with Intel Optane DC pers...Principled Technologies
 

Tendances (20)

Demartek Lenovo Storage S3200 MS Exchange Evaluation_2016-01
Demartek Lenovo Storage S3200 MS Exchange Evaluation_2016-01Demartek Lenovo Storage S3200 MS Exchange Evaluation_2016-01
Demartek Lenovo Storage S3200 MS Exchange Evaluation_2016-01
 
The Dell EMC PowerMax 8000 outperformed another vendor's array on an OLTP-lik...
The Dell EMC PowerMax 8000 outperformed another vendor's array on an OLTP-lik...The Dell EMC PowerMax 8000 outperformed another vendor's array on an OLTP-lik...
The Dell EMC PowerMax 8000 outperformed another vendor's array on an OLTP-lik...
 
Consolidating Oracle database servers onto Dell PowerEdge R920 running Oracle...
Consolidating Oracle database servers onto Dell PowerEdge R920 running Oracle...Consolidating Oracle database servers onto Dell PowerEdge R920 running Oracle...
Consolidating Oracle database servers onto Dell PowerEdge R920 running Oracle...
 
A single-socket Dell EMC PowerEdge R7515 solution delivered better value on a...
A single-socket Dell EMC PowerEdge R7515 solution delivered better value on a...A single-socket Dell EMC PowerEdge R7515 solution delivered better value on a...
A single-socket Dell EMC PowerEdge R7515 solution delivered better value on a...
 
IMCSummit 2015 - Day 2 Developer Track - The NVM Revolution
IMCSummit 2015 - Day 2 Developer Track - The NVM RevolutionIMCSummit 2015 - Day 2 Developer Track - The NVM Revolution
IMCSummit 2015 - Day 2 Developer Track - The NVM Revolution
 
IMCSummit 2015 - Day 2 IT Business Track - Drive IMC Efficiency with Flash E...
IMCSummit 2015 - Day 2  IT Business Track - Drive IMC Efficiency with Flash E...IMCSummit 2015 - Day 2  IT Business Track - Drive IMC Efficiency with Flash E...
IMCSummit 2015 - Day 2 IT Business Track - Drive IMC Efficiency with Flash E...
 
Watch your transactional database performance climb with Intel Optane DC pers...
Watch your transactional database performance climb with Intel Optane DC pers...Watch your transactional database performance climb with Intel Optane DC pers...
Watch your transactional database performance climb with Intel Optane DC pers...
 
Run more applications without expanding your datacenter
Run more applications without expanding your datacenterRun more applications without expanding your datacenter
Run more applications without expanding your datacenter
 
Demartek lenovo s3200_mixed_workload_environment_2016-01
Demartek lenovo s3200_mixed_workload_environment_2016-01Demartek lenovo s3200_mixed_workload_environment_2016-01
Demartek lenovo s3200_mixed_workload_environment_2016-01
 
Data Domain Architecture
Data Domain ArchitectureData Domain Architecture
Data Domain Architecture
 
Get more I/O performance on fewer servers with Intel Optane DC SSDs
Get more I/O performance on fewer servers with Intel Optane DC SSDsGet more I/O performance on fewer servers with Intel Optane DC SSDs
Get more I/O performance on fewer servers with Intel Optane DC SSDs
 
Boosting performance with the Dell Acceleration Appliance for Databases
Boosting performance with the Dell Acceleration Appliance for DatabasesBoosting performance with the Dell Acceleration Appliance for Databases
Boosting performance with the Dell Acceleration Appliance for Databases
 
Consolidating Oracle database servers on the Dell PowerEdge R930
Consolidating Oracle database servers on the Dell PowerEdge R930Consolidating Oracle database servers on the Dell PowerEdge R930
Consolidating Oracle database servers on the Dell PowerEdge R930
 
OLTP with Dell EqualLogic hybrid arrays: A comparative study with an industry...
OLTP with Dell EqualLogic hybrid arrays: A comparative study with an industry...OLTP with Dell EqualLogic hybrid arrays: A comparative study with an industry...
OLTP with Dell EqualLogic hybrid arrays: A comparative study with an industry...
 
Hardware upgrades to improve database, SharePoint, Exchange, and file server ...
Hardware upgrades to improve database, SharePoint, Exchange, and file server ...Hardware upgrades to improve database, SharePoint, Exchange, and file server ...
Hardware upgrades to improve database, SharePoint, Exchange, and file server ...
 
Technical Report NetApp Clustered Data ONTAP 8.2: An Introduction
Technical Report NetApp Clustered Data ONTAP 8.2: An IntroductionTechnical Report NetApp Clustered Data ONTAP 8.2: An Introduction
Technical Report NetApp Clustered Data ONTAP 8.2: An Introduction
 
Dell PowerEdge R820 and R910 servers: Performance and reliability
Dell PowerEdge R820 and R910 servers: Performance and reliabilityDell PowerEdge R820 and R910 servers: Performance and reliability
Dell PowerEdge R820 and R910 servers: Performance and reliability
 
Using SAS GRID v 9 with Isilon F810
Using SAS GRID v 9 with Isilon F810Using SAS GRID v 9 with Isilon F810
Using SAS GRID v 9 with Isilon F810
 
20+ Million Records a Second - Running Kafka on Isilon F800
20+ Million Records a Second - Running Kafka on Isilon F800 20+ Million Records a Second - Running Kafka on Isilon F800
20+ Million Records a Second - Running Kafka on Isilon F800
 
Watch your transactional database performance climb with Intel Optane DC pers...
Watch your transactional database performance climb with Intel Optane DC pers...Watch your transactional database performance climb with Intel Optane DC pers...
Watch your transactional database performance climb with Intel Optane DC pers...
 

Similaire à Handle transaction workloads and data mart loads with better performance

Achieve up to 80% better throughput and increase storage efficiency with the ...
Achieve up to 80% better throughput and increase storage efficiency with the ...Achieve up to 80% better throughput and increase storage efficiency with the ...
Achieve up to 80% better throughput and increase storage efficiency with the ...Principled Technologies
 
Offer faster access to critical data and achieve greater inline data reductio...
Offer faster access to critical data and achieve greater inline data reductio...Offer faster access to critical data and achieve greater inline data reductio...
Offer faster access to critical data and achieve greater inline data reductio...Principled Technologies
 
Manage transactional and data mart loads with superior performance and high a...
Manage transactional and data mart loads with superior performance and high a...Manage transactional and data mart loads with superior performance and high a...
Manage transactional and data mart loads with superior performance and high a...Principled Technologies
 
Backing Up Mountains of Data to Disk
Backing Up Mountains of Data to DiskBacking Up Mountains of Data to Disk
Backing Up Mountains of Data to DiskIT Brand Pulse
 
Empower your databases with strong, efficient, scalable performance
Empower your databases with strong, efficient, scalable performanceEmpower your databases with strong, efficient, scalable performance
Empower your databases with strong, efficient, scalable performancePrincipled Technologies
 
Upgrade to Dell EMC PowerEdge R6515 servers and gain better OLTP and VDI perf...
Upgrade to Dell EMC PowerEdge R6515 servers and gain better OLTP and VDI perf...Upgrade to Dell EMC PowerEdge R6515 servers and gain better OLTP and VDI perf...
Upgrade to Dell EMC PowerEdge R6515 servers and gain better OLTP and VDI perf...Principled Technologies
 
Drive new initiatives with a powerful Dell EMC, Nutanix, and Toshiba solution...
Drive new initiatives with a powerful Dell EMC, Nutanix, and Toshiba solution...Drive new initiatives with a powerful Dell EMC, Nutanix, and Toshiba solution...
Drive new initiatives with a powerful Dell EMC, Nutanix, and Toshiba solution...Principled Technologies
 
Run compute-intensive Apache Hadoop big data workloads faster with Dell EMC P...
Run compute-intensive Apache Hadoop big data workloads faster with Dell EMC P...Run compute-intensive Apache Hadoop big data workloads faster with Dell EMC P...
Run compute-intensive Apache Hadoop big data workloads faster with Dell EMC P...Principled Technologies
 
Upgrading to Windows Server 2019 on Dell EMC PowerEdge servers: A simple proc...
Upgrading to Windows Server 2019 on Dell EMC PowerEdge servers: A simple proc...Upgrading to Windows Server 2019 on Dell EMC PowerEdge servers: A simple proc...
Upgrading to Windows Server 2019 on Dell EMC PowerEdge servers: A simple proc...Principled Technologies
 
A Dell and Nutanix solution can boost datacenter efficiency
A Dell and Nutanix solution can boost datacenter efficiencyA Dell and Nutanix solution can boost datacenter efficiency
A Dell and Nutanix solution can boost datacenter efficiencyPrincipled Technologies
 
Complete data analysis faster with Google Cloud C3 high CPU instances enabled...
Complete data analysis faster with Google Cloud C3 high CPU instances enabled...Complete data analysis faster with Google Cloud C3 high CPU instances enabled...
Complete data analysis faster with Google Cloud C3 high CPU instances enabled...Principled Technologies
 
Drive new initiatives with a powerful Dell EMC, Nutanix, and Toshiba solution
Drive new initiatives with a powerful Dell EMC, Nutanix, and Toshiba solutionDrive new initiatives with a powerful Dell EMC, Nutanix, and Toshiba solution
Drive new initiatives with a powerful Dell EMC, Nutanix, and Toshiba solutionPrincipled Technologies
 
Enterprise Mass Storage TCO Case Study
Enterprise Mass Storage TCO Case StudyEnterprise Mass Storage TCO Case Study
Enterprise Mass Storage TCO Case StudyIT Brand Pulse
 
Comparing Cost of Dell EMC Centera and HPE/SUSE/iTernity iCAS
Comparing Cost of Dell EMC Centera and HPE/SUSE/iTernity iCASComparing Cost of Dell EMC Centera and HPE/SUSE/iTernity iCAS
Comparing Cost of Dell EMC Centera and HPE/SUSE/iTernity iCASIT Brand Pulse
 
Dell APEX outperformed comparable Amazon EC2 instances on a decision-support ...
Dell APEX outperformed comparable Amazon EC2 instances on a decision-support ...Dell APEX outperformed comparable Amazon EC2 instances on a decision-support ...
Dell APEX outperformed comparable Amazon EC2 instances on a decision-support ...Principled Technologies
 
IBM Pure Data System for Analytics (Netezza)
IBM Pure Data System for Analytics (Netezza)IBM Pure Data System for Analytics (Netezza)
IBM Pure Data System for Analytics (Netezza)Girish Srivastava
 
Comparing Dell Compellent network-attached storage to an industry-leading NAS...
Comparing Dell Compellent network-attached storage to an industry-leading NAS...Comparing Dell Compellent network-attached storage to an industry-leading NAS...
Comparing Dell Compellent network-attached storage to an industry-leading NAS...Principled Technologies
 
PureSystems on the Private Cloud, John Kaemmerer and Gerry Novan, 11th Sept 14
PureSystems on the Private Cloud, John Kaemmerer and Gerry Novan, 11th Sept 14PureSystems on the Private Cloud, John Kaemmerer and Gerry Novan, 11th Sept 14
PureSystems on the Private Cloud, John Kaemmerer and Gerry Novan, 11th Sept 14IBM Systems UKI
 
Application Report: Big Data - Big Cluster Interconnects
Application Report: Big Data - Big Cluster InterconnectsApplication Report: Big Data - Big Cluster Interconnects
Application Report: Big Data - Big Cluster InterconnectsIT Brand Pulse
 
Scaling Oracle 12c database performance with EMC XtremIO storage in a Databas...
Scaling Oracle 12c database performance with EMC XtremIO storage in a Databas...Scaling Oracle 12c database performance with EMC XtremIO storage in a Databas...
Scaling Oracle 12c database performance with EMC XtremIO storage in a Databas...Principled Technologies
 

Similaire à Handle transaction workloads and data mart loads with better performance (20)

Achieve up to 80% better throughput and increase storage efficiency with the ...
Achieve up to 80% better throughput and increase storage efficiency with the ...Achieve up to 80% better throughput and increase storage efficiency with the ...
Achieve up to 80% better throughput and increase storage efficiency with the ...
 
Offer faster access to critical data and achieve greater inline data reductio...
Offer faster access to critical data and achieve greater inline data reductio...Offer faster access to critical data and achieve greater inline data reductio...
Offer faster access to critical data and achieve greater inline data reductio...
 
Manage transactional and data mart loads with superior performance and high a...
Manage transactional and data mart loads with superior performance and high a...Manage transactional and data mart loads with superior performance and high a...
Manage transactional and data mart loads with superior performance and high a...
 
Backing Up Mountains of Data to Disk
Backing Up Mountains of Data to DiskBacking Up Mountains of Data to Disk
Backing Up Mountains of Data to Disk
 
Empower your databases with strong, efficient, scalable performance
Empower your databases with strong, efficient, scalable performanceEmpower your databases with strong, efficient, scalable performance
Empower your databases with strong, efficient, scalable performance
 
Upgrade to Dell EMC PowerEdge R6515 servers and gain better OLTP and VDI perf...
Upgrade to Dell EMC PowerEdge R6515 servers and gain better OLTP and VDI perf...Upgrade to Dell EMC PowerEdge R6515 servers and gain better OLTP and VDI perf...
Upgrade to Dell EMC PowerEdge R6515 servers and gain better OLTP and VDI perf...
 
Drive new initiatives with a powerful Dell EMC, Nutanix, and Toshiba solution...
Drive new initiatives with a powerful Dell EMC, Nutanix, and Toshiba solution...Drive new initiatives with a powerful Dell EMC, Nutanix, and Toshiba solution...
Drive new initiatives with a powerful Dell EMC, Nutanix, and Toshiba solution...
 
Run compute-intensive Apache Hadoop big data workloads faster with Dell EMC P...
Run compute-intensive Apache Hadoop big data workloads faster with Dell EMC P...Run compute-intensive Apache Hadoop big data workloads faster with Dell EMC P...
Run compute-intensive Apache Hadoop big data workloads faster with Dell EMC P...
 
Upgrading to Windows Server 2019 on Dell EMC PowerEdge servers: A simple proc...
Upgrading to Windows Server 2019 on Dell EMC PowerEdge servers: A simple proc...Upgrading to Windows Server 2019 on Dell EMC PowerEdge servers: A simple proc...
Upgrading to Windows Server 2019 on Dell EMC PowerEdge servers: A simple proc...
 
A Dell and Nutanix solution can boost datacenter efficiency
A Dell and Nutanix solution can boost datacenter efficiencyA Dell and Nutanix solution can boost datacenter efficiency
A Dell and Nutanix solution can boost datacenter efficiency
 
Complete data analysis faster with Google Cloud C3 high CPU instances enabled...
Complete data analysis faster with Google Cloud C3 high CPU instances enabled...Complete data analysis faster with Google Cloud C3 high CPU instances enabled...
Complete data analysis faster with Google Cloud C3 high CPU instances enabled...
 
Drive new initiatives with a powerful Dell EMC, Nutanix, and Toshiba solution
Drive new initiatives with a powerful Dell EMC, Nutanix, and Toshiba solutionDrive new initiatives with a powerful Dell EMC, Nutanix, and Toshiba solution
Drive new initiatives with a powerful Dell EMC, Nutanix, and Toshiba solution
 
Enterprise Mass Storage TCO Case Study
Enterprise Mass Storage TCO Case StudyEnterprise Mass Storage TCO Case Study
Enterprise Mass Storage TCO Case Study
 
Comparing Cost of Dell EMC Centera and HPE/SUSE/iTernity iCAS
Comparing Cost of Dell EMC Centera and HPE/SUSE/iTernity iCASComparing Cost of Dell EMC Centera and HPE/SUSE/iTernity iCAS
Comparing Cost of Dell EMC Centera and HPE/SUSE/iTernity iCAS
 
Dell APEX outperformed comparable Amazon EC2 instances on a decision-support ...
Dell APEX outperformed comparable Amazon EC2 instances on a decision-support ...Dell APEX outperformed comparable Amazon EC2 instances on a decision-support ...
Dell APEX outperformed comparable Amazon EC2 instances on a decision-support ...
 
IBM Pure Data System for Analytics (Netezza)
IBM Pure Data System for Analytics (Netezza)IBM Pure Data System for Analytics (Netezza)
IBM Pure Data System for Analytics (Netezza)
 
Comparing Dell Compellent network-attached storage to an industry-leading NAS...
Comparing Dell Compellent network-attached storage to an industry-leading NAS...Comparing Dell Compellent network-attached storage to an industry-leading NAS...
Comparing Dell Compellent network-attached storage to an industry-leading NAS...
 
PureSystems on the Private Cloud, John Kaemmerer and Gerry Novan, 11th Sept 14
PureSystems on the Private Cloud, John Kaemmerer and Gerry Novan, 11th Sept 14PureSystems on the Private Cloud, John Kaemmerer and Gerry Novan, 11th Sept 14
PureSystems on the Private Cloud, John Kaemmerer and Gerry Novan, 11th Sept 14
 
Application Report: Big Data - Big Cluster Interconnects
Application Report: Big Data - Big Cluster InterconnectsApplication Report: Big Data - Big Cluster Interconnects
Application Report: Big Data - Big Cluster Interconnects
 
Scaling Oracle 12c database performance with EMC XtremIO storage in a Databas...
Scaling Oracle 12c database performance with EMC XtremIO storage in a Databas...Scaling Oracle 12c database performance with EMC XtremIO storage in a Databas...
Scaling Oracle 12c database performance with EMC XtremIO storage in a Databas...
 

Plus de Principled Technologies

Realize 2.1X the performance with 20% less power with AMD EPYC processor-back...
Realize 2.1X the performance with 20% less power with AMD EPYC processor-back...Realize 2.1X the performance with 20% less power with AMD EPYC processor-back...
Realize 2.1X the performance with 20% less power with AMD EPYC processor-back...Principled Technologies
 
Improve performance and gain room to grow by easily migrating to a modern Ope...
Improve performance and gain room to grow by easily migrating to a modern Ope...Improve performance and gain room to grow by easily migrating to a modern Ope...
Improve performance and gain room to grow by easily migrating to a modern Ope...Principled Technologies
 
Boost PC performance: How more available memory can improve productivity
Boost PC performance: How more available memory can improve productivityBoost PC performance: How more available memory can improve productivity
Boost PC performance: How more available memory can improve productivityPrincipled Technologies
 
Deploy with confidence: VMware Cloud Foundation 5.1 on next gen Dell PowerEdg...
Deploy with confidence: VMware Cloud Foundation 5.1 on next gen Dell PowerEdg...Deploy with confidence: VMware Cloud Foundation 5.1 on next gen Dell PowerEdg...
Deploy with confidence: VMware Cloud Foundation 5.1 on next gen Dell PowerEdg...Principled Technologies
 
Upgrade your cloud infrastructure with Dell PowerEdge R760 servers and VMware...
Upgrade your cloud infrastructure with Dell PowerEdge R760 servers and VMware...Upgrade your cloud infrastructure with Dell PowerEdge R760 servers and VMware...
Upgrade your cloud infrastructure with Dell PowerEdge R760 servers and VMware...Principled Technologies
 
A comparison of security features in Dell, HP, and Lenovo PC systems
A comparison of security features in Dell, HP, and Lenovo PC systemsA comparison of security features in Dell, HP, and Lenovo PC systems
A comparison of security features in Dell, HP, and Lenovo PC systemsPrincipled Technologies
 
Increase security, sustainability, and efficiency with robust Dell server man...
Increase security, sustainability, and efficiency with robust Dell server man...Increase security, sustainability, and efficiency with robust Dell server man...
Increase security, sustainability, and efficiency with robust Dell server man...Principled Technologies
 
Scale up your storage with higher-performing Dell APEX Block Storage for AWS ...
Scale up your storage with higher-performing Dell APEX Block Storage for AWS ...Scale up your storage with higher-performing Dell APEX Block Storage for AWS ...
Scale up your storage with higher-performing Dell APEX Block Storage for AWS ...Principled Technologies
 
Scale up your storage with higher-performing Dell APEX Block Storage for AWS
Scale up your storage with higher-performing Dell APEX Block Storage for AWSScale up your storage with higher-performing Dell APEX Block Storage for AWS
Scale up your storage with higher-performing Dell APEX Block Storage for AWSPrincipled Technologies
 
Get in and stay in the productivity zone with the HP Z2 G9 Tower Workstation
Get in and stay in the productivity zone with the HP Z2 G9 Tower WorkstationGet in and stay in the productivity zone with the HP Z2 G9 Tower Workstation
Get in and stay in the productivity zone with the HP Z2 G9 Tower WorkstationPrincipled Technologies
 
Open up new possibilities with higher transactional database performance from...
Open up new possibilities with higher transactional database performance from...Open up new possibilities with higher transactional database performance from...
Open up new possibilities with higher transactional database performance from...Principled Technologies
 
Improving database performance and value with an easy migration to Azure Data...
Improving database performance and value with an easy migration to Azure Data...Improving database performance and value with an easy migration to Azure Data...
Improving database performance and value with an easy migration to Azure Data...Principled Technologies
 
Realize better value and performance migrating from Azure Database for Postgr...
Realize better value and performance migrating from Azure Database for Postgr...Realize better value and performance migrating from Azure Database for Postgr...
Realize better value and performance migrating from Azure Database for Postgr...Principled Technologies
 
Set up students and teachers to excel now and in the future with Intel proces...
Set up students and teachers to excel now and in the future with Intel proces...Set up students and teachers to excel now and in the future with Intel proces...
Set up students and teachers to excel now and in the future with Intel proces...Principled Technologies
 
Finding the path to AI success with the Dell AI portfolio - Summary
Finding the path to AI success with the Dell AI portfolio - SummaryFinding the path to AI success with the Dell AI portfolio - Summary
Finding the path to AI success with the Dell AI portfolio - SummaryPrincipled Technologies
 
Finding the path to AI success with the Dell AI portfolio
Finding the path to AI success with the Dell AI portfolioFinding the path to AI success with the Dell AI portfolio
Finding the path to AI success with the Dell AI portfolioPrincipled Technologies
 
Achieve strong performance and value on Azure SQL Database Hyperscale
Achieve strong performance and value on Azure SQL Database HyperscaleAchieve strong performance and value on Azure SQL Database Hyperscale
Achieve strong performance and value on Azure SQL Database HyperscalePrincipled Technologies
 
Improve backup and recovery outcomes by combining Dell APEX Data Storage Serv...
Improve backup and recovery outcomes by combining Dell APEX Data Storage Serv...Improve backup and recovery outcomes by combining Dell APEX Data Storage Serv...
Improve backup and recovery outcomes by combining Dell APEX Data Storage Serv...Principled Technologies
 

Plus de Principled Technologies (20)

Realize 2.1X the performance with 20% less power with AMD EPYC processor-back...
Realize 2.1X the performance with 20% less power with AMD EPYC processor-back...Realize 2.1X the performance with 20% less power with AMD EPYC processor-back...
Realize 2.1X the performance with 20% less power with AMD EPYC processor-back...
 
Improve performance and gain room to grow by easily migrating to a modern Ope...
Improve performance and gain room to grow by easily migrating to a modern Ope...Improve performance and gain room to grow by easily migrating to a modern Ope...
Improve performance and gain room to grow by easily migrating to a modern Ope...
 
Boost PC performance: How more available memory can improve productivity
Boost PC performance: How more available memory can improve productivityBoost PC performance: How more available memory can improve productivity
Boost PC performance: How more available memory can improve productivity
 
Deploy with confidence: VMware Cloud Foundation 5.1 on next gen Dell PowerEdg...
Deploy with confidence: VMware Cloud Foundation 5.1 on next gen Dell PowerEdg...Deploy with confidence: VMware Cloud Foundation 5.1 on next gen Dell PowerEdg...
Deploy with confidence: VMware Cloud Foundation 5.1 on next gen Dell PowerEdg...
 
Upgrade your cloud infrastructure with Dell PowerEdge R760 servers and VMware...
Upgrade your cloud infrastructure with Dell PowerEdge R760 servers and VMware...Upgrade your cloud infrastructure with Dell PowerEdge R760 servers and VMware...
Upgrade your cloud infrastructure with Dell PowerEdge R760 servers and VMware...
 
A comparison of security features in Dell, HP, and Lenovo PC systems
A comparison of security features in Dell, HP, and Lenovo PC systemsA comparison of security features in Dell, HP, and Lenovo PC systems
A comparison of security features in Dell, HP, and Lenovo PC systems
 
Increase security, sustainability, and efficiency with robust Dell server man...
Increase security, sustainability, and efficiency with robust Dell server man...Increase security, sustainability, and efficiency with robust Dell server man...
Increase security, sustainability, and efficiency with robust Dell server man...
 
Increase security, sustainability, and efficiency with robust Dell server man...
Increase security, sustainability, and efficiency with robust Dell server man...Increase security, sustainability, and efficiency with robust Dell server man...
Increase security, sustainability, and efficiency with robust Dell server man...
 
Scale up your storage with higher-performing Dell APEX Block Storage for AWS ...
Scale up your storage with higher-performing Dell APEX Block Storage for AWS ...Scale up your storage with higher-performing Dell APEX Block Storage for AWS ...
Scale up your storage with higher-performing Dell APEX Block Storage for AWS ...
 
Scale up your storage with higher-performing Dell APEX Block Storage for AWS
Scale up your storage with higher-performing Dell APEX Block Storage for AWSScale up your storage with higher-performing Dell APEX Block Storage for AWS
Scale up your storage with higher-performing Dell APEX Block Storage for AWS
 
Get in and stay in the productivity zone with the HP Z2 G9 Tower Workstation
Get in and stay in the productivity zone with the HP Z2 G9 Tower WorkstationGet in and stay in the productivity zone with the HP Z2 G9 Tower Workstation
Get in and stay in the productivity zone with the HP Z2 G9 Tower Workstation
 
Open up new possibilities with higher transactional database performance from...
Open up new possibilities with higher transactional database performance from...Open up new possibilities with higher transactional database performance from...
Open up new possibilities with higher transactional database performance from...
 
Improving database performance and value with an easy migration to Azure Data...
Improving database performance and value with an easy migration to Azure Data...Improving database performance and value with an easy migration to Azure Data...
Improving database performance and value with an easy migration to Azure Data...
 
Realize better value and performance migrating from Azure Database for Postgr...
Realize better value and performance migrating from Azure Database for Postgr...Realize better value and performance migrating from Azure Database for Postgr...
Realize better value and performance migrating from Azure Database for Postgr...
 
Realize better value and performance migrating from Azure Database for Postgr...
Realize better value and performance migrating from Azure Database for Postgr...Realize better value and performance migrating from Azure Database for Postgr...
Realize better value and performance migrating from Azure Database for Postgr...
 
Set up students and teachers to excel now and in the future with Intel proces...
Set up students and teachers to excel now and in the future with Intel proces...Set up students and teachers to excel now and in the future with Intel proces...
Set up students and teachers to excel now and in the future with Intel proces...
 
Finding the path to AI success with the Dell AI portfolio - Summary
Finding the path to AI success with the Dell AI portfolio - SummaryFinding the path to AI success with the Dell AI portfolio - Summary
Finding the path to AI success with the Dell AI portfolio - Summary
 
Finding the path to AI success with the Dell AI portfolio
Finding the path to AI success with the Dell AI portfolioFinding the path to AI success with the Dell AI portfolio
Finding the path to AI success with the Dell AI portfolio
 
Achieve strong performance and value on Azure SQL Database Hyperscale
Achieve strong performance and value on Azure SQL Database HyperscaleAchieve strong performance and value on Azure SQL Database Hyperscale
Achieve strong performance and value on Azure SQL Database Hyperscale
 
Improve backup and recovery outcomes by combining Dell APEX Data Storage Serv...
Improve backup and recovery outcomes by combining Dell APEX Data Storage Serv...Improve backup and recovery outcomes by combining Dell APEX Data Storage Serv...
Improve backup and recovery outcomes by combining Dell APEX Data Storage Serv...
 

Dernier

The Codex of Business Writing Software for Real-World Solutions 2.pptx
The Codex of Business Writing Software for Real-World Solutions 2.pptxThe Codex of Business Writing Software for Real-World Solutions 2.pptx
The Codex of Business Writing Software for Real-World Solutions 2.pptxMalak Abu Hammad
 
CNv6 Instructor Chapter 6 Quality of Service
CNv6 Instructor Chapter 6 Quality of ServiceCNv6 Instructor Chapter 6 Quality of Service
CNv6 Instructor Chapter 6 Quality of Servicegiselly40
 
08448380779 Call Girls In Diplomatic Enclave Women Seeking Men
08448380779 Call Girls In Diplomatic Enclave Women Seeking Men08448380779 Call Girls In Diplomatic Enclave Women Seeking Men
08448380779 Call Girls In Diplomatic Enclave Women Seeking MenDelhi Call girls
 
08448380779 Call Girls In Civil Lines Women Seeking Men
08448380779 Call Girls In Civil Lines Women Seeking Men08448380779 Call Girls In Civil Lines Women Seeking Men
08448380779 Call Girls In Civil Lines Women Seeking MenDelhi Call girls
 
Scaling API-first – The story of a global engineering organization
Scaling API-first – The story of a global engineering organizationScaling API-first – The story of a global engineering organization
Scaling API-first – The story of a global engineering organizationRadu Cotescu
 
Powerful Google developer tools for immediate impact! (2023-24 C)
Powerful Google developer tools for immediate impact! (2023-24 C)Powerful Google developer tools for immediate impact! (2023-24 C)
Powerful Google developer tools for immediate impact! (2023-24 C)wesley chun
 
IAC 2024 - IA Fast Track to Search Focused AI Solutions
IAC 2024 - IA Fast Track to Search Focused AI SolutionsIAC 2024 - IA Fast Track to Search Focused AI Solutions
IAC 2024 - IA Fast Track to Search Focused AI SolutionsEnterprise Knowledge
 
Exploring the Future Potential of AI-Enabled Smartphone Processors
Exploring the Future Potential of AI-Enabled Smartphone ProcessorsExploring the Future Potential of AI-Enabled Smartphone Processors
Exploring the Future Potential of AI-Enabled Smartphone Processorsdebabhi2
 
Tata AIG General Insurance Company - Insurer Innovation Award 2024
Tata AIG General Insurance Company - Insurer Innovation Award 2024Tata AIG General Insurance Company - Insurer Innovation Award 2024
Tata AIG General Insurance Company - Insurer Innovation Award 2024The Digital Insurer
 
Data Cloud, More than a CDP by Matt Robison
Data Cloud, More than a CDP by Matt RobisonData Cloud, More than a CDP by Matt Robison
Data Cloud, More than a CDP by Matt RobisonAnna Loughnan Colquhoun
 
How to Troubleshoot Apps for the Modern Connected Worker
How to Troubleshoot Apps for the Modern Connected WorkerHow to Troubleshoot Apps for the Modern Connected Worker
How to Troubleshoot Apps for the Modern Connected WorkerThousandEyes
 
A Call to Action for Generative AI in 2024
A Call to Action for Generative AI in 2024A Call to Action for Generative AI in 2024
A Call to Action for Generative AI in 2024Results
 
08448380779 Call Girls In Greater Kailash - I Women Seeking Men
08448380779 Call Girls In Greater Kailash - I Women Seeking Men08448380779 Call Girls In Greater Kailash - I Women Seeking Men
08448380779 Call Girls In Greater Kailash - I Women Seeking MenDelhi Call girls
 
Finology Group – Insurtech Innovation Award 2024
Finology Group – Insurtech Innovation Award 2024Finology Group – Insurtech Innovation Award 2024
Finology Group – Insurtech Innovation Award 2024The Digital Insurer
 
A Domino Admins Adventures (Engage 2024)
A Domino Admins Adventures (Engage 2024)A Domino Admins Adventures (Engage 2024)
A Domino Admins Adventures (Engage 2024)Gabriella Davis
 
GenCyber Cyber Security Day Presentation
GenCyber Cyber Security Day PresentationGenCyber Cyber Security Day Presentation
GenCyber Cyber Security Day PresentationMichael W. Hawkins
 
Axa Assurance Maroc - Insurer Innovation Award 2024
Axa Assurance Maroc - Insurer Innovation Award 2024Axa Assurance Maroc - Insurer Innovation Award 2024
Axa Assurance Maroc - Insurer Innovation Award 2024The Digital Insurer
 
2024: Domino Containers - The Next Step. News from the Domino Container commu...
2024: Domino Containers - The Next Step. News from the Domino Container commu...2024: Domino Containers - The Next Step. News from the Domino Container commu...
2024: Domino Containers - The Next Step. News from the Domino Container commu...Martijn de Jong
 
Histor y of HAM Radio presentation slide
Histor y of HAM Radio presentation slideHistor y of HAM Radio presentation slide
Histor y of HAM Radio presentation slidevu2urc
 
🐬 The future of MySQL is Postgres 🐘
🐬  The future of MySQL is Postgres   🐘🐬  The future of MySQL is Postgres   🐘
🐬 The future of MySQL is Postgres 🐘RTylerCroy
 

Dernier (20)

The Codex of Business Writing Software for Real-World Solutions 2.pptx
The Codex of Business Writing Software for Real-World Solutions 2.pptxThe Codex of Business Writing Software for Real-World Solutions 2.pptx
The Codex of Business Writing Software for Real-World Solutions 2.pptx
 
CNv6 Instructor Chapter 6 Quality of Service
CNv6 Instructor Chapter 6 Quality of ServiceCNv6 Instructor Chapter 6 Quality of Service
CNv6 Instructor Chapter 6 Quality of Service
 
08448380779 Call Girls In Diplomatic Enclave Women Seeking Men
08448380779 Call Girls In Diplomatic Enclave Women Seeking Men08448380779 Call Girls In Diplomatic Enclave Women Seeking Men
08448380779 Call Girls In Diplomatic Enclave Women Seeking Men
 
08448380779 Call Girls In Civil Lines Women Seeking Men
08448380779 Call Girls In Civil Lines Women Seeking Men08448380779 Call Girls In Civil Lines Women Seeking Men
08448380779 Call Girls In Civil Lines Women Seeking Men
 
Scaling API-first – The story of a global engineering organization
Scaling API-first – The story of a global engineering organizationScaling API-first – The story of a global engineering organization
Scaling API-first – The story of a global engineering organization
 
Powerful Google developer tools for immediate impact! (2023-24 C)
Powerful Google developer tools for immediate impact! (2023-24 C)Powerful Google developer tools for immediate impact! (2023-24 C)
Powerful Google developer tools for immediate impact! (2023-24 C)
 
IAC 2024 - IA Fast Track to Search Focused AI Solutions
IAC 2024 - IA Fast Track to Search Focused AI SolutionsIAC 2024 - IA Fast Track to Search Focused AI Solutions
IAC 2024 - IA Fast Track to Search Focused AI Solutions
 
Exploring the Future Potential of AI-Enabled Smartphone Processors
Exploring the Future Potential of AI-Enabled Smartphone ProcessorsExploring the Future Potential of AI-Enabled Smartphone Processors
Exploring the Future Potential of AI-Enabled Smartphone Processors
 
Tata AIG General Insurance Company - Insurer Innovation Award 2024
Tata AIG General Insurance Company - Insurer Innovation Award 2024Tata AIG General Insurance Company - Insurer Innovation Award 2024
Tata AIG General Insurance Company - Insurer Innovation Award 2024
 
Data Cloud, More than a CDP by Matt Robison
Data Cloud, More than a CDP by Matt RobisonData Cloud, More than a CDP by Matt Robison
Data Cloud, More than a CDP by Matt Robison
 
How to Troubleshoot Apps for the Modern Connected Worker
How to Troubleshoot Apps for the Modern Connected WorkerHow to Troubleshoot Apps for the Modern Connected Worker
How to Troubleshoot Apps for the Modern Connected Worker
 
A Call to Action for Generative AI in 2024
A Call to Action for Generative AI in 2024A Call to Action for Generative AI in 2024
A Call to Action for Generative AI in 2024
 
08448380779 Call Girls In Greater Kailash - I Women Seeking Men
08448380779 Call Girls In Greater Kailash - I Women Seeking Men08448380779 Call Girls In Greater Kailash - I Women Seeking Men
08448380779 Call Girls In Greater Kailash - I Women Seeking Men
 
Finology Group – Insurtech Innovation Award 2024
Finology Group – Insurtech Innovation Award 2024Finology Group – Insurtech Innovation Award 2024
Finology Group – Insurtech Innovation Award 2024
 
A Domino Admins Adventures (Engage 2024)
A Domino Admins Adventures (Engage 2024)A Domino Admins Adventures (Engage 2024)
A Domino Admins Adventures (Engage 2024)
 
GenCyber Cyber Security Day Presentation
GenCyber Cyber Security Day PresentationGenCyber Cyber Security Day Presentation
GenCyber Cyber Security Day Presentation
 
Axa Assurance Maroc - Insurer Innovation Award 2024
Axa Assurance Maroc - Insurer Innovation Award 2024Axa Assurance Maroc - Insurer Innovation Award 2024
Axa Assurance Maroc - Insurer Innovation Award 2024
 
2024: Domino Containers - The Next Step. News from the Domino Container commu...
2024: Domino Containers - The Next Step. News from the Domino Container commu...2024: Domino Containers - The Next Step. News from the Domino Container commu...
2024: Domino Containers - The Next Step. News from the Domino Container commu...
 
Histor y of HAM Radio presentation slide
Histor y of HAM Radio presentation slideHistor y of HAM Radio presentation slide
Histor y of HAM Radio presentation slide
 
🐬 The future of MySQL is Postgres 🐘
🐬  The future of MySQL is Postgres   🐘🐬  The future of MySQL is Postgres   🐘
🐬 The future of MySQL is Postgres 🐘
 

Handle transaction workloads and data mart loads with better performance

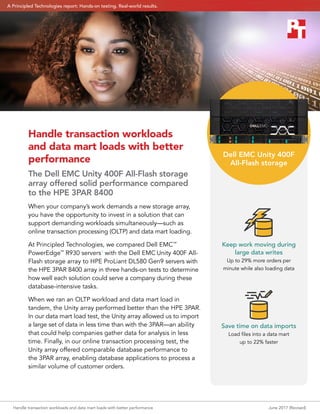
  • 1. Handle transaction workloads and data mart loads with better performance June 2017 (Revised) Handle transaction workloads and data mart loads with better performance The Dell EMC Unity 400F All-Flash storage array offered solid performance compared to the HPE 3PAR 8400 When your company’s work demands a new storage array, you have the opportunity to invest in a solution that can support demanding workloads simultaneously—such as online transaction processing (OLTP) and data mart loading. At Principled Technologies, we compared Dell EMC™ PowerEdge™ R930 servers1 with the Dell EMC Unity 400F All- Flash storage array to HPE ProLiant DL580 Gen9 servers with the HPE 3PAR 8400 array in three hands-on tests to determine how well each solution could serve a company during these database-intensive tasks. When we ran an OLTP workload and data mart load in tandem, the Unity array performed better than the HPE 3PAR. In our data mart load test, the Unity array allowed us to import a large set of data in less time than with the 3PAR—an ability that could help companies gather data for analysis in less time. Finally, in our online transaction processing test, the Unity array offered comparable database performance to the 3PAR array, enabling database applications to process a similar volume of customer orders. Dell EMC Unity 400F All-Flash storage Keep work moving during large data writes Up to 29% more orders per minute while also loading data Save time on data imports Load files into a data mart up to 22% faster A Principled Technologies report: Hands-on testing. Real-world results.
  • 2. Handle transaction workloads and data mart loads with better performance June 2017 (Revised) Keep your work going through intensive data mart loads Writing files to a data mart database is a task usually left to the late hours of the night, or one that involves separate hardware. But what happens if your company needs to run both online transaction and data mart workloads from the same storage environment? With such heavy stress on a system, you might expect a large dip in performance here— large enough to force you to purchase completely separate systems in order to get your work done in a reasonable time. However, in our dual workload test, the Unity array was better able to handle the added stress. For this test, we measured how long it took for each array to put data from many large text files into a single database while simultaneously fulfilling customer orders as part of an OLTP workload. The Unity array enabled the PowerEdge R930 server to process an average of 96,976 orders per minute—29 percent more than the 74,977 orders per minute the ProLiant DL380 Gen9 processed with the 3PAR array. Save time during large data mart writes While it’s good to know how much stress your system can handle, you may also choose to run your data mart and OLTP workloads separately. Loading data from various sources into a data mart is a critical step in gathering and organizing data for analysis, and this process often involves loading from flat files. The Dell EMC Unity loaded three terabytes’ worth of data into a data mart in 1 hour, 2 minutes—22 percent faster than the 1 hour, 16 minutes it took for the HPE array. Saving time here can speed up the time it takes to start analyzing your data, so you can get business insights sooner. 29% more orders per minute during the data load Dell EMC 96,976 74,977HPE 22% faster to import a large data set Less time is better Dell EMC 1h 2m 1h 16m HPE What’s a data mart? Your enterprise business collects data from many different departments. Whether it's sales, marketing, or research and development, you will often want to bundle data from these disparate sources and load it into a single location for analysis and reporting. The data mart is a convenient place to store different departments’ information for processing and analysis.
  • 3. Handle transaction workloads and data mart loads with better performance June 2017 (Revised) Handle demanding online transaction processing (OLTP) work Even without the added stress of a simultaneous data mart workload, OLTP work is one of the most stressful types for a storage array to handle—especially if it has to satisfy a large volume of users simultaneously. We used an OLTP workload benchmark called DVD Store 2 to test how well the Dell EMC and HPE storage arrays could handle many simulated users completing tasks such as browsing an online catalog and making final purchases. The solutions handled a comparable number of database orders per minute (OPM); the Dell EMC Unity array enabled the PowerEdge R930 server to process 112,725 OPM, whereas the HPE ProLiant DL380 Gen9 fulfilled 111,761 OPM with the 3PAR array. Being able to process a large volume of customer requests in a timely manner can result in a better experience for the end user. DVD Store 2 We used a benchmark called DVD Store 2 to test each storage array’s capabilities while handling OLTP workloads. DVD Store simulates an online video marketplace, mimicking the way thousands of users might shop in a real- life scenario. The more user-initiated orders a server can fulfill, the better its performance. To learn more about DVD Store, visit http://linux.dell.com/dvdstore. Storage fabric using Brocade® Gen 6 hardware In our tests, we used Connectrix® DS-6620B switches, built on Brocade Gen 6 hardware, known as the Dell EMC Connectrix B-Series Gen 6 Fibre Channel by Brocade. The Connectrix B Series provides out-of-the box tools for SAN monitoring, management, and diagnostics that simplify administration and troubleshooting for administrators. Brocade Fibre offers Brocade Fabric Vision® Technology, which can provide further visibility into the storage network with monitoring and diagnostic tools. With Monitoring and Alerting Policy Suite (MAPS), admins can proactively monitor the health of all connected storage using policy-based monitoring. Brocade offers another tool to simplify SAN management for Gen 6 hardware: Connectrix Manager Converged Network Edition (CMCNE). This tool uses an intuitive GUI to help admins automate repetitive tasks and further simplify SAN fabric management in the datacenter. To learn more about what Brocade Gen 6 has to offer, visit www.brocade.com. The value of compression Both the Unity and the 3PAR arrays employ a variety of techniques to save space so you can fit more data on your hardware. One of these techniques is compression. Compression algorithms reduce the number of bits needed to represent a set of data—the higher the compression ratio, the more space this particular data reduction technique saves. During our OLTP test, the Unity array achieved a compression ratio of 3.2- to-1 on the database volumes, whereas the 3PAR array averaged a 1.3-to- 1 ratio. In our data mart loading test, the 3PAR achieved a ratio of 1.4-to-1 on the database volumes, whereas the Unity array got 1.3 to 1.
  • 4. Handle transaction workloads and data mart loads with better performance June 2017 (Revised) Conclusion Database work is a big deal—in terms of its importance to your company, and the sheer magnitude of the work. Our tests with the Dell EMC PowerEdge R930 server and Unity 400F All-Flash storage array demonstrated that it could perform comparably to an HPE ProLiant DL380 Gen9 server and 3PAR array during OLTP workloads, with a better compression ratio (3.2-to-1 vs. 1.3-to-1). For loading large sets of data, the Dell EMC Unity finished 22 percent faster than the HPE 3PAR, which can result in less hassle for the administrator in charge of data marts. When running both OLTP and data mart workloads in tandem, the Unity array outperformed the HPE 3PAR in terms of orders processed per minute by 29 percent. For additional product information concerning the Unity 400F storage array, visit DellEMC.com/Unity. 1 http://www.dell.com/en-us/work/shop/productdetails/poweredge-r930 http://www.principledtechnologies.com
  • 5. Handle transaction workloads and data mart loads with better performance June 2017 (Revised) On April 18, 2017, we finalized the hardware and software configurations we tested. Updates for current and recently released hardware and software appear often, so unavoidably these configurations may not represent the latest versions available when this report appears. For older systems, we chose configurations representative of typical purchases of those systems. We concluded hands-on testing on May 4, 2017. Appendix A: System configuration information Servers under test Server configuration information Dell EMC PowerEdge R930 HPE ProLiant DL580 Gen9 BIOS name and version Dell EMC 2.2.0 U17 v2.30 Non-default BIOS settings N/A N/A Operating system name and version/build number VMware® ESXi™ 6.5.0 4564106 VMware ESXi 6.5.0 4564106 Date of last OS updates/patches applied 03/31/2017 03/31/2017 Power management policy Maximum performance Maximum performance Processor Number of processors 4 4 Vendor and model Intel® Xeon® E7-8860 v4 Intel Xeon E7-8860 v4 Core count (per processor) 18 18 Core frequency (GHz) 2.20 2.20 Stepping B0 B0 Memory module(s) Total memory in system (GB) 512 512 Number of memory modules 32 32 Vendor and model Samsung® M393A2G40DB0-CPB Samsung M393A2G40DB0-CPB Size (GB) 16 16 Type PC4-17000 PC4-17000 Speed (MHz) 2,133 2,133 Speed running in the server (MHz) 2,133 2,133 Local storage Number of drives 2 2 Drive vendor and model Seagate® ST300MM0006 Seagate ST300MM0006 Drive size (GB) 300 300 Drive information (speed, interface) 6Gbps, SAS 6Gbps, SAS
  • 6. Handle transaction workloads and data mart loads with better performance June 2017 (Revised) Server configuration information Dell EMC PowerEdge R930 HPE ProLiant DL580 Gen9 Network adapter Vendor and model Intel Ethernet 10GbE 2P X520 Adapter HP Ethernet 10Gb 2-port 560SFP+ Number and type of ports 2 x 10GbE 2 x 10GbE Driver version 17.5.10 0x8000088b Fibre Channel HBA Vendor and model Emulex LightPulse LPe31002-M6 2-Port Emulex LightPulse LPe31002-M6 2-Port Number and type of ports 2 x 16Gb Fibre Channel 2 x 16Gb Fibre Channel Firmware version 11.1.212.0 11.1.212.0 Power supplies Vendor and model Dell EMC 0V1YJ6A00 HPE 656364-B21 Number of power supplies 2 2 Wattage of each (W) 900 1,200 Storage solution Storage configuration information Dell EMC Unity 400F HPE 3PAR 8400 Controller firmware revision UnityOS 4.1.1.9121942 HPE 3PAR OS 3.3.1.215 Number of storage controllers 2 2 Number of storage shelves 2 4 Drive vendor and model number 24 x Dell EMC V4-2S6FXL-800 24 x HPE DOPM3840S5xnNMRI Drive size (GB) 800 3,840 Drive information (speed, interface, type) 12Gbps, SAS, SSD 12Gbps, SAS, SSD
  • 7. Handle transaction workloads and data mart loads with better performance June 2017 (Revised) Appendix B: How we tested Our Dell EMC testbed consisted of two Dell EMC PowerEdge R930 servers. Our HPE testbed consisted of two HPE ProLiant DL580 Gen9 servers. On both testbeds, one server hosted each of the OLTP VMs, while the other hosted the data mart VM. We also used a two-socket, 2U server to host our client and infrastructure VMs. Each server had two 10Gb connections to a Dell Networking X1052 for network traffic. Each server under test had two 16Gb Fibre connections to a redundant set of Dell EMC DS6620B Fibre Channel switches. Each array had two 16Gb connections to each fibre channel switch. Configuring the Fibre Channel switches We created Fibre Channel zones according to best practices for each all-flash array. We placed each server port in a zone with all storage ports. We used two Dell EMC DS6620B Fibre Channel switches for redundancy and multipathing. Creating the Fibre Channel zones 1. Log into the Brocade switch GUI. 2. Click ConfigureZone Admin 3. Click the Zone tab. 4. Click New Zone, and enter a zone name. 5. Select all storage WWNs and a single server port WWN. 6. Click the right arrow to add the WWNs to the zone. 7. Repeat steps 4-6 for all remaining server ports. 8. Click the Zone Config tab. 9. Click New Zone Config, and enter a zone configuration name. 10. Select all newly created zones. 11. Click the right arrow to add the zones to the zone config. 12. Click Zoning ActionsSave Config to save the changes. 13. Click Zoning ActionsEnable Config. 14. Click Yes. Configuring the storage On each storage array, we created a variety of LUNs to be used in testing. Each OLTP VM had its own LUN for the OS, eight separate LUNs for SQL data (two for each SQL instance), and four separate LUNs for SQL log data (one for each SQL instance). The data mart VM had its own LUN for the OS, eight separate LUNs for SQL data, and a single LUN for SQL logs. The data mart VM also had three PCIe NVMe SSDs on the data mart host to hold the source data. We enabled compression on both arrays for all tests, so all SQL database and log LUNs were compressed on both arrays. Configuring the Unity 400F array We created a single RAID 5 storage pool using all available drives. We created one LUN per drive (see Table 1 for drive counts) sized to fit each drive. For each VM, we created a Consistency Group that contained all the LUNs necessary for each VM. Creating the storage pool 1. Log into the Unity 400F array Unisphere GUI. 2. In the left-hand column, in the Storage category, click Pools. 3. To create a new storage pool, click the plus sign. 4. Enter a name and description, and click Next. 5. Choose Extreme Performance Tier, and check the box for Use FAST Cache. 6. Set the Extreme Performance Tier to RAID 5, and click Next. 7. Leave Create VMware Capability Profile for the Pool unchecked, and click Next. 8. Review your selection, and click Finish. Creating the block LUNs 1. In the left-hand column, in the Storage category, click Block. 2. To create a new LUN, click the plus sign. 3. Select the number of LUNs to create, give them a name, choose the pool you created in the previous step, leave the Tiering Policy to Extreme Performance Tier. 4. Check the box for Compression for all OLTP LUNs, or leave unchecked for data mart LUNs. Click Next.
  • 8. Handle transaction workloads and data mart loads with better performance June 2017 (Revised) 5. You will configure access at the Consistency Group level, so leave this blank, and click Next. 6. Leave Enable Automatic Snapshot Creation unchecked, and click Next. 7. Leave Enable Replication unchecked, and click Next. 8. Review your selection, and click Finish. 9. Repeat steps 1 through 8 as necessary to create all LUNs for the environment. Adding ESXi hosts 1. Complete setup for Installing VMware vCenter 6.5 before proceeding the with storage setup. 2. In the left-hand column, in the Access category, click VMware. 3. To add the vCenter server managing the hosts, click the plus sign. 4. Enter the IP address, username, and password for the vCenter server appliance, and click Find. 5. Check the boxes next to the hosts in the Dell EMC testbed, and click Next. 6. Verify the correct hosts have been selected, and click Finish. Creating the Consistency Groups 1. In the left-hand column, in the Storage category, click Block. 2. Click the Consistency Groups tab. 3. To create a new Consistency Group, click the plus sign. 4. Add a name, and click Next. 5. Click the plus sign, click Add Existing LUNs to add the LUNs related to the Consistency Group, and click OK. Click Next. 6. Click the plus sign, add the host(s) to connect to, and click Next. 7. Leave Enable Automatic Snapshot Creation unchecked, and click Next. 8. Leave Enable Replication unchecked, and click Next. 9. Review your selection, and click Finish. 10. Repeat steps 1 through 9 until you have a Consistency Group for all three VMs on the servers under test (SUTs). Configuring the HPE 3PAR 8400 array We created a single RAID 5 CPG using all available drives. We created one LUN per drive (see Table 1 for drive counts) sized to fit each drive. For each VM, we created a Virtual Volume Set that contained all the LUNs necessary to each VM. Creating the storage pool 1. Log into the HPE 3PAR SSMC GUI. 2. At the top, click 3PAR StoreServ, and click Common Provisioning Groups under Block Persona. 3. In the left-hand column, under Common Provisioning Groups, click Create CPG. 4. Under the General heading, enter a name, and verify the correct system is selected in the System drop-down menu. 5. Under the Allocation Settings heading, ensure the Device type is set to SSD 100K. 6. Verify the RAID type is set to RAID 5. 7. Change Availability to Cage (Default) 8. Click Create. Creating the Virtual Volumes 1. At the top, click 3PAR StoreServ, and click Virtual Volumes under Block Persona. 2. In the left-hand column, under Virtual Volumes, click Create virtual volume. 3. Under the General heading, enter a name for the VVol. 4. Verify the correct system is selected in the System drop-down menu. 5. Set the size of the VVol in the Size field, and click Create. 6. Repeat steps 1 through 5 as necessary to create all VVols for the environment. Creating the Virtual Volume Sets 1. At the top, click 3PAR StoreServ, and click Virtual Volume Sets under Block Persona. 2. In the left-hand column, under Virtual Volume Sets, click Create virtual volume set. 3. Under the General heading, enter a name for the Virtual Volume Set. 4. Verify the correct system is selected in the System drop-down menu. 5. Click Add virtual volumes. 6. Select all the virtual volumes created for the first VM, and click Add. 7. Click Create. 8. Repeat steps 1 through 7 until you have a virtual volume set for all three VMs on the SUTs.
  • 9. Handle transaction workloads and data mart loads with better performance June 2017 (Revised) Adding the ESXi hosts 1. Complete setup for installing VMware vCenter 6.5 before proceeding with the storage setup. 2. At the top, click 3PAR StoreServ, and click Hosts under Block Persona. 3. In the left-hand column, under Hosts, click Create host. 4. Under the General heading, enter a name for the host in the Name field. 5. Verify the correct system is selected in the System drop-down menu. 6. Set the Host OS to VMware (ESXi) 7. Under the Paths heading, click Add FC. 8. In the Add FC window, select the WWNs associated with the first host, and click Add. 9. Click Create. 10. Repeat steps 1 through 9 to add the second host. Creating the host sets 1. At the top, click 3PAR StoreServ, and click Host Sets under Block Persona. 2. In the left-hand column, under Host Sets, click Create host set. 3. Under the General heading, enter a name for the host set in the Name field. 4. Under the Host Set Members heading, click on Add hosts. 5. Select both hosts, and click Add. 6. Click Create. Assigning Virtual Volume Sets to Host Sets 1. At the top, click 3PAR StoreServ, and click Virtual Volume Sets under Block Persona. 2. In the left-hand column, under Virtual Volume Sets, select the first VVol set. 3. On the right-hand side, click Actions, and click Export. 4. Under the Export To heading, click Add. 5. At the top of the window, select the Host set option. 6. Select the Host set, and click Add. 7. Leave the Export With section at default values, and click Export. VM and storage summary OLTP workload VMs Data mart workload VMs vCPUs 32 64 Memory 64 GB 130 GB OS drive 1x 40 GB 1x 60 GB Database drives 8x 210 GB 8x 1 TB Log drives 4x 110 GB 1x 550 GB PCIe NVMe drives N/A 3x 1.8 TB Table 1: VM and storage summary Installing VMware vSphere 6.5 We installed the VMware vSphere 6.5 hypervisor to a local RAID 1 disk pair. The RAID 1 virtual disk was created using the BIOS utilities on each server. 1. Boot the server to the installation media. 2. At the boot menu screen, choose the standard installer. 3. Press Enter. 4. Press F11 to accept the license terms. 5. Press Enter to install to the local virtual disk. 6. Press Enter to select the US Default keyboard layout. 7. Create a password for the root user, and press Enter. 8. Press F11 to begin the installation.
  • 10. Handle transaction workloads and data mart loads with better performance June 2017 (Revised) Installing VMware vCenter® 6.5 1. Mount the VCSA ISO to a Windows server that has connectivity to the target vCenter host. 2. Browse to <mount location>vcsa-ui-installerwin32 and run installer.exe. 3. Click Install. 4. Click Next. 5. Check I accept the terms of the license agreement, and click Next. 6. Leave vCenter Server with an Embedded Platform Services Controller checked, and click Next. 7. Enter the IP address and credentials for the target vCenter host, and click Next. 8. Enter a name and password for the VCSA appliance, and click Next. 9. Select Tiny for the deployment size, and click Next. 10. Select a datastore to store the appliance, and click Next. 11. Enter network settings for the appliance, and click Next. 12. Review the summary, and click Finish. 13. Once the deployment is complete, click Continue. 14. Click Next. 15. Select Synchronize time with NTP servers from the drop-down menu, and enter the IP address or hostnames of your NTP servers. Select Enabled from the SSH drop-down menu. Click Next. 16. Enter a username and password for the vCenter SSO, and click Next. 17. Uncheck Join the VMware’s Customer Experience Improvement Program (CEIP), and click Next. 18. Review the summary, and click Finish. Installing Microsoft® Windows Server® 2016 Datacenter Edition 1. Boot the VM to the installation media. 2. Press any key when prompted to boot from DVD. 3. When the installation screen appears, leave language, time/currency format, and input method as default, and click Next. 4. Click Install now. 5. When the installation prompts you, enter the product key. 6. Check I accept the license terms, and click Next. 7. Click Custom: Install Windows only (advanced). 8. Select Windows Server 2016 Datacenter Edition (Desktop Experience), and click Next. 9. Select Drive 0 Unallocated Space, and click Next, at which point Windows begins automatically, and restarts automatically after completing. 10. When the Settings page appears, fill in the Password and Reenter Password fields with the same password. 11. Log in with the password you set up previously. Installing SQL Server® 2016 1. Prior to installing, add the .NET Framework 3.5 feature to the server. 2. Mount the installation DVD for SQL Server 2016. 3. Click Run SETUP.EXE. If Autoplay does not begin the installation, navigate to the SQL Server 2016 DVD, and double-click it. 4. In the left pane, click Installation. 5. Click New SQL Server stand-alone installation or add features to an existing installation. 6. Select the Enter the product key radio button, and enter the product key. Click Next. 7. Click the checkbox to accept the license terms, and click Next. 8. Click Use Microsoft Update to check for updates, and click Next. 9. Click Install to install the setup support files. 10. If there are no failures displayed, click Next. 11. At the Setup Role screen, choose SQL Server Feature Installation, and click Next. 12. At the Feature Selection screen, select Database Engine Services, Full-Text and Semantic Extractions for Search, Client Tools Connectivity, Client Tools Backwards Compatibility. Click Next. 13. At the Installation Rules screen, after the check completes, click Next. 14. At the Instance configuration screen, leave the default selection of default instance, and click Next. 15. At the Server Configuration screen, choose NT ServiceSQLSERVERAGENT for SQL Server Agent, and choose NT Service MSSQLSERVER for SQL Server Database Engine. Change the Startup Type to Automatic. Click Next. 16. At the Database Engine Configuration screen, select the authentication method you prefer. For our testing purposes, we selected Mixed Mode. 17. Enter and confirm a password for the system administrator account. 18. Click Add Current user. This may take several seconds.
  • 11. Handle transaction workloads and data mart loads with better performance June 2017 (Revised) 19. Click Next. 20. At the Error and usage reporting screen, click Next. 21. At the Installation Configuration Rules screen, check that there are no failures or relevant warnings, and click Next. 22. At the Ready to Install screen, click Install. 23. After installation completes, click Close. 24. Close the installation window. 25. Shut down the VM, and create a clone to be used for the data mart workload. 26. Power on the VM. 27. Repeat steps 2-26 for instances 2, 3, and 4, replacing the default instance name at the Instance configuration screen with MSSQLSERVER2, MSSQLSERVER3, and MSSQLSERVER4 at step 14. 28. Shut down the VM, and create another clone to be used for the second OLTP workload. Configuring the DVD Store 2 benchmark Data generation overview We generated our data using the Install.pl script included with DVD Store version 2.1 (DS2), providing the parameters for our 250GB database size and the Microsoft SQL Server 2016 platform. We ran the Install.pl script on a utility system running Linux®. The Install.pl script also generated the database schema. After processing the data generation, we transferred the data files and schema creation files to a Windows-based system running SQL Server 2016. We built the 250GB database in SQL Server 2016, and then performed a full backup, storing the backup file on the C: drive for quick access. We used that backup file to restore the server between test runs. The only modifications we made to the schema creation scripts were the specified file sizes for our database. We explicitly set the file sizes higher than necessary to ensure that no file-growth activity would affect the outputs of the test. Besides this file size modification, the database schema was created and loaded according to the DVD Store documentation. Specifically, we followed the steps below: 1. We generated the data and created the database and file structure using database creation scripts in the DS2 download. We made size modifications specific to our 250GB database and the appropriate changes to drive letters. 2. We transferred the files from our Linux data generation system to a Windows system running SQL Server. 3. We created database tables, stored procedures, and objects using the provided DVD Store scripts. 4. We set the database recovery model to bulk-logged to prevent excess logging. 5. We loaded the data we generated into the database. For data loading, we used the import wizard in SQL Server Management Studio. Where necessary, we retained options from the original scripts, such as Enable Identity Insert. 6. We created indices, full-text catalogs, primary keys, and foreign keys using the database-creation scripts. 7. We updated statistics on each table according to database-creation scripts, which sample 18 percent of the table data. 8. On the SQL Server instance, we created a ds2user SQL Server login using the following Transact-SQL (T-SQL) script: USE [master] GO CREATE LOGIN [ds2user] WITH PASSWORD=N’’, DEFAULT_DATABASE=[master], DEFAULT_LANGUAGE=[us_english], CHECK_EXPIRATION=OFF, CHECK_POLICY=OFF GO 9. We set the database recovery model back to full. 10. We created the necessary full text index using SQL Server Management Studio. 11. We created a database user and mapped this user to the SQL Server login. 12. We then performed a full backup of the database. This backup allowed us to restore the databases to a pristine state relatively quickly between tests. Logical name Filegroup Initial size (MB) Database files primary PRIMARY 8 cust1 DS_CUST_FG 50,776 cust2 DS_CUST_FG 50,776
  • 12. Handle transaction workloads and data mart loads with better performance June 2017 (Revised) Logical name Filegroup Initial size (MB) cust3 DS_CUST_FG 50,776 cust4 DS_CUST_FG 50,776 ind1 DS_IND_FG 20,118 ind2 DS_IND_FG 20,118 ind3 DS_IND_FG 20,118 ind4 DS_IND_FG 20,118 ds_misc DS_MISC_FG 392 orders1 DS_ORDERS 25,004 orders2 DS_ORDERS 25,004 orders3 DS_ORDERS 25,004 orders4 DS_ORDERS 25,004 Log files ds_log Not applicable 90,152 Table 2: DS2 initial file size modifications Configuring the database workload client For our testing, we used a virtual client for the Microsoft SQL Server client. To create this client, we installed Windows Server 2012 R2, assigned a static IP address, and installed .NET 3.5. Running the DVD Store tests We created a series of batch files, SQL scripts, and shell scripts to automate the complete test cycle. DVD Store outputs an orders-per-minute metric, which is a running average calculated through the test. In this report, we report the last OPM reported by each client/target pair. Each complete test cycle consisted of general steps: 1. Clean up prior outputs from the target system and the client driver system. 2. Drop the databases from the target. 3. Restore the databases on the target. 4. Shut down the target. 5. Reboot the host and client system. 6. Wait for a ping response from the server under test and the client system. 7. Let the test server idle for 10 minutes. 8. Start the DVD Store driver on the client. We used the following DVD Store parameters for testing: ds2sqlserverdriver.exe --target=<target_IP> --ramp_rate=10 --run_time=180 --n_threads=32 --db_size=250GB --think_time=0.1 --detailed_view=Y --warmup_time=15 --report_rate=1 --csv_output=<drive path> Configuring the bulk load data mart We used HammerDB to generate TPCH-compliant source data at scale factor 3000, for a total of 3.31TB of raw data. The generated data exists in the form of pipe-delimited text files, which we placed on NVMe PCIe SSDs for fast reads. We split the six largest tables into 32 separate files for parallel loading. Each chunk had its own table in SQL Server, for a total of 6x32 one-to-one streams. We used batch scripting and SQLCMD to start 32 simultaneous SQL scripts. Each script contained BULK INSERT statements to load the corresponding chunk for each table. For example, the 17th SQL script loaded ORDERS_17.txt into table ORDERS_17, and upon finishing, began loading LINEITEM_17.txt into table LINEITEM_17, and so on through each table. Generating the data 1. Download HammerDB v2.21, and run hammerdb.bat. 2. Click OptionsBenchmark. 3. Select the radio buttons for MSSQL Server and TPC-H, and click OK. 4. In the left pane, expand SQL ServerTPC-HDatagen, and double-click Options.
  • 13. Handle transaction workloads and data mart loads with better performance June 2017 (Revised) 5. Select the radio button for 3000, enter a target location for the TPC-H data, and select 32 for the number of virtual users. Click OK. 6. Double-click Generate, and click Yes. Creating the target database We used the following SQL script to create the target database (some lines have been removed and replaced with an ellipsis for clarity): IF EXISTS (SELECT name FROM master.dbo.sysdatabases WHERE name = ‘tpch3000’) DROP DATABASE tpch3000 GO CREATE DATABASE tpch3000 ON PRIMARY ( NAME = tpch3000_root, FILENAME = ‘F:tpchtpch_root.mdf’, SIZE = 100MB, FILEGROWTH = 100MB), FILEGROUP DATA_FG_MISC ( NAME = tpch3000_data_ms, FILENAME = ‘F:tpchtpch_data_ms.mdf’, SIZE = 500MB, FILEGROWTH = 100MB), FILEGROUP DATA_FG_01 (NAME = tpch3000_data_01, FILENAME = ‘F:tpchtpch_data_01.mdf’, SIZE = 112640MB, FILEGROWTH = 100MB), FILEGROUP DATA_FG_02 (NAME = tpch3000_data_02, FILENAME = ‘G:tpchtpch_data_02.mdf’, SIZE = 112640MB, FILEGROWTH = 100MB), FILEGROUP DATA_FG_03 (NAME = tpch3000_data_03, FILENAME = ‘H:tpchtpch_data_03.mdf’, SIZE = 112640MB, FILEGROWTH = 100MB), FILEGROUP DATA_FG_04 (NAME = tpch3000_data_04, FILENAME = ‘I:tpchtpch_data_04.mdf’, SIZE = 112640MB, FILEGROWTH = 100MB), FILEGROUP DATA_FG_05 (NAME = tpch3000_data_05, FILENAME = ‘J:tpchtpch_data_05.mdf’, SIZE = 112640MB, FILEGROWTH = 100MB), FILEGROUP DATA_FG_06 (NAME = tpch3000_data_06, FILENAME = ‘K:tpchtpch_data_06.mdf’, SIZE = 112640MB, FILEGROWTH = 100MB), FILEGROUP DATA_FG_07 (NAME = tpch3000_data_07, FILENAME = ‘L:tpchtpch_data_07.mdf’, SIZE = 112640MB, FILEGROWTH = 100MB), FILEGROUP DATA_FG_08 (NAME = tpch3000_data_08, FILENAME = ‘M:tpchtpch_data_08.mdf’, SIZE = 112640MB, FILEGROWTH = 100MB), FILEGROUP DATA_FG_09 (NAME = tpch3000_data_09, FILENAME = ‘F:tpchtpch_data_09.mdf’, SIZE = 112640MB, FILEGROWTH = 100MB), FILEGROUP DATA_FG_10 (NAME = tpch3000_data_10, FILENAME = ‘G:tpchtpch_data_10.mdf’, SIZE = 112640MB, FILEGROWTH = 100MB), FILEGROUP DATA_FG_11 (NAME = tpch3000_data_11, FILENAME = ‘H:tpchtpch_data_11.mdf’, SIZE = 112640MB, FILEGROWTH = 100MB), FILEGROUP DATA_FG_12 (NAME = tpch3000_data_12, FILENAME = ‘I:tpchtpch_data_12.mdf’, SIZE = 112640MB, FILEGROWTH = 100MB), FILEGROUP DATA_FG_13 (NAME = tpch3000_data_13, FILENAME = ‘J:tpchtpch_data_13.mdf’, SIZE = 112640MB, FILEGROWTH = 100MB), FILEGROUP DATA_FG_14 (NAME = tpch3000_data_14, FILENAME = ‘K:tpchtpch_data_14.mdf’, SIZE = 112640MB, FILEGROWTH = 100MB), FILEGROUP DATA_FG_15 (NAME = tpch3000_data_15, FILENAME = ‘L:tpchtpch_data_15.mdf’, SIZE = 112640MB, FILEGROWTH = 100MB), FILEGROUP DATA_FG_16 (NAME = tpch3000_data_16, FILENAME = ‘M:tpchtpch_data_16.mdf’, SIZE = 112640MB, FILEGROWTH = 100MB), FILEGROUP DATA_FG_17 (NAME = tpch3000_data_17, FILENAME = ‘F:tpchtpch_data_17.mdf’, SIZE = 112640MB, FILEGROWTH = 100MB), FILEGROUP DATA_FG_18 (NAME = tpch3000_data_18, FILENAME = ‘G:tpchtpch_data_18.mdf’, SIZE = 112640MB, FILEGROWTH = 100MB), FILEGROUP DATA_FG_19 (NAME = tpch3000_data_19, FILENAME = ‘H:tpchtpch_data_19.mdf’, SIZE = 112640MB, FILEGROWTH = 100MB), FILEGROUP DATA_FG_20 (NAME = tpch3000_data_20, FILENAME = ‘I:tpchtpch_data_20.mdf’, SIZE = 112640MB, FILEGROWTH = 100MB), FILEGROUP DATA_FG_21 (NAME = tpch3000_data_21, FILENAME = ‘J:tpchtpch_data_21.mdf’, SIZE = 112640MB, FILEGROWTH = 100MB), FILEGROUP DATA_FG_22 (NAME = tpch3000_data_22, FILENAME = ‘K:tpchtpch_data_22.mdf’, SIZE = 112640MB, FILEGROWTH = 100MB), FILEGROUP DATA_FG_23 (NAME = tpch3000_data_23, FILENAME = ‘L:tpchtpch_data_23.mdf’, SIZE = 112640MB, FILEGROWTH = 100MB), FILEGROUP DATA_FG_24 (NAME = tpch3000_data_24, FILENAME = ‘M:tpchtpch_data_24.mdf’, SIZE = 112640MB,
  • 14. Handle transaction workloads and data mart loads with better performance June 2017 (Revised) FILEGROWTH = 100MB), FILEGROUP DATA_FG_25 (NAME = tpch3000_data_25, FILENAME = ‘F:tpchtpch_data_25.mdf’, SIZE = 112640MB, FILEGROWTH = 100MB), FILEGROUP DATA_FG_26 (NAME = tpch3000_data_26, FILENAME = ‘G:tpchtpch_data_26.mdf’, SIZE = 112640MB, FILEGROWTH = 100MB), FILEGROUP DATA_FG_27 (NAME = tpch3000_data_27, FILENAME = ‘H:tpchtpch_data_27.mdf’, SIZE = 112640MB, FILEGROWTH = 100MB), FILEGROUP DATA_FG_28 (NAME = tpch3000_data_28, FILENAME = ‘I:tpchtpch_data_28.mdf’, SIZE = 112640MB, FILEGROWTH = 100MB), FILEGROUP DATA_FG_29 (NAME = tpch3000_data_29, FILENAME = ‘J:tpchtpch_data_29.mdf’, SIZE = 112640MB, FILEGROWTH = 100MB), FILEGROUP DATA_FG_30 (NAME = tpch3000_data_30, FILENAME = ‘K:tpchtpch_data_30.mdf’, SIZE = 112640MB, FILEGROWTH = 100MB), FILEGROUP DATA_FG_31 (NAME = tpch3000_data_31, FILENAME = ‘L:tpchtpch_data_31.mdf’, SIZE = 112640MB, FILEGROWTH = 100MB), FILEGROUP DATA_FG_32 (NAME = tpch3000_data_32, FILENAME = ‘M:tpchtpch_data_32.mdf’, SIZE = 112640MB, FILEGROWTH = 100MB) LOG ON ( NAME = tpch3000_log, FILENAME = ‘N:LOGtpch3000tpch3000_log.ldf’, SIZE = 360000MB, FILEGROWTH = 100MB) GO /*set db options*/ ALTER DATABASE tpch3000 SET RECOVERY SIMPLE ALTER DATABASE tpch3000 SET AUTO_CREATE_STATISTICS OFF ALTER DATABASE tpch3000 SET AUTO_UPDATE_STATISTICS OFF ALTER DATABASE tpch3000 SET PAGE_VERIFY NONE USE tpch3000 GO create table CUSTOMER_1 ([c_custkey] [bigint] NOT NULL,[c_mktsegment] [char](10) NULL,[c_nationkey] [int] NULL,[c_name] [varchar](25) NULL,[c_address] [varchar](40) NULL,[c_phone] [char](15) NULL,[c_acctbal] [money] NULL,[c_comment] [varchar](118) NULL) on DATA_FG_01 create table CUSTOMER_2 ([c_custkey] [bigint] NOT NULL,[c_mktsegment] [char](10) NULL,[c_nationkey] [int] NULL,[c_name] [varchar](25) NULL,[c_address] [varchar](40) NULL,[c_phone] [char](15) NULL,[c_acctbal] [money] NULL,[c_comment] [varchar](118) NULL) on DATA_FG_02 … create table CUSTOMER_32 ([c_custkey] [bigint] NOT NULL,[c_mktsegment] [char](10) NULL,[c_nationkey] [int] NULL,[c_name] [varchar](25) NULL,[c_address] [varchar](40) NULL,[c_phone] [char](15) NULL,[c_ acctbal] [money] NULL,[c_comment] [varchar](118) NULL) on DATA_FG_32 create table LINEITEM_1 ([l_shipdate] [date] NULL,[l_orderkey] [bigint] NOT NULL,[l_discount] [money] NOT NULL,[l_extendedprice] [money] NOT NULL,[l_suppkey] [int] NOT NULL,[l_quantity] [bigint] NOT NULL,[l_ returnflag] [char](1) NULL,[l_partkey] [bigint] NOT NULL,[l_linestatus] [char](1) NULL,[l_tax] [money] NOT NULL,[l_commitdate] [date] NULL,[l_receiptdate] [date] NULL,[l_shipmode] [char](10) NULL,[l_linenumber] [bigint] NOT NULL,[l_shipinstruct] [char](25) NULL,[l_comment] [varchar](44) NULL) on DATA_FG_01 create table LINEITEM_2 ([l_shipdate] [date] NULL,[l_orderkey] [bigint] NOT NULL,[l_discount] [money] NOT NULL,[l_extendedprice] [money] NOT NULL,[l_suppkey] [int] NOT NULL,[l_quantity] [bigint] NOT NULL,[l_ returnflag] [char](1) NULL,[l_partkey] [bigint] NOT NULL,[l_linestatus] [char](1) NULL,[l_tax] [money] NOT NULL,[l_commitdate] [date] NULL,[l_receiptdate] [date] NULL,[l_shipmode] [char](10) NULL,[l_linenumber] [bigint] NOT NULL,[l_shipinstruct] [char](25) NULL,[l_comment] [varchar](44) NULL) on DATA_FG_02 … create table LINEITEM_32 ([l_shipdate] [date] NULL,[l_orderkey] [bigint] NOT NULL,[l_discount] [money] NOT NULL,[l_extendedprice] [money] NOT NULL,[l_suppkey] [int] NOT NULL,[l_quantity] [bigint] NOT NULL,[l_ returnflag] [char](1) NULL,[l_partkey] [bigint] NOT NULL,[l_linestatus] [char](1) NULL,[l_tax] [money] NOT NULL,[l_commitdate] [date] NULL,[l_receiptdate] [date] NULL,[l_shipmode] [char](10) NULL,[l_linenumber] [bigint] NOT NULL,[l_shipinstruct] [char](25) NULL,[l_comment] [varchar](44) NULL) on DATA_FG_32 create table ORDERS_1 ([o_orderdate] [date] NULL,[o_orderkey] [bigint] NOT NULL,[o_custkey] [bigint] NOT NULL,[o_orderpriority] [char](15) NULL,[o_shippriority] [int] NULL,[o_clerk] [char](15) NULL,[o_ orderstatus] [char](1) NULL,[o_totalprice] [money] NULL,[o_comment] [varchar](79) NULL) on DATA_FG_01 create table ORDERS_2 ([o_orderdate] [date] NULL,[o_orderkey] [bigint] NOT NULL,[o_custkey] [bigint] NOT NULL,[o_orderpriority] [char](15) NULL,[o_shippriority] [int] NULL,[o_clerk] [char](15) NULL,[o_ orderstatus] [char](1) NULL,[o_totalprice] [money] NULL,[o_comment] [varchar](79) NULL) on DATA_FG_02 … create table ORDERS_32 ([o_orderdate] [date] NULL,[o_orderkey] [bigint] NOT NULL,[o_custkey] [bigint] NOT NULL,[o_orderpriority] [char](15) NULL,[o_shippriority] [int] NULL,[o_clerk] [char](15) NULL,[o_
  • 15. Handle transaction workloads and data mart loads with better performance June 2017 (Revised) orderstatus] [char](1) NULL,[o_totalprice] [money] NULL,[o_comment] [varchar](79) NULL) on DATA_FG_32 create table PART_1 ([p_partkey] [bigint] NOT NULL,[p_type] [varchar](25) NULL,[p_size] [int] NULL,[p_ brand] [char](10) NULL,[p_name] [varchar](55) NULL,[p_container] [char](10) NULL,[p_mfgr] [char](25) NULL,[p_retailprice] [money] NULL,[p_comment] [varchar](23) NULL) on DATA_FG_01 create table PART_2 ([p_partkey] [bigint] NOT NULL,[p_type] [varchar](25) NULL,[p_size] [int] NULL,[p_ brand] [char](10) NULL,[p_name] [varchar](55) NULL,[p_container] [char](10) NULL,[p_mfgr] [char](25) NULL,[p_retailprice] [money] NULL,[p_comment] [varchar](23) NULL) on DATA_FG_02 … create table PART_32 ([p_partkey] [bigint] NOT NULL,[p_type] [varchar](25) NULL,[p_size] [int] NULL,[p_ brand] [char](10) NULL,[p_name] [varchar](55) NULL,[p_container] [char](10) NULL,[p_mfgr] [char](25) NULL,[p_retailprice] [money] NULL,[p_comment] [varchar](23) NULL) on DATA_FG_32 create table PARTSUPP_1 ([ps_partkey] [bigint] NOT NULL,[ps_suppkey] [int] NOT NULL,[ps_supplycost] [money] NOT NULL,[ps_availqty] [int] NULL,[ps_comment] [varchar](199) NULL) on DATA_FG_01 create table PARTSUPP_2 ([ps_partkey] [bigint] NOT NULL,[ps_suppkey] [int] NOT NULL,[ps_supplycost] [money] NOT NULL,[ps_availqty] [int] NULL,[ps_comment] [varchar](199) NULL) on DATA_FG_02 … create table PARTSUPP_32 ([ps_partkey] [bigint] NOT NULL,[ps_suppkey] [int] NOT NULL,[ps_supplycost] [money] NOT NULL,[ps_availqty] [int] NULL,[ps_comment] [varchar](199) NULL) on DATA_FG_32 create table SUPPLIER_1 ([s_suppkey] [int] NOT NULL,[s_nationkey] [int] NULL,[s_comment] [varchar] (102) NULL,[s_name] [char](25) NULL,[s_address] [varchar](40) NULL,[s_phone] [char](15) NULL,[s_acctbal] [money] NULL) on DATA_FG_01 create table SUPPLIER_2 ([s_suppkey] [int] NOT NULL,[s_nationkey] [int] NULL,[s_comment] [varchar] (102) NULL,[s_name] [char](25) NULL,[s_address] [varchar](40) NULL,[s_phone] [char](15) NULL,[s_acctbal] [money] NULL) on DATA_FG_02 … create table SUPPLIER_32 ([s_suppkey] [int] NOT NULL,[s_nationkey] [int] NULL,[s_comment] [varchar] (102) NULL,[s_name] [char](25) NULL,[s_address] [varchar](40) NULL,[s_phone] [char](15) NULL,[s_acctbal] [money] NULL) on DATA_FG_32
  • 16. Handle transaction workloads and data mart loads with better performance June 2017 (Revised) Inserting the data into Microsoft SQL Server We used 32 individual SQL scripts to create a BULK INSERT process on each filegroup. The first script is shown here as an example: bulk insert tpch3000..CUSTOMER_1 from ‘O:CUSTOMER_1.tbl’ with (TABLOCK,DATAFILETYPE=’char’,CODEPAGE=’raw’,FieldTerminator=’|’,BATCHSIZE=14062500) bulk insert tpch3000..LINEITEM_1 from ‘O:LINEITEM_1.tbl’ with (TABLOCK,DATAFILETYPE=’char’,CODEPAGE=’raw’,FieldTerminator=’|’,BATCHSIZE=562500000) bulk insert tpch3000..ORDERS_1 from ‘O:ORDERS_1.tbl’ with (TABLOCK,DATAFILETYPE=’char’,CODEPAGE=’raw’,FieldTerminator=’|’,BATCHSIZE=140625000) bulk insert tpch3000..PART_1 from ‘O:PART_1.tbl’ with (TABLOCK,DATAFILETYPE=’char’,CODEPAGE=’raw’,FieldTerminator=’|’,BATCHSIZE=18750000) bulk insert tpch3000..PARTSUPP_1 from ‘O:PARTSUPP_1.tbl’ with (TABLOCK,DATAFILETYPE=’char’,CODEPAGE=’raw’,FieldTerminator=’|’,BATCHSIZE=75000000) bulk insert tpch3000..SUPPLIER_1 from ‘O:SUPPLIER_1.tbl’ with (TABLOCK,DATAFILETYPE=’char’,CODEPAGE=’raw’,FieldTerminator=’|’,BATCHSIZE=937500) Starting the SQL BULK INSERT scripts We used Windows CMD and SQLCMD to start the 32 BULK INSERT scripts with CPU affinity: start /node 0 /affinity 1 sqlcmd -S localhost -d tpch3000 -U sa -P ****** -i C:UsersAdministrator Documentsgen_1.sql start /node 0 /affinity 2 sqlcmd -S localhost -d tpch3000 -U sa -P ****** -i C:UsersAdministrator Documentsgen_2.sql start /node 0 /affinity 4 sqlcmd -S localhost -d tpch3000 -U sa -P ****** -i C:UsersAdministrator Documentsgen_3.sql start /node 0 /affinity 8 sqlcmd -S localhost -d tpch3000 -U sa -P ****** -i C:UsersAdministrator Documentsgen_4.sql start /node 0 /affinity 10 sqlcmd -S localhost -d tpch3000 -U sa -P ****** -i C:UsersAdministrator Documentsgen_5.sql start /node 0 /affinity 20 sqlcmd -S localhost -d tpch3000 -U sa -P ****** -i C:UsersAdministrator Documentsgen_6.sql start /node 0 /affinity 40 sqlcmd -S localhost -d tpch3000 -U sa -P ****** -i C:UsersAdministrator Documentsgen_7.sql start /node 0 /affinity 80 sqlcmd -S localhost -d tpch3000 -U sa -P ****** -i C:UsersAdministrator Documentsgen_8.sql start /node 0 /affinity 100 sqlcmd -S localhost -d tpch3000 -U sa -P ****** -i C:UsersAdministrator Documentsgen_9.sql start /node 0 /affinity 200 sqlcmd -S localhost -d tpch3000 -U sa -P ****** -i C:UsersAdministrator Documentsgen_10.sql start /node 0 /affinity 400 sqlcmd -S localhost -d tpch3000 -U sa -P ****** -i C:UsersAdministrator Documentsgen_11.sql start /node 0 /affinity 800 sqlcmd -S localhost -d tpch3000 -U sa -P ****** -i C:UsersAdministrator Documentsgen_12.sql start /node 0 /affinity 1000 sqlcmd -S localhost -d tpch3000 -U sa -P ****** -i C:UsersAdministrator Documentsgen_13.sql start /node 0 /affinity 2000 sqlcmd -S localhost -d tpch3000 -U sa -P ****** -i C:UsersAdministrator Documentsgen_14.sql start /node 0 /affinity 4000 sqlcmd -S localhost -d tpch3000 -U sa -P ****** -i C:UsersAdministrator Documentsgen_15.sql start /node 0 /affinity 8000 sqlcmd -S localhost -d tpch3000 -U sa -P ****** -i C:UsersAdministrator Documentsgen_16.sql start /node 1 /affinity 1 sqlcmd -S localhost -d tpch3000 -U sa -P ****** -i C:UsersAdministrator Documentsgen_17.sql start /node 1 /affinity 2 sqlcmd -S localhost -d tpch3000 -U sa -P ****** -i C:UsersAdministrator Documentsgen_18.sql start /node 1 /affinity 4 sqlcmd -S localhost -d tpch3000 -U sa -P ****** -i C:UsersAdministrator Documentsgen_19.sql start /node 1 /affinity 8 sqlcmd -S localhost -d tpch3000 -U sa -P ****** -i C:UsersAdministrator Documentsgen_20.sql start /node 1 /affinity 10 sqlcmd -S localhost -d tpch3000 -U sa -P ****** -i C:UsersAdministrator Documentsgen_21.sql
start /node 1 /affinity 20 sqlcmd -S localhost -d tpch3000 -U sa -P ****** -i C: UsersAdministratorDocumentsgen_22.sql start /node 1 /affinity 40 sqlcmd -S localhost -d tpch3000 -U sa -P ****** -i C:UsersAdministrator Documentsgen_23.sql start /node 1 /affinity 80 sqlcmd -S localhost -d tpch3000 -U sa -P ****** -i C:UsersAdministrator
  • 17. Handle transaction workloads and data mart loads with better performance June 2017 (Revised) Principled Technologies is a registered trademark of Principled Technologies, Inc. All other product names are the trademarks of their respective owners. DISCLAIMER OF WARRANTIES; LIMITATION OF LIABILITY: Principled Technologies, Inc. has made reasonable efforts to ensure the accuracy and validity of its testing, however, Principled Technologies, Inc. specifically disclaims any warranty, expressed or implied, relating to the test results and analysis, their accuracy, completeness or quality, including any implied warranty of fitness for any particular purpose. All persons or entities relying on the results of any testing do so at their own risk, and agree that Principled Technologies, Inc., its employees and its subcontractors shall have no liability whatsoever from any claim of loss or damage on account of any alleged error or defect in any testing procedure or result. In no event shall Principled Technologies, Inc. be liable for indirect, special, incidental, or consequential damages in connection with its testing, even if advised of the possibility of such damages. In no event shall Principled Technologies, Inc.’s liability, including for direct damages, exceed the amounts paid in connection with Principled Technologies, Inc.’s testing. Customer’s sole and exclusive remedies are as set forth herein. This project was commissioned by Dell EMC. Principled Technologies® Facts matter.®Principled Technologies® Facts matter.® Documentsgen_24.sql start /node 1 /affinity 100 sqlcmd -S localhost -d tpch3000 -U sa -P ****** -i C:UsersAdministrator Documentsgen_25.sql start /node 1 /affinity 200 sqlcmd -S localhost -d tpch3000 -U sa -P ****** -i C:UsersAdministrator Documentsgen_26.sql start /node 1 /affinity 400 sqlcmd -S localhost -d tpch3000 -U sa -P ****** -i C:UsersAdministrator Documentsgen_27.sql start /node 1 /affinity 800 sqlcmd -S localhost -d tpch3000 -U sa -P ****** -i C:UsersAdministrator Documentsgen_28.sql start /node 1 /affinity 1000 sqlcmd -S localhost -d tpch3000 -U sa -P ****** -i C:UsersAdministrator Documentsgen_29.sql start /node 1 /affinity 2000 sqlcmd -S localhost -d tpch3000 -U sa -P ****** -i C:UsersAdministrator Documentsgen_30.sql start /node 1 /affinity 4000 sqlcmd -S localhost -d tpch3000 -U sa -P ****** -i C:UsersAdministrator Documentsgen_31.sql start /node 1 /affinity 8000 sqlcmd -S localhost -d tpch3000 -U sa -P ****** -i C:UsersAdministrator Documentsgen_32.sql