LoveShaw LD3 SBF with 60 Series Cartridge Manual
•
0 j'aime•634 vues

This side belt driven tape sealer is recommended for dimensionally unstable cases, lightweight cases

Recommandé
Recommandé
Contenu connexe
Similaire à LoveShaw LD3 SBF with 60 Series Cartridge Manual
Similaire à LoveShaw LD3 SBF with 60 Series Cartridge Manual (10)
Plus de Pyramid Packaging Inc.
Plus de Pyramid Packaging Inc. (20)
Dernier
Dernier (20)
LoveShaw LD3 SBF with 60 Series Cartridge Manual
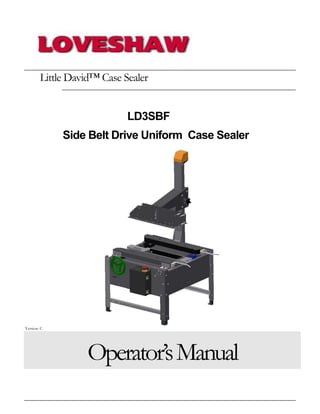
- 1. Little David™ Case Sealer LD3SBF Side Belt Drive Uniform Case Sealer Version: C Operator’sManual
- 2. L I T T L E D A V I D ™ C A S E S E A L E R LD3SBF Operation Copyright Loveshaw Loveshaw, Inc. 2206 Easton Turnpike, PO. Box 83 South Canaan, PA 18459 Tel: 1-800-962-2633 • 570-937-4921 Fax: 570-937-4016 www.loveshaw.com ITW PADLOCKER, LTD. Unit 9 Brunel Gate West Portway Industrial Estate Andover, Hampshire SP10 3SL ENGLAND Tel: 264-357511 Fax: 264-355964 Friday, January 25, 2013
- 3. Table of Contents Chapter 1: Introduction Chapter 2: Operating Safety Chapter 3: Overview Chapter 4: Installation Chapter 5: Theory of Operation Chapter 6: Machine Components Chapter 7: Maintenance
- 4. Chapter 8: Troubleshooting Chapter 9: Warranty Chapter 10: Assembly Drawings and Schematic Chapter 11: Machine Special Options
- 5. Introduction hank you for purchasing the Little David™ case sealer, the LD3SBF. The LD3SBF is uniform side belt drive case sealer. The LD3SBF is a robust built 24/7 case sealer constructed of quality materials, bearing, and electrical components.. All employees who will be required to operate and maintain the case sealer must read this manual to ensure safe operation as well as proper set-up and maintenance throughout the life of the machine . After reading this manual, you will know how to perform the following functions, How to operate the machine safely. How to set the conveyor height of the machine How to set the head height.. How to adjust the side belt drive width. Troubleshooting and replacing of worn or defective parts. Throughout this manual there are several illustrations designed to help you perform the variety of tasks described. Chapter 1 T
- 6. Operating Safety Observe the warnings and cautions below when using the Little David LD3SBF case sealer. Within this manual, all safety labels are depicted with location and part number. If a safety, label is missing or not legible it must be replaced immediately. Failure to follow safety labels can lead to injury or damage to the machine. Instruction:RequirementtoSystemOperation An electrical receptacle must be located near the machine. The line cord connection to the receptacle is the disconnect means for the machine. The receptacle must be located in an area that is easily accessible to all personnel. Warning:PotentialBodilyInjury Always disconnect all sources of energy to the machine before performing maintenance. Sources of energy include electrical and pneumatic. Refer to your company’s lock out tag out procedures. Never bypass or remove safety guards from the machine or tape cartridge. Never override safety devices such as Emergency Stop switches. Never adjust the machine or tape cartridges when the machine is operating. Never place hands or body inside confines of the machine unless top head assembly is locked in place and all power sources are locked out. Never wear jewelry, loose clothing, such as ties, scarves etc and long hair must be pulled back when operating this machine. Never pull a jammed box out of the machine while it is in operation. Stop machine and raise head with bypass switch. When feeding a semi automatic case sealer always hold the top flaps down a rear of box, to avoid accidental entrapment in the machine Chapter 2 Instruction: Warning: Warning: Warning: Warning: Warning: Warning: Warning: Warning:
- 7. This manual contains operator information for Little David Application Equipment. It is directed toward the person who operates and maintains the machine. Read through the manual completely before operating the machine. Thereafter, refer to it as necessary. Take special note of all warnings, cautions, and maintenance instructions. Like any other piece of equipment, the Little David Case Sealer functions best when maintained and used correctly. Caution:PotentialMachineDamage: Never push or drag machine across the floor with the top head assembly fully raised. Makes sure it is completely lowered. Never pull the machine by its pack table or side rails. Provide and use proper electrical power. Do not operate, maintain, or otherwise use this machine, except as described in this manual. Special instruction: The side drive assembly incorporates adjustable side belt guard. The guard are made adjustable to maintain 1/32” gap between the top of the belt and the guard itself. This eliminates a pinch point between the guard and the belt. The guards are located at the rear of the machine where the belt wraps around the drive pulleys. The guards must be adjusted inward as the belts wear. It is mandatory the gap be adjusted to no more than 1/32” clearance between the top of the belt and the guard itself. The guard is simply adjusted by loosening two 6mm panel head machine screws and sliding the guard inward to maintain the 1/32” gap. Failure to adjust the guards may cause injury. Caution: Caution: Caution: Caution: Mounting screws Drive belt Belt guard Gap not to exceed 1/32”
- 9. Case Sealer Sections Overview This manual covers several parts of the machine. The following diagram identifies the key sections of the machine. Chapter 3 Mast Assy. Head Assy. Frame Assy. Side Drive Guides Control Station/ Electrical Enclosure E-stop Side Rail Lock Head Lock Side Belt Drive
- 10. Machine Specifications Machine dimensions: Height: 60.81” @ 22.25” conveyor height Width: 42.08” Length: 31.77" Conveyor height: 22.25” to 30.25” – Standard Electrical Requirements: Standard Voltage: 120/1/60 with 15 amp dedicated service. Optional voltages are available consult factory. Operating speed: Standard belt speed: 76 ft/min
- 11. Air Requirement: N/A Machine box capacity: Length: - 6” to infinite Width: - 4.50” to 21” ( 2" tape cartridge) Width: - 5.50" to 21" ( 3" tape cartridge) Height: 4.50” to 20”
- 13. Installation lways check for any signs that the machine may have been damaged before fully removing it from the shipping skid. If machine arrives damaged contact Loveshaw immediately to help in filing a claim with shipping company. Section 1: Placing the Machine The case sealer is fully assembled and ready for operation. Step One: Carefully remove the machine from the shipping skid. Remove all fasteners and brackets holding the machine to the skid. Step Two: Take care removing the machine from the skid as it weighs 230 pounds! Use a forklift or similar device to complete this task Step Three: Move machine to designate location. It may be necessary to adjust the conveyor height of the machine. The legs on the machine are adjustable by loosening the leg clamping hardware and moving the leg to its proper position. The use of a jack or forklift is required. Chapter 4 A
- 14. Theory of Operation LD3SBF The LD3SBF needs to be manually adjusted for the width and height of the box to be sealed. With the machine off, a box will need to be placed between the side belt arms. Rotate the hand wheel to adjust the side belt drives out. Raise the head assembly by losing the lock knob on the side of the head weldment. With the lock knob loose lift the head assembly till it clears the box then rotate the lock knob to lock the head in place. (NOTE: Do not place the box on top or under cartridge while adjusting drives or head assembly. Damage may result.) While holding the box in placed between the side belt drives turn the hand wheel till the side belt drives grip the box. Fold all four top flaps of the box, holding them down unlock and then lower the head assembly till it is just resting on top of the box then lock the head in place with head lock knob. Start machine and the box will be pulled through with the side belt drives and exit the machine. It may be necessary to increase the side belt drive tension if the box stalls. Rotate the hand wheel to increase drive pressure.( NOTE: Excess pressure will cause box damage and to little will cause box to stall.) Chapter 5
- 15. Key design features: The LD3SBF is a uniform manual adjusted side belt case sealer with counter balanced head assembly. Some of the key features are. Self tracking industrial grade endless belts. Easy access internal mounted side belt tensioners. Adjustable rear pinch point guards. 2" to 3" tape cartridge capability ( Fill plates and hardware required for change from 3" to 2" in base. Head assembly requires longer head shafts from 2" to 3". Internal mounted and guarded constant force spring used to balance the weight on head weldment. Roller bearings on mast assembly for long life and smooth vertical movement. Head lock knob designed for quick adjustment of head height and positive locking ability.
- 16. Machine Components Control Station / Electrical Enclosure The control station consist of an electrical enclosure, push pull mushroom head emergency stop switch and a momentary start pushbutton with motor overload relay. Chapter 6 E-STOP START
- 17. Side Belt Drive Assembly The side drive assembly consist of (2) 1/6 hp gear motor, idler, tension assembly, box guides and endless, guided, rough top belting. The side belt drive assembly, assist in conveying the box forward through the machine. The side belt drive assembly insures that tall unstable boxes will not topple over as they process through the machine. The endless rough top belt has an integral guide rib on the back of it. This guide eliminates any sophisticated apparatus to track the belt. The endless belt feature has increased longevity over conventional laced belting. The tensioner when adjusted maintains the tension on the drive roller. E-STOP BOX GUIDE GEAR MOTOR
- 18. Head Weldment & Mast Assembly The head weldment assembly consists of a sheet metal weldment, roller bearings, slide plates and locking knob. The weldment can be converted to a 2" wide or 3" wide cartridge cavity by changing the tie shafts. The horizontal surface that contact the box is made of a low friction plastic that provides a long wear surface. Internal sealed roller bearings and low friction slide plates provide smooth vertical head weldment travel on the mast assembly. The mast assembly is made up of a vertical structrual tube, constant force spring assembly, spring mount bracket and guard. ROLLER BEARINGS (INSIDE COVER) LOCK KNOB HEAD TIE SHAFTS MAST ASSEMBLY SLIDE PLATES
- 19. Maintenance Safety: NEVERperformanymaintenanceontheLD3SBFwithoutfirst followingyourcompany’sLOCKOUT/TAGOUTprocedures. Replacing Side Belt Gear motor 1. Disconnect electrical or unplug machine. 2. Remove side belt drive guard. 3. Loosen belt by turning locking nut on bottom side of belt arm. When loosen remove tension by loosing lock nut and turning jacking bolt towards the center of belt arm. This will remove tension from belt. 4. Loosen hardware at rear of belt arm for finger guard. This will allow the guard to be moved out of the way and remove the provide clearance to remove the endless belts.. 5. Note height of drive roller on drive shaft for reinstall. Turn drive roller to access (2) set screws. Loosen (2) set screws and remove drive roller and key. 6. Locate motor wire. It may be necessary cut a few wire ties to allow some slack in the line when removing the motor. Note there location for replacement later. 7. Remove motor mounting screws completely then remove motor and motor spacers. Chapter 7
- 20. 8. Rewire replacement motor and replace it with the four mounting 9. Replace wire ties on motor cable. Make sure to leave room for side belt to travel in/out. 10. With height note from removal reinstall drive roller and key. 11. Install endless belt and tighten tensioner. DO NOT over tighten this may cause damage to idler assembly or belt. 12. Adjust finger guard so the belt will not rub it but maintains a 1/32" clearance. 13. Replace top drive guard. 14. Re-connect electrical supply or plug in machine and run as normal. TOP DRIVE MOTOR MOTOR SPACERS MOTOR SPRCKET DRIVE ROLLER FINGER GUARD
- 21. Machine Maintenance: Daily------- Clean machine ( as required) Inspect side belt drives. Weekly----- Check / Adjust side belt tensioner Inspect area around gear motors Inspect belt idlers Adjust finger guards for belts (as required) Monthly---- Check / Adjust head wear pads Cartridge Maintenance: Refer to cartridge area of manual
- 22. Constant force spring removal and installation 6/20/06 Rev. 1 procedure for internally mounted spring 1 of 3 The following are step by step instructions for the removal and installation of the internally located constant force spring assembly. SPECIAL NOTE: Follow proper lock out/tag out procedures and use proper PPE (personal protection equipment) Example: safety glasses and protective gloves. . Figure 5: Remove spring bracket assembly from top of mast. Figure 1: Locate spring cover at top of mast assembly Figure 2: Loosen and remove hardware holding spring cover. (1) located near side (1) located far side Figure 3: Remove spring cover from mast assembly exposing spring. Figure 6: Remove head stop hardware from mast. (1) located near side (1) located far side Figure 4: Loosen and remove spring bracket hardware.
- 23. Constant force spring removal and installation 6/20/06 Rev. 1 procedure for internally mounted spring 2 of 3 Figure 7: Slide head upward until spring is forced outside of mast. Figure 8: Slide head up to expose spring mount hardware. Then lock in place using lock knob on the side of head weldment. Figure 9: Remove hardware that holds spring in place. Figure 10: Remove spring from spring/actuator bracket. Figure 11: Reassemble new constant force spring assembly. Figure 12: Insert spring shaft thru spring drum and center with a set collar on each side. Figure 13: Insert constant force spring assembly into spring bracket. The spring should be facing the rear of the bracket as shown. Figure 14: Attach new spring bracket assembly to top of mast.
- 24. Constant force spring removal and installation 6/20/06 Rev. 1 procedure for internally mounted spring 3 of 3 Figure 15: Pivot spring in place to line up with spring/actuator bracket and reinstall hardware. Figure 16: Reinstall head stop hardware in mast assembly. (1) near side (1) far side Figure 17: Reinstall spring cover. (1) bolt near side (1) bolt far side. Figure 18: Assembly is complete. Adjust head and run machine as normal.
- 25. Troubleshooting: PROBLEM CAUSE CORRECTIVE ACTION Machine will not start. Emergency stop switch(s) activated either control box or top head assembly. No incoming power. Defective start pushbutton Check that both E-stop switches are not engaged. Check machine fuses and plant receptacle. Re-place pushbutton. Box jamming in machine. Box is out of range of machine. Box is voided and head is crushing it. Tape cartridge problems. Side belt drive belting worn. Do not run out of spec box. Adjust head balance regulator. Check tape cartridge troubleshooting. Replace drive belts. Top head assy. won’t move. Lock knob engaged Guide bearing / wear pad tight.. Head lifting spring failure. Check that lock knob is not engaged. Adjust guide bearing / wear pads. Replace head lifting spring. Side drive will not move. Adjustment chain broken. Side drive screw binding. Check that chain and adjust. Grease adjustment screw. Drive belts are slipping. Belts are not tensioned. Belts are worn. Adjust tensioner until spring is collapsed. Replace drive belts. Chapter 8
- 26. Warranty: Little David® Warranty For: All Standard Little David® Semi-Automatic Case Sealers. All Standard LD-16 Series Fully Automatic Case Sealers. All Special Application Case Sealers (Fully & Semi Automatic). 2 YEAR WARRANTY ON DRIVE MOTOR 2 YEAR WARRANTY ON GEAR MOTOR 2 YEAR WARRANTY ON GEAR REDUCER 3 YEAR WARRANTY ON TAPE CARTRIDGE (EXCEPT FOR MOVING PARTS THAT ARE SUBJECT TO NORMAL WEAR, TEAR AND REPLACEMENT WHICH ARE WARRANTED ONLY TO BE FREE FROM DEFECTS IN MATERIAL AND WORKMANSHIP.) 1 YEAR ON PLC 1 YEAR ON SERVO DRIVE 1 YEAR ALL OTHER PARTS Except for wear and moving parts. *LIMITED WARRANTY – LOVESHAW, an ITW COMPANY (HEREIN AFTER “LOVESHAW”) WARRANTS ONLY THAT THE GOODS SOLD BY IT SHALL BE FREE FROM DEFECTS IN MATERIAL AND WORKMANSHIP, UNDER PROPER AND NORMAL USE AND MAINTENANCE, AS FOLLOWS: DRIVE MOTOR - 2 YEARS GEAR REDUCER - 2 YEARS GEAR MOTOR - 2 YEARS (THIS APPLIES TO SIDE BELTS ONLY) TAPE CARTRIDGE - 3 YEARS (EXCEPT FOR MOVING PARTS AND PARTS WHICH ARE SUBJECT TO NORMAL WEAR, TEAR AND REPLACEMENT WHICH ARE WARRANTED ONLY TO BE FREE FROM DEFECTS IN MATERIAL AND WORKMANSHIP); PLC - 1 YEAR SERVO DRIVE - 1 YEAR ALL OTHER PARTS - 1 YEAR (EXCEPT FOR MOVING PARTS AND PARTS, WHICH ARE SUBJECT TO NORMAL WEAR, TEAR AND REPLACEMENT WHICH ARE WARRANTED ONLY TO BE FREE FROM DEFECTS IN MATERIAL AND WORKMANSHIP). THE WARRANTY PERIOD SHALL COMMENCE AS OF THE DATE OF DELIVERY TO THE PURCHASER. THE Chapter 9 CASE SEALER, CUSTOM & SPECIAL APPLICATIONS
- 27. OBLIGATION OF LOVESHAW UNDER THIS WARRANTY IS STRICTLY LIMITED TO THE COST OF REPAIRING OR REPLACING, AS LOVESHAW MAY ELECT, ANY PART OR PARTS THAT PROVE IN LOVESHAW’S JUDGMENT TO HAVE BEEN DEFECTIVE IN MATERIAL OR WORKMANSHIP AT THE TIME THE GOODS WERE SHIPPED FROM LOVESHAW’S PLANT. ANY WARRANTY CLAIM NOT MADE IN WRITING TO LOVESHAW AT ITS HOME OFFICE WITHIN THE APPLICABLE WARRANTY PERIOD AND WITHIN 10 DAYS OF FAILURE WILL NOT BE VALID. THIS IS THE SOLE AND EXCLUSIVE REMEDY AVAILABLE UNDER THIS WARRANTY. UNDER NO CIRCUMSTANCES WILL LOVESHAW BE LIABLE FOR INCIDENTAL, SPECIAL OR CONSEQUENTIAL DAMAGES. IF REQUESTED BY LOVESHAW, PURCHASER SHALL RETURN ANY DEFECTIVE PART OR PARTS TO LOVESHAW’S PLANT, FREIGHT PREPAID. ALL WARRANTY PART REPLACEMENT AND REPAIRS MUST BE MADE BY LOVESHAW OR A LOVESHAW DEALER AUTHORIZED TO HANDLE THE GOODS COVERED BY THIS WARRANTY. ANY OUTSIDE WORK OR ALTERATIONS DONE WITHOUT LOVESHAW’S PRIOR WRITTEN APPROVAL WILL RENDER THIS WARRANTY VOID. LOVESHAW an ITW COMPANY WILL NOT ASSUME ANY EXPENSE OR LIABILITY FOR ANY REPAIRS MADE TO ITS GOODS OUTSIDE ITS WORKS WITHOUT ITS PRIOR WRITTEN CONSENT. THIS WARRANTY SHALL NOT APPLY TO ANY ITEM THAT HAS NOT BEEN USED, OPERATED, AND MAINTAINED IN ACCORDANCE WITH LOVESHAW’S RECOMMENDED PROCEDURES. LOVESHAW SHALL HAVE NO LIABILITY WHATSOEVER WHERE THE GOODS HAVE BEEN ALTERED, MISUSED, ABUSED OR INVOLVED IN AN ACCIDENT. NO PERSON IS AUTHORIZED TO MAKE ANY WARRANTY OR TO CREATE ANY LIABILITY BINDING UPON LOVESHAW, WHICH IS NOT STATED IN THIS WARRANTY. THIS WARRANTY IS EXPRESSLY IN LIEU OF ALL OTHER WARRANTIES OF ANY KIND, EXPRESSED OR IMPLIED, WHICH ARE HEREBY EXCLUDED. IN PARTICULAR, THE IMPLIED WARRANTY OF MERCHANTABILITY, AS WELL AS THE IMPLIED WARRANTY OF FITNESS FOR A PARTICULAR PURPOSE ARE HEREBY EXCLUDED. LOVESHAW an ITW Company 2206 Easton Turnpike, South Canaan,, PA 18459 570.937.4921 - 800.572.3434 - FAX 570.937.3229
- 28. ASSEMBLY DRAWINGS AND SCHEMATICS Chapter 10
- 33. LD3S SPECIA Before Serial N gear m SBF & AL NOTE: e ordering Number a motor for & SP30 g any side and moto replacem Mot 5010 5010 5010 5010 04F M ebelt gear or side loc ment. tor Part # 00-042R 00-042L 00-053 00-068 Motor r motors cation. Th # Descr Gear Gear Gear Gear Selec have mac his will he ription Motor RH Motor LH Motor Motor ction C chine Mo elp determ Volta H 120/1 H 120/1 240/1 220-4 Chart odel, mine corr age / Hz 1/60 1/60 1/50 440/3/50 rect 0-60
- 38. MACHINE AVAIABLE SPECIAL OPTIONS Chapter 11