
Recommandé
Contenu connexe
Tendances
Tendances (20)
Similaire à INTRODUCTIONS OF HTML
Similaire à INTRODUCTIONS OF HTML (20)
Dernier
Dernier (20)
INTRODUCTIONS OF HTML
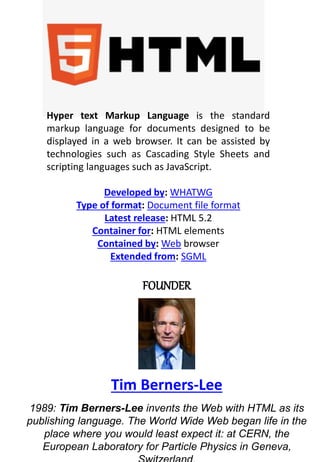
- 1. Hyper text Markup Language is the standard markup language for documents designed to be displayed in a web browser. It can be assisted by technologies such as Cascading Style Sheets and scripting languages such as JavaScript. Developed by: WHATWG Type of format: Document file format Latest release: HTML 5.2 Container for: HTML elements Contained by: Web browser Extended from: SGML FOUNDER Tim Berners-Lee 1989: Tim Berners-Lee invents the Web with HTML as its publishing language. The World Wide Web began life in the place where you would least expect it: at CERN, the European Laboratory for Particle Physics in Geneva,
- 2. Introduction to HTML, CSS, JavaScript & How websites work? | Web Development Tutorials #1 I started this course as an attempt to teach you web development in a fun, easy way! The aim of this course is to teach you how to build a high quality, responsive, and modern website using HTML, CSS, and JavaScript. Now let us first understand what HTML, CSS, and Javascript are for? For every website to be designed, HTML (HyperText Markup Language) is a must. This is the skeleton of a website. Without it, no website can run. CSS (Cascading Style Sheets) adds beauty to that website and JavaScript adds the brain to allow the functioning of that website. Therefore, CSS and JavaScript add beauty and brain to a particular website respectively. Let us now take another example of a car. The HTML acts as the metallic body of a car and the CSS acts as the color and design of the car. Finally, the engine of a car is like the JavaScript on the website to add functionality. Normally, a client or a user sends a request to the webserver of the website, he wants to visit. The web server that has its own IP address stores all the files in the backend which can be written in PHP, Python, or NodeJs. The web server after some computations sends the response to the client in the form of HTML, CSS, and JavaScript.
- 3. Finally, to understand- HTML is used as a standard language for any website design. It acts as a static skeleton to a web application. It’s a well-standardized system. CSS is used to handle the presentation of the web page. It makes the website look attractive and beautiful. JavaScript allows scripting on your website and makes it completely dynamic in nature. It provides front end scripting for your website and is a high-level dynamic interpreted programming language. Now, HTML, CSS, and JavaScript have a lot of concepts in them which we will take over through the span of this course. Therefore, it cannot be learned all at once. If you are a beginner, learning HTML up to 80%, CSS up to 40-60%, and JavaScript up to 50-70% will be more than enough to start building websites. This is something nobody in the web development industry talks about and hence I thought to share this personal advice with all of you. Please don't get me wrong when I say that. Once you have learned and understood the bare minimum to build a website you can come back to the course and start watching it once again for perfecting and sharpening the already learned concepts. Sometimes following this practice gets difficult, the good news is that once you start watching these videos and get your hands dirty with basic HTML, CSS, and JavaScript, the rest you will gradually learn based upon your practices and experiences with the help of projects I have designed as a part of this course. You need to learn all the concepts simultaneously and co-relate all the things by practicing them.
- 4. HTML Tutorial: Installing VS Code & Live Server | Web Development Tutorials #2 In this tutorial, we are going to start our first HTML tutorial. In the last tutorial, we have learnt about HTML, CSS, and JavaScript and how the web server reverts with the response after getting the request. We will now learn about how to write HTML code in the Visual Studio Code. It is a free open source IDE from Microsoft which makes our work a lot easier. Therefore, I recommend everyone to download this software and install it. Make a folder named “Complete Web development Bootcamp” and then open VS Code in that folder by pressing right-click > Open with code. In case, you can’t find the option of opening the particular folder with Visual Studio, you can restart your PC or laptop to make sure that changes have taken place after you installed VS Code. “Harry.html” is an example of a very simple HTML file in which we make further changes to make it look professional. Although you can write all the HTML, CSS, and JavaScript codes in Notepad, I’ll not recommend doing so. This is because in Notepad you have to make different files and edit them one by one and also it does not provide the option of syntax highlighting. And, I would recommend using the Chrome Browser due to its nice functionality and amazing dev tools. Although this tutorial is not a comprehensive explanation of the VS Code, I want you to know some of its basic functionalities. As soon as you enter the exclamation mark (!) in the editor, it gives you the option of Emet Abbreviation. When you click on it, you get a boilerplate sample of the basic HTML format which you can edit further to make a professional website. If you are using the Visual Studio Code for the first time, it may look a little complicated to you. But as you keep practicing on it, believe me, it will make your work effortless and easy. Also, if you are going to write codes of Python or any other language in the future, the VS code IDE will definitely be going to help you. You will find five main buttons on the left panel of the VS Code. These are Explorer, Search, Git, Debugger, and Extensions.
- 5. One of the most important extensions that I would recommend to install is Live Server. After installing it, refresh the Visual Studio Code and click on the Go Live option in the right bottom. The advantage we get by using this amazing extension is that it automatically makes changes in the web page whatever you write in the HTML code. There are two types of settings options in the Visual Studio Code. The first set of settings is the user settings which are used to manage the user and whole VS code. The second set is the Workspace settings which is for only the particular workspace (opened folder) in which you are currently working. You can also change the keyboard shortcuts according to your needs to make your work efficient. So these are some basic knowledge and tips about the Visual Studio Code. I hope you have understood all the concepts very easily. The software works the same in macOS and Linux. Code as described/written in the video <!-- This is doctype --> <!DOCTYPE html> <!-- Our HTML code starts here --> <html lang="en"> <!-- Our Head tag starts here --> <head> <meta charset="UTF-8"> <meta name="viewport" content="width=device-width, initial- scale=1.0"> <meta http-equiv="X-UA-Compatible" content="ie=edge"> <title>This is title</title> </head> <!-- Our Body tag starts here --> <body> Yeh meri body ka content hai </body> </html>
- 6. HTML Tutorial: Basic Structure of a Website | Web Development Tutorials #3 HTML Tutorial- Basic Structure of a Website After understanding the basics of HTML and the installation of Visual Studio Code, it is now time to understand the basic structure of a website. In this tutorial, we will focus only on HTML. Therefore, no need to worry about CSS and JavaScript now. We have seen earlier, by writing an exclamation mark, we get the whole boiler template of the HTML code. It saves our time as we don't need to write the template code manually. The main reason why we use Visual Studio Code is it allows code folding (minimize different sections in HTML) which sometimes becomes necessary to avoid confusion. The HTML code contains some sections such as DOCTYPE, meta tags, head, and body. All the tags that we include in an HTML file, needs to be first opened and then closed by angular brackets. Let us now understand different sections one by one. Doctype HTML- Doctype HTML justifies that it is a HTML document. So, we are defining specifically for a browser to understand that it is an HTML document. To understand more about the type of documents, <html lang= “en”> - It is the opening part of the HTML tag that tells us the language of the document is in English. <head> - Head contains all the meta-tags in it which is used to describe the contents of a website. Meta means providing information about information. Therefore, meta tags are used to define the keywords and descriptions on our website. Head also contains the title of the website and all the external files like CSS and JavaScript that we link to it. <body> - Body contains all the contents of the webpage in it. However, in the beginning, our website may look a little uglier but after including stylesheets it will start looking attractive.
- 7. Sometimes we want to write a particular thing that we do not want the browser to take it as a part of code. So, we can include it in the comments by writing “<!-- Your text -->” in this format. However, there is a shortcut to convert any text into comments. You need to press “Ctrl + / (forward slash)” to convert any texts into comments. Comments are completely ignored by the browser and are treated as those parts in the code which the developer writes for his understanding. It is necessary because from time to time our codes will get lengthier and we do not want to mix everything. Therefore, comments become important for reference to anything in the future. I believe you must have understood until now about how the basic structure of a website looks like. You will not face any type of difficulties if you follow the step by step process as told. Mostly, the coding part will be done under the body section. And if you have not accessed the playlist till now, I request to go through the playlist because it is the right place where you will find all the videos related to Web Development in Hindi.
- 8. Code as described/written in the video <!-- This is doctype --> <!DOCTYPE html> <!-- Our HTML code starts here --> <html lang="en"> <!-- Our Head tag starts here --> <head> <meta charset="UTF-8"> <meta name="viewport" content="width=device-width, initial-scale=1.0"> <meta http-equiv="X-UA-Compatible" content="ie=edge"> <title>This is title</title> </head> <!-- Our Body tag starts here --> <body> Yeh meri body ka content hai </body> </html>
- 9. HTML Tutorial: Title, Script, Link & Meta Tags | Web Development Tutorials #4 HTML Tutorial: Title, Script, Link, and Meta Tags In the last tutorial, we have learned how the basic structure of a website looks like. In this HTML tutorial, we are going to learn about title, scripts, links, and Meta tags. We will make a new file as “tut4.html” and then use basic emmet abbreviation as told previously to get the boilerplate HTML template. The objective of this tutorial is to know completely about HTML heads tag and what these contain. The Meta Tags are used to define the Meta data in an HTML. They are mainly used in SEO (Search Engine Optimization) techniques which help any particular website to rank better in Google or different search engines. It simply boosts the ranking of a webpage to get more traffic on any website.
- 10. So let us understand various meta tags. <meta charset= “UTF-8”> It simply means that the characters that are used will be of UTF-8. It declares the page’s character encoding. It should contain a standard IANA MIME name for character encodings. Moreover, authors are encouraged to use UTF-8. <meta name= “viewport” content= “width=device-width, initial- scale=1.0"> This tag is used to make your website responsive and adjust its width in such a way that it looks good in both PC or mobile. It helps in making the website mobile friendly also. <meta http-equiv= “X-UA-Compatible” content= “ie=edge”> - It helps any particular website to open in the highest compatibility mode available. It is mostly for those who are still using Internet Explorer. Because there are still some people who have not upgraded their system and are still using the older versions. To add descriptions and keywords on our website, we still use meta tags. <meta name= “description” content = “This is a description”> To add a description, we have to write the above statement and write your own description in the content part. <meta name= “keywords” content= “html tutorial, css tutorial”> <meta name= “keywords” content= “html tutorial, css tutorial”>
- 11. Keywords are those special words through which a user reach any website. You can add the keywords in the content part of the tag. If we want our website to be indexed in Google or other search engines and bots should follow all the links present on the website, then we have to write- <meta name= “robots” content= “INDEX, FOLLOW”> o link our stylesheets named as “harry.css” in the HTML code, we have to write- <link rel= “stylesheet” href= “harry.css”> In the same way, as we have included CSS, we can also include a JavaScript file in <head> tag. <script src = “harry.js”></script> I believe you have understood what all things are present in the head tags of the HTML file. In the upcoming tutorials, we will understand the concept of body tag where we write the main content of the website.
- 12. Code as described/written in the video <!DOCTYPE html> <html lang="en"> <head> <meta charset="UTF-8"> <meta name="viewport" content="width=device-width, initial- scale=1.0"> <meta http-equiv="X-UA-Compatible" content="ie=edge"> <meta name="description" content="This is description"> <meta name="keywords" content="html, html tutorials, web development"> <meta name="robots" content="INDEX, FOLLOW"> <title>Document</title> <!-- This is how you include external css --> <link rel="stylesheet" href="harry.css"> <!-- This is how you include external JavaScript --> <script src="harry.js"></script> </head> <body> </body> </html>
- 13. HTML Tutorial: Headings & Paragraphs | Web Development Tutorials #5 In the last section, we have discussed the head tags. Therefore, in this HTML tutorial, we will see the basics of <body> tag. Since this course is for both beginners and advanced, therefore, we will learn each and every basic topic. Some students were still having trouble in understanding what Emmet Abbreviation is. Emmet abbreviation just makes our work easy providing us the basic template of HTML. Abbreviations are the heart of the Emmet toolkit. It comes automatically built-in with Visual Studio Code.Let us begin with the simple heading tags. There are basically six types of heading tags ranging from <h1>, <h2>, <h3>, <h4>, <h5>, and <h6>. These are the six heading tags from h1 being the largest font size and h6 being the smallest font size. There is an important you should know about H1 tags. In every website there is only one <h1> tag, which is the main heading of the website. You should never write the normal paragraph text as headings just to make it bold. It is advised that using <h1> tag only once will help in SEO (Search Engine Optimization) of a website and even ranking it higher in different search engines. Then comes the paragraph tag which is denoted by <p>. Whenever we want to add a paragraph on our website then we can simply use paragraph tag in the format- <p>some random texts</p> To write a new paragraph, simply jump on a new line and start writing the new paragraph in a paragraph tag. To get 4 different lines of paragrapgh tag, we can simply write p*4.
- 14. Let us now discuss the main advantage of emmet abbreviation. If we want some random texts up to any number of words then we can either copy from any article from the Internet or just write random words, which of course will not look good. To avoid this, we can write lorem and the number of words we want in a paragraph. Let us understand with an example- <p>Lorem40</p> This code will give us a paragraph of 40 words. The next tags that we are going to see are <strong> and <em> (emphasized) tags. Writing some texts between strong tags will make that portion of the text as bold. And writing any text between em tags, will convert that part as Italic. However, these texts can later be changed with the help of CSS. Now to change a line in a paragraph we can easily use the <br> tag. It is a self-closing tag which helps to break a line. However, using too many <br> tags is not good for practice. We will discuss this more when we are going to learn CSS.
- 15. <p>first<br><br><br><br>This is a new line</p> Then the next tag is the <hr> tag which is also a self-closing tag. It helps to add a horizontal ruler like a line on the webpage. Apart from these there are also Bold and Italic tags also but it is is recommened to use them in HTML 5. It is recommended to use strong and em tags instead. In the beginning, you may think, our websites are looking a little ugly but when we will go to the CSS section then, believe me, our website will start looking more attractive like other professional websites. So stay tuned with the tutorials to get more knowledge about the complete web development course.
- 16. Code as described/written in the video <!DOCTYPE html> <html lang="en"> <head> <meta charset="UTF-8"> <meta name="viewport" content="width=device-width, initial-scale=1.0"> <meta http-equiv="X-UA-Compatible" content="ie=edge"> <meta name="description" content="This is description"> <meta name="keywords" content="html, html tutorials, web development"> <meta name="robots" content="INDEX, FOLLOW"> <title>Document</title> <!-- This is how you include external css --> <link rel="stylesheet" href="harry.css"> <!-- This is how you include external JavaScript --> <script src="harry.js"></script> </head> <body> </body> </html>
- 17. HTML Tutorial: Img and Anchor tags | Web Development Tutorials #6 Till now, in this web development course, we have learned about basics so far. In this tutorial, we will learn “How to handle images and links in HTML". Before we proceed let me tell you that, from this tutorial, we are going to increase our pace of learning because HTML is quite easy and to the point language and I don’t think you will face any problems if you will read and learn each and every tutorial wisely. First, let’s set up the boilerplate. It is a basic HTML template with all the required fields. If you haven’t checked the previous tutorials, then it is suggested to go through them in the first place. Now, let’s have a look at the anchor tag that basically helps us to handle links. In the body tag, if you type “a", anchor tag will appear. Just hit the enter key or if you want you can manually write the whole tag. Refer to the declaration below: <a href=""> </a> Here href is the attribute of anchor tag where you have to write the URL of the website or Link that you want to open. Next, you have to write the Keyword on which you want the user to click so that he will be redirected to the linked website. Refer to the example below: <a href="https://google.com">Go to Google</a> Now, the problem arises here is that as soon as we click on the keyword, the website will open on the same webpage but if in case you want to open the website in a new tab then you have to add a new attribute in the anchor tag I.e. “target". You might be confused between tag and attribute, then let me quickly tell you the difference between both.
- 18. Tag is like a container that allows you to handle an element whereas attribute is the property that enhances that container makes it more convenient to use. To open a website in a new tab, you have to write something like this: <a href="https://google.com" target = "_blank">Go to Google</a> Through this anchor tag, you can also link internal webpages that are locally available in your directory. You just have to use the address of the internal webpages including the file name with its extension. For instance: <a href="tut4.html" target = "_blank">Go to Google</a> So, this was all in the anchor tag of HTML now let’s move to the next topic I.e. handling Images in HTML. In order to insert an image in a webpage, you have to use the img tag. An img tag generally have two basic attributes “src" and “alt". <img src="" alt=""> Here “src" is the field where you have to insert the URL or address of the image and the “alt" attribute is a field that will display to users if their browser fails to load the image. In the “alt" tag, we generally input a keyword of the image that can define the image in case the user can’t see the image. For instance: <img src="https://source.unsplash.com/random" alt= "Error loading image">
- 19. Here a random image will be loaded because this URL stores multiple images and any one of them gets reloaded every time we refresh the webpage. Apart from this, let's see another example where we can adjust the height and width of the image using the URL only. Well, this is not something that we can do in every URL. Here we can do it because the developers of the website have created this URL accordingly. For instance: <img src="https://source.unsplash.com/1600x900/?nature,water" alt= "Error loading image"> If you want to manipulate the dimensions of the images, you can use the “height" and “width" attribute of img tag. Though it is not recommended to manipulate the dimension using these attributes, we will use CSS to alter the design accordingly. Refer to the illustration below: <img src="https://source.unsplash.com/1600x900/?nature,water" alt= "Error loading image" width = "233" height="34"> Here the image will be loaded as per the new dimensions. This was all in this tutorial, don’t forget to check the previous tutorials for better understanding of web development using HTML.
- 20. Code as described/written in the video <!DOCTYPE html> <html lang="en"> <head> <meta charset="UTF-8"> <meta name="viewport" content="width=device-width, initial-scale=1.0"> <meta http-equiv="X-UA-Compatible" content="ie=edge"> <title>Links and images</title> </head> <body> <a href="https://google.com" target="_blank">Go to google</a><br> <a href="https://facebook.com" target="_blank">Go to facebook</a><br> <a href="https://twitter.com" target="_blank">Go to twitter</a><br> <a href="https://linkedin.com" target="_blank">Go to Linkedin</a><br> <a href="/tut4.html" target="_blank">Tut 4</a> <a href="/tut5.html" target="_blank">Tut 5</a> <!-- Image is not present hence alt text is shown --> <!-- <img src="harry.jpg" alt="Error loading image"> --> <img src="https://source.unsplash.com/200x110/?nature,water" alt="remote image" width="233" height="34"> </body> </html>
- 21. HTML Tutorial: Lists and Tables | Web Development Tutorials #7 HTML Tutorial: Lists and Tables In this tutorial, we will work on the concepts of Lists and Tables in HTML. So, let us start by making a new file as tut.html and add the boilerplate to get the necessary HTML template. Give the title as Tables and Lists in <title> tag. The lists are basically of two types- Ordered lists (ol) <ol> <li>This is the first item of my unordered list</li> </ol> Unordered lists (ul) <ul> <li>This is the first item if my unordered list</li> </ul> The difference between an ordered and an unordered list is that the ordered list displays the list in this format - 1. 2. 3. …. On the other hand, the unordered lists display the list in the following format- . . . ….
- 22. Both the lists have more than one attribute which we can write using the type command. For example, if we write: <ol type= “I”> Then we will get the lists as I, II, III, and so on. In the same format, we can also get the lists as A, B, C, and so on. This applies on unordered lists also. If we write <ul type= “square”> Then we will get a bulleted square instead of a circle. There are various other references available from which you can see all the attributes. There is no need to learn all these things. You will get perfect by practising.
- 23. HTML also allows the nesting of lists. It simply means we can add a list into another list. <ul type="circle"> <li>This is first item of my unordered list</li> <li>This is second item of my unordered list</li> <ul> <li>Another one</li> <li>Another two</li> <li>Another three</li> </ul> Let us now discuss the Tables in HTML. A table is just a combination of rows and columns on a webpage. The structure of the table looks like- The main part is the table tag, and it consists of two parts: the table head and table body. The <thead> consists of the main head of the table and <tbody> consists of the body of the table.
- 24. <tr> is used to justify that it is the part of a row. Inside the <tr> tag, we give the headings of a row under the <th> tag. The final structure of a table looks like- In a table, there are mostly two things to remember, the head and the body of a table. To add more rows to the table, we can simply add a <tr> tag and add any number of rows in a table. I believe you have understood clearly what the lists and tables are. Tables and lists are two primary components of a website that helps in making it more attractive. There will be more tutorials coming to assist you in developing your site. So be patient and keep practising the things taught till now.
- 25. Code as described/written in the video <!DOCTYPE html> <html lang="en"> <head> <meta charset="UTF-8"> <meta name="viewport" content="width=device-width, initial- scale=1.0"> <meta http-equiv="X-UA-Compatible" content="ie=edge"> <title>Tables and Lists</title> </head> <body> <ul type="circle"> <li>This is first item of my unordered list</li> <li>This is second item of my unordered list</li> <ul> <li>Another one</li> <li>Another two</li> <li>Another three</li> </ul> <li>This is third item of my unordered list</li> </ul> <ol type="a"> <li>This is first item of my ordered list</li> <li>This is second item of my ordered list</li> <li>This is third item of my ordered list</li> </ol>
- 26. <!-- Tables --> <h3>HTML Table</h3> <table> <thead> <tr> <th>Name</th> <th>Employee Id</th> <th>Employee Role</th> </tr> </thead> <tbody> <tr> <td> Harry </td> <td> 34343 </td> <td> Programmer </td> </tr> <tr> <td> Rohan Das</td> <td> 3483 </td> <td> HTML Expert </td> </tr> <tr> <td> Shubham </td> <td> 7564 </td> <td> Android Developer </td> </tr> </tbody> </table> </body> </html>
- 27. HTML Tutorial: Forms & Input Tags | Web Development Tutorials #8 This HTML tutorial involves the learning of forms and Input tags used in HTML. We are going to start by making a new HTML file as “tut8.html” and adding a boilerplate through Emmet abbreviation. Forms are a very important part of HTML. It represents the document section containing interactive controls for submitting information. Whenever we add a <form> tag in the HTML, it is going to ask for some action for submitting that particular form in the backend for future reference. So, for now, we will write it as backend.php. All the data submitted in a form will be stored automatically in the backend “backend.php” after submitting it. The template will look like- <form action= “backend.php”> Then comes the <input>tags which are present inside the form, where the user provides the input. These inputs can be of any type whether text, button, checkbox, date, time, etc. Input Tags are used to create interactive controls for web-based forms in order to accept data from the user. The <span> is an in-line element and <div> is a block element. Which means, if we use two separate div tags for different inputs, then all the inputs will come on different lines. We will learn about the span and div in detail in the upcoming tutorial. Till then we will use the <br> tags for breaking a line. To get the input as text, the syntax is- <input type= “text”>
- 28. To get the input type as an email in the form, the syntax is- <div> Email: <input type="email" name="myEmail"> </div> The name here is used so that the backend can recognize the tag that we are using. To get the submit button in the form, the syntax is- <div> <input type= “submit” value= “submit now”> </div> We can also add date and time in the form. To add these, the general syntax is- <div> <input type= “date” name= ”myDate” id= “”> </div> It will give the complete date form in the format of “dd/mm/yyyy”. To add any numeric text in the HTML form, the syntax is- <div> Number: <input type= “number” name “myNumber”> </div> While filling several online forms, you must have seen the radio buttons and checkboxes in the form. Radio buttons are such buttons that allows to select any one of the following options amongst all. For example, while selecting the gender, we can only select either male or female. Whereas the checkbox allows selecting the multiple options available. The example of both the formats are as follows- For checkbox- <div> Are you eligible?: <input type="checkbox" name="myEligibility" checked> </div>
- 29. For Radio buttons- <div> Gender: Male <input type="radio" name="myGender"> Female <input type="radio" name="myGender"> Other <input type="radio" name="myGender"> </div> To reset all the information, entered in the form, we take the help of a reset button. To get the reset button, we have to write- <div> Input type= “reset” value= “Reset Now” </div> After inserting all these input tags, our form will look like- These are some of the examples of basic input tags used inside the form in the HTML. Apart from these, there are numerous more input tags available, but you need not to learn all these at once. You can always take help of references available. And one more advice, never try to grasp all things at once. Practice makes a man perfect.
- 30. Code as described/written in the video <!DOCTYPE html> <html lang="en"> <head> <meta charset="UTF-8"> <meta name="viewport" content="width=device-width, initial- scale=1.0"> <meta http-equiv="X-UA-Compatible" content="ie=edge"> <title>Forms</title> </head> <body> <h2>This is HTML forms tutorial</h2> <form action="backend.php"> <label for="name"> Name</label> <div> <input type="text" name="myName" id="name"> </div> <br> <div> Role: <input type="text" name="myRole"> </div> <br> <div> Email: <input type="email" name="myEmail"> </div> <br> <div> Date: <input type="date" name="myDate"> </div> <br>
- 31. <div> Bonus: <input type="number" name="myBonus"> </div> <br> <div> Are you eligible?: <input type="checkbox" name="myEligibility" checked> </div> <br> <div> Gender: Male <input type="radio" name="myGender"> Female <input type="radio" name="myGender"> Other <input type="radio" name="myGender"> </div> <br> <div> Write about yourself: <br><textarea name="myText" cols="90" rows="10"></textarea> </div> <br> <div> <label for="car">Car</label> <select name="myCar" id="car"> <option value="ind">Indica</option> <option value="swf" selected>Swift</option> </select> </div> <br>
- 32. <div> <input type="submit" value="Submit Now"> <input type="reset" value="Reset Now"> </div> </form> </body> </html> HTML Tutorial: Inline & Block Elements | Web Development Tutorials #9 In the last tutorial, we have discussed forms and input tags. Here, we are going to understand what are inline and block elements. Let us start this tutorial by making a new file as tut9.html and adding the basic boilerplate of HTML. Then put the title as “Inline and Block Elements” in the <title> tag. Inline elements are those elements which only occupy the space bounded by the tags defining the element, instead of breaking the flow of element. On the other hand, block-level elements take up the entire space of its parent element. Let us understand this with an example- If we write any text in the paragraph tag like this- <p>This is a paragraph</p> <p>This is also a paragraph</p> Or <p>This is a paragraph</p> <p>This is also a paragraph</p>
- 33. In both the above examples, we will see the output in both different lines, not in the same line. We want both the texts in the same line but it is not so. Can you think why? It is because the paragraph tag is a block element. The Block element means that it will take the full width of a single line and does not allow any other content to fit in it. But, if we write both the texts between the <span> tags like- <span>This is a paragraph</span> <span>This is also a paragraph</span> Then we see that both the texts will appear in the same line. It is because the <span> tag is an inline element. It allows all the elements in the same line. To understand it more, we can take the help of CSS by applying the border. However, you need not worry about the border as it is a part of CSS. I’m using this just for the case of an example. <p style= “border: 2px solid, red;”>This is a paragraph</p> <p style= “border: 2ox solid blue;”>This is also a paragraph</p> <span style= “border: 2px solid red;”>This is a span</span> <span style = “border: 2px solid red;”>This is also a span</span> After testing the above code in the live server, you will know the main difference between inline and block elements.
- 34. The above example shows how inline elements will take only its portion of text whereas the block element will take the whole width of the line. You will understand it more with the help of different colours through CSS. Anchor <a> tags also behaves like an inline element. We have two different options of making our text appear in a single line. The first one is either with the help of CSS through borders or with the help of inline elements. As we have reached the end of this tutorial, I want you to find out whether li, em, div is inline or block elements. So, I believe till now you must have understood the major difference between Inline and Block elements. Stay with the course to learn more things in this complete web development Bootcamp. Code as described/written in the video <!DOCTYPE html> <html lang="en"> <head> <meta charset="UTF-8"> <meta name="viewport" content="width=device-width, initial- scale=1.0"> <meta http-equiv="X-UA-Compatible" content="ie=edge"> <title>Inline and Block elements</title> </head> <body> <strong style="border: 2px solid red;">this is a paragraph</strong> <a style="border: 2px solid blue;"> this is also a paragraph</a> <span style="border: 2px solid red;">this is a span</span> <span style="border: 2px solid red;">this is also a span</span> li, em, div, img </body> </html>
- 35. HTML Tutorial: Ids & Classes in HTML | Web Development Tutorials #10 HTML Tutorial- IDs and Classes in HTML Here, we are going to learn about IDs and Classes in HTML. The ID is an identifier which must be unique in the whole HTML document. It is used to find an element while linking, scripting, or styling. Whereas, Classes allow CSS and JavaScript to select and access specific elements. Let us start by making a new file as tut10.html and adding an instant boilerplate to get the basic HTML template. Name the <title> tag as Ids and Classes in HTML to give the title of the website. Here, I'll try to explain with the vert basic example. When a new child is born, we urge to give him a name or his identity by which he will be known further. Or if you are having a pet, you must have given him some name to call. In the same way, IDs refer to giving a name to any particular element for its identity. It simply refers giving an identity to an element. We know, no two names can be given to any of the two members of the family. In the same way, one ID can be given to only one element on a website. Therefore, in the below example, the id mainBox cannot be given to any other element. <div id= “mainBox” class= “redBG”> Now the question arises what is the need for an ID in HTML? The answer is, while using JavaScript or CSS, we can target one full element and can make the necessary changes in it.
- 36. In the same way, we can grab the full element and change the border or width or many more things through CSS. Let us now understand what are classes with an example. Assume that I am having 100 elements in my HTML and I want to give a red background to all the 100 elements. To do this, we have two options. Either we have to select each element and assign a red background to it or we can create a class redBG and assign a red background to it. Then we can give this class to the elements in which we want a red background color. To avoid confusion, I am assuming that the class redBG is already defined. One point to note here is we can assign only one ID to a particular element but it is not so in the case of classes. An element can have more than one class in itself. The more classes we add in an element, the more property will get added to it. Classes are denoted by a dot ‘.’ and ID is denoted by hash ‘#’. For example, to get a redBG class in an element we can simply write that element name followed by .redBG. The below picture shows everything, you have learned till now-
- 37. These are the major differences between classes and IDs. You can take the help of the references provided and practice more to understand more about them. However, we will learn more in detail about them in CSS and JavaScripts. Code as described/written in the video <!DOCTYPE html> <html lang="en"> <head> <meta charset="UTF-8"> <meta name="viewport" content="width=device-width, initial- scale=1.0"> <meta http-equiv="X-UA-Compatible" content="ie=edge"> <title>Ids and classes in HTML</title> </head> <body> <h3>Ids and classes tutorial</h3> <div id="mainBox" class="redBg blackBorder"> this is mainbox </div> <span class="redBg"></span> <!-- Select and press ctrl + / to comment --> <!-- Emmet --> <!-- . is for class and # is for id --> <span class="redBg"></span> <span id="mainSpan"></span> <div class="redBg blackBorder anotherClass"></div> <!-- Emmet takes div tag as default --> <div class="blackBackground"></div> <!-- Creating multiple elements using Emmet --> <!-- span.myClass.myClass2.myClass3*4 + <Tab> to print 4 similar elements using Emmet -->
- 38. <span class="myClass myClass2 myClass3">First</span> <span class="myClass myClass2 myClass3">Second</span> <span class="myClass myClass2 myClass3">Third</span> <span class="myClass myClass2 myClass3">Fourth</span> </body> </html> HTML Tutorial: HTML Entities | Web Development Tutorials #11 HTML Tutorial- HTML Entities This tutorial is about different Entities used in the HTML. An entity is a piece of text (“string”) that begins with an ‘&’ and ends with a ‘;’. These are frequently used to display reserved characters, and invisible characters. As usual, let us begin the tutorial by making a new HTML file as tut11.html and add an instant boilerplate to get the basic template of HTML. Give the title as HTML Entities in the <title> tag. Try to understand with the below example. If we write the code as <div class= “container”> <p>This is a Paragraph</p> </div> <div class= “container”> <p>This is another Paragraph</p> </div>
- 39. If we add some spaces in between these texts then what will you expect? You will normally say that all the extra spaces will reflect back on the webpage. But it is not so. Because HTML treats all the extra spaces as a single space only and automatically removes all of them. Therefore, if you want to use extra spaces or any special characters, then you have to use HTML entities. To get extra space we can use   (non-breaking space) after that particular text. For example- <div class= “container”> <p>This is another   Paragraph</p> </div> By writing this way, we can create 1 extra space after the word another. By adding five  , we can get 5 extra spaces. However, I do not recommend using this method because it looks unprofessional. We will learn to create extra spaces in CSS with the help of margin, padding, or selectors that looks more professional.
- 40. Entities are also used to write some special characters that you cannot write from keyboards and also those words that are reserved in HTML. For example, if we want <p> to appear in the result, then it is not possible without the help of entities. <div class= “container”> <p>This is another Paragraph<p></p> </div> By writing the above code, we will see that we cannot obtain the <p> in our result. Therefore, the solution for this is we can take the help of HTML entities. We have to write in this format- <div class= “container”> <p>This is another Paragraph <p> </p> </div> There is a list of different reserved characters and hundreds of special characters that you cannot write without entities. There is no need to learn all those entities available. You are always free to take the help of various references available. So, this is all for this tutorial and I hope you have got the basic knowledge about HTML entities. If you still have any queries, feel free to ask. Code as described/written in the video <!DOCTYPE html> <html lang="en"> <head> <meta charset="UTF-8"> <meta name="viewport" content="width=device-width, initial-scale=1.0">
- 41. <meta http-equiv="X-UA-Compatible" content="ie=edge"> <title>HTML Entities</title> </head> <body> <div class="container"> <p>This is a paragraph</p> </div> <div class="container"> <p>This is another paragraph with two spaces</p> <p>Paragraph is written like this <p> </p> <p>Pound is written like this £ </p> <p>Copyright is written like this © </p> <p>Another character is ⇛ </p> <p>Another character is ¼ </p> <p>Empty character is written like this </p> </div> </body> </html> HTML Tutorial: Semantic Tags in HTML| Web Development Tutorials #12 HTML Tutorial- Semantic Tags in HTML In this HTML tutorial, we are going to learn about Semantics in HTML. Semantics are used to give proper meaning to the websites and help search engines to analyze it properly. Also, we can get help in return from different search engines in recognizing the original tags and their uses. For example, there are different tags used for the headers, navigation bars, body, and footers. So to analyze each and every tag properly, we have to use Semantics. The better the use of Semantics in a website, the more is the number of chances that it is being crawled by the search engines. It will also help in the better ranking of a website.
- 42. In very simple language, Semantic means to provide meaning to any word. If we talk in about a web page, then earlier most of the websites are made only using divs including different classes and IDs in them. But that was not the correct way of telling the search engines that if the elements are header, footer, or any other body. There are many examples of Semantics. You can take the reference of the internet to view all. Here are some of the important semantic elements- <header> <nav> <section> <article> <footer> With these examples, the search engines can easily differentiate between headers, navigation bars, sections, bodies, and footers. Also, when we share the link of this website in social media, then the viewers will easily understand headings, sections, and body of a website. But now the question arises, is it necessary to use all these things? The straight answer is No. It is not necessary to use the semantics but including it will help in the SEO part and increase the probability of ranking of your website. If you are working on a blog, then you must use this technique to improve its ranking. On the other hand, non-semantic elements do not justify their meaning. For example, div and span don't tell much what they do apart from the division between texts.
- 43. The semantics part in the HTML is not so difficult, therefore without wasting much time we will directly jump on the CSS section where we will learn to make some good looking and real websites. It is always better to learn HTML, CSS, and JavaScript each 75% rather than learning only 100% HTML. You should first try to build the basic foundation of web development and then keep learning step by step through practising. Because you will never be able to learn 100% of web development. Therefore, try to improve skills by practising more. Code as described/written in the video <!DOCTYPE html> <html lang="en"> <head> <meta charset="UTF-8"> <meta name="viewport" content="width=device-width, initial-scale=1.0"> <meta http-equiv="X-UA-Compatible" content="ie=edge"> <title>HTML Semantic Tags</title> </head> <body> <h3>Semantic Elements</h3> <details> <summary>I have keys but no doors. I have space but no room. You can enter but can’t leave. What am I? A keyboard. A keyboard. A keyboard. A keyboard. A keyboard. A keyboard. A keyboard. A keyboard. A keyboard. A keyboard. A keyboard.</summary> lorem34 </details> </body> </html>