SlideShare une entreprise Scribd logo
1  sur  79
Serena Porter
Spring 2017
EDCI 325 Portfolio
2
Table of Contents
Contour Line Drawings … pages 4-6
Lesson on Cubism … pages 7-10
Lesson on Origami …pages 11-16
Lesson on Parts of a Whole …pages 17-21
Lesson on Contour Line Drawing …pages 22-25
Lesson on Matisse Collages …pages 26-29
Lesson on Aesthetics …pages 30-32
Lesson on Self-Portraits …pages 33-37
Lesson on Papermaking …pages 38-40
Lesson on Textures and Sculptures …pages 41-45
Lesson on String Art …pages 46-51
Lesson on Paper Mache Masks …pages 52-59
Lesson on Watercolor Wheel …pages 60-63
Critical Writing Assignment …pages 64-67
Visualizing Science Gallery Review …pages 68-70
Pollock Biography …pages 71-73
Fieldwork Reflection …pages 74-76
High SchoolGallery Review …pages 77-79
3
Contour Line Drawings
4
5
6
University of Idaho Lesson Plan
Name: Serena Porter and Adrianne Nuxoll Date: March 6, 2017
Subject: Art (Grades 4-5th) Topic: Cubism
The big idea(s) or essential question(s):
When shape is brought to students’ attention, they can become more observant about the shapes they
see around them and better understand how they can bring those shapes into their art.
State of Idaho and/or common core standards addressed:
4-5.VA.1.1.1 Compare and contrast specific works of art from different time periods or cultures.
4-5.VA.1.1.2 Identify specific works as belonging to a particular era in art history.
Objectives (what the students will be able to do as a result of the lesson):
TSWBAT The students will be able to identify the works of Pablo Picasso specifically in
his period of cubism.
TSWBAT The students will be able to create self-portraits using the idea of cubism and the
element of shape.
Materials and/or technology:
Mirrors
Zip-lock with geometric shapes
Construction paper
Glue
Markers and Pencils
Scissors
_________________________________________________________________________________
Elements of Design: shape and line
Principles of Design: emphasis and proportion
Art Terms: shape, geometric shapes, biomorphic shapes, cubism
Cross Curricular Application: Art history and geometry
Activities/procedures (include anticipated time for each)
Introduction/activator:
We will be asking students to direct their attention to a painting displayed on the projector. We will
ask them to talk to a partner about things that stand out to them in the oil painting. After a few
minutes of discussion, we will go around the room asking for partners to share with the class the
elements of the painting that stood out to them. The oil painting depicted here is The Weeping
Woman by Pablo Picasso, and it was painted in 1937 during the period of cubism. Next, we will
display another painting and ask students to repeat the same process, but also to notice what the
differences are between the two paintings. We will again go around the room asking students to share
their analyses. The oil painting depicted here is The Old Guitarist by Pablo Picasso, and it was
painted in 1904 during Picasso’s blue period.
Definition of Art Terms:
Shape – two-dimensional, having a length and width, and can be geometric or freeform
Geometric shapes – angular figures with straight edges
Freeform shapes – freeform figures, biomorphic (found in nature)
Cubism – works are recognized by their two-dimensional appearance using geometric angles, lines,
and shapes
Class activities (what you/students will do) Class activities (why you will do them)
7
1. We will discuss the history of cubism
and Pablo Picasso’s periods with the
PowerPoint as an aid. We will also be
addressing shape as an element of design.
2. We will demonstrate how to use the
mirrors to create features of the face that
are more on the realistic side.
3. We will ask students to practice using the
mirror to draw a feature of their face on a
blank sheet of paper.
4. We will demonstrate how to create a self-
portrait using the ideas of cubism, shape,
and abstract using the white board and
pre-made pieces of the portrait.
5. We will explain the requirements that
their portraits must have: two eyes with
eyelashes and eyebrows, a mouth, and a
nose. We will also explain that the
proportions do not have to be accurate,
and that the placement of the parts do not
have to be anatomically correct.
1. The history of Pablo Picasso helps
students to understand the ideas behind
cubism, and the elements of art can be
depicted in most paintings but shape is
very relevant in cubism.
2. This is to help students who might have a
hard time pictures the features and details
of their face.
3. Time for a little practice helps those
students who have never drawn faces, and
it gives them time to figure out the mirror.
4. This allows students to understand the
process, and how they can create a self-
portrait while still being abstract.
5. The guidelines are helpful for the students
to see what they need to focus on, and
they will be able to create abstract
portraits without having to worry about
them looking exactly like them.
Closure/reminders
We will have students display their portraits on the pin-up board, and we will encourage discussion
about the elements of cubism and shape that they learned about and see among their peer’s portraits.
Students will be responsible for cleanup of their area and art supplies. All critics and discussion need
to be positive and provide all students with the feeling of acceptance and safety when talking about
their artwork.
Assessment (how you will know students met the objectives - include rubrics)
Students will be assessed on their participation in the lesson, understanding of cubism and shape
techniques, and class discussions both before and after the project.
Accommodations/differentiation
Accommodations can be made for students with visual or dexterity issues. Text can be made larger,
and a printout provided. A partner can also be assigned to anyone struggling.
Reflection/evaluation (after lessonis taught)
I think that this lesson went really well. We modified things a little as we went along. Some students
wanted to just do portraits of other people instead of themselves which we said was perfectly okay to
do. We also started gathering some of the materials before the end such as the mirrors, glue, and
scissors because they were finished with them, and cleaning up along the way I think made things a
little less cluttered and run more smoothly. We did have a lot of chatting happening as
demonstrations were being given, but I don’t think it was too bad. Everyone was able to stay on task
and follow along with the instructions. The end result was a bunch of very unique portraits, and every
student interpreted cubism differently which is exactly what we wanted. Overall, I think it was a time
consuming but very fun art project. I think with students in fourth or fifth grade I would definitely
break up the project over several days so that everyone had adequate time to finish their portraits.
8
Pablo Picasso
“PabloPicassowasone of the greatestandmost influentialartistsof the
20th century,aswell asthe co-creatorof Cubism.”
PabloPicassowasborn inMalaga, Spain,in1881, to DoñaMaria Picasso
y Lopezand Don José RuizBlascohe.Hisfatherwasan art teacherand
painter.Whenhe was12, he had mastereddrawingskillstaughtinthe
art academieshe didn’tletthe factthat he was a relativelypoorstudent
slowhimdown.Whenhe was13, hisskill level wasgreaterthanhis
fathers.PicassohashisfirstexhibitioninBarcelonaata café.He ended
up goingto Paristo openhisownstudioandwhile inParishe viewedfor
the firsttime,the workof the Impressionistsandbeganpaintinglike
them.
In 1902, Picassobeganto develophisownpersonal style andthislead
himto hisBlue Period,paintingmelancholy(sorrowful,depressed)
themes.Late in1904, Picassobegantopaintin warmercolors,beginning
whatis calledhisRose Period.
 Picassosufferedthe lossof abestfriend, CarlosCasagemas,hispaintingsweren’tselling,he was
nearstarving,and sobecause of hisdepression,he begantopaintwithbluesandgreensandin
a differentstyle.Hisworkshowedhisfeelingsandemotions.In1903, duringhisBlue period,he
createdfamouspaintings,“Blue Nude,”“LaVie,”andthe “OldGuitarist”.
 DuringPicasso’sRose Period,he startedusingwarmercolorsof beiges,pinks,andreds.He had
overcome hisdepressionperiodandhadfalleninlove withabeautiful ladywhowasamodel ,
Fernande Oliver.
In 1907, he begana style of art that distortedformandsimplifiedandabstractedthe subjects.Thisis
where cubismcame intoplace.Thisiswhere objectsare brokenapart,geometricshapes,andthere isa
collage effectorfeel.
“Cubismshocked,appalledandfascinatedthe artworld.”
WhenWorldWar I occurredPicasso’sart changedthemesagain.Itbecame more somberandmore
aboutrealityagain.There were manyperiodsfollowingthistime aswell.He continuedwithhiswork
until hislateryears.Itwas saidthat hisart work wouldbe whatkepthimalive.He endeduppassing
whenhe was91 yearsoldon April 8,1973 inMougins,France.
“Picassohas saidto be one of the mostcelebratedandinfluential paintersof the
20th century. Picassoalsoremainsrenownedforswitchingbetweenstylessooften
and differentthathislife'sworkseemstobe the productof five orsix great artists
rather thanjustone.”
Biography.comEditors."PabloPicasso." Biography.com.A&ENetworksTelevision,
10 Dec. 2015. Web.06 Mar. 2017.
9
10
This was the example that
Adrianne and I put
together during the
demonstration.
These are a
couple of the
students’ final
portraits.
11
University of Idaho Lesson Plan
Name:
Hannah KesslerandBrookSprenger
Date:
March 2nd
, 2017
Subject:
3-5 grade Art
Topic:
Origami
The big idea(s) oressential question(s):
Origami isJapanese traditionartform.Thislessonfostersamulticultural environmentandpromotes
simplifiedstep-by-stepinstruction.
State of Idaho and/or CommonCore standards addressed:
4-5.V A.2.1.3 Use appropriate artsvocabularyto discussa varietyof art works.
4-5.V A.2.1.5 Identifyelements(line,shape,form, value,texture,color,space) inartworksand
environments.
4-5.V A.1.1.2 Identifyspecificworksasbelongingtoa particularerain art history.
4-5.V A.1.1.3 Explainhowa specificworkof art reflectseventsinhistoryand/orculture.
Objectives (what the students will be able to do as a result of the lesson):
TSWBAT: Define the wordorigami andunderstandthe historybehindorigami.
TSWBAT: Foldorigami squaresintofiguresthroughpicture andexplicitinstruction.
Materialsand/or Technology:
Origami paper,PowerPoint,Instructionsforfolds,History,andGame Pieces.
ElementsofDesign: shape,form
PrinciplesofDesign:pattern,proportion
Art Terms: Origami,crease,symmetry,triangle,square
Cross Curricular Application:Art history,geometry
Activities/Procedures:
Introduction/activator:
We will introduce origamibyreadingashorthistoryand showingthe studentsimportantorigami works.We
will have aPowerPointwithpictures.Thenwe will leadagame (time permitting)withartdefinitions.Each
studentwill be giveneitheraterm or a definitionandit ishisor her jobto match the termwiththe
definition.
DefinitionofArt Terms:
Origami- The Japanese artof foldingpaperintodecorative figures.The wordorigami originatesfromwords
ori andkami.
Ori- To fold.
Kami- Paper
Triangle- A three sidedpolygon.
Square- A quadrilateral withfourcongruentsides.
Crease- A line ora ridge producedbyfoldingorpressing.
Symmetry- The qualityof beingmade upof exactlysimilarpartsfacingeachotheraroundan axis.
Class Activities(whatyou/studentswill do):
1. Studentswill be givenasheetof origami
paperand a set of instructionsforhow to
folda crane.
Class Activities(whyyou will do them):
1. Origami encourageshandsonlearning
throughsequence patterns.
12
2. Thisactivitywill be completedasa whole
group,withthe teachersgivingstep-by-step
instructionthatcorrelate withthe
instructionsonthe providedinstruction
sheet.
3. For independentactivity,studentswill be
givena newpiece of origami paperto
complete adifferentfigure.Studentswillbe
giventhe choice betweenajumpingfrog,
Japanese Hinadolls,ora wigglingdinosaur.
2. The crane is one of the firstfoldstaughtto
childrenbecause of itssimplicityand
popularity.
3. Allowsstudentstopractice the artof folding,
while usingtheirowncreativestylesand
interpretations.
Closure/Reminders:
Studentswill take afewminutestodoa gallerywalk.Eachstudentwill critiqueone of the figures,bywriting
a positive commentonastickynote.Afterthe gallerywalkisfinished,eachstudentwill make theirwayback
to theirchairand put awayany extramaterials.
Assessment(howyou will know studentsmet the objectives - include rubrics):
Studentswill be assessedbytheirparticipationinthe lesson.Eachstudentmustcomplete apapercrane and
one otherorigami figure of theirchoosing.We will informallyassessunderstandingbyaskingquestionsand
monitoringtheirabilitytofollow the directionsprovided.
Accommodations/differentiation:
For studentswhocannotfollowastep-by-stepwrittenprocedure,we will provide aneasierfold(3-4folds)
and we will one onone assistthem.
13
History of Origami
The actual origin of Origami is unknown, however paper was first invented in China. The folding
technique was then introduced into Japan from Buddhist monks3. The introduction of paper
making to Japan several hundred years later coincided with the development of their religion
and soon became part of the lives of the people2. The earliest known traditions of paper folding
in Japan were of ceremonial origin1. Such as the Japanese noshi, which is white paper folded
with a strip of dried abalone or dried meat. This was first recorded during the Muromachi
Period. Origami was originally used only for religious purposes due to the high cost of paper1.
Many Origami instructions were passed down orally3. The oldest known written document
about Japanese origami, the Senbazuru Orikata, surfaced in 17973. The practice is most
extensive in Japan, so Japan is credited with developing Origami into fine art1. One of the most
famous origami designs is the Japanese crane. Legend says that anyone who folds one thousand
paper cranes will have their hearts desire come true. Many Japanese prepare a garland of one
thousand paper cranes when a family member or friend is ill, as a form of prayer for their
recovery. A famous story has turned the origami crane into a symbol of peace1. In 1955, a
twelve year old Japanese girl named Sadako Sasaki, who had been exposed to the radiation of
the atomic bombing in Hiroshima as an infant, was dying of leukemia1. She decided to fold one
thousand cranes in hopes of becoming cure. When she realized she would not survive, she
wished instead for world peace and an end to suffering. Sadako folded more then 1300 cranes
before her death and was buried with a wreath of one thousand cranes to honor her dreams.
Her friends created a statue in her honor at Hiroshima Peace Park.
14
1New World Encyclopedia http://www.newworldencyclopedia.org/entry/Origami
2Origami with Rachel Katz http://origamiwithrachelkatz.com/origami/origami.php
3History of Origami http://www.origami-instructions.com/history-of-origami.html
15
16
These were three of the origami figures that I created.
17
Art Lesson Plan
Name: Acadia Babin Date: March 9, 2017
Discipline: Art Topic: Parts of a Whole
The big idea(s) or essential understanding(s): The students will
understand why details are important.
State of Idaho Standards
K.VA.2.2.5 Show respect for
personal work and works of
others.
K.VA.3.1.4 Demonstrate skills
of observation in the
production of artwork.
K.VA.3.2.3 Replicate or imitate
an existing work, respecting
the intent of its original
creator.
Domain 1:
Visual Arts
Domain 2:
Visual Arts
Objectives (What the students will be able to do as a result of the lesson):
TSWBAT The students will be able to each recreate a grid of
the “starry night”.
TSWBAT The students will be able to identify a part of a
whole painting.
Materials:
A Replication of a famous piece of art. (Starry night)
Cut into equal pieces for all of the students
Paints
Brushes
Pencils
Room arrangement/seating guidelines/plan for entering room, etc:
Children should be seated with enough room so that their elbows were not
touching anyone else, and they could share water and possibly paints.
Precautions/Discipline rules (ex. Safety considerations for responses to
literature):
18
The paint may be a distraction to some students. Make sure that the students are doing
what is necessary. Be sure that the students are not painting each other, flinging paint,
using fingers or hands, or getting paint on clothes.
Sequencing/Steps (include anticipated time)
1. Anticipatory Set
(attention, review or motivation)
We will be presenting a powerpoint to go over some
basic facts before we start the rest of the lesson.
2. Purpose/Objective
(stated to the students)
Today we are going to see if
everyone can create a whole picture
working together. We are going to
do this by each person getting one
grid of a whole painting.
Each student will do their best to
do their own imitation of the
painting. When we are finished, we
will put it together and see what
picture it looks like.
3. Plan
Information/Modeling:
(LIST in Bullet form)
 Check for Understanding
(Make sure everyone understands what was
taught and/or directions)
 Guided Practice
(Teacher available for guidance as students
work on project or paper/how to manage
proximity)
 We will model the
different types of strokes
we can make with a
brush.
 The guided practice will
be the students imitating
their grid of the whole
“Starry Night”.
Assessment (a way of proving that student
learning is taking place – how will you measure
learning?)
I will do this by walking around
observing the students. At the
end, this will be assessed
through positive criticism of
their peers.
Independent Practice (usually
homework or teacher not needed to continue)
Adaptations and
Accommodations (for special needs)
For students who need more
help, we will be walking around
for assistance. We will work
together and show how to hold
19
a paint brush and discuss the
colors and texture of the
painting.
REFLECTION
1. Did the students meet the objective(s)? They did it much better than I
even thought they could.
2. What types of re-teaching is needed for unsuccessful students?
Showing students how to apply less water and more paint and how to copy
the artwork from their copy to the page needed to be done with less
successful students.
3. What went well?
The students put together the end result, and it went much better than I
thought that it would go. Everyone was able to see where each painting
part belonged a part of the whole.
4. What would I change next time?
I think next time I would have the students put their name on the back of
their paper before they started painting.
CONNECTIONS TO TEXTS
Herberholz, Donald W., and Barbara J. Herberholz. Artworks for elementary teachers:
developing artistic and perceptual awareness. Boston, MA: McGraw-Hill, 2002. Print.
Student artifact(s)/ product(s)/ evidence:
20
Acadia Babin
Dr. Sally Machlis
EDCI 325
23 Mar. 2017
Van Gogh and Part of a Whole
Vincent Van Gogh started devotedly painting in the last 10 years of his life. During his life, he
only sold one painting for $80. He was born in Holland in 1853. He was a post-impressionistic
artist. He was a pastor in Belgium until he was dismissed. He stayed in Belgium where he
stayed to study art. His early works are considered to be somber, sharp, and a specific color to it.
In 1886 he moved to Paris, and he tried to copy the impressionists that he had become friends
with. To do this, he traded his dark colors for lighter colors and used shorter brush strokes. He
did not enjoy this type of work though, so in 1888 he went insane and was committed for a
couple years. He was let out in 1890, and he died soon after. This lack of fame during his life
made his artwork that much more appealing.
His paintings were so texturized that some think that he may have squeezed paint directly onto
canvas which helped create depth and texture. He used balance with his strong colors and mix of
textures. Most of the paintings that he created have two colors in common. This is because two
of his favorite colors were blue and yellow. Yellow was thought to represent warmth, love, and
friendship. He uses balance and unity with the colors he uses- usually blues and yellows. The
colors he uses attach a strong feeling to the audience.
Vincent Van Gogh used impasto painting. This is a word used in Italy to mean, “paste” or
“mixture.” This is a technique where “paint is laid on so thickly that the texture of brush strokes
or palette knife is clearly visible”. His paintings were known to be bold and dramatic and hold
heavy amounts of emotion. It shows a great amount of movement.
While Actual Texture refers to the physical or real surface qualities we can notice by touching
art, Visual Texture gives the illusion of real texture on a 2D surface. By dividing a piece of his
artwork into different graphs, it makes it easier to see the impasto that Van Gogh used in “Starry
Night” and his other works.
21
Works Cited
Herberholz, Donald W., and Barbara J. Herberholz. Artworks for elementary teachers:
developing artistic and perceptual awareness. Boston, MA: McGraw-Hill, 2002. Print.
Impact, The Net. "Vincent van Gogh Gallery." Vincent van Gogh Gallery. N.p., n.d. Web. 26
Mar. 2017.
This was the class photo of the final product, and my individual contribution was the painting in
the bottom right hand corner.
22
University of Idaho Lesson Plan
Name: SallyGravesMachlis Date: Spring16
Subject: 1-4 grade Art Topic: ContourLine Drawing
The big idea(s) oressential question(s):
With specificinstruction,everyone canimprove theirhandeye coordinationandpowersof observationand
learnto draw.
State of Idaho and/or common core standards addressed:
4-5.VA.1.1.2 Identify specificworksasbelongingtoaparticularera inart history.
4-5.VA.3.1.3 Applythe elementsof shape,line,value,form, texture,andspace inartwork.
Objectives(whatthe studentswill be able to do as a resultof the lesson):
TSWBAT Identifythe artworkof JohnJamesAudubon
TSWBAT Understandthe techniquesof contourline drawingandimprove theirobservationand
drawingskills
Materialsand/or technology:
Imagesof drawingsbyJohnJamesAudubon,demonstrationpaper,popcorn,#2pencilsandwhite drawing
paper9X11
ElementsofDesign: line,shape,space,texture
PrinciplesofDesign:proportion
Art Terms: outline, contourline,blindcontourline
Cross Curricular Application:Art history,scientificobservation,coordinationinsports
Activities/procedures (include anticipated time for each):
Introduction/activator:
Drawingisone of the most basictoolsinthe fieldof visual art. Introduce the artistJohnJamesAudubonand
hisapproach to scientificobservationanddocumentationthroughdrawingandpainting.Show examplesof
hisworkincludinghismistakesandexplainhow he improvedwithyearsof practice.
There are manytypesof drawing but thislessonfocusesoncontourline drawingbecause 1.Itis easyto
learn,2. It isverysimilartothe wayelementarystudentsdraw,3.It isa technique thatimproveshand-eye
coordinationandstudent’sperceptual skills,and4.It can be usedinexpressive andcreative ways.
DefinitionofArt Terms:
Contourline drawing- linesthatdelineatethe edgesof formsare calledcontourlines.Contourline follows
the artist’seye as itperceivesthe edgesof the form.Itdoesnotinclude shadingortexture unlessitcanbe
perceivedasaseparate form.
23
Class activities(what you/studentswill do):
1. Studentswill be givendrawingpaperand
pencil andpopcorn.
2. The teacherdemonstratesthe technique of
blindcontourdrawingthatinvolves
followingthe contoursof the objectwiththe
eye andnot lookingatthe paper.
3. Afterdrawing5 blindcontourdrawingsof
popcorn,the studentscanbeginto lookat
theirpaperand draw5 more.
4. Olderstudentscanmove to a more difficult
subjectlike crumpledpaper,handsorshoes.
Youngerstudentscanuse theirimagination
to turn theirpopcornexercisesinto
imaginarycreatures.
Class activities(whyyou will do them):
1. Popcornis easyto draw and isa good
beginningsubject
2. Thishelpsteachstudentshow toreallysee
and translate the 3-D worldontoa 2-D piece
of paper.
3. Thisallowsthe studentstotry to learna new
skill andunderstandthatthe processismore
importantthanthe product.
4. It isimportantto allow youngerstudentsto
use theirimaginationandnotfocustoo long
on skill buildingandprovideolderstudents
the nextstepinimprovingtheirskills.
Closure/reminders:
Studentswill be responsibleforclean-upof theirareaandart supplies. Youngerstudentswill enjoysharing
theirimaginarycreatures.Olderstudentscandiscusshow eachpiece of popcornlooksdifferentbecause
theywere drawingwhattheyreallysee notaniconfrom memoryof whattheythinka piece of popcorn
lookslike.All critiquesanddiscussionsneedtobe positiveandprovide all studentswiththe feelingof
acceptance and safetywhentalkingabouttheirartwork
Assessment(howyou will know studentsmet the objectives - include rubrics):
Studentswill be assessedontheirparticipationinthe lesson,understandingof contourline drawing
techniquesand classdiscussionsbothbefore andafterthe project.
Accommodations/differentiation:
Accommodationsmaybe made fora studentwithvisual ordexterityissues.The lessonisshort,focusedand
shouldholdthe attentionof moststudents.
24
John JamesAudubon (1785 – 1851) wasa famousFrench-Americanornithologist,naturalistand
artist(painter).He isbestknownforhisdocumentedillustrationsof NorthAmericanbirdsintheir
natural habitats1
.
Audubonworkedinamuseumasa taxidermistandnaturalist. He paintedandsoldportraitsand
gave art lessonswhilstpursuinghisambitiontosurpassAlexanderWilson’sornithologicalwork.His
familyfollowedhimtoLouisiana,where he hunted,studiedanddrew birds.Hiswife workedasa
governessandtrainedteachertosupportthe family.
In 1820, Audubonconceivedthe ideaof publishingacollectionof paintingsof NorthAmerican
birds.He calledthisfuture project“Birdsof America”(1826-1838). Hisambitionwasto paintone page a
day.He hiredhunterswhogatheredspecimenforhim.
Unable to findanAmericanpublisher,AudubonwenttoEnglandandScotlandinthe 1826. His
picturescreateda sensation,andhe published“Birdsof America.Thiswasa workof 87 parts continuing
435 life-sized,handcoloredengravingmade fromhiswatercolors.
Audubonreturnedtothe UnitedStatesin1839, and publishedAmericaneditionsof hisbird
paintings.Later,he workedwithjohnBackmanon“The ViviparousQuadrupedsof NorthAmerica”
(1824-1854). Audubonmade hislastcollectingtripalongthe Missouri Riverin1843.
Fewmenof his age enjoyedthe travel of Audubon.He spentdaysandweeksinthe woods
studyingbirdsandanimals;andhisspectaculardrawingwhichwere criticizedbysome,were sceneshe
actuallywitnessed.He travelledtoParistosell hisbookandneveracceptedanofferfora single print,
alwaysinsistingthe bookbe soldintact.Thisisone reasonhisprintsare so rare today.
AudubonSocietyNationalisone of the oldestandlargestnational conservationorganizationsin
the world.It wasfoundedin1905, andnamedfor the Americanbirdsartistandnaturalist,JohnJames
Audubon.2
1
Wikipedia the free encyclopedia. http://en.wikipedia.org/wiki/John_James_Audubon 1/20/14
10:20pm
2
National Audubon Society. http://www.audubon.org/john-james-audubon 1/20/14 10:05p
25
Contour Line Drawing Practice
26
University of Idaho Lesson Plan
Name: Sally Graves Machlis Date: Spring 2015
Subject: Cut paper Collage Grade: 2nd – 3rd
Goal: Students will study positive and negative shapes and apply what they learn in cut paper collages
similar to Henry matisse’s paper collages.
State of Idaho and/or common core
Standard 2: Critical thinking
2-3. V. A. 2. 1. 1 Use art vocabulary to discuss specific works of art.
2-3. V. A. 2. 1. 2 Identify the elements (line, shape, color, space)
Standards 3: Performance
2-3. V. A. 3. 1. 1 Acquire and use skills necessary for applying art techniques, media and
process.
2-3. V. A. 3. 1. 2 Demonstrate safe and proper use, care and storage of media materials and other
equipment.
2-3. V. A. 3. 1. 3 Apply the elements of line, shapes,color, space in artwork.
Elements ofDesign:line, shape, color, space
Principles ofDesign:pattern,repetition, variety Art Terms: positive and negative space,geometric and
organic shapes,collage
Cross Curricular Application: history and geometry
Aesthetic Scanning/Art History Time: 10 minutes Overheads: Paintings: green-Stripe; Open Window,
Rings of PassionJoy: Dance(11); Matisse making his cut outs, Creole Dancer,The Horse,the Rider and
the Clown, Henri Matisse: Sticker Art Shapes
Teacher’s Materials:Visual aids, construction paper, scissors, glue, example Student Materials: 9’’X
12’’ contruction paper, contruction paper scraes,scissors,glue, pencils, various textural material
(optional).
Activity: After a discussion of Matisse’s collage cut outs, teacher demosntrates cutting positive and
negative shapes. Teacher shows how both can be utilized in a collage design. Teacher shows students
completed example(optional) Each student receives one 9’’X12’’piece of paper and select severalsmaller
scraps. Students cut out organic and geometric shapesand glue both the negative and the positive spaces
on their background papers. Students clean up their area by replacing ‘‘useable’’ construction
papers/scraps in appropriate box, put glue
Production: 40 minutes Objectives (what the students will be able to do as a result of the lesson):
Students learn to identify positive and negative space,geometric and organic shapes. Students learn to
create a collage.
Management/Safety Tips: Students will know how to properly use scissors and scissors away,clean-up
table top.
27
Evaluation: 10 minutes Students will hang their collages up on the wall across from the library.
Students will gather to critique their collages. Students will respond to the following questions: 1.
Did you use positive and negative shapes? 2. Did you use geometric and organic shapes? 3. Have you
created repetition, variety and pattern in your collage? 4. If you used texture, how and why did you use
it?
28
Henri Matisse
Henri Matisse was born in France in 1869 to working class parents and studied to become a
lawyer. He began to paint when his mother brought him art supplies during the period of
convalescence from an attack of appendicitis in 1889. He said later, “From the moment I held
the box of colors in my hands, I knew this was my life. I threw myself into it like a beast that
plunges towards the thing it loves.” Matisse’s mother was the first to advise her son not to
adhere to the “rules” of art, but rather listen to his own emotions. His drastic change of
profession deeply disappointed his father since he was a trained lawyer.
Matisse was considered the leader of the Fauvism movement, which literally means “wild
beasts” because of the use bright colors, distortion and brush strokes. He eliminated
unnecessary details and used color for emotional expression.
Matisse began using cut out paper as his primary medium in his last few years of life. When
cutting paper, Matisse would cut out directly from colored sheets of paper. He would never
draw out his shapes as he believed that part of the effect was lost when lines were drawn and
then painted. He would spend days and weeks rearranging the shapes until he was satisfied and
would then glue the shapes down.
29
My Matisse Collage
30
University of Idaho LessonPlan
Understanding Aesthetics Date: 2016
Grade: 4-8 Topic: Art and Design
The Big Idea: To help students learn how aesthetic judgments are made
State of Idaho/Common Core State Standards and how they relate:
Standard 1: Historical and Cultural Contexts

1.1: Discuss the historical and cultural contexts of the visual arts.
VA.1.1.3 Explain how a specific work of art reflects events in history and/or culture.
1.2: Discuss the interconnections between visual arts and societies.
VA.1.2.2 Describe how elements of various arts depict ideas and emotions.
Standards 2: Critical Thinking
V A.2.1.1 Identify and respond to characteristics and content of various visual art forms.
Use art vocabulary to discuss specific works of art.
V. A. 2. 1. 2 Identify the elements (line, shape, color, space)
Objectives: (what the students will be able to do as a result of the lesson)
TSWBAT: Learn the definition and characteristics of aesthetics
TSWBAT: Use art vocabulary to develop an educated aesthetic argument
Diversity goals: (select at least one and expand on how the lesson relates)
• Developing cultural consciousness
o This lesson allows students to explore a wide range of art and culture. This will
diversify their view of what art can be and what it can say.
Materials and/or Technology needed:
 Collection of similar objects that can be aesthetically assessed such as shoes, hats, lunch
boxes or dolls)
 A list of specific aesthetic points of view
 General supplies for making awards
Activities/Procedures: (include anticipated time for each)
Introduction/Activator: Introduce the history and value of museums and art collections. Why to we
value certain arts and cultural artifacts? Who decides what is included in a museum? Define
aesthetics as educated judgments about the experience, impact, meaning and value of art.
Class activities: (what you/students will do): Class activities: (why you will do them)
31
 Display a group of objects to be assessed
such as 15 different shoes. They should
vary is materials, style, color, size, etc.
but of course all have the same function.
 Arrange students in working groups of 4-
6 students---one group needs to be the
museum curators
 Give students the list of aesthetic points
of view and ask them to choose one shoe
and develop an argument why their shoe
should be included in the “Great Shoe
Museum. ”
 Students present their argument to the
museum curators in any creative form
they wish. It could be a song, Poem,
story, rap song, performance, or
illustrated argument.
 The museum curators/judges will retire
to make the awards for the most
compelling argument, most creative,
most convincing, etc.
 This will introduce the students to the concept
that the same object can be created and
designed in many different styles appealing to
different people.
 The aesthetic points of view will expand
students’ knowledge of how art can be
judged.
 Working together is a valuable student
experience in terms of collaboration. Creating
an aesthetic argument allows them to think
more deeply about the concept of aesthetic
judgment.
 The judges will provide feedback on the
student presentations and what arguments
they felt were most convincing.
Closure/Reminders:
 Discuss the merits of the different presentations and recap the understanding of what makes
an aesthetic judgment.
Assessment: (how you will know students met the objectives - include rubrics)
 After the activity is finished, students will discuss using these questions:
o Do you have a better understanding of how aesthetic decisions are made in the current
art world? And how they were made in the past?
o Do you have a greater understanding of the wide range of beliefs about what is
beautiful or valuable?
o Do you understand the definition of aesthetics?
Accommodations/Differentiation:
 Everyone can participate in some way in the group discussions and presentations
32
There were no pieces ofart to photograph for this lesson.
Aesthetic Points of View:
You believe art should be environmentally responsible and enlightening.
You believe art should make people think.
You believe art should be realistic and always look like something from the real world.
You believe art should be beautiful, something people like to look at.
You believe art should be made by hand from traditional materials
You believe that art should contribute to our understanding of history and society
You believe that art should always express feelings such as joy, sorrow, anger or humor.
You believe art should demonstrate exceptional technical skill.
You believe art should have a special message or story about how to be a better person.
You believe that art has to be original or unique-something we have never seem before.
33
University of Idaho Lesson Plan
Name: SallyGravesMachlis Date: Fall 2016
Subject: 1-4 grade Art Topic: Self Portraits
The big idea(s) oressential question(s):
Withspecificinstruction,everyone canimprove theirhandeye coordination,powers of observationand
learnto drawa self-portraitbyusingguidesformeasuringcorrectproportions.
State of Idaho and/or common core standards addressed:
_________ Identifyspecificworksasbelongingtoaparticularera inart history.
_________ Applythe elementsof shape,line,form, texture,andbalance inartwork.
Objectives(whatthe studentswill be able to do as a resultof the lesson):
TSWBAT Identifythe artworkof artiststhat usedportraiture invariousgenres,show historical
contextof portraiture
TSWBAT Studentswill learnbasichumanfacial proportionsanddraw a self-portrait
Materialsand/or technology:
Imagesof portraitpainting,demonstrationpaper,mirrors,#2pencils,rulersandwhite drawingpaper9X11
Elementsof Design: line,andvalue
PrinciplesofDesign:proportionandbalance
Art Terms: outline,proportion,organizational line
Cross Curricular Application:Art history,scientificobservation,mathematical proportions(fractions)
Activities/procedures (include anticipated time for each):
Introduction/activator:
Portraiture hasa longtraditioninart history.Introduce some artiststhatcreatedportraitsor self-portraits
and discussthe relevance of documentationthroughportraitpaintinginhistory.Show printedorprojected
imagesof portraiture anddiscussthe historical context.
There are manytypeswaysto draw correctproportions;thismethodisa goodapproach formost students.
1. It is easyto learn,2. It showselementarystudentshow dividing aspace and planningcanbenefittheir
drawing3. It isa technique thatimproveshand-eye coordinationandstudent’sperceptual skills,and4.It can
be usedinexpressiveandcreative ways.
DefinitionofArt Terms:
Contourline drawing- linesthatdelineatethe edgesof formsare calledcontourlines.Contourline follows
the artist’seye as itperceivesthe edgesof the form.Itdoesnotinclude shadingortexture unlessitcanbe
perceivedasaseparate form.
Organizational Line-marksmade asameans of providingaworkingframeworkforadrawing;organizational
linesare usedtotake measurementof the object,itspartsandsurroundings.
34
Proportion- the correctiondepictionof the all the partsrelatedtoeachotherin a shape/formwithina
realisticpaintingordrawing
Value-referstothe lightnessordarkness(shading)
Balance-placementof variouselementsinawork of art inrelationtoeachother through theirorganization
and positioning.
Class activities(what you/studentswill do):
1. Variousprintsof portraitswill be handed
out andthe classwill discusswhyportraits
were originallypainted.
2. Instructorwill demonstrate onthe boardthe
basicproportionsof a face.Studentswill be
givena handoutof facial proportionsif you
believeitwill be of furtherassistanceduring
the drawingprocess.
3. Studentswill be given,drawingpaper,
pencilsandmirrorsandwill begintheir
drawingwitha basic“egg” shape.Instructor
will demonstratehowtolightlysketch
organizational linestocreate proportion
guidesforeyes,nose andmouth.
4. Studentsfurtherrefinethe face shape by
directlyobservingtheirownface shape as
reflectedinthe mirror.Theywill alsorefine
the shape of theireyesandmouth.The
mouthis bestdrawnif the line betweenthe
lipsisdrawnfirst.
5. Afterall the facial featuresare drawn,
studentsshouldadddirectionallinesfor
hair.Remindstudentstoaddthe neck.The
neckis usuallywiderthanoriginallythought;
it shouldline upunderthe jawline.
6. For uppergrade students,gointoadding
shading.Lookat the darkestareas of the
face.Usuallythe closestareasare lighterin
value andthe deeperareasare darker in
value.Strongdrawingshave avarietyof
values.Darkvs.lightvaluesina drawing
provide contrast.Rootsof hair are usually
dark, as isthe areas behindthe ears(hair).
Addas many detailsasdesiredforarealistic
appearance.
Class activities(whyyou will do them):
1. Self Portraitsare funto draw andis a good
beginningsubject.
2. Thishelpsteachstudentshow torender
correct proportions.
3. Thischallengesstudentstolearnanewskill
and to understandhow certaintechniques
can aide inthe processof creatingan
accurate drawing/portrait.
4. It isimportantto allow youngerstudentsto
use theirimaginationabitandmake
mistakesalongthe way.Forolderstudentsit
isimportantto focuson patience andskill
building.
Closure/reminders:
Studentswill be responsibleforclean-upof theirareaandart supplies.Studentswill enjoyseeinghowusing
proportionguide andorganizationallinewillimprovetheirself-portraits.All critiquesanddiscussionsneedto
be positive andprovide all studentswiththe feelingof acceptance andsafetywhentalkingabouttheir
artwork
35
Assessment(howyou will know studentsmet the objectives - include rubrics):
Studentswill be assessedontheirparticipationinthe lesson,understandingproportional drawing
techniques andclassdiscussionsbothbefore andafterthe project.
Accommodations/differentiation:
Accommodationsmaybe made fora studentwithvisual ordexterityissues.The lessonisshort,focusedand
shouldholdthe attentionof moststudents.
36
37
My Self-Portrait
38
39
40
Hannah Kesslerand I made two pieces of paper.
The whole class made severalbeautiful pieces of paper.
41
University of Idaho Art Lesson Plan
Name
Macie Bakken and Brianna Reasoner
Date
3/2/17
Subject
1-3 Art
Topic
Texture
The big idea
With specific instruction, everyone can understand the importance of texture in art
pieces as well as the world that surrounds us.
State of Idaho/common core standard
K.VA.3.1.3Applythe elementsof color,shape,andline in artwork.
K.VA.3.2.2Applyartisticconcepts,knowledge,andskillstooriginal artwork.
K.VA.3.3.1Experimentwithdifferentmaterials,techniques,andprocessesinthe visual arts.
Objectives
TSWBAT The students will be able to point out the different types of texture.
TSWBAT The students will be able to understand the purpose of texture and apply it.
Materials
Clay, pointed wooden sticks, texture tools, #2 pencil, and a 9x11 piece of paper,
projector, images of texture
 Elements of Design: texture, sculpture
 Principles of Design: Texture
 Art Terms: texture, Implied texture
 Cross Curricular Application: Art History, Scientific Observation(wildlife)
Activities/procedures
42
Introduction/activator (5 minutes)
Close your eyes,
You wake up in the morning, toss back the crisp cotton sheets. Your bare feet move across the
polished wood floor. You get into the shower and feel the warm water spalsh against your skin,
the soap slide over your arms. You wrap yourself in a soft terry towel. Your clothes provide you
with a whole array of textures: silky, starched, velvety, coarse, elastic. Breakfast provides even
more: fluffy scrambled eggs, crisp bacon, melted butter dripping off crunchy toast.
You look out the window, and even though you can't touch it, you can see the layers of texture
in the leaves of the old oak tree and its gnarly bark, the multicolored aging brick on the building
across the street, the gleaming polished surface of a car.
Imagine the world without texture.
Definition of Art Terms:
 Texture- The quality of a two or three dimensional surface: how it feels or looks in a
piece of art.
 Implied Texture- “Implied texture in artwork contains the illusion of actual textures. Like
other implied formal elements it represents a material or object in the physical world.
Implied texture is used to allow the viewer to enter into the scenario that the artist has
created. It can also be used to give the viewer information about the object that is
represented.”
Class activities (20-25 minutes)
1. Students will get out a piece
of paper and pencil and go
on an art walk around the
classroom and write down 5
items with texture.
2. The teacher will show
examples of items and
sculptures that use texture.
3. After drawing the item(s) the
students will describe the
texture.
4. Next it’s the students turn to
think of an animal with a
texture they like.
5. After students have an
animal in mind they will
receive clay and have access
to tools and will be allowed
Class activities
1. Different items around the
classroom are easy to draw and
giving the students the opportunity
to pick the items they are drawing
shows individuality and provides
different perspectives.
2. This helps students understand the
concept of texture and how it truly
looks like when demonstrated in a
2D artwork or in a sculpture.
3. This will allow the students to show
their understanding of texture and
how they think it applies to a
specific object in their surroundings.
4. This allows children to think of
animals that they see every day or
their favorite animal and think about
what kinds of texture is shown
through that animal.
43
to create their textured
animal.
6. Older students will be given
access to different texture
tools for safety reasons and
given more clay for bigger
sculptures; maybe be
encouraged to create the
texture of a large subject.
5. This allows children to have a first-
hand experience of how to apply
texture and be able to physically
show what they feel it would look
like on their own animal; giving the
freedom of choice is another great
point.
6. It is important to give younger
children the ability to use their
imagination and give them tools for
them to easily apply to their clay. It
is also important to give older
children the opportunity to challenge
themselves and use more complex
tools to help them apply more
technique to their sculpture.
Closure/reminders (2minutes) . Students will be responsible for clean-up
of their workspace and put away art
supplies. If time permits, children can get
up and walk around to look at the different
animals their classmates created with
texture for children older and younger. Any
and all comments about students art work
must be positive and support must be
given to all students so they feel their
artwork has been appreciated and
recognized.
Assessment (10-15 minutes)
Students will be assessed on their participation in the lesson, understanding of texture
techniques, and their final clay structures.
Accommodations/differentiation
Accommodations will be made for students who are ELLs or have a visual or auditory
issue. The lesson is more hands-on and should hold the students’ focus for a majority
of the time.
44
45
These were my two texture sculptures – a jellyfish and a turtle.
46
47
48
49
50
51
This is my product of string art after following the pattern on the back side of the paper.
52
53
54
55
56
57
58
59
These are a few of the masks that students in the class did, but I was not there to decorate a
mask. I made one which can be seenin the picture on the cover of my portfolio.
60
61
62
63
This is a color wheel that Hannah Kesslerdid, and she let me borrow this picture because I
was gone this day.
64
Serena Porter
EDCI 325
01 Feb. 2017
The Value in Teaching Visual Arts
As a student learning to become a highly qualified educator, I want to understand the
purpose of everything I am teaching to children; especially, what the value is in teaching visual
arts. There are huge nationwide pushes to focus education on the STEM subjects, but research is
showing that we need to have more visual arts and humanities integrated back into the
curriculum so that children are getting a more well-rounded education. Not every student learns
the same way, and integrating visual arts into our core STEM subjects can help those students
who are more kinetic and visual learners to tackle their subjects in a way they can better
understand. Visual arts can be beneficial in a variety of ways physiologically, psychologically,
emotionally, and socially for students and individuals.
According to an article written and published by the National Art Education Association
called Learning in a Visual Age, the visual arts can be a source of aesthetic experience, a source
of human understanding, a way to think more fluidly and creatively, and a way for students to
understand and better appreciate the arts. They go on to say that there are many mental benefits
from teaching students the visual arts because they learn practical mental skills that are not
taught in other subjects such as observing, envisioning, innovating, and reflecting. These skills
become habit through art classes, and they then become habitual in other subjects that the
students are studying. This creates a body of students who are more intelligent and have a greater
understanding of their studies. “In addition to developing students’ intellectual capabilities,
visual arts instruction also helps develop young people’s sense of civic engagement” (pg. 5).
65
When students can start to imagine worlds unlike their own, they can join society wanting to
make changes towards creating a world worth living in. There are many perspectives that can be
understood and developed through the teaching of visual arts (Eisner 2013). Understanding that
the world can be seen differently through everyone’s eyes, allows students to engage in social
justice issues with greater empathy and consideration. Not only are the visual arts benefitting
students’ knowledge capabilities and building their social skills, but also the visual arts are
helping children to say what they do not know how to express yet with words.
In a short article written by Elliot Eisner called 10 Lessons the Arts Teach, he says that
the arts can help children to express feelings that they do not have words, and that when they are
asked to explore these feeling they must reach into their “poetic capacities” (pg. 1) to find the
words they are looking for. This strengthens children’s abilities to better manage their emotions
whether it be excitement, or stress, or anger etc. The health benefits that come from children
being able to sort through their stress and emotions are huge. Children can stay more alert in the
classroom, participate in activities, have a better appetite, and get more sleep when they are not
as stressed out or overwhelmed with emotions that they do not know how to express.
This overall theory that teaching the visual arts can be beneficial is convincing enough,
but I have seen it in action in my practicum experience. I was given the opportunity to aid with
art hour in a first grade classroom at Lena Whitmore Elementary. What I observed every time
that I went to my practicum was that the students in this particular first grade classroom were full
of emotions that were so compacted that they were always just one comment away from an
emotional breakdown. I would help the teacher through the rocky math hour and recess with
constant behavior interventions, and then when it came to art, it was like an entirely different set
of children had walked into the classroom. The students were so excited and engaged each week
66
when my mentor teacher would introduce their new art lesson. It helped that my mentor teacher
was thrilled about art herself, and she understood how important art became to her students.
Sometimes art was the only outlet that day that some of her students would get. One afternoon,
the art project was one that I did not think was going to go as well as it did. She asked the
students to pick any color of construction paper that they would like and draw lines on the paper
that represented how they felt. She gave examples of a happy feeling by drawing swirls on bright
yellow paper and of a sad feeling by drawing straight dark lines on a blue paper. Her instructions
were to pick two feelings (which she wrote out a bunch of on the board) and express them in
lines and with color. As they all drew their lines and wrote the feelings on the back of the paper,
she played classical music as she always did during art class. The students were being quiet and
were enthralled by their pieces.
When I returned the following week, I read the feelings that students were expressing,
and I was incredibly distraught. The students who were usually needing the most supervision and
intervention were the ones who picked angry and sad as emotions that they were feeling. A black
sheet of paper with one white circle in the middle caught my eye in particular. The feeling
expressed was lonely. It was then that I realized that these kids just needed a way to let go of
some of the emotions that they had tightly bottled up, and that their teacher had provided them
with that opportunity by teaching visual arts. While I think the visual arts provide great ways to
explore core subjects, I think that the emotional benefits of the arts are enough for me to want to
teach the visual arts not just as an integrated method of teaching but as a core subject. Learning
should be student centered, and what is more student centered than giving your students the
opportunity to communicate through art when they do not yet have the tools to manage how they
are feeling.
67
References
Eisner, Elliot. "Ten Lessons the Arts Teach." National Art Education Association. p.1, 2013.
Web. 1 Feb. 2017.
"Learning in a Visual Age - The Critical Importance of Visual Arts Education." National Art
Education Association. p.1-20, 2016. Web. 1 Feb. 2017.
68
Serena Porter
EDCI 325
07 Mar. 2017
Prichard Art Gallery Review
The Prichard Art Gallery hosted an art exhibit from the University of Idaho called
Visualizing Science. The exhibit will be on display from February 10th, 2017 to April 15th, 2017.
This exhibit displayed the works of scientists and artists who collaborated to create artworks in a
multitude of mediums ranging from paintings to metalworks to digital graphs and fabrics that
allowed for a better understanding of various aspects of science. There were seven scientists and
eight artists which created seven teams of creative minds who explored science through visual
arts. The artists and scientists who contributed to this exhibit are Nishiki Sugawara-Beda and
James Foster, Val Carter and Craig McGowan, Delphine Keim, Sally Graves Machlis, and
Sanford Eigenbrode, Mike Sonnichsen and Jennifer Johnson-Leung, Greg Turner-Rahman and
Holly Wichman, J. Casey Doyle and Bryn Martin, and Stacy Isenbarger and Penelope Morgan.
The first person listed in each of the teams is the artist who collaborated with a scientist, the
second person listed in each of the teams, to help the public visualize science.
One of the works that caught my eye was the work of J. Casey Doyle and Bryn Martin
called Nebulous. Bryn Martin is a scientist who studies the nerves in the human eye. J. Casey
Doyle works with ceramics, and together they created this art piece that was a display of the
retinal nerves using clay. The art piece started with an eye, and then the retinal nerves were
sliced as they would be seen on an MRI and laid out piece by piece behind the eye. There was
not any color other than the grey color that clay originates in, but color was not necessary to
understand the science they were trying to emphasis. The length and complexity of these nerves
69
were most obviously the emphasis of this work, and I think they did a great job in helping the
viewer to visualize these nerves. This artist/scientist team created a piece that was quite tangible
like many of the other teams who contributed to the exhibit. Having tangible science is very
important for developing an understanding of complex ideas, especially, for those who are not of
logical and analytical intelligence but one of the other eight of Gardner’s multiple intelligences.
Not all the art pieces at the exhibit were tangible though.
My favorite piece of work in the exhibition was Hyperelliptic Threshold Noise by Mike
Sonnichsen and Jennifer Johnson. This piece was a field of polynomial equations that were
plotted and made visual. The visual was broken down into three frames with each frame under a
black light that emphasized the colors and patterns displayed among the many equations that
were plotted on this field. While this piece wasn’t tangible like most the rest of the exhibition, it
was still insightful, and it helped me to visualized the plotting of polynomial equations. Before
this, I would have had no image come to mind when asked to think about equations that weren’t
something I specifically knew like the equation for a circle or a parabola, etc. While the media
used (printmaking) isn’t itself a tangible media like that of a ceramic retinal nerve, the
polynomial equations became tangible through the plotting. On the plaque attributing credit to
the artist and scientist of this piece there was a great statement that expands my explanation,
“These prints deploy layers of color on the abstract void of a black background, bringing
numerical plots into tangible form.” This piece was my favorite because it most closely related to
my emphasis, mathematics, and it gave me insight on how to connect math to science and the
arts.
The humanities can give us different perspectives of science along with giving us the
ability to visualize and manipulate science. The visual arts can help a variety of learners to better
70
understand difficult concepts. I think that this exhibit was interesting because of the collaboration
that happened between a multitude of fields. I would love to see something like this with more
fields so that more people could understand how the visual arts coincide with other fields that are
considered more dominant by education such as language arts. Overall, it was a great learning
experience because I had never been to an art exhibition or even an art show before going to the
Prichard Art Gallery.
71
Serena Porter
EDCI 325
09 April 2017
Jackson Pollock Biography
Jackson Pollock was a painter during the abstract
expressionist movement. Pollock’s life was not very long as he died
at the age of 44 years old in 1956 from an alcohol- related car
accident. He struggled with alcohol most of his life, and he was
frequently regarded as an angry drunk. However, he could express
his pain and anger in his life through his paintings, and he became
very influential during this particular art movement. After his death,
numerous exhibition went up in his honor portraying many of his life works.
In his younger years, Pollock married a painter by the name of Lee Krasner. Soon after,
he found a technique of painting that he loved, and he worked on it until it was perfect. This
technique is how people identify his paintings today. His technique was inspired by using
household paints and materials which was not common practice by other artists of this time.
Pollock also did not use an easel and pallet like many other painters, he would out his canvases
on the floor. The painting utensils he would use were not your typical paint brush either; he
would use hardened brushes, sticks, and basting syringes to apply paint to the canvas. Pollock
called his technique the “drip” method as he would drip household paint over the canvas never
touching the applicator to the canvas. This technique makes the element of texture most
prominent when you look at them. You can feel the texture with your eyes before even noticing
72
that the paint has not been spread by a brush but
rather left in its blots and dribbles.
One of his famous works of art is a
painting he called Autumn Rhythm. He created
this work in the fall of 1950. The painting is very
abstract, and there is no representational picture.
Jackson Pollock remarked, “I’m very representational some of
the time, and a little all of the time. But when you’re working out of your unconscious, figures
are bound emerge. Painting is a state of being. Painting is self-discovery. Every good artist paints
what he is.” Autumn Rhythm may have meant something to Pollock, but today it is studied
because of its elements of lines and movement. Pollock physically moved the canvas frequently
as he worked making sure every inch of the whole canvas was just as meaningful as the next. His
movement made the lines appear as though they are moving in the painting. While there was
intention when he painted, he was always painting with spontaneity even as he painted in front of
crowds. His paintings were not planned, but he claimed that there was never an accident and all
his lines are intentional.
Another one of his paintings that gave him much novelty and fame was Reflection of the
Big Dipper. This painting was one that he layered paints on the canvas, and then,
he dripped enamel as the final coat over it. This is one of his more representational
paintings; however, it is still very abstract. Many of his paintings, including
Reflection of the Big Dipper and Autumn Rhythm were displayed in exhibits.
Because of his technique, he became a very influential American painter, and
many of his paintings are still being displayed in art exhibits and museums.
Autumn Rhythm, 1950
Reflection of the Big
Dipper, 1947
73
Bibliography
"Biography of Jackson Pollock." Jackson Pollock' Biography. N.p., 2011. Web. 11 Apr. 2017.
<http://www.jackson-pollock.org/biography.jsp>.
"Jackson Pollock: The Artist." National Gallery of Art. N.p., 2017. Web. 11 Apr. 2017.
<https://www.nga.gov/feature/pollock/artist15a.shtm>.
74
Serena Porter
EDCI 325
30 April 2017
Practicum Reflection – Art
My practicum placement this semester was in Mrs. Horne’s second grade classroom at
McDonald Elementary. While I was in the classroom, I did not witness any art projects or art
history. This was because they only had art scheduled once a week, and it was on Friday
afternoons. I was there Wednesday mornings, so I always helped with reading and writing
workshops. However, there were many art projects that the school collaborated on.
When you walk into the elementary school, you can see many examples of their
collaborative artwork. One wall is covered in all of these tiles that compose two dinosaurs – a
blue one and a green one. When looking at them from a little bit of a distance, you can see that
the dinosaurs are made up of all of these tiles that have been painted. However, when you get
closer, you can see that each tile has been painted by individual students with different pictures
on them. Some students even painted their names on them which is such a cool way of making
the school a more integrated and collaborative community.
Another one of their schoolwide art projects was an art piece comprised of these braided
beads. There were tons of individual bands of braided beads that were multiple colors and
different patterns. Each student made their own strand of braided beads, and then, they put them
all together. They created this very colorful and large beaded work of art that each student got to
contribute to which is displayed in the hallway on the way to their cafeteria/gym. While the
school focuses on decorating their hall with student work and school wide art, the classroom I
was working in was not so focused on students doing art.
75
The once a week the students would do art there were not frequently art lessons done by
the teacher. Mrs. Horne usually brought in other people to teach the art lessons such as local
artists, parents that dabbled in art, and practicum students. On one of Mrs. Horne’s filing
cabinets was a list of art supplies that she had so that anyone who came into her class would
know what kind of materials would be available to them. Unfortunately, that list was very small
and mostly consisted of construction paper, water colors, and oil pastels. I do not know if this
limited list was due to a lack of funding or if it was just not a strong belief of the teacher to teach
more art than the standards required. I do like that she was able to bring so many people into her
classroom because that provides the students with different perspectives and potentially experts
in the field of art. However, it seemed that she was not doing it to provide a well-rounded
experience for students but rather she did not have great comfort in teaching art herself.
As most teachers are required to, Mrs. Horne did display the objectives of the day in each
subject up on the board. One week, the art objective was to learn about lines and shapes. There
was a guest who came in and taught the students about the elements of lines and shapes in art,
and the final student products were these pieces of computer paper that they split into four
squares. They had a drawing in each of the four squares, and then they colored their illustrations.
I was responsible for gluing “the art” onto construction paper the following week so that we
could display them in the hallway. The students always got to illustrate the writing in class
multiple times a week, and I struggled to see the difference between what they did in writing and
what they called an art project that displayed the students’ understanding of lines and shape in
art.
Overall, I think that there is general improvements that needs to be made to the art
curriculum and opportunities that are provided in that classroom. I do not know how other
76
classrooms in that school operated in regards to art, but there were various art projects displayed
in the hallways from different classrooms. Hopefully, there are other classrooms that are
supporting art a little more than the second grade class I was in this semester.
77
Serena Porter
EDCI 325
02 May 2017
Exhibit Paper 2 – Visualizing Science
For the 26th annual Idaho high school art exhibition, Ridenbaugh Hall at the University of
Idaho hosted a gallery of a variety of high school artworks. The theme chosen this year was
Visualizing Science, and one of the only rules for the contestants was that the art had to be two-
dimensional so as to not put any schools at a disadvantage if their art budgets could not support
students and their artwork ideas. The first-place prize was a $1000 scholarship to the University
of Idaho. There were entries from high schools all over the state, and the skill level presented
was a huge range as well. None of the submissions were rejected, and all the art was displayed
for viewers in Ridenbaugh Hall on the University’s campus.
While the theme was the same at this gallery as the Prichard Gallery’s exhibit Visualizing
Science, there was a huge difference in these two galleries. The majority of the difference does
lie in the fact that the exhibition at the Prichard gallery was constructed by scientists and
professional artists, but difference also lies in perspective. The way these two exhibits portrayed
science was widely different. The high school students interpreted the theme in a variety of ways
ranging from exploring human anatomy to astronomy all the way to environmental impacts that
the world is experiencing. This theme allowed students to see how art can be integrated into their
other core subjects, and how they can express complex scientific ideas in visual art.
The interpretation of the theme was not the only thing that differed amongst schools and
individual students but also the media used in this gallery of works varied greatly. While the
guidelines limited the students to two-dimensional submissions, they were not limited on the
78
media they could use to create their two-dimensional works of art. Many students sketched and
used colored pencils or markers, but others used photography, paint, graphic design, stippling,
chalk, thread, and newspaper to add special elements to their work. There were so many
submissions, perspectives, and medias that it was difficult to pick my favorite.
As far as a whole school’s submission, I think that Post Falls High School had the best
submissions overall. Each of the students visualized science differently, and there were many
medias used to create their pieces. They also had quite a few submissions, and so many of them
were of high quality. They were attention catching and very visually appealing. This school was
also the school that provided the 1st place winner submission which was by student Savannah
Thorny. She had a beautiful piece that was so detailed that it looked as though the lion, skull, and
heart were pulled from real life. She brought so many elements into her piece such as
perspective, color, and lines that made her piece stand out. The corners of the work had the
appearance of being burned, and there were just layers of content. I was not at all surprised that
her work received a first-place ribbon; however, I was taken back by how much talent this
student could portray in just this one piece.
Overall, I was really impressed with all of the submissions. This gallery was just
portraying some of the artist talent of Idaho’s high school students. Exhibitions like these really
allow schools to see the importance of visual art programs in their schools and just how talented
their students can be when given the opportunities to be creative and explore new concepts in
different manners than traditional teaching offers. It was easy to see some of the budget restraints
that schools had by some of the art submissions, but to me, that just means that the students at
those schools were all the more talented by working with what they were limited to and still
creating impressive works of art. I am very interested to see what theme the students get next
79
year, and how they are going to interpret it.

Contenu connexe

Tendances

Lichtenstein Inspired Mixed Media Portraits
Lichtenstein Inspired Mixed Media PortraitsLichtenstein Inspired Mixed Media Portraits
Lichtenstein Inspired Mixed Media Portraitsilaeadigital
 
Art & Activity: Engaging Visual Literacy Skills & Prior Knowledge to Explore ...
Art & Activity: Engaging Visual Literacy Skills & Prior Knowledge to Explore ...Art & Activity: Engaging Visual Literacy Skills & Prior Knowledge to Explore ...
Art & Activity: Engaging Visual Literacy Skills & Prior Knowledge to Explore ...Kate Gukeisen
 
Class activities -Bacon
Class activities -BaconClass activities -Bacon
Class activities -BaconInma Contreras
 
Aziz art jan2020
Aziz art jan2020Aziz art jan2020
Aziz art jan2020Aziz Anzabi
 
City Lore Outcomes Institute Powerpoint
City Lore Outcomes Institute Powerpoint City Lore Outcomes Institute Powerpoint
City Lore Outcomes Institute Powerpoint citylore
 
Adding STEAM to Math with Origami- NJEA 2016 Presentation
Adding STEAM to Math with Origami- NJEA 2016 PresentationAdding STEAM to Math with Origami- NJEA 2016 Presentation
Adding STEAM to Math with Origami- NJEA 2016 PresentationBoakes, Norma
 

Tendances (12)

Lichtenstein Inspired Mixed Media Portraits
Lichtenstein Inspired Mixed Media PortraitsLichtenstein Inspired Mixed Media Portraits
Lichtenstein Inspired Mixed Media Portraits
 
Zp term 1
Zp term 1Zp term 1
Zp term 1
 
00016692 (1)
00016692 (1)00016692 (1)
00016692 (1)
 
INK on PAPER 2
INK on PAPER 2INK on PAPER 2
INK on PAPER 2
 
AICLE - MODERN ART
AICLE - MODERN ARTAICLE - MODERN ART
AICLE - MODERN ART
 
Lesson 1 7
Lesson 1  7Lesson 1  7
Lesson 1 7
 
Art & Activity: Engaging Visual Literacy Skills & Prior Knowledge to Explore ...
Art & Activity: Engaging Visual Literacy Skills & Prior Knowledge to Explore ...Art & Activity: Engaging Visual Literacy Skills & Prior Knowledge to Explore ...
Art & Activity: Engaging Visual Literacy Skills & Prior Knowledge to Explore ...
 
Class activities -Bacon
Class activities -BaconClass activities -Bacon
Class activities -Bacon
 
Aziz art jan2020
Aziz art jan2020Aziz art jan2020
Aziz art jan2020
 
City Lore Outcomes Institute Powerpoint
City Lore Outcomes Institute Powerpoint City Lore Outcomes Institute Powerpoint
City Lore Outcomes Institute Powerpoint
 
NCECA 2014: Ryan Krippendorf
NCECA 2014: Ryan KrippendorfNCECA 2014: Ryan Krippendorf
NCECA 2014: Ryan Krippendorf
 
Adding STEAM to Math with Origami- NJEA 2016 Presentation
Adding STEAM to Math with Origami- NJEA 2016 PresentationAdding STEAM to Math with Origami- NJEA 2016 Presentation
Adding STEAM to Math with Origami- NJEA 2016 Presentation
 

Similaire à Art Portfolio

Tws presentation final_mp
Tws presentation final_mpTws presentation final_mp
Tws presentation final_mpthegrither
 
Art gr-1-teachers-guide-q12
Art gr-1-teachers-guide-q12Art gr-1-teachers-guide-q12
Art gr-1-teachers-guide-q12EDITHA HONRADEZ
 
Art gr-1-teachers-guide-q12
Art gr-1-teachers-guide-q12Art gr-1-teachers-guide-q12
Art gr-1-teachers-guide-q12EDITHA HONRADEZ
 
Art gr-1-teachers-guide-q12
Art gr-1-teachers-guide-q12Art gr-1-teachers-guide-q12
Art gr-1-teachers-guide-q12EDITHA HONRADEZ
 
Art gr.1 teacher's guide (q1&2)
Art gr.1 teacher's guide (q1&2)Art gr.1 teacher's guide (q1&2)
Art gr.1 teacher's guide (q1&2)Nancy Damo
 
Equivalents project summary Powerpoint
Equivalents project summary PowerpointEquivalents project summary Powerpoint
Equivalents project summary PowerpointIsobel2559
 
Author says i say lesson plan
Author says i say lesson planAuthor says i say lesson plan
Author says i say lesson planKyle Guzik
 
Their Work, Not Mine: The Student Centered Studio Classroom 2014
Their Work, Not Mine: The Student Centered Studio Classroom 2014Their Work, Not Mine: The Student Centered Studio Classroom 2014
Their Work, Not Mine: The Student Centered Studio Classroom 2014Rebecca MissRoberts
 
David and Anne Part 1
David and Anne Part 1David and Anne Part 1
David and Anne Part 1jasonelvis
 
Vanessa Florencio -- Student Work 2008 & 2009
Vanessa Florencio -- Student Work 2008 & 2009Vanessa Florencio -- Student Work 2008 & 2009
Vanessa Florencio -- Student Work 2008 & 2009mrsflo
 
'1916 Drypoint Prints'
'1916 Drypoint Prints''1916 Drypoint Prints'
'1916 Drypoint Prints'Angela Clarke
 
Module 1 activity clil unit plan template dafne fortea
Module 1 activity clil unit plan template dafne forteaModule 1 activity clil unit plan template dafne fortea
Module 1 activity clil unit plan template dafne forteaDafne Fortea
 
Visual arts lesson 1
Visual arts lesson 1Visual arts lesson 1
Visual arts lesson 1tamara hope
 
Integrating Art History Presentation
Integrating Art History PresentationIntegrating Art History Presentation
Integrating Art History Presentationkguyotte
 
Drawing Article for 101
 Drawing Article for 101 Drawing Article for 101
Drawing Article for 101Lori Kent
 
Progression Assignment
Progression AssignmentProgression Assignment
Progression AssignmentAva Shacklady
 

Similaire à Art Portfolio (20)

Tws presentation final_mp
Tws presentation final_mpTws presentation final_mp
Tws presentation final_mp
 
Art gr-1-teachers-guide-q12
Art gr-1-teachers-guide-q12Art gr-1-teachers-guide-q12
Art gr-1-teachers-guide-q12
 
Art gr-1-teachers-guide-q12
Art gr-1-teachers-guide-q12Art gr-1-teachers-guide-q12
Art gr-1-teachers-guide-q12
 
Art gr-1-teachers-guide-q12
Art gr-1-teachers-guide-q12Art gr-1-teachers-guide-q12
Art gr-1-teachers-guide-q12
 
Art gr.1 teacher's guide (q1&2)
Art gr.1 teacher's guide (q1&2)Art gr.1 teacher's guide (q1&2)
Art gr.1 teacher's guide (q1&2)
 
Equivalents project summary Powerpoint
Equivalents project summary PowerpointEquivalents project summary Powerpoint
Equivalents project summary Powerpoint
 
Author says i say lesson plan
Author says i say lesson planAuthor says i say lesson plan
Author says i say lesson plan
 
Their Work, Not Mine: The Student Centered Studio Classroom 2014
Their Work, Not Mine: The Student Centered Studio Classroom 2014Their Work, Not Mine: The Student Centered Studio Classroom 2014
Their Work, Not Mine: The Student Centered Studio Classroom 2014
 
David and Anne Part 1
David and Anne Part 1David and Anne Part 1
David and Anne Part 1
 
Vanessa Florencio -- Student Work 2008 & 2009
Vanessa Florencio -- Student Work 2008 & 2009Vanessa Florencio -- Student Work 2008 & 2009
Vanessa Florencio -- Student Work 2008 & 2009
 
Art 3 tg full english
Art 3 tg full englishArt 3 tg full english
Art 3 tg full english
 
Geometry in art
Geometry in art  Geometry in art
Geometry in art
 
'1916 Drypoint Prints'
'1916 Drypoint Prints''1916 Drypoint Prints'
'1916 Drypoint Prints'
 
Module 1 activity clil unit plan template dafne fortea
Module 1 activity clil unit plan template dafne forteaModule 1 activity clil unit plan template dafne fortea
Module 1 activity clil unit plan template dafne fortea
 
Visual arts lesson 1
Visual arts lesson 1Visual arts lesson 1
Visual arts lesson 1
 
Integrating Art History Presentation
Integrating Art History PresentationIntegrating Art History Presentation
Integrating Art History Presentation
 
'Still life'
'Still life''Still life'
'Still life'
 
Drawing Article for 101
 Drawing Article for 101 Drawing Article for 101
Drawing Article for 101
 
Place in Question
Place in QuestionPlace in Question
Place in Question
 
Progression Assignment
Progression AssignmentProgression Assignment
Progression Assignment
 

Plus de Serena Porter

Classroom Management Plan
Classroom Management PlanClassroom Management Plan
Classroom Management PlanSerena Porter
 
8 Week Curriculum Map
8 Week Curriculum Map8 Week Curriculum Map
8 Week Curriculum MapSerena Porter
 
Formal Poetry Lesson Plan
Formal Poetry Lesson PlanFormal Poetry Lesson Plan
Formal Poetry Lesson PlanSerena Porter
 
Phonemic Awareness Lesson
Phonemic Awareness LessonPhonemic Awareness Lesson
Phonemic Awareness LessonSerena Porter
 
Earthquakes Lesson Plan
Earthquakes Lesson PlanEarthquakes Lesson Plan
Earthquakes Lesson PlanSerena Porter
 

Plus de Serena Porter (8)

Classroom Management Plan
Classroom Management PlanClassroom Management Plan
Classroom Management Plan
 
Resume
ResumeResume
Resume
 
8 Week Curriculum Map
8 Week Curriculum Map8 Week Curriculum Map
8 Week Curriculum Map
 
Formal Poetry Lesson Plan
Formal Poetry Lesson PlanFormal Poetry Lesson Plan
Formal Poetry Lesson Plan
 
Phonemic Awareness Lesson
Phonemic Awareness LessonPhonemic Awareness Lesson
Phonemic Awareness Lesson
 
Earthquakes Lesson Plan
Earthquakes Lesson PlanEarthquakes Lesson Plan
Earthquakes Lesson Plan
 
Lesson on Movement
 Lesson on Movement Lesson on Movement
Lesson on Movement
 
Lesson on Pathways
Lesson on PathwaysLesson on Pathways
Lesson on Pathways
 

Dernier

FSB Advising Checklist - Orientation 2024
FSB Advising Checklist - Orientation 2024FSB Advising Checklist - Orientation 2024
FSB Advising Checklist - Orientation 2024Elizabeth Walsh
 
Beyond_Borders_Understanding_Anime_and_Manga_Fandom_A_Comprehensive_Audience_...
Beyond_Borders_Understanding_Anime_and_Manga_Fandom_A_Comprehensive_Audience_...Beyond_Borders_Understanding_Anime_and_Manga_Fandom_A_Comprehensive_Audience_...
Beyond_Borders_Understanding_Anime_and_Manga_Fandom_A_Comprehensive_Audience_...Pooja Bhuva
 
On National Teacher Day, meet the 2024-25 Kenan Fellows
On National Teacher Day, meet the 2024-25 Kenan FellowsOn National Teacher Day, meet the 2024-25 Kenan Fellows
On National Teacher Day, meet the 2024-25 Kenan FellowsMebane Rash
 
Towards a code of practice for AI in AT.pptx
Towards a code of practice for AI in AT.pptxTowards a code of practice for AI in AT.pptx
Towards a code of practice for AI in AT.pptxJisc
 
UGC NET Paper 1 Mathematical Reasoning & Aptitude.pdf
UGC NET Paper 1 Mathematical Reasoning & Aptitude.pdfUGC NET Paper 1 Mathematical Reasoning & Aptitude.pdf
UGC NET Paper 1 Mathematical Reasoning & Aptitude.pdfNirmal Dwivedi
 
Unit 3 Emotional Intelligence and Spiritual Intelligence.pdf
Unit 3 Emotional Intelligence and Spiritual Intelligence.pdfUnit 3 Emotional Intelligence and Spiritual Intelligence.pdf
Unit 3 Emotional Intelligence and Spiritual Intelligence.pdfDr Vijay Vishwakarma
 
Understanding Accommodations and Modifications
Understanding  Accommodations and ModificationsUnderstanding  Accommodations and Modifications
Understanding Accommodations and ModificationsMJDuyan
 
Key note speaker Neum_Admir Softic_ENG.pdf
Key note speaker Neum_Admir Softic_ENG.pdfKey note speaker Neum_Admir Softic_ENG.pdf
Key note speaker Neum_Admir Softic_ENG.pdfAdmir Softic
 
Jamworks pilot and AI at Jisc (20/03/2024)
Jamworks pilot and AI at Jisc (20/03/2024)Jamworks pilot and AI at Jisc (20/03/2024)
Jamworks pilot and AI at Jisc (20/03/2024)Jisc
 
Interdisciplinary_Insights_Data_Collection_Methods.pptx
Interdisciplinary_Insights_Data_Collection_Methods.pptxInterdisciplinary_Insights_Data_Collection_Methods.pptx
Interdisciplinary_Insights_Data_Collection_Methods.pptxPooja Bhuva
 
Sociology 101 Demonstration of Learning Exhibit
Sociology 101 Demonstration of Learning ExhibitSociology 101 Demonstration of Learning Exhibit
Sociology 101 Demonstration of Learning Exhibitjbellavia9
 
2024-NATIONAL-LEARNING-CAMP-AND-OTHER.pptx
2024-NATIONAL-LEARNING-CAMP-AND-OTHER.pptx2024-NATIONAL-LEARNING-CAMP-AND-OTHER.pptx
2024-NATIONAL-LEARNING-CAMP-AND-OTHER.pptxMaritesTamaniVerdade
 
Holdier Curriculum Vitae (April 2024).pdf
Holdier Curriculum Vitae (April 2024).pdfHoldier Curriculum Vitae (April 2024).pdf
Holdier Curriculum Vitae (April 2024).pdfagholdier
 
SKILL OF INTRODUCING THE LESSON MICRO SKILLS.pptx
SKILL OF INTRODUCING THE LESSON MICRO SKILLS.pptxSKILL OF INTRODUCING THE LESSON MICRO SKILLS.pptx
SKILL OF INTRODUCING THE LESSON MICRO SKILLS.pptxAmanpreet Kaur
 
ICT Role in 21st Century Education & its Challenges.pptx
ICT Role in 21st Century Education & its Challenges.pptxICT Role in 21st Century Education & its Challenges.pptx
ICT Role in 21st Century Education & its Challenges.pptxAreebaZafar22
 
REMIFENTANIL: An Ultra short acting opioid.pptx
REMIFENTANIL: An Ultra short acting opioid.pptxREMIFENTANIL: An Ultra short acting opioid.pptx
REMIFENTANIL: An Ultra short acting opioid.pptxDr. Ravikiran H M Gowda
 
Making communications land - Are they received and understood as intended? we...
Making communications land - Are they received and understood as intended? we...Making communications land - Are they received and understood as intended? we...
Making communications land - Are they received and understood as intended? we...Association for Project Management
 
Spellings Wk 3 English CAPS CARES Please Practise
Spellings Wk 3 English CAPS CARES Please PractiseSpellings Wk 3 English CAPS CARES Please Practise
Spellings Wk 3 English CAPS CARES Please PractiseAnaAcapella
 
HMCS Vancouver Pre-Deployment Brief - May 2024 (Web Version).pptx
HMCS Vancouver Pre-Deployment Brief - May 2024 (Web Version).pptxHMCS Vancouver Pre-Deployment Brief - May 2024 (Web Version).pptx
HMCS Vancouver Pre-Deployment Brief - May 2024 (Web Version).pptxmarlenawright1
 
How to Create and Manage Wizard in Odoo 17
How to Create and Manage Wizard in Odoo 17How to Create and Manage Wizard in Odoo 17
How to Create and Manage Wizard in Odoo 17Celine George
 

Dernier (20)

FSB Advising Checklist - Orientation 2024
FSB Advising Checklist - Orientation 2024FSB Advising Checklist - Orientation 2024
FSB Advising Checklist - Orientation 2024
 
Beyond_Borders_Understanding_Anime_and_Manga_Fandom_A_Comprehensive_Audience_...
Beyond_Borders_Understanding_Anime_and_Manga_Fandom_A_Comprehensive_Audience_...Beyond_Borders_Understanding_Anime_and_Manga_Fandom_A_Comprehensive_Audience_...
Beyond_Borders_Understanding_Anime_and_Manga_Fandom_A_Comprehensive_Audience_...
 
On National Teacher Day, meet the 2024-25 Kenan Fellows
On National Teacher Day, meet the 2024-25 Kenan FellowsOn National Teacher Day, meet the 2024-25 Kenan Fellows
On National Teacher Day, meet the 2024-25 Kenan Fellows
 
Towards a code of practice for AI in AT.pptx
Towards a code of practice for AI in AT.pptxTowards a code of practice for AI in AT.pptx
Towards a code of practice for AI in AT.pptx
 
UGC NET Paper 1 Mathematical Reasoning & Aptitude.pdf
UGC NET Paper 1 Mathematical Reasoning & Aptitude.pdfUGC NET Paper 1 Mathematical Reasoning & Aptitude.pdf
UGC NET Paper 1 Mathematical Reasoning & Aptitude.pdf
 
Unit 3 Emotional Intelligence and Spiritual Intelligence.pdf
Unit 3 Emotional Intelligence and Spiritual Intelligence.pdfUnit 3 Emotional Intelligence and Spiritual Intelligence.pdf
Unit 3 Emotional Intelligence and Spiritual Intelligence.pdf
 
Understanding Accommodations and Modifications
Understanding  Accommodations and ModificationsUnderstanding  Accommodations and Modifications
Understanding Accommodations and Modifications
 
Key note speaker Neum_Admir Softic_ENG.pdf
Key note speaker Neum_Admir Softic_ENG.pdfKey note speaker Neum_Admir Softic_ENG.pdf
Key note speaker Neum_Admir Softic_ENG.pdf
 
Jamworks pilot and AI at Jisc (20/03/2024)
Jamworks pilot and AI at Jisc (20/03/2024)Jamworks pilot and AI at Jisc (20/03/2024)
Jamworks pilot and AI at Jisc (20/03/2024)
 
Interdisciplinary_Insights_Data_Collection_Methods.pptx
Interdisciplinary_Insights_Data_Collection_Methods.pptxInterdisciplinary_Insights_Data_Collection_Methods.pptx
Interdisciplinary_Insights_Data_Collection_Methods.pptx
 
Sociology 101 Demonstration of Learning Exhibit
Sociology 101 Demonstration of Learning ExhibitSociology 101 Demonstration of Learning Exhibit
Sociology 101 Demonstration of Learning Exhibit
 
2024-NATIONAL-LEARNING-CAMP-AND-OTHER.pptx
2024-NATIONAL-LEARNING-CAMP-AND-OTHER.pptx2024-NATIONAL-LEARNING-CAMP-AND-OTHER.pptx
2024-NATIONAL-LEARNING-CAMP-AND-OTHER.pptx
 
Holdier Curriculum Vitae (April 2024).pdf
Holdier Curriculum Vitae (April 2024).pdfHoldier Curriculum Vitae (April 2024).pdf
Holdier Curriculum Vitae (April 2024).pdf
 
SKILL OF INTRODUCING THE LESSON MICRO SKILLS.pptx
SKILL OF INTRODUCING THE LESSON MICRO SKILLS.pptxSKILL OF INTRODUCING THE LESSON MICRO SKILLS.pptx
SKILL OF INTRODUCING THE LESSON MICRO SKILLS.pptx
 
ICT Role in 21st Century Education & its Challenges.pptx
ICT Role in 21st Century Education & its Challenges.pptxICT Role in 21st Century Education & its Challenges.pptx
ICT Role in 21st Century Education & its Challenges.pptx
 
REMIFENTANIL: An Ultra short acting opioid.pptx
REMIFENTANIL: An Ultra short acting opioid.pptxREMIFENTANIL: An Ultra short acting opioid.pptx
REMIFENTANIL: An Ultra short acting opioid.pptx
 
Making communications land - Are they received and understood as intended? we...
Making communications land - Are they received and understood as intended? we...Making communications land - Are they received and understood as intended? we...
Making communications land - Are they received and understood as intended? we...
 
Spellings Wk 3 English CAPS CARES Please Practise
Spellings Wk 3 English CAPS CARES Please PractiseSpellings Wk 3 English CAPS CARES Please Practise
Spellings Wk 3 English CAPS CARES Please Practise
 
HMCS Vancouver Pre-Deployment Brief - May 2024 (Web Version).pptx
HMCS Vancouver Pre-Deployment Brief - May 2024 (Web Version).pptxHMCS Vancouver Pre-Deployment Brief - May 2024 (Web Version).pptx
HMCS Vancouver Pre-Deployment Brief - May 2024 (Web Version).pptx
 
How to Create and Manage Wizard in Odoo 17
How to Create and Manage Wizard in Odoo 17How to Create and Manage Wizard in Odoo 17
How to Create and Manage Wizard in Odoo 17
 

Art Portfolio

  • 2. 2 Table of Contents Contour Line Drawings … pages 4-6 Lesson on Cubism … pages 7-10 Lesson on Origami …pages 11-16 Lesson on Parts of a Whole …pages 17-21 Lesson on Contour Line Drawing …pages 22-25 Lesson on Matisse Collages …pages 26-29 Lesson on Aesthetics …pages 30-32 Lesson on Self-Portraits …pages 33-37 Lesson on Papermaking …pages 38-40 Lesson on Textures and Sculptures …pages 41-45 Lesson on String Art …pages 46-51 Lesson on Paper Mache Masks …pages 52-59 Lesson on Watercolor Wheel …pages 60-63 Critical Writing Assignment …pages 64-67 Visualizing Science Gallery Review …pages 68-70 Pollock Biography …pages 71-73 Fieldwork Reflection …pages 74-76 High SchoolGallery Review …pages 77-79
  • 4. 4
  • 5. 5
  • 6. 6 University of Idaho Lesson Plan Name: Serena Porter and Adrianne Nuxoll Date: March 6, 2017 Subject: Art (Grades 4-5th) Topic: Cubism The big idea(s) or essential question(s): When shape is brought to students’ attention, they can become more observant about the shapes they see around them and better understand how they can bring those shapes into their art. State of Idaho and/or common core standards addressed: 4-5.VA.1.1.1 Compare and contrast specific works of art from different time periods or cultures. 4-5.VA.1.1.2 Identify specific works as belonging to a particular era in art history. Objectives (what the students will be able to do as a result of the lesson): TSWBAT The students will be able to identify the works of Pablo Picasso specifically in his period of cubism. TSWBAT The students will be able to create self-portraits using the idea of cubism and the element of shape. Materials and/or technology: Mirrors Zip-lock with geometric shapes Construction paper Glue Markers and Pencils Scissors _________________________________________________________________________________ Elements of Design: shape and line Principles of Design: emphasis and proportion Art Terms: shape, geometric shapes, biomorphic shapes, cubism Cross Curricular Application: Art history and geometry Activities/procedures (include anticipated time for each) Introduction/activator: We will be asking students to direct their attention to a painting displayed on the projector. We will ask them to talk to a partner about things that stand out to them in the oil painting. After a few minutes of discussion, we will go around the room asking for partners to share with the class the elements of the painting that stood out to them. The oil painting depicted here is The Weeping Woman by Pablo Picasso, and it was painted in 1937 during the period of cubism. Next, we will display another painting and ask students to repeat the same process, but also to notice what the differences are between the two paintings. We will again go around the room asking students to share their analyses. The oil painting depicted here is The Old Guitarist by Pablo Picasso, and it was painted in 1904 during Picasso’s blue period. Definition of Art Terms: Shape – two-dimensional, having a length and width, and can be geometric or freeform Geometric shapes – angular figures with straight edges Freeform shapes – freeform figures, biomorphic (found in nature) Cubism – works are recognized by their two-dimensional appearance using geometric angles, lines, and shapes Class activities (what you/students will do) Class activities (why you will do them)
  • 7. 7 1. We will discuss the history of cubism and Pablo Picasso’s periods with the PowerPoint as an aid. We will also be addressing shape as an element of design. 2. We will demonstrate how to use the mirrors to create features of the face that are more on the realistic side. 3. We will ask students to practice using the mirror to draw a feature of their face on a blank sheet of paper. 4. We will demonstrate how to create a self- portrait using the ideas of cubism, shape, and abstract using the white board and pre-made pieces of the portrait. 5. We will explain the requirements that their portraits must have: two eyes with eyelashes and eyebrows, a mouth, and a nose. We will also explain that the proportions do not have to be accurate, and that the placement of the parts do not have to be anatomically correct. 1. The history of Pablo Picasso helps students to understand the ideas behind cubism, and the elements of art can be depicted in most paintings but shape is very relevant in cubism. 2. This is to help students who might have a hard time pictures the features and details of their face. 3. Time for a little practice helps those students who have never drawn faces, and it gives them time to figure out the mirror. 4. This allows students to understand the process, and how they can create a self- portrait while still being abstract. 5. The guidelines are helpful for the students to see what they need to focus on, and they will be able to create abstract portraits without having to worry about them looking exactly like them. Closure/reminders We will have students display their portraits on the pin-up board, and we will encourage discussion about the elements of cubism and shape that they learned about and see among their peer’s portraits. Students will be responsible for cleanup of their area and art supplies. All critics and discussion need to be positive and provide all students with the feeling of acceptance and safety when talking about their artwork. Assessment (how you will know students met the objectives - include rubrics) Students will be assessed on their participation in the lesson, understanding of cubism and shape techniques, and class discussions both before and after the project. Accommodations/differentiation Accommodations can be made for students with visual or dexterity issues. Text can be made larger, and a printout provided. A partner can also be assigned to anyone struggling. Reflection/evaluation (after lessonis taught) I think that this lesson went really well. We modified things a little as we went along. Some students wanted to just do portraits of other people instead of themselves which we said was perfectly okay to do. We also started gathering some of the materials before the end such as the mirrors, glue, and scissors because they were finished with them, and cleaning up along the way I think made things a little less cluttered and run more smoothly. We did have a lot of chatting happening as demonstrations were being given, but I don’t think it was too bad. Everyone was able to stay on task and follow along with the instructions. The end result was a bunch of very unique portraits, and every student interpreted cubism differently which is exactly what we wanted. Overall, I think it was a time consuming but very fun art project. I think with students in fourth or fifth grade I would definitely break up the project over several days so that everyone had adequate time to finish their portraits.
  • 8. 8 Pablo Picasso “PabloPicassowasone of the greatestandmost influentialartistsof the 20th century,aswell asthe co-creatorof Cubism.” PabloPicassowasborn inMalaga, Spain,in1881, to DoñaMaria Picasso y Lopezand Don José RuizBlascohe.Hisfatherwasan art teacherand painter.Whenhe was12, he had mastereddrawingskillstaughtinthe art academieshe didn’tletthe factthat he was a relativelypoorstudent slowhimdown.Whenhe was13, hisskill level wasgreaterthanhis fathers.PicassohashisfirstexhibitioninBarcelonaata café.He ended up goingto Paristo openhisownstudioandwhile inParishe viewedfor the firsttime,the workof the Impressionistsandbeganpaintinglike them. In 1902, Picassobeganto develophisownpersonal style andthislead himto hisBlue Period,paintingmelancholy(sorrowful,depressed) themes.Late in1904, Picassobegantopaintin warmercolors,beginning whatis calledhisRose Period.  Picassosufferedthe lossof abestfriend, CarlosCasagemas,hispaintingsweren’tselling,he was nearstarving,and sobecause of hisdepression,he begantopaintwithbluesandgreensandin a differentstyle.Hisworkshowedhisfeelingsandemotions.In1903, duringhisBlue period,he createdfamouspaintings,“Blue Nude,”“LaVie,”andthe “OldGuitarist”.  DuringPicasso’sRose Period,he startedusingwarmercolorsof beiges,pinks,andreds.He had overcome hisdepressionperiodandhadfalleninlove withabeautiful ladywhowasamodel , Fernande Oliver. In 1907, he begana style of art that distortedformandsimplifiedandabstractedthe subjects.Thisis where cubismcame intoplace.Thisiswhere objectsare brokenapart,geometricshapes,andthere isa collage effectorfeel. “Cubismshocked,appalledandfascinatedthe artworld.” WhenWorldWar I occurredPicasso’sart changedthemesagain.Itbecame more somberandmore aboutrealityagain.There were manyperiodsfollowingthistime aswell.He continuedwithhiswork until hislateryears.Itwas saidthat hisart work wouldbe whatkepthimalive.He endeduppassing whenhe was91 yearsoldon April 8,1973 inMougins,France. “Picassohas saidto be one of the mostcelebratedandinfluential paintersof the 20th century. Picassoalsoremainsrenownedforswitchingbetweenstylessooften and differentthathislife'sworkseemstobe the productof five orsix great artists rather thanjustone.” Biography.comEditors."PabloPicasso." Biography.com.A&ENetworksTelevision, 10 Dec. 2015. Web.06 Mar. 2017.
  • 9. 9
  • 10. 10 This was the example that Adrianne and I put together during the demonstration. These are a couple of the students’ final portraits.
  • 11. 11 University of Idaho Lesson Plan Name: Hannah KesslerandBrookSprenger Date: March 2nd , 2017 Subject: 3-5 grade Art Topic: Origami The big idea(s) oressential question(s): Origami isJapanese traditionartform.Thislessonfostersamulticultural environmentandpromotes simplifiedstep-by-stepinstruction. State of Idaho and/or CommonCore standards addressed: 4-5.V A.2.1.3 Use appropriate artsvocabularyto discussa varietyof art works. 4-5.V A.2.1.5 Identifyelements(line,shape,form, value,texture,color,space) inartworksand environments. 4-5.V A.1.1.2 Identifyspecificworksasbelongingtoa particularerain art history. 4-5.V A.1.1.3 Explainhowa specificworkof art reflectseventsinhistoryand/orculture. Objectives (what the students will be able to do as a result of the lesson): TSWBAT: Define the wordorigami andunderstandthe historybehindorigami. TSWBAT: Foldorigami squaresintofiguresthroughpicture andexplicitinstruction. Materialsand/or Technology: Origami paper,PowerPoint,Instructionsforfolds,History,andGame Pieces. ElementsofDesign: shape,form PrinciplesofDesign:pattern,proportion Art Terms: Origami,crease,symmetry,triangle,square Cross Curricular Application:Art history,geometry Activities/Procedures: Introduction/activator: We will introduce origamibyreadingashorthistoryand showingthe studentsimportantorigami works.We will have aPowerPointwithpictures.Thenwe will leadagame (time permitting)withartdefinitions.Each studentwill be giveneitheraterm or a definitionandit ishisor her jobto match the termwiththe definition. DefinitionofArt Terms: Origami- The Japanese artof foldingpaperintodecorative figures.The wordorigami originatesfromwords ori andkami. Ori- To fold. Kami- Paper Triangle- A three sidedpolygon. Square- A quadrilateral withfourcongruentsides. Crease- A line ora ridge producedbyfoldingorpressing. Symmetry- The qualityof beingmade upof exactlysimilarpartsfacingeachotheraroundan axis. Class Activities(whatyou/studentswill do): 1. Studentswill be givenasheetof origami paperand a set of instructionsforhow to folda crane. Class Activities(whyyou will do them): 1. Origami encourageshandsonlearning throughsequence patterns.
  • 12. 12 2. Thisactivitywill be completedasa whole group,withthe teachersgivingstep-by-step instructionthatcorrelate withthe instructionsonthe providedinstruction sheet. 3. For independentactivity,studentswill be givena newpiece of origami paperto complete adifferentfigure.Studentswillbe giventhe choice betweenajumpingfrog, Japanese Hinadolls,ora wigglingdinosaur. 2. The crane is one of the firstfoldstaughtto childrenbecause of itssimplicityand popularity. 3. Allowsstudentstopractice the artof folding, while usingtheirowncreativestylesand interpretations. Closure/Reminders: Studentswill take afewminutestodoa gallerywalk.Eachstudentwill critiqueone of the figures,bywriting a positive commentonastickynote.Afterthe gallerywalkisfinished,eachstudentwill make theirwayback to theirchairand put awayany extramaterials. Assessment(howyou will know studentsmet the objectives - include rubrics): Studentswill be assessedbytheirparticipationinthe lesson.Eachstudentmustcomplete apapercrane and one otherorigami figure of theirchoosing.We will informallyassessunderstandingbyaskingquestionsand monitoringtheirabilitytofollow the directionsprovided. Accommodations/differentiation: For studentswhocannotfollowastep-by-stepwrittenprocedure,we will provide aneasierfold(3-4folds) and we will one onone assistthem.
  • 13. 13 History of Origami The actual origin of Origami is unknown, however paper was first invented in China. The folding technique was then introduced into Japan from Buddhist monks3. The introduction of paper making to Japan several hundred years later coincided with the development of their religion and soon became part of the lives of the people2. The earliest known traditions of paper folding in Japan were of ceremonial origin1. Such as the Japanese noshi, which is white paper folded with a strip of dried abalone or dried meat. This was first recorded during the Muromachi Period. Origami was originally used only for religious purposes due to the high cost of paper1. Many Origami instructions were passed down orally3. The oldest known written document about Japanese origami, the Senbazuru Orikata, surfaced in 17973. The practice is most extensive in Japan, so Japan is credited with developing Origami into fine art1. One of the most famous origami designs is the Japanese crane. Legend says that anyone who folds one thousand paper cranes will have their hearts desire come true. Many Japanese prepare a garland of one thousand paper cranes when a family member or friend is ill, as a form of prayer for their recovery. A famous story has turned the origami crane into a symbol of peace1. In 1955, a twelve year old Japanese girl named Sadako Sasaki, who had been exposed to the radiation of the atomic bombing in Hiroshima as an infant, was dying of leukemia1. She decided to fold one thousand cranes in hopes of becoming cure. When she realized she would not survive, she wished instead for world peace and an end to suffering. Sadako folded more then 1300 cranes before her death and was buried with a wreath of one thousand cranes to honor her dreams. Her friends created a statue in her honor at Hiroshima Peace Park.
  • 14. 14 1New World Encyclopedia http://www.newworldencyclopedia.org/entry/Origami 2Origami with Rachel Katz http://origamiwithrachelkatz.com/origami/origami.php 3History of Origami http://www.origami-instructions.com/history-of-origami.html
  • 15. 15
  • 16. 16 These were three of the origami figures that I created.
  • 17. 17 Art Lesson Plan Name: Acadia Babin Date: March 9, 2017 Discipline: Art Topic: Parts of a Whole The big idea(s) or essential understanding(s): The students will understand why details are important. State of Idaho Standards K.VA.2.2.5 Show respect for personal work and works of others. K.VA.3.1.4 Demonstrate skills of observation in the production of artwork. K.VA.3.2.3 Replicate or imitate an existing work, respecting the intent of its original creator. Domain 1: Visual Arts Domain 2: Visual Arts Objectives (What the students will be able to do as a result of the lesson): TSWBAT The students will be able to each recreate a grid of the “starry night”. TSWBAT The students will be able to identify a part of a whole painting. Materials: A Replication of a famous piece of art. (Starry night) Cut into equal pieces for all of the students Paints Brushes Pencils Room arrangement/seating guidelines/plan for entering room, etc: Children should be seated with enough room so that their elbows were not touching anyone else, and they could share water and possibly paints. Precautions/Discipline rules (ex. Safety considerations for responses to literature):
  • 18. 18 The paint may be a distraction to some students. Make sure that the students are doing what is necessary. Be sure that the students are not painting each other, flinging paint, using fingers or hands, or getting paint on clothes. Sequencing/Steps (include anticipated time) 1. Anticipatory Set (attention, review or motivation) We will be presenting a powerpoint to go over some basic facts before we start the rest of the lesson. 2. Purpose/Objective (stated to the students) Today we are going to see if everyone can create a whole picture working together. We are going to do this by each person getting one grid of a whole painting. Each student will do their best to do their own imitation of the painting. When we are finished, we will put it together and see what picture it looks like. 3. Plan Information/Modeling: (LIST in Bullet form)  Check for Understanding (Make sure everyone understands what was taught and/or directions)  Guided Practice (Teacher available for guidance as students work on project or paper/how to manage proximity)  We will model the different types of strokes we can make with a brush.  The guided practice will be the students imitating their grid of the whole “Starry Night”. Assessment (a way of proving that student learning is taking place – how will you measure learning?) I will do this by walking around observing the students. At the end, this will be assessed through positive criticism of their peers. Independent Practice (usually homework or teacher not needed to continue) Adaptations and Accommodations (for special needs) For students who need more help, we will be walking around for assistance. We will work together and show how to hold
  • 19. 19 a paint brush and discuss the colors and texture of the painting. REFLECTION 1. Did the students meet the objective(s)? They did it much better than I even thought they could. 2. What types of re-teaching is needed for unsuccessful students? Showing students how to apply less water and more paint and how to copy the artwork from their copy to the page needed to be done with less successful students. 3. What went well? The students put together the end result, and it went much better than I thought that it would go. Everyone was able to see where each painting part belonged a part of the whole. 4. What would I change next time? I think next time I would have the students put their name on the back of their paper before they started painting. CONNECTIONS TO TEXTS Herberholz, Donald W., and Barbara J. Herberholz. Artworks for elementary teachers: developing artistic and perceptual awareness. Boston, MA: McGraw-Hill, 2002. Print. Student artifact(s)/ product(s)/ evidence:
  • 20. 20 Acadia Babin Dr. Sally Machlis EDCI 325 23 Mar. 2017 Van Gogh and Part of a Whole Vincent Van Gogh started devotedly painting in the last 10 years of his life. During his life, he only sold one painting for $80. He was born in Holland in 1853. He was a post-impressionistic artist. He was a pastor in Belgium until he was dismissed. He stayed in Belgium where he stayed to study art. His early works are considered to be somber, sharp, and a specific color to it. In 1886 he moved to Paris, and he tried to copy the impressionists that he had become friends with. To do this, he traded his dark colors for lighter colors and used shorter brush strokes. He did not enjoy this type of work though, so in 1888 he went insane and was committed for a couple years. He was let out in 1890, and he died soon after. This lack of fame during his life made his artwork that much more appealing. His paintings were so texturized that some think that he may have squeezed paint directly onto canvas which helped create depth and texture. He used balance with his strong colors and mix of textures. Most of the paintings that he created have two colors in common. This is because two of his favorite colors were blue and yellow. Yellow was thought to represent warmth, love, and friendship. He uses balance and unity with the colors he uses- usually blues and yellows. The colors he uses attach a strong feeling to the audience. Vincent Van Gogh used impasto painting. This is a word used in Italy to mean, “paste” or “mixture.” This is a technique where “paint is laid on so thickly that the texture of brush strokes or palette knife is clearly visible”. His paintings were known to be bold and dramatic and hold heavy amounts of emotion. It shows a great amount of movement. While Actual Texture refers to the physical or real surface qualities we can notice by touching art, Visual Texture gives the illusion of real texture on a 2D surface. By dividing a piece of his artwork into different graphs, it makes it easier to see the impasto that Van Gogh used in “Starry Night” and his other works.
  • 21. 21 Works Cited Herberholz, Donald W., and Barbara J. Herberholz. Artworks for elementary teachers: developing artistic and perceptual awareness. Boston, MA: McGraw-Hill, 2002. Print. Impact, The Net. "Vincent van Gogh Gallery." Vincent van Gogh Gallery. N.p., n.d. Web. 26 Mar. 2017. This was the class photo of the final product, and my individual contribution was the painting in the bottom right hand corner.
  • 22. 22 University of Idaho Lesson Plan Name: SallyGravesMachlis Date: Spring16 Subject: 1-4 grade Art Topic: ContourLine Drawing The big idea(s) oressential question(s): With specificinstruction,everyone canimprove theirhandeye coordinationandpowersof observationand learnto draw. State of Idaho and/or common core standards addressed: 4-5.VA.1.1.2 Identify specificworksasbelongingtoaparticularera inart history. 4-5.VA.3.1.3 Applythe elementsof shape,line,value,form, texture,andspace inartwork. Objectives(whatthe studentswill be able to do as a resultof the lesson): TSWBAT Identifythe artworkof JohnJamesAudubon TSWBAT Understandthe techniquesof contourline drawingandimprove theirobservationand drawingskills Materialsand/or technology: Imagesof drawingsbyJohnJamesAudubon,demonstrationpaper,popcorn,#2pencilsandwhite drawing paper9X11 ElementsofDesign: line,shape,space,texture PrinciplesofDesign:proportion Art Terms: outline, contourline,blindcontourline Cross Curricular Application:Art history,scientificobservation,coordinationinsports Activities/procedures (include anticipated time for each): Introduction/activator: Drawingisone of the most basictoolsinthe fieldof visual art. Introduce the artistJohnJamesAudubonand hisapproach to scientificobservationanddocumentationthroughdrawingandpainting.Show examplesof hisworkincludinghismistakesandexplainhow he improvedwithyearsof practice. There are manytypesof drawing but thislessonfocusesoncontourline drawingbecause 1.Itis easyto learn,2. It isverysimilartothe wayelementarystudentsdraw,3.It isa technique thatimproveshand-eye coordinationandstudent’sperceptual skills,and4.It can be usedinexpressive andcreative ways. DefinitionofArt Terms: Contourline drawing- linesthatdelineatethe edgesof formsare calledcontourlines.Contourline follows the artist’seye as itperceivesthe edgesof the form.Itdoesnotinclude shadingortexture unlessitcanbe perceivedasaseparate form.
  • 23. 23 Class activities(what you/studentswill do): 1. Studentswill be givendrawingpaperand pencil andpopcorn. 2. The teacherdemonstratesthe technique of blindcontourdrawingthatinvolves followingthe contoursof the objectwiththe eye andnot lookingatthe paper. 3. Afterdrawing5 blindcontourdrawingsof popcorn,the studentscanbeginto lookat theirpaperand draw5 more. 4. Olderstudentscanmove to a more difficult subjectlike crumpledpaper,handsorshoes. Youngerstudentscanuse theirimagination to turn theirpopcornexercisesinto imaginarycreatures. Class activities(whyyou will do them): 1. Popcornis easyto draw and isa good beginningsubject 2. Thishelpsteachstudentshow toreallysee and translate the 3-D worldontoa 2-D piece of paper. 3. Thisallowsthe studentstotry to learna new skill andunderstandthatthe processismore importantthanthe product. 4. It isimportantto allow youngerstudentsto use theirimaginationandnotfocustoo long on skill buildingandprovideolderstudents the nextstepinimprovingtheirskills. Closure/reminders: Studentswill be responsibleforclean-upof theirareaandart supplies. Youngerstudentswill enjoysharing theirimaginarycreatures.Olderstudentscandiscusshow eachpiece of popcornlooksdifferentbecause theywere drawingwhattheyreallysee notaniconfrom memoryof whattheythinka piece of popcorn lookslike.All critiquesanddiscussionsneedtobe positiveandprovide all studentswiththe feelingof acceptance and safetywhentalkingabouttheirartwork Assessment(howyou will know studentsmet the objectives - include rubrics): Studentswill be assessedontheirparticipationinthe lesson,understandingof contourline drawing techniquesand classdiscussionsbothbefore andafterthe project. Accommodations/differentiation: Accommodationsmaybe made fora studentwithvisual ordexterityissues.The lessonisshort,focusedand shouldholdthe attentionof moststudents.
  • 24. 24 John JamesAudubon (1785 – 1851) wasa famousFrench-Americanornithologist,naturalistand artist(painter).He isbestknownforhisdocumentedillustrationsof NorthAmericanbirdsintheir natural habitats1 . Audubonworkedinamuseumasa taxidermistandnaturalist. He paintedandsoldportraitsand gave art lessonswhilstpursuinghisambitiontosurpassAlexanderWilson’sornithologicalwork.His familyfollowedhimtoLouisiana,where he hunted,studiedanddrew birds.Hiswife workedasa governessandtrainedteachertosupportthe family. In 1820, Audubonconceivedthe ideaof publishingacollectionof paintingsof NorthAmerican birds.He calledthisfuture project“Birdsof America”(1826-1838). Hisambitionwasto paintone page a day.He hiredhunterswhogatheredspecimenforhim. Unable to findanAmericanpublisher,AudubonwenttoEnglandandScotlandinthe 1826. His picturescreateda sensation,andhe published“Birdsof America.Thiswasa workof 87 parts continuing 435 life-sized,handcoloredengravingmade fromhiswatercolors. Audubonreturnedtothe UnitedStatesin1839, and publishedAmericaneditionsof hisbird paintings.Later,he workedwithjohnBackmanon“The ViviparousQuadrupedsof NorthAmerica” (1824-1854). Audubonmade hislastcollectingtripalongthe Missouri Riverin1843. Fewmenof his age enjoyedthe travel of Audubon.He spentdaysandweeksinthe woods studyingbirdsandanimals;andhisspectaculardrawingwhichwere criticizedbysome,were sceneshe actuallywitnessed.He travelledtoParistosell hisbookandneveracceptedanofferfora single print, alwaysinsistingthe bookbe soldintact.Thisisone reasonhisprintsare so rare today. AudubonSocietyNationalisone of the oldestandlargestnational conservationorganizationsin the world.It wasfoundedin1905, andnamedfor the Americanbirdsartistandnaturalist,JohnJames Audubon.2 1 Wikipedia the free encyclopedia. http://en.wikipedia.org/wiki/John_James_Audubon 1/20/14 10:20pm 2 National Audubon Society. http://www.audubon.org/john-james-audubon 1/20/14 10:05p
  • 26. 26 University of Idaho Lesson Plan Name: Sally Graves Machlis Date: Spring 2015 Subject: Cut paper Collage Grade: 2nd – 3rd Goal: Students will study positive and negative shapes and apply what they learn in cut paper collages similar to Henry matisse’s paper collages. State of Idaho and/or common core Standard 2: Critical thinking 2-3. V. A. 2. 1. 1 Use art vocabulary to discuss specific works of art. 2-3. V. A. 2. 1. 2 Identify the elements (line, shape, color, space) Standards 3: Performance 2-3. V. A. 3. 1. 1 Acquire and use skills necessary for applying art techniques, media and process. 2-3. V. A. 3. 1. 2 Demonstrate safe and proper use, care and storage of media materials and other equipment. 2-3. V. A. 3. 1. 3 Apply the elements of line, shapes,color, space in artwork. Elements ofDesign:line, shape, color, space Principles ofDesign:pattern,repetition, variety Art Terms: positive and negative space,geometric and organic shapes,collage Cross Curricular Application: history and geometry Aesthetic Scanning/Art History Time: 10 minutes Overheads: Paintings: green-Stripe; Open Window, Rings of PassionJoy: Dance(11); Matisse making his cut outs, Creole Dancer,The Horse,the Rider and the Clown, Henri Matisse: Sticker Art Shapes Teacher’s Materials:Visual aids, construction paper, scissors, glue, example Student Materials: 9’’X 12’’ contruction paper, contruction paper scraes,scissors,glue, pencils, various textural material (optional). Activity: After a discussion of Matisse’s collage cut outs, teacher demosntrates cutting positive and negative shapes. Teacher shows how both can be utilized in a collage design. Teacher shows students completed example(optional) Each student receives one 9’’X12’’piece of paper and select severalsmaller scraps. Students cut out organic and geometric shapesand glue both the negative and the positive spaces on their background papers. Students clean up their area by replacing ‘‘useable’’ construction papers/scraps in appropriate box, put glue Production: 40 minutes Objectives (what the students will be able to do as a result of the lesson): Students learn to identify positive and negative space,geometric and organic shapes. Students learn to create a collage. Management/Safety Tips: Students will know how to properly use scissors and scissors away,clean-up table top.
  • 27. 27 Evaluation: 10 minutes Students will hang their collages up on the wall across from the library. Students will gather to critique their collages. Students will respond to the following questions: 1. Did you use positive and negative shapes? 2. Did you use geometric and organic shapes? 3. Have you created repetition, variety and pattern in your collage? 4. If you used texture, how and why did you use it?
  • 28. 28 Henri Matisse Henri Matisse was born in France in 1869 to working class parents and studied to become a lawyer. He began to paint when his mother brought him art supplies during the period of convalescence from an attack of appendicitis in 1889. He said later, “From the moment I held the box of colors in my hands, I knew this was my life. I threw myself into it like a beast that plunges towards the thing it loves.” Matisse’s mother was the first to advise her son not to adhere to the “rules” of art, but rather listen to his own emotions. His drastic change of profession deeply disappointed his father since he was a trained lawyer. Matisse was considered the leader of the Fauvism movement, which literally means “wild beasts” because of the use bright colors, distortion and brush strokes. He eliminated unnecessary details and used color for emotional expression. Matisse began using cut out paper as his primary medium in his last few years of life. When cutting paper, Matisse would cut out directly from colored sheets of paper. He would never draw out his shapes as he believed that part of the effect was lost when lines were drawn and then painted. He would spend days and weeks rearranging the shapes until he was satisfied and would then glue the shapes down.
  • 30. 30 University of Idaho LessonPlan Understanding Aesthetics Date: 2016 Grade: 4-8 Topic: Art and Design The Big Idea: To help students learn how aesthetic judgments are made State of Idaho/Common Core State Standards and how they relate: Standard 1: Historical and Cultural Contexts
 1.1: Discuss the historical and cultural contexts of the visual arts. VA.1.1.3 Explain how a specific work of art reflects events in history and/or culture. 1.2: Discuss the interconnections between visual arts and societies. VA.1.2.2 Describe how elements of various arts depict ideas and emotions. Standards 2: Critical Thinking V A.2.1.1 Identify and respond to characteristics and content of various visual art forms. Use art vocabulary to discuss specific works of art. V. A. 2. 1. 2 Identify the elements (line, shape, color, space) Objectives: (what the students will be able to do as a result of the lesson) TSWBAT: Learn the definition and characteristics of aesthetics TSWBAT: Use art vocabulary to develop an educated aesthetic argument Diversity goals: (select at least one and expand on how the lesson relates) • Developing cultural consciousness o This lesson allows students to explore a wide range of art and culture. This will diversify their view of what art can be and what it can say. Materials and/or Technology needed:  Collection of similar objects that can be aesthetically assessed such as shoes, hats, lunch boxes or dolls)  A list of specific aesthetic points of view  General supplies for making awards Activities/Procedures: (include anticipated time for each) Introduction/Activator: Introduce the history and value of museums and art collections. Why to we value certain arts and cultural artifacts? Who decides what is included in a museum? Define aesthetics as educated judgments about the experience, impact, meaning and value of art. Class activities: (what you/students will do): Class activities: (why you will do them)
  • 31. 31  Display a group of objects to be assessed such as 15 different shoes. They should vary is materials, style, color, size, etc. but of course all have the same function.  Arrange students in working groups of 4- 6 students---one group needs to be the museum curators  Give students the list of aesthetic points of view and ask them to choose one shoe and develop an argument why their shoe should be included in the “Great Shoe Museum. ”  Students present their argument to the museum curators in any creative form they wish. It could be a song, Poem, story, rap song, performance, or illustrated argument.  The museum curators/judges will retire to make the awards for the most compelling argument, most creative, most convincing, etc.  This will introduce the students to the concept that the same object can be created and designed in many different styles appealing to different people.  The aesthetic points of view will expand students’ knowledge of how art can be judged.  Working together is a valuable student experience in terms of collaboration. Creating an aesthetic argument allows them to think more deeply about the concept of aesthetic judgment.  The judges will provide feedback on the student presentations and what arguments they felt were most convincing. Closure/Reminders:  Discuss the merits of the different presentations and recap the understanding of what makes an aesthetic judgment. Assessment: (how you will know students met the objectives - include rubrics)  After the activity is finished, students will discuss using these questions: o Do you have a better understanding of how aesthetic decisions are made in the current art world? And how they were made in the past? o Do you have a greater understanding of the wide range of beliefs about what is beautiful or valuable? o Do you understand the definition of aesthetics? Accommodations/Differentiation:  Everyone can participate in some way in the group discussions and presentations
  • 32. 32 There were no pieces ofart to photograph for this lesson. Aesthetic Points of View: You believe art should be environmentally responsible and enlightening. You believe art should make people think. You believe art should be realistic and always look like something from the real world. You believe art should be beautiful, something people like to look at. You believe art should be made by hand from traditional materials You believe that art should contribute to our understanding of history and society You believe that art should always express feelings such as joy, sorrow, anger or humor. You believe art should demonstrate exceptional technical skill. You believe art should have a special message or story about how to be a better person. You believe that art has to be original or unique-something we have never seem before.
  • 33. 33 University of Idaho Lesson Plan Name: SallyGravesMachlis Date: Fall 2016 Subject: 1-4 grade Art Topic: Self Portraits The big idea(s) oressential question(s): Withspecificinstruction,everyone canimprove theirhandeye coordination,powers of observationand learnto drawa self-portraitbyusingguidesformeasuringcorrectproportions. State of Idaho and/or common core standards addressed: _________ Identifyspecificworksasbelongingtoaparticularera inart history. _________ Applythe elementsof shape,line,form, texture,andbalance inartwork. Objectives(whatthe studentswill be able to do as a resultof the lesson): TSWBAT Identifythe artworkof artiststhat usedportraiture invariousgenres,show historical contextof portraiture TSWBAT Studentswill learnbasichumanfacial proportionsanddraw a self-portrait Materialsand/or technology: Imagesof portraitpainting,demonstrationpaper,mirrors,#2pencils,rulersandwhite drawingpaper9X11 Elementsof Design: line,andvalue PrinciplesofDesign:proportionandbalance Art Terms: outline,proportion,organizational line Cross Curricular Application:Art history,scientificobservation,mathematical proportions(fractions) Activities/procedures (include anticipated time for each): Introduction/activator: Portraiture hasa longtraditioninart history.Introduce some artiststhatcreatedportraitsor self-portraits and discussthe relevance of documentationthroughportraitpaintinginhistory.Show printedorprojected imagesof portraiture anddiscussthe historical context. There are manytypeswaysto draw correctproportions;thismethodisa goodapproach formost students. 1. It is easyto learn,2. It showselementarystudentshow dividing aspace and planningcanbenefittheir drawing3. It isa technique thatimproveshand-eye coordinationandstudent’sperceptual skills,and4.It can be usedinexpressiveandcreative ways. DefinitionofArt Terms: Contourline drawing- linesthatdelineatethe edgesof formsare calledcontourlines.Contourline follows the artist’seye as itperceivesthe edgesof the form.Itdoesnotinclude shadingortexture unlessitcanbe perceivedasaseparate form. Organizational Line-marksmade asameans of providingaworkingframeworkforadrawing;organizational linesare usedtotake measurementof the object,itspartsandsurroundings.
  • 34. 34 Proportion- the correctiondepictionof the all the partsrelatedtoeachotherin a shape/formwithina realisticpaintingordrawing Value-referstothe lightnessordarkness(shading) Balance-placementof variouselementsinawork of art inrelationtoeachother through theirorganization and positioning. Class activities(what you/studentswill do): 1. Variousprintsof portraitswill be handed out andthe classwill discusswhyportraits were originallypainted. 2. Instructorwill demonstrate onthe boardthe basicproportionsof a face.Studentswill be givena handoutof facial proportionsif you believeitwill be of furtherassistanceduring the drawingprocess. 3. Studentswill be given,drawingpaper, pencilsandmirrorsandwill begintheir drawingwitha basic“egg” shape.Instructor will demonstratehowtolightlysketch organizational linestocreate proportion guidesforeyes,nose andmouth. 4. Studentsfurtherrefinethe face shape by directlyobservingtheirownface shape as reflectedinthe mirror.Theywill alsorefine the shape of theireyesandmouth.The mouthis bestdrawnif the line betweenthe lipsisdrawnfirst. 5. Afterall the facial featuresare drawn, studentsshouldadddirectionallinesfor hair.Remindstudentstoaddthe neck.The neckis usuallywiderthanoriginallythought; it shouldline upunderthe jawline. 6. For uppergrade students,gointoadding shading.Lookat the darkestareas of the face.Usuallythe closestareasare lighterin value andthe deeperareasare darker in value.Strongdrawingshave avarietyof values.Darkvs.lightvaluesina drawing provide contrast.Rootsof hair are usually dark, as isthe areas behindthe ears(hair). Addas many detailsasdesiredforarealistic appearance. Class activities(whyyou will do them): 1. Self Portraitsare funto draw andis a good beginningsubject. 2. Thishelpsteachstudentshow torender correct proportions. 3. Thischallengesstudentstolearnanewskill and to understandhow certaintechniques can aide inthe processof creatingan accurate drawing/portrait. 4. It isimportantto allow youngerstudentsto use theirimaginationabitandmake mistakesalongthe way.Forolderstudentsit isimportantto focuson patience andskill building. Closure/reminders: Studentswill be responsibleforclean-upof theirareaandart supplies.Studentswill enjoyseeinghowusing proportionguide andorganizationallinewillimprovetheirself-portraits.All critiquesanddiscussionsneedto be positive andprovide all studentswiththe feelingof acceptance andsafetywhentalkingabouttheir artwork
  • 35. 35 Assessment(howyou will know studentsmet the objectives - include rubrics): Studentswill be assessedontheirparticipationinthe lesson,understandingproportional drawing techniques andclassdiscussionsbothbefore andafterthe project. Accommodations/differentiation: Accommodationsmaybe made fora studentwithvisual ordexterityissues.The lessonisshort,focusedand shouldholdthe attentionof moststudents.
  • 36. 36
  • 38. 38
  • 39. 39
  • 40. 40 Hannah Kesslerand I made two pieces of paper. The whole class made severalbeautiful pieces of paper.
  • 41. 41 University of Idaho Art Lesson Plan Name Macie Bakken and Brianna Reasoner Date 3/2/17 Subject 1-3 Art Topic Texture The big idea With specific instruction, everyone can understand the importance of texture in art pieces as well as the world that surrounds us. State of Idaho/common core standard K.VA.3.1.3Applythe elementsof color,shape,andline in artwork. K.VA.3.2.2Applyartisticconcepts,knowledge,andskillstooriginal artwork. K.VA.3.3.1Experimentwithdifferentmaterials,techniques,andprocessesinthe visual arts. Objectives TSWBAT The students will be able to point out the different types of texture. TSWBAT The students will be able to understand the purpose of texture and apply it. Materials Clay, pointed wooden sticks, texture tools, #2 pencil, and a 9x11 piece of paper, projector, images of texture  Elements of Design: texture, sculpture  Principles of Design: Texture  Art Terms: texture, Implied texture  Cross Curricular Application: Art History, Scientific Observation(wildlife) Activities/procedures
  • 42. 42 Introduction/activator (5 minutes) Close your eyes, You wake up in the morning, toss back the crisp cotton sheets. Your bare feet move across the polished wood floor. You get into the shower and feel the warm water spalsh against your skin, the soap slide over your arms. You wrap yourself in a soft terry towel. Your clothes provide you with a whole array of textures: silky, starched, velvety, coarse, elastic. Breakfast provides even more: fluffy scrambled eggs, crisp bacon, melted butter dripping off crunchy toast. You look out the window, and even though you can't touch it, you can see the layers of texture in the leaves of the old oak tree and its gnarly bark, the multicolored aging brick on the building across the street, the gleaming polished surface of a car. Imagine the world without texture. Definition of Art Terms:  Texture- The quality of a two or three dimensional surface: how it feels or looks in a piece of art.  Implied Texture- “Implied texture in artwork contains the illusion of actual textures. Like other implied formal elements it represents a material or object in the physical world. Implied texture is used to allow the viewer to enter into the scenario that the artist has created. It can also be used to give the viewer information about the object that is represented.” Class activities (20-25 minutes) 1. Students will get out a piece of paper and pencil and go on an art walk around the classroom and write down 5 items with texture. 2. The teacher will show examples of items and sculptures that use texture. 3. After drawing the item(s) the students will describe the texture. 4. Next it’s the students turn to think of an animal with a texture they like. 5. After students have an animal in mind they will receive clay and have access to tools and will be allowed Class activities 1. Different items around the classroom are easy to draw and giving the students the opportunity to pick the items they are drawing shows individuality and provides different perspectives. 2. This helps students understand the concept of texture and how it truly looks like when demonstrated in a 2D artwork or in a sculpture. 3. This will allow the students to show their understanding of texture and how they think it applies to a specific object in their surroundings. 4. This allows children to think of animals that they see every day or their favorite animal and think about what kinds of texture is shown through that animal.
  • 43. 43 to create their textured animal. 6. Older students will be given access to different texture tools for safety reasons and given more clay for bigger sculptures; maybe be encouraged to create the texture of a large subject. 5. This allows children to have a first- hand experience of how to apply texture and be able to physically show what they feel it would look like on their own animal; giving the freedom of choice is another great point. 6. It is important to give younger children the ability to use their imagination and give them tools for them to easily apply to their clay. It is also important to give older children the opportunity to challenge themselves and use more complex tools to help them apply more technique to their sculpture. Closure/reminders (2minutes) . Students will be responsible for clean-up of their workspace and put away art supplies. If time permits, children can get up and walk around to look at the different animals their classmates created with texture for children older and younger. Any and all comments about students art work must be positive and support must be given to all students so they feel their artwork has been appreciated and recognized. Assessment (10-15 minutes) Students will be assessed on their participation in the lesson, understanding of texture techniques, and their final clay structures. Accommodations/differentiation Accommodations will be made for students who are ELLs or have a visual or auditory issue. The lesson is more hands-on and should hold the students’ focus for a majority of the time.
  • 44. 44
  • 45. 45 These were my two texture sculptures – a jellyfish and a turtle.
  • 46. 46
  • 47. 47
  • 48. 48
  • 49. 49
  • 50. 50
  • 51. 51 This is my product of string art after following the pattern on the back side of the paper.
  • 52. 52
  • 53. 53
  • 54. 54
  • 55. 55
  • 56. 56
  • 57. 57
  • 58. 58
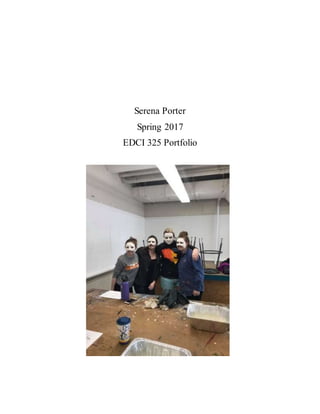
  • 59. 59 These are a few of the masks that students in the class did, but I was not there to decorate a mask. I made one which can be seenin the picture on the cover of my portfolio.
  • 60. 60
  • 61. 61
  • 62. 62
  • 63. 63 This is a color wheel that Hannah Kesslerdid, and she let me borrow this picture because I was gone this day.
  • 64. 64 Serena Porter EDCI 325 01 Feb. 2017 The Value in Teaching Visual Arts As a student learning to become a highly qualified educator, I want to understand the purpose of everything I am teaching to children; especially, what the value is in teaching visual arts. There are huge nationwide pushes to focus education on the STEM subjects, but research is showing that we need to have more visual arts and humanities integrated back into the curriculum so that children are getting a more well-rounded education. Not every student learns the same way, and integrating visual arts into our core STEM subjects can help those students who are more kinetic and visual learners to tackle their subjects in a way they can better understand. Visual arts can be beneficial in a variety of ways physiologically, psychologically, emotionally, and socially for students and individuals. According to an article written and published by the National Art Education Association called Learning in a Visual Age, the visual arts can be a source of aesthetic experience, a source of human understanding, a way to think more fluidly and creatively, and a way for students to understand and better appreciate the arts. They go on to say that there are many mental benefits from teaching students the visual arts because they learn practical mental skills that are not taught in other subjects such as observing, envisioning, innovating, and reflecting. These skills become habit through art classes, and they then become habitual in other subjects that the students are studying. This creates a body of students who are more intelligent and have a greater understanding of their studies. “In addition to developing students’ intellectual capabilities, visual arts instruction also helps develop young people’s sense of civic engagement” (pg. 5).
  • 65. 65 When students can start to imagine worlds unlike their own, they can join society wanting to make changes towards creating a world worth living in. There are many perspectives that can be understood and developed through the teaching of visual arts (Eisner 2013). Understanding that the world can be seen differently through everyone’s eyes, allows students to engage in social justice issues with greater empathy and consideration. Not only are the visual arts benefitting students’ knowledge capabilities and building their social skills, but also the visual arts are helping children to say what they do not know how to express yet with words. In a short article written by Elliot Eisner called 10 Lessons the Arts Teach, he says that the arts can help children to express feelings that they do not have words, and that when they are asked to explore these feeling they must reach into their “poetic capacities” (pg. 1) to find the words they are looking for. This strengthens children’s abilities to better manage their emotions whether it be excitement, or stress, or anger etc. The health benefits that come from children being able to sort through their stress and emotions are huge. Children can stay more alert in the classroom, participate in activities, have a better appetite, and get more sleep when they are not as stressed out or overwhelmed with emotions that they do not know how to express. This overall theory that teaching the visual arts can be beneficial is convincing enough, but I have seen it in action in my practicum experience. I was given the opportunity to aid with art hour in a first grade classroom at Lena Whitmore Elementary. What I observed every time that I went to my practicum was that the students in this particular first grade classroom were full of emotions that were so compacted that they were always just one comment away from an emotional breakdown. I would help the teacher through the rocky math hour and recess with constant behavior interventions, and then when it came to art, it was like an entirely different set of children had walked into the classroom. The students were so excited and engaged each week
  • 66. 66 when my mentor teacher would introduce their new art lesson. It helped that my mentor teacher was thrilled about art herself, and she understood how important art became to her students. Sometimes art was the only outlet that day that some of her students would get. One afternoon, the art project was one that I did not think was going to go as well as it did. She asked the students to pick any color of construction paper that they would like and draw lines on the paper that represented how they felt. She gave examples of a happy feeling by drawing swirls on bright yellow paper and of a sad feeling by drawing straight dark lines on a blue paper. Her instructions were to pick two feelings (which she wrote out a bunch of on the board) and express them in lines and with color. As they all drew their lines and wrote the feelings on the back of the paper, she played classical music as she always did during art class. The students were being quiet and were enthralled by their pieces. When I returned the following week, I read the feelings that students were expressing, and I was incredibly distraught. The students who were usually needing the most supervision and intervention were the ones who picked angry and sad as emotions that they were feeling. A black sheet of paper with one white circle in the middle caught my eye in particular. The feeling expressed was lonely. It was then that I realized that these kids just needed a way to let go of some of the emotions that they had tightly bottled up, and that their teacher had provided them with that opportunity by teaching visual arts. While I think the visual arts provide great ways to explore core subjects, I think that the emotional benefits of the arts are enough for me to want to teach the visual arts not just as an integrated method of teaching but as a core subject. Learning should be student centered, and what is more student centered than giving your students the opportunity to communicate through art when they do not yet have the tools to manage how they are feeling.
  • 67. 67 References Eisner, Elliot. "Ten Lessons the Arts Teach." National Art Education Association. p.1, 2013. Web. 1 Feb. 2017. "Learning in a Visual Age - The Critical Importance of Visual Arts Education." National Art Education Association. p.1-20, 2016. Web. 1 Feb. 2017.
  • 68. 68 Serena Porter EDCI 325 07 Mar. 2017 Prichard Art Gallery Review The Prichard Art Gallery hosted an art exhibit from the University of Idaho called Visualizing Science. The exhibit will be on display from February 10th, 2017 to April 15th, 2017. This exhibit displayed the works of scientists and artists who collaborated to create artworks in a multitude of mediums ranging from paintings to metalworks to digital graphs and fabrics that allowed for a better understanding of various aspects of science. There were seven scientists and eight artists which created seven teams of creative minds who explored science through visual arts. The artists and scientists who contributed to this exhibit are Nishiki Sugawara-Beda and James Foster, Val Carter and Craig McGowan, Delphine Keim, Sally Graves Machlis, and Sanford Eigenbrode, Mike Sonnichsen and Jennifer Johnson-Leung, Greg Turner-Rahman and Holly Wichman, J. Casey Doyle and Bryn Martin, and Stacy Isenbarger and Penelope Morgan. The first person listed in each of the teams is the artist who collaborated with a scientist, the second person listed in each of the teams, to help the public visualize science. One of the works that caught my eye was the work of J. Casey Doyle and Bryn Martin called Nebulous. Bryn Martin is a scientist who studies the nerves in the human eye. J. Casey Doyle works with ceramics, and together they created this art piece that was a display of the retinal nerves using clay. The art piece started with an eye, and then the retinal nerves were sliced as they would be seen on an MRI and laid out piece by piece behind the eye. There was not any color other than the grey color that clay originates in, but color was not necessary to understand the science they were trying to emphasis. The length and complexity of these nerves
  • 69. 69 were most obviously the emphasis of this work, and I think they did a great job in helping the viewer to visualize these nerves. This artist/scientist team created a piece that was quite tangible like many of the other teams who contributed to the exhibit. Having tangible science is very important for developing an understanding of complex ideas, especially, for those who are not of logical and analytical intelligence but one of the other eight of Gardner’s multiple intelligences. Not all the art pieces at the exhibit were tangible though. My favorite piece of work in the exhibition was Hyperelliptic Threshold Noise by Mike Sonnichsen and Jennifer Johnson. This piece was a field of polynomial equations that were plotted and made visual. The visual was broken down into three frames with each frame under a black light that emphasized the colors and patterns displayed among the many equations that were plotted on this field. While this piece wasn’t tangible like most the rest of the exhibition, it was still insightful, and it helped me to visualized the plotting of polynomial equations. Before this, I would have had no image come to mind when asked to think about equations that weren’t something I specifically knew like the equation for a circle or a parabola, etc. While the media used (printmaking) isn’t itself a tangible media like that of a ceramic retinal nerve, the polynomial equations became tangible through the plotting. On the plaque attributing credit to the artist and scientist of this piece there was a great statement that expands my explanation, “These prints deploy layers of color on the abstract void of a black background, bringing numerical plots into tangible form.” This piece was my favorite because it most closely related to my emphasis, mathematics, and it gave me insight on how to connect math to science and the arts. The humanities can give us different perspectives of science along with giving us the ability to visualize and manipulate science. The visual arts can help a variety of learners to better
  • 70. 70 understand difficult concepts. I think that this exhibit was interesting because of the collaboration that happened between a multitude of fields. I would love to see something like this with more fields so that more people could understand how the visual arts coincide with other fields that are considered more dominant by education such as language arts. Overall, it was a great learning experience because I had never been to an art exhibition or even an art show before going to the Prichard Art Gallery.
  • 71. 71 Serena Porter EDCI 325 09 April 2017 Jackson Pollock Biography Jackson Pollock was a painter during the abstract expressionist movement. Pollock’s life was not very long as he died at the age of 44 years old in 1956 from an alcohol- related car accident. He struggled with alcohol most of his life, and he was frequently regarded as an angry drunk. However, he could express his pain and anger in his life through his paintings, and he became very influential during this particular art movement. After his death, numerous exhibition went up in his honor portraying many of his life works. In his younger years, Pollock married a painter by the name of Lee Krasner. Soon after, he found a technique of painting that he loved, and he worked on it until it was perfect. This technique is how people identify his paintings today. His technique was inspired by using household paints and materials which was not common practice by other artists of this time. Pollock also did not use an easel and pallet like many other painters, he would out his canvases on the floor. The painting utensils he would use were not your typical paint brush either; he would use hardened brushes, sticks, and basting syringes to apply paint to the canvas. Pollock called his technique the “drip” method as he would drip household paint over the canvas never touching the applicator to the canvas. This technique makes the element of texture most prominent when you look at them. You can feel the texture with your eyes before even noticing
  • 72. 72 that the paint has not been spread by a brush but rather left in its blots and dribbles. One of his famous works of art is a painting he called Autumn Rhythm. He created this work in the fall of 1950. The painting is very abstract, and there is no representational picture. Jackson Pollock remarked, “I’m very representational some of the time, and a little all of the time. But when you’re working out of your unconscious, figures are bound emerge. Painting is a state of being. Painting is self-discovery. Every good artist paints what he is.” Autumn Rhythm may have meant something to Pollock, but today it is studied because of its elements of lines and movement. Pollock physically moved the canvas frequently as he worked making sure every inch of the whole canvas was just as meaningful as the next. His movement made the lines appear as though they are moving in the painting. While there was intention when he painted, he was always painting with spontaneity even as he painted in front of crowds. His paintings were not planned, but he claimed that there was never an accident and all his lines are intentional. Another one of his paintings that gave him much novelty and fame was Reflection of the Big Dipper. This painting was one that he layered paints on the canvas, and then, he dripped enamel as the final coat over it. This is one of his more representational paintings; however, it is still very abstract. Many of his paintings, including Reflection of the Big Dipper and Autumn Rhythm were displayed in exhibits. Because of his technique, he became a very influential American painter, and many of his paintings are still being displayed in art exhibits and museums. Autumn Rhythm, 1950 Reflection of the Big Dipper, 1947
  • 73. 73 Bibliography "Biography of Jackson Pollock." Jackson Pollock' Biography. N.p., 2011. Web. 11 Apr. 2017. <http://www.jackson-pollock.org/biography.jsp>. "Jackson Pollock: The Artist." National Gallery of Art. N.p., 2017. Web. 11 Apr. 2017. <https://www.nga.gov/feature/pollock/artist15a.shtm>.
  • 74. 74 Serena Porter EDCI 325 30 April 2017 Practicum Reflection – Art My practicum placement this semester was in Mrs. Horne’s second grade classroom at McDonald Elementary. While I was in the classroom, I did not witness any art projects or art history. This was because they only had art scheduled once a week, and it was on Friday afternoons. I was there Wednesday mornings, so I always helped with reading and writing workshops. However, there were many art projects that the school collaborated on. When you walk into the elementary school, you can see many examples of their collaborative artwork. One wall is covered in all of these tiles that compose two dinosaurs – a blue one and a green one. When looking at them from a little bit of a distance, you can see that the dinosaurs are made up of all of these tiles that have been painted. However, when you get closer, you can see that each tile has been painted by individual students with different pictures on them. Some students even painted their names on them which is such a cool way of making the school a more integrated and collaborative community. Another one of their schoolwide art projects was an art piece comprised of these braided beads. There were tons of individual bands of braided beads that were multiple colors and different patterns. Each student made their own strand of braided beads, and then, they put them all together. They created this very colorful and large beaded work of art that each student got to contribute to which is displayed in the hallway on the way to their cafeteria/gym. While the school focuses on decorating their hall with student work and school wide art, the classroom I was working in was not so focused on students doing art.
  • 75. 75 The once a week the students would do art there were not frequently art lessons done by the teacher. Mrs. Horne usually brought in other people to teach the art lessons such as local artists, parents that dabbled in art, and practicum students. On one of Mrs. Horne’s filing cabinets was a list of art supplies that she had so that anyone who came into her class would know what kind of materials would be available to them. Unfortunately, that list was very small and mostly consisted of construction paper, water colors, and oil pastels. I do not know if this limited list was due to a lack of funding or if it was just not a strong belief of the teacher to teach more art than the standards required. I do like that she was able to bring so many people into her classroom because that provides the students with different perspectives and potentially experts in the field of art. However, it seemed that she was not doing it to provide a well-rounded experience for students but rather she did not have great comfort in teaching art herself. As most teachers are required to, Mrs. Horne did display the objectives of the day in each subject up on the board. One week, the art objective was to learn about lines and shapes. There was a guest who came in and taught the students about the elements of lines and shapes in art, and the final student products were these pieces of computer paper that they split into four squares. They had a drawing in each of the four squares, and then they colored their illustrations. I was responsible for gluing “the art” onto construction paper the following week so that we could display them in the hallway. The students always got to illustrate the writing in class multiple times a week, and I struggled to see the difference between what they did in writing and what they called an art project that displayed the students’ understanding of lines and shape in art. Overall, I think that there is general improvements that needs to be made to the art curriculum and opportunities that are provided in that classroom. I do not know how other
  • 76. 76 classrooms in that school operated in regards to art, but there were various art projects displayed in the hallways from different classrooms. Hopefully, there are other classrooms that are supporting art a little more than the second grade class I was in this semester.
  • 77. 77 Serena Porter EDCI 325 02 May 2017 Exhibit Paper 2 – Visualizing Science For the 26th annual Idaho high school art exhibition, Ridenbaugh Hall at the University of Idaho hosted a gallery of a variety of high school artworks. The theme chosen this year was Visualizing Science, and one of the only rules for the contestants was that the art had to be two- dimensional so as to not put any schools at a disadvantage if their art budgets could not support students and their artwork ideas. The first-place prize was a $1000 scholarship to the University of Idaho. There were entries from high schools all over the state, and the skill level presented was a huge range as well. None of the submissions were rejected, and all the art was displayed for viewers in Ridenbaugh Hall on the University’s campus. While the theme was the same at this gallery as the Prichard Gallery’s exhibit Visualizing Science, there was a huge difference in these two galleries. The majority of the difference does lie in the fact that the exhibition at the Prichard gallery was constructed by scientists and professional artists, but difference also lies in perspective. The way these two exhibits portrayed science was widely different. The high school students interpreted the theme in a variety of ways ranging from exploring human anatomy to astronomy all the way to environmental impacts that the world is experiencing. This theme allowed students to see how art can be integrated into their other core subjects, and how they can express complex scientific ideas in visual art. The interpretation of the theme was not the only thing that differed amongst schools and individual students but also the media used in this gallery of works varied greatly. While the guidelines limited the students to two-dimensional submissions, they were not limited on the
  • 78. 78 media they could use to create their two-dimensional works of art. Many students sketched and used colored pencils or markers, but others used photography, paint, graphic design, stippling, chalk, thread, and newspaper to add special elements to their work. There were so many submissions, perspectives, and medias that it was difficult to pick my favorite. As far as a whole school’s submission, I think that Post Falls High School had the best submissions overall. Each of the students visualized science differently, and there were many medias used to create their pieces. They also had quite a few submissions, and so many of them were of high quality. They were attention catching and very visually appealing. This school was also the school that provided the 1st place winner submission which was by student Savannah Thorny. She had a beautiful piece that was so detailed that it looked as though the lion, skull, and heart were pulled from real life. She brought so many elements into her piece such as perspective, color, and lines that made her piece stand out. The corners of the work had the appearance of being burned, and there were just layers of content. I was not at all surprised that her work received a first-place ribbon; however, I was taken back by how much talent this student could portray in just this one piece. Overall, I was really impressed with all of the submissions. This gallery was just portraying some of the artist talent of Idaho’s high school students. Exhibitions like these really allow schools to see the importance of visual art programs in their schools and just how talented their students can be when given the opportunities to be creative and explore new concepts in different manners than traditional teaching offers. It was easy to see some of the budget restraints that schools had by some of the art submissions, but to me, that just means that the students at those schools were all the more talented by working with what they were limited to and still creating impressive works of art. I am very interested to see what theme the students get next
  • 79. 79 year, and how they are going to interpret it.