

Recommandé
Contenu connexe
Tendances
Tendances (20)
En vedette
En vedette (20)
Similaire à Photography
Similaire à Photography (20)
Dernier
Dernier (20)
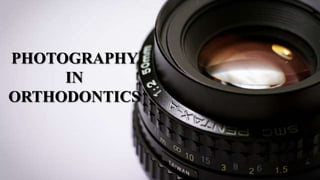
Photography
- 2. CONTENTS • INTRODUCTION • EVOLUTION OF PHOTOGRAPHY • HISTORY OF PHOTOGRAPHY IN ORTHODONTICS • IMPORTANCE OF PHOTOGRAPHY IN ORTHODONTICS • ALL ABOUT DIGITAL PHOTOGRAPHY • CAMERA EXPOSURE • DIGITAL PHOTOGRAPHY (CLINICAL SCENARIO) • PHOTOGRAPHY LIGHTINGS • PHOTOGRAPHY AREA/SETUP • SOFTWARES USED IN CLINICAL PHOTGRAPHY • CONCLUSION
- 3. • It is often stated that Photography is the magic by which light is transformed in colour, space and time • The three facets of the visual experience: colour : a three dimensional entity consisting of hue, value,chroma space : defines the depth, transparency, size, shape/form and texture time : indicates movement, flicker, sparkle (vitality), fluctuation and glitter
- 4. Photographs are an essential part of clinical documentation. Current ‘the best practice’ is a full set of extra and intra-oral photographs, both at the start and completion of orthodontic treatment and ideally, some mid-treatment photographs showing key-stages in treatment. Jonathan Sandler and Alison Murray Journal of Orthodontics, Vol. 28, No. 3, 197-202, September 2001
- 6. Camera obscura an image of a scene at the other side of a screen is projected through a small hole in that screen as a reversed and inverted image on a surface opposite to the opening.
- 7. Joseph Niépce (1822) • the inventor of photography and a pioneer in that field. • developed heliography, a technique he used to create the world's oldest surviving product of a photographic process.
- 8. Louis-Jaques-Mandé Daguerre (1837) • daguerreotypy Title pages of Daguerre's 1839 manual, published soon after Arago's lecture to meet the intense public demand for more information about the photography.
- 9. Hercules Florence silver-salt-based paper process(1832) Photographie
- 10. William Henry Fox Talbot salted paper and calotype processes photography pioneer The Pencil of Nature
- 11. George Eastman(1885) Marketed the first flexible roll film.
- 12. Color Photography Autochrome, the first commercially successful color process, was introduced by the Lumière brothers in 1907.
- 13. Digital Photography the first consumer camera (1981) digital single lens reflex camera (1991)
- 14. Digital imaging is a highly manipulative medium. It permits different communicative potentials and applications.
- 15. HISTORY OF PHOTOGRAPHY IN ORTHODONTICS
- 16. The history of dentistry and photography began in 1840 First dental school was opened world's first photographic gallery was opened
- 17. Dr. Edward Angle (Father of Orthodontics) was first known orthodontist to photograph his patients as part of his diagnostic workup
- 18. 1960’s to 1970’s A limitation of 35mm film based photography became clear. Invention of INSTANT film cameras. • while not the quality of 35mm film, offered the ability to take a photograph and see results within a couple of minutes. Film was processed inside the camera. Lester Dine modified and affixed lenses and a flash creating the dental world’s first instant photographic system
- 19. 1980’s the most important invention in dentistry - DIGITAL PHOTOGRAPHY Digital photography combines the best of all the three of the previous photographic concepts: the quality of 35mm film the speed of instant photography the computerized integration of video
- 20. Why go digital in orthodontics?
- 21. • No waiting time • Ability to enhance images • Can see images immediately • Allows immediate retakes • Can make exact duplicates • Images can be easily stored • Can be instantly forwarded or transmitted to patients, labs, colleagues etc • Cost effective
- 24. Why take orthodontic photographic records?
- 25. Case records (photo documentation) Complement other orthodontic records Important clinical and legal role From a diagnostic point of view Case presentations to study clubs and other groups
- 26. Academic research Training of staff and students Publications Patient education Presurical planning, and post operative analysis
- 29. 0-255
- 31. CCD allows to view photographs on the spot, eliminating film and development costs, image manipulation and editing capabilites. Digital Photography in Orthodontics; Journal of Orthodontics/Vol. 28/2001/197–201
- 32. 1990s – typical CCD would comprise 640x480 pixels 1999 – first ‘Mega-pixel’ cameras ( over 1,000,000 pixels per image)
- 33. The conventional 35mm slide is thought to contain the equivalent of 20-30 million pixels of information.
- 34. Prosumer cameras • Image preview facility • Problems – – point flash(built-in) : shadows on most images – Not powerful enough to allow the photos to be taken on very small aperture (f32) – Live display on LCD is inaccurate and are very power hungry – Focusing system is problematic – Macro settings also sometimes gives disappointing results Digital Photography in Orthodontics; Journal of Orthodontics/Vol. 28/2001/197–201
- 37. Parts of a typical digital camera
- 39. • Standard lens a camera lens giving a field of view similar to that of the naked eye.
- 41. • Wide angle lens wide-angle lens refers to a lens whose focal length is substantially smaller than the focal length of a normal lens.
- 43. • Telephoto lens Telephoto lenses are especially handy when you can’t get physically close to your subject
- 45. • Macro lens A macro lens is one which allows you to take sharp, detailed, close-up photos of small subject
- 47. • Fisheye lens A fisheye lens is an ultra wide-angle lens that produces strong visual distortion intended to create a wide panoramic image
- 49. APS-C sensor • Advanced Photo System type-C (APS-C) is an image sensor format • APS-C variants are considerably smaller than 35 mm standard film. • Because of this, devices with APS-C sensors are known as "cropped frame"
- 50. CCD • CCD image sensor is an analog device ( passive-pixel sensor) • CCDs is a more mature technology • Prone to Blooming effect CMOS • CMOS imaging chip is a type of Active pixel sensor made using CMOS semiconductor process • CMOS has fever components, use less power, provide faster readouts • CMOS sensors are less expensive to manufacture • Can combine the image sensor function and image processing functions within the same integrated circuit
- 51. CROP FACTOR • Most digital camera sensors are smaller than film, so any image you see from those cameras is created from a smaller area than film • If a photo is made with the same lens, but a smaller sensor, it shows a smaller area. • The smaller sensor is cropping the len’s image compared to a 35mm film frame
- 52. • JPG/JPEG (joint photographic experts group) most common file format used in digital photography less compression=less data thrown away=larger file size • RAW actual data taken directly from a digital camera’s image sensor unprocessed image, purest image file possible need specific software • TIFF (tagged image file format) larger size, good quality photographs can be compressed and uncompressed IMAGE FORMATS
- 53. Camera Exposure
- 54. • Determines how light or dark an image will appear when it's been captured by your camera • Determined by just three camera settings: aperture ISO Exposure triangle shutter speed
- 56. Shutter speed • Length of time during which the shutter is open • Expressed as a fraction of a second (.. 1/60 , 1/125 , 1/200, .. , 1/500..) • 1/4000 is a faster shutter speed • Faster shutter speed freeze the action • Good photography requires a balance between shutter speed and aperture
- 57. Shutter Speed Typical Examples 1 - 30+ seconds Specialty night and low-light photos on a tripod 2 - 1/2 second To add a silky look to flowing water Landscape photos on a tripod for enhanced depth of field 1/2 to 1/30 second To add motion blur to the background of a moving subject Carefully taken hand-held photos with stabilization 1/50 - 1/100 second Typical hand-held photos without substantial zoom 1/250 - 1/500 second To freeze everyday sports/action subject movement Hand-held photos with substantial zoom (telephoto lens) 1/1000 - 1/4000 second To freeze extremely fast, up-close subject motion
- 59. Aperture setting • The opening that controls the amount of light entering the lens. • Aperture size is measured in “f-numbers”. • Every time the f-stop value halves, the light-collecting area quadruples.
- 61. Depth of field • A camera's aperture setting is what determines a photo's depth of field • the range of distance over which objects appear in sharp focus. Wide Aperture f/2.0 - low f-stop number shallow depth of field Narrow Aperture f/16 - high f-stop number large depth of field
- 64. ISO SPEED • The ISO speed determines how sensitive the camera is to incoming light. • A lower ISO speed is almost always desirable, since higher ISO speeds dramatically increase image noise.
- 66. Two main types of digital cameras • Point & Shoot Advantages: - small and lightweight - lower cost Disadvantages: - not upgradeable - inconsistent magnification Recent Photography Trends in Orthodontics, TurkJOrthod.2016
- 67. Advantages: - highest image quality - upgradeable - various lighting options Disadvantages: - heavy - expensive • DSLR CAMERA
- 68. • An DSLR allows manual focus and can accommodate a variety of lenses • Virtually any digital SLR can produce excellent photographs. • Satisfactory depth of field + good illumination = high quality intra-oral photos
- 69. The lens needed for dental photography is a Macro lens with a focal length of 85-105mm
- 70. Recommended camera settings • Digital cameras automatically calculate exposures • To take the best possible shot, however, you may need to control the settings manually • Shutter speed – 1/125 • ISO – 100 • Mode – M • Aperture for Extra-oral – f-8 to f-11 • Aperture for intra oral – f-32 • Aperture for mirror view – f-19 to f-16 Digital dental photograph;British Dental Journal 207, 63 - 69 (2009)
- 71. Exposure Mode: “M” Manual or “Av” Aperture Priority (Usually set on the dial on top of the camera) Flash Mode: ETTL This is an automatic mode that works well for beginners. Advanced users may choose to experiment with manual flash exposure settings.
- 72. Focus Mode: “MF” Manual Focus Not to be confused with the exposure mode set above. This prevents the autofocus from changing the magnification setting. Focus will be achieved by moving the camera. This may initially seem more complex, but the mouth is generally too dark for autofocus to work properly.
- 73. Bister et al, Ten current digital single lens reflex (SLR) cameras were tested for use in intra- and extra-oral photography as used in orthodontics. • Canon350D Canon20D Fujifilm S3Pro Konica -Minolta7D • Nikon D100 Nikon D70 NikonD50 Olympus E1 • Olympus E300 Pentax DS No camera took acceptable images in factory default settings
- 74. over exposure, aperture and flash adjustment needed, good color fidelity over exposure, once adjusted, were able to take intra- and extra-oral photographs without the need to change settings poor DOF and aperture adjustment needed . largest and brightest viewfinders Nikon and Fujifilm Olympus Canon, Konica-Minolta and Pentax Konica-Minolta and Pentax Comparison of 10 digital SLR cameras for orthodontic photography; Journal of Orthodontics, Vol. 33, 2006, 223–230
- 75. Photography lighting There was one huge road block to taking dental pictures. There was no clear way to get light from the camera’s flash inside the dark cavern that is the mouth 1952
- 76. • Universal flash system for general macro photography • A circular flash that attached to the end of the camera’s lens • Ability to pinpoint light directly into patient’s mouth • Providing full illumination from external anterior to posterior intra- oral quadrant pictures
- 77. To improve portrait photography, an additional flash called a “point light” was added to the ring flash system Two distinct flashes - Ring for intra oral - Point for facials
- 78. Point flash • Single strobe-light source mounted on one side of the camera lens • Flash can be moved around the lens to provide directional lighting from different angles • Placed at 12, 9 , and 3 o’clock position for frontal, right lateral and left lateral views respectively • Requires considerable experience and additional setup time before each exposure
- 79. Twin flash
- 80. LED flash
- 81. Armamentarium A
- 82. Cheek retractors • Larger end of the large retractors are used • Assistant should hold both retractors pulling them both laterally, and forward • By pulling the lips forwards, towards the photographer it makes it easier for the patient to bite together in occlusion and pulls the soft tissue away from the teeth For anterior intra-oral shots
- 83. • Use the smaller end of the larger retractor on the side of interest • The photographer should hold it themselves and pull it an extra 4-5mm both distally and away from the teeth to ensure at least the distal of first molar is captured • The assistant passively holds the large end of the larger retractor on the opposite side For the Buccal intra-oral shots
- 84. Mirrors • Long-handled, front-silvered, glass mirrors are ideal • Long handles are held by the photographer to allow complete control of the picture and keep assistants fingers out of the shot.
- 86. • reflection from the glass surface occurs when the silvering is on the back surface • Prior to taking photographs the mirror should be either be warmed to prevent misting of the mirror when it is inserted into the patient’s mouth, or the patient should be instructed to hold their breath for 10 seconds or so • During occlusal photography light is never reflected 100% and there is a tendency to be slightly underexposed.
- 88. What images to take
- 91. With the teeth in maximal intercuspation and the lips closed
- 92. Dynamic smile
- 93. Close-up image of the natural smile
- 94. OBLIQUE VIEW (THREE-FOURTH , 45º) At rest
- 95. At smile
- 96. Close-up smile
- 98. At smile
- 99. Anterior view
- 101. Buccal view
- 102. Occlusal mirror view
- 103. Positioning the camera • The distance from the camera to subject will be determined by the focal length of the lens • Best way to standardize facial portraits is to keep focal length of the lens same ( ideally 100mm or 105mm) and maintain consistent subject-to- camera distance • A line from the middle of the lens to the eye is parallel to the horizontal plane. If the camera is too high, the head will appear to have a forward tilt; if the camera is too low, the head will seem to tilt backward. • Focus on the patient’s lower eyelid
- 104. Gage et al, To compare the facial morphometric analysis using CBCT volumetric rendering and digital photography 3-D CBCT derived images were more accurate than 2-D photometric analysis when measuring upper and lower lip lengths in frontal view. Clinicians of different training backgrounds show higher consistency and accuracy in measuring the lower facial third from the frontal aspect with 3-D CBCT derived images than with 2-Dphotographs. Comparison of facial morphometric analysis using CBCT volumetric rendering and digital photography; JOral Maxillofac Surg Med Pathol (2015)
- 105. Photography area
- 106. • A dedicated photography room can be as small as about 13x20 ft, with a 13ft ceiling • Enough space between the patient and the background • White background - painted flat wall free of distractions - custom-sized, motorized, light blocking shade or a white roll-up screen • Sunlight from a window should be shaded • light can be diffused with either a Soft box or an Umbrella light
- 107. • Key light – used to highlight the form and dimension of the subject • Fill light – may be used to reduce the contrast of a scene and provide some illumination for the areas of the image that are in shadow • Fill flash – a photographic technique used to brighten the deep shadow areas, particularly in backlit subjects • Back light – the process of illuminating the subject from the back
- 109. Dolphin imaging featuring 3D • Helps visualization and analysis of craniofacial anatomy from data produced by cone beam computed tomography(CBCT), MRI, medical CT and 3D facial camera systems • Features tools for onscreen manipulation and analysis of volumetric datasets • Measurements and digitization can be performed in both 3D and traditional 2D
- 110. • 3D image capturing system for facial profile • 3D system – Photomodeler • Photomodeler system measurements can be used to assess linear distances and angles • Adobe Photoshop CS6 • Adobe Photoshop lightroom 4 -Image editing , organizing and sharing
- 111. Sandler et al, To assess the quality of photographs taken by orthodontists to see whether those taken by orthodontic auxiliaries and clinical photographers are of comparable quality. Extraoral photographs showed no significant differences between the 3 groups. The results for intraoral photographs showed that, orthodontists produced significantly more good-quality intraoral photographs. Quality of clinical photographs taken by orthodontists, professional photographers, and orthodontic auxiliaries; Am J Orthod Dentofacial Orthop 2009;135:657-62
- 112. Conclusion Clinical photography has been greatly improved with the advent of digital cameras, especially digital SLRs. To obtain high-quality, consistent photographs, the orthodontist must select an SLR that meets clinical requirements. It provides a diagnostic information that is easily recognized and understood by both professionals and laypersons In order to get the full diagnostic value out of digital photography, a systematic method and regimentation of clinical images must be adopted
- 113. References • Eder, J.M (1945) [1932]. History of Photography, 4th. Edition • Comparison of 10 digital SLR cameras for orthodontic photography; Journal of Orthodontics, Vol. 33, 2006, 223–230 • Digital dental photograph;British Dental Journal 207, 63 - 69 (2009) • Quality of clinical photographs taken by orthodontists, professional photographers, and orthodontic auxiliaries; Am J Orthod Dentofacial Orthop 2009;135:657-62 • Jonathan Sandler and Alison Murray Journal of Orthodontics, Vol. 28, No. 3, 197-202, September 2001 • How to avoid common errors in clinical photography; Journal of Orthodontics, Vol. 32, 2005, 43–54
Notes de l'éditeur
- Hue: the common distinction between colors positioned around a color wheel (which is, strictly, aHue wheel) Value: the quality lightness or darkness. That is, black is a dark value or low value. White is a light value or high value. Chroma: the quality of a color's purity, intensity or saturation.
- The term "camera obscura" also refers to constructions or devices that make use of the principle within a box, tent or room. Camerae obscurae with a lens in the opening have been used since the second half of the 16th century
- was the first publicly announced photographic process, and for nearly twenty years, it was the one most commonly used. he essential elements—a silver-plated surface sensitized by iodine vapor, developed by mercury vapor, and "fixed" with hot saturated salt water—were in place in 1837.
- n Brazil, Hercules Florence had apparently started working out a silver-salt-based paper process in 1832, later naming it Photographie.
- Photography pioneer who invented the salted paper and calotype processes, precursors to photographic processes of the later 19th and 20th centuries The Pencil of Nature---uses to which photography could be put
- The first flexible photographic roll film was marketed by George Eastman in 1885, but this original "film" was actually a coating on a paper base. As part of the processing, the image-bearing layer was stripped from the paper and transferred to a hardened gelatin support. The first transparent plastic roll film followed in 1889. It was made from highly flammable nitrocellulose ("celluloid"), now usually called "nitrate film".
- Autochrome plates were one of several varieties of additive color screen plates and films
- The history of dentistry and photography began in 1840 when the first dental school was opened, and the world's first photographic gallery was opened and operated by a dentist turned photographer--Alexander Wolcott . Since that time, photography and dentistry have been partners as photography has become an integral part of a patient's record and treatment plan. The specialty of orthodontics has led the way in this model of recording patient data.
- Doctor could take photographs, but they couldn’t review those photographs until the film was developed
- Cost effective- no buying film, processing no worries about where to store the hard copy of the photos.
- When you press the button to take a photograph with a digital camera, an aperture opens at the front of the camera and light streams in through the lens. So far, it's just the same as a film camera. From this point on, however, everything is different. There is no film in a digital camera. Instead, there is a piece of electronic equipment that captures the incoming light rays and turns them into electrical signals. This light detector is a charge-coupled device (CCD) In a digital camera Light from the thing you are photographing zooms into the camera lens. This incoming "picture" hits the image sensor chip, which breaks it up into millions of pixels. The sensor measures the color and brightness of each pixel and stores it as a number. Your digital photograph is effectively an enormously long string of numbers describing the exact details of each pixel it contains.
- Soft-tissue patterns during the treatment pl stage. Assess lip morphology and tonicity, the sm and smile esthetics from various angles. Assess the degree of incisal show upon sn For purposes of research and publication, lecturing and teaching presentations. and t Growing importance of the need for such r'
- Digital images are made up of picture elements (‘pixels’) comprising red, green, and blue light, each set at a level between 0 and 255. If all three colours are set at 255 white is the result, while if all are set at zero, black results . There are 256 grey shades that result from all three colours being set at the same number. Varying the level of each of the three colours results in the gamut of 16·7 million colours.
- e Charged Couple device (CCD). This is made up of pixels, the number of which, combined with the degree of compression, determines the quality of the final output.
- Problems were cost of developing and processing films, time required for processing and physical storage of all the patient slides or prints
- Bridge camera Falls in midrange price bracket and lies between the consumer camera and the professional models Host of useful features ( macro-zoom lens, high image quality) Image preview facility (LCD)
- Camera body and components are relatively expensive…….Higher end cameras can be very heavy and therefore difficult to hold with one hand Numerous interchangeable lens of the same manufacturer and 3rd party lens which are compatible…………Flash provides TTL metering Pictures can be taken at manual focus (for macro photography)…………..Limit switch on the lens allows the same magnification to be set for all intra-oral photos…………..Images are stored on a storage card………..Rapid turn-around………….Checkable exposure accuracy
- with a focal length approximately equal to the diagonal of the negative (taken as 50 mm for a 35 mm camera),
- 50mm, 35mm, 30mm All lenses have an “mm” number printed on them somewhere. The short definition of mm is “focal length,” which is measured in millimeters. Some lenses have a range of focal lengths, such as 18mm to 55mm, while others have a single, “fixed” focal length. We call variable focal length lenses “zoom” lenses, because you can “zoom” in or out to get closer to a subject or further away. Fixed focal length lenses are called “prime.” Prime lenses have only one mm designation for a simple reason: they don’t zoom. If you want to get closer or further from your subject with a prime lens, you have to use your feet.
- he lens itself has to be wider in order to capture enough light to make an exposure. So the peripheral vision of a wide angle lens is broader, which means it “sees” more of what is in a scene. That means wide angle lenses are very well suited to any type of photography where your goal is to photograph something t 24mm
- he lens itself has to be wider in order to capture enough light to make an exposure. So the peripheral vision of a wide angle lens is broader, which means it “sees” more of what is in a scene. That means wide angle lenses are very well suited to any type of photography where your goal is to photograph something t 24mm
- 120-300mm
- the image sensor format is the shape and size of the image sensor. The quality of the image from an APS-C sensor is higher when compared to a smaller sensor due to its larger size which allows it to collect more light. However, compared to a full-frame camera, image quality is lower, particularly at high ISO values (shooting with little light).
- Digital cameras have become extremely common as the prices have come down. One of the drivers behind the falling prices has been the introduction of CMOS image sensors. CMOS sensors are much less expensive to manufacture than CCD sensors. Both CCD (charge-coupled device) and CMOS (complementary metal-oxide semiconductor) image sensors start at the same point -- they have to convert light into electrons CCD sensors have been mass produced for a longer period of time, so they are more mature. They tend to have higher quality and more pixels….. The AFE is considered key to low-noise, high-resolution images. There is a limit to how much charge each pixel or photosite can store. If there is too much charge for one photosite it will overflow to its neighbouring pixel causing an effect which is called blooming or streaking. Manufacturers try to eliminate this effect by “anti-blooming gates” which can be compared to vertical drainage channels running beside each row of photosites. These allow the overflowing charge to flow away without affecting surrounding pixels.
- The outer, red box displays what a 24×36 mm sensor would see, the inner, blue box displays what a 15×23 mm sensor would see. (The actual image circle of most lenses designed for 35 mm SLR format would extend further beyond the red box than shown in the above image.) The crop factor is sometimes referred to as "magnification factor",[4] "focal length factor" or "focal length multiplier
- A camera's shutter determines when the camera sensor will be open or closed to incoming light from the camera lens. The shutter speed specifically refers to how long this light is permitted to enter the camera.
- Every time the f-stop value halves, the light-collecting area quadruples
- Increasing the aperture size reduces the depth of field , and vice versa Amount of a subject that appears sharp in front of or behind the principal plane of focus
- Increasing the aperture size reduces the depth of field , and vice versa
- Increasing the aperture size reduces the depth of field , and vice versa
- manufacturers’ recommended macro-lens and macro-flash were used with each camera
- Consists of two units mounted next to the lens A twin flash may be the best system for orthodontic use because it offers, soft, uniform illumination, simultaneously reveals surface details, colour transitions, translucency variations and crack lines
- efficiency, longer life span than incandescent sources, and much more less heat than xenon and mercury short arc plasma lamps Provides continuous illumination Can be critically focused through the viewfinder Bright and free of excessive reflection Provides sufficient shadowing to avoid flat look of ring flash
- Glass mirrors produce a far superior photograph compared to polished metal mirrors, as there is much greater reflection of the light and more resistant to scratching Silvering on the front side of the mirrors prevents double images, which occur due to second reflection from the glass surfaces when the silvering is on the back surface
- Glass mirrors produce a far superior photograph compared to polished metal mirrors, as there is much greater reflection of the light and more resistant to scratching
- check for equal visibility of the ears on both sides interpupillary line should be parallel to the horizontal plane distance from the outer cantus of the eye to the hairline should be the same on both sides
- patient’s body is at right angle to the camera, but the patient turns the head about 45° until the opposite eyebrow can be seen
- a) Class 3. (b) Class 1. (c) Class 2. (d–f) Differing skeletal pattern purely due to patient positioning errors
- A wide angle lens can result in “barrel distortion”, involving enlargement of the chin and nose, elongation in the antero-posterior dimension, and excessive curvature on the sides An extremely powerful telephoto lens creates “compression distortion”, with nearer subjects appearing smaller , shortening in the antero-posterior dimension, and excessive flattening of features
- Fifty sets of orthodontic photographs were collected from each of 3 types of photographers: orthodontists, orthodontic auxiliaries, and professional clinical photographers.