Final year report on remote control of home appliances via bluetooth
•
16 j'aime•9,735 vues

Remote control of home appliances via bluetooth using Arduino

Recommandé
Recommandé
Contenu connexe
Tendances
Tendances (20)
Similaire à Final year report on remote control of home appliances via bluetooth
Similaire à Final year report on remote control of home appliances via bluetooth (20)
Dernier
Dernier (20)
Final year report on remote control of home appliances via bluetooth
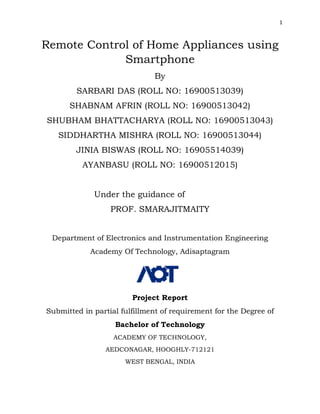
- 1. 1 Remote Control of Home Appliances using Smartphone By SARBARI DAS (ROLL NO: 16900513039) SHABNAM AFRIN (ROLL NO: 16900513042) SHUBHAM BHATTACHARYA (ROLL NO: 16900513043) SIDDHARTHA MISHRA (ROLL NO: 16900513044) JINIA BISWAS (ROLL NO: 16905514039) AYANBASU (ROLL NO: 16900512015) Under the guidance of PROF. SMARAJITMAITY Department of Electronics and Instrumentation Engineering Academy Of Technology, Adisaptagram Project Report Submitted in partial fulfillment of requirement for the Degree of Bachelor of Technology ACADEMY OF TECHNOLOGY, AEDCONAGAR, HOOGHLY-712121 WEST BENGAL, INDIA
- 2. 2 ACKNOWLEDGEMENT First and foremost, we would like to thank to our supervisor of this project, Prof. SmarajitMaity for the valuable guidance and advice. He inspired us greatly to work in this project. His willingness to motivate us contributed tremendously to our project. We also would like to thank him for showing us some example that related to the topic of our project. Besides, we would like to thank the authority of Academy of Technology (AOT) for providing us with a good environment and facilities to complete this project. Finally, an honorable mention goes to our families and friends for their understandings and supports on us in completing this project. Without helps of the particular that mentioned above, we would face many difficulties while doing this. SARBARI DAS SHABNAM AFRIN SHUBHAM BHATTACHARYA SIDDHARTHA MISHRA JINIA BISWAS AYAN BISWAS
- 3. 3 Department of Electronics and IntrumentationEngineering Academy of Technology, Adisaptagram CERTIFICATE This is to certify that SARBARI DAS (ROLL NO: 16900513039) SHABNAM AFRIN (ROLL NO: 16900513042) SHUBHAM BHATTACHARYA (ROLL NO: 16900513043) SIDDHARTHA MISHRA (ROLL NO: 16900513044) JINIA BISWAS (ROLL NO: 16905514039) AYANBASU (ROLL NO: 16900512015) have undergone the live project on Remote Control of Home Appliances using Smartphones and have prepared this project report by virtue of their Diligence and self-effort. They have successfully completed every aspect of this project with a lot of sincerity while abiding with the rules of the institution. We wish them all success for their future _______________________ ___________________________ Prof. Smarajit Maity Prof. Hiranmoy Mandal (Project Guide) (Head of Dept.)
- 4. 4 Table of Contents Chapter 1: Introduction………………………………………………………………..6 Chapter 2: Literature Survey…………………………………………………………9 2.1: GSM based home automation……………………………………………..9 2.2: IR remote controlled home automation………………………………..11 2.3: DTMF based home automation………………………………………….14 2.4: RF based home automation………………………………………………16 Chapter 3: Previous Project work……………………………………………18 3.1: Component specification………………………………………………….18 3.2: Hardware description……………………………………………………..20 3.3: Software description……………………………………………………….22 3.4: Implementation of arduino on breadboard…………………………..25 3.5: Checking our arduino circuit……………………………………………31 Chapter 4: Project Work…………………………………………………….35 4.1: Introduction………………………………………………………………….37 4.2: Block diagram………………………………………………………………38 4.3: Circuit diagram…………………………………………………………….39 4.4: Flowchart ……………………………………………………………………42 4.5: Program………………………………………………………………………43 Chapter 5: Result and Analysis…………………………………………..47 5.1: Truth table………………………………………………………………….47 5.2: Snapshot and screenshots of the project…………………………….48 5.3: Merits…………………………………………………………………………50 5.4: Demerits……………………………………………………………………..51 5.5: Future scope………………………………………………………………..51 Chapter 6: Reference………………………………………………………..53
- 6. 6 CHAPTER-1 INTRODUCTION In the past few years there are so many inventions in the field of consumer electronics such as cellular phone, air conditions, home security devices and home theaters. All these appliances can be easily controlled by a single controller, using personal area network in a home environment. Busy environment and personal limitation the market is going towards the home automation and networking and Bluetooth is an ideal solution for this purpose. In buildings, temperature and other electronic devices can be easily controlled by home automation but high degree of computer work is involved. This report demonstrates a simple home automation system which consists of remote mobile, host controller, and several home appliances. At home, we generally operate (switch on/off) all the electrical and electronics appliances such as fan, light, cooler, air conditioner, and so on through switches of the regular switch board. This manual switching of any home appliance is an inconvenient method for physically disabled or elders or even for normal young guys when frequent switching operation is required. Thus, this conventional manual switching method has to be overcome by an easier method of switching. This can be done using an advanced switching method like a remote control for electronic home appliances.
- 7. 7 We can use the unconventional remote control technology for controlling the home appliances easily without using the fixed wall switch boards. There are different types of remote control technologies such as infrared or IR remote technology, radio frequency or RF remote control technology, android based remote control, GSM based remote control, DTMF based remote control, Bluetooth remote control technology, and so on using different wireless communication systems.
- 9. 9 CHAPTER- 2 LITERATURE SURVEY We discuss about a few real time embedded systems based projects with which we can design and implement remote control circuit for home appliances. 2.1: GSM Based Home Automation Mobile phone is a revolutionary invention of the century. It was primarily designed for making and receiving calls & text messages, but it has become the whole world after the Smart phone comes into the picture. In this project we are building a home automation system, where one can control the home appliances, using the simple GSM based phone, just by sending SMS through his phone. In this project, no Smart phone is needed, just the old GSM phone will work to switch ON and OFF any home electronic appliances, from anywhere. 2.1.1: Working Explanation In this project, Arduino is used for controlling whole the process. Here we have used GSM wireless communication for controlling home appliances. We send some commands like “#A.light on*”, “#A.light off*” and so on for controlling AC home appliances. After receiving given commands by Arduino through GSM, Arduino send signal to relays, to switch ON or OFF the home appliances using a relay driver.
- 10. 10 Here we have used a prefix in command string that is “#A.”. This prefix is used to identify that the main command is coming next to it and * at the end of string indicates that message has been ended. When we send SMS to GSM module by Mobile, then GSM receives that SMS and sends it to Arduino. Now Arduino reads this SMS and extract main command from the received string and stores in a variable. After this, Arduino compare this string with predefined string. If match occurred then Arduino sends signal to relay via relay driver for turning ON and OFF the home appliances. 2.1.2: BLOCK DIAGRAM Fig. 2.1.2: Block diagram of GSM based home automation.
- 11. 11 2.2: IR Remote Controlled Home Automation In this project, we are using IR based wireless communication for controlling home appliances. In this project, Arduino is used for controlling whole the process. We send some commands to the controlling system by using IR TV/DVD/MP3 remote for controlling AC home appliances. After receiving signal from IR remote, Arduino sends related signal to relays which are responsible for switching ON or OFF of the home appliances through a relay driver. 2.2.1: Working Explanation: Working of this project is easily understandable. When we press any button of IR Remote then remote sends a code in form of train of encoded pulses using 38Khz modulating frequency. These pulses are received by TSOP1738 sensor and read by Arduino and then Arduino decodes received train of pulse into a hex value and compares that decoded value with the predefined hex value of the pressed button. If any match occurs then Arduino perform relative operation and the corresponding result is also displayed on 16x2 LCD by using appropriate commands.
- 12. 12 2.2.2: BLOCK DIAGRAM Fig. 2.2.2: Block diagram of IR remote controlled home automation.
- 13. 13 2.3: DTMF Based Home Automation There are two types of communication that is we generally use - one is wired and other one is wireless. In wireless communication we transmits signal wirelessly, like using radio frequency (RF) and in wired communication in which we uses wires like copper wire. In this project “DTMF Based Home Automation System” we are going to control our home appliances wirelessly. Other important feature of this project is, that we are not going to use any microcontroller in it. 2.3.1: WORKING EXPLANATION DTMF controlled home appliances project works over mobile DTMF technology that exists in Dial tone. DTMF stands for Dual Tone Multiple Frequency. There are some frequencies that we used to create DTMF tone. In simple words by adding or mixing two or more frequencies generates DTMF tone When one upper and one lower frequencies mixed then a tone is created that tone we calls Dual Tone Multiple Frequency. In this project we control ac appliances by pressing dial pad keys like 1, 2, 3, 4, 5 and more.
- 14. 14 So we can control each of the appliances according to table output given below. Table 2.3.1: DTMFFrequency Key Table 2.3.2: BLOCK DIAGRAM Fig. 2.3.2: Block diagram of DTMF based home automation
- 15. 15 2.4: RF BASED HOMEAUTOMATION Radio frequency or RF remote control technology based home automation is another technique for implementing remote controlled home appliances. It consists of RF transmitter circuit and RF receiver circuit. 2.4.1: WORKING EXPLANATION The RF transmitter circuit block diagram consists of 6V battery that provides power supply to the RF remote. 8051 microcontroller to which the load switches or switches of home appliances are interfaced. Based on the switch or push button pressed, the microcontroller sends commands signals to encoder block. This data is encoded and transmitted through the antenna of the RF transmitter. The receiver block diagram consists of the power supply block, 8051 microcontroller, home appliances connected to the microcontroller through Opto-Isolators and triacs, RF receiver interfaced to the microcontroller through the decoder. The data receiver from the transmitter is received by the RF receiver, decoded by the decoder and then fed to the microcontroller. Based on the data received, the microcontroller sends command signals to turn on or turn off the home appliances which are here represented as lamp loads for demonstration purpose.
- 16. 16 2.4.2: BLOCK DIAGRAM Fig. 2.4.2.1: Block diagram of encoder in RF based home automation Fig. 2.4.2.2: Block diagram of decoder in RF based home automation
- 17. 17 CHAPTER- 3 PREVIOUS PROJECT WORK
- 18. 18 CHAPTER-3 PREVIOUS PROJECT WORK 3.1: COMPONENT SPECIFICATION 1. Android Smartphone 2. Atmega 328P-PU Microcontroller 3. Bluetooth Module (HC-05) 4. Relay Driver (UCN2003A) 5. Bulb (25 Watt) 6. AC Fan 7. Arduino IDE 8. SMPS(12V, 1A) 9. Bulb Holder 10. Terminal Block 11. Crystal Oscillator(16 MHz) 12. Ceramic Capacitor(22 pF) 13. Radial Capacitor(10 microF) 14. Resistor(100 ohm, 180 ohm,1 kohm,10 kohm) 15. LED’s 16. Switch Push Button 17. Breadboard 18. Relay Switches 19. Voltage Regulator (7805) 20. Lead wires
- 19. 19 3.2: Hardware Description: 3.2.1: Atmega328: ATMEGA 328 microcontroller, which acts as a processor for the arduino board. Nearly it consists of 28 pins. From these 28 pins, the inputs can be controlled by transmitting and receiving the inputs to the external device. It also consists of pulse width modulation (PWM). These PWM are used to transmit the entire signal in a pulse modulation. Input power supply such as Vcc and Gnd are used. These IC mainly consists of analog and digital inputs. These analog and digital inputs are used for the process of certain applications. The operating volt ranges from 5v. The input voltage recommended for arduino microcontroller is from 7v and the maximum of 12v. The DC input current given to the arduino board is in the range of 40mA. Fig. 3.2.1: Pin configuration of 328p
- 20. 20 3.2.2: Switching Relay: A relay is an electrically operated switch. Many relays use an electromagnet to mechanically operate a switch, but other operating principles are also used, such as solid-state relays. Relays are used where it is necessary to control a circuit by a low-power signal (with complete electrical isolation between control and controlled circuits), or where several circuits must be controlled by one signal. Fig. 3.2.2: Switching Relay In this project the relay have been used to control the 230V power supply of household when connected with the Bluetooth app. 3.2.3: Bluetooth Module: HC-05 module is an easy to use Bluetooth SPP (Serial Port Protocol) module, designed for transparent wireless serial connection setup. Serial port Bluetooth module is fully qualified Bluetooth V2.0+EDR (Enhanced Data Rate) 3Mbps Modulation with complete 2.4GHz radio transceiver and baseband. It uses CSR Blue core 04-External single chip. Fig. 3.2.3: Bluetooth Module
- 21. 21 3.2.4: Power Supply: Fig. 3.2.4: Setup of power supply used
- 22. 22 3.3: Software Description: 3.3.1: Android Operating System: Android is an open-source operating system which means that any manufacturer can use it in their phones free of charge. It was built to be truly open. Android is built on the open Linux Kernel. Furthermore, it utilizes a custom JAVA virtual machine that was designed to optimize memory and hardware resources in a mobile environment. Fig 3.3.1: Android Operating System An android app is meant for phones with an android based operating systems. They can be downloaded from the android app Market which is pre-loaded on every android phone. Blue control APP and Bluetooth Spp APP are some examples.
- 23. 23 3.3.2:Arduino Integrated Development Environment: The open-source Arduino Software (IDE) makes it easy to write code and upload it to the board. It runs on Windows, Mac OS X, and Linux. The environment is written in Java and based on Processing and other open-source software. This software can be used with any Arduino board.It contains a text editor for writing code, a message area, a text console, a toolbar with buttons for common functions and a series of menus. It connects to the Arduino and Genuino hardware to upload programs and communicate with them. Programs written using Arduino Software (IDE) are called sketches. These sketches are written in the text editor and are saved with the file extension .ino. There are two special functions that are a part of every Arduino sketch: setup() and loop() . The setup() is called once, when the sketch starts. It's a good place to do setup tasks like setting pin modes or initializing libraries. The loop() function is called over and over and is heart of most sketches.
- 24. 24 Fig. 3.3.2: Android Integrated Development Environment We started this project in previous semester. Since then, we have come a long way in completing the entire project. Let us review the work done by us in previous semester. To keep the project cost effective, we have implemented Arduino Uno on breadboard.
- 25. 25 3.4: Implementation of Arduino Uno on breadboard: Fig. 3.4.1: Arduino Uno on breadboard The steps mentioned below are to be followed to create the set up shown above. Step 1: Adding power and ground wires for where our voltage regulator willbe. Fig. 3.4.2: Add power and ground wire to voltage regulator
- 26. 26 Step 2:Adding power and ground wires at the bottom of our board connecting each rail. Fig. 3.4.3: Add power and ground wire to bottom of our board connecting each rail. Step 3:Adding the 7805 power regulator and the lines to power the board. The regulator is a TO-220 package where the Input from the external power supply goes input on the left, ground is in the middle and the 5V output is on the right (when facing the front of the regulator). Add power OUT and ground wires that connect to the right and left rails of the breadboard. Also a 10uF capacitor between the IN of the regulator and the ground as well as a 10uF capacitor on the right rail between power and ground. The silver strip on the capacitor signifies the ground leg. Fig. 3.4.4: Add 7805 power regulator and two 10uF capacitor
- 27. 27 Step 4:Adding an LED and a 220-ohm resistor on the left side of your board across from the voltage regulator. An LED attached to power like this is a great trouble shooting trick. We'll always know when our board is being powered as well as quickly know if your board is being shorted. Fig. 3.4.5: Add LED and 220 ohm resistor The red and black wires to the left of the voltage regulator are where our power supply will be plugged in. The red wire is for the power and the black wire is for the ground. We only attach a power supply that is between 7-16V. Any lower and you won't get 5V out of our regulator. Any higher and our regulator may be damaged. A 9V battery, 9V DC power supply, or 12V DC power supply is suitable.
- 28. 28 Step 5: Connecting a 10k ohm pull up resistor to +5V from the reset pin in order to prevent the chip from resetting itself during normal operation. The reset pin reboots the chip when pulled down to ground. In later steps we will show you how to add a reset switch that takes advantage of this. Fig. 3.4.6: Add 10k ohm resistor and Atmega 328p The pins are connected as follows: 1. Pin 7 - Vcc - Digital Supply Voltage 2. Pin 8 - GND 3. Pin 22 - GND 4. Pin 21 - AREF - Analog reference pin for ADC 5. Pin 20 - AVcc - Supply voltage for the ADC converter.
- 29. 29 Step 6: Adding a 16 MHz external clock between pin 9 and 10, and add two 22 pF capacitors running to ground from each of those pins. Fig 3.4.7: Add 16 MHz clock and two 22 pF capacitors Step 7: Adding the small tactile switch so that we can reset the Arduino whenever we'd like and prepare the chip for uploading a new program. A quick momentary press of this switch will reset the chip when needed. Add the switch just above the top of the Atmega chip crossing the gap in the breadboard. Then, add a wire from the bottom left leg of the switch to the RESET pin of the Atmega chip and a wire from the top left leg of the switch to ground. Fig. 3.4.8: Add tactical switch
- 30. 30 Step 8:Finally, adding the LED. The long leg or the anode connects to the red wire and the short leg or the cathode connects to the 220 ohm resistor going to ground. Following all above steps we have made our own Arduino UNO board shown below. Fig. 3.4.9: Final implementation of Arduino Uno on breadboard
- 31. 31 3.5: Checking our Arduino Circuit: Now to see whether our Arduino is working or not, we upload a blinking LED program in it.It turns the LED on and off after a delay of 250 ms. The code and flowchart of the same is given below. 3.5.1: FLOWCHART Fig. 3.5.1: Flowchart to check arduino circuit
- 32. 32 3.5.2: CODE: intledPin = 10; void setup() { pinMode(ledPin, OUTPUT); } void loop() { digitalWrite(ledPin, HIGH); delay(250); digitalWrite(ledPin, LOW); delay(250); }
- 33. 33 The response of the above program is shown below: When green LED is on: Fig. 3.5.2.1: Response of program when LED is on When green LED is off: Fig. 3.5.2.2: Response of program when LED is off
- 35. 35 CHAPTER- 4 4.1: INTRODUCTION Although home automation today is not a new thing but most advanced home automation systems in existence today require a big and expensive change of infrastructure. This means that it often is not feasible to install a home automation system in an existing building. “Homatic” is a wireless home automation application that is supposed to be implemented in existing home environments, without any changes in the existing infrastructure. “Homatic” lets the user to control his home from his or her android smart phone. In the smart phone application the user can select actions what should happen with electrical and/or electronic devices in the network. Mobile phone is a revolutionary invention of the century. It was primarily designed for making and receiving calls & text messages, but it has become the whole world after the Smart phone comes into the picture. In this project we are building a home automation system, where one can control the home appliances, using the Bluetooth based Smartphone, just by sending commands via Bluetooth from an application designed for this project.
- 36. 36 4.2: BLOCK DIAGRAM Fig. 4.2: Block diagram of the project This application controls the various appliances connected to your arduino and relays. When the toggle buttons on the application are pressed, corresponding bluetooth signals are sent from your android phone to he Bluetooth module you have hooked up to your arduino. The arduino finds out which signal was sent and compares it to the predefined signals assigned for each appliance. When it identifies that signal, then the arduino activates the relay hooked up to its digital pin by passing 5V through it. Thus the relay is switched ON and the corresponding appliance connected to the relay is turned ON as well. To switch it OFF, arduino passes a 0V or logic low to its digital pin.
- 37. 37 4.3: CIRCUIT DIAGRAM Fig. 4.3.1: Circuit diagram of the project This project consists of a microcontroller, two 6V relays, a bulb, a fan and Bluetooth module. Here ATMEGA328p microcontroller is used. It is an 8 bit microcontroller and it requires supply voltage of 5V DC. Use 7805 power supply circuit to provide 5V DC to the microcontroller. We can use 9V DC battery or 12V, 1A adapter to provide the supply to the circuit. For the above circuit additionally you need to connect reset circuit and crystal circuit to the controller to work properly. Bluetooth module TX and RX pins are connected to the RXD and TXD pins of controller. Vcc pin is connected to the 5V and GND pin is connected to ground.
- 38. 38 Controller communicates with Bluetooth module using serial communication (UART protocol). Use a baud rate of 9600 to communicate with Bluetooth. To change the Bluetooth name and password then you need to use Bluetooth AT commands. Below are the few Bluetooth AT commands: AT — Responds OK. (Used to test the Bluetooth module) AT+RESET — Responds OK. (Used to reset the module) AT+NAME? — Responds with the module name. AT+NAME = <name> — Responds OK. Name should be less than or equal to 20 characters. AT+PSWD? — Responds with the existing password. AT+PSWD =<password> — Sets module pairing password. Electrical loads (bulb and fan) are connected through the relays. Here relays are used to switch AC loads using small DC voltages. NPN transistors are used to drive the relays. Remote Password Operated Home Appliances Control Project Algorithm: Initialize UART protocol. Now read the data from Bluetooth module. Compare the received string with predefined strings and accordingly switch the electrical loads.
- 39. 39 Now the steps for implementing the home automation circuit are as follows: The connection diagram for arduino is as shown. For setting up this system, wiring connections have to be made between the arduino and bluetooth module and also with the relays. Step I: Connecting Bluetooth The bluetooth module’s Tx is connected to arduino Rx (digital pin 0) and the module’s Rx to arduinoTx (digital pin 1). 5V and GND of the module is connected to the arduino’s 5V and GND. Step II: Connecting Relay Driver The relay driver chip consist of total 16 pins (8 pins both side) where pin 1 to 7 are input from digital pins of Arduino and pin 10 to 16 are for the output to the relay switches. The pin 8 is connected to ground and pin 9 to +12v supply. Here in our project, we are connecting digital pin 7 and 8 (pin 13 and 14 of Atmel328) to the pin 1 and 2 of relay driver. Step III: Connecting Relay Switches The relay we’re using is SPDT, it has 5 pins on the underside. As shown below, here pins 1 and 3 are the coil pins. Pin 1 is connected to the pin 16 and 3 is connected to arduino GND. Pin 2 is the common contact in the relay to which you have to connect the power for our appliance (AC 230V), and 4 is the pin to which you have to connect our appliance wire. Fig. 4.3.2: Relay pins
- 40. 40 Step IV:Connecting your appliance to the relay In a normal SPDT relay, whose pin out is shown in the above step, pins 2 and 4 act identical to the two terminals of a switch. When digital HIGH voltage is applied from the arduino to the relay, switch turns ON, when the voltage is withdrawn it turns OFF. We can attach this system you made to a normal switchboard by extending the wires from behind the switches in the board to your relay. As seen in the connection diagram in the above step, you have to connect a power AC line to the common terminal of all the relays. Then, you have to extend the wires from behind the switchboard of the corresponding lights/lamps you wish to control. Each of these wires are connected to the “NO”(Normally Open) terminal of the relays (pin no 4 in step no 1’s relay pin out diagram). Step v: Loading the arduino software Here it checks the incoming bluetooth signal via the bluetooth module and then compares (ASCII values) using an “if” statement with previously defined values. If it matches the value, relay is activated using “digitalWrite(pin,HIGH)” command , which passes 5V to the arduino digital pin.
- 41. 41 Step VI: Downloading the android application and setting up Bluetooth There are a lot of applications available in Google playstore for home automation. We install any one of them.Once you have installed the application, before opening it you need to pair and connect with your bluetooth module. For this, you need to power the arduino and bluetooth module and then turn ON the bluetooth of your phone and make it visible to other devices. After that, search for new devices in bluetooth, select your bluetooth module from the list, enter the pairing code when prompted ,it is usually ’1234′ or ’0000′ .Note the name of your device , in this case it is “HC- 05″. After pairing with the system, go to the application and enter the name of your bluetooth module you noted earlier (case-sensitive) and click “OK”. After that the phone will get connected to your system, and on clicking the respective buttons, the appliances turn ON/OFF.
- 42. 42 4.4:FLOWCHART Fig. 4.4: Flowchart of the program
- 43. 43 4.5: PROGRAM CODE String voice; int led1 = 2; //Connect LED 1 To Pin #2 int led2 = 3; //Connect LED 2 To Pin #3 //--------------------------Call A Function------------------------- ------// voidallon(){ digitalWrite(led1, HIGH); digitalWrite(led2, HIGH); } voidalloff(){ digitalWrite(led1, LOW); digitalWrite(led2, LOW); } //---------------------------------------------------------------------- -// void setup() { Serial.begin(9600); pinMode(led1, OUTPUT); pinMode(led2, OUTPUT); } //---------------------------------------------------------------------- -//
- 44. 44 void loop() { while (Serial.available()){ //Check if there is an available byte to read delay(10); //Delay added to make thing stable char c = Serial.read(); //Conduct a serial read if (c == '#') {break;} //Exit the loop when the # is detected after the word voice += c; //Shorthand for voice = voice + c } if (voice.length() > 0) { Serial.println(voice); //---------------------------------------------------------------------- -// //----------Control Multiple Pins/ LEDs----------// if(voice == "*all on") {allon();} //Turn Off All Pins (Call Function) else if(voice == "*all off"){alloff();} //Turn On All Pins (Call Function) //----------Turn On One-By-One----------// else if(voice == "*light on") {digitalWrite(led1, HIGH);} else if(voice == "*fan on") {digitalWrite(led2, HIGH);} //----------Turn Off One-By-One----------// else if(voice == "*light off") {digitalWrite(led1, LOW);}
- 45. 45 else if(voice == "*fan off") {digitalWrite(led2, LOW);} //---------------------------------------------------------------------- -// voice="";}} //Reset the variable after initiating
- 46. 46 CHAPTER- 5 RESULT AND ANALYSIS
- 47. 47 CHAPTER- 5 5.1: Truth Table INPUT:1 OUTPUT:1 INPUT:2 OUTPUT:2 Manual switch: 1 Relay switch: 2 Light Manual switch: 1 Relay switch: 2 Fan 0 0 0 0 0 0 0 1 1 0 1 1 1 0 1 1 0 1 1 1 0 1 1 0 Table 5.1: Truth table of the project
- 48. 48 5.2: Snapshot and Screenshots of the project Fig 5.2.1: when both (Light and Fan) are off Fig 5.2.2: when Light is on
- 49. 49 Fig 5.2.3: When Fan is on Fig 5.2.4: When both (Light and Fan) are on
- 50. 50 5.3: MERITS 1. It is a robust and easy to use system. 2. There is no need for extra training of that person who is using it. 3. All the control would be in your hands by using this home automation system. 4. This project can provide the facility of monitoring all the appliances within the communication range through Bluetooth. 5. The schematic of Arduino is open source, for the future enhancement of the project board can be extended to add more hardware features. 6. The inefficiency of operation of conventional wall switches can be overwhelmed using various home automation systems (without using conventional switching methods). 7. The loss of power can be reduced and manpower required for home automation is very less compared to conventional methods. 8. Provides safety from electrical power short circuits while using conventional wall switches to operate loads.
- 51. 51 5.4:DEMERITS 1. Bluetooth is used in this home automation system, which have a range of 10 to 20 meters so the control cannot be achieved from outside this range. 2. Application is disconnected after disconnect of the Bluetooth. 3. When the new users want to connect, first download application software and then configuration must be done. 4. Security problem 5.5: FUTURE SCOPE: This project can be further developed by integrating it with the internet to monitor your home while sitting in a remote area. By doing this, one can keep an eye on his or her home through an internet connected to the user’s mobile phone or PC or laptop. This will not only improve the security of your home in this modern day world but will also assist in conservation of energy like if you left any home appliance switched on by mistake, then you can check the status of the appliance on the graphical interface made on your mobile and can switch it off using the net connectivity.
- 53. 53 CHAPTER-6 REFERENCE [1] www.electronicshub.org [2] www.engineersgarage.com [3] www.atmel.com [4] www.arduino.org [5] Home Automation For Dummies by Dwight Spivey [6] How to Get Started with Home Automation by Author Mymitram [7] Getting Started with Arduino by Massimo Banzi