4. Project Report
on
Wi-fi Based Data Transfer From Any Portable Storage
Media
submitted in partial fulfillment of the requirement
for the award of the Degree of
Bachelor of Engineering
in
Electronics & Telecommunication Engineering
by
Shubhankar S. Kulkarni
Shruti G. Karandikar
Pratik P. Khandalkar
under the guidance of
Asst Prof. Sukanya Kulkarni
Department of Electronics & Telecommunication Engineering
Bharatiya Vidya Bhavan’s
Sardar Patel Institute of Technology
Munshi Nagar, Andheri-West, Mumbai-400058
University of Mumbai
April 2016
5. Certificate
This is to certify that the Project entitled “Wi-fi Based Data Transfer From Any Portable
Storage Media” has been completed successfully by Mr. Shubhankar S. Kulkarni, Miss.
Shruti G. Karandikar and Mr. Pratik P. Khandalkar under the guidance of Asst Prof.
Sukanya Kulkarni for the award of Degree of Bachelor of Engineering in Electronics &
Telecommunication Engineering from University of Mumbai.
Certified by
Asst Prof. Sukanya Kulkarni Dr. Y. S. Rao
Project Guide Head of Department
Dr. Prachi Gharpure
Principal
Department of Electronics & Telecommunication Engineering
Bharatiya Vidya Bhavan’s
Sardar Patel Institute of Technology
Munshi Nagar, Andheri(W), Mumbai-400058
University of Mumbai
April 2016
6. Project approval Certificate
This is to certify that the Project entitled “Wi-fi Based Data Transfer From Any Portable
Storage Media” by Mr. Shubhankar S. Kulkarni, Miss Shruti G. Karandikar and Mr. Pratik
P Khandalkar is approved for the award of Degree of Bachelor of Engineering in Electronics
& Telecommunication Engineering from University of Mumbai.
External Examiner Internal Examiner
(signature) (signature)
Name: Name:
Date: Date:
Seal of the Institute
7. Abstract
The world’s information is increasing exponentially every year, so do the devices storing
it. Pen-drives, hard-drives, solid state drives etc. have become part and parcel of everyone’s
lives. A survey from ’The Wall Street Journal’ shows that there is a significant increase in
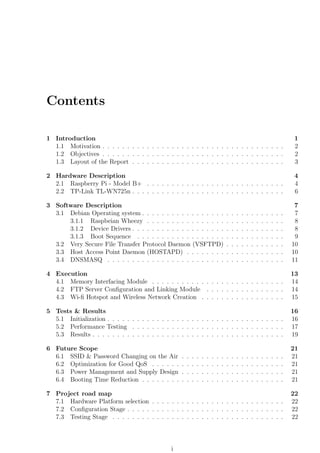
the demand for smart-phones which adversely affected the laptop market. Fig.1. But most
of the portable storages are designed for computers and hence cannot be used with smart-
phones.On The Go (OTG) is the only one option available for the same with no support for
hard-drives. Today’s technology faces the problem of an unshared memory access for external
storages, incompatibility of hard-drives with smart-phones, non comprehensiveness of storage
design etc. We propose the device in this report which will solve all these problems and will
standardize the connection between the smart-phones and the external storages without any
hardware changes on both smart-phone and storage side.
The device we are proposing in this report allows any USB storage to connect to it. It
creates it’s own wi-fi network allowing smart-phones connect to it. It hosts a file transfer
protocol server with external storage as source files. Once the device is properly configured,
multiple users can access the same external storage over wi-fi connection. Each user can
upload, download, stream and read the files inside the external storage device. The integrity
of data in multiuser environment is maintained by restricting the deletion operation. In this
way the proposed device acts as a perfectly universal data transfer agent between portable
storages and smart-phones giving compatibility to incompatible devices with today’s tech-
nology.
Figure 1: Consumer demand for smart-phones and laptops.
8. Chapter 1
Introduction
Large storage and fast sharing is need of the hour for today’s techno savvy society. To fulfill
this, smart-phones are often complemented with an external SD card. New technologies
have evolved which allow smart-phones to store data up to 128GB. But there are limitations
in increasing this memory size. Major reason behind this difficulty is the space required
by the SD cards on a PCB, their effective cost and software optimization for data transfer
between secondary and main memory. So, another options like pen drives and hard disks
are explored for storing the data. Devices like pen-drives and hard disks are at epitome of
their popularity. But none of the smart phones except those with OTG service, support such
hardware connection with them.
Figure 1.1: New Interface Device.
In this report we propose a device that accomplishes the optimized hardware connection
between a pen-drive or hard disk or sd card and smart-phones. As seen from Figure 4.1 the
’New Interface Device’ is the proposed device, which is connected to three media storage
drives at a time whose data can be viewed by other client devices over the Wi-Fi interface.
The device has a central processing unit that communicates with memory devices attached
to it. The data stored in the external memory can then be exchanged using Wi-Fi technology
at 2.4GHz ISM band radio frequencies to an upper level device like a smart-phone with the
help of Wi-Fi adapter [11]. Thus smart-phones can be directly connected to any kind of
available portable data storage, virtually giving it a sense of infinite shared memory. Apart
from this, the device is equipped with rechargeable Li-Po battery which makes it portable.
1
9. The device we are proposing in this report, acts as a wi-fi hotspot to which multiple
users can connect [8]. The wi-fi hotspot uses WPA2PSK authentication mechanism, IEEE
802.11i standard, which makes it one of the most secured network. As a client, no user has
an authority to delete any content on the storage. The maximum theoretical speed of the
network is 54Mbps [11]. Up-to 7 users can stream a full HD video simultaneously. Three
USB devices can be connected simultaneously inclusive of one hard drive and one or more
pen drives [7]. Transfer of data among these devices is also possible.
1.1 Motivation
This work was motivated by the need to standardize the date transfer between the smart-
phones and external storage media. The proposed device should be a universal data transfer
agent which supports any portable storage media with USB. It should give the ability to
multiple users to access the same storage simultaneously over standard Wi-fi connection.
It should stream multimedia at very high speed. The algorithm should be flexible enough
to allow users to connect any type of external USB storage with different file system and
different power requirement. The proposed device should assure the integrity of the data
with no access to delete any contents from the storage and no ability to overwrite it.
1.2 Objectives
• To study various File systems, their advantages and compatibilities.
• To study the booting environment of Unix operating system.
• To study wi-fi standard IEEE 802.11b/g/n with ad-hoc and infrastructure mode.
• To increase the compatibility of the USB port by manipulating the current supply via
software interface.
• To perform installation and configuration of daemon processes required for the device.
• To understand software and hardware linking in terms of Unix operating system.
• To analyze the link speed and maximum system capacity.
• To optimize the configurations to increase the throughput.
2
10. 1.3 Layout of the Report
A brief chapter by chapter overview is presented here.
• Chapter 2: A detailed description of hardware and the experimental setup used for
the execution of the algorithm to fulfill required criteria. This includes system on chip
computer Raspberry Pi B+ and the Tp-link wi-fi adapter.
• Chapter 3: Various softwares and their features will be described in this chapter. It
basically emphasizes on the operating system and the daemon processes used in it.
• Chapter 4: In this chapter, the most essential information on the execution methods,
configurations for the given softwares to meet the requirements are given.
• Chapter 5: Initialization and performance testing is explained in this chapter along
with their significant results
• Chapter 6: Some of the most important challenges that will give a proper shape to the
device as a product and their preferred solutions are mentioned in this chapter.
• Chapter 7: This chapter describes the project road map.
• Chapter 8: Conclusions and discussion on research work.
3
11. Chapter 2
Hardware Description
To send the data wirelessly a wifi adapter is required. The whole system is based on Rasp-
berry pi model B+ accompanied with wifi adapter TP Link’s TL-WN725n. The various
hardwares used are explained below:
2.1 Raspberry Pi - Model B+
The Raspberry Pi hardware has evolved through several versions that feature variations in
memory capacity and peripheral-device support. The credit-card sized computer is capable
of many of the things that your desktop PC does, like spreadsheets, word-processing and
games. It also plays high-definition video. The Raspberry Pi - Model B+ makes this com-
puter so small and powerful is the Broadcom BCM2835, a System-on-Chip that contains an
ARM1176JZFS with floating point, running at 700MHz, and a Videocore 4 GPU. The GPU
provides Open GL ES 2.0, hardware-accelerated OpenVG, and 1080p30 H.264 high-profile
decode and is capable of 1Gpixel/s, 1.5Gtexel/s or 24 GFLOPs of general purpose compute.
The new Model B+ also has a 10/100 Ethernet port so the web (or serve web pages) can
be surfed from right there on the Pi . The system volume no longer lives on an SD card
but instead a microSD card, so its even easier to prepare, run and debug several different
operating systems on the same hardware.[10] This emplies that no more large SD cards are
requires and no more deceptively difficult to handle adapters Most Linux distributions for
the Pi will happily live on a 2GB microSD card but larger cards are supported.
The Model B+s FOUR built-in USB ports provide enough connectivity for a mouse,
keyboard, or any other USB device also a USB can be connected. Powering the Raspberry
Pi is easy, just plug any USB power supply into the micro-USB port. Theres no power
button so the Pi will begin to boot as soon as power is applied, to turn it off simply remove
power. The four built-in USB ports can even output up to 1.2A enabling you to connect
more power hungry USB devices (This does require a 2Amp micro USB Power Supply).On
top of all that, the low-level peripherals on the Pi make it great for hardware hacking. The
0.1” spaced 40-pin GPIO header on the Pi gives you access to 26 GPIO, UART, I2C, SPI as
well as 3.3 and 5V sources.[10]
4
12. This block diagram depicts models B+.
Figure 2.1: Generic block diagram of Raspberry Pi B+ boards
The Raspberry Pi model B+ have the following features:
• Broadcom BCM2835 SoC
• 700 MHz ARM1176JZF-S core CPU
• Broadcom VideoCore IV GPU
• 512 MB RAM
• 4 x USB2.0 Ports with up to 1.2A output
• Expanded 40-pin GPIO Header
• Video/Audio Out via 4-pole 3.5mm connector, HDMI, or Raw LCD (DSI)
• Storage: microSD
• 10/100 Ethernet (RJ45)
Figure 2.2: Raspberry Pi Model B+
5
13. 2.2 TP-Link TL-WN725n
TP Link’s TL-WN725n is Wireless and Nano USB adapter with a speed of 150Mbps. TL-
WN725n allows users to connect a desktop or notebook computer to a wireless network at
150Mbps.. This miniature adapter is designed to be as convenient as possible and once
connected to a computers USB port. It can create it’s own network acting as a server and
other devices as clients. It allocates them i/p addresses and itself as a gateway. It also
features advanced wireless encryption and easy installation[11]
Figure 2.3: TP-Link TL-WN725n
The TP-Link TL-WN725n provides the following features :
• Wireless N speed up to 150Mbps
• Seamlessly compatible with 802.11b/g/n products
• 14-language utility and auto run CD
• Supports software-based WPS
• Supports Soft AP function for Wireless Internet Sharing
• Advanced Security: Supports WEP, WPA/WPA2,WPA-PSK/WPA2-PSK
• Supports Windows XP 32/64bit, Vista 32/64bit, Windows 7 32/64bit, Windows 8
32/64bit
• Supports WMM (Wi-Fi Multimedia) Standard for better streaming of real-time data
such as video and music
• Supports ad-hoc and infrastructure modes
Figure 2.4: TP-Link TL-WN725n connected with Raspberry Pi Model B+
6
14. Chapter 3
Software Description
The performance parameter for transferring the data is the data rate at which the client can
read, write or stream the data. As the system is based on Raspberry Pi, it uses the debian
raspbian operating system and other daemon processes which supports various services in
the raspbian operating system.
softwares which used in the project are:
• Debian Operating system (Raspbian Wheezy)
• Very Secure File Transfer Protocol Daemon (VSFTPD)
• Host Access Point Daemon (HOSTAPD)
• DNSMASQ
3.1 Debian Operating system
Debian is a Unix-like computer operating system that is composed entirely of free software,
most of which is under the GNU General Public License, and packaged by a group of indi-
viduals known as the Debian Project. The Debian Stable Linux distribution is one of the
most popular operating system for personal computers and network servers, and has been
used as a base for several other distributions.[19] The Debian Testing and Unstable branches
are rolling release and have eventually become the Stable distribution after development and
testing. Packages are first uploaded to Unstable, from which they migrate to Testing. When
Testing is mature enough it becomes Stable.
Debian has access to online repositories that contain over 50,000 software packages mak-
ing it one of the largest software compilations. Debian officially contains only free software,
but non-free software can be downloaded from the Debian repositories and installed.[19] De-
bian includes popular free programs such as LibreOffice, Iceweasel (Firefox) web browser,
Evolution mail, K3b disc burner, VLC media player, GIMP image editor and Evince docu-
ment viewer. Debian is a popular choice for web servers.
The Raspberry Pi uses Debian base to perform the deisred tasks. As Operating system
is concerned the device drivers are also required and the boot sequences play an important
role in assigning the priority to the services and tasks. Hence the operating system covers
all three subsections under it.
7
15. 3.1.1 Raspbeian Wheezy
Raspbian is a free operating system based on Debian optimized for the Raspberry Pi hard-
ware. An operating system is the set of basic programs and utilities that make your Rasp-
berry Pi run. However, Raspbian provides more than a pure OS: it comes with over 35,000
packages, pre-compiled software bundled in a nice format for easy installation on your Rasp-
berry Pi.
The initial build of over 35,000 Raspbian packages, optimized for best performance on
the Raspberry Pi, was completed in June 2012. However, Raspbian is still under active
development with an emphasis on improving the stability and performance of as many Debian
packages as possible.[17]
3.1.2 Device Drivers
Under Linux and UNIX each and every hardware device treated as a file. A device file allows
to accesses hardware devices so that end users do not need to get technical details about
hardware. In short, a device file (also called as a special file) is an interface for a device
driver that appears in a file system as if it were an ordinary file. This allows software to
interact with the device driver using standard input/output system calls, which simplifies
many tasks.[18]
In computing, a device driver is a computer program that operates or controls a partic-
ular type of device that is attached to a computer. A driver provides a software interface
to hardware devices, enabling operating systems and other computer programs to access
hardware functions without needing to know precise details of the hardware being used.
A driver communicates with the device through the computer bus or communications
subsystem to which the hardware connects. When a calling program invokes a routine in
the driver, the driver issues commands to the device. Once the device sends data back to
the driver, the driver may invoke routines in the original calling program.
Figure 3.1: Operating System
8
16. 3.1.3 Boot Sequence
Boot sequence is the order in which 25a computer searches for nonvolatile data storage de-
vices containing program code to load the operating system (OS). Typically, a Macintosh
structure uses ROM and Windows uses BIOS to start the boot sequence. Once the instruc-
tions are found, the CPU takes control and loads the OS into system memory. The devices
that are usually listed as boot order options in the BIOS settings are hard disks, floppy
drives, optical drives, flash drives, etc. The user is able to change the boot sequence via the
CMOS setup. Boot sequence is also called as boot order or BIOS boot order.[16]
Figure 3.2: Boot Sequence in Debian
9
17. 3.2 Very Secure File Transfer Protocol Daemon (VS-
FTPD)
vsftpd is a GPL licensed FTP server for UNIX systems, including Linux. It is secure and
extremely fast. It is stable.FTP is a client-server protocol that relies on two communications
channels between client and server: a command channel for controlling the conversation and
a data channel for transmitting file content. Clients initiate conversations with servers by
requesting to download a file. Using FTP, a client can upload, download, delete, rename,
move and copy files on a server. A user typically needs to log on to the FTP server, although
some servers make some or all of their content available without login, also known as anony-
mous FTP.[12]FTP sessions work in passive or active modes. In active mode, after a client
initiates a session via a command channel request, the server initiates a data connection
back to the client and begins transferring data. In passive mode, the server instead uses
the command channel to send the client the information it needs to open a data channel.
Because passive mode has the client initiating all connections, it works well across firewalls
and Network Address Translation (NAT) gateways.
3.3 Host Access Point Daemon (HOSTAPD)
Hostapd (Host access point daemon) is a user space software access point capable of turning
normal network interface cards into access points and authentication servers. The cur-
rent version supports Linux (Host AP, madwifi, mac80211-based drivers) and FreeBSD
(net80211).[13]
Figure 3.3: WiFi Technology supported by hostapd
Hostapd creates an access point(AP) which allows users to connect the network created
by itself. The accesss point can be explained below:
• An AP is like a wireless switch;
• An AP can only use one band at a time: 2.4GHz OR 5GHz, a so-called ”dual-band
AP” is just one AP at 2.4GHz plus one at 5GHz;
• An AP using the 2.4GHz band can be b, g and n at the same time (if the hardware
supports it);
10
18. • An AP using the 5GHz band can be a, n and ac at the same time (if the hardware
supports it);
• An AP can have multiple SSIDs, making it look like multiple APs, but all will share
the same band AND channel.
Capabilities of Hostapd
• Create an AP;
• Create multiple APs on the same card (if the card supports it, usually up to 8);
• Create one AP on one card and another AP on a second card, all within a single
instance of Hostapd;
• Use 2.4GHz and 5GHz at the same time on the same card. This requires a card with
two radios though, which is pretty rare (but hostapd supports it) - if the card creates
two wlanX interfaces, you might be lucky
3.4 DNSMASQ
Dnsmasq provides network infrastructure for small networks: DNS, DHCP, router advertise-
ment and network boot. It is designed to be lightweight and have a small footprint, suitable
for resource constrained routers and firewalls. It has also been widely used for tethering
on smartphones and portable hotspots, and to support virtual networking in virtualisation
frameworks. Supported platforms include Linux (with glibc and uclibc), Android, *BSD,
and Mac OS X. Dnsmasq is included in most Linux distributions and the ports systems of
FreeBSD, OpenBSD and NetBSD. Dnsmasq provides full IPv6 support.[14]
• Local DNS names can be defined by reading /etc/hosts, by importing names from the
DHCP subsystem, or by configuration of a wide range of useful record types.
• Upstream servers can be configured in a variety of convenient ways, including dynamic
configuration as these change on moving upstream network.
• Authoritative DNS mode allows local DNS names may be exported to zone in the
global DNS. Dnsmasq acts as authoritative server for this zone, and also provides zone
transfer to secondaries for the zone, if required.
• DNSSEC validation may be performed on DNS replies from upstream nameservers,
providing security against spoofing and cache poisoning.
• Specified sub-domains can be directed to their own upstream DNS servers, making
VPN configuration easy.
• Internationalised domain names are supported.
Dynamic Host Configuration Protocol (DHCP) is a client/server protocol that automatically
provides an Internet Protocol (IP) host with its IP address and other related configuration
information such as the subnet mask and default gateway. RFCs 2131 and 2132 define
11
19. DHCP as an Internet Engineering Task Force (IETF) standard based on Bootstrap Protocol
(BOOTP), a protocol with which DHCP shares many implementation details. DHCP allows
hosts to obtain required TCP/IP configuration information from a DHCP server.[15]
Every device on a TCP/IP-based network must have a unique unicast IP address to
access the network and its resources. Without DHCP, IP addresses for new computers or
computers that are moved from one subnet to another must be configured manually; IP
addresses for computers that are removed from the network must be manually reclaimed.
With DHCP, this entire process is automated and managed centrally. The DHCP server
maintains a pool of IP addresses and leases an address to any DHCP-enabled client when it
starts up on the network. Because the IP addresses are dynamic (leased) rather than static
(permanently assigned), addresses no longer in use are automatically returned to the pool for
reallocation. The network administrator establishes DHCP servers that maintain TCP/IP
configuration information and provide address configuration to DHCP-enabled clients in the
form of a lease offer.The DHCP subsystem supports, BOOTP and PXE. The DHCP server
stores the configuration information in a database that includes:
• Both static and dynamic DHCP leases are supported, along with stateless mode in
DHCPv6.
• The PXE system is a full PXE server, supporting netboot menus and multiple ar-
chitecture support. It includes proxy-mode, where the PXE system co-operates with
another DHCP server.
• There is a built in read-only TFTP server to support netboot.
• Machines which are configured by DHCP have their names automatically included in
the DNS and the names can specified by each machine or centrally by associating a
name with a MAC address or UID in the dnsmasq configuration file.
Benefits of DHCP:
DHCP includes the following features to reduce network administration:
• Centralized and automated TCP/IP configuration.
• The ability to define TCP/IP configurations from a central location.
• The ability to assign a full range of additional TCP/IP configuration values by means
of DHCP options.
• The efficient handling of IP address changes for clients that must be updated frequently,
such as those for portable computers that move to different locations on a wireless
network.
• The forwarding of initial DHCP messages by using a DHCP relay agent, which elimi-
nates the need for a DHCP server on every subnet.
12
20. Chapter 4
Execution
The main task for the device is to make any portable storage media accessible over wi-
fi to any device which is a part of its wireless network. To achieve this goal, a wireless
FTP Server is needs to be designed. The whole implementation is divided into three logical
sections which includes fetching the data, populating it to the FTP server and then servicing
its clients on demand. A client is any user connected to the device through FTP protocol
using the device’s generated network. The proposed device run. Each section is described
in detail in the following sub-sections.
Figure 4.1: New Interface Device.
13
21. 4.1 Memory Interfacing Module
This section consists of mounting of portable storage devices to the desired location in the
operating system. Debian operating system uses its file system to interface any hardware
with it [6]. Any hardware attached to it has a respective file in the operating system which
is a driver file of that hardware and the file acts as an interface between the kernel and the
hardware. The storage devices attached to the USB port of Raspberry pi [9] follows a file
scheme of sda1, sdb1, sdc1 and so on in the Debian operating system. These files act as
source for mounting these drives to a particular folder.
The main task is to mount any device at the time of booting before the execution of all
the daemon processes. For this necessary changes are done in the ”fstab” configuration file
of the operating system with the compatible user id, group id, file access permissions and the
path for mounting the drive. The user id and the group id for the mount file should match
with the serving folder of FTP server with all the access rights.By default, all the removable
drives are mounted under ”/media” folder [6].
USB port of Raspberry pi B+ provides the output current of 600mA [7]. This current
rating is the most suitable for the portable devices like pen-drives or SD-cards, but when it
comes to hard-drives, the scenario changes drastically. Hard-drives require at least 1200mA
of current for the proper spinning of the rotor used in it. Raspberry Pi’s i/o pins solve this
problem. These i/o pins run on 1200mA [7]. Hence, one of the i/o pins and the VCC of the
USB port is shorted via a simple software manipulation in ”boot configuration” file of the
operating system. This forces USB port to start supply of 1200mA current and hard drives
can also be connected.
4.2 FTP Server Configuration and Linking Module
The most commonly used protocol for transfer of large data is the File Transfer Protocol.
Most of the file explorer applications for the smartphones or browsers support FTP server.
FTP server works with two TCP connections simultaneously i.e. control connection and
the data connection with the client. The control connection is persistent throughout the
communication between the client and the server on port 21 [4]. Traversing between the files
is also done over a control connection. The data connection is made on and off according to
the transfer requirements. Data connection port is configurable.
The device proposed in this paper runs Very Secured File Transfer Protocol Daemon
(VSFTPD) FTP server for offering a standard FTP services to the end user. VSFTPD is
a versatile and easily configurable FTP server daemon software. It is configured by making
particular changes to ”vsftpd.conf” file of the software. It is configured in such a way that it
will follow IPv4(Internet Protocol Version 4) scheme, any anonymous user can read, write,
upload, create directories and files on it. VSFTPD does not allow any user to delete any
contents on the FTP server.
VSFTPD shows only those files which are stored in the ”ftp” folder under the services
offered by the Debian operating system. To show the contents of the external drives on the
ftp server, they must be present in this folder. Several ways of doing this are
1. Copy the whole contents. But,it is a very inefficient method and consumes memory on
the primary partition of the operating system.
14
22. 2. Let the external drive mount directly to ftp folder. This is impossible as external drives
mount only in /media folder.
3. The most efficient way is to softlink mount folder and ftp folder. In this method the
pointer to mount folder is stored in ftp folder. So ftp folder acts as if it is a media
folder.
In this way the content of external drives are shown on the FTP server.
4.3 Wi-fi Hotspot and Wireless Network Creation
The main aim of making everything available over the wireless medium is obtained in this
particular section, so that ’Wireless’ FTP server can be realized. This section consists of
three parts
1. Configuring drivers for the wi-fi adapter
2. Configuring DHCP (Dynamic Host Configuration Protocol) server
3. Configuration of wi-fi hotspot.
The wi-fi adapter used for our system is TP Link’s TL-wn725n. It is a small USB wi-fi
adapter which supports all wi-fi standards i.e. 802.11b/g/n [11]. This adapter supports both
infrastructure and AdHoc networking mode. It uses Realtek’s chip as the main component.
To make this device work along with the operating system, specific drivers compatible with
given version of an operating system are installed. If the drivers are installed properly, new
interface wlan0 is generated in the device files of the operating system. Static IP address is
assigned to this interface.
Wi-fi hotspot is created on the wi-fi adapter using hostapd (Host Access Point Daemon)
software.[13] By using this daemon program the adapter creates a wireless access point to
which multiple users can connect. wi-fi adapter creates its own network in AdHoc mode
with 802.11g hardware mode. Different authentication schemes can be implemented which
includes WEP, WPA-PSK, WPA2PSK. Using WPA2PSK is the most suitable one as it is
the most secure authentication standard for wi-fi network. All the above options along with
SSID and password is configured in the ”hostapd.conf”, the configuration file of the hostapd
[13].
When any smartphone is connected to the network created by the device, it must be
assigned a particular IP address in the range of its own network address so that it can
communicate with the device properly. This assignment of IP addresses to every new device
connecting to the wi-fi hotspot is done by the DHCP server. The daemon software used
in this device is ”dnsmasq”. It is dns cum DHCP server. DHCP server is configured by
providing information about the interface on which it is going to provide IP addresses,
wlan0 in our case, range of IP-addresses which limits the number of devices connected to
the created network, the time for which the connection will be maintained i.e. refresh time,
lease time, default gateway IP-address and default DNS IP-address.
After completing all these configurations, the device is ready to host any type of storage
devices over wi-fi hotspot.
15
23. Chapter 5
Tests & Results
The previous chapters concerned with proving the steps to configure the device to meet
the design requirements. This chapter illustrates about the usage of the device and the
performance testing. Each task is explained in detail in the following sub-sections.
5.1 Initialization
The algorithm for the stated device contains three major modules. Each module depends
on the earlier module. The work flow is as shown in Figure 4.1
1. Memory interfacing module
2. Linking Module
3. Serving Module
The steps for using the completely configured device are as follows:
1. Connect the required pen drive/hard disk/SD card to the USB slot in the device
2. Power ON the module.It takes around 30 sec for initialization.
3. Scan for the device’s Wi-Fi network
4. Connect to the Wi-Fi network.
5. Once, the user is connected to the network he can open any browser and type in address
bar ”ftp://’IP-address of wlan0 interface’” , which is ”ftp://192.168.1.2” for our device.
6. The contents of the drive connected will appear on the screen and he can traverse
through the files, upload or download any file required.
7. If data streaming is demanded, specific browsers such as Chrome,Firefox etc can be
used.
16
24. 5.2 Performance Testing
Once the device is configured ,it must pass some tests to approve it for its utmost utiliza-
tion.Test cases prove to be a certain way of qualifying the quality of service.Various tests are
done on the module. They are listed below along with the test results.
Working conditions : Raspberry Pi B+ board is completely configured and connected to a
fully charged power bank (2A output). TP-Link Wi-Fi adapter interfaced and configured
with Raspberry Pi B+ board. Three pen-drives are connected to the module at a time.
User’s Smart-phone running Android 4.4.4, placed 2m away from the module.
• Test 1: Checking the correctness of the Hostapd by the connection with the wi-fi
hotspot with correct SSID and password entry.
This test is Passed. Refer Figure 5.1
Figure 5.1: Password Authentication DHCP testing.
• Test 2: Checking for the correctness of DHCP server by checking for the IP address
assigned to the connected device
This test is Passed.
• Test 3: Checking whether FTP server is working or not by opening the FTP server by
entering the IP-address of the device.
This test is Passed. Refer Figure 5.2
17
25. • Test 4: Checking for the proper linking of the mount folder and serving folder by
traversing through the files in each storage device.
Since the folders USB1 , USB2 , USB3 are visible, this test is Passed. Refer Figure 5.2
Figure 5.2: Connecting to the FTP Server on 192.168.1.2
• Test 5:Download or Upload a file.
Done successfully Refer Figure 5.5
• Test 6: Create a new directory
Refer left image of Figure 5.3
• Test 7: Check whether delete command is permitted or not.
The action is not permitted. Refer Figure5.6
• Test 8:
¯
Stream a video and song Can be done Successfully.
Refer Figure 5.4 Maximum 8 users can stream 1080p video with 500kbps on an average.
12 users can stream 720p video with 360kbps on an average.
18
26. 5.3 Results
Thus browsing of data through directories of pendrives and downloading the selected files is
permitted, as seen from following images. Streaming of video is also accomplished success-
fully.
Figure 5.3: Displaying the contents of both the pen-drives
Figure 5.4: Video streaming demo
19
27. Figure 5.5: Downloading a file from the USB with data rate 4.48Mbps
Figure 5.6: Deleting operation prohibited
20
28. Chapter 6
Future Scope
The above tests are performed in a very controlled and ideal environment. But when it
comes to the practical implementation of a device as a full fledged product, lots of challenges
need to be faced. Future scopes of the device and proposed solutions are as follows.
6.1 SSID & Password Changing on the Air
User should have the right to change the SSID and the password of the device. This problem
is solved with the help of python based web server hosting a web page having a form for
new SSID and password. These inputs are taken as an input parameter by a python code.
The same python code opens a configuration file of hostapd and edits it with new input
parameters. Configuration file is saved and the hostapd is restarted. In this way user gets a
full authority to change SSID and password on the wireless interface as well.
6.2 Optimization for Good QoS
Device must limit the number of users joining the network as the quality of service degrades
with the increasing serving nodes. This issue is solved by limiting the range of IP addresses
assigned by the DHCP server to the desired number of IP’s which can be serviced seamlessly.
6.3 Power Management and Supply Design
The device supplies a power to wi-fi adapter as well as the external storage devices like
pen-drive or hard-drive. Both of these devices consume a lot of power for their effective
operation. So the efficient power management is needed and it is done by configuring power
management configuration files of hostapd. This will increase a battery life of the device.
6.4 Booting Time Reduction
The device takes considerable amount of time about 40 seconds to boot and start all the
daemon processes. This boot time can be further reduces by removing the unnecessary
services the operating system is providing.
21
29. Chapter 7
Project road map
7.1 Hardware Platform selection
This stage includes the detailed review of the technologies available in the market like micro-
controller based boards like arduino uno, ARM7 based general purpose boards and system
on chip devices like Raspberry pi or apple device etc. Selecting the technology which will be
the most convenient to use and which will have that kind of productivity that is needed for
the fulfillment of the problem statement is the essential part of this stage.
7.2 Configuration Stage
• To install suitable version of compatible operating system on SD-card used for the
Raspberry-pi board.
• To install device drivers for wi-fi adapter to make it work with the Raspberry-pi board.
• To install and the daemon processes required for the desired operation.
• To configure network settings.
• Study and solve the issues regarding the file system and mounting locations of the
external drives.
• Study of i/o pins for hard drive compatibility.
• Study of booting process to avoid login procedure.
7.3 Testing Stage
• To test the working of daemon processes with the use of system logs.
• To check for allowed services like upload, download, create folder, read, stream and
notification for denied services i.e. deletion.
• To measure maximum uplink and downlink speeds.
• To find out the allowable system capacity and modifications for best quality of service.
22
30. 7.4 Finishing and Documentation stage
• To prepare and present project idea
• To implement the modifications, corrections and suggestions obtained during previous
presentation.
• To prepare the final report and send it for review.
• To do the necessary corrections from the review report.
• To prepare poster of project
• To write technical paper for paper presentation.
• Final Presentation.
23
31. Chapter 8
Conclusion
Unshared memory access for external storages, incompatibility of hard-drives with smart-
phones, non comprehensiveness of storage design etc are some pertaining issues for today’s
techno savvy society. Taking this as problem statement we propose a solution to these prob-
lems through our device. Various tests are done with the proposed device which proving its
quality and usability. The device gives access to multiple users to use storage simultaneously
fulfilling the shared memory objective , the device supports all type of external storages
overcoming the problem of non comprehensiveness of storage design and wireless network
offers complete portability . In a nutshell, the solution given for the problem statement
ensures a complete portable device capable of hosting any storage media device over a Wi-Fi
network by following a basic but the most important protocol under TCP/IP protocol suite.
It gives user the complete authority to manipulate the data on the storage by assuring that
no data will be deleted/lost. Further improvements can be done for users to choose their
own SSID and password and modify them from their smart-phones itself.
24
32. Bibliography
[1] N. Stuban,”Wireless data transmission between personal computers ”,in IEEE Inter-
national conference on Electronics Technology: Meeting the Challenges of Electronics
Technology Progress,27th International Spring Seminar,2004, pp 237 - 241 vol.2
[2] K. Saitoh ,Y. Inoue, A. Iiuka and M. Morikura,” An effective data transfer method by
integrating priority control into multirate mechanisms for IEEE 802.11 wireless LANs,
in Vehicular Technology Conference, 2002 , pp 55-59 vol.1
[3] TP-LINK,”150Mbps Wireless N Nano USB Adapter,TL-WN725N”, Rev: 1.0.0
1910010668 Data Sheet,[2012]
[4] Elizabeth D. Zwicky, Simon Cooper and D. Brent Chapman,Building Internet Fire-
walls,Second Edition, June 2000, pp 287-300
[5] Otto Keklinen ,”Configure device as a wireless Hotspot”, 27.8.2014[Online],Available:
https://seravo.fi/2014/create-wireless-access-point-hostapd
[6] ”Linux file system”, http : //tldp.org/LDP/intro − linux/html/sect0301.html
[7] ”Raspberry Pi Hardware” ,
https://www.raspberrypi.org/documentation/hardware/raspberrypi/
[8] ”Introduction to Ad hoc Networks”,
http://www.cs.jhu.edu/ cs647/introadhoc.pdf
[9] ”Configuring Raspberry-Pi”,https://www.raspberrypi.org/forums
[10] ”Raspberry Pi - Model B+”,
https://www.sparkfun.com/products/retired/12994
[11] ”TP-Link TL-WN725n”,
http://www.tp-link.com/il/products/details/cat-11T L − WN725N.html
[12] ”File Transfer Protocol (FTP)”,
http://searchenterprisewan.techtarget.com/definition/File-Transfer-Protocol
[13] ”Hostapd”,
https://https://wiki.gentoo.org/wiki/Hostapd
25
34. Acknowledgments
We are thankful to Associate Prof. Sukanya Kulkarni for mentoring and encouraging us
on timely basis. We are grateful to Dr. Y. S. Rao for providing us the necessary hardware
and software tools as and when required. We also acknowledge Sardar Patel Institute of
Technology, Andheri for providing the necessary facilities for carrying out this work.
27