Key Timelines And Deadline Ppt Background Graphics
•
0 j'aime•144 vues

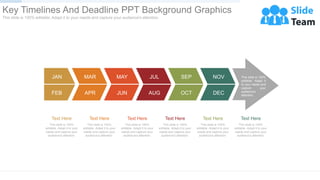
Presenting key timelines and deadline ppt background graphics. Presenting key timelines and deadline ppt background graphics. This is a key timelines and deadline ppt background graphics. This is a six stage process. The stages in this process are jan, feb, mar, apr, may, jun, jul, aug, sep, oct, nov, dec. https://bit.ly/3deek4p

Recommandé
Recommandé
Contenu connexe
Tendances
Tendances (20)
Similaire à Key Timelines And Deadline Ppt Background Graphics
Similaire à Key Timelines And Deadline Ppt Background Graphics (20)
Plus de SlideTeam
Plus de SlideTeam (20)
Dernier
Dernier (20)
Key Timelines And Deadline Ppt Background Graphics
- 1. This slide is 100% editable. Adapt it to your needs and capture your audience's attention. Text Here This slide is 100% editable. Adapt it to your needs and capture your audience's attention. Text Here This slide is 100% editable. Adapt it to your needs and capture your audience's attention. Text Here This slide is 100% editable. Adapt it to your needs and capture your audience's attention. Text Here This slide is 100% editable. Adapt it to your needs and capture your audience's attention. Text Here This slide is 100% editable. Adapt it to your needs and capture your audience's attention. Text Here JAN MAR MAY JUL SEP NOV FEB APR JUN AUG OCT DEC This slide is 100% editable. Adapt it to your needs and capture your audience's attention. Key Timelines And Deadline PPT Background Graphics This slide is 100% editable. Adapt it to your needs and capture your audience's attention.
- 2. Instructions To Edit This Slide This slide has been made in PowerPoint using basic PowerPoint shapes, and all graphics are 100% editable in PowerPoint. You can change color, size and orientation of any element to your liking, and add/edit any piece of text anywhere.
- 3. Resize Any Shape And Edit Color The entire slide has been made in PowerPoint itself, and you can edit the color of any component in this graphic. To change the color, just right click the object to highlight it, and then follow instructions - 1. Right click on the object or shape that you want to change the color of. 2. Choose Format Shape in the dialog box. 3. Choose “Fill” in the Format Shape box then “Solid” or “Gradient” depending on the appearance of the object. Change colour as shown in the picture. 1 2 3
- 4. The icons we have shown are just for demo purposes. You can replace these icons with the correct icons to suit your message. We have a large collection of icons to choose from. 1. To replace any icon, double click on it and select it, and then right click it to ungroup it. 2. Delete the icon and replace it with any icon or graphic from our site. Use Your Own Icons In Any Slide You can replace the icons in this slide with any icons you like from our site, or completely remove them if required - 1 2 3
- 5. Select From Thousands Of Editable Icons On Every Topic These icons are available at the Icons section on www.slideteam.net
- 6. Replace Image In This Slide With Your Own The image we have shown in this slide is for demo purposes only. You can replace this image with your own - 1 2 3
- 7. Change Orientation Of Any Graphic You can change the angle of any graphic in this slide e.g. if the slide has a needle, or any other shape, you can just select it and change the angle to suit your requirement. 1. For example, you can select the Dashboard Needle by double clicking on it, and then right click it once to highlight it. 2. Choose Format Shape in the dialog box. 3. Choose “Size” in the Format Shape box then “Rotation” and enter your preferred rotation angle. Once the angle is to your liking, adjust the position of the needle back to the centre. You can also just rotate it using the rotate icon on the top of the shape itself once it is highlighted. 1 2 3