
Recommandé
Contenu connexe
Tendances
Tendances (20)
En vedette
En vedette (20)
Similaire à Week 202 design skills
Similaire à Week 202 design skills (20)
Dernier
Dernier (20)
Week 202 design skills
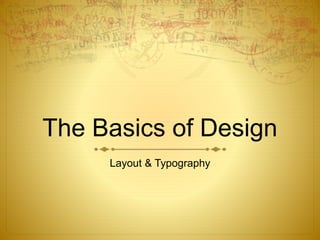
- 1. The Basics of Design Layout & Typography
- 2. Aims & Objectives To introduce and demonstrate the key principles of design. To develop understanding of terminology to help with the analysis of graphic designs. To research graphic designs and graphic designers. To discuss how to put the principles of design into action.
- 3. Principles of Design The four things you need to know before starting: Audience - who you want to hear your message Format – of the page or design Constraints - time, budget, format Principles - of basic design
- 5. Principles of Design The most iconic, well-known and attractive designs are startlingly simple. Take these logos, for instance: SPECIAL SKILL: TYPOGRAPHY SPECIAL SKILL: SEDUCTIVE CONNOTATION SPECIAL SKILL: ADAPTABILITY SPECIAL SKILL: CONCEPT (DYNAMISM)
- 6. Principles of Design The six key principles of design are: Emphasis – keeping your main message clear, both in terms of the layout and the typography. Contrast – visually stressing the difference between the different elements on the page. Balance – grouping information in a logical way, leaving a clear and pleasing effect. Alignment – drawing connections with different elements e.g. graphics, images, shapes and lines. Repetition – where all the elements meet, they need to unify and ‘feed into’ the main message. Flow – how the design ‘leads the eye’, starting with the simplest point that Western readers tend to read from left to right.
- 7. Terminology The following is some of the most important terminology that you will come across in design. Try to use both the principles and these terms when analysing and creating your designs: Visual Hierarchy – splitting information into primary, secondary and tertiary message. Focal point – the part of the page that is most emphasised. Accent – Any other points than the focal point that influence the key message, too much of which can ‘cloud’ it.
- 8. Terminology Thumbnail – a quick, exploratory sketch that act as the visual proof of a thinking process. Thumbnails that you quite like become Roughs before choosing your favourite and polishing it up as a Comp (comprehensive). Body Copy – the small type that carries most of the information in a design. Dead Space / White Space – space that represents an unwieldy ‘gap’ vs. space that contributes to the aesthetic flow. Serif / San Serif – a ‘serif’ is the parts of letters that stick out and are often flowing type whereas ‘sans serif’ is without serifs and look more blocky. Leftfield – not expected or prepared for (often have an unclear purpose; seen as quite ‘quirky’)
- 9. Inspiration Graphic design is a huge and expanding field that grows alongside the power of the web and commercial business. There is therefore lots of inspiration to find. Begin by picking one of the following designers and researching their work. Whichever you choose, try to identify some of their most celebrated designs and what styles, principles or techniques they appear to excel with: David Carson Paul Rand Alan Fletcher Katherine McCoy Saul Bass Neville Brody Giambattista Bodoni Chip Kidd Milton Glaser Adrain Fruitger
- 10. Inspiration For further inspiration, try the following links: 25 Graphic Designers to follow 46 Greatest Logos of All Time 10 Great Infographics 12 Documentaries every graphic designer should see Brilliant words of advice from 14 Great Graphic Designers And, for a dose of reality: The 25 Worst Things About Being A Graphic Designer Today
- 11. Emphasis Keeping your main message clear, both in terms of the layout and the typography. 1. What are the primary, secondary and tertiary focal points? 2. Special effects
- 12. Emphasis Keeping your main message clear, both in terms of the layout and the typography. 3. In pairs or groups, discuss how to improve the following designs
- 13. Contrast Visually stressing the difference between the different elements on the page. 1. What two changes to this page have had the most effect from a design point of view? 2. If you were to attempt to create a two-word logo purely in MS Word, what might you do to help it stand out?
- 14. Contrast Visually stressing the difference between the different elements on the page. 3. How can you improve the contrast between elements in this menu? 4. How has the contrast improved here?
- 15. Balance Grouping information in a logical way, leaving a clear and pleasing effect. 1. Without re-sizing anything, how might you create a greater sense of balance with this flyer by re- arrangement?
- 16. Balance Grouping information in a logical way, leaving a clear and pleasing effect. 2. Don’t just fill up the page. Use the space wisely. How might you re-size and re-style this flyer? 3. See how this image complements itself on each side.
- 17. Alignment Drawing connections with different elements e.g. graphics, images, shapes and lines. 1. Load up InDesign as shown. Why is it set up like this? 2. How might you re-position the text and graphics to greater effect with this poster?
- 18. Alignment Drawing connections with different elements e.g. graphics, images, shapes and lines. 3. Here are some different alignment effects. Click me
- 19. Repetition Where all the elements meet, they need to unify and ‘feed into’ the main message. 1. How might you make better use of the egg symbol for these pages?
- 20. Repetition Where all the elements meet, they need to unify and ‘feed into’ the main message. 2. How do these font changes work? Are they effective?
- 21. Repetition Where all the elements meet, they need to unify and ‘feed into’ the main message. 3. What has improved here and what could be better?
- 22. Flow How the design ‘leads the eye’. 1. What technique is this known as in Photoshop? 2. Why doesn’t this work?
- 23. Flow How the design ‘leads the eye’. 3. Explain why the text has been grouped in this way and what contributes to the flow.
- 24. Aims & Objectives To introduce and demonstrate the key principles of design. To develop understanding of terminology to help with the analysis of graphic designs. To research graphic designs and graphic designers. To discuss how to put the principles of design into action.
Notes de l'éditeur
- 1 - The logo, ‘winning recipes’ and the slogan. 3 – Visual effects & grouping.
- 1 - The logo, ‘winning recipes’ and the slogan. 3 – Visual effects & grouping.
- 1 – The contrast between the images and the width of the rule lines. 2 – Fonts (serif script vs. bold sans serif) & Thickness of font. 3 – Size & Separation. 4 – Increasing the contrast, a more playful font, repeating the image and flushing to the right (avoid stacking text; rotate it instead).
- 1 – The contrast between the images and the width of the rule lines. 2 – Fonts (serif script vs. bold sans serif) & Thickness of font. 3 – Size & Separation. 4 – Increasing the contrast, a more playful font, repeating the image and flushing to the right (avoid stacking text; rotate it instead).
- 1 – Either centralise everything to create symmetry or, better, flush to the right and align the page with a repeated graphic style. 2 – Hold the image in place with the focal point (name) by covering left to right, allowing you to take up the top half and create asymmetry with the graphic. Note how the text flushed to the right creates white space.
- 1 – Either centralise everything to create symmetry or, better, flush to the right and align the page with a repeated graphic style. 2 – Hold the image in place with the focal point (name) by covering left to right, allowing you to take up the top half and create asymmetry with the graphic. Note how the text flushed to the right creates white space.
- 1 – Load up InDesign and create a new document with 3 columns, 5mm Gutter and 6mm margins except for the inner margin at 12mm. 2 – Group objects into lines and blocks. 3 – Click on the ‘08’ picture.
- 1 – Load up InDesign and create a new document with 3 columns, 5mm Gutter and 6mm margins except for the inner margin at 12mm. 2 – Group objects into lines and blocks. 3 – Click on the ‘08’ picture.
- 1 – Make better use of an iconic shape besides adding more imagery to repeat the effect. 2 – The first one changes how the word both looks and sounds. There is double meaning in the plus and minus sign. There is a clear case of leading the eye with the spiral and the pointing effect of ‘continuation’. Unusual, well-aligned gaps and fades can create dynamic effects. 3 – The weighting of the lines has improved in order to de-clutter the design but there is still too much repetition.
- 1 – Make better use of an iconic shape besides adding more imagery to repeat the effect. 2 – The first one changes how the word both looks and sounds. There is double meaning in the plus and minus sign. There is a clear case of leading the eye with the spiral and the pointing effect of ‘continuation’. Unusual, well-aligned gaps and fades can create dynamic effects. 3 – The weighting of the lines has improved in order to de-clutter the design but there is still too much repetition.
- 1 – Make better use of an iconic shape besides adding more imagery to repeat the effect. 2 – The first one changes how the word both looks and sounds. There is double meaning in the plus and minus sign. There is a clear case of leading the eye with the spiral and the pointing effect of ‘continuation’. Unusual, well-aligned gaps and fades can create dynamic effects. 3 – The weighting of the lines has improved in order to de-clutter the design but there is still too much repetition.
- 1 – Text Flow. 2 – It keeps the eye looking at the headline. 3 – It first tells you why it’s there in the first place, then announces who it is, then what is included, then where/when it is and finally how to contact them. The design is logical and bordered by a slogan and selling line. The graphic adds to the elegance and flow.
- 1 – Text Flow. 2 – It keeps the eye looking at the headline. 3 – It first tells you why it’s there in the first place, then announces who it is, then what is included, then where/when it is and finally how to contact them. The design is logical and bordered by a slogan and selling line. The graphic adds to the elegance and flow.