
Recommandé
Recommandé
Contenu connexe
Similaire à Lab communications online version
Similaire à Lab communications online version (20)
Dernier
Dernier (20)
Lab communications online version
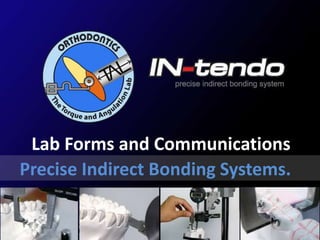
- 1. Lab Forms and Communications Precise Indirect Bonding Systems.
- 2. The Torque Angulation Laboratory www.torque-angulationlab.com Presented by IN-tendo www.intendo-ortho.com and
- 3. • The correct information and it’s communication to the lab is necessary for a successful bonding. • This information should include future planning; for example any prosthetic or cosmetic work in collaboration with a Prosthodontist, such as future crowns, tooth reductions or changes of morphology such as a canine to replace a lateral. • Height requirements for brackets will depend on this information. • X-Rays are important for the larger picture. Labs cannot see more than the model. Impacted teeth, erupting 8’s, root positions where root torque may be needed or a simple message to apply it to certain teeth such as palatal placed laterals for example. • In Lingual Orthodontics we are dealing with mainly adults, so what we can do to the patient effectively is restricted for a stable outcome, think about expansions, recession, perio- involvement, etc., therefore good communication between clinic and lab is essential.
- 4. An example of a diagnostic set –up lab form. The information required really helps the lab do a better job. Try to include as much of your treatment plan and guidelines as possible.…we are not mind readers
- 5. An example of the bonding form. This information is not the same as required on the set-up model form. The type of bonding required, movements and extractions indicated + wires required. Say what teeth do not need bonding and why…? Future extraction, Pontics on bridges, etc., There’s also a space to write your own specific bonding values if you know what you need.
- 6. What’s your treatment plan? Which brackets will best achieve it? What type of bonding / lab service do you need ? Does it fit with the treatment costs and your skills?
- 7. Filling in the lab forms:- Obviously your e-mail is very important so we can communicate, line ID and or Messenger are also helpful for quick communications. I sometimes send interim images via WhatsApp or Messenger whilst I am doing a set-up to ask a specific question. Age of patient is also a help for us. Tell us what arches you want treating. Tell us what system you want, 2D, 3D B.E.S.T. or IN-Tendo. On the top right we have the arches. Here you can mark with an X all teeth being extracted. It also helps to indicate movements by adding arrows to that effect. Teeth missing or not to be bonded should be shaded in. Tick the box if you want the “Lab Brackets” or your own (which you will supply).
- 8. More details about teeth to be bonded/ extracted. Apart from the shading and the X’s, it also helps if you indicate preferences for Molar brackets. Place a T for tubes and a D for Double brackets. Tell us also in the box if it is an extraction case and if you intend to use Mini Screws (TADS). This will also affect anchorage requirements in bracket positioning. Also tick the relevant boxes for the choice of wires and template, You can write in extra wires if the size is not there. Then we need to know your preference for transfer trays. Whole arch = 1 piece, Bi Lateral = 2 pieces and anterior / posteriors sections = 3 pieces Finally on the bonding form you have space to write any extra details that you think will help us do the correct work for you.
- 9. If IN-tendo is the choice of system on the first lab form, then the second form for “Set-Up Models” needs to be completed. On this form ‘ArchForm’ means which is the preferential arch form to follow, if neither, then use the boxes below for Ovoid, square or tapered. Expansion or Constriction? Indicate the max of each arch. If there are some teeth which are good archform indicators, please write them down in the box provided. If protraction or retraction is needed, please highlight which and indicate the desired amount. Treat to which midline? Tick the boxes…Upper, lower or facial? How do we achieve this? IPR , Archform symmetry?
- 10. Class of Occlusion? Tick the boxes for which is applicable, Class I Molar and Canine? Axial tooth references….what does this mean? Any tooth with a nice long axis that you and the patient would really like to keep. For example an Central incisor that looks nice, therefore we can use this as an ‘Axis’ indicator for the bonding values. What type of Occlusal plane do you want/ Flat, with COS (Curve of Spee) or just maintain? Would you like to Intrude or Extrude teeth? Please write in the box which teeth numbers. Over Bite…what is the desired OB for the case, tick the box. And finally there is space at the bottom to include any other special requirements you have.
- 11. The following are some examples of good communications via photos and other means…Why? Cross referencing with the lab forms, for “key indicators”, axial and archform, highlighting areas of concern, leveling and here buccal torque. Midline reference and facial profile / harmony through the planned diagnostic models. Images help the lab.
- 14. If you have scans then by all means use them for communications. 3D are good to manipulate, better still if you have done your desired type of set-up using a software then send us that file to follow.
- 15. You can send individual photos via e-mails or on a CD with the work, or make a Word Doc as shown here, digital images or send a PPT. One tip, if sending any photos via e-mail be sure to ‘resize’ them so they pass the internet easily to be downloaded. You can do this in most image applications like ACDsee or similar.
- 16. Composite pad thickness and shape depends on the purpose. Reduce bends? Shape for better bonding and hygiene “To Bend or Not to bend…that is the question?” Tell the lab what you prefer to do and what thickness of composite should be the maximum.
- 17. Specific height or axis requirements? Will certain teeth be modified in the plan, cusp reductions, crowns, etc., Because the height of the brackets depend on this also to avoid re-bonding or bending to finish.
- 18. Tip backs on Extraction cases for anchorage or will you use mini screws / micro implants? Sliding mechanics or loops? Do you need ‘Tip Backs? Programming via the bracket slot?
- 19. What type of brackets? Self Ligating or Normal Slot? All 018 or mixed with 022 for posterior sliding mechanics or just bi- dimensional for posterior passive torque?
- 20. What prescription? To close a diastema, will it be best using some “tip backs” … or just reduce Tip to 0. Ask the lab to do it! Where do you want your tubes? On the 7’s only or on One last molar unilateral…or both 1st and 2nd molars?
- 21. To control buccal torque in non extraction cases then we should use a bracket system that is 018 throughout OR you will have an average of 17 degrees of play if a 022 posterior bracket is used! Maintain spaces or not? It affects the positioning also.
- 22. Here I did a mix of ORG Mini anterior brackets with 018 molars from the same company, but another bracket system for the PM’s, because the Org were just a bi-dimensional set with 022 posteriors. Where torque is needed then 018 slot throughout is better. Now DTC company are making the whole set in 018 slot!
- 23. The inter bracket distance in this case allows this mix, if the brackets were closer then a single bracket would be better on the PM.
- 24. This mix allows better rotation control of the premolar. Close up of the Lower from the previous slide and below the bracket system the PM brackets were taken from.
- 25. Where the robots will bend wires or the Dr. wants simplified bonding (cheaper service) without torque programming in the slot, then we can bond the brackets as close as we can to the teeth, same as 2D. But keep in mind as the torque cannot be programmed into the slots, so morphology will dictate the slot positions and therefore the wires could have many twists in them causing more friction and therefore slower movements.
- 26. This was a case for the SureSmile system from Orametrix in the US, with robot bent wires.
- 27. What about ‘Bands’ and brackets soldering to them ? It is best to fit them to the models before sending, or if you take a silicone impression, be careful not to move the bands and then send the impression to the lab for casting. We always have problems when they are cast before arrival. There’s a technique to getting them off the models without too much difficulty. We find that Vaseline is not good enough. All the inner surfaces are best covered by a very thin coat of denture wax, also any areas where stone could cast into around the outside of the bands.
- 29. Preparation of the lingual surface is needed for some teeth to avoid bonding problems. Removal of enamel elevations if possible will simplify the lab bonding by getting brackets closer to the other teeth and improve patient comfort and reduce 1st order wire bends.
- 30. Again incorporating tip backs in extraction cases for max anchorage:- Not needed so much on all teeth if mini screws are used, you need to judge case by case for the mechanics needed.
- 31. Summary:- • Plan ahead as much as possible • Look at each case individually • Check all impressions before going ahead. • Communicate all relevant details to the lab.
- 32. A lab who communicates well!