
Recommandé
Contenu connexe
Tendances
En vedette
En vedette (19)
Similaire à Version 3 introduction 11 jul-2016
Similaire à Version 3 introduction 11 jul-2016 (20)
Dernier
Dernier (20)
Version 3 introduction 11 jul-2016
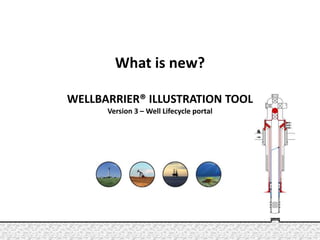
- 1. What is new? WELLBARRIER® ILLUSTRATION TOOL Version 3 – Well Lifecycle portal
- 2. We have created a new version (3) There are two principal reasons for doing this: • We are doing a technology change from Silverlight to HTML5, because Microsoft has stopped development of Silverlight and will not support this after 2020. • We are creating a solution that will be prepared to offer new modules in the future
- 3. With many improvements We have made changes to the tool The tool is now more well based than illustration based. Based on user feedback we are please to offer you the following: • You create one input table for the well, which is used for all subsequent illustrations • Illustrations are annotated with information from the input table • Revisions of illustration is now “stacked” and available as old “versions” • A traffic light system for well barrier elements for production and P&A wells • The system will show current well barrier schematic based on logic or user override • The barrier illustration and barrier table is now edited on the same page • The tool is more screen friendly, showing full size illustrations and tables • Plus numerous changes to make the tool more consistent and intuitive Browser required: Internet Explorer 11, Firefox 42 or Google Chrome 47
- 4. The new version has a structure with 3 principal views : Home + Well overview + Product and 2 editor panels : Well data editor + Product editor Home – access to wells and general information Well data editor – used for all subsequent work Well overview – well status and current WBS Product – the different products you work on Product editor – editing the product pages
- 5. Home Here you will find useful general information. View panelHere you have easy access to recent and pending work. Navigation (my work) panel The blue menu is used to navigate to the well you want to work on. Or you create a new well in the archive. Navigation (archive) panel Personal and system settings System menu
- 6. Well overview The main panel will show the current well barrier schematic and principal well data View panel The left side panel allow you to navigate to different types of well information Navigation panel The right side panel gives an overview of work log, versions and comments, for this well. History panel The top menu shows the available type of illustrations in this well. Number of illustrations pr. product is shown in brackets Product menu The row below the top menu will give the identification of the field, well, illustration, and current status Illustration identifier
- 7. Product The left side panel allows you to navigate to the different illustrations for this product. Navigation panel As long at the panel on the left side is blue, you are in the view mode and have easy access to all illustration belonging to the different products. View panel The right side panel gives an overview of work log, versions and comments, for this illustration. History panel Chose the product you want to work with from the Product menu If a number appear behind the product it will indicate how many illustrations can be found in the library. If the product is under-lined it indicates that these products are associated (based on the well barrier illustration you have made). Product menu You can do the following to a product: Delete Copy Export Create associated product Edit Product functionality
- 8. Well data editor The top menu allows you to Save your work and exit the editor. Editor function menu The top left corner always tells you which well you are working on Identifier In edit mode you input all data for the well, this will subsequently be used for all illustrations you create. Well data editor panel When the color of the left side panel changes to white it indicates you are in edit mode. Select the type of data you want to input Navigation panel
- 9. Product editor The top menu allows you to work principal functions of the editor page such as • Position of the illustration in the available area • Zoom in on the editor to work on fine details Editor function menu The top left corner always tells you which well you are working on. Identifier When you create an illustration and define the barrier elements, you will see the barrier element table next to the illustration. As you define components to be barrier elements, the table will automatically be updated and you can edit its content at the same time as preparing the illustration. Work panel The left side panel gives you access to all components When the color of the left side panel changes to white it indicates you are in edit mode. Editor component panel The right side panel gives an overview of work log, versions and comments for this illustration. History panel
- 10. The most important things • You should have no problems creating new wells and illustrations • Fill in the «Well Data Editor» tables as this will save you from much text editing • Backward compatibility can sometimes be a challenge • Make a new well folder and start the illustrations from scratch if necessary • Contact support@wellbarrier.com for advise if you have any issue • Read the support documentation • You’re probably like me, I only read them when I have a problem • "Version 3 - New and changed functionality" will explain a lot • "Version 3 - Known compatibility issues", will give you a quick fix to known issues • "User Guide Wellbarrier Illustration Tool", will give you much more details • There are easy reading documents, to be found on the Home page • Do not hesitate to contact us at support@wellbarrier.com • If you find any anomally, misbehaviour or bug, please make a screenshot with a reference to field/well/drawings number and a brief description • Improvement suggestions are always welcome