Raspberry Pi Introductory Lecture
•Télécharger en tant que PPTX, PDF•
0 j'aime•88 vues

The document provides an outline for a course on learning Internet of Things (IoT) using Raspberry Pi, covering topics such as connecting and setting up the Raspberry Pi, programming with Python, building circuits, and creating basic IoT projects involving home automation, security monitoring, and remote control. The course structure includes introducing Raspberry Pi hardware and software, Python programming, connecting electronic components, and applying the skills learned to build a digital making project.

Recommandé
Recommandé
Contenu connexe
Similaire à Raspberry Pi Introductory Lecture
Similaire à Raspberry Pi Introductory Lecture (20)
Plus de Syed Umaid Ahmed
Plus de Syed Umaid Ahmed (8)
Dernier
Dernier (20)
Raspberry Pi Introductory Lecture
- 2. Eben Upton CEO (Raspberry Pi Foundation) Release date 29 February 2012; 6 years ago Power Rating: 5 volt and 2.5 ampere 2018: 18 million pieces sold
- 3. This course is designed for people with no experience with Raspberry Pi, who are interested in learning about the power of Internet of Things (IoT) using Raspberry Pi. Raspberry Pi is a versatile, credit card sized computer that can be used for home automation, security monitoring, remote controlling, web servers or even just as a computer. This is your first step in the exciting journey of discovering the Internet of Things (IoT). We will start by introducing the hardware and installing the operating system, with some basic command line instructions. Then you will learn about updating and upgrading the operating system, setting up network and Wi-Fi, accessing the Raspberry Pi from a remote application, basic electronics and controlling circuits through the Raspberry Pi. Have you heard about Raspberry Pi? Would you like to learn how to build amazing Raspberry Pi projects?
- 4. Course structure During this course we will cover: - What is Raspberry Pi and what can you do with it? - What is the Internet of Things (IoT)? - Connect the Raspberry Pi - Install Raspbian Operating System (OS) using new out of the box software (NOOBS) and setup wifi - Connect electronic components to Raspberry Pi - Remote control Pi - Command line and Python3 interpreter basics. ASSESSMENT Assessments are designed to provide learners with opportunities to demonstrate they have attained the required skills and knowledge using a range of practically based activities and tasks, as required by recognised standards
- 5. What will you achieve? (Course outcomes) By the end of the course, you'll be able to... Develop understanding of how the Raspberry Pi can be used as a tool for physical computing. Apply knowledge of programming concepts to control digital inputs and outputs. Explore practical applications of inputs and outputs to make a project. Reflect on your learning and create ideas for your classroom practice. Identify ways of engaging learners in physical computing in your learning context.
- 6. What topics will you cover? • Introduction to the Raspberry Pi computer. • Setting up the Raspberry Pi hardware and software and booting your Pi for the first time. • Writing your first Python program, and make a simple reaction game. • Basic Linux library installations • The importance of success and failure when learning. • How simple circuits work, how to connect an LED to your Raspberry Pi, and how to switch your LED on and off using Python code to create light sequences. • Different kinds of input devices that can be used to sense the real world. Connecting and taking input from a simple button, and how to build your own button based projects. • Applying your knowledge about physical computing to create a digital making project that is shared with and reviewed by your peers.
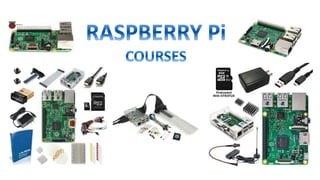
- 7. What software or tools do you need? 1. Raspberry Pi (models B+ through to 3) 2. Micro-SD card (8GB minimum) with our Raspbian operating system installed 3. Monitor and HDMI cable (or VGA adaptor) 4. USB keyboard and mouse 5. Buttons (Simple Push Buttons) 6. Servo Motors, 5 volts (9g) 7. Breadboard 8. LEDs, a button, 330Ω resistors and jumper cables (male to female). 9. Passive Infrared Motion Sensor (PIR Sensor) 10. Laptop and Ethernet Cable with RJ-45 on both ends. 11. Internet Connectivity 12. Power Adapter (5 volt and 2.5 amp) or a standard USB cable
- 8. Setting up the software So you’ve got a Raspberry Pi, and you’ve made sure you have all the physical equipment you need. Now what? It’s time to get yourself an operating system and boot up your Raspberry Pi. The recommended operating system for use with the Raspberry Pi is called Raspbian. Raspbian is a version of GNU/Linux, designed specifically to work well with the Raspberry Pi. You have a couple of options when it comes to getting hold of a copy of Raspbian. 1. You can download the operating system for free from the Raspberry Pi website and put it onto a blank SD card. 2. In order to flash the image we recommend you download a tool called ’’Win32 Disk-imager’’ which makes this process really straightforward. 3. Once you have downloaded the OS image and Imager, insert your SD card (8GB+) into the computer or laptop’s SD card reader. 4. Load Imager and click Select Image. You’ll then need to browse and select the OS image file you just downloaded (no need to decompress it). 5. Click Select Drive an choose the drive that matches your SD card. 6. Click Flash! and wait. In around 10 minutes you’ll have a Raspbian SD card ready to boot.
- 9. Connecting all the things Plugging in your Raspberry Pi Begin by placing your SD card into the SD card slot on the Raspberry Pi. It will only fit one way. Make sure that your monitor or TV is turned on, and that you have selected the right input (e.g. HDMI 1, DVI, etc.). Connect your HDMI cable from your Raspberry Pi to your monitor or TV. If you intend to connect your Raspberry Pi to the internet, plug an Ethernet cable into the Ethernet port, or connect a Wi-Fi dongle.
- 10. GETTING STARTED WITH PYTHON We’ll test some of the codes in the first class in this environment
- 11. PYTHON PRACTICE Today we’re going to discuss the loops, libraries, functions and Syntax of python programming language. Ask the instruction to provide at least 10 short pieces of codes for different Real time applications.
- 13. Applied Activity: Working with loops A core concept in programming is the ability to repeat instructions, either a fixed (finite) number of times, or over and over until some condition is met, possibly forever (infinite). These loops are powerful tools to master, and are common in all but the simplest programs. In Python, loops are defined using two different structures - while loops are potentially infinite, and for loops repeat a specific number of times. Below you can see examples of both.
- 14. o Environment o Basic Methods of working o Additional Software o Linux Basics o Libraries Updates o Boot options o Languages o Text Editors o Chromium Browser
- 15. General Purpose Input Output on the Raspberry Pi The GPIO pins are one way in which the Raspberry Pi can control and monitor the outside world by being connected to electronic circuits. The Pi can control LEDs, turning them on or off, drive motors, and interact with many other objects. It can also detect the pressing of a switch, change in temperature, or light, etc, by attaching kinds of sensors. We refer to all these activities, and more, as physical computing. Most models of the Raspberry Pi have 40 pins that look like this: These pins are a physical interface between the Raspberry Pi and the outside world. Using them, you can program the Raspberry Pi to switch devices on and off (output), or receive data from sensors and switches (input). Of the 40 pins, 26 are GPIO pins and the others are power or ground pins (plus two ID EEPROM pins which you should not play with unless you know your stuff!)
- 16. • Build your connections immediately
- 17. You should see that your LED has turned off. This is because at the moment, pin 17 is in an off or low state. To turn on the LED, we’ll need to set pin 17 to be on or high. When the pin is in a high state, it will provide 3.3 volts to the circuit. To change the state of the pin, you’re going to need a few lines of Python code, which you’ll write in the next step. Blinky blinky lights 1. We’re going to use the ‘development environment’ IDLE, to write and run Python code. Open IDLE by clicking on Menu > Programming > Python 3 (IDLE) on your Raspberry Pi. 2. As before, you’re going to need an empty file to start writing your code. Click on File > New File to open a new window. Save this straight away (File > Save As..) and call it blink.py. 3. You used the time module to help write a simple program, and you imported the sleep function. In this you’re going to use a module called gpiozero. This module gives you access to the GPIO pins on the Raspberry Pi. You don’t need to use the whole of the gpiozero library, just the bit that allows you to control LEDs.
- 19. Let’s check out the amazing Raspberry Pakistan’s Profile for these: https://github.com/SyedUmaidAhmed
- 20. Analogue vs Digital Using the GPIO pins on the Raspberry Pi, it is easy to send a signal to an output component and turn it on or off. You can also detect whether an input component is on or off. Components that operate in this way are called digital components. An LED is an example of a digital output component. It can either be on or off, and there is no value in-between. We can think of the on and off states as being either 1 or 0. You can send a 1 to the LED to illuminate it on and a 0 to the LED to turn it off again. A button is an example of a digital input component. It can either be on or off as well. When the button is pressed, it sends a 1 to the Raspberry Pi GPIO pin it is connected to. When the button is released, it sends a 0 to the GPIO pin. There is no other value that can be sent, as you can’t half-press a button.
- 21. Look at the graph below. It shows the result of a button being pushed and released over time. When it is being pushed it sends a 1, and when it is released it sends a 0. Digital input and output components are easy to use with the Raspberry Pi, as the GPIO pins are all digital. They can only send or receive 1s and 0s. However, not all components are digital. Some are called analogue components. Analogue components can send and receive values in-between 1 and 0. A motor is an example of an analogue output component. You can send it values between 1 and 0, which will control the speed of the motor. If you send the motor a 1 it will drive at full speed. If you send it 0.5 it will drive at half speed. Sending a 0 will stop the motor.
- 22. An example of an analogue input component is a Light Dependent Resistor (LDR). When there is no light shining on the component it will send a 0, and as light increases, the value sent by the LDR will gradually increase until it hits a maximum value of 1. Using analogue components with the Raspberry Pi is a little trickier than using digital components. To use an analogue output component with the GPIO pins, you need to use a technique called Pulse Width Modulation (PWM). This sends very rapid pulses of 1s and 0s to the component, which when taken as an average can be received as values in between 1 and 0. Look at the graph below. The blue line shows the digital signal, over a period of time, moving from 0 to 1 and back again. The signal is 1 for a third of the total time and 0 for the remaining two thirds. This then averages out at around 0.33, which would be the value that is received by the analogue component. You can see this as the red line on the graph.
- 23. To use an analogue input component with the GPIO pins, you need to use an Analogue to Digital Convertor (ADC), that will turn analogue signals into digital signals. Although you can buy small ADCs for use in your circuits Wiring up your button Buttons and switches are a class of input component. They allow a user to have some control over a circuit, or to send signals to a computer. The keys on your keyboard are all examples of buttons; when you press a key it sends a signal to the computer that represents the character that has been pressed.
- 24. from gpiozero import Button btn = Button(4) while True: btn.wait_for_press() print('You pressed me') btn.wait_for_release() print('You released me')
- 27. Servo motors have been around for a long time and are utilized in many applications. They are small in size but pack a big punch and are very energy-efficient. These features allow them to be used to operate remote-controlled or radio-controlled toy cars, robots and airplanes. Servo motors are also used in industrial applications, robotics, in-line manufacturing, pharmaceutics and food services.
- 28. Two day workshop based on International project of Tkinter: https://drive.google.com/open?id=11vaTrW8rsVyVfVkpt8yriVqclUR4QrMY
- 29. 1. Create a Twitter account 2. Create a Twitter application 3. Send a tweet from Python BASIC LIBRARIES INSTALLATION AT LINUX: https://www.makeuseof.com/tag/how-to-build-a-raspberry-pi-twitter-bot/
- 30. When someone enters to you home: Sense with PIR sensor Blink an LED for indication The security guard will press the button The door will open with the help of servo motor There is a tweet from your account
- 31. Raspberry Pi • Python / Linux • Projects • Basics • 16 Credit Hour • Training Content • Quizzes/Assignments • Training project
- 32. Raspberry Pi (Advance) • Projects • Home Automation / IoT with Cloud / Smart Phone Door lock • Twitter notification generate • Robotics – • Smart mirror • Tinker GUI • Image processing / computer vision • Training Content • Quizzes/Assignments • Labview or matlab • 32 Credit Hour
- 33. AI Tenser flow – Open CV • Python / Open CV • Projects • Training Contents • Quizes/Assignments • 20 Credit Hour • Pre Requisite – Pi/Python
- 34. Automation with Arduino and Pi • Python + Pi (8 Hours) + AI • Arduino + IoT + Robotic • Labview or Matlab • Credit Hours 32
- 35. List of Components • 15 batch – 5 kits • Cost comparison – local vs foreign • Raspberry Pi 3 model b
- 36. Task to do • Course outline as per above • Training contents • How it is done internationally (syllabus) and locally
Notes de l'éditeur
- LDR