2. Starter Activity: Commands
Think of 10 commands that you know how to use
in Scratch. You may be asked to name these in a
minute.
Scratch Project
3. Scratch Project
This is a project that you will have three lessons to
complete. Using your Scratch skills and
programming knowledge you are to create a new
Scratch project or develop an existing project.
Lesson
Understand that programs are normally created
in a series of stages
Analyse, design, create and test a Scratch project
Understand the importance of evaluating
Objectives
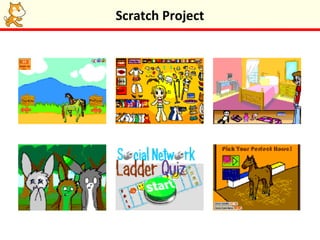
4. Past projects
In recent years students have created:
1.A virtual aquarium with moving fish and sound
effects.
2.A house created from shapes.
3.A car maze based on the A mazing game.
4.A graphic of a car made up of shapes.
5.A duck hunt game based on the forest archery
game.
Scratch Project
5. Stage 1: Deciding on an Idea
Brainstorm some ideas for your project.
•Think of the areas you’ve covered so far... Is it
going to be graphics-based? A story? A game?
•Check out the Scratch gallery at http://
scratch.mit.edu for some inspiration
•Your teacher may let you access some game
creator cards
•Discuss your ideas with your elbow partner and
decide on one project
Scratch Project
6. Stage 2: Planning
Complete the ‘Project Plan’ worksheet which is in
the Programming in Scratch folder in Groupwork.
This will help you to plan your project.
Scratch Project
7. Stage 3: Development
•Using Scratch create (develop) your project
– gather the sprites, costumes, sounds and
backgrounds – remember to give them
sensible names
– create the code using your algorithms
Scratch Project
8. Stage 4: Testing
•Test your project to make sure it works
•Let your peers test it too
•Fix any program bugs or errors that either
yourself or your peers found
Scratch Project
9. Stage 5: Evaluating
Evaluate your work by answering the following
questions:
1.How did the project turn out compared to how
you originally planned it?
2.What mistakes did you make on the way?
3.If you were to start again from the beginning,
what would you do differently?
4.How could you improve what you have done?
Scratch Project
10. Stage 6: Feedback
•Complete a gallery walk to see all the students
projects.
•Provide some verbal feedback to your elbow
partner on their project.
Scratch Project
11. Is that the End
Completing this unit doesn’t mean to say that it’s
the end of programming for you using Scratch.
Download it at home (http://scratch.mit.edu) and
explore the featured projects.
The website is a vibrant community of Scratchers.
May be you could get a project featured on the
website one day!
Scratch Project
12. Submission of Work
This is the end of the unit. Your teacher will tell
you what files you need to submit for marking.
Scratch Project
13. Lessons 6, 7 and 8 – Scratch Project
Understand that programs are normally created
in a series of stages
Analyse, design, create and test a Scratch project
Understand the importance of evaluating
Objectives