2. To the left you see my work on Photoshop, my first
skill learnt. I added the image of the main character
in all of my construction. After inserting it, the
image still had a back ground therefore the pen tool
was required to edit the image.
3. After finalising my Masthead designs on photo shop,
when it came to construction, I was all set with my
ideas and ready to create. My masthead(POP
Addiction) was inserted with consideration of the
colour scheme I had previously planned along with
the correct playful like fonts. Straight across the top
of the cover where the masthead most stands out.
4. To the left you see the screenshots of my photo
shop work developing even further, a barcode, price
and date of construction was inserted. Eveey singke
magazine front cover includes the essentials, such
as a barcode with the price of the magazine. It
makes sense for the bar code and the price to be
close together for the bar code is a symbol which
means this material was scanned and purchased.
The price crucially needs to be visible and this is the
fist place where any viewer would look. Also you
can see a second screenshot of my work which
shows clearly the digits of the date of construction.
This is located in the top right hand corner of the
cover, arguably it is out of the way. However I
intentionally did this for the date if construction is
rather irrelevant in comparison with other inserts.
5. Much like the masthead, I designed the headers alone on
Photoshop previously to 100% know what my header was
going to be and understand why it is relevant to my project.
During my research I found that the header is found
commonly underneath the masthead for it will then be the
second insert of the cover read. The point of a header is to
aid the masthead in drawing in any potential buyers,
therefore it makes sense for the masthead and then header
to be located bear by each other so that the viewers can
receive a double thrill when coming across the magazine.
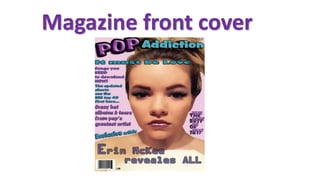
6. Revealing my entire magazine front cover now, the new and
final insert which was the following step on from my header
is easy to notice. The small text around the edges of the
magazine or across my image. Relating to the colour scheme
was rather easy now therefore, that part of inserting the text
was a speedy process. However, the font differed from the
masthead and the header for the smaller text is not as
important, therefore a less eye catching font was put in
place. Further more, to allow the writing on the front cover
to be readable and not intimidating to any youngster that
simply cannot be bothered to make the effort to read them, I
involved an outline, almost like a shadow to allow the text to
standout but also by relating to the genre, have a fun
appearance.
8. To kick start my contents page construction, the heading is a
vitality, ever contents page needs a title, even if it simply labels
‘contents page’. Not much was to be considered at this stage,
besides the simple font which I liked the look of, and the colour.
With the two main colours being purple and turquoise not
including the background, I decided it had to be one of the two.
9. The new insert at this stage in quite clear to see at the
bottom of the contents page. During my research I analysed
many pop genre magazine including front covers, contents
and DPS. I took I liking and understanding to one magazine in
particular. We love Pop. I was attracted to these particular
magazine due to so many inserts, yet moreover it was the
layout which really caught my eye. I was intrigued at first as
to why the unique, colourful shape was involved in the
magazine. My first impression was not great of this insert for
I did not quite understand why the existence of the shape
was relevant. On the other hand, I researched further and
found that this shape was on every single page of the
magazine. The consistency was strong, the colour was
relevant, so I asked myself… If this colourful shape involved
attracted me, why should it not attract others. Therefore I
decided to travel to the exclusive by also following in ‘we
love pop’s footsteps and include the consistent shape.
10. The following insert of the contents page was the main image,
again my character appears in the centre of the page, this image
required editing by the use of the pen tool however what you can
see on the left is the final touched of my image applying.
11. The next step was proceeding with the other relevant images in
which I previously decided to involve in my construction of the
magazine. It is very rare to see just the one image on any
magazine contents page, especially on a Pop magazine.
Therefore this step was a vital one.
12. On the left you can see my final design at its full, this was the final
step of the construction of my contents page when I inserted all of
the text required to make this magazine a quality one. Including the
page number in the bottom right hand corner, the contents page is
the first page of any reading material where you need to consider the
page number for the front cover does not require one.
14. On the left you can witness the beginning of my DPS. With
the main image of my character taking u the right hand side
of the page, (the most space on the DPS), this was my first
insertion of the page. Requiring the pen tool for editing,
however this is the final look of the image on my DPS.
15. While the origins of my DPS began with the images being
included, I decided it was only right to go on further with the
insertion of another image. I was never going to include the one
single image on the DPS therefore this was the next step I
proceeded with.
16. The title was the third step of constructing my DPS, every DPS
upholds some sort of heading for the reader to grasp an
understanding of what it is the are about to on and read. The
work pout into this part of the construction was much, for I
considered all areas in which may appeal to viewers. Hence
the coloured background to the text, it allows the title to
stand out therefore catches people’s eyes. Also, on the erin I
included a back light behind her name, she is a pop star
therefore I found it quite relevant to place the spotlight on her
name. Finally, the last touch to the heading was to the text
itself and not the background, a dark outline almost like it
foreshadows the text. I did this because it also make the text
stand out and more visible.
17. Like the previous page (the contents page), the same shape
appears here too. Along the top just like the magazine, we love
pop, the colourful shape takes form to support the consistency
which allows it not to uphold a random effect.
18. Visible on the left, you can see my final piece on the
Photoshop software. The last step that was missing until this
stage was the text involvement, assuring that all of the text
inserted is relevant to the character Erin McKee and the genre
of Pop. Also, I took the colour scheme into extreme
consideration when coming to the text, therefore half of the
writing was in purple and the other half in turquois purely to
compliment each other.