A new user guide
•Télécharger en tant que PPTX, PDF•
0 j'aime•175 vues

A new user guide for using iTrust Reviews website

Recommandé
Recommandé
Contenu connexe
En vedette
En vedette (19)
Similaire à A new user guide
Similaire à A new user guide (20)
Dernier
Dernier (20)
A new user guide
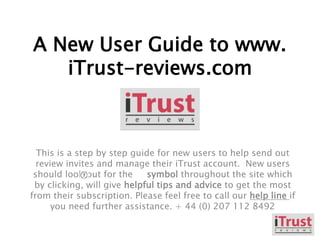
- 1. A New User Guide to www. iTrust-reviews.com This is a step by step guide for new users to help send out review invites and manage their iTrust account. New users should look out for the symbol throughout the site which by clicking, will give helpful tips and advice to get the most from their subscription. Please feel free to call our help line if you need further assistance. + 44 (0) 207 112 8492
- 2. Step 1 The first thing a new user has to do is create an account with their business details, contact details and upload their logo for use both on emails sent to your clients and to appear in the free consumer directory area of the iTrust site. Click on New User Sign Up at the top of the home page to get started.
- 3. Once you have created an account you will be sent an email to your main contact address confirming your user name and password for your records. On successful sign up a link to Step 2 below is provided for your convenience. Step 1
- 4. You should now decide which plan is most suitable for the size of your business (Silver , Gold , Platinum). Higher volume users should contact us by phone or email for a bespoke high volume package. The package you choose will depend on the number of review invites you wish to make each month. Remember you can add each month according to seasonal demands using our Top Up feature . Click on Product and Prices at the top of the home page to select the package of your choice (if you did not follow the link on successful sign up). Here you can select to pay monthly or annually. We accept all major credit cards, debit cards and simplest of all is our Direct Debit sign up. Step 2
- 5. Step 2 Having created an account, selected a package and paid, you can check at any time what you have bought and the number of reviews and email requests you have remaining that month by clicking on Your Package Status in the black Navigation Box on the left of pages accessible to subscribers. 1 2
- 6. Step 3 Now click on Manage Your Widget. The iWidget sits on your website and shows the average score you have received by your consumers/ clients from the market sector questions 1 to 5. Now with a few clicks you can select the size and colour of the iWidget you wish to display, preview it and create the required code to display the iWidget in your website.
- 7. Step 3 The code is automatically displayed in the box “ Code Embed”. Copy and paste this into the code of your website home page or ask your webmaster to do it for you. Alternatively we offer a set up service for a £29 one off charge which you can select on the Packages and Prices page.
- 8. Step 4 Having created your iWidget now click on Manage Questionaire/ QR Code in the black Navigation Box on the left of the screen. This is an important area where you will edit your Personal Market Research questions, select the score when you will receive email alerts and where you will download your QR Scan code. Full details and advice are provided under the help buttons on this page. Click on Edit to select score and compose your questions. 1 2
- 9. Step 4 Your unique QR Scan Code is also displayed here which you should download to your hard drive for future use, again read the help button for full details. A supply of free QR Cards for your business is also provided and instructions how to receive these are given here.
- 10. Step 5 Now Click Manage your Contacts. Here you should upload your customers/clients details ( name / email addresses) . This can be done either as a bulk upload from an existing database (Excel, CSV file) or on an individual basis. Look under the help for fuller details, advice and instructions. The status of each contact is shown against each individual contact along with the time of the last action. 1 2
- 11. Step 5 From here you will select the contacts you wish to invite to review your business, you can also review the email to be sent, then and send your invites. The email will come from the iTrust secure server. At any time you can elect to delete any or all contacts from your database. 1 2
- 12. Step 6 Having sent your invites you will soon start receiving your consumer/client reviews which is recorded in detail (for your use only)in the Your Reviews area. Here you can respond publicly to reviews and elect to publish reviews prior to the 72 hour window being reached should one have been held back due to a poor score.
- 13. Step 7 Click on Your Statistics to see how your business is performing and how you can make improvements to increase your score and profitability. There is an individual help button against each graph explaining how the data can be looked at then analysed for you to better understand the feedback you receive from your clients.