Housekeeping Safety by Pennsylvania Department of Labor
•Télécharger en tant que PPT, PDF•
5 j'aime•5,232 vues

Housekeeping safety

Recommandé
Contenu connexe
Tendances
Tendances (20)
En vedette
En vedette (20)
Similaire à Housekeeping Safety by Pennsylvania Department of Labor
Similaire à Housekeeping Safety by Pennsylvania Department of Labor (20)
Plus de Atlantic Training, LLC.
Plus de Atlantic Training, LLC. (20)
Dernier
Dernier (20)
Housekeeping Safety by Pennsylvania Department of Labor
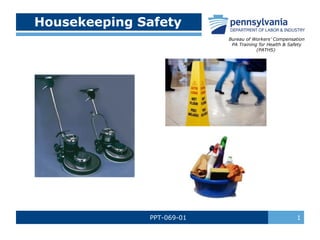
- 1. PPT-069-01 1 Housekeeping Safety Bureau of Workers’ Compensation PA Training for Health & Safety (PATHS)
- 2. PPT-069-01 2 Topics • Safety with Sharp Objects • Preventing Slips, Trips and Falls • Safe Lifting/Material Handling • Safety with Chemicals • Fire Extinguisher Use
- 3. PPT-069-01 3 Safety with Sharps
- 4. PPT-069-01 4 Safety with Sharps o Keep scissors sharpened o Use proper scissors for the job being done o Do not try to catch falling scissors o Carry scissors with the blades closed o Hand scissors to someone with the handle facing them
- 5. PPT-069-01 5 Sharps Safety • When using a box cutter, cut away from yourself • Keep box cutters closed when not in use • Put broken glass in a safe container and mark it • Do not pick up broken glass with your bare hands • Always wear the correct PPE when cleaning an area
- 6. PPT-069-01 6 Cuts • If you cut yourself, wash the wound thoroughly under cold water • If the wound is shallow and the bleeding stops, dry the skin around it with a paper towel/clean cloth • If available, put an “infection prevention” cream/spray on the wound • Cover the wound with a sterile bandage to keep the wound shielded and clean
- 7. PPT-069-01 7 Cuts • To stop bleeding if the wound is deep: → Apply pressure → Raise the wound site above the heart → Seek medical attention a.s.a.p.
- 8. PPT-069-01 8 Universal Precautions • All human blood and certain human bodily fluids are treated as if they’re infectious for Human Immunodeficiency Virus (HIV), Hepatitis B (HBV), and other bloodborne pathogens • Should be observed in all situations where there is a potential for contact with blood or other potentially infectious materials • For your safety treat all human blood and certain body fluids as if they are infectious
- 9. PPT-069-01 9 Potentially Infectious Bodily Fluids o Blood o Saliva, vomit, urine o Semen or vaginal secretions o Skin, tissue, cell cultures o Other body fluids Universal precautions assume that all bodily fluids are contaminated with infectious blood
- 10. PPT-069-01 10 Use Protective Equipment o Always wear Protective gloves when cleaning: ▪ Latex (or non-latex if you are allergic) ▪ Rubber ▪ Nitrile ▪ NOT Leather or Cloth o “Surgical” Mask – if bodily fluids are wet o Long Sleeve Shirt/Long Pants – if bodily fluids are wet
- 11. PPT-069-01 11 Syringes/Needles o Do not place hands directly in trash cans/containers o When emptying trash cans keep bag away from body o If you find a syringe/needle: treat as if it’s used o Only handle syringe by “barrel” never by needle o Place in puncture resistant container (OSHA requires special red colored containers) o Do not throw syringes/syringe disposal containers into dumpsters
- 12. PPT-069-01 12 Needle Sticks If you pierce or puncture your skin with a used needle, follow this first aid advice immediately: o Encourage the wound to bleed, ideally by holding it under running water o Wash the wound using running water and plenty of soap o Don’t scrub the wound while you’re washing it o Don’t suck the wound o Dry the wound and cover it with a waterproof plaster or dressing o Report the incident & get medical attention
- 13. PPT-069-01 13 Report on the Job Injuries • Report any on the job injuries to your Supervisor as soon as possible, and make sure an injury report is completed a.s.a.p.
- 14. Preventing Slips, Trips & Falls PPT-069-01 14
- 15. Two Types of Falls PPT-069-01 15 • On same level: high frequency, low severity • From elevations: low frequency, high severity
- 16. Causes PPT-069-01 16 • Wet, slippery, oily floors/stairs • Loose irregular surfaces such as rocks • Insufficient light • Uneven walkways or sidewalks
- 17. Causes PPT-069-01 17 o Shoes with slick soles or raised heels o Moving too fast o Carrying items (impair balance, obstruct vision) o Objects on the floor (e.g. paperclips, food)
- 18. Causes PPT-069-01 18 • Poor housekeeping • Loose handrails • Uncovered/unguarded pits/floor openings • Improper ladder usage
- 19. Causes PPT-069-01 19 • Shifting floor tiles • Not watching while walking/moving • Spilled liquids • Cords across walkways
- 20. What to Do? PPT-069-01 20 Prevent! Prevent! Prevent! Prevent!
- 21. Prevention - What to Do PPT-069-01 21 Four Steps: (1) Find the problem/hazard (2) Check it out (3) Fix it (4) Look at it again
- 22. Step 1 – Find the Problem PPT-069-01 22 • Is the area wet, slippery, or cluttered? • Are employees moving too quickly? • Is the area poorly lit? • Are stairs steep or in poor condition? Step up due to raised floor
- 23. Any Problems Here? PPT-069-01 23 Exit/Walkway Cluttered; More Lighting Needed
- 24. Step 1 (Continued) PPT-069-01 24 • Are handrails present? • Are there unguarded edges/openings? • Does layout make a slip, trip, fall situation? • Are there cords across the walkway?
- 25. What about This? PPT-069-01 25 Walkway cluttered; Cords across
- 26. Step 2 – Check it Out PPT-069-01 26 • Is the problem area near moving machinery or is the area high traffic? • Is the area properly lit? • Are employees wearing proper footwear?
- 27. Which is Safer for Work? PPT-069-01 27 These shoes are much safer!
- 28. Step 2 (Continued) PPT-069-01 28 o Are “wet floor” signs in place? o Are floors being mopped ½ at a time? o Is walking surface more slippery due to its construction? o Is area outside and subject to weather?
- 29. Step 3 – Fix It PPT-069-01 29 • If possible, eliminate or control the hazard immediately (e.g. having spills wiped up) • If not possible, take steps to alert people and then determine what can be done to eliminate or control the hazard
- 30. Hazard Alert PPT-069-01 30 If unable to fix quickly, alert people!
- 31. Step 4 – Look at it Again PPT-069-01 31 • Ensure the hazard/problem was repaired, eliminated, or controlled • Does the area have to be checked periodically to ensure the hazard/problem does not return? • Determine if any training is required for affected employees • Should appropriate signage be posted?
- 32. Prevention Measures PPT-069-01 32 • Install non-slip tape or “grip cleats” on stairs • Have one hand free and use handrails when walking up or down stairs • Store objects on shelves or in cabinets, not in aisles/walkways • Don’t run while working • Ensure aisles/walkways are kept clear and unobstructed
- 33. Stair Safety PPT-069-01 33 Non-slip threads on stair edges Reflective edging on last step
- 34. Prevention PPT-069-01 34 • Wear proper footwear and don’t run or move quickly while walking • Have leaks/spills cleaned up quickly • Place “caution tape” on uneven/drop-off areas • Develop and put into place a ladder safety and inspection program
- 35. Wearing Proper Footwear PPT-069-01 35 Wear shoes with slip-resistant soles or traction devices when walking or working on surfaces that are wet, greasy, icy, or otherwise slick No footwear has anti-slip properties for every condition – select the proper type of footwear for the work conditions and the type of flooring or walking/working surface Slip-resistant traction devices for snow and ice that fit over the soles
- 36. Prevention PPT-069-01 36 • Have “wet floor” signs posted where necessary • Thoroughly investigate all slips, trips, and falls • Apply “non-skid” coating or place “non-skid strips” in areas where floors are likely to be slippery or wet • Report hazardous situations as soon as possible
- 37. Prevention PPT-069-01 37 • Pick up objects that have fallen on the floor (e.g. food, paper clips, etc.) • Have carpets, rugs, and mats secured to the floor, and tape down raised ends • Always close file cabinet drawers • Do not place delivery carts in the middle of an aisle or walkway
- 38. Falling “Properly” PPT-069-01 38 IF YOU DO FALL, YOU CAN REDUCE THE CHANCE OF SERIOUS INJURY IF YOU: o ROLL WITH THE FALL; DON’T REACH OUT. LET YOUR BODY CRUMPLE AND ROLL o BEND YOUR ELBOWS AND KNEES AND USE YOUR LEGS AND ARMS TO ABSORB THE FALL o GET MEDICAL ATTENTION AFTER A FALL TO TREAT ANYTHING TORN, SPRAINED, OR BROKEN
- 39. What may have Happened? PPT-069-01 39 Running down stairs? Not using handrail? Shoelaces untied? Object on stairs above?
- 41. PPT-069-01 41 Material Handling Tips Check the object before you attempt to lift it. ▪ Test every load before lifting = pushing object lightly with hands or feet to see how easily it moves (good indication as to how heavy it is) ▪ Remember, a small size does not always mean a light load! Make sure the load you are lifting is packed correctly. ▪ Employees packing boxes should make sure weight is balanced and packed so it won’t move around ▪ Loose pieces inside a box can cause accidents if the box becomes unbalanced
- 42. Tips PPT-069-01 42 Make sure the load is easy to reach. ▪ Don’t arch your back when lifting a load over your head ▪ Use a ladder instead of lifting something over your head Here’s the best way to pick up an object: ▪ Use slow and smooth movements (hurried, jerky movements can strain the muscles in your back) ▪ Keep your body facing the object while you lift it (twisting while lifting can injure your back)
- 43. PPT-069-01 43 Test the Load! • Always test the load before lifting to ensure it’s not too heavy for you to lift and carry by yourself! • If you determine the load is too heavy get assistance (either by using people or an appropriate mechanical aid)
- 44. Planning Ahead PPT-069-01 44 • Before moving a load plan both the load and the route (allows you to evaluate hazards, limitations, route safety, and final placement) • Evaluate the weight and shape of the load and also what material is made of • Some items to check: → Is Personal Protective Equipment (PPE) or other safety gear necessary? → Size/shape/weight within your limits? → Can you get a firm hand hold? → Will you be able to see over the load? → Will you need assistance (people, cart)?
- 45. Back Injury Prevention: Plan your Lift PPT-069-01 45 • Think about the weight, size, and shape of the object and the distance you will be moving it • Is the object bulky? Will you need help? • Do you see any hazards that can be eliminated? • Think about the route you’ll be taking: any stairs, doors, obstacles? • If the object is heavy or
- 46. Planning Ahead – the Route PPT-069-01 46 • Check the route you will take and place where you will put the load down • Injuries and property damage can occur when unexpected problems happen during the move • Considerations for the route: - Are there steps, tripping hazards, closed doors, tight doorways or passageways? - Are there blind corners or wet/slippery floors? - What is the traffic situation (people, tables,
- 47. Planning Ahead-the Drop Off Point PPT-069-01 47 Some considerations: ▪ Where will you place the load? ▪ Is there room for the load? ▪ Is the site strong enough to hold the load? ▪ Will the load block traffic or create a hazard when placed? ▪ Will the load have to be placed elsewhere or will it be in the right location after you set it down?
- 48. Lowering the Object PPT-069-01 48 • When lowering an object remember to bend at the knees not at the waist and avoid twisting motions while putting the load down ( • If you must turn while lowering an object adjust your feet rather than twisting your back Not the correct way to lower a box!
- 49. Lifting Properly – Step One PPT-069-01 49 ● Stand close to the load with your feet spread about shoulder width apart ● One foot slightly in front of the other for balance
- 50. Lifting Properly – Step Two PPT-069-01 50 ● Squat down bending at the knees (not your waist) ● Tuck your chin while keeping your back as vertical as possible
- 51. Lifting Properly – Step Three PPT-069-01 51 Get a firm grasp on the object before beginning the lift
- 52. Lifting Properly –Step Four PPT-069-01 52 Begin slowly lifting with your LEGS by straightening them. Never twist your body during this step!
- 53. Lifting Properly – Step Five PPT-069-01 53 ● Once lift is complete, keep object as close to your body as possible ● As load's center of gravity moves away from body, dramatic increase in stress to the lumbar region of the back
- 54. Is this Safe? PPT-069-01 54 NO! Bending over at the waist Heavy lifting from below knees Improper posture
- 55. Strengthening Exercise PPT-069-01 55 Wall Slides to strengthen your muscles . . . . - Stand with your back against a wall, feet shoulder-width apart - Slide down into a crouch with knees bent to 90 degrees - Count to 5 and slide back up the wall; Repeat 5 times
- 56. Stretching Exercises PPT-069-01 56 Gastroc Stretch ▪ Lean against a wall or other stationary object, both palms against the object ▪ Leg you want to stretch is back, several feet from wall, heel firmly positioned on the floor ▪ Other leg is flexed about halfway between back leg and wall ▪ Start with your back straight and gradually lunge forward until you feel the stretch in your calf ▪ Very important to keep back foot straight and angled 90 degrees from wall
- 57. Stretches PPT-069-01 57 Stretches for side of neck: • Sit or stand with arms hanging loosely at sides • Turn head to one side, then the other • Hold for 5 seconds, each side • Repeat 1 to 3 times
- 58. Stretches PPT-069-01 58 Stretches for side of shoulder and back of upper arm • Stand or sit and place right hand on left shoulder • With left hand, pull right elbow across chest toward left shoulder and hold 10 to 15 seconds • Repeat on other side
- 59. and Finally PPT-069-01 59 Stretches for triceps, top of shoulders, waist • Keep knees slightly flexed • Stand or sit with arms overhead • Hold elbow with hand of opposite arm • Pull elbow behind head gently as you slowly lean to side until mild stretch is felt • Hold 10 to 15 sec • Repeat on other side
- 61. Food Service Chemicals PPT-069-01 61 ● There are often many chemicals in a food service environment such as: Drain Cleaners Bleaches Surface Cleaners De-greasers Floor Cleaners • Chemicals can be harmful to your health and the environment – always use caution when working with any chemical!
- 62. Chemical Safety PPT-069-01 62 • NEVER MIX CHEMICALS TOGETHER! A violent reaction could occur causing injury/damage • Store flammable chemicals in cabinets designed for safe storage • If chemicals are stored in the kitchen, store on shelves below foodstuffs so if they leak they will not contaminate food • Wear appropriate PPE when using chemicals
- 63. Types of PPE PPT-069-01 63 EYE PROTECTION SUCH AS SAFETY GOGGLES: HAND PROTECTION SUCH AS RUBBER GLOVES: RESPIRATORY PROTECTION:
- 64. Chemical Safety PPT-069-01 64 o Make sure chemicals are properly labeled and in appropriate containers o Read and follow warning labels o If available, review corresponding Safety Data Sheets (SDS’s) before working with chemicals o Follow manufacturer’s recommendations when mixing water with chemicals
- 65. Chemical Safety PPT-069-01 65 • Wash hands thoroughly after using any chemicals • Ensure lids are placed back on chemical containers when you’re done using them • Dispose of used chemical containers safely (follow your establishment’s procedures) • Do not store pesticides and other chemicals together
- 66. Chemical Safety PPT-069-01 66 • Clean up spills immediately and dispose of clean up materials properly • Ensure areas are well ventilated when using chemicals • If you feel sick while using a chemical, get to fresh air and have your Supervisor notified as soon as possible • Report any injuries or physical reactions you may have when using chemicals immediately
- 67. Review PPT-069-01 67 • Never mix chemicals! • Read warning labels and SDS’s • Wear appropriate PPE • Ensure chemicals are properly labeled • Store chemicals safely • Clean up spills immediately • Notify your Supervisor if injured
- 68. Remember PPT-069-01 68 • USE COMMON SENSE AND GOOD SAFETY PRACTICES WHEN WORKING WITH CHEMICALS! • NEVER BECOME COMPLACENT WHEN WORKING WITH ANY CHEMICAL • CHEMICALS HAVE THE POTENTIAL TO HARM YOU OR THE ENVIRONMENT! • BE CAREFUL, BE SAFE, BE HAPPY!
- 70. Fire Extinguisher Use PPT-069-01 70 o Fire extinguishers are marked to indicate the class of fire they can be used on o Access to fire extinguishers should not be blocked/obstructed o After a fire extinguisher is used it must be recharged, not put back in place o Most fire extinguishers will make a mess!
- 72. Class of FiresClass of Fires PPT-069-01 72 Class A = Ordinary Combustibles (e.g. Wood, Paper, Rubber) Class B = Flammable Liquids/Gases (e.g. Gasoline, Methane) Class C = Energized Electrical (e.g. Electrical appliance plugged in)
- 73. Class D Fires PPT-069-01 73 Class D Fires = Combustible metals (e.g. titanium, aluminum) Extinguishers for these classes of fire: - Often specific for type of metal in question - No picture designator - No rating; also not given multi-purpose rating
- 74. Class K Fires PPT-069-01 74 • Class “K” fires occur in cooking grease made from animal fat • These fires usually burn very hot and can be dangerous to extinguish • There are special fire extinguishers that are used for these types of fires and are usually in kitchen areas of restaurants/cafeterias
- 75. Class K Fire Extinguisher PPT-069-01 75 Looks like a 2 ½ gallon pressurized water extinguisher – don’t get them mixed up! Use the labels/markings on all extinguishers to ensure you have the correct one!
- 76. Use a Fire Extinguisher = P.A.S.S. PPT-069-01 76 P = Pull the pin on the fire extinguisher handle A = Aim the nozzle/horn of the extinguisher at the base/bottom of the fire S = Squeeze the fire extinguisher handles together to make the extinguisher work S = Sweep the extinguisher from side to side as if you were using a broom
- 77. Used Extinguisher PPT-069-01 77 Never put a fire extinguisher that’s been used back in place (even if it still feels heavy) Even a short burst can cause the extinguisher to leak pressure after use Putting a used extinguisher back in place can mean it won’t work in the future Have used extinguishers checked and recharged by a reputable dealer
- 78. Extinguishers - Summary PPT-069-01 78 • Always report fires immediately! • Use only the proper class of fire extinguishers for the fire you’re trying to extinguish • If the fire seems too large for you to handle leave the area closing doors as you exit • Notify others in the area so that they can safely evacuate • Never place a used fire extinguisher back in its place – it needs to be checked and recharged
- 79. General Safety - Buffers PPT-069-01 79
- 80. General Safety - Buffers PPT-069-01 80 • Do not use buffers unless you’ve been trained. • Read the manufacturer’s instructions to become completely familiar with the buffer’s used • Wear long pants and slip resistant shoes when using a buffer • Check cords on electric buffers for damage & do not use if frayed, cut, damaged • Do not “ride” on buffer (unless designed for that purpose) • Get a good grip on the handle to maintain control of the machine
- 81. General Safety - Buffers PPT-069-01 81 • Buffers that are damaged or in need of repair should be placed out of service and “tagged” • Do not run the floor buffer over electrical cords, door stops, or other obstructions • Unplug an unattended floor buffer • Do not yank on the electrical cord to disconnect a floor buffer • Unplug the floor buffer before changing the buffing pad or cleaning block
- 82. General Safety - Buffers PPT-069-01 82 • Never try to move a floor buffer by pulling on the electrical cord • Carefully operate a floor buffer across changes in floor surface texture to prevent strong pulling motions/loss of control of the buffer • Cleaning solutions used with a floor buffer may leave wet floor surfaces • Post signs warning of wet floors near the area being cleaned • NEVER use propane powered buffers in enclosed areas
- 83. Overall: Safe Actions Save Lives PPT-069-01 83 • Always use safe procedures and methods, never take shortcuts • Use appropriate safety equipment • Wear proper footwear • Think before you lift anything • Report safety hazards to your Supervisor/Manager as soon as possible • Think safety all the time, every time!