Shooting news videos with iPhones
•Télécharger en tant que PPT, PDF•
4 j'aime•2,892 vues

This document provides guidance for producing a video news assignment. Key deadlines include discussing the assignment on March 2nd and having a story idea due by March 16th, with the final video due on April 13th. Students will work in pairs to shoot and edit a 2-3 minute video news package on a newsworthy local topic. The document reviews considerations for video journalism, including choosing a topic, shooting footage, interviewing subjects, and editing the package together with b-roll, sound bites, and a voiceover.

Recommandé
Contenu connexe
Tendances
Tendances (20)
En vedette
En vedette (20)
Similaire à Shooting news videos with iPhones
Similaire à Shooting news videos with iPhones (20)
Plus de CubReporters.org
Plus de CubReporters.org (20)
Dernier
Dernier (20)
Shooting news videos with iPhones
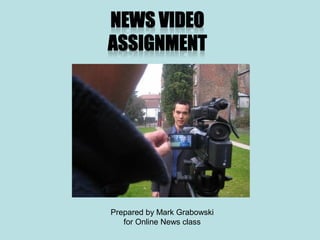
- 1. Prepared by Mark Grabowski for Online News class
- 2. Important deadlines • We will discuss this assignment in depth during class on Mon., March 2 • At that time, I will instruct you how to shoot and edit video, including how to use the appropriate software (iMovie) and equipment (iPhone or iPad) • Your story idea is due March 16. This assignment will be due on April 13. You will present your news video in class.
- 3. You’ll be producing something like this… http://www.youtube.com/user/AlabamaAudrey#p/a/u/0/eUs VMGcDciE
- 4. Your video skills can also be used to: • Tape musical performances http://poochaumusic.blogspot.com/2010/04/underground-cafe.html • Capture sports highlights http://johnotano.blogspot.com/2009/12/adelphi-dunk.html • Show interview snippets http://aupanthersbaseball.blogspot.com/2010/10/panthers-pitching-posing-early-threat.html • Instruct or explain how to https://www.youtube.com/watch?v=MbXzI-IAdSc • Make funny videos, spoofs, parodies, etc. http://vids.myspace.com/index.cfm?fuseaction=vids.individual&VideoID=8350671 … all of which can be posted on your blog and/or website!
- 5. First, some history • The advent of cheap digital video cameras and free video-editing software has ushered in the digital video revolution. Instead of a $35,000 camera, an even more expensive editing station, a two- or three-person crew and years of training, one college student can produce high quality Web video with a $175 camera and a computer.
- 6. Why learn this? • Now that video is easier for everyone to produce and to view online, any kind of journalist can participate. As a result, some TV news stations have broken up traditional news teams to create video journalists or VJs. Also known as backpack journalists, they work solo and serve as both videographer and reporter on assignment. Non-broadcast news organizations have also jumped in, publishing documentary video stories, breaking news, in-studio stand-ups and all manner of other features in video.
- 7. OK, now let’s discuss the specifics of assignment along with video journalism tips…
- 8. Select groups • Break up into pairs of 2-3 students. • Choose roles: cameraperson or reporter. Everyone should contribute to newsgathering, scriptwriting and editing. • Set up meeting times outside of class • Expect to spend several hours on this assignment.
- 9. Choose topic • Must be newsworthy • Must be timely, but also “evergreen” • Must be local • Must interview sources on camera • Must get video footage • Must be able to tell story within a few minutes or less – not 10 minutes or more • Prof. Grabowski must approve your topic
- 10. Broadcast news judgment Broadcast journalists view news a bit differently – they need pictures and sound. One of the big differences between print and broadcast is how those mediums define “what is news.” The broadcast mediums have a narrower scope. There are four major criteria for shaping news judgment for broadcast mediums…
- 11. News judgment 1. Timeliness: TV news magazines may have proliferated, but “the breaking story” still rules the day. However, in our class, your video will take a few weeks to produce from the time of topic conception to the finished video. Choose a topic that will still be “news” in six weeks (“evergreen”); not something that has a short shelf life (like a particular event occurring this week). 2. Information or content: Broadcast stories have to answer the “what” question quickly because of the time factor; there is not much emphasis on the “why” and “how”
- 12. News judgment 3. Audio/visual impact: Being somewhat of a slave to the technologies involved, TV doesn’t like stories without pictures and sound bites 4. People: Humanizing the stories gives them greater impact. It’s a first cousin of some of those anecdotal lead approaches you’ve heard about in Newswriting and Features Writing.
- 13. News judgment Of course, there are other differences between print and broadcast: -- Broadcast folks are more concerned with “time” rather than “space.” This time-forced focus on brevity fosters a lack of depth, which is one of the major criticisms of broadcast journalism. -- The broadcast reporter is much more concerned with their appearance and manner of speech than print reporters. Voice and looks matter in their story-telling. -- Broadcast reporters don’t have to describe sights and sounds -- they can let the technology do that for them.
- 14. News judgment But there are also similarities … -- Both mediums are utilizing the Web more and more to fill in the gaps in their coverage. --The main similarity is the need for good writing (e.g. catchy lead) and reporting (e.g. credible sources).
- 15. Before getting camcorder, get story first • Figure out what all of your 5 W’s are. • Set up interviews • Write your script • Time it – say it out loud. Finished video should be 2 to 3 minutes long.
- 16. Some things never change • Many rules of print journalism apply: must be newsworthy, must interview good sources, have good info, be succinct, be informative. • Your story will be a mix of reporter providing facts (NO opinions!) and sources providing quotes on camera
- 17. Broadcast: Differences from print journalism • 1. Use a friendlier, more conversational tone (when appropriate). “Watch out for construction on the East Loop tomorrow as you’re headed to work.” • 2. Keep it short, simple and easy to follow. One idea per sentence; limit sentences to 15 words or fewer. Use simpler words. • 3. Say so long to the inverted pyramid. Broadcast stories need a beginning, a middle and an end. • 4. Use present tense. You want to sound new, fresh and immediate
- 18. Broadcast: differences • 5. Attribution, quotes get different treatment. In print, the attribution generally goes behind the quote or statement. In broadcast, it’s generally the opposite. – Print: Jones gave a confession, police said. – Broadcast: Police say Jones confessed to the crime. (note the use of present tense) • 6. Numbers: round them off, spell them out. Don’t use $497,457; use “about 500,000 dollars” or “about a half million dollars.” Make numbers easy to read: – 0: Write as zero – 1-9: Spell out as words. Maybe eleven also since it can look like two L’s – 10-999: Use numerals – Above 999: try to round off; use combo of words and numerals
- 19. Writing the script Because news is weighed a bit differently at broadcast mediums, the writing takes on certain characteristics: 1. Immediacy: Focus on what’s happening now. --Broadcast writers try to achieve a sense of immediacy by using the present tense as much as possible. The price of gasoline hasn’t “gone up” it is “going up.” -- If there is no danger of inaccuracy or deceit, omit the time element altogether -- If you have to use the past tense in the story, include the time element -- Remember to update. The best way to avoid having “yesterday’s news” is to update with a new development, attempt to localize, etc.
- 20. Writing the script 2. Conversational style: Write the way you talk -- Use simple, short sentences -- Use transitive verbs. Transitive verbs do things to things; they demand a direct object. * intransitive We would like to stay longer, but we must leave. (In this example, the verb "leave" does not take a direct object) * transitive The audience attentively watched the latest production of Little Women. (In this example, the verb "watch" is used transitively and takes the noun phrase "the latest production of Little Women" as a direct object.) -- Don’t use slang, colloquialisms or incorrect grammar
- 21. Writing the script 3. Tight phrasing: Remember, your foe is time instead of space. Time is less forgiving -- Sentences should be no more than 12-15 words -- Cut down on adjectives and adverbs -- Using active voice over passive voices will trim some verbiage -- Concentrate on the bare facts; print and online folks will fill in the details
- 22. Writing the script 4. Clarity: Unlike print and the Web, broadcast audiences can’t go back over the copy (unless it’s in the crawler!). The audience only sees it or hears it once -- or until the next news break. -- In addition to short sentences, use nickel-and-dime words. -- Avoid too many numbers -- ** Don’t be afraid to repeat words or phrases. Repeat proper names rather than use pronouns. Be sure to “tee up” (use identifiers) for unfamiliar names. Longtime Houston businessman John Smith died Wednesday…… -- Avoid foreign words and phrases -- ** Keep the subject close to the verb. (NO: “Rodriguez, who has been struggling at the plate recently, smacked a three-run homer in the ninth inning.” YES: “Rodriguez smacked a three-run homer in the ninth inning. He’s struggled at the plate lately.”)
- 23. Broadcast leads Here’s a surprise: Broadcast leads, just like their print cousins, strive to capture the attention of their audience. It has to have enough substance or style to draw attention but not so much information that it hinders comprehension. Unlike the print lead of 35-45 words, broadcast leads should probably be fewer than 15 words -- 20 max. So, don’t crowd the lead with too much information. Waiting for certain questions to be answered will also keep the audience listening or watching. Also, just like the print lead, the broadcast lead must set the proper tone and mood for the story. Don’t mislead!
- 24. Broadcast leads Textbooks mention four types of broadcast leads: – Single Act Leads – Umbrella or Comprehensive Leads – Chronological Narrative Leads – Soft Leads It wouldn’t hurt you to read about those types, but the two types you will most often deal with if you go into some form of broadcast are: -- the “single act lead” and the “soft lead.”
- 25. Broadcast leads The single act lead: • Goes immediately into the “what happened” and “who” aspects. • The “what” is most important, followed by the “who.” • The time and place may be included. • The “how” and “why” come later in the story, if at all. Example: A Texas House committee voted today to ban gays and lesbians from adopting children.
- 26. Broadcast leads The soft lead: • This is also called “cuing in.” • It is characterized by using a general statement that will pique interest before going into the specifics of the story. Example: Gay rights activists hit another roadblock today in the Texas House. (note there’s a bit of suspense here; you don’t know yet what happened, but you can deduce gay activists won’t like it.)
- 27. Story format • You’ll do a “package story” combining sound bites, b-roll footage, voice-overs and (optional) stand-ups..
- 28. Story Elements • Stand-up: reporter appears and talks on camera, usually at the beginning and end. (Optional: it’s up to you whether to include this.) • Sound bites: quotes from on-camera interviews with sources. (This is a must.) • B-roll: video footage that doesn’t involve either an on camera talent or an interview face being on the screen. (This is a must.) • Voiceovers: audio from the reporter or a source mixed with b-roll footage. (This is a must.) • Nat sound: video accompanied by its own sound – called “natural sounds.”(Recommended.)
- 29. Plan ahead • If you’re borrowing video equipment, it may not always be available when you want it. So, reserve it ahead of time and use your time wisely. • Don’t just go out and shoot random footage. Before you shoot, you need to know what your story is. This will help you determine what footage you need. • Multiple shooting sessions may be needed.
- 30. Equipment • Borrow a digital camcorder that shoots HD, if possible. If not, use your smart phone or tablet. Use the best video camera possible. • Make sure the equipment has a charged battery. Keep in mind that the battery only lasts so long.
- 31. Equipment • If you’re using your smart phone, there’s no need to use a microphone. That’s because it has its own built in microphone. Unfortunately, this is one of its weak spots – the audio isn’t very good. So, talk loudly and have your sources talk loudly. Do a sound check. Be sure to use the same camera to record everything, including voiceovers, otherwise your audio will sound inconsistent (and the disparity will be obvious).
- 32. Equipment • If possible, use a tripod. Video doesn’t look good if the image is shaky like you shot it during an earthquake. If you find yourself without a tripod, hold your camera as steady as possible. Use the stabilizing feature on iMovie. And avoid using the zoom. As you zoom in, it gets easier and easier to see even the most subtle camera movement.
- 33. Do an equipment check • Make sure video and audio are working before you start taping. • Make sure your camera is set to record video (not take photos, which is usually the default mode) • Do a sound check. Make sure you and the people you interview are speaking loudly enough so the camera picks it up well.
- 34. Look the part • Don’t dress like a slob. You don’t have to wear a tie or dress, but … Comb your hair, wear clean, conservative clothes, avoid colors that bleed or stick out and shirts with offensive slogans. (Also: wear same outfit if you shoot on multiple days.) • Remember, you are reporting news on camera, so be professional. Emulate TV reporters.
- 35. Then get footage • Determine what visuals will complement your script. • Create a sheet with two columns: on the left (or top) will be very short paragraphs that tell your story. On the right (or bottom) will be the video footage you need to get to illustrate your words. This is known as a “storyboard.” • Match the content of your video to the content of your audio.
- 36. Storyboarding • It’s a simple process. No artistic talent necessary. On a whiteboard or sheet of paper, start by writing the main idea on top. Then draw boxes in a row from left to right (or top to bottom), with labels that represent each piece of the story (e.g. lead, interview w/ source, etc.). Imagine the boxes are the video viewer or screen and sketch a quick representation of what the viewer would see. (Stick figures work.) Adapt and change as you gather info and footage.
- 38. Elements Video stories have some basic elements that you will carefully edit together. There are other types of elements to include, but these will get you started: 1) video accompanied by its own sound – called “natural sounds” or nat sound 2) snippets of people sharing information that advances the story – “sound on tape” or SOTs 3) your vocal track over video – your vocal track is the “voice over” or VO, and the background video under your narration is called “b-roll.”
- 39. Shoot lots of short scenes • Each location/scene you film should be no more than 15-20 seconds. • Think of it as a patchwork quilt that has many different pieces of tiny fabric that all add up to create a unified whole – all of the little pieces contribute to the overall visual effect of the quilt
- 40. Matching video & audio • Shoot on location. • If you’re reporting on the field hockey team, shoot at their field. Preferably when they are playing or practicing. • If you’re talking about the school play, you need to be at the theater and get actual footage from the play (or rehearsal). • Make sure what you’re showing matches what’s being said.
- 41. Telling stories through video • It’s also important to establish context. For example, if you’re shooting a story about a beloved local bar that is about to close down, you want to show viewers the outside of the store within its natural setting. Is the bar one among many in a strip mall along a busy thoroughfare? Or is it a stand-alone store at the crossroads of a tiny no-stoplight village in the foothills? You’ll need to anticipate the kinds of questions your viewers will have and answer them visually and through the narration.
- 42. Interviewing people on camera • Set up interviews as soon as possible. School officials, for example, are busy people and may require a couple weeks notice. • Be sure sources know you’re interviewing them on camera for a news video. Since you’re a student, they’ll probably expect you’re writing a newspaper article and just bringing a notepad or tape recorder. They may also want time to primp themselves.
- 43. Interviewing people on camera • Interview people first without the camera rolling. • This way, they can think about their responses and provide thoughtful responses. • Few people provide good quotes speaking off the cuff with the camera pointed at them. • So, do a run through, get background info you need, and then get quotes from them on camera.
- 44. Interviewing people on camera • While it’s OK to tell your source ahead of time the topics you plan to discuss during your interview, I would not recommend sending them your questions in advance. • If your source has too much time to prepare, their answers are likely to sound scripted and stilted and even fake – that’s not the way people naturally talk.
- 45. Interviewing people • People don’t really understand how to hold and use microphones, so you should always be the one to hold the stick mic (if you use one). This puts you in control so you can get the best audio possible. • Leave a little headroom at the top of the frame. • Position your subject a little to the left or right of center and leave nose room to the opposite side. • And position yourself at same level as subject so viewers won’t feel like they are looking up or down.
- 46. Interviewing people • If both you and your partner attend an interview, make sure the source looks at the person with the camera, not the other student sitting across the room. Otherwise, the source will look awkward on camera. • Use the LCD monitor on the camera to watch the interview at the same time that you look over the camera and make eye contact with the subject. This puts the subject at ease, gives her someone to look at and makes the interview more natural-sounding.
- 47. Interviewing people • Don’t, for any reason, make any sound at all when your subject is talking. The camera will pick up every sound you make – a sigh, a cough, a chuckle or anything you say. Even the littlest laugh or “Ummm” from the camera person sounds awful. So keep your lips zipped when recording because you won’t be able to edit out the unwanted audio later. Use body language, such as nodding, to indicate to the speaker that you understand him.
- 48. Interviewing people • Don’t shoot your subject in front of a window or with the sun behind her, unless you want your subject to appear in silhouette; the best light source comes from behind the camera. • Also avoid shooting your source with a bright light right next to her.
- 49. General shooting tips • Each shot should be 10 to 20 seconds. • Use your tripod whenever possible. • Clean your camera lens each time before you shoot. • Focus your iPhone camera by holding your finger on the screen until it says “AE/AF lock”
- 50. General shooting tips • Let the tape run for about 10 seconds at the beginning of a tape and leave a little tape at the end as well. • Get as close as you can to your subjects and shoot close-ups whenever possible. • Use “airplane mode” so you won’t be interrupted by a text message or call.
- 51. General shooting tips • When shooting video, hold your camera horizontally ONLY. • If you hold it vertically, you’ll get black frames on the sides of your video footage. Plus, it will be inconsistent when paired with horizontal footage. • This is really important!
- 53. General shooting tips • For online video, avoid pans (horizontal movement of the camera) and zooms (focusing in or out using the zoom feature on the camera) because not only does it look bad on the Internet, but unnecessary movement also slows down the video stream. If you need to zoom, step closer. • Lighting is important. Don’t shoot outside at night.
- 54. General shooting tips • If you do a standup, reporter should identify himself/herself at end of video (e.g. “Reporting from St. John’s University, I’m John Smith”), so be sure to get a shot of this – and make sure this is shot on location. So, if you’re covering the soccer team, shoot this scene in front of the soccer field. Also, don’t say you’re “reporting live” -- you’re not. That’s only appropriate when the video is airing live.
- 55. Save your footage! • Very important: You may need to return your camcorder soon after borrowing it, so you need to make sure you copy the footage to a flash drive or DVD. If you return your camcorder without saving your work, it will be erased. Even if you use your own smart phone/camera, you may inadvertently delete your footage. When you edit footage, be sure to keep original unedited footage in case you make a mistake or find use for it later.
- 56. -- Record yourself. -- Adjust your delivery. -- Most common problems can be avoided. -- Study the pros. -- Practice. It takes practice to sound like a pro
- 57. Putting it together • Sit down and create a log of everything you’ve shot. Even the briefest list of the video, audio and time code will help you create your script and will provide a time- saving tool during the editing process. • It’s helpful to write your script in two columns, with the audio narration on the right and the corresponding video on the left.
- 58. Putting it together • Select the SOTs (interview sound bites) that help move the story forward. Design visual sequences to flesh out the narration and be sure to include shots that help establish location and context. Remember that, except for SOTs, each snippet of b- roll coverage will usually run about five or six seconds at the most.
- 59. Putting it together • Use still-screen graphics or illustrations, if appropriate. • But keep this to a minimal. • When video is available, use video instead of still images. • Generally, still images are appropriate only for things like charts/graphs or photos of missing/deceased people.
- 60. Putting it together • After you’ve finished writing, you will need to record the chunks of narration between the SOTs. You can do this using your smart phone camera. iMovie allows you to delete the video, just keep the audio and combine it with other video and audio. • For audio consistency purposes, it’s important to do voiceovers and narration with the same device you use to record your on-camera reporting scenes and interviews.
- 61. Putting it together • Record voiceovers in a quiet area. Closets are surprisingly helpful (the clothes help soundproof). • Action is key. At every moment during your video, there should be sound and interesting visuals.
- 62. Putting it together • You will use iMovie to edit your video footage, insert credits (captions identifying interview sources) and upload it to YouTube. We’ll review how to in class. • In addition, an iMovie tutorial is available online at: http://www.apple.com/findouthow/movies/
- 63. Caption The bottom of the screen is where captions go. Always include source’s name and title. Don’t forget.
- 64. Sample news videos • Melissa Chan reports on new taco stand at AU: http://www.youtube.com/watch?v=aoQid4J9fmg • Leslie Fazin reports on new spinning class at AU: http://www.youtube.com/watch? v=U_E1oHYuLCM
- 65. Spending a little bit of money can help a lot! • Third party apps for audio (e.g. $1.99 iTalk) and video (e.g. $4.99 MoviePro) can greatly improve the quality of your footage. • Smartphone microphones and tripods are available online at very affordable prices ($20 or less)
- 66. Remember • You need to start work on this immediately. No extensions will be given. Equipment likely won’t be available on short notice. Interviewing people on camera won’t be as simple as interviewing them with a notepad. You may also struggle with some of the technology and computer programs. So, expect to learn through trial and error. As such, you can’t do this at the last minute.
- 67. Questions? E-mail Professor Grabowski: grabowsm [at] stjohns.edu
- 68. Sources • JournalismNext by Mark Briggs • Professor Paul McGrath, University of Houston - Clear Lake • Inside Reporting by Tim Harrower • Knight Digital Media Center • Professor Mindy McAdams, University of Florida • “How to Use Your New Flip Video,” eHow.com • “How to Shoot Good iPhone video,” Courtney Ware