SlideShare une entreprise Scribd logo
1  sur  17
Télécharger pour lire hors ligne
Using Microsoft Excel                                                              Getting Started


      Using Microsoft Excel
About Excel
What is a Spreadsheet?
Microsoft Excel is a program that’s used for creating spreadsheets.
So what is a spreadsheet?
Before personal computers were common, “spreadsheet” referred to
large sheets of lined paper, which were used by people in various businesses to record facts and
figures in rows and columns, and then make calculations based on the information.
When personal computers first began appearing, one of the first applications was a program released
in 1979 called VisiCalc. It was used as a tool for performing spreadsheet style calculations that
would have been to difficult to do on a calculator. The program quickly became so popular that
people began buying personal computers for their businesses just so they could use VisiCalc.


                                             VisiCalc

Since then, many other spreadsheet programs have been popular over the years, such as Quattro Pro
and Lotus 123. Microsoft Excel was first released in 1985 with newer versions being released every
couple of years. The most recent version is Excel 2003 (version 11).


© Stephen O’Neil 2005                     Page 1 Of 17                       www.oneil.com.au/pc
Using Microsoft Excel                                                                    Getting Started


How Do Spreadsheets Work?
Computer spreadsheets are based on their old paper formats. A spreadsheet on a
computer uses rows and columns to record information such as text and numbers,
such as the example below.

                                  Graduates from University
                                  1996     1997     1998     1999     2000     2001      Total


           Nursing               3,982    3,999    4,012    4,350    3,330    3,500    23,173
           Law                   5,001    5,330    4,998    5,200    5,120    5,101    30,750
           Art                   1,060    1,870    1,509    1,777    1,670    1,830     9,716
           Science               2,646    2,300    2,100    2,222    3,100    1,998    14,366
           Music                   480      390      389      410      376      296     2,341

           Total Graduates      13,169   13,889   13,008   13,959   13,596   12,725    80,346


           Average               2,634    2,778    2,602    2,792    2,719    2,545    16,069
           Minimum                 480      390      389      410      376      296     2,341
           Maximum               5,001    5,330    4,998    5,200    5,120    5,101    30,750

One major benefit of using computers for spreadsheets is that the computer can do a lot of the hard
work for you. For example, in the table above, the computer could be told to automatically work out
the summary amounts such as total, average, minimum and maximum.
A spreadsheet program can also create graphs and other types of charts, based on information in your
tables. The example below shows a graph that was easily created from the table above.


                                  Graduates From University

               6,000

               5,000

               4,000                                                             Law
                                                                                 Nursing
               3,000
                                                                                 Science
                                                                                 Art
               2,000
                                                                                 Music
               1,000

                     0
                         1996   1997     1998     1999     2000     2001


© Stephen O’Neil 2005                       Page 2 Of 17                        www.oneil.com.au/pc
Using Microsoft Excel                                                             Getting Started

Spreadsheets are often used for business documents such as invoices where numbers and totals are
important. A program such as Excel can automatically add up totals for a document such as the
invoice shown below. A document like this could be given a customer to provide details of how
much money they owe to the business.


Spreadsheet Contents
The cells in a spreadsheet can contain 3 types of information. Excel will treat cells differently
depending on the cell contents.
   • Text – Any names or labels that are required on the spreadsheet
   • Number – All numerical values including dates/times, percentages and dollar values
   • Formula – Formulas are written in a cell to automatically calculate an answer.


© Stephen O’Neil 2005                     Page 3 Of 17                     www.oneil.com.au/pc
Using Microsoft Excel                                                           Getting Started


     Working with Excel
     The Excel Screen
Title bar
Menu bar
Standard toolbar
Formatting toolbar
Formula Bar

Row and column
headings


Sheet tabs


Status bar


     Title bar            Shows the name of the application and the name of the currently open file
     Menu bar             Contains all of the program’s menus
     Standard toolbar     Provides single click access to common Excel features
     Formatting toolbar   Provides single click access to common formatting features
     Formula bar          Used to edit the contents of cells on the spreadsheet
     Headings             Each column in the spreadsheet has a heading with a letter
                          Each row in the spreadsheet has a heading with a number
     Sheet tabs           An Excel file can have more than one sheet. These are used for selecting
                          different sheets
     Status bar           Shows information based on what you are doing and provides quick access to
                          some features


     © Stephen O’Neil 2005                    Page 4 Of 17                     www.oneil.com.au/pc
Using Microsoft Excel                                                                   Getting Started


Exercise 1.         Opening an Existing File
Opening a file in Excel is done the same way as in most other programs. Opening a file can be done
in one of the following ways:
    • Hold down the [Ctrl] key on your keyboard and press [O].
    • Click the Open icon on the toolbar (looks like a folder opening).
    • From the menu, select File and then Open.


   1) Select the Open command using one of the above methods. You will see the file open dialog
      as shown below.


   2) Click on the Look In: list and select the drive and location that the file is in. Your teacher will
      tell you where the files are stored.
   3) When you have selected the right location, a list of Excel files will appear. Select the file
      called Music Charts.xls and click Open. The spreadsheet file will now open in Excel

Components of a file
Each file in Excel is referred to as a Workbook. This is because each file may contain more than one
spreadsheet. A new workbook will begin with three blank sheets.
Each sheet contains 65,536 rows and 256 columns. The rectangle areas that make up the rows and
columns are referred to as cells.


© Stephen O’Neil 2005                        Page 5 Of 17                        www.oneil.com.au/pc
Using Microsoft Excel                                                                    Getting Started


Moving Around a Workbook
Moving around the workbook can be done with the mouse, with the keyboard or with a combination
of the two.

Exercise 2.           Moving around with the mouse
The sheet in front of you will be made up of numerous cells. You can select a particular cell by
clicking on it with your mouse. Each cell is referred to by its column letter and then its row number.
For example: in the picture shown below, the cell in column C and row 7 is selected. This cell would
be referred to as cell C7.


   1) Click on cell C7 to select it.

You can use the scrollbars to move to sections of the sheet that are off the screen. The scroll bar on
the right can be used for moving up and down and the scroll bar at the bottom can be used for
moving sideways.

   Click the arrows to move
   one row/column at a time

                                  Drag the scroll boxes to
                                  move quickly

                                                                 Click the blank area on
                                                                 the scrollbar to move one
                                                                 screen at a time


   2) Practice using the scrollbars to move around the sheet


© Stephen O’Neil 2005                         Page 6 Of 17                       www.oneil.com.au/pc
Using Microsoft Excel                                                         Getting Started


Exercise 3.         Moving Around With The Keyboard
   1) Hold down the [Ctrl] key and press [Home]. This will move you to cell A1.
   2) Press the down arrow ↓ 5 times and press the right arrow → 3
      times. You should have cell 6 selected.
   3) Press [Home]. This will move you to column A.
   4) Hold down [Ctrl] and press the down arrow ↓ to move to the last non-empty cell in that
      direction.
   5) Hold down [Ctrl] and press the right arrow → to move to the last non-empty cell in that
      direction. You should now be on cell D102.
   6) Press [Ctrl] [Home] again and then practice the additional shortcuts listed below.

[Page Down]         Move down one screen
[Page Up]           Move up one screen
[Alt] [Page Down]   Move right one screen
[Alt] [Page Up]     Move left one screen


© Stephen O’Neil 2005                   Page 7 Of 17                    www.oneil.com.au/pc
Using Microsoft Excel                                                                   Getting Started


Selecting Cells
When you are working in a spreadsheet, it is important to be able to select cells in the sheet. Some of
the more common tasks that can be done when cells are selected are:
    • Format cells (change colours, text sizes etc.)
    • Copy and move cells
    • Sort information
    • Create a graph from the information that’s selected

Like many things in Excel, selecting cells can be done with the mouse or with the keyboard. First
we’ll try selecting cells with the mouse. Make sure the Music Charts file is still open.

Exercise 4.          Selecting by dragging
    1) Move your mouse so that it is positioned over cell 2 (the
        one which says “Company”)
    2) Click and hold down the left mouse button.
    3) With the button still held down, drag the mouse to cell
          10 and then release the mouse button.
All of the cells from 2 to 10 should now be selected. Excel
refers to this group of cells as 2: 10.


Exercise 5.          Selecting by pointing and clicking
If you are selecting a large range of cells then using the drag
method may be difficult. For example, if you tried to select the entire music charts table, you may
have a hard time selecting a range of cells that goes off the screen. In these cases, the point and click
method can be easier.
    1) Click on cell 2 to select it.
    2) Scroll down so you can see the bottom of the music charts table.
    3) Hold down the [Shift] key while you click on cell 102.
The cells in between will now all be selected.

Exercise 6.          Selecting with the keyboard
As you have just seen, the [Shift] key can be helpful with selecting cells. Remember the keyboard
shortcuts used for moving in the previous section. Holding down [Shift] while using any of these
shortcuts will select cells as you move over them.
   1) Hold down [Shift] While pressing the arrows on the keyboard. You will select cells as you
       move over them, or un-select them as you move back over them.
   2) Press [Ctrl] and [Home] to move to the beginning of the sheet.
   3) Hold [Shift] and [Ctrl] while pressing the down arrow.
   4) Hold [Shift] and [Ctrl] while pressing the right arrow.
The whole table should now be selected.


© Stephen O’Neil 2005                        Page 8 Of 17                        www.oneil.com.au/pc
Using Microsoft Excel                                                                Getting Started


Exercise 7.         Additional shortcuts for selecting
   1) Click the column heading for column . This will select the entire column.


   2) Click the row heading for row 5. This will select the entire row.


   3) Move your mouse over the column A heading. Click and hold your mouse button and then
      drag to the column D heading. Everything in columns A, B, C and D will now be selected.

   4) Click the button where the row headings and column headings meet. This will select the
      entire sheet.


   5) Click anywhere inside the table and press [Ctrl] and [Spacebar]. This will select the entire
      table. If you do this while you are in a blank cell it will select the column.
   6) Press [Ctrl] [A]. This will select the entire sheet.
   7) Use the drag method to select from cell A2 to cell D3. Hold down [Ctrl] and select from cell A6
      to cell D7. The [Ctrl] key allows you to select more than one range of cells at the same time.


© Stephen O’Neil 2005                      Page 9 Of 17                       www.oneil.com.au/pc
Using Microsoft Excel                                                               Getting Started


Creating a New Spreadsheet File
Exercise 8.          Closing a Workbook
Before creating a new workbook, we’ll close the previous one. You can have more than one
workbook open at the same time, but too many files open at once can make your computer run
slowly.
In the top-right corner of the Excel screen you will see 2 buttons with crosses on them. The top one
will close Excel entirely. The bottom one will close the workbook you are working on but Excel will
remain open.

                  Close the program (you can also press [Alt] [F4] )
                  Close the workbook (you can also press [Ctrl] [F4] )

   1) Click the bottom close button, or press [Ctrl] [F4] to close the Music Charts workbook. If you
      see a message asking if you want to save changes, click No.

Exercise 9.          Creating a new workbook
    1) Click the New icon on the toolbar or press [Ctrl] [N] to create a new blank workbook.
You can also create a new workbook by going to the File menu and selecting New, though this will
ask you to choose what type of file you want before creating the workbook.

Exercise 10.         Saving a Workbook
The Save command can be accessed using one of the methods below.

   •   Go to the File menu and select Save
   •   Click the Save icon on the toolbar (looks like a floppy disk).
   •   Press [Ctrl] and [S]

Use one of the above methods to choose the save command. Because it is the first time you’ve saved
the file, you will be asked to specify a filename and a location.


Call the file Grades. Your teacher will tell you where to save it.


© Stephen O’Neil 2005                        Page 10 Of 17                    www.oneil.com.au/pc
Using Microsoft Excel                                                                    Getting Started


Entering information in to the worksheet
   1) Make sure you are in cell A1. Type your name and press [Enter].

On Excel’s normal settings, pressing [Enter] will not only complete what you are typing in the cell, it
will also move to the cell below. If cell A2 hasn’t already been selected for you, then select it
yourself.

   2) With cell A2 still selected, type your age and press [Enter].
   3) With A3 as the selected cell, hold down [Ctrl] and press [;]. This should
      place today’s date in the cell. Press [Enter] to complete entry in that cell.

Notice that the cell with your name is aligned to the left while the others are
aligned to the right. This is because text and numbers are treated differently in
Excel (a date or time is considered to be a type of number).

Exercise 11.         Editing Cell Contents
   1) Select cell B1 one and enter the following text (including the spelling error).

Easten Goldfields Senior High School

To correct the mistake, we’ll need to edit the cell. If you click on the cell and begin typing, all of the
text in the cell will be deleted. We need to change to edit mode so we can edit parts of the cell’s
contents. There are three ways to enter edit mode.

   •   Double-click on the cell you want to edit
   •   Press [F2] when the cell you want to edit is selected

   •   Click in the formula bar below the toolbar icons

   2) Use one of the above methods to enter Edit mode. A red x and a green will appear to the
      left of the formula bar.
   3) Edit the text in the cell so that Easten is changed to Eastern.
   4) When you have edited the cell contents, press [Enter] or click the green tick to complete the
      changes to the cell contents. If you want to cancel making changes to the contents of a cell,
      you can press [Esc] or click the red cross icon.


© Stephen O’Neil 2005                        Page 11 Of 17                        www.oneil.com.au/pc
Using Microsoft Excel                                                                  Getting Started


Copying and Moving
It’s often necessary to copy and move certain parts of your spreadsheet. This can be done using any
of the methods explained below.

Cut, Copy & Paste
Using the standard Windows copy & paste features is one of the most common ways to copy and
move information in Excel. When you use the cut or copy features in excel, the information you had
selected is copied to an area of Windows known as the clipboard. The copy feature will leave the
information in its original location so you can make a copy. The cut feature will remove it from its
original location so you can move it. You can then choose where the copied, information will go by
pasting from the clipboard.

Exercise 12.        Copy & Paste
   1) Open the file called Copying.
   2) Select the cells A1 to A5.

To copy the selected information, you can use one of the following methods.

   •   Go to the Edit menu (or right click on the selected cells) and select Copy.
   •   Click the Copy icon on the toolbar which looks like two documents.
   •   Hold down [Ctrl] and press [C].

   3) Use one of the above methods to use the copy command. A moving dotted line will appear
      around the selected cells to indicate they are the ones marked for copying.
   4) Click on cell C1. This is the beginning of the range we will paste the cells to.

To paste the selected information from the clipboard, you can use one of the following methods.

   •   Go to the Edit menu (or right click on the selected cells) and select Paste.
   •   Click the Paste icon on the toolbar which looks like a clipboard.
   •   Hold down [Ctrl] and press [V].

   5) Use one of the above methods to paste from the clipboard. The contents of the cells from
      A1:A5 will be copied to C1:C5.

When the information is pasted, you will see a smart tag appear
in the corner of the pasted information (it looks like the paste
icon). If you click on that icon, you get a list of options which
allow you to make choices about the information that has been
pasted, such as whether or not the formatting will match the
cells that were copied from or the cells that were copied to. You
see smart tags a lot in excel. Pay attention to them. There are
some very useful features hidden away in those menus!


© Stephen O’Neil 2005                       Page 12 Of 17                         www.oneil.com.au/pc
Using Microsoft Excel                                                                          Getting Started


Exercise 13.            Cut & Paste
The difference between copy and cut is that the cut feature doesn’t leave the original information
behind, so it is used for moving.

      1) Select the cells A1 to A5.

To cut the selected information, you can use one of the following methods.

      •   Go to the Edit menu (or right click on the selected cells) and select Cut.
      •   Click the Cut icon on the toolbar which looks like a pair of scissors.
      •   Hold down [Ctrl] and press [V].

      2) Use one of the above methods to use the cut command. A moving dotted line will appear
         around the selected cells to indicate they are the ones marked for moving.
      3) Click on cell C1. This is the beginning of the range we will paste the cells to.
      4) Select cell E1 and use the techniques described in the previous exercise to paste to that
         location. The contents of the original cells will now be moved to the new location.

Tip       Look on your keyboard and you will notice that the shortcut keys for cut, copy and paste (X, C and V)
          are all right next to each other and near the [Ctrl] key. A quick way to work is to use these shortcuts
          with your left hand, while your right hand uses the mouse to select the areas to copy and paste.


© Stephen O’Neil 2005                            Page 13 Of 17                          www.oneil.com.au/pc
Using Microsoft Excel                                                                Getting Started


Exercise 14.        Drag & Drop
Drag & Drop is another method used for copying and moving information.
   1) Select cells E1:E5.
   2) When the cells are selected, there is a black border around the selected cells. Move your
      mouse over one of the borders and your mouse pointer will change to a white arrow shape.
   3) Hold your mouse down and drag to begin moving the cells. A shaded rectangle will indicate
      where the cells will be moved to. Drag your mouse until the shaded rectangle is over cells
      G1:G5.
   4) Release your mouse button to move the contents of E1:E5 to these cells.

You can also use the drag and drop technique for copying cells. The only difference is that you hold
down the [Ctrl] key as you’re dragging.

   1) Select cells G1:G5.
   2) When the cells are selected, there is a black border around the selected cells. Move your
      mouse over one of the borders and your mouse pointer will change to a white arrow shape.
   3) Hold your mouse down and drag to begin moving the cells. A shaded rectangle will indicate
      where the cells will be moved to. Drag your mouse until the shaded rectangle is over cells
      A8:A12. While you are dragging, press and hold the [Ctrl] key. A + sign will appear next to the
      mouse to indicate that you are copying instead of moving.
   4) Release your mouse button to move the contents of E1:E5 to these cells. Make sure you don’t
      release the [Ctrl] key until after you’ve released the mouse button.
   5) Practice using the copy & paste method and the drag & drop method until all of the shaded
      areas are filled in with seasons.


© Stephen O’Neil 2005                     Page 14 Of 17                       www.oneil.com.au/pc
Using Microsoft Excel                                                                    Getting Started


Exercise 15.        Auto fill
Excel has a feature called Auto fill, which enables the user to easily copy information over a large
range of cells at the same time. Make sure the Copy workbook is still open. Like most workbooks,
this one has more than one sheet. We will change to the second sheet to practice using the auto fill
feature.
    1) To change to the second sheet, press [Ctrl] [Page Down] or click the tab for sheet 2 at the
       bottom of the screen.
   2) Select cell A1. When the cell is selected, you will see a border around the cell that is used for
       moving cells. In the bottom-right corner of that border, is an area referred to as the fill handle.
       If you move your mouse over the bottom-right corner, your mouse pointer will change to a
       small black cross.
   3) With your mouse pointer still positioned over the fill handle, click and hold the mouse button,
       then drag downwards. Continue dragging until you have reached cell
       A10.
   4) Release the mouse button, and those cells will all be filled with the
       contents of cell A1.
   5) Select cell B1. Follow the steps above to fill the cells below with the
       contents of cell B1. Excel will recognise this cell as being one of the days
       of the week, and will fill the other cells with the following days. This
       uses a feature known as intelligent auto fill.
   6) Try the same thing with cell C1 and you will see that Excel also
       recognises abbreviated day names.
   7) The same also works with month names. Use the fill handle to copy cell
       D1 to the cells below, then copy E1 to the cells below.
   8) Use the fill handle to copy F1 to the cells below and do the same with G1
   9) In cell H1 we have not only a month name, but a year as well. Use the fill handle to copy this
       to the cells below. When the series reaches January, the year will change appropriately.
   10) In cell H1 we have a month name. Use the fill handle to copy it to the cells blow and the
       series will continue. The contents of cell H1 may also be a person’s name. If this was the
       case, then we might not want it to change the following cells the months in the year. Try
       using the fill handle on cell I1 but this time hold down the [Ctrl] key as you drag downwards.
       This will temporarily disable the intelligent auto fill feature.
   11) In other cases, you may want to force Excel to fill intelligently. If you use the auto fill feature
       on cell J1, the cells would all be filled with the number 1. If you hold down [Ctrl], you will be
       telling Excel to use Auto Fill. Copy cell J1 downwards while holding down [Ctrl].
   12) In column K, we have 2 cells filled in. Select both of those cells (K1:K2). If you use the fill
       handle while 2 cells are selected, Excel will work out the difference between the 2 cells and
       increase the following cells by the same amount. Try copying downwards using the fill
       handle. Try doing the same with the 2 months in column L.
   13) In column M, we have a month in addition to the year. When the series reaches January, the
       year will change. Try copying M1 down with the fill handle.


   14) Save the changes to the file when you are done (     or [Ctrl][S])

© Stephen O’Neil 2005                       Page 15 Of 17                         www.oneil.com.au/pc
Using Microsoft Excel                                                                   Getting Started


Creating a table
Now we’ll use what has been covered so far to create a table.
  1) Close the workbook that is currently open ( or [Ctrl][F4]).
  2) Open your Grades file if it is not still open ( or [Ctrl][O])

To check and see if a workbook is already open, select the Window menu. The
bottom of the menu will show a list of all the workbooks currently open with a
tick next to the workbook you are currently viewing. When more than one
workbook is open, you can select a file name from the Window menu to switch
to that workbook. You can also press [Ctrl] [F6] to switch between open
workbooks.
    3) Enter the text Term 1 in cell B5.
    4) Use the fill handle to copy the contents of that cell over the next three cells as shown below.


Those cells should now be filled in with Term 2, Term 3 and Term 4.


   5) Complete the list of names in column A as shown below.


   6) In cell A15 enter Class Average.
   7) In cell F5 enter Year Total.


© Stephen O’Neil 2005                       Page 16 Of 17                        www.oneil.com.au/pc
Using Microsoft Excel                                         Getting Started

   8) Enter the numbers shown below.


   9) Save the file after you have made the changes.


© Stephen O’Neil 2005                    Page 17 Of 17   www.oneil.com.au/pc

Contenu connexe

Tendances

Excel 2010 training presentation understand data at a glance with condition...
Excel 2010 training presentation   understand data at a glance with condition...Excel 2010 training presentation   understand data at a glance with condition...
Excel 2010 training presentation understand data at a glance with condition...MFMinickiello
 
Introduction microsoft excel 2007
Introduction microsoft excel 2007Introduction microsoft excel 2007
Introduction microsoft excel 2007Celia Bandelier
 
Microsoft® Office Excel® 2007 Training
Microsoft® Office Excel® 2007 TrainingMicrosoft® Office Excel® 2007 Training
Microsoft® Office Excel® 2007 Trainingsun12341
 
Pagelayout & data tab of ms excel 2010
Pagelayout & data tab of ms excel 2010Pagelayout & data tab of ms excel 2010
Pagelayout & data tab of ms excel 2010Nitish Kumar
 
Pks ms excel unit 2_bcomcs
Pks ms excel unit 2_bcomcsPks ms excel unit 2_bcomcs
Pks ms excel unit 2_bcomcsKALAISELVI P
 
MS EXCEL PPT PRESENTATION
MS EXCEL PPT PRESENTATIONMS EXCEL PPT PRESENTATION
MS EXCEL PPT PRESENTATIONMridul Bansal
 
Emmylet computer guide on excel
Emmylet computer guide on excelEmmylet computer guide on excel
Emmylet computer guide on excelOfun Emma
 
01 microsoft excel 2007 (introduction)
01 microsoft excel 2007 (introduction)01 microsoft excel 2007 (introduction)
01 microsoft excel 2007 (introduction)benchhood
 

Tendances (11)

Excel 2010 training presentation understand data at a glance with condition...
Excel 2010 training presentation   understand data at a glance with condition...Excel 2010 training presentation   understand data at a glance with condition...
Excel 2010 training presentation understand data at a glance with condition...
 
Introduction microsoft excel 2007
Introduction microsoft excel 2007Introduction microsoft excel 2007
Introduction microsoft excel 2007
 
Excel2007
Excel2007Excel2007
Excel2007
 
Microsoft® Office Excel® 2007 Training
Microsoft® Office Excel® 2007 TrainingMicrosoft® Office Excel® 2007 Training
Microsoft® Office Excel® 2007 Training
 
Pagelayout & data tab of ms excel 2010
Pagelayout & data tab of ms excel 2010Pagelayout & data tab of ms excel 2010
Pagelayout & data tab of ms excel 2010
 
Ms excel 2007
Ms excel 2007Ms excel 2007
Ms excel 2007
 
MS OFfice presentation
MS OFfice presentationMS OFfice presentation
MS OFfice presentation
 
Pks ms excel unit 2_bcomcs
Pks ms excel unit 2_bcomcsPks ms excel unit 2_bcomcs
Pks ms excel unit 2_bcomcs
 
MS EXCEL PPT PRESENTATION
MS EXCEL PPT PRESENTATIONMS EXCEL PPT PRESENTATION
MS EXCEL PPT PRESENTATION
 
Emmylet computer guide on excel
Emmylet computer guide on excelEmmylet computer guide on excel
Emmylet computer guide on excel
 
01 microsoft excel 2007 (introduction)
01 microsoft excel 2007 (introduction)01 microsoft excel 2007 (introduction)
01 microsoft excel 2007 (introduction)
 

En vedette

En vedette (7)

Windows Basic
Windows BasicWindows Basic
Windows Basic
 
Jesus on Humility
Jesus on HumilityJesus on Humility
Jesus on Humility
 
Taxomic Structure
Taxomic StructureTaxomic Structure
Taxomic Structure
 
THE HARDEST CHRISTIAN ACT 02
THE HARDEST CHRISTIAN ACT 02THE HARDEST CHRISTIAN ACT 02
THE HARDEST CHRISTIAN ACT 02
 
Blessing for Ishmael
Blessing for IshmaelBlessing for Ishmael
Blessing for Ishmael
 
 
11032013 slides
11032013 slides11032013 slides
11032013 slides
 

Similaire à Using Microsoft Excel1 Getting Started

advance excell notes EMERSON EDUARDO RODRIGUES
advance excell notes EMERSON EDUARDO RODRIGUESadvance excell notes EMERSON EDUARDO RODRIGUES
advance excell notes EMERSON EDUARDO RODRIGUESEMERSON EDUARDO RODRIGUES
 
advance excell notes EMERSON EDUARDO RODRIGUES
advance excell notes EMERSON EDUARDO RODRIGUESadvance excell notes EMERSON EDUARDO RODRIGUES
advance excell notes EMERSON EDUARDO RODRIGUESEMERSON EDUARDO RODRIGUES
 
ms excel for mba first sem students of dr hs gour university sagar(m.p)
ms excel for mba first sem students of dr hs gour university sagar(m.p)ms excel for mba first sem students of dr hs gour university sagar(m.p)
ms excel for mba first sem students of dr hs gour university sagar(m.p)gaurav jain
 
How to use microsoft excel
How to use microsoft excelHow to use microsoft excel
How to use microsoft excelgirum003
 
PIS Excel Lesson 1.pptx
PIS Excel Lesson 1.pptxPIS Excel Lesson 1.pptx
PIS Excel Lesson 1.pptxrubben7
 
Element of an electronic speadsheet ms excel
Element of an electronic speadsheet   ms excelElement of an electronic speadsheet   ms excel
Element of an electronic speadsheet ms exceleVidhya
 
Getting started with_microsoft_excel
Getting started with_microsoft_excelGetting started with_microsoft_excel
Getting started with_microsoft_excelDeepak Chavan
 
Teaching Excel
Teaching ExcelTeaching Excel
Teaching Excelsam ran
 
Microsoft excel beginner
Microsoft excel beginnerMicrosoft excel beginner
Microsoft excel beginnerSushate Sandal
 
Microsoft excel beginner
Microsoft excel beginnerMicrosoft excel beginner
Microsoft excel beginnerSushate Sandal
 
Visual basic programming session 3
Visual basic programming session 3Visual basic programming session 3
Visual basic programming session 3Russel Corraya
 
Microsoft excel 2007 programme for effective tertiary institution result grading
Microsoft excel 2007 programme for effective tertiary institution result gradingMicrosoft excel 2007 programme for effective tertiary institution result grading
Microsoft excel 2007 programme for effective tertiary institution result gradingAlexander Decker
 
Ms excel 2007 tutorial
Ms excel 2007 tutorialMs excel 2007 tutorial
Ms excel 2007 tutorialjks2010
 
Microsoft excel training module
Microsoft excel training moduleMicrosoft excel training module
Microsoft excel training moduleJeff Piontek
 

Similaire à Using Microsoft Excel1 Getting Started (20)

18BCS5EL-U5 (1).pdf
18BCS5EL-U5 (1).pdf18BCS5EL-U5 (1).pdf
18BCS5EL-U5 (1).pdf
 
advance excell notes EMERSON EDUARDO RODRIGUES
advance excell notes EMERSON EDUARDO RODRIGUESadvance excell notes EMERSON EDUARDO RODRIGUES
advance excell notes EMERSON EDUARDO RODRIGUES
 
advance excell notes EMERSON EDUARDO RODRIGUES
advance excell notes EMERSON EDUARDO RODRIGUESadvance excell notes EMERSON EDUARDO RODRIGUES
advance excell notes EMERSON EDUARDO RODRIGUES
 
ms excel for mba first sem students of dr hs gour university sagar(m.p)
ms excel for mba first sem students of dr hs gour university sagar(m.p)ms excel for mba first sem students of dr hs gour university sagar(m.p)
ms excel for mba first sem students of dr hs gour university sagar(m.p)
 
How to use microsoft excel
How to use microsoft excelHow to use microsoft excel
How to use microsoft excel
 
PIS Excel Lesson 1.pptx
PIS Excel Lesson 1.pptxPIS Excel Lesson 1.pptx
PIS Excel Lesson 1.pptx
 
Microsoft Excel
Microsoft ExcelMicrosoft Excel
Microsoft Excel
 
Element of an electronic speadsheet ms excel
Element of an electronic speadsheet   ms excelElement of an electronic speadsheet   ms excel
Element of an electronic speadsheet ms excel
 
Getting started with_microsoft_excel
Getting started with_microsoft_excelGetting started with_microsoft_excel
Getting started with_microsoft_excel
 
Teaching Excel
Teaching ExcelTeaching Excel
Teaching Excel
 
Microsoft excel beginner
Microsoft excel beginnerMicrosoft excel beginner
Microsoft excel beginner
 
Microsoft excel beginner
Microsoft excel beginnerMicrosoft excel beginner
Microsoft excel beginner
 
Microsoft excel beginner
Microsoft excel beginnerMicrosoft excel beginner
Microsoft excel beginner
 
1st quarter 1st meeting- spreadsheet
1st quarter   1st meeting- spreadsheet1st quarter   1st meeting- spreadsheet
1st quarter 1st meeting- spreadsheet
 
Visual basic programming session 3
Visual basic programming session 3Visual basic programming session 3
Visual basic programming session 3
 
Top 10 excel tips
Top 10 excel tipsTop 10 excel tips
Top 10 excel tips
 
Microsoft excel 2007 programme for effective tertiary institution result grading
Microsoft excel 2007 programme for effective tertiary institution result gradingMicrosoft excel 2007 programme for effective tertiary institution result grading
Microsoft excel 2007 programme for effective tertiary institution result grading
 
Excel for beginner
Excel for beginnerExcel for beginner
Excel for beginner
 
Ms excel 2007 tutorial
Ms excel 2007 tutorialMs excel 2007 tutorial
Ms excel 2007 tutorial
 
Microsoft excel training module
Microsoft excel training moduleMicrosoft excel training module
Microsoft excel training module
 

Plus de Jack Frost

Other study questions - Related to Canadian Citizenship Exam
Other study questions - Related to Canadian Citizenship ExamOther study questions - Related to Canadian Citizenship Exam
Other study questions - Related to Canadian Citizenship ExamJack Frost
 
Important Names And Dates for Canadian Citizenship Exam
Important Names And Dates for Canadian Citizenship ExamImportant Names And Dates for Canadian Citizenship Exam
Important Names And Dates for Canadian Citizenship ExamJack Frost
 
90 ecom challenge
90 ecom challenge90 ecom challenge
90 ecom challengeJack Frost
 
Preceptorship meds
Preceptorship medsPreceptorship meds
Preceptorship medsJack Frost
 
Research for queens park common cases
Research for queens park common casesResearch for queens park common cases
Research for queens park common casesJack Frost
 
Diagnosis and medications research
Diagnosis and medications researchDiagnosis and medications research
Diagnosis and medications researchJack Frost
 
Jeopardy Game
Jeopardy Game Jeopardy Game
Jeopardy Game Jack Frost
 
Jeopardy 2016 - Handout
Jeopardy 2016 - HandoutJeopardy 2016 - Handout
Jeopardy 2016 - HandoutJack Frost
 
Cheat sheet - Plan of Care
Cheat sheet - Plan of CareCheat sheet - Plan of Care
Cheat sheet - Plan of CareJack Frost
 
Professional communication 4 simulation
Professional communication 4   simulationProfessional communication 4   simulation
Professional communication 4 simulationJack Frost
 
L 4 sims prep student 2016
L 4 sims prep student 2016L 4 sims prep student 2016
L 4 sims prep student 2016Jack Frost
 
Weekly reflections 2 and 3
Weekly reflections 2 and 3Weekly reflections 2 and 3
Weekly reflections 2 and 3Jack Frost
 
Horizontal violence prof comm4
Horizontal violence prof comm4Horizontal violence prof comm4
Horizontal violence prof comm4Jack Frost
 
Ethical dilemma class presentation
Ethical dilemma   class presentationEthical dilemma   class presentation
Ethical dilemma class presentationJack Frost
 
Teaching narcan injection
Teaching narcan injectionTeaching narcan injection
Teaching narcan injectionJack Frost
 
Journal (Week 3) CPE 3
Journal (Week 3) CPE 3Journal (Week 3) CPE 3
Journal (Week 3) CPE 3Jack Frost
 
Professional communication 3
Professional communication 3Professional communication 3
Professional communication 3Jack Frost
 
Professional Communication 3 sample case study
Professional Communication 3 sample case studyProfessional Communication 3 sample case study
Professional Communication 3 sample case studyJack Frost
 

Plus de Jack Frost (20)

Other study questions - Related to Canadian Citizenship Exam
Other study questions - Related to Canadian Citizenship ExamOther study questions - Related to Canadian Citizenship Exam
Other study questions - Related to Canadian Citizenship Exam
 
Important Names And Dates for Canadian Citizenship Exam
Important Names And Dates for Canadian Citizenship ExamImportant Names And Dates for Canadian Citizenship Exam
Important Names And Dates for Canadian Citizenship Exam
 
90 ecom challenge
90 ecom challenge90 ecom challenge
90 ecom challenge
 
Preceptorship meds
Preceptorship medsPreceptorship meds
Preceptorship meds
 
Plan of care
Plan of carePlan of care
Plan of care
 
Research for queens park common cases
Research for queens park common casesResearch for queens park common cases
Research for queens park common cases
 
Diagnosis and medications research
Diagnosis and medications researchDiagnosis and medications research
Diagnosis and medications research
 
Plan of care
Plan of carePlan of care
Plan of care
 
Jeopardy Game
Jeopardy Game Jeopardy Game
Jeopardy Game
 
Jeopardy 2016 - Handout
Jeopardy 2016 - HandoutJeopardy 2016 - Handout
Jeopardy 2016 - Handout
 
Cheat sheet - Plan of Care
Cheat sheet - Plan of CareCheat sheet - Plan of Care
Cheat sheet - Plan of Care
 
Professional communication 4 simulation
Professional communication 4   simulationProfessional communication 4   simulation
Professional communication 4 simulation
 
L 4 sims prep student 2016
L 4 sims prep student 2016L 4 sims prep student 2016
L 4 sims prep student 2016
 
Weekly reflections 2 and 3
Weekly reflections 2 and 3Weekly reflections 2 and 3
Weekly reflections 2 and 3
 
Horizontal violence prof comm4
Horizontal violence prof comm4Horizontal violence prof comm4
Horizontal violence prof comm4
 
Ethical dilemma class presentation
Ethical dilemma   class presentationEthical dilemma   class presentation
Ethical dilemma class presentation
 
Teaching narcan injection
Teaching narcan injectionTeaching narcan injection
Teaching narcan injection
 
Journal (Week 3) CPE 3
Journal (Week 3) CPE 3Journal (Week 3) CPE 3
Journal (Week 3) CPE 3
 
Professional communication 3
Professional communication 3Professional communication 3
Professional communication 3
 
Professional Communication 3 sample case study
Professional Communication 3 sample case studyProfessional Communication 3 sample case study
Professional Communication 3 sample case study
 

Dernier

DATA STRUCTURE AND ALGORITHM for beginners
DATA STRUCTURE AND ALGORITHM for beginnersDATA STRUCTURE AND ALGORITHM for beginners
DATA STRUCTURE AND ALGORITHM for beginnersSabitha Banu
 
Judging the Relevance and worth of ideas part 2.pptx
Judging the Relevance  and worth of ideas part 2.pptxJudging the Relevance  and worth of ideas part 2.pptx
Judging the Relevance and worth of ideas part 2.pptxSherlyMaeNeri
 
ECONOMIC CONTEXT - LONG FORM TV DRAMA - PPT
ECONOMIC CONTEXT - LONG FORM TV DRAMA - PPTECONOMIC CONTEXT - LONG FORM TV DRAMA - PPT
ECONOMIC CONTEXT - LONG FORM TV DRAMA - PPTiammrhaywood
 
Inclusivity Essentials_ Creating Accessible Websites for Nonprofits .pdf
Inclusivity Essentials_ Creating Accessible Websites for Nonprofits .pdfInclusivity Essentials_ Creating Accessible Websites for Nonprofits .pdf
Inclusivity Essentials_ Creating Accessible Websites for Nonprofits .pdfTechSoup
 
Incoming and Outgoing Shipments in 3 STEPS Using Odoo 17
Incoming and Outgoing Shipments in 3 STEPS Using Odoo 17Incoming and Outgoing Shipments in 3 STEPS Using Odoo 17
Incoming and Outgoing Shipments in 3 STEPS Using Odoo 17Celine George
 
HỌC TỐT TIẾNG ANH 11 THEO CHƯƠNG TRÌNH GLOBAL SUCCESS ĐÁP ÁN CHI TIẾT - CẢ NĂ...
HỌC TỐT TIẾNG ANH 11 THEO CHƯƠNG TRÌNH GLOBAL SUCCESS ĐÁP ÁN CHI TIẾT - CẢ NĂ...HỌC TỐT TIẾNG ANH 11 THEO CHƯƠNG TRÌNH GLOBAL SUCCESS ĐÁP ÁN CHI TIẾT - CẢ NĂ...
HỌC TỐT TIẾNG ANH 11 THEO CHƯƠNG TRÌNH GLOBAL SUCCESS ĐÁP ÁN CHI TIẾT - CẢ NĂ...Nguyen Thanh Tu Collection
 
MULTIDISCIPLINRY NATURE OF THE ENVIRONMENTAL STUDIES.pptx
MULTIDISCIPLINRY NATURE OF THE ENVIRONMENTAL STUDIES.pptxMULTIDISCIPLINRY NATURE OF THE ENVIRONMENTAL STUDIES.pptx
MULTIDISCIPLINRY NATURE OF THE ENVIRONMENTAL STUDIES.pptxAnupkumar Sharma
 
THEORIES OF ORGANIZATION-PUBLIC ADMINISTRATION
THEORIES OF ORGANIZATION-PUBLIC ADMINISTRATIONTHEORIES OF ORGANIZATION-PUBLIC ADMINISTRATION
THEORIES OF ORGANIZATION-PUBLIC ADMINISTRATIONHumphrey A Beña
 
Keynote by Prof. Wurzer at Nordex about IP-design
Keynote by Prof. Wurzer at Nordex about IP-designKeynote by Prof. Wurzer at Nordex about IP-design
Keynote by Prof. Wurzer at Nordex about IP-designMIPLM
 
ISYU TUNGKOL SA SEKSWLADIDA (ISSUE ABOUT SEXUALITY
ISYU TUNGKOL SA SEKSWLADIDA (ISSUE ABOUT SEXUALITYISYU TUNGKOL SA SEKSWLADIDA (ISSUE ABOUT SEXUALITY
ISYU TUNGKOL SA SEKSWLADIDA (ISSUE ABOUT SEXUALITYKayeClaireEstoconing
 
Visit to a blind student's school🧑‍🦯🧑‍🦯(community medicine)
Visit to a blind student's school🧑‍🦯🧑‍🦯(community medicine)Visit to a blind student's school🧑‍🦯🧑‍🦯(community medicine)
Visit to a blind student's school🧑‍🦯🧑‍🦯(community medicine)lakshayb543
 
4.18.24 Movement Legacies, Reflection, and Review.pptx
4.18.24 Movement Legacies, Reflection, and Review.pptx4.18.24 Movement Legacies, Reflection, and Review.pptx
4.18.24 Movement Legacies, Reflection, and Review.pptxmary850239
 
Influencing policy (training slides from Fast Track Impact)
Influencing policy (training slides from Fast Track Impact)Influencing policy (training slides from Fast Track Impact)
Influencing policy (training slides from Fast Track Impact)Mark Reed
 
How to Add Barcode on PDF Report in Odoo 17
How to Add Barcode on PDF Report in Odoo 17How to Add Barcode on PDF Report in Odoo 17
How to Add Barcode on PDF Report in Odoo 17Celine George
 
What is Model Inheritance in Odoo 17 ERP
What is Model Inheritance in Odoo 17 ERPWhat is Model Inheritance in Odoo 17 ERP
What is Model Inheritance in Odoo 17 ERPCeline George
 
Field Attribute Index Feature in Odoo 17
Field Attribute Index Feature in Odoo 17Field Attribute Index Feature in Odoo 17
Field Attribute Index Feature in Odoo 17Celine George
 
Proudly South Africa powerpoint Thorisha.pptx
Proudly South Africa powerpoint Thorisha.pptxProudly South Africa powerpoint Thorisha.pptx
Proudly South Africa powerpoint Thorisha.pptxthorishapillay1
 
ENGLISH6-Q4-W3.pptxqurter our high choom
ENGLISH6-Q4-W3.pptxqurter our high choomENGLISH6-Q4-W3.pptxqurter our high choom
ENGLISH6-Q4-W3.pptxqurter our high choomnelietumpap1
 

Dernier (20)

DATA STRUCTURE AND ALGORITHM for beginners
DATA STRUCTURE AND ALGORITHM for beginnersDATA STRUCTURE AND ALGORITHM for beginners
DATA STRUCTURE AND ALGORITHM for beginners
 
Judging the Relevance and worth of ideas part 2.pptx
Judging the Relevance  and worth of ideas part 2.pptxJudging the Relevance  and worth of ideas part 2.pptx
Judging the Relevance and worth of ideas part 2.pptx
 
ECONOMIC CONTEXT - LONG FORM TV DRAMA - PPT
ECONOMIC CONTEXT - LONG FORM TV DRAMA - PPTECONOMIC CONTEXT - LONG FORM TV DRAMA - PPT
ECONOMIC CONTEXT - LONG FORM TV DRAMA - PPT
 
Inclusivity Essentials_ Creating Accessible Websites for Nonprofits .pdf
Inclusivity Essentials_ Creating Accessible Websites for Nonprofits .pdfInclusivity Essentials_ Creating Accessible Websites for Nonprofits .pdf
Inclusivity Essentials_ Creating Accessible Websites for Nonprofits .pdf
 
Incoming and Outgoing Shipments in 3 STEPS Using Odoo 17
Incoming and Outgoing Shipments in 3 STEPS Using Odoo 17Incoming and Outgoing Shipments in 3 STEPS Using Odoo 17
Incoming and Outgoing Shipments in 3 STEPS Using Odoo 17
 
YOUVE_GOT_EMAIL_PRELIMS_EL_DORADO_2024.pptx
YOUVE_GOT_EMAIL_PRELIMS_EL_DORADO_2024.pptxYOUVE_GOT_EMAIL_PRELIMS_EL_DORADO_2024.pptx
YOUVE_GOT_EMAIL_PRELIMS_EL_DORADO_2024.pptx
 
HỌC TỐT TIẾNG ANH 11 THEO CHƯƠNG TRÌNH GLOBAL SUCCESS ĐÁP ÁN CHI TIẾT - CẢ NĂ...
HỌC TỐT TIẾNG ANH 11 THEO CHƯƠNG TRÌNH GLOBAL SUCCESS ĐÁP ÁN CHI TIẾT - CẢ NĂ...HỌC TỐT TIẾNG ANH 11 THEO CHƯƠNG TRÌNH GLOBAL SUCCESS ĐÁP ÁN CHI TIẾT - CẢ NĂ...
HỌC TỐT TIẾNG ANH 11 THEO CHƯƠNG TRÌNH GLOBAL SUCCESS ĐÁP ÁN CHI TIẾT - CẢ NĂ...
 
MULTIDISCIPLINRY NATURE OF THE ENVIRONMENTAL STUDIES.pptx
MULTIDISCIPLINRY NATURE OF THE ENVIRONMENTAL STUDIES.pptxMULTIDISCIPLINRY NATURE OF THE ENVIRONMENTAL STUDIES.pptx
MULTIDISCIPLINRY NATURE OF THE ENVIRONMENTAL STUDIES.pptx
 
THEORIES OF ORGANIZATION-PUBLIC ADMINISTRATION
THEORIES OF ORGANIZATION-PUBLIC ADMINISTRATIONTHEORIES OF ORGANIZATION-PUBLIC ADMINISTRATION
THEORIES OF ORGANIZATION-PUBLIC ADMINISTRATION
 
Keynote by Prof. Wurzer at Nordex about IP-design
Keynote by Prof. Wurzer at Nordex about IP-designKeynote by Prof. Wurzer at Nordex about IP-design
Keynote by Prof. Wurzer at Nordex about IP-design
 
ISYU TUNGKOL SA SEKSWLADIDA (ISSUE ABOUT SEXUALITY
ISYU TUNGKOL SA SEKSWLADIDA (ISSUE ABOUT SEXUALITYISYU TUNGKOL SA SEKSWLADIDA (ISSUE ABOUT SEXUALITY
ISYU TUNGKOL SA SEKSWLADIDA (ISSUE ABOUT SEXUALITY
 
Visit to a blind student's school🧑‍🦯🧑‍🦯(community medicine)
Visit to a blind student's school🧑‍🦯🧑‍🦯(community medicine)Visit to a blind student's school🧑‍🦯🧑‍🦯(community medicine)
Visit to a blind student's school🧑‍🦯🧑‍🦯(community medicine)
 
4.18.24 Movement Legacies, Reflection, and Review.pptx
4.18.24 Movement Legacies, Reflection, and Review.pptx4.18.24 Movement Legacies, Reflection, and Review.pptx
4.18.24 Movement Legacies, Reflection, and Review.pptx
 
FINALS_OF_LEFT_ON_C'N_EL_DORADO_2024.pptx
FINALS_OF_LEFT_ON_C'N_EL_DORADO_2024.pptxFINALS_OF_LEFT_ON_C'N_EL_DORADO_2024.pptx
FINALS_OF_LEFT_ON_C'N_EL_DORADO_2024.pptx
 
Influencing policy (training slides from Fast Track Impact)
Influencing policy (training slides from Fast Track Impact)Influencing policy (training slides from Fast Track Impact)
Influencing policy (training slides from Fast Track Impact)
 
How to Add Barcode on PDF Report in Odoo 17
How to Add Barcode on PDF Report in Odoo 17How to Add Barcode on PDF Report in Odoo 17
How to Add Barcode on PDF Report in Odoo 17
 
What is Model Inheritance in Odoo 17 ERP
What is Model Inheritance in Odoo 17 ERPWhat is Model Inheritance in Odoo 17 ERP
What is Model Inheritance in Odoo 17 ERP
 
Field Attribute Index Feature in Odoo 17
Field Attribute Index Feature in Odoo 17Field Attribute Index Feature in Odoo 17
Field Attribute Index Feature in Odoo 17
 
Proudly South Africa powerpoint Thorisha.pptx
Proudly South Africa powerpoint Thorisha.pptxProudly South Africa powerpoint Thorisha.pptx
Proudly South Africa powerpoint Thorisha.pptx
 
ENGLISH6-Q4-W3.pptxqurter our high choom
ENGLISH6-Q4-W3.pptxqurter our high choomENGLISH6-Q4-W3.pptxqurter our high choom
ENGLISH6-Q4-W3.pptxqurter our high choom
 

Using Microsoft Excel1 Getting Started

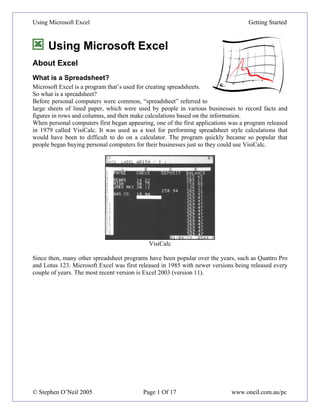
  • 1. Using Microsoft Excel Getting Started Using Microsoft Excel About Excel What is a Spreadsheet? Microsoft Excel is a program that’s used for creating spreadsheets. So what is a spreadsheet? Before personal computers were common, “spreadsheet” referred to large sheets of lined paper, which were used by people in various businesses to record facts and figures in rows and columns, and then make calculations based on the information. When personal computers first began appearing, one of the first applications was a program released in 1979 called VisiCalc. It was used as a tool for performing spreadsheet style calculations that would have been to difficult to do on a calculator. The program quickly became so popular that people began buying personal computers for their businesses just so they could use VisiCalc. VisiCalc Since then, many other spreadsheet programs have been popular over the years, such as Quattro Pro and Lotus 123. Microsoft Excel was first released in 1985 with newer versions being released every couple of years. The most recent version is Excel 2003 (version 11). © Stephen O’Neil 2005 Page 1 Of 17 www.oneil.com.au/pc
  • 2. Using Microsoft Excel Getting Started How Do Spreadsheets Work? Computer spreadsheets are based on their old paper formats. A spreadsheet on a computer uses rows and columns to record information such as text and numbers, such as the example below. Graduates from University 1996 1997 1998 1999 2000 2001 Total Nursing 3,982 3,999 4,012 4,350 3,330 3,500 23,173 Law 5,001 5,330 4,998 5,200 5,120 5,101 30,750 Art 1,060 1,870 1,509 1,777 1,670 1,830 9,716 Science 2,646 2,300 2,100 2,222 3,100 1,998 14,366 Music 480 390 389 410 376 296 2,341 Total Graduates 13,169 13,889 13,008 13,959 13,596 12,725 80,346 Average 2,634 2,778 2,602 2,792 2,719 2,545 16,069 Minimum 480 390 389 410 376 296 2,341 Maximum 5,001 5,330 4,998 5,200 5,120 5,101 30,750 One major benefit of using computers for spreadsheets is that the computer can do a lot of the hard work for you. For example, in the table above, the computer could be told to automatically work out the summary amounts such as total, average, minimum and maximum. A spreadsheet program can also create graphs and other types of charts, based on information in your tables. The example below shows a graph that was easily created from the table above. Graduates From University 6,000 5,000 4,000 Law Nursing 3,000 Science Art 2,000 Music 1,000 0 1996 1997 1998 1999 2000 2001 © Stephen O’Neil 2005 Page 2 Of 17 www.oneil.com.au/pc
  • 3. Using Microsoft Excel Getting Started Spreadsheets are often used for business documents such as invoices where numbers and totals are important. A program such as Excel can automatically add up totals for a document such as the invoice shown below. A document like this could be given a customer to provide details of how much money they owe to the business. Spreadsheet Contents The cells in a spreadsheet can contain 3 types of information. Excel will treat cells differently depending on the cell contents. • Text – Any names or labels that are required on the spreadsheet • Number – All numerical values including dates/times, percentages and dollar values • Formula – Formulas are written in a cell to automatically calculate an answer. © Stephen O’Neil 2005 Page 3 Of 17 www.oneil.com.au/pc
  • 4. Using Microsoft Excel Getting Started Working with Excel The Excel Screen Title bar Menu bar Standard toolbar Formatting toolbar Formula Bar Row and column headings Sheet tabs Status bar Title bar Shows the name of the application and the name of the currently open file Menu bar Contains all of the program’s menus Standard toolbar Provides single click access to common Excel features Formatting toolbar Provides single click access to common formatting features Formula bar Used to edit the contents of cells on the spreadsheet Headings Each column in the spreadsheet has a heading with a letter Each row in the spreadsheet has a heading with a number Sheet tabs An Excel file can have more than one sheet. These are used for selecting different sheets Status bar Shows information based on what you are doing and provides quick access to some features © Stephen O’Neil 2005 Page 4 Of 17 www.oneil.com.au/pc
  • 5. Using Microsoft Excel Getting Started Exercise 1. Opening an Existing File Opening a file in Excel is done the same way as in most other programs. Opening a file can be done in one of the following ways: • Hold down the [Ctrl] key on your keyboard and press [O]. • Click the Open icon on the toolbar (looks like a folder opening). • From the menu, select File and then Open. 1) Select the Open command using one of the above methods. You will see the file open dialog as shown below. 2) Click on the Look In: list and select the drive and location that the file is in. Your teacher will tell you where the files are stored. 3) When you have selected the right location, a list of Excel files will appear. Select the file called Music Charts.xls and click Open. The spreadsheet file will now open in Excel Components of a file Each file in Excel is referred to as a Workbook. This is because each file may contain more than one spreadsheet. A new workbook will begin with three blank sheets. Each sheet contains 65,536 rows and 256 columns. The rectangle areas that make up the rows and columns are referred to as cells. © Stephen O’Neil 2005 Page 5 Of 17 www.oneil.com.au/pc
  • 6. Using Microsoft Excel Getting Started Moving Around a Workbook Moving around the workbook can be done with the mouse, with the keyboard or with a combination of the two. Exercise 2. Moving around with the mouse The sheet in front of you will be made up of numerous cells. You can select a particular cell by clicking on it with your mouse. Each cell is referred to by its column letter and then its row number. For example: in the picture shown below, the cell in column C and row 7 is selected. This cell would be referred to as cell C7. 1) Click on cell C7 to select it. You can use the scrollbars to move to sections of the sheet that are off the screen. The scroll bar on the right can be used for moving up and down and the scroll bar at the bottom can be used for moving sideways. Click the arrows to move one row/column at a time Drag the scroll boxes to move quickly Click the blank area on the scrollbar to move one screen at a time 2) Practice using the scrollbars to move around the sheet © Stephen O’Neil 2005 Page 6 Of 17 www.oneil.com.au/pc
  • 7. Using Microsoft Excel Getting Started Exercise 3. Moving Around With The Keyboard 1) Hold down the [Ctrl] key and press [Home]. This will move you to cell A1. 2) Press the down arrow ↓ 5 times and press the right arrow → 3 times. You should have cell 6 selected. 3) Press [Home]. This will move you to column A. 4) Hold down [Ctrl] and press the down arrow ↓ to move to the last non-empty cell in that direction. 5) Hold down [Ctrl] and press the right arrow → to move to the last non-empty cell in that direction. You should now be on cell D102. 6) Press [Ctrl] [Home] again and then practice the additional shortcuts listed below. [Page Down] Move down one screen [Page Up] Move up one screen [Alt] [Page Down] Move right one screen [Alt] [Page Up] Move left one screen © Stephen O’Neil 2005 Page 7 Of 17 www.oneil.com.au/pc
  • 8. Using Microsoft Excel Getting Started Selecting Cells When you are working in a spreadsheet, it is important to be able to select cells in the sheet. Some of the more common tasks that can be done when cells are selected are: • Format cells (change colours, text sizes etc.) • Copy and move cells • Sort information • Create a graph from the information that’s selected Like many things in Excel, selecting cells can be done with the mouse or with the keyboard. First we’ll try selecting cells with the mouse. Make sure the Music Charts file is still open. Exercise 4. Selecting by dragging 1) Move your mouse so that it is positioned over cell 2 (the one which says “Company”) 2) Click and hold down the left mouse button. 3) With the button still held down, drag the mouse to cell 10 and then release the mouse button. All of the cells from 2 to 10 should now be selected. Excel refers to this group of cells as 2: 10. Exercise 5. Selecting by pointing and clicking If you are selecting a large range of cells then using the drag method may be difficult. For example, if you tried to select the entire music charts table, you may have a hard time selecting a range of cells that goes off the screen. In these cases, the point and click method can be easier. 1) Click on cell 2 to select it. 2) Scroll down so you can see the bottom of the music charts table. 3) Hold down the [Shift] key while you click on cell 102. The cells in between will now all be selected. Exercise 6. Selecting with the keyboard As you have just seen, the [Shift] key can be helpful with selecting cells. Remember the keyboard shortcuts used for moving in the previous section. Holding down [Shift] while using any of these shortcuts will select cells as you move over them. 1) Hold down [Shift] While pressing the arrows on the keyboard. You will select cells as you move over them, or un-select them as you move back over them. 2) Press [Ctrl] and [Home] to move to the beginning of the sheet. 3) Hold [Shift] and [Ctrl] while pressing the down arrow. 4) Hold [Shift] and [Ctrl] while pressing the right arrow. The whole table should now be selected. © Stephen O’Neil 2005 Page 8 Of 17 www.oneil.com.au/pc
  • 9. Using Microsoft Excel Getting Started Exercise 7. Additional shortcuts for selecting 1) Click the column heading for column . This will select the entire column. 2) Click the row heading for row 5. This will select the entire row. 3) Move your mouse over the column A heading. Click and hold your mouse button and then drag to the column D heading. Everything in columns A, B, C and D will now be selected. 4) Click the button where the row headings and column headings meet. This will select the entire sheet. 5) Click anywhere inside the table and press [Ctrl] and [Spacebar]. This will select the entire table. If you do this while you are in a blank cell it will select the column. 6) Press [Ctrl] [A]. This will select the entire sheet. 7) Use the drag method to select from cell A2 to cell D3. Hold down [Ctrl] and select from cell A6 to cell D7. The [Ctrl] key allows you to select more than one range of cells at the same time. © Stephen O’Neil 2005 Page 9 Of 17 www.oneil.com.au/pc
  • 10. Using Microsoft Excel Getting Started Creating a New Spreadsheet File Exercise 8. Closing a Workbook Before creating a new workbook, we’ll close the previous one. You can have more than one workbook open at the same time, but too many files open at once can make your computer run slowly. In the top-right corner of the Excel screen you will see 2 buttons with crosses on them. The top one will close Excel entirely. The bottom one will close the workbook you are working on but Excel will remain open. Close the program (you can also press [Alt] [F4] ) Close the workbook (you can also press [Ctrl] [F4] ) 1) Click the bottom close button, or press [Ctrl] [F4] to close the Music Charts workbook. If you see a message asking if you want to save changes, click No. Exercise 9. Creating a new workbook 1) Click the New icon on the toolbar or press [Ctrl] [N] to create a new blank workbook. You can also create a new workbook by going to the File menu and selecting New, though this will ask you to choose what type of file you want before creating the workbook. Exercise 10. Saving a Workbook The Save command can be accessed using one of the methods below. • Go to the File menu and select Save • Click the Save icon on the toolbar (looks like a floppy disk). • Press [Ctrl] and [S] Use one of the above methods to choose the save command. Because it is the first time you’ve saved the file, you will be asked to specify a filename and a location. Call the file Grades. Your teacher will tell you where to save it. © Stephen O’Neil 2005 Page 10 Of 17 www.oneil.com.au/pc
  • 11. Using Microsoft Excel Getting Started Entering information in to the worksheet 1) Make sure you are in cell A1. Type your name and press [Enter]. On Excel’s normal settings, pressing [Enter] will not only complete what you are typing in the cell, it will also move to the cell below. If cell A2 hasn’t already been selected for you, then select it yourself. 2) With cell A2 still selected, type your age and press [Enter]. 3) With A3 as the selected cell, hold down [Ctrl] and press [;]. This should place today’s date in the cell. Press [Enter] to complete entry in that cell. Notice that the cell with your name is aligned to the left while the others are aligned to the right. This is because text and numbers are treated differently in Excel (a date or time is considered to be a type of number). Exercise 11. Editing Cell Contents 1) Select cell B1 one and enter the following text (including the spelling error). Easten Goldfields Senior High School To correct the mistake, we’ll need to edit the cell. If you click on the cell and begin typing, all of the text in the cell will be deleted. We need to change to edit mode so we can edit parts of the cell’s contents. There are three ways to enter edit mode. • Double-click on the cell you want to edit • Press [F2] when the cell you want to edit is selected • Click in the formula bar below the toolbar icons 2) Use one of the above methods to enter Edit mode. A red x and a green will appear to the left of the formula bar. 3) Edit the text in the cell so that Easten is changed to Eastern. 4) When you have edited the cell contents, press [Enter] or click the green tick to complete the changes to the cell contents. If you want to cancel making changes to the contents of a cell, you can press [Esc] or click the red cross icon. © Stephen O’Neil 2005 Page 11 Of 17 www.oneil.com.au/pc
  • 12. Using Microsoft Excel Getting Started Copying and Moving It’s often necessary to copy and move certain parts of your spreadsheet. This can be done using any of the methods explained below. Cut, Copy & Paste Using the standard Windows copy & paste features is one of the most common ways to copy and move information in Excel. When you use the cut or copy features in excel, the information you had selected is copied to an area of Windows known as the clipboard. The copy feature will leave the information in its original location so you can make a copy. The cut feature will remove it from its original location so you can move it. You can then choose where the copied, information will go by pasting from the clipboard. Exercise 12. Copy & Paste 1) Open the file called Copying. 2) Select the cells A1 to A5. To copy the selected information, you can use one of the following methods. • Go to the Edit menu (or right click on the selected cells) and select Copy. • Click the Copy icon on the toolbar which looks like two documents. • Hold down [Ctrl] and press [C]. 3) Use one of the above methods to use the copy command. A moving dotted line will appear around the selected cells to indicate they are the ones marked for copying. 4) Click on cell C1. This is the beginning of the range we will paste the cells to. To paste the selected information from the clipboard, you can use one of the following methods. • Go to the Edit menu (or right click on the selected cells) and select Paste. • Click the Paste icon on the toolbar which looks like a clipboard. • Hold down [Ctrl] and press [V]. 5) Use one of the above methods to paste from the clipboard. The contents of the cells from A1:A5 will be copied to C1:C5. When the information is pasted, you will see a smart tag appear in the corner of the pasted information (it looks like the paste icon). If you click on that icon, you get a list of options which allow you to make choices about the information that has been pasted, such as whether or not the formatting will match the cells that were copied from or the cells that were copied to. You see smart tags a lot in excel. Pay attention to them. There are some very useful features hidden away in those menus! © Stephen O’Neil 2005 Page 12 Of 17 www.oneil.com.au/pc
  • 13. Using Microsoft Excel Getting Started Exercise 13. Cut & Paste The difference between copy and cut is that the cut feature doesn’t leave the original information behind, so it is used for moving. 1) Select the cells A1 to A5. To cut the selected information, you can use one of the following methods. • Go to the Edit menu (or right click on the selected cells) and select Cut. • Click the Cut icon on the toolbar which looks like a pair of scissors. • Hold down [Ctrl] and press [V]. 2) Use one of the above methods to use the cut command. A moving dotted line will appear around the selected cells to indicate they are the ones marked for moving. 3) Click on cell C1. This is the beginning of the range we will paste the cells to. 4) Select cell E1 and use the techniques described in the previous exercise to paste to that location. The contents of the original cells will now be moved to the new location. Tip Look on your keyboard and you will notice that the shortcut keys for cut, copy and paste (X, C and V) are all right next to each other and near the [Ctrl] key. A quick way to work is to use these shortcuts with your left hand, while your right hand uses the mouse to select the areas to copy and paste. © Stephen O’Neil 2005 Page 13 Of 17 www.oneil.com.au/pc
  • 14. Using Microsoft Excel Getting Started Exercise 14. Drag & Drop Drag & Drop is another method used for copying and moving information. 1) Select cells E1:E5. 2) When the cells are selected, there is a black border around the selected cells. Move your mouse over one of the borders and your mouse pointer will change to a white arrow shape. 3) Hold your mouse down and drag to begin moving the cells. A shaded rectangle will indicate where the cells will be moved to. Drag your mouse until the shaded rectangle is over cells G1:G5. 4) Release your mouse button to move the contents of E1:E5 to these cells. You can also use the drag and drop technique for copying cells. The only difference is that you hold down the [Ctrl] key as you’re dragging. 1) Select cells G1:G5. 2) When the cells are selected, there is a black border around the selected cells. Move your mouse over one of the borders and your mouse pointer will change to a white arrow shape. 3) Hold your mouse down and drag to begin moving the cells. A shaded rectangle will indicate where the cells will be moved to. Drag your mouse until the shaded rectangle is over cells A8:A12. While you are dragging, press and hold the [Ctrl] key. A + sign will appear next to the mouse to indicate that you are copying instead of moving. 4) Release your mouse button to move the contents of E1:E5 to these cells. Make sure you don’t release the [Ctrl] key until after you’ve released the mouse button. 5) Practice using the copy & paste method and the drag & drop method until all of the shaded areas are filled in with seasons. © Stephen O’Neil 2005 Page 14 Of 17 www.oneil.com.au/pc
  • 15. Using Microsoft Excel Getting Started Exercise 15. Auto fill Excel has a feature called Auto fill, which enables the user to easily copy information over a large range of cells at the same time. Make sure the Copy workbook is still open. Like most workbooks, this one has more than one sheet. We will change to the second sheet to practice using the auto fill feature. 1) To change to the second sheet, press [Ctrl] [Page Down] or click the tab for sheet 2 at the bottom of the screen. 2) Select cell A1. When the cell is selected, you will see a border around the cell that is used for moving cells. In the bottom-right corner of that border, is an area referred to as the fill handle. If you move your mouse over the bottom-right corner, your mouse pointer will change to a small black cross. 3) With your mouse pointer still positioned over the fill handle, click and hold the mouse button, then drag downwards. Continue dragging until you have reached cell A10. 4) Release the mouse button, and those cells will all be filled with the contents of cell A1. 5) Select cell B1. Follow the steps above to fill the cells below with the contents of cell B1. Excel will recognise this cell as being one of the days of the week, and will fill the other cells with the following days. This uses a feature known as intelligent auto fill. 6) Try the same thing with cell C1 and you will see that Excel also recognises abbreviated day names. 7) The same also works with month names. Use the fill handle to copy cell D1 to the cells below, then copy E1 to the cells below. 8) Use the fill handle to copy F1 to the cells below and do the same with G1 9) In cell H1 we have not only a month name, but a year as well. Use the fill handle to copy this to the cells below. When the series reaches January, the year will change appropriately. 10) In cell H1 we have a month name. Use the fill handle to copy it to the cells blow and the series will continue. The contents of cell H1 may also be a person’s name. If this was the case, then we might not want it to change the following cells the months in the year. Try using the fill handle on cell I1 but this time hold down the [Ctrl] key as you drag downwards. This will temporarily disable the intelligent auto fill feature. 11) In other cases, you may want to force Excel to fill intelligently. If you use the auto fill feature on cell J1, the cells would all be filled with the number 1. If you hold down [Ctrl], you will be telling Excel to use Auto Fill. Copy cell J1 downwards while holding down [Ctrl]. 12) In column K, we have 2 cells filled in. Select both of those cells (K1:K2). If you use the fill handle while 2 cells are selected, Excel will work out the difference between the 2 cells and increase the following cells by the same amount. Try copying downwards using the fill handle. Try doing the same with the 2 months in column L. 13) In column M, we have a month in addition to the year. When the series reaches January, the year will change. Try copying M1 down with the fill handle. 14) Save the changes to the file when you are done ( or [Ctrl][S]) © Stephen O’Neil 2005 Page 15 Of 17 www.oneil.com.au/pc
  • 16. Using Microsoft Excel Getting Started Creating a table Now we’ll use what has been covered so far to create a table. 1) Close the workbook that is currently open ( or [Ctrl][F4]). 2) Open your Grades file if it is not still open ( or [Ctrl][O]) To check and see if a workbook is already open, select the Window menu. The bottom of the menu will show a list of all the workbooks currently open with a tick next to the workbook you are currently viewing. When more than one workbook is open, you can select a file name from the Window menu to switch to that workbook. You can also press [Ctrl] [F6] to switch between open workbooks. 3) Enter the text Term 1 in cell B5. 4) Use the fill handle to copy the contents of that cell over the next three cells as shown below. Those cells should now be filled in with Term 2, Term 3 and Term 4. 5) Complete the list of names in column A as shown below. 6) In cell A15 enter Class Average. 7) In cell F5 enter Year Total. © Stephen O’Neil 2005 Page 16 Of 17 www.oneil.com.au/pc
  • 17. Using Microsoft Excel Getting Started 8) Enter the numbers shown below. 9) Save the file after you have made the changes. © Stephen O’Neil 2005 Page 17 Of 17 www.oneil.com.au/pc