Microsoft office 2000 presentation
•Télécharger en tant que PPT, PDF•
1 j'aime•2,720 vues

Thank you

Recommandé
Contenu connexe
Tendances
Tendances (20)
En vedette
En vedette (20)
Similaire à Microsoft office 2000 presentation
Similaire à Microsoft office 2000 presentation (20)
Microsoft office 2000 presentation
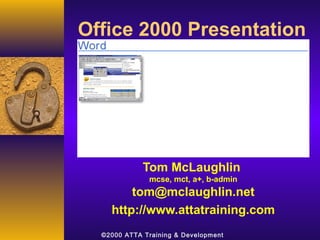
- 1. Office 2000 Presentation Tom McLaughlin mcse, mct, a+, b-admin tom@mclaughlin.net http://www.attatraining.com ©2000 ATTA Training & Development
- 2. Similar Look and Feel ♦ All Office programs have a similar look and feel. Looks the same for those who have used to Office 97 products. ♦ There is a tutorial and helps for WordPerfect users.
- 3. Word and Excel ♦ Word Processing Word is a word processor application. It is the best choice for text-heavy documents such as letters, reports, resumes, and fax cover sheets. ♦ Keeping Track of Data Excel is a spreadsheet program. It's useful for keeping large quantities of numeric data organized and for performing calculations on that data.
- 4. Outlook and PowerPoint ♦ Organizing Your Life Outlook is a personal organizer that keeps track of your calendar, your To Do list, and your address book, and sends and receives e-mail. ♦ Creating Presentations PowerPoint is a presentation program. It generates multimedia computer shows, 35mm slides, and overhead transparencies for use in sales presentations and informational briefings.
- 5. Publisher and Access ♦ Desktop Publishing Publisher is a desktop publishing program. Like Word, Publisher also focuses on text, but it has fewer text-management capabilities and more layout utilities. Managing Databases Access is a database management program. Access organizes data in a tabular format, with more features that enable you to enter, organize, edit, and search large amounts of data.
- 6. Front Page & Photo Draw ♦ Creating for the Web FrontPage is a Web-site creation program. Use FrontPage to design Web pages for Internet use and to link them together into a cohesive Web site. ♦ Editing Images Photo Draw is an image-editing program. Use Photo Draw to create and modify images for to be used with other Office programs.
- 7. Most Recently Opened Files ♦ The four most recently opened files appear at the bottom of the File menu. ♦ If you wish more then the default four, click on Tools/Options/General and type in 9 for the maximum amount. ♦ Or Start / Documents and find the document there.
- 8. Special Dialog boxes ♦ Publisher, PowerPoint, and Access all start up with special dialog boxes on the screen that help you open existing files and start new ones.
- 9. Menu’s, Toolbars, & Shortcuts In this section, you will learn about the three main methods of issuing commands in a program: ♦ Menus, ♦ Toolbars, ♦ Shortcut menus.
- 10. Application & Shortcuts ♦ Application Menu Each program has a row of menu names directly under the program's title bar at the top of the screen. ♦ Taking a Shortcut Some commands have a key combination listed next to them (such as Ctrl+X for Cut). ♦ BIC VXZ
- 11. Unavailable, Icons, & Ellipsis ♦ Unavailable Commands Some commands appear dimmed, such as Cut shown here. ♦ Icon Shortcuts Some commands have icons to their left. These represent toolbar buttons that serve as alternatives to the command. ♦ Ellipsis (three dots)… This indicates that choosing that command will open a dialog box. Such as Find…
- 12. The More Buttons Button ♦ You may often find, however, that the button you need isn't displayed. This is usually not a problem, since you can always access the hidden button you need by clicking the More Buttons button.
- 13. Help is a click away! • Office Help Assistant ♦ Help is provided either by clicking HELP on the menu bar or pressing F1 on your keyboard. Here’s another great tip: ♦ Shift + F1 over an Icon, your mouse will turn to a “?” question mark. Click on the icon and it will describe what it does!
- 14. Drop Down Menus ♦ Depending on how your PC is set up, double arrows may appear at the bottom of the menu.
- 15. Saving Files in Office 2000 My Documents ♦ By default, the data files that you create in Office programs are stored in the folder called My Documents. ♦ If you save all of your files to the My Documents folder, you will not have any trouble remembering where you stored your files. …right…
- 16. Find & Saving To Other Places ♦ If you decide to save files to different drives and folders, you may forget where a particular file is stored. ♦ Office 2000 and its applications include a Find command that locates elusive files for you.
- 17. Save vs. Save As ♦ You will normally want to save your work in the default or “native” format of the program. ♦ However you may need to save in a different format to share files with someone who does not have the same version of Office, or make a second working copy to preserve the first version.
- 18. Save As = New Copy ♦ When you use Save As during subsequent saves, the command actually creates a copy of the original file. ♦ By using Save As on an existing file, whether you are saving the file under a different name, or in a different location or format, you are creating an additional version of the original file
- 19. Overview of Outlook ♦ Outlook is a multi-purpose program that combines an e-mail program, a date book, and an address book. With Outlook, you can: ♦ Work with e-mail ♦ Track and schedule appointments ♦ Record information about contacts ♦ Keep lists of tasks and notes
- 20. ♦ The “Today” view in Outlook 2000 ♦ The “Today” view in Outlook 2000 allows you to keep track of your allows you to keep track of your appointments and tasks in one appointments and tasks in one window along with keeping you window along with keeping you informed of the e-mail you have in informed of the e-mail you have in your Inbox, Drafts and Outboxes. your Inbox, Drafts and Outboxes.
- 21. This is the Inbox view. Currently the Inbox This is the Inbox view. Currently the Inbox menu is being displayed along with the menu is being displayed along with the Preview Pane below. Preview Pane below. If there is no Preview Pane, you may view If there is no Preview Pane, you may view the email by double clicking on it in the list. the email by double clicking on it in the list.
- 22. ••Tosend a message to someone, click on the To send a message to someone, click on the icon below the word File on the menu bar. It icon below the word File on the menu bar. It will have the word “NEW” beside it. will have the word “NEW” beside it. ••Remember, the word "Inbox" must be Remember, the word "Inbox" must be highlighted in the Folder List in order for the highlighted in the Folder List in order for the correct icon to be displaying. correct icon to be displaying.
- 23. ••Replysends a response to only the person who sent Reply sends a response to only the person who sent the original message. the original message. ••Replyto All sends your message to the sender and Reply to All sends your message to the sender and all recipients of the original message. all recipients of the original message.
- 24. Blind Courtesy Copy Bcc: ♦ You can also send blind courtesy copies (Bcc), in which the recipients do not see one another's names. ♦ To add the Bcc line to the message composition window, from the View menu, choose Bcc Field. (Blind Carbon Copy)
- 25. ••Youcan also open the Sent Items You can also open the Sent Items folder to verify that messages were folder to verify that messages were sent. sent. ••Messagesmove to this folder from Messages move to this folder from the Outbox. Messages that you the Outbox. Messages that you send stay here for a period of time, send stay here for a period of time, depending on your Outlook setup. depending on your Outlook setup.
- 26. You can put your name, company, logo’s and You can put your name, company, logo’s and other items as a “signature”. other items as a “signature”. A signature is an ending to a message that is A signature is an ending to a message that is automatically placed there. To create one, click automatically placed there. To create one, click on Tools/Options… on Tools/Options…
- 27. ••FromTools/Options…this popup From Tools/Options…this popup window will appear. window will appear. ••Clickon the Mail Format tab at Click on the Mail Format tab at the top, then click on Signature the top, then click on Signature Picker at the bottom. Picker at the bottom.
- 28. Organize Your Information •• Microsoft Outlook 2000® helps you organize all Microsoft Outlook 2000® helps you organize all your emails by colour or by name, to alert it’s your emails by colour or by name, to alert it’s presence upon arrival or in the listings. presence upon arrival or in the listings.
- 29. Outlook Contacts ♦ In Outlook, contacts are information records about friends and business associates.
- 30. Address Book ♦ Select Names from the Address Book ♦ Select the name of the person to whom you are sending a message. Then, click the To button. The name appears in the Message Recipients box.
- 31. Personal Distribution List ♦ A Personal Distribution List is a group of people to whom ♦ A Personal Distribution List is a group of people to whom you can send the same e-mail address simultaneously. you can send the same e-mail address simultaneously. ♦ To create a personal distribution list, while the contacts ♦ To create a personal distribution list, while the contacts folder is viewed, click on File, New, and Distribution List. folder is viewed, click on File, New, and Distribution List.
- 32. Inserting a File or Attachment ♦ On the tool bar, click the Insert File button. In the pop up dialog box, locate and select the file that you want to attach. Then click Insert choice.
- 33. Action Commands
- 34. Outlook Search & Find ♦ To find specific contacts, you can use Outlook's Find tool. For example, you might have several contacts and use the Outlook Find search method to locate one contact record very quickly. ♦ Or you might search for all contacts at a particular company.
- 35. Outlook’s Calendar ♦ This view can be customized to meet the users needs by re-sizing each of the panes, or clicking on the display icons above. ♦ Yellow area is the Task Area
- 36. Available Email Formats ♦ Plain Text E-Mail If you are sending e-mail messages in the Plain Text format, the text appears in a separate pane. ♦ HTML will allow your receiver will see the email as a Web page. ♦ Use with caution!
- 37. Appointments
- 38. Reminder Views
- 39. Outlook Tasks ♦ The Tasks list helps you remember everything you need to do. ♦ As you might remember, tasks also appear in the Task Pad when you use the Outlook Calendar in Day view. (Yellow Pad)
- 40. Tasks – Due Date ♦ If you enter a due date, Outlook calculates the number of days until the task is due. The number is updated each day. ♦ With the Status, % Completed, and Priority boxes, you can track the progress you have made on a task and the task's importance.
- 41. Word 2000 • Improve your productivity through streamlined communication and new avenues for collaboration. • Word allows you to easily share and manage information through e-mail, print, and the Web using tools you're already familiar with.
- 42. Cut & Paste Improved ♦ Easily Cut and Paste from Multiple Documents ♦ No more jumping back and forth to cut and paste between different documents.
- 43. Tables Made Easy ♦ Draw and Format Tables Quickly ♦ Draw your table one cell at a time, erase several lines at once, and even split cells diagonally!
- 44. Tables Made Really Easy!
- 45. Manage & Share Information ♦ Just click to open the new Office E-mail header in Word and send your document as an e-mail message that retains your original formatting.
- 46. Share High-fidelity Documents Online •As the companion file format for Office 2000, HTML makes it easy to share information with anyone. •Use the Save As Web Page (HTML) feature to create a document that anyone with a browser can view with the same high fidelity as it has in Word.
- 47. Live Hyperlinks in Documents ♦ Insert hyperlinks into your documents more easily with the improved hyperlink interface. ♦ Quickly create links to other documents, Web pages, graphics, and pictures—and even customize how text is displayed in your links.
- 48. Excel 2000 ♦ As part of Office 2000, Microsoft Excel 2000 adopts HTML as its companion file format ♦ You can easily share data-rich spreadsheets in a Web browser—letting even those who don't have Excel view your data.
- 50. Cell Address ♦ If you need to identify a particular cell, refer to it by its cell address. A cell address is made up of the cell's column letter and row number. So the address of the first cell in the worksheet is A1. The cell below it is A2, and so on. ♦ Insert/Name
- 51. Excel Worksheets ♦ Excel workbook, or file, is made up of three worksheets that are accessible through the sheet tabs at the bottom of the Excel window. ♦ You can change sheet names to make them more meaningful. ♦ You can also add or delete worksheets from a workbook as needed.
- 52. Inserting Cells ♦ If needed, you can insert a cell or range of cells within a worksheet. When you do so, existing data remains intact, but is shifted over to make room for the new cell(s).
- 53. Inserting a Row or Column ♦ If you delete a column or row that contains a cell that's used in a formula, that formula could result in an error.
- 54. Easily Access and Analyze Data Microsoft Excel 2000 makes it easier to access vital business information using your organization's intranet.
- 55. Too Much Text ♦ If, for example, cell A1 has too much text, its contents will spill over into cell B1, so long as B1 is empty. ♦ If B1 contains data, the contents cell A1 will appear to be cut off.
- 56. Popular Formats ♦ There are several different number formats that you can use in your worksheet. The three most popular are Currency Style, Percent Style, and Comma Style. Each format has a button on the toolbar for easy application.
- 57. Working on a Range After selecting a range, you can: ♦ Format the range ♦ Copy or move the range ♦ Delete the contents of the cells in the range ♦ Insert a similar range of cells ♦ Name the range
- 58. Numeric Labels ♦ Although, in Excel, labels can include numbers, you can't add, subtract, divide, or multiply a label. ♦ For example, a zip code or an employee ID may contain numbers, but you probably wouldn't want to calculate them.
- 59. Custom Cells ♦ Rotate and indent text within a cell, even merge cells, without tricky formatting. ♦ Customizable cells make dynamic spreadsheet presentation a breeze.
- 60. Comments ♦ A comment is a note that can be attached to a cell. ♦ A comment is hidden, but you can make it appear in a ScreenTip by resting the mouse pointer over the cell that contains the comment that you want to view or delete.
- 61. Excel Pivot Tables ♦ It's easy with the improved PivotTable interface to create professional-quality reports.
- 62. AutoCorrect ♦ Adding Correcting Entries In the AutoCorrect dialog box, make sure the Replace text as you type check box is selected. ♦ Type your mistake or abbreviation in the Replace box. Then type the replacement text in the With box. Choose the Add button to add the entry.
- 63. Undo/Redo Several Changes ♦ To undo or redo several changes at once, click the arrow to the right of the Undo button or the Redo button and select the changes you want to undo or redo.
- 64. Front Page 2000 ♦ Create, Edit, Manage, and Update Your Site ♦ All from One Easy-to-Use Application
- 66. Page View Tabs ♦ Now let's take a closer look at the Page view window. When you have a Web page open in Page view, you'll notice three small tabs at the bottom of the window: Normal, HTML, and Preview.
- 67. Status Bar ♦ Let's take a look at a very useful status bar that shows the estimated time it will take to view a page over the Internet. ♦ The status bar is called the Estimated Time status bar and it is located in the lower right corner of the Page view window.
- 68. Microsoft Publisher ♦ Easily Create and Publish Professional- Quality Business Publications
- 69. Design Sets ♦ Project a Consistent, Polished Identity Across All Your Communications
- 70. Publisher Catalog Templates ♦ Select the Type of Publication You Need
- 71. Questions & Answers Thank you! ELDIN VREVIĆ
Notes de l'éditeur
- When you learn how to accomplish something in one program, such as opening a file or printing your work, it's only a short leap to being able to do it in other programs. You may find yourself using only one or two of the Office programs on a regular basis, but you should know a little bit about all of them so you can make an intelligent choice about which program to use for a given task. In many cases, the capabilities of various Office 2000 programs overlap, and the same job could possibly be done in any of several programs. As you become more familiar with Office 2000, you will be better able to fit the task to the program.
- Choose Word whenever the dominant element is text. In Word, using the Close button closes only the active document if more than one document is open. Use Excel to create worksheets with calculated totals, to organize lists, and to make charts and graphs.
- Use Publisher for text-based documents that require special formatting, such as certificates, newsletters, greeting cards, and posters.
- Almost every Office program can save files in Web format, but FrontPage can tie all those saved pages together with a consistent format. For example, you can create artwork for a logo that you could use in Word, Excel, PowerPoint, or Publisher
- If you save all of your files to the My Documents folder, you will not have any trouble remembering where you stored your files. The My Documents folder is the default storage location for all files. Chances are, however, that you will decide to save files to different drives and folders. If so, you may forget where a particular file is stored. Office 2000 and its applications include a Find command that locates elusive files for you. When you start Word or Excel , a new, blank document is created automatically for your use. By default, Word is named Document1 , and the Excel is named Book1
- You will need to choose Cancel (or Exit Catalog, in the case of Publisher) to close this startup box before you can exit the program.
- When working with an Office program, you will spend most of your time entering and editing data. The remainder of the time, you will issue commands to the program that tell it what to do with the data (format it, save it, print it, search it, and so on). Wherever possible, each Office program uses the same menu and toolbar commands, arranged in the same way. This helps ease the transition from one program to another. Depending on how your computer is set up, the Standard and Formatting toolbars may appear on separate lines, or together on one line. When they are on a single line, many of the buttons are not visible, and you must "scroll" through them using the More Buttons arrow at the end of the toolbar. Docked or Floating Toolbars can be either docked or floating . "Docked" means the toolbar is attached to one side of the program's window. A toolbar can also "float," which means it has its own movable box with its own title bar. To move a docked toolbar, drag it by its handle. The handle is the ridged line at the left of the toolbar. To move a floating toolbar, drag it by its title bar.
- Each of these menu names, in turn, opens a menu when you click on it. From there, you can click on a command to select it. You can press a key combination (hold down the first key and tap the second one) as an alternative to opening the menu and selecting the command. Cntl+B=Bold; Cntl+I= Italics; Cntl+C=Copy; Cntl+V=Paste; Cntl+X=Cut; Cntl+Z=Undo
- For example, Cut is not available because nothing has been selected yet, so there is nothing to cut. As with shortcut keys, these are not very helpful at first, because you must open the menu to see them. As you become more experienced, however, you will begin to recognize the pictures and associate them with the toolbar buttons.
- To turn off the Office Help Assistant, right click on it, choose Options, Make sure the Options Tab is selected, and clear the top check box!
- Personalizing Menu Choices By default, the personalized menu system is turned on. This feature may or may not be enabled on the computer that you are using, depending on how it has been set up. When personalized menus are enabled, Office 2000 keeps track of which commands you use, showing all of the commands that you have recently used as soon as the menu opens. The commands you haven't used in a while are hidden until you click the double arrow or pause for a moment. Or go to Tools/Customize/Options and clear those boxes for the hidden menus.
- New Folders Once you have worked with Windows Explorer for a while, you will probably decide that you need to create some folders of your own for storing files. A folder name can contain up to 255 characters, including spaces. It cannot contain these characters: \\ / : * ? " < > | Folder names must be unique within that level of the file structure. For example, you cannot have two folders named Misc. Docs on the root directory (C:), but you can have one on C: and one within the My Documents folder (C:\\My Documents\\Misc. Docs).
- Find It Some people prefer to use the Find feature in Windows rather than the one in any particular Office program. To do so, choose Find from the Start command on the taskbar, then select the Files or Folders option. Delete It To delete a file from the Save As or Open dialog box, you simply select the file and then click the Delete button, or press Delete on the keyboard. You can also right-click a file and choose Delete from the shortcut menu. New It To save files in a new folder , click the Create New Folder button. Or use Alt+5 in creating a new folder. Viewing It Once you have the Save As or Open dialog box open, click the arrow on the Views button and select a different view.
- In Word, for example, you will save in Word format; in Excel you'll save in Excel format, and so on.
- From the Save As list, choose a different file format. If you are not sure what format someone else needs a file to be in, choose a generic format. In Word, use Rich Text Format (*.rtf); in Excel, use Text (Tab delimited) (*.txt). These files will open in almost every word-processing and spreadsheet program.
- Important Note: The view in the right side of the screen depends on which folder on the left is highlighted. In this picture, the inbox is being displayed because the word Inbox is highlighted. Close the Preview Pane You can close and open the preview pane. To do this task, from the View menu, select Preview Pane. If the message is from a reliable source, such as another person you know in your company, choose Run Script. If you do not know the source of the e-mail (for example, an unsolicited sales message), choose Disable Script. If the message you are opening contains embedded HTML or scripting commands, you may see a box prompting you to Disable Script or Run Script.
- The Outbox After you click Send, your message moves to the Outbox. Depending on your Outlook setup and network connection, the message is sent either immediately or the next time you click Send/Receive on the Standard toolbar. You must have an active network connection to send and receive e-mail.
- Send/Receive The message window closes, and the message moves to your Outbox. Depending on your Outlook setup and network connection, you might have to click Send/Receive on the Standard toolbar to send the message. If the message is in the Outbox, it has not been sent. You might need to connect to a network and then click Send/Receive. If you have questions about your setup or network connection, contact your computer support department or Internet service provider.
- You can also open the Sent Items folder to verify that messages were sent. Messages move to this folder from the Outbox. Messages that you send stay here for a period of time, depending on your Outlook setup.
- You can also choose either to view the free and busy times of the entire team together or to see an expanded list of free and busy times for the individual team members.
- You can also set a default signature in this window. If you only have one signature, or have one that you use most of the time, you may want to set it up so that signature goes directly into the message box. If you don't set a default, you can insert it manually in the message box by clicking on insert, Signature, and then the name of your signature
- Get a Quick Look at Your Day View your daily appointments, manage your task list, and stay on top of your inbox—all from the customizable Outlook Today screen. For more detailed information, click on links directly within Outlook Today. Managing your workday is easier than ever. Stay on Top of Your Expanding Inbox Manage your inbox easily and efficiently using the Find and Organize Tools . They help you conduct fast, easy searches for e-mail messages, appointments, and tasks, and walk you through organizing your inbox efficiently. Now you can create folders, rules, formatting, and views that do everything from identifying junk e-mail to applying a specified color to e-mail messages sent by a particular person.
- What Can You Do with Contact Records? You can use a contact to start an e-mail, schedule a meeting, or make a telephone call. To perform these actions, you need to select the record and open it. Other Views To use other views, from the View menu, select Current View. Then select a view. Open a Record To open a record, double-click it. The record appears.
- Global Address List In addition to the Contacts list, if you work with a company network that uses MS-Exchange, you also will have a Global Address List. This list contains all of the names and addresses of people who have e-mail accounts on the server running Exchange. You can use addresses in this list, but you cannot add addresses to it.
- To add names to this distribution list, click Select Members. Now select the names from the Global address list or your Contacts list. To add people to the list, highlight their name and click on "Members" (or by double clicking on the name). When you are finished, click OK. Now give the list a name. Choose a name that helps you remember what all the people in the list have in common. When you are finished, click OK
- Note: have to be in New or Reply to see the clip. Insert Options Insert as Text adds the contents of the selected file as text into the e-mail message. Insert as Attachment attaches a separate file to the e-mail message. The recipient gets both the e-mail message and a copy of the file.
- Action Commands New Letter to Contact opens a new Word document with the contact's information already entered. New Message to Contact starts an e-mail message. New Meeting Request to Contact uses e-mail and the calendar to schedule a meeting. New Appointment with Contact schedules an appointment on the calendar.
- Search Results This search found one record that contains the name Simone. Find searches through all of the text in the records if the Search all check box is selected. Otherwise, Find searches data in only the Name, Company, Addresses, and Category fields
- This view shows what appointments you have on the specified day, along with a two month calendar and a task listing. Click on the Toolbar To switch among the available views, click the Day, Work Week, Week, or Month buttons on the Standard toolbar.
- Default Outlook E-Mail The attachment appears as an icon in your message or in a pane at the bottom of the message. The user double-clicks the attachment to open it.
- Outlook has to be running in order for a reminder to appear. If you are running Outlook when the reminder is scheduled to appear, a flashing button appears on the taskbar, and a message box appears on your screen. For example, let's say you have to attend a meeting in 20 minutes, and you have a reminder set to open in 15 minutes. However, you do not have Outlook running, so the reminder window cannot open. Many users open Outlook when they start their computer and leave it running until the end of the day. Recurrence Button Click the Recurrence button on the Standard toolbar in the Appointment window to open the Appointment Recurrence dialog box. Appointment Recurrence Dialog Box In the Recurrence pattern options group, specify an interval for the appointment (Daily, Weekly, etc.). Here, the appointment is scheduled to occur every week. The option you select determines the detail options you can select. Daily Options With the Daily option, you can schedule an appointment every day or a pattern of days, such as every two days. Number of Occurrences In the Range of recurrence options group, you can also set the number of meeting occurrences. For example, you can have a meeting stop after 10 occurrences. Here, we have the meeting recurring indefinitely. After selecting options, click OK to save the occurrence information. The Appointment Recurrence dialog box closes. You can then click Save and Close on the Appointment window to record the appointment.
- Three Options When a reminder appears, you have three choices. Dismiss turns the reminder off. Snooze turns the reminder off temporarily. The reminder reappears after the interval specified in the Click Snooze to be reminded again box. Open Item opens the Calendar window, so that you can read your notes and decide what to do.
- Recurrence, Reminder, and Notes You can set Recurrence, Reminder, and note information for a task in the same way that you did for an appointment when using the Calendar tool
- Microsoft Word 2000 gives you the tools to more easily create professional-quality documents and share information—in print, e-mail, and on the Web. Microsoft Word 2000 helps you make the most of your time. With intelligent new formatting features, it's faster and easier to create highly effective print and Web-based documents.
- Collect and Paste allows you to store up to 12 pieces of information from different documents on the clipboard, and then insert them — one at a time or all at once — into your Word document.
- Create tables exactly the way you want them to appear. The updated Table Tool makes it easier than ever to draw and edit tables. Draw your table one cell at a time, erase several lines at once, and even split cells diagonally The updated Table Tool makes it easier than ever to draw and edit tables. Take advantage of improved table flexibility to automatically wrap text around your tables, and create documents that contain floating tables.
- E-mail your document without ever leaving Word.
- Create Professional-Quality Web Pages As part of Office 2000, Word shares Web page Themes with the FrontPage® 2000 Web site creation and management tool. Use a Theme template to create new Web pages or apply a Theme to an existing Web page. Choose from more than 30 predesigned Themes that include varying graphical elements such as backgrounds, bullets, text formatting, and color options. Edit Web pages created in Word using Office Web Editing—simply "round-trip" your document back into Word, where you can update it with full program functionality.
- Word automatically checks all links and corrects those that have moved or aren't working. Web Subscriptions allow you to easily track collaborative efforts. Subscribe to be notified of changes made to any Office 2000 or HTML document on your Web server. You determine the conditions and frequency of updates, which are automatically sent to you by e-mail.
- More Than Numbers Excel 2000 provides comprehensive tools to help you create, analyze, and share spreadsheets. Create rich spreadsheets more easily than ever using enhanced formatting features. Analyze your data with charts, PivotTable® dynamic views, and graphs. And post your results to the Web for universal viewing and collaboration. Further Office integration introduces seamless e-mail and powerful collaboration tools that help your team work together more effectively.
- E-mail Your Data Without Leaving Excel Integration with the rest of Office 2000 makes it easy to share your work. Just click the new Office E-mail button on your toolbar to open the Microsoft Outlook® Mail header, then e-mail your document as is, right from Excel. Your document is sent in HTML format, which allows any recipient to view it. Recipients with Excel can open your spreadsheet in the application for further analysis.
- A range is a related group of adjacent cells and will be discussed in detail later in the course. A Range allows you to perform a single function, such as formatting or copying, on all the cells within the range simultaneously.
- Remember Top Left Corner. Adds above or to the left. Remember not to click on Row or Column if you want to just insert a cell. Remember to Right Click when in doubt! When inserting a single cell, you can choose to either shift cells right or shift cells down. Click OK to insert the cells. You can remove cells as well, shifting the remaining data over to fill the gap left by the cells you remove. To remove a cell, select the cell you want to remove. However, if the cell you select contains data, that data will be removed as well.
- New Columns and Rows If you need to, you can insert additional columns and/or rows anywhere in your worksheet. The new columns or rows are inserted between the existing ones. Your existing data won't be affected by the insertion; it is simply moved over or down. If you need to, you can insert additional columns and/or rows anywhere in your worksheet. The new columns or rows are inserted between the existing ones. Your existing data won't be affected by the insertion; it is simply moved over or down. For example, if you had a formula that divided some number by cell C12, and you deleted either column C, or row 12, then the formula would result in an error because you'd be trying to divide by zero. The number of columns or rows inserted will equal the number of columns or rows selected. So if you want to insert multiple columns or rows, select the same number as you want inserted. This is also true for deleting columns or rows. The number of columns or rows selected is the same number that will be deleted.
- Work Collectively with Web Components Excel and Office 2000 bring you the power of Office Web Components , providing Web viewers the ability to manipulate spreadsheet, chart, and PivotTable® data from within their browser for on-the-spot data analysis. Simply click the "Add Interactivity" button when you Save As Web Page.
- This is in appearance only, the formula bar will still show the cell's actual contents when it is activated. If you type a number into a cell that's not wide enough to display it, the number may appear in scientific notation (1.23e+4). When it can, Excel tries to expand the column to fit the length of a new number entry automatically, so that the scientific notation does not appear. However, if the notation does appear, the solution of course, is to widen the column.
- Be careful when using the Decrease Decimal button. It rounds the number, instead of simply cutting off the unwanted numbers. For example, if you set a cell to display zero decimal places, the number 428.79 becomes 429, not 428. This may or may not be the result you want
- Separate Ranges If you need to select more than one range at a time, you can. This section will look at the steps for selecting multiple ranges. Press and hold down the Ctrl key. Repeat the first step to select the next range. Select additional ranges as needed, while holding down Ctrl. For example, you can select two separate ranges that don't touch (non-contiguous). You can then perform a single task on them at the same time.
- By default text values are left-aligned in a cell (placed against the left edge), while numeric values are right-aligned in a cell. To enter a numeric label, type an apostrophe ('), then the number. An example is shown here in the Formula Bar To enter a fraction, type a zero, a space, and then the fraction, as in: 0 1/2. If you want to enter a mixed number (an integer and a fraction, as in 4 1/3) you do not need to enter the zero first. To enter today's date, press Ctrl+semicolon (;). If you enter a time without following it by a p (P.M.) or an a (A.M.), Excel assumes you're using military time. Thus, 2:35 automatically becomes 2:35 A.M. If you enter a two-digit year, Excel assumes the year is either 1930 to 1999 (if you enter a number from 30 to 99) or 2000 to 2029 (if you enter a number from 00 to 29). For this reason, it might be better to use four-digit years if you're entering several dates that use different years — for example, a series of birth dates.
- Use the new PivotTable AutoFormat feature New PivotChart™ views offer powerful, visual representations of your data that can easily be manipulated for further analysis. Because PivotChart and PivotTable views are linked, they are updated in tandem as you change or move fields.
- If AutoCorrect changes something you don't want it to, you can undo the change by choosing Undo Typing from the Edit menu, or clicking the Undo button on the toolbar. You can also remove the correction entirely from the AutoCorrect list. Select the item from the Replace text as you type list in the AutoCorrect dialog box and choose the Delete button to delete the entry.
- The multiple views in FrontPage 2000 allow you to see all the files in your Web, run reports to find slow pages and older files, set up your site's navigational structure, and keep track of Web tasks. For example, you can create and edit Web pages in Page View, use Folders View to see all the content on your Web, then set up how your pages link to one another in Navigation View.
- Category Component. Save time by assigning Web pages to customizable categories, and then use the Category Component to automatically create hyperlinks to all of the documents in a specific category. This eliminates a tedious task, and provides users with continually updated links on specified pages. Create Webs Anywhere . Create Web sites in a folder on your hard disk without installing a Web Server. This makes getting started with FrontPage 2000 as simple as getting started with Microsoft Office. Nested Subwebs. Flexible security in FrontPage 2000 allows you to turn a folder in your Web into a subweb, complete with unique permissions by group or user. Document Check-In and Check-Out. Check out Web pages to keep others from posting changes to the pages that you're working on. Check pages back in once updates are complete. You can even roll back to the previous version of the pages if you don't like the changes you've made. Workflow Reports. Assign page responsibilities to specific team members and set up approval levels or stages to follow your internal publishing process. Then use FrontPage Reports to list and update assignments and approval levels
- The Normal tab is the space in which you create, edit, and format the contents of your Web page. The HTML tab shows the actual, raw HTML code of the page you're creating.
- Whether you're creating a newsletter, brochure, Web site, or catalog, Publisher 2000 makes it a snap. Create, customize, and publish distinctive business publications—with less effort and better results than using a word processor
- Automated design guidance and more than 40 coordinated Design Sets help you create a consistent look across all your materials.
- Easily get started on your publication by choosing from more than 2,000 publication templates and more than 40 Design Sets for a consistent look across all your materials, or start with a blank publication. From brochures and Web sites to newsletters and business cards, you're certain to find just the publication you need. Or try the new Quick Publication Wizard for fast and easy single-page designs and layouts that you can create in minutes