
Recommandé
Recommandé
Contenu connexe
Similaire à Kobelco sk15 sr hydraulic excavator service repair manual
Similaire à Kobelco sk15 sr hydraulic excavator service repair manual (6)
Plus de fjjsekkmdmes
Plus de fjjsekkmdmes (20)
Dernier
Dernier (20)
Kobelco sk15 sr hydraulic excavator service repair manual
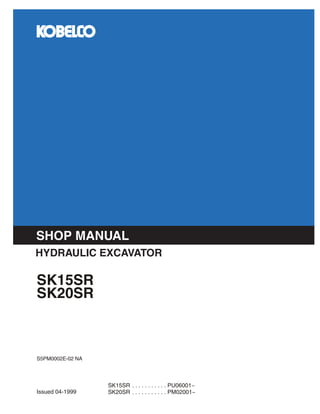
- 1. SK15SR . . . . . . . . . . . PU06001~ SK20SR . . . . . . . . . . . PM02001~ Issued 04-1999 S5PM0002E-02 NA SK15SR SK20SR HYDRAULIC EXCAVATOR SHOP MANUAL
- 2. Bur • Issue Date 04-1999 Printed in U.S.A. • Book/Form Number S5PM0002E-02 NA Copyright © 2005. Kobelco Construction Machinery America, LLC. All Rights Reserved. HYDRAULIC EXCAVATOR SHOP MANUAL APPLICABLE SK15SR. . . . . . . . . . PU06001~ SK20SR. . . . . . . . . . PM02001~ SK15SR / SK20SR
- 3. Kobelco Construction Machinery America, LLC reserves the right to make improvements in design or changes in specifications at any time without incurring any obligation to install them on units previously sold. All data given in this publication is subject to production variations. Dimensions and weights are only approximate. Illustrations do not necessarily show products in standard condition.For exact information about any particular product, please consult your Dealer. Any use of editorial or pictorial content is strictly prohibited without express written permission from Kobelco Construction Machinery America, LLC . Carol Stream, IL 60188 U.S.A.. S5PM0002E-00 NA S5PM0002E-01 NA S5PM0002E-02 NA SK15SR, SK20SR SK15SR, SK20SR SK15SR, SK20SR Not Available Not Available 04-1999 First Edition Revision 1 Revision 2 Revision History Remarks Issue Issue Date Applicable Machines
- 4. HYDRAULIC EXCAVATOR MODEL SK15SR SK20SR BOOKCODE NO. S5PM0002E®
- 5. HYDRAULIC EXCAVATOR SHOP MANUAL model SK15SR SK20SR This is the shop manua~for KOBELCO hydraulic excavator. Contained is the necessary technical data concerning the maintenance and repair of this model. The manual is divided into the following four major sections ; GENERAL,SYSTEMS, COMPONENTS and PROCEDURE. *GENERAL PM01. SPECIFICATION PM04. MAINTENANCESTANDARDAND -- OPERATION AND CONTROLS TEST PROCEDURE (Refer to OperatorsManual) -- PREVENTIVE MAINTENANCE PM03. LOCATION AND (Refer to OperatorsManual) WEIGHT OF COMPONENTS PM07. WORKING STANDARD *SYSTEMS PM12. HYDRAULIC SYSTEM PM22. CONTROLSYSTEM PM15. UPPER STRUCTURE PM25. ELECTRIC SYSTEM PM18. TRAVEL SYSTEM PM21. A’FFACHMENTS PM29. TROUBLE SHOOTING *COMPONENTS 12. HYDRAULIC PUMP 16. SWIVELJOINT 13. CONTROLVALVE 17. HYDRAULICCYLINDER 14. OTHER VALVES 15. HYDRAULIC MOTOR 50. ENGINE "PROCEDURE Whenchecking orrepairing themachine we suggest thatyourefer tothismanual carefully. We hope that reference tothis manual will helptomaintain a hight level ofworldng efficiency andreliability. For further details on maintenance and cheksreferto the "OPERATORS MANUAL"whichhas been supplied withthemachine. Although all datawas correct at the timeof printing, due to continual designchangesand improvements, somecontents matnotconform totheactual machine. Takespecial caretoorder parts onlyafter confirming thevalidity ofthepartnumber in the"PARTS MANUAL". If younotice anyexplanatory discrepancies, afterconsulting oneof ourrepresentatives, please updata yourmanual according tothelatest data. However, intheevent of anyspecification changes, wewillissue revised edition. INDEX KOBEID:) Book code No. S5PMOOO2E,
- 6. SHOP MANUAL SKI5SR model SK2OSR TABLE OF CONTENTS 1. SPECIFICATION ................................................ 2. OPERATION ANDCONTROLS (Refer to Operators Manual) PM03 3. LOCATION ANDWEIGHTOF COMPONENTS ......... 4. MAINTENANCESTANDARDSAND TEST PROCEDURES .......................................... PM04 o 6. PREVENTIVEMAINTENANCE (Refer to Operators Manual) PM07 7. WORKING STANDARDS ....................................... o OHowto IndexeachShopManualSection The GENERALof this shop manualconsistsof 8 headingsas shown above. Each sectioncan be easilyreferredto by indexesappendedto the marginof the page as indicatedon the right. Please usetheindexes forspeedy reference. r KOBELO:) GENERAL
- 7. SK15SR SK20SR List of Shop Manual GENERALSection Title BookCodeNo. Distribution Year- Month Index No. SK15SR SK20SR Applicable Machines PU06001~07000 PM02001~03500 ¯ ~ PU07001- "~ PM03501- PM01 SPECIFICATION V S5PM0 I01E’2~ -- . 1999-4 ] S2PM1003E(!) -- OPERATION ~ S2PM1004E ",------ Refer to Operators manual LOCATION AND WEIGHT PM03 OF COMPONENTS 1999-4 J MAINTENANCE STANDARDS PM04 S5PM0401EtDi -,--- AND TEST PROCEDURES 1999-4 ] PREVENTIVE S2PM0003E(~) -- ~ S2PM1004E -"--- MAINTENANCE Refer to Operators manual S5PM0701E PM07 WAOPKING STANDARDS 1997-5 * First edition : May, 1997 ¯ First revision : March, 1998 " Second revision : April, 1999
- 8. 1.1 1. SPECIFICATION GENERAL VIEW Pl DE I ERY PORT P1.P2.P3 (PF3/8) SUCTION PORT(for Front PI, Center P2) (PP3/4) SUCTION PORT(for Rear pump P3) (PFI/2) Fig. 1 General view of hydraulic pump 1.2 SPECtFICATIONS Type Item ~~ Displacement cclrev (cu.irgrev) Working pressure kgf/cm 2 (psi) KFP1161-61-30 Front P1,Center P2 [ 6.1x2(0.37x 2) 210(2,990) Rear P3 3.0(0.18) 4O(57O) Rated revolution rpm 2,350 Rotational direction CW(viewing from pump shaft side) Flow rate ~/min (gal/min) 14.3 × 2(3.8 × 2) 7.1(1.9) Weight kg(lbs) approx. 5.1(11)
- 9. 2.1 CONSTRUCTION 2. CONSTRUCTION AND OPERATION 14 14 16 15 17 i 5 17 15 17 2 3 8 6 14 16 15 10 14 16 15 14 7 14 12 11 17 15 17 15 13 20 Fig. 3 Construction of 3-series gear type hydraulic pump NO. NAME Q’TY No. NAME Q’TY 1 MOUNTING FLANGE 1 12 DRIVEN GEAR 1 2 GEAR PLATE 1 13 COVER 1 3 FRONT DRIVE GEAR 1 14 PRESSURE PLATE 6 4 DRIVEN GEAR 1 15 PLATE SEAL 6 5 CENTER PLATE 1 16 BACK-UP 6 6 GEAR PLATE 1 17 O-RING 6 7 REAR DR1VE GEAR 1 18 OIL SEAL 1 8 DRIVEVN GEAR 1 19 SNAP RING 1 9 CENTER PLATE 1 20 BOLT 4 10 GEAR PLATE 1 21 WASHER 4 11 3-SERIES REAR DRIVE GEAR 1 2
- 10. 2.2 OPERATION The gear pump is so constructed that, with rotation of the drive shaft, the drive gear and driven gear are rotated with which the oil sucked up from tab suction side enters into the gear tooth groove and is transferred to the delivery side through the gear plate. And a pressure balance mechanism is adopted for this pump to get a high volumetric efficiency. As the pressure plates of each pump are able to move for axial direction while no-load operation, the pressure plates are pressed to the gears with the sealing force on the plate seals. And while loaded operation, the delivery pressure is led to the back side of the pressure plate, that acts as a pressing force against gears with a slightly greater force than the force with which the pressure plate is separated from the gears, to maintain a proper clearance between the pressure plate and the side face of gears. DRIVE GEAR DRIVE SHAFT GEAR PLATE q Suction ~ -~ Delivery side side DRIIVEN GEAR Fig. 3 Operating principal of gear pump COVER Bearing with low pressure lubrication PRESSURE PLATE(movableside plate) GEAR PLATE alloy] GEAR:No.oftooth-12 / PLATE SEAL MOUNTING FLANGE ~ (Aluminum alloy] ----~- ulj~ -l_ PLATE (Aluminumalloy) Fig. 4 3-series gear pump 3
- 11. 3.1 3. REMOVAL AND INSTALLATION GENERAL PRECAUTIONS ¯ The removing and installing works are to be carried out at a clean place providing clean containers to place the removed parts in. ¯ Before the removal, make around the ports clean and remove the paint around each joint with a wire brush. ¯ Clean each of removed parts with a cleaning oil such as diesel fuel, etc. ¯ Put a match mark on each of the mating parts so that they shall be installed keeping relative positioning with each other. ¯ Replace all the seals to new one at every removal, and install them with thinly applying grease. ¯ Check each part for abnormal wear and seizure, retouch sharp edges and burrs with a sand paper, etc., if any. 3.2 SPECIAL TOOL ¯ Oilseal (18) inserting jig (1) Cap Material : $46Corequivalent Apply hardchrome plating (i0p Makeroundness smooth. ~ ~i ot Sand paper c.. (2) Sleeve Material: Aluminum Unit:mm(in) 1.6a 70(2.76) Noshap sdge No shap sdges nor burr: 3.3 REMOVAL (1) Fix the pump on a vice gripping the mounting flange (1) making the fixing flange face to downside. ¯ When gripping it on a vice, use a soft material such as wooden piece, aluminum or cupper plate, etc., not to damage the flange face. (2) Loosen the bolts (20), and remove them together with the washers (21). : 14ram (3) Remove the cover (13), then remove the ring (17), plate seal (15) and back-up (16). 17 20 13 21~ Fig. 5
- 12. (4) Removethe pressure plate(14). (5) Puta matchmarkonthe shaftendsof the 3- seriesreardrivegear(11) and the driven gear (12), then pulloffthegears. (6) Pull off the pressure plate (4). ¯ While pulling off the pressure plate, pay special attention not to give it any slant. When it becomes slant and difficult to remove, do not forcedly tap it, but makeit in level by meansof applying hydraulic oil or alike and pushing it with fingers. (7) Put a distingushing mark on the gear plate (10) for its front and rear, then removeit. 14 k 10 Fig. 6 (8) Removethe O-ring (17), plate seal (15) back-up (16) from the center plate (9). (9) Pull off the center plate (9) for upwards lightly tapping its round with a plastic hammer. (10) Removethe O-ring (17), plate seal (15) back-up (16) on the lower surface of center plate (9) (11) Removethe pressure plate (14). (12) Put a match mark on the shaft ends of the rear drive gear (7) and the driven gear (8), then pull them off. ¯ Pay special attention not to mix up the front and the center for the driven gear (8). (13) Pull offthe pressure plate(14) on the bottom ofgear plate(6). ¯ FoUowtethe instruction menfioned in the above(6). (14) Put a distingushing mark on the gear plate (6) for its front and rear, then removeit. Fig. 7 14 Fig. 8
- 13. (15) Removethe O-ring (17), plate seal (15) back-up (16) from the center plate (5). (16) Pull off the center plate (5) for upwards lightly tapping its round with a plastic hammer. (17) Removethe O-ring (17), plate seal (15) back-up (16) from the lower face of center plate (5). 16 (18) Removethe pressure plate (14). (19) Put a match mark on the shaft ends of the front drive gear (3) and the driven gear (4), then pull themof J[i (20) Pull offthe pressure plate (14) on the bottom ofgear plate (2). ¯ Follow tothe instruction mentioned in the above(6). (21) Put a distingushing mark on the gear plate (2) for its front and rear, then removeit. I4 Fig. 9 2 4 14 (22) Removethe O-ring (17), plate seal (15) back-up (16) from the mounting flange (1). (23) Remove the snap ring (19), then remove the oil seal (18). 19 Fig. 10 17 16 15 Fig. 11 6
- 14. 3,4 INSTALLATION (I) Makeclean each part. (2) Grip the mounting flange (1) on a vice at its non-machined surface making the installing face to downside. ¯ Apply sof~ material for gripping. (3) Insert the plate seal (15), back-up (16) O-ring (17) into the groove on the mounting flange (1) not allowing them to protrude from the outer peripheral surface. ¯ Pay attention for the inserting direction of the back-up (16), (Refer to Fig. 13.) PLATE SEAL 16 17 1 .~j BACK-UP ~A brira upside) RING (4) Install the gear plate (2) on the mounting flange (1). ¯ When it is difficult to insert the positioning dowel pin, lightly tap it with a plastic hammer. (5) Insert the pressure plate (14) into the bottom of gear plate (2) making the grooved face upside. (Refer to Fig. 15.) ¯ At this time, pay attention for the position of the suction side and delivery side of the pressure plate (14). (Refer Fig. 15.) (6) Insert the front drive gear (3) and driven gear (4) aligning the match mark put at the removal. ¯ After the insertion, apply 2~3cc (0.122~ 0.183cu.in) of clean hydraulic oil to the gear tooth groove. (7) Insert the pressure plate (14) into the gear plate (2) making the grooved face downside. ¯ At that time, pay attention for the position of the suction side and delivery side of the pressure plate (14). (Refer Fig. 15.) Fig. 13 Installation of back-up 2 Fig. 14 14 Delivery side Suction side Fig. 15 Installation of pressure plate 7
- 15. (8) Securely insert the plate seal (15), back-up (16) and O-ring (17) into the center plate of front pump side, not allowing them to protrude from the outer peripheral surface. ¯ Refer to Fig. 13 for the inserting direction of back-up (16). ¯ Refer to Fig. 17 for the direction of center plate (5). (9) Makingthe seal insertion face of center plate (5) to downside, install it to the gear plate (2). ¯ At that time, pay special attention not to allow dropping off or protrusion of the plate seal (15), back-up (16) and/or O-ring (17). ¯ If it is impossible to set the center plate (5) to the place with 2 or 3 mm(0.08 0.12 in) of gap, probably the seals are not properly set in place. Confirm it again. (10) Securely insert the plate seal (15), back-up (16) and O-ring (17) into the groove on center plate (5), not allowing them protrude from the outer peripheral surface. ¯ Refer to Fig. 13 for the inserting direction of back-up (16). (II)Install thegearplate (6)tothecenter plate (5) with the same procedures as mentioned intheabove para. (4). (12) Insert the pressure plate (14) into the bottom of the gear plate (6) with the same procedures as mentioned in the above para. (5). (13)Aligning the matchmarkput at the removal, insert thereardrivegear(7)andthedriven gear (8). ¯ Afterthe insertion, apply2~3cc(0.12~ 0.16cu.in)of cleanhydraulic oil to the geartooth groove. (14) Insert the pressure plate (14) into the gear plate (6) with the same procedures mentioned in the above para. (7). 17 17 16 Fig. 16 Theside at whichthis hole goes through the delivery port, is of the front pump side. Delivery port Fig.17Direction forcenter plate (5) 14 Fig. 18
- 16. (15) Insert the plate seal (15), back-up (16) O-ring (17) into the center plate (9) of center pump side, with the same procedures as mentioned in the above para. (3). *Refer to Fig. 17 for the direction of center plate (9). -For the center plate, the side with the suction port is the front pump side, and the side without the suction port is the center pump side. (16) Install the center plate (9) to the gear plate (6), with the same procedures as mentioned in the above para. (9). (17) Insert the plate seal (15), back-up (16) O-ring (17) into the groove on the center plate (9), with the same procedures mentioned in the above para. (9). (18) Install the gear plato (10) to the center plate (9), with the same procedures as mentioned in the above para. (5). (19) Insert the pressure plato (14) into the bottom of the gear plate (10), with the same procedures as mentioned in the above para. (5). (20) Insert the 3-series rear drive (11) and driven gear (12) aligning the match mark put at the removal. ¯ After the insertion, apply 2~3cc (0.12~ 0.18 cu.in) of clean hydraulic oil to the gear tooth groove. (21) Insert the pressure plate (14) into the gear plate (10), with the same procedures mentioned in the above para. (7). (22) Insert the plate seal (15), back-up (16) O-ring (17) into the groove on the cover (13), with the same procedures as mentioned in the above para. (3). (23) Install the cover (13) to the gear plate (10), with the same procedures as mentioned in the above para. (9). 17 17 16 is Fig. 19 14 Fig.20 20 17 13 ~~ 16 Fig. 21
- 17. (24) Set the washers(21) to the pads for bolts (20) on the cover (13), and insert and tighten the bolts (20). : 14m,Tightening torque : 4.75±25kgf.m (34± 1.8ft.lbs) Note: Makethe threaded portion wet condition. (25) Nowtake off the pumpassy from the vice. Then confirm that the pumpcan be lightly rotated with a tool turning it from the drive shaft end. (26) Install the oil seal (18) to the mounting flange(1). ¯ Applylithium grease to the lip portion of oil seal. ¯ Refer to Fig. 22 for the installing direction. (27) Install the snap ring (19) to prevent the oil seal from loosening off. Use the new snap ring at every removal. JIG(SLEEVE) JIG(CAP) 18 1 Inputshall of pump Fig. 22 Installation ofoil seal (18) 4.1 (1) 4. MAINTENANCE STANDARDS CHECKANDMAINTENANCE After the inspection on the removedparts for their damages and/or discoloration, clean them with a cleaning oil. However, do not soak the parts madeof rubber into the diesel fuel. Check for the following items, and retouch or replace to newone if necessary. Gearplate (2)(6)(10) To improve the volumetric efficiency, this gear pumpis so designed that the gear tooth tip is getting in a direct contact with the pumpbody while the operation getting to fit with each other. Therefore , a trace of such direct contact is observed on adjacent to the suction port for the pumponce operated. Thelength of the contacting trace is normal if it is less than half of the internal periphery of the gear bore on the pumpbody, with 0.05ram (0.002in) of the depth (a). When depth (a) becomes more than 0.15mm (0.006in), it is considered that the shaft bearing is wornout. ¯ Replace the pumpassy to newone at a~ 0.15ram (0.006in). Trace of c°ntact ~ Q)~ a Suction ~very side Fig. 23 Gear plate 10
- 18. (2) Drive Gear (3)(7)(11) Driven Gear (4)(8)(12) Almost no deterioration for the roughness would be observed on the shaft and side face of the gear as far as the hydraulic oil is clean, and smooth trace of contact should be observed on them. When the roughness on the shaft or gear side surface becomes worse in the extent of scratching with a finger nail or gear tooth face is abnormally worn out, replace them to new one. ¯ When the shaft dia. becomes ~ d/ 17.930mm(0.706in), replace the pump assy to new one. (3) Pressure Plate (14) The pressure plate surface has a coating of black color. At the normal condition, as shown in the Fig. 25, a lustrous trace of contact is shown on the sliding surface with the gear. Occasionally, there may appear the back metal showing silver color partially. Even if the back metal appears on the surface, it is normal unless otherwise the following phenomenon is observed. ¯ The surface becomes rough in the extent of scratching finger nail. ¯ The thickness becomes less than 3.930mm (0.155in). (4) Mounting Flange (1), Center Plates (5)(9). Cover (13) As same as the pump body, check for the eccentric wear on the bearing. The black gray surface is coated with teflon of soft material, pay attention for the handling not to give any scores on it. ¯ Whenthe teflon coating is worn out, and the red cupper color of back metal appears in the extent of more than 150 °, replace it to newone. (5) Make sure to replace the plate seal (15), back-up (16), O-ring (17), oil seal (18) snap ring (19) to new one at every removal. (6) When either of the mounting flange (1), center plates (5)(9) or cover (13) is replaced, make sure to replace the drive gear and driven gear assembled to it to new one, too. Otherwise, the required deliverying volume may not be obtained. Fig. 24 Drive gear, drive gear Trace of contact .... Thickness Suctionside / -[I- Deliveryside Fig. 25 Pressure plate Trace of contact on bearing / Fig. 26 Flange, plate and cover 11
- 19. 5. TROUBLESHOOTING Troubled Condition Possible Causes Measure Nooil delivered from Lowoil level in tank. Refill hydraulic oil up to specified gear pump level. Clogged suction line or strainer. Make them clean. When oil is contaminated, change oil to new one. Gear pump pressure not Pressure plate (14) is worn out. Replace to new one. mcreased Bearings (pressed fit to (1)(5)(9) Replace to new one. (13)) are worn out. Defective plate seal (15) or back-up Replace to new one. (16). Improper adjustment of relief Using calibrated pressure gauge, valve. increase pressure up to specified level. Sucking up air. ¯ Retighten looseness in suction line. ¯ Refill oil in tank. ¯ Check for oil seal in pump. ¯ Do not operate until bubbles in tank disappear. Abnormal noise on pump Crashing of suction side hose, or Removecause for crashing of hose, clogging on strainer, causing make clean strainer. cavitation Sucking air due to looseness on Retighten each joint. suction side joint. Cavitation due to too high viscosity ¯ Changeoil to proper viscosity. of oil. ¯ Operate at proper oil temp. Improper alignment for shafts of Re-align. pump and engine. Bubbles in hydraulic oil. Checkfor the causeof generating bubbles, andimprove it. Oil leakage from pump Defective oil seal (18) or O-ring (17) Replace to new one. of pump. Dust caught on seal. Re-check for pump. 12
- 20. KOBELIO SHOP MANUAL ApplicableModel: SK20SR HYDRAULIC PUMP TABLE OF CONTENTS i. SPECIFICATION i.i General View ...................................................... 1 1.2 Specification ...................................................... 1 2. CONSTRUCTION AND OPERATION 2.1 Construction ...................................................... 2 2.2 Operation ............................................................ 4 3. REMOVAL AND INSTALLATION 3.1 Removal ............................................................ 6 3.2 Installation ......................................................... i0 4. MAINTENANCE STANDARDS 4.1Check andMeasurement .................................... 15 5.TROUBLESHOOTING ............................................. 16 KOBE STEEL, LTD.
- 21. Thank you very much for your reading. Please Click Here. Then Get COMPLETE MANUAL. NO WAITING NOTE: If there is no response to click on the link above, please download the PDF document first and then click on it.
- 22. m I The hydraulic pumpsucks up and pressureizes the hydraulic oil and supplies it to i each equipment. This manual covers the fundametals on the hydraulic pumponly. Please refer to the other manualsfor the role and function of the hydraulic pump. i Models Applicable Machines Notes Models Applicable Machines Notes SK20SR PM020Ol- Revision Date of Issue Remarks First edition July, 1997 $5120396E S
- 23. 1.1 GENERALVIEW 1. SPECIFICATION OIL FILLING PORT DELIVERY PORT P1 ~ pFI/4) DELIVERY PORT P2J (PF3/8) / (PF3/s) DELIVERY PORT P4 DELIVERYPORT P3 (pF1/2) SUCTION PORT $1 (SAEJ518B-11/4) 1.2 SPECIFICATIONS Fig. 1 General view of hydraulic pump Table 1 Type Displacement cdrev (cu’in]rev) Working pressure kgffc~ (psi) PVD-0B- 19L3 PS-6G3-4280F Piston pump P1, P2 9.3x2 (0.57x2) 210 (2,990) Gear pump P3 P4 6.4 (0.39) 2.7 (0.16) 180 (2,560) 40 (570) Rated revolution rpm 2,350 (Max. : 2,550) Rotational direction CW(Viewing from pump shaft side) Flow rate ~/min (gagmin) 21.9x 2 (5.8x 2) 15 (4.0) I 6.3 (1.7) Control characteristics Total power control (P1 ÷ P2 + P3) (with power-shift by P3 pump) Weight kg (lbs) 16 (35)
- 24. 2. CONSTRUCTION AND OPERATION 2.1 CONSTRUCTION (1) Hydraulic Piston Pump 3 43,42,20,125 23 33 51 39 18 8 9 4 13 15 19 62 61 60 71 34 32 30 36 26 12 10 7 11 6 14 24 35 40 27 56 5 31 67 66 72 2,44,49,52 Fig. 2 Sectional construction of hydraulic pump 65,53,54,68,70 No. NAME Q’TY No, NAME Q’TY No. NAME Q’TY 1 BODY S 1 21 ROD G 1 49 PLUG 5 2 BODY H 1 23 WASHER 2 51 PLUG 1 3 SHAFT 1 24 RETAINER 2 52 SPRING WASHER 5 4 CYLINDER BARREL 1 25 STOPPER PIN A 1 53 PLUG 1 5 VALVE PLATE 1 26 STOPPER PIN B 1 54 ’O-RING 1 6 PISTON I0 27 PIN WITH HOLE i 56 SPRING PIN 1 7 SHOE 10 30 BALL BEARING 1 6O SET SCREW 1 8 SHOE HOLDER 1 31 NEEDLE BEARING 1 61 NUT 1 9 BARREL HOLDER 1 32 OIL SEAL 1 62 SEAL WASHER 1 10 SWASH PLATE 1 33 CONED DISK SPRING 4 65 GEAR PUMP KIT 1 11 NEEDLE 3 34 SNAP RING 1 66 COUPLING 1 12 OSCILLATING PIN 2 35 SNAP RING 1 67 COLLAR 1 13 PACKING 1 36 SNAP RING 1 68 CAPSCREW 2 14 SPRING C 1 39 O-RING 1 7O WASHER 2 15 SPRING T1 1 4O O-RING 2 71 O-RING 1 18 SPRING HOLDER 1 42 PLUG 1 72 O-RING 1 19 SPRING GUIDE 1 43 O-RING 1 2O PIN 1 44 SOCKET BOLT 5