SlideShare une entreprise Scribd logo
1  sur  92
Télécharger pour lire hors ligne
2009 ENGINE
Cooling - Compass & Patriot
DESCRIPTION
DESCRIPTION
The cooling system regulates engine operating temperature. It allows the engine to reach normal operating
temperature as quickly as possible. It also maintains normal operating temperature and prevents overheating.
The cooling system consists:
Radiator
Coolant
Electric cooling Fans
Water pump
Thermostat
Charge air cooler (Turbocharged vehicles only)
In-radiator Power steering oil cooler (Turbocharged vehicles only)
Hoses and clamps
Transmission oil cooler
Coolant pressure bottle/overflow system
OPERATION
GAS ENGINE
The primary purpose of a cooling system is to maintain engine temperature in a range that will provide
satisfactory engine performance and emission levels under all expected driving conditions. It also provides hot
water (coolant) for heater performance and cooling for automatic transmission oil. It does this by transferring
heat from engine metal to coolant, moving this heated coolant to the radiator, and then transferring this heat to
the ambient air.
When the engine is cold and both the primary and secondary thermostats are closed. The coolant will
circulate through the engine, heater system, and the bypass. The cooling system has no flow through the
radiator
As the engine warms up, the primary thermostat will start to open at 77 °C (170 °F). Coolant will start to
flow through the radiator and the internal transmission cooler. The primary thermostat will fully open at
95 °C (203 °F).
The secondary thermostat will start to open at 95 °C (203 °F). This will increase the coolant flow through
the cylinder block and cylinder head and the radiator. The secondary thermostat will fully open at 104 °C
(220 °F).
2009 Jeep Patriot Limited
2009 ENGINE Cooling - Compass & Patriot
2009 Jeep Patriot Limited
2009 ENGINE Cooling - Compass & Patriot
a
Saturday, September 08, 2012 12:55:36 PM Page 1 © 2006 Mitchell Repair Information Company, LLC.
a
Saturday, September 08, 2012 12:55:40 PM Page 1 © 2006 Mitchell Repair Information Company, LLC.
TURBOCHARGED ENGINE ONLY: the turbocharged engine has a single thermostat that starts to
open at 90.5 °C (195 °F) and is fully open at 100 °C (212 °F). This is done to reduce resistance and
increase flow.
DIESEL
Fig. 1: Cooling System Flow
Courtesy of CHRYSLER LLC
The water pump draws coolant from the radiator and delivers it to the engine block. The coolant travels through
the engine block into the cylinder head. Coolant exits the engine at the thermostat. If the coolant temperature is
less than 87°C (189°F) the thermostat directs all of the coolant back to the water pump. If the coolant
temperature is between 87°C (189°F) and 102°C (216°F) the thermostat is in the mix mode and directs the
coolant to the radiator and the water pump. If the coolant is greater than 102°C (216°F), the thermostat directs
all of the coolant to the radiator.
The thermostat also feeds excess coolant and bleeds air from the system through a hose leading to the coolant
reservoir. The reservoir returns coolant to the inlet side of the water pump. A port and hose at the rear of the
engine block provides coolant to the heater core. This coolant is returned to the engine at the intake side of the
water pump.
The oil cooler receives coolant directly from the engine block. A hose returns this coolant to the inlet side of the
water pump.
1 - COOLANT RECOVERY PRESSURE
CONTAINER
7 - WATER PUMP
2 - PRESSURE CAP 8 - THERMOSTAT HOUSING
3 - HEATER CORE 9 - RADIATOR
4 - AUXILIARY HEATER 10 - COOLANT DRAIN VALVE
5 - ENGINE 11 - SERVICE FILL VENT VALVE
6 - OIL COOLER
2009 Jeep Patriot Limited
2009 ENGINE Cooling - Compass & Patriot
a
Saturday, September 08, 2012 12:55:36 PM Page 2 © 2006 Mitchell Repair Information Company, LLC.
DIAGNOSIS AND TESTING
AERATION
If coolant level drops below a certain point, aeration will occur drawing air into the water pump resulting in the
following:
High reading shown on the temperature gauge.
Loss of coolant flow through the heater core.
Corrosion in the cooling system.
Transmission oil will become hotter (automatic transmission equipped vehicles).
Water pump seal may run dry, increasing the risk of premature seal failure.
Combustion gas leaks into the coolant can also cause the above problems.
DEAERATION
As air is removed from the cooling system, it gathers in the coolant recovery container. This pressure is released
into the atmosphere through the pressure valve located in the radiator pressure cap when pressure reaches 96 -
124 kPa (14 - 18 psi). This air is replaced with coolant from the coolant recovery container.
To effectively deaerate the system, multiple thermal cycles of the system may be required.
FLOW CHECK
To determine whether coolant is flowing through the cooling system, use one of the following procedures:
If engine is cold, idle engine until normal operating temperature is reached. Then feel the upper radiator
hose. If it is hot, coolant is circulating.
Remove pressure cap when engine is cold, remove small amount of coolant. Idle engine until thermostat
opens, you should observe coolant flow while looking down the filler neck. Once flow is detected install
the pressure cap.
LEAK TESTING
NOTE: Deaeration does not occur at engine idle, higher engine speeds are required.
Normal driving will deaerate cooling system.
WARNING: Do not remove the cooling system pressure cap with the system hot and
under pressure because serious burns from coolant can occur.
WARNING: If vehicle has been run recently, wait 15 minutes before removing
pressure cap. Place a shop towel over the cap, and without pushing
down, rotate it counterclockwise to the first stop. Allow fluids to escape
through the overflow tube. When the system stops pushing coolant and
2009 Jeep Patriot Limited
2009 ENGINE Cooling - Compass & Patriot
a
Saturday, September 08, 2012 12:55:36 PM Page 3 © 2006 Mitchell Repair Information Company, LLC.
With engine not running, wipe the coolant filler neck sealing seat clean. The radiator should be full.
Attach Tool 7700 or equivalent cooling system pressure tester to the coolant filler neck. Apply 104 kPa (15 psi)
pressure. If the pressure drops more than 13 kPa (2 psi) in 2 minutes inspect all points for external leaks.
All hoses, radiator and heater, should be moved while at 104 kPa (15 psi) since some leaks occur while driving
due to engine movement, etc.
If there are no external leaks after the gauge dial shows a drop in pressure, detach the tester. Start engine and
run the engine to normal operating temperature in order to open the thermostat and allow the coolant to expand.
Reattach the tester. If the needle on the dial fluctuates, it indicates a combustion leak and is usually a head
gasket leak.
If the needle on the dial does not fluctuate, race the engine a few times. If an abnormal amount of coolant or
steam is emitted from the tailpipe, it may indicate a damaged head gasket, cracked engine block or cylinder
head.
There may be internal leaks which can be determined by removing the oil dipstick. If water globules appear
intermixed with the oil, it will indicate an internal leak in the engine. If there is an internal leak, the engine must
be disassembled for repair.
COOLING SYSTEM
steam into the coolant recovery container and pressure drops, push down
on the cap and remove it completely. Squeezing the radiator inlet hose
with a shop towel (to check pressure) before and after turning to the first
stop is recommended.
WARNING: With tool in place pressure builds up fast. Any excessive amount of
pressure built up by continuous engine operation must be released to a
safe pressure point. Never permit pressure to exceed 138 kpa (20 psi).
CONDITION POSSIBLE CAUSE CORRECTION
TEMPERATURE GAUGE
READS LOW
1. Diagnostic Trouble Code
(DTC) has been set indicating a
stuck open engine thermostat.
1. Replace thermostat, if necessary.
If a (DTC) has not been set, the
problem may be with the
temperature gauge.
-
2. Engine Coolant Temperature
Sensor.
2. Check connector at Engine
Coolant Temperature Sensor. Repair
as necessary.
-
3. Inoperative temperature
gauge.
3. Check gauge operation. Refer to
Electrical/Instrument Cluster -
Diagnosis and Testing .
4. Coolant level low during
cold ambient temperature,
accompanied by poor heater
4. Check coolant level in the coolant
recovery/reserve container and the
radiator. Inspect the system for
2009 Jeep Patriot Limited
2009 ENGINE Cooling - Compass & Patriot
a
Saturday, September 08, 2012 12:55:36 PM Page 4 © 2006 Mitchell Repair Information Company, LLC.
-
performance. leaks. Repair as necessary. Refer to
WARNINGS in this service
information before removing
pressure cap.
TEMPERATURE GAUGE
READS HIGH OR ENGINE
COOLANT WARNING LAMP
ILLUMINATES. COOLANT
MAY OR MAY NOT BE LOST
FROM SYSTEM.
1. Trailer being towed, a steep
hill being climbed, vehicle
being operated in slow moving
traffic, or engine idling during
high ambient (outside)
temperatures with air
conditioning on. High altitudes
could also cause these
conditions.
1. This may be a temporary
condition and repair is not
necessary. Turn off the air
conditioning and drive the vehicle
without any of the previous
conditions. Observe the temperature
gauge. The gauge should return to
the normal range. If the gauge does
not return to the normal range,
determine the cause of the
overheating and repair.
-
2. Inoperative temperature
gauge.
2. Check gauge operation. Refer to
Electrical/Instrument Cluster -
Diagnosis and Testing .
-
3. Is temperature warning lamp
(if equipped) illuminating
unnecessarily?
3. Check warning lamp operation.
Refer to Electrical/Instrument
Cluster - Diagnosis and Testing .
-
4. Coolant low in
recovery/reserve bottle and
radiator?
4. Check for coolant leaks and repair
as necessary.
-
5. Pressure cap not installed
tightly. If cap is loose, boiling
point of coolant will be
lowered. Also refer to the
following step 6.
5. Tighten cap.
-
6. Poor seals at pressure cap. 6. (a) Check condition of cap and
cap seals. See Diagnosis and
Testing . Replace cap if necessary.
- -
(b) Check condition of filler neck. If
neck is warped or damaged, replace
neck.
-
7. Coolant level low in
radiator, but not in coolant
recovery/reserve bottle. This
indicates the radiator is not
drawing coolant from the
coolant recovery/reserve bottle
as the engine cools. As the
engine cools, a vacuum is
formed inside the cooling
system. If the pressure cap
seals are defective, or the
7. (a) Check condition of pressure
cap and cap seals. Replace cap if
necessary.
-
(b) Check condition of filler neck.
Replace if damaged.
-
(c) Check condition of hose from
filler neck to coolant container. It
should be tight at both ends without
any kinks or tears. Replace hose as
necessary.
(d) Check coolant recovery/reserve
2009 Jeep Patriot Limited
2009 ENGINE Cooling - Compass & Patriot
a
Saturday, September 08, 2012 12:55:36 PM Page 5 © 2006 Mitchell Repair Information Company, LLC.
-
cooling system has a leak, a
vacuum cannot be formed.
bottle and hose for blockage. Repair
as necessary.
-
8. Freeze point of coolant not
correct. Mixture ratio may be
too rich.
8. Check coolant concentration. See
Diagnosis and Testing . Adjust
glycol-to-water ratio as required.
-
9. Coolant not flowing through
system.
9. Check for coolant flow at filler
neck with some coolant removed,
engine warm, and thermostat open.
Coolant should be observed flowing
through filler neck. If flow is not
observed, determine reason for lack
of flow and repair as necessary.
-
10. Radiator air seals missing
or improperly installed.
10. Inspect air seals. Correct as
necessary.
-
11. Radiator or A/C condenser
fins are dirty or clogged.
11. Clean obstruction from fins.
-
12. Radiator core is plugged or
corroded.
12. Replace or clean radiator.
-
13. Fuel or ignition system
problems.
13. Refer to the appropriate
Powertrain Diagnostic Procedure
service information.
-
14. Dragging Brakes. 14. Inspect brake system and repair
as necessary. Refer to Brakes -
Diagnosis and Testing .
-
15. Bug screen or other
aftermarket accessory is being
used causing reduced air flow.
15. Remove bug screen or
accessory.
-
16. Thermostat partially or
completely closed.
16. Check thermostat operation and
replace as necessary. See Diagnosis
and Testing .
-
17. Cooling fan not operating
properly.
17. Check electric fan operation and
repair as necessary.
-
18. Cylinder head gasket
leaking.
18. Check cylinder head gasket for
leaks. See Diagnosis and Testing .
- 19. Heater core leaking. 19. Check heater core for leaks.
TEMPERATURE GAUGE
READING IS INCONSISTENT
(FLUCTUATES, CYCLES OR IS
ERRATIC)
1. The gauge may cycle up and
down. This is due to the
cycling of the electric radiator
fan.
1. A normal condition. No
correction is necessary. If gauge
cycling is the hot zone, check
electric fan operation and repair as
necessary.
-
2. During cold weather
operation with the heater
blower in the high position, the
gauge reading may drop
slightly.
2. A normal condition. No
correction is necessary.
3. Temperature gauge or 3. Check gauge operation. Refer to
2009 Jeep Patriot Limited
2009 ENGINE Cooling - Compass & Patriot
a
Saturday, September 08, 2012 12:55:36 PM Page 6 © 2006 Mitchell Repair Information Company, LLC.
-
Engine Coolant Temperature
Sensor is defective or shorted.
Electrical/Instrument Cluster -
Diagnosis and Testing .
-
4. Gauge reading rises when
vehicle is brought to a stop
after heavy use (engine still
running).
4. A normal condition. No
correction is necessary. The gauge
should return to normal range after
vehicle is driven.
-
5. Gauge reading high after
restarting a warmed-up (hot)
engine.
5. A normal condition. No
correction is necessary. The gauge
should return to normal range after a
few minutes of engine operation.
-
6. Coolant level low in radiator
(air will build up in the cooling
system causing the thermostat
to open late).
6. Check and correct coolant leaks.
-
7. Cylinder head gasket leaking
allowing exhaust gas to enter
cooling system. This will cause
thermostat to open late.
7. (a) Check for cylinder head
gasket leaks using Tool C-3685-A
Block Leak Tester or the equivalent.
Repair as necessary.
-
(b) Check for coolant in the engine
oil. Inspect for white steam emitting
from exhaust system. Repair as
necessary.
-
8. Water pump impeller loose
on shaft.
8. Check water pump and replace as
necessary.
-
9. Air leak on the suction side
of water pump allows air to
build up in cooling system.
This will cause the thermostat
to open late.
9. Locate leak and repair as
necessary.
PRESSURE CAP IS BLOWING
OFF STEAM AND/OR
COOLANT FLOWING INTO
RECOVERY BOTTLE.
TEMPERATURE GAUGE
READING MAY BE ABOVE
NORMAL, BUT NOT HIGH.
COOLANT LEVEL MAY BE
HIGH IN RECOVERY BOTTLE.
1. Pressure relief valve in
pressure cap is defective.
1. Check condition of pressure cap
and seals. See Diagnosis and
Testing . Replace as necessary.
COOLANT LOSS TO THE
GROUND WITHOUT PRESSURE
CAP BLOWOFF. GAUGE IS
READING HIGH OR HOT.
1. Coolant leaks in radiator,
cooling system hoses, water
pump or engine.
1. Pressure test cooling system and
repair as necessary.
DETONATION OR PRE-
IGNITION (NOT CAUSED BY
IGNITION SYSTEM). GAUGE
MAY OR MAY NOT BE
1. Engine overheating. 1. Check reason for overheating and
repair as necessary.
2009 Jeep Patriot Limited
2009 ENGINE Cooling - Compass & Patriot
a
Saturday, September 08, 2012 12:55:36 PM Page 7 © 2006 Mitchell Repair Information Company, LLC.
READING HIGH.
-
2. Freeze point of coolant not
correct.
2. Check the freeze point of the
coolant. See Diagnosis and
Testing . Adjust glycol-to-water
ratio as required.
HOSE OR HOSES COLLAPSE
WHEN ENGINE IS COOLING
1. Vacuum created in cooling
system on engine cool-down is
not being relieved through
coolant recovery/reserve
system.
1. (a) Pressure cap relief valve stuck.
See Diagnosis and Testing .
Replace as necessary.
- -
(b) Hose between coolant
recovery/reserve bottle and outlet
connector is kinked. Repair as
necessary.
- -
(c) Vent at coolant recovery/reserve
bottle is plugged. Clean vent and
repair as necessary.
- -
(d) Recovery/reserve bottle is
internally blocked or plugged.
Check for blockage and repair as
necessary.
RADIATOR FAN OPERATES
ALL THE TIME
1. Malfunctioning electrical
component or circuit.
1. Refer to appropriate Powertrain
Diagnostic Procedures. Repair as
necessary.
2. Check for low coolant level. 2. Repair as necessary.
RADIATOR FAN WILL NOT
OPERATE, GAUGE READING
HIGH OR HOT
1. Fan motor defective. 1. Refer to appropriate Powertrain
Diagnostic article for operation of
the scan tool. Repair as necessary.
-
2. Fan relay, powertrain control
module (PCM) or engine
coolant temperature sensor
defective.
2. Refer to appropriate Powertrain
Diagnostic article for operation of
the scan tool. Repair as necessary.
-
3. Blown fuse in power
distribution center (PDC).
3. Determine cause for blown fuse
and repair as necessary.
NOISY FAN 1. Fan blade loose. 1. Replace radiator fan assembly.
-
2. Fan blade striking a
surrounding object.
2. Locate point of fan blade contact
and repair as necessary.
-
3. Air obstructions at radiator
or A/C condenser.
3. Remove obstructions and/or clean
debris from radiator and/or A/C
condenser.
- 4. Electric fan motor defective. 4. Replace radiator fan assembly.
INADEQUATE AIR
CONDITIONER PERFORMANCE
(COOLING SYSTEM
SUSPECTED)
1. Electric radiator fan not
operating when A/C is on.
1. Refer to appropriate Powertrain
Diagnostic article for operation of
the scan tool. Repair as necessary.
2009 Jeep Patriot Limited
2009 ENGINE Cooling - Compass & Patriot
a
Saturday, September 08, 2012 12:55:36 PM Page 8 © 2006 Mitchell Repair Information Company, LLC.
-
2. Radiator and/or air
conditioning condenser is
restricted, obstructed or dirty.
2. Remove restriction and/or clean
as necessary.
-
3. Radiator air seals missing or
improperly installed.
3. Inspect air seals. Repair as
necessary.
-
4. Engine is overheating (heat
may be transferred from
radiator to A/C condenser).
High underhood temperature
due to engine overheating may
also transfer heat to A/C
components.
4. Correct overheating condition.
Refer to this service information.
INADEQUATE HEATER
PERFORMANCE
1. Has a diagnostic trouble
code (DTC) been set?
1. Refer to Powertrain Diagnostic
Procedures.
-
2. Coolant level low. 2. Check cooling system for leaks.
Repair as necessary.
-
3. Obstructions in heater hose
fittings at engine.
3. Remove heater hoses at both ends
and check for obstructions. Repair
as necessary.
-
4. Heater hose kinked. 4. Locate kinked area and repair as
necessary.
-
5. Water pump is not pumping
coolant to heater core. When
the engine is fully warmed up,
both heater hoses should be hot
to the touch.
5. See Diagnosis and Testing .
Repair as necessary.
HEAT ODOR 1. Various heat shields are used
at certain components. One or
more of these shields may be
missing.
1. Locate missing shields and
replace or repair as necessary.
-
2. Is temperature gauge reading
above the normal range?
2. Refer to the previous Temperature
Gauge Reads High in these
Diagnostic Charts. Repair as
necessary.
-
3. Is cooling fan operating
correctly?
3. Repair as necessary.
-
4. Has undercoating been
applied to any unnecessary
component.
4. Clean undercoating as necessary.
-
5. Engine may be running rich
causing the catalytic converter
to overheat.
5. Refer to appropriate Powertrain
Diagnostic article for operation of
the scan tool. Repair as necessary.
POOR DRIVEABILITY
(THERMOSTAT POSSIBLY
STUCK OPEN). GAUGE MAY
BE READING LOW
1. Has a diagnostic trouble
code (DTC ) been set?
1. Refer to the Powertrain
Diagnostic Procedure service
information for checking a DTC
related to the thermostat.
2009 Jeep Patriot Limited
2009 ENGINE Cooling - Compass & Patriot
a
Saturday, September 08, 2012 12:55:36 PM Page 9 © 2006 Mitchell Repair Information Company, LLC.
STANDARD PROCEDURE
COOLANT LEVEL CHECK
STEAM IS COMING FROM
FRONT OF VEHICLE NEAR
GRILLE AREA WHEN
WEATHER IS WET, ENGINE IS
WARMED UP, RUNNING, AND
VEHICLE IS STATIONARY.
TEMPERATURE GAUGE IS IN
NORMAL RANGE.
1. During wet weather,
moisture (snow, ice or rain
condensation) on the radiator
will evaporate when the
thermostat opens. This opening
allows heated water into the
radiator. When the moisture
contacts the hot radiator, steam
may be emitted. This usually
occurs in cold weather with no
fan or airflow to blow it away.
1. Occasional steam emitting from
this area is normal. No repair is
necessary.
COOLANT COLOR 1. Coolant color is not
necessarily an indication of
adequate corrosion or
temperature protection. Do not
rely on coolant color for
determining condition of
coolant.
1. Check the freeze point of the
coolant. See Diagnosis and
Testing . Adjust the glycol-to-water
ratio as required.
COOLANT LEVEL CHANGES IN
COOLANT
RECOVERY/RESERVE BOTTLE
1. Level changes are to be
expected as coolant volume
fluctuates with engine
temperature. If the level in the
bottle was between the FULL
HOT and ADD marks at
normal engine operating
temperature, the level should
return to within that range after
operation at elevated
temperatures.
1. A normal condition. No repair is
necessary.
2009 Jeep Patriot Limited
2009 ENGINE Cooling - Compass & Patriot
a
Saturday, September 08, 2012 12:55:36 PM Page 10 © 2006 Mitchell Repair Information Company, LLC.
Fig. 2: Coolant Level
Courtesy of CHRYSLER LLC
The coolant recovery/reserve system provides a quick visual method for determining the coolant level without
removing the pressure cap. Simply observe, with the engine idling and warmed up to normal operating
temperature, that the level of the coolant in the recovery/reserve bottle is between the FULL HOT and ADD
marks.
COOLING SYSTEM DRAINING
1. Position a clean collecting container under draincock location.
2. Without removing the pressure cap and with system not under pressure, turn draincock counterclockwise
to open.
3. The coolant reserve bottle should empty first, then remove the pressure cap.
4. If coolant reserve bottle does not empty first:
NOTE: Do not remove pressure cap for routine coolant level inspections.
WARNING: Do not open the radiator draincock with the system hot and under
pressure. Serious burns from coolant can occur.
NOTE: Drain, flush, and fill the cooling system at the mileage or time intervals
specified in the MAINTENANCE SCHEDULE. Refer to Vehicle Quick
Reference/Maintenance Schedules - Description . If the solution is dirty, rusty,
or contains a considerable amount of sediment; clean and flush with a reliable
cooling system cleaner. Care should be taken in disposing of the used engine
coolant from your vehicle. Check governmental regulations for disposal of used
engine coolant.
2009 Jeep Patriot Limited
2009 ENGINE Cooling - Compass & Patriot
a
Saturday, September 08, 2012 12:55:36 PM Page 11 © 2006 Mitchell Repair Information Company, LLC.
a. Check condition of the pressure cap and cap seals.
b. Check for kinked or torn overflow hose from filler neck to reserve bottle.
5. Allow cooling system to drain completely.
FILLING COOLING SYSTEM
1. Close radiator draincock. Hand tighten only.
2. Remove the cooling system pressure cap. Install Tool 8195 Filling Aid Funnel.
3. Use the supplied clip to pinch overflow hose.
WARNING: Make sure engine cooling system is cool before removing pressure cap or
any hose. The cooling system is pressurized when hot. Severe personal
injury may result from escaping hot coolant.
CAUTION: Do not use well water, or suspect water supply in cooling system. A 50/50
mixture of the recommended ethylene glycol and distilled water is
recommended. For recommended coolant usage. Refer to Vehicle Quick
Reference/Capacities and Recommended Fluids - Description .
NOTE: For cooling system capacity. Refer to Vehicle Quick Reference/Capacities and
Recommended Fluids - Specifications .
NOTE: Be careful not to spill coolant on drive belts or the generator.
NOTE: While filling the cooling system, pour coolant into the larger section of the
Tool 8195, Filling Aid Funnel.
2009 Jeep Patriot Limited
2009 ENGINE Cooling - Compass & Patriot
a
Saturday, September 08, 2012 12:55:36 PM Page 12 © 2006 Mitchell Repair Information Company, LLC.
Fig. 3: Filling Cooling System
Courtesy of CHRYSLER LLC
4. Pour coolant into system until funnel is full.
5. Start engine and run at 1500 - 2000 rpm to force air bubbles out.
6. Remove clip from overflow hose and release excess coolant in funnel into coolant recovery container.
7. Install cooling system pressure cap.
8. Slowly fill coolant reserve/recovery bottle to at least the FULL HOT mark with the recommended
coolant. It may be necessary to add additional coolant to the reserve/recovery bottle after three or four
warm-up/cool down cycles to maintain coolant level between the FULL HOT and ADD marks. This is
due to the removal of trapped air from the system.
CLEANING/REVERSE FLUSHING
CLEANING
Drain the cooling system and refill with water. Run the engine with the radiator cap installed until the upper
radiator hose is hot. Stop the engine and drain the water from system. If the water is dirty, fill the system with
water, run the engine and drain the system. Repeat this procedure until the water drains clean.
REVERSE FLUSHING
Reverse flushing of the cooling system is the forcing of water through the cooling system. This is done using air
pressure in the opposite direction of normal coolant flow. It is usually only necessary with very dirty systems
with evidence of partial plugging.
REVERSE FLUSHING RADIATOR
Disconnect the radiator hoses from the radiator inlet and outlet. Attach a section of the radiator hose to the
radiator bottom outlet fitting and insert the flushing gun. Connect a water supply hose and air supply hose to the
flushing gun.
Allow the radiator to fill with water. When the radiator is filled, apply air in short blasts. Allow the radiator to
refill between blasts. Continue this reverse flushing until clean water flows out through the rear of the radiator
cooling tube passages.
1 - SPECIAL TOOL 8195 FILLING AID FUNNEL
2 - PINCH OVERFLOW HOSE
CAUTION: Coolant may leak out of the bottle overflow tube if filling too rapidly.
CAUTION: Internal radiator pressure must not exceed 138 kPa (20 psi) as damage to
radiator may result.
2009 Jeep Patriot Limited
2009 ENGINE Cooling - Compass & Patriot
a
Saturday, September 08, 2012 12:55:36 PM Page 13 © 2006 Mitchell Repair Information Company, LLC.
REVERSE FLUSHING ENGINE
Drain the cooling system. Remove the thermostat housing and thermostat. Install the thermostat housing.
Disconnect the radiator upper hose from the radiator and attach the flushing gun to the hose. Disconnect the
radiator lower hose from the water pump and attach a lead-away hose to the water pump inlet fitting.
Connect the water supply hose and air supply hose to flushing gun. Allow the engine to fill with water. When
the engine is filled, apply air in short blasts, allowing the system to fill between air blasts. Continue until clean
water flows through the lead away hose.
Remove the lead away hose, flushing gun, water supply hose and air supply hose. Remove the thermostat
housing and install the thermostat. Install the thermostat housing with a replacement gasket. Refer to
Thermostat Replacement. Connect the radiator hoses. Refill the cooling system with the correct antifreeze/water
mixture. Refer to Vehicle Quick Reference/Capacities and Recommended Fluids - Description . Refer to
Refilling the Cooling System.
CHEMICAL CLEANING
In some instances, use a radiator cleaner (Mopar® Radiator Kleen or equivalent) before flushing. This will
soften scale and other deposits and aid flushing operation.
INSPECTION
INSPECTION
After performing a cleaning/flush procedure, inspect all hoses, clamps and connections for deterioration and
leaks. Inspect radiator and heater core for leaks.
SPECIFICATIONS
SPECIFICATIONS
CAUTION: On vehicles equipped with a heater water control valve, be sure the heater
control valve is closed (heat off). This will prevent coolant flow with scale
and other deposits from entering the heater core.
CAUTION: Follow manufacturers instructions when using these products.
DESCRIPTION SPECIFICATIONS
METRIC US
1.8L Engine* 6.8L 7.2 qts.
2.0L Engine* 6.8L 7.2 qts.
2.4L Engine* 6.8L 7.2 qts.
2009 Jeep Patriot Limited
2009 ENGINE Cooling - Compass & Patriot
a
Saturday, September 08, 2012 12:55:36 PM Page 14 © 2006 Mitchell Repair Information Company, LLC.
TORQUE
SPECIAL TOOLS
SPECIAL TOOLS
Fig. 4: Funnel - 8195
Courtesy of CHRYSLER LLC
2.0L Diesel Engine* 8.5L 8.0 qts.
*(Includes heater and coolant recovery bottle filled to MAX level.)
DESCRIPTION N.m Ft. Lbs. In. Lbs.
Bolts, A/C Condenser to Radiator 5 - 44
Bolt, Automatic Belt Tensioner Pulley - Gas Engine 24 18 -
Bolt Automatic Belt Tension Assembly 54 40 -
Bolts, Charge Air Cooler to Radiator (Turbo Equipped) 5 - 44
Bolt, Coolant Recovery Bottle 4 - 35
Bolts, Coolant Adapter 18 13 -
Bolts, Inlet housing to coolant adapter 11 8 97
Screw, bypass valve to radiator 5 - 44
Screw, bypass tube to EGR Cooler 10 7 89
Screw, transmission cooler to radiator 5 - 44
Engine Coolant Temperature Sensor - 19 14 -
Pivot Bolt, Generator Mounting 54 40 -
Locking Nut, Generator Mounting 54 40 -
Screws, Transmission Cooler to Radiator 8 - 71
Bolts, Water Pump to Engine Block 24 18 -
EGR Cooler to exhaust manifold tube nuts 20 15 -
EGR Cooler to exhaust manifold tube bolts 20 15 -
EGR to EGR valve tube bolts 20 15 -
Bolts, Water Pump Inlet Tube to water pump housing - Gas
Engine
24 18 -
Bolts, Water Pump to Water Pump Adapter - Gas Engine 22 16 -
Bolts, Water Pump Pulley to Water Pump - Gas Engine 9 - 80
2009 Jeep Patriot Limited
2009 ENGINE Cooling - Compass & Patriot
a
Saturday, September 08, 2012 12:55:36 PM Page 15 © 2006 Mitchell Repair Information Company, LLC.
Fig. 5: Pliers, Hose Clamp - 8495A
Courtesy of CHRYSLER LLC
Fig. 6: Tester, Cooling System - 7700-A
Courtesy of CHRYSLER LLC
Fig. 7: Refractometer - 8286
Courtesy of CHRYSLER LLC
Fig. 8: Disconnect, Trans Cooler Line - 8875A
Courtesy of CHRYSLER LLC
2009 Jeep Patriot Limited
2009 ENGINE Cooling - Compass & Patriot
a
Saturday, September 08, 2012 12:55:36 PM Page 16 © 2006 Mitchell Repair Information Company, LLC.
Fig. 9: DRB III Essential Kit - CH6010A
Courtesy of CHRYSLER LLC
ACCESSORY DRIVE
BELT, SERPENTINE
Description
GAS ENGINE
Fig. 10: Accessory Drive Belt Routing
Courtesy of CHRYSLER LLC
The accessory drive belt (2) is a serpentine type belt that is driven by the crankshaft pulley (6).
The belt drives the A/C compressor, generator (3), power steering pump (1) and water pump (7). Belt tension is
maintained by an automatic belt tensioner (8).
DIESEL ENGINE
2009 Jeep Patriot Limited
2009 ENGINE Cooling - Compass & Patriot
a
Saturday, September 08, 2012 12:55:36 PM Page 17 © 2006 Mitchell Repair Information Company, LLC.
Fig. 11: Accessory Belt Routing - Diesel
Courtesy of CHRYSLER LLC
The accessory drive belt (2) on the 2.2L Diesel engine is of the serpentine style. This belt is used to drive the
generator (1), power steering pump (5), and the A/C compressor (4).
Diagnosis and Testing
ACCESSORY DRIVE BELT
VISUAL DIAGNOSIS
2009 Jeep Patriot Limited
2009 ENGINE Cooling - Compass & Patriot
a
Saturday, September 08, 2012 12:55:36 PM Page 18 © 2006 Mitchell Repair Information Company, LLC.
Fig. 12: Belt Wear Patterns
Courtesy of CHRYSLER LLC
When diagnosing serpentine accessory drive belts, small cracks that run across the ribbed surface of the belt
from rib to rib (1), are considered normal. These are not a reason to replace the belt. However, cracks running
along a rib (not across) (2) are not normal. Any belt with cracks running along a rib must be replaced. Also
replace the belt if it has excessive wear, frayed cords or severe glazing.
Refer to ACCESSORY DRIVE BELT DIAGNOSIS CHART for further belt diagnosis.
NOISE DIAGNOSIS
Noises generated by the accessory drive belt are most noticeable at idle. Before replacing a belt to resolve a
noise condition, inspect all of the accessory drive pulleys for contamination, alignment, glazing, or excessive
end play.
ACCESSORY DRIVE BELT DIAGNOSIS CHART
1 - NORMAL CRACKS ON BELT
2 - NOT NORMAL CRACKS ON BELT
CONDITION POSSIBLE CAUSES CORRECTION
RIB CHUNKING (One or more
ribs has separated from belt body)
1. Foreign objects imbedded in
pulley grooves.
1. Remove foreign objects from
pulley grooves. Replace belt.
2. Installation damage 2. Replace belt
RIB OR BELT WEAR 1. Pulley misaligned 1. Align pulley(s)
2. Abrasive environment 2. Clean pulley(s). Replace belt if
necessary
2009 Jeep Patriot Limited
2009 ENGINE Cooling - Compass & Patriot
a
Saturday, September 08, 2012 12:55:36 PM Page 19 © 2006 Mitchell Repair Information Company, LLC.
3. Rusted pulley(s) 3. Clean rust from pulley(s)
4. Sharp or jagged pulley groove
tips
4. Replace pulley. Inspect belt.
5. Belt rubber deteriorated 5. Replace belt
BELT SLIPS 1. Belt slipping because of
insufficient tension
1. Inspect/Replace tensioner if
necessary
2. Belt or pulley exposed to
substance that has reduced friction
(belt dressing, oil, ethylene glycol)
2. Replace belt and clean pulleys
3. Driven component bearing
failure (seizure)
3. Replace component or bearing
4. Belt glazed or hardened from
heat and excessive slippage
4. Replace belt.
LONGITUDINAL BELT
CRACKING
1. Belt has mistracked from pulley
groove
1. Replace belt
2. Pulley groove tip has worn
away rubber to tensile member
2. Replace belt
GROOVE JUMPING
(Belt does not maintain correct
position on pulley)
1. Incorrect belt tension 1. Inspect/Replace tensioner if
necessary
2. Pulley(s) not within design
tolerance
2. Replace pulley(s)
3. Foreign object(s) in grooves 3. Remove foreign objects from
grooves
4. Pulley misalignment 4. Align component
5. Belt cordline is broken 5. Replace belt
BELT BROKEN
(Note: Identify and correct
problem before new belt is
installed)
1. Incorrect belt tension 1. Replace Inspect/Replace
tensioner if necessary
2. Tensile member damaged
during belt installation
2. Replace belt
3. Severe misalignment 3. Align pulley(s)
4. Bracket, pulley, or bearing
failure
4. Replace defective component
and belt
NOISE (Objectionable squeal,
squeak, or rumble is heard or felt
while drive belt is in operation)
1. Incorrect belt tension 1. Inspect/Replace tensioner if
necessary
2. Bearing noise 2. Locate and repair
3. Belt misalignment 3. Align belt/pulley(s)
4. Belt to pulley mismatch 4. Install correct belt
5. Driven component induced
vibration
5. Locate defective driven
component and repair
6. System resonant frequency
induced vibration
6. Vary belt tension within
specifications
TENSION SHEETING FABRIC
FAILURE
(Woven fabric on outside,
1. Tension sheeting contacting
stationary object
1. Correct rubbing condition
2. Excessive heat causing woven 2. Replace belt
2009 Jeep Patriot Limited
2009 ENGINE Cooling - Compass & Patriot
a
Saturday, September 08, 2012 12:55:36 PM Page 20 © 2006 Mitchell Repair Information Company, LLC.
Removal
GAS ENGINE
Fig. 13: Accessory Drive Belt Routing
Courtesy of CHRYSLER LLC
1. Using a wrench, rotate accessory drive belt tensioner (8) counterclockwise until accessory drive belt (2)
can be removed from pulleys (5 and 9).
2. Remove accessory drive belt (2).
DIESEL
circumference of belt has cracked
or separated from body of belt)
fabric to age
3. Tension sheeting splice has
fractured
3. Replace belt
CORD EDGE FAILURE
(Tensile member exposed at edges
of belt or separated from belt
body)
1. Incorrect belt tension 1. Inspect/Replace tensioner if
necessary
2. Belt contacting stationary object 2. Replace belt
3. Pulley(s) out of tolerance 3. Replace pulley
4. Insufficient adhesion between
tensile member and rubber matrix
4. Replace belt
2009 Jeep Patriot Limited
2009 ENGINE Cooling - Compass & Patriot
a
Saturday, September 08, 2012 12:55:36 PM Page 21 © 2006 Mitchell Repair Information Company, LLC.
Fig. 14: Accessory Belt Routing - Diesel
Courtesy of CHRYSLER LLC
1. Raise vehicle on hoist.
2. Remove belt splash shield.
3. Using a wrench, rotate belt tensioner (8) clockwise until belt (6) can be removed from power steering
pump pulley (4). Gently, release spring tension on tensioner (8).
4. Remove accessory drive belt (2).
Cleaning
CLEANING
Clean all foreign debris from belt pulley grooves. The belt pulleys must be free of oil, grease, and coolants
before installing the drive belt.
Installation
GAS ENGINE
2009 Jeep Patriot Limited
2009 ENGINE Cooling - Compass & Patriot
a
Saturday, September 08, 2012 12:55:36 PM Page 22 © 2006 Mitchell Repair Information Company, LLC.
Fig. 15: Accessory Drive Belt Routing
Courtesy of CHRYSLER LLC
1. Install the accessory drive belt (2) around all the pulleys except for the generator pulley (3).
2. Using a wrench, rotate accessory drive belt tensioner (8) counterclockwise until accessory drive belt (2)
can be installed on the generator pulley (3). Release spring tension onto accessory drive belt (2).
DIESEL
NOTE: When installing drive belt on the pulleys, make sure that belt is properly routed
and all V-grooves make proper contact with pulley grooves.
2009 Jeep Patriot Limited
2009 ENGINE Cooling - Compass & Patriot
a
Saturday, September 08, 2012 12:55:36 PM Page 23 © 2006 Mitchell Repair Information Company, LLC.
Fig. 16: Accessory Belt Routing - Diesel
Courtesy of CHRYSLER LLC
1. Install belt over all pulleys except for the power steering pump pulley (5). See Removal .
2. Using a wrench, rotate belt tensioner (8) clockwise until belt can be installed onto power steering pump
pulley (5). Release spring tension onto belt.
3. Install belt splash shield. See Removal .
4. Lower vehicle from hoist.
PULLEY, IDLER
Removal
REMOVAL
NOTE: When installing accessory drive belt, be sure belt is routed around all
accessories correctly.
2009 Jeep Patriot Limited
2009 ENGINE Cooling - Compass & Patriot
a
Saturday, September 08, 2012 12:55:36 PM Page 24 © 2006 Mitchell Repair Information Company, LLC.
Fig. 17: Accessory Drive Belt Routing
Courtesy of CHRYSLER LLC
1. Raise vehicle on hoist.
2. Remove belt splash shield.
3. Remove accessory drive belt (2). See Removal .
4. Remove idler pulley mounting bolt. Remove idler pulley (5 or 9).
Installation
INSTALLATION
Fig. 18: Accessory Drive Belt Routing
2009 Jeep Patriot Limited
2009 ENGINE Cooling - Compass & Patriot
a
Saturday, September 08, 2012 12:55:36 PM Page 25 © 2006 Mitchell Repair Information Company, LLC.
Courtesy of CHRYSLER LLC
1. Position pulley (5 or 9) in mounting position. Install idler pulley mounting bolt. Tighten bolt to 48 N.m
(35 ft. lbs.).
2. Install accessory drive belt (2). See Installation .
3. Install belt splash shield.
4. Lower vehicle.
TENSIONER, BELT
Description
DESCRIPTION
The automatic belt tensioner maintains proper tension on the accessory drive belt. The tensioner pulley can be
serviced separately.
Removal
GAS ENGINE
Fig. 19: Splash Shield
Courtesy of CHRYSLER LLC
2009 Jeep Patriot Limited
2009 ENGINE Cooling - Compass & Patriot
a
Saturday, September 08, 2012 12:55:36 PM Page 26 © 2006 Mitchell Repair Information Company, LLC.
1. Raise vehicle on hoist.
2. Remove belt splash shield (3).
Fig. 20: Accessory Drive Belt Routing
Courtesy of CHRYSLER LLC
3. Remove accessory drive belt. See Removal .
4. Remove accessory drive belt tensioner mounting bolt. Remove accessory drive belt tensioner (8).
DIESEL ENGINE
1 - POWER STEERING PUMP
2 - ACCESSORY DRIVE BELT
3 - GENERATOR
4 - CRANKSHAFT PULLEY
5 - LOWER IDLER PULLEY
6 - CRANKSHAFT PULLEY
7 - WATER PUMP PULLEY
8 - ACCESSORY DRIVE BELT TENSIONER
9 - UPPER IDLER PULLEY
2009 Jeep Patriot Limited
2009 ENGINE Cooling - Compass & Patriot
a
Saturday, September 08, 2012 12:55:36 PM Page 27 © 2006 Mitchell Repair Information Company, LLC.
Fig. 21: Accessory Belt Routing - Diesel
Courtesy of CHRYSLER LLC
1. Remove accessory drive belt (2). See Removal .
2. Remove tensioner bracket mounting bolts.
3. Remove tensioner assembly from engine.
4. If idler pulley is to be replaced, remove pulley from tensioner.
Installation
GAS ENGINE
2009 Jeep Patriot Limited
2009 ENGINE Cooling - Compass & Patriot
a
Saturday, September 08, 2012 12:55:36 PM Page 28 © 2006 Mitchell Repair Information Company, LLC.
Fig. 22: Accessory Drive Belt Routing
Courtesy of CHRYSLER LLC
1. Position accessory drive belt tensioner (8) and install mounting bolt (1). Tighten bolt (1) to 24 N.m (212
in. lbs.).
2. Install accessory drive belt (2). See Installation .
2009 Jeep Patriot Limited
2009 ENGINE Cooling - Compass & Patriot
a
Saturday, September 08, 2012 12:55:36 PM Page 29 © 2006 Mitchell Repair Information Company, LLC.
Fig. 23: Splash Shield
Courtesy of CHRYSLER LLC
3. Install belt splash shield (3).
4. Lower vehicle.
DIESEL ENGINE
Fig. 24: Accessory Belt Routing - Diesel
Courtesy of CHRYSLER LLC
1. Install tensioner pulley (7) and bolt, if removed. Tighten bolt to 27 N.m (20 ft. lbs.).
2. Install tensioner assembly (8) to engine and tighten bolt to 54 N.m (40 ft. lbs.).
3. Install accessory drive belt (2). See Installation .
ENGINE
BOTTLE, COOLANT RECOVERY
Description
2009 Jeep Patriot Limited
2009 ENGINE Cooling - Compass & Patriot
a
Saturday, September 08, 2012 12:55:36 PM Page 30 © 2006 Mitchell Repair Information Company, LLC.
GAS ENGINE
The coolant recovery system consists of a coolant recovery container mounted to the RH inner wheel housing, a
vent hose for the coolant recovery container, a hose connecting the container to the radiator neck, and a pressure
cap.
Operation
GAS ENGINE
The system works in conjunction with the cooling system pressure cap to utilize thermal expansion and
contraction of the coolant to keep the coolant free of trapped air. The system provides space for expansion and
contraction. Also, the system provides a convenient and safe method for checking and adjusting the coolant
level at atmospheric pressure without removing the pressure cap. It also provides some reserve coolant to
compensate for minor leaks and evaporation or boiling losses.
DIESEL ENGINE
The location of the container allows any air or vapor exceeding the pressure/vent cap rating to escape through
the cap. Coolant flows through the container at all times during engine operation whether the engine is cold or
at normal operating temperature. The coolant container is equipped with a pressure/vent cap. For more
information. See Description
Removal
GAS ENGINE
Fig. 25: Coolant Recovery Container
Courtesy of CHRYSLER LLC
1 - MOUNTING BRACKET
2009 Jeep Patriot Limited
2009 ENGINE Cooling - Compass & Patriot
a
Saturday, September 08, 2012 12:55:36 PM Page 31 © 2006 Mitchell Repair Information Company, LLC.
1. Partially drain cooling system using the draincock only. See Standard Procedure . Drain system below
level of the coolant recovery pressure container.
2. Remove the return hose (5) from the upper radiator hose tee (3).
3. Remove the coolant recovery bottle mount bolt (2) from the mounting bracket (1).
4. Disengage the coolant recovery container (6) from the washer reservoir bottle (4).
5. Remove the coolant recovery container (6).
DIESEL ENGINE
Fig. 26: Coolant Recovery Pressure Container
Courtesy of CHRYSLER LLC
1. Partially drain cooling system using the draincock only. See Standard Procedure . Drain system below
2 - BOLT
3 - RADIATOR HOSE TEE
4 - WASHER RESERVOIR
5 - HOSE
6 - COOLANT RECOVERY CONTAINER
1 - COOLANT RECOVERY PRESSURE CONTAINER
2 - DASH PANEL
3 - COOLANT HOSE
4 - RETAINING BOLTS
5 - RETAINING NUT
2009 Jeep Patriot Limited
2009 ENGINE Cooling - Compass & Patriot
a
Saturday, September 08, 2012 12:55:36 PM Page 32 © 2006 Mitchell Repair Information Company, LLC.
level of the coolant recovery pressure container.
2. Remove engine cover.
3. Disconnect hose and remove oil separator from top of valve cover.
4. Remove fuel filter heater and position aside.
5. Disconnect return hose at coolant recovery container (1).
6. Remove coolant recovery container mounting bolts bolt.
7. Lift container up at disconnect coolant hose from left side of coolant recovery container
8. Remove coolant recovery container from engine compartment.
Installation
GAS ENGINE
Fig. 27: Coolant Recovery Container
Courtesy of CHRYSLER LLC
1. Position the coolant recovery container (6) into the washer fluid reservoir (4).
2. Install the coolant recovery container mounting bolt (2). Tighten the mounting bolt to 4 N.m (35 in. lbs.).
3. Connect the hose (5) at the upper radiator tee (3).
4. Fill coolant recovery container to proper level. See Standard Procedure
1 - MOUNTING BRACKET
2 - BOLT
3 - RADIATOR HOSE TEE
4 - WASHER RESERVOIR
5 - HOSE
6 - COOLANT RECOVERY CONTAINER
2009 Jeep Patriot Limited
2009 ENGINE Cooling - Compass & Patriot
a
Saturday, September 08, 2012 12:55:36 PM Page 33 © 2006 Mitchell Repair Information Company, LLC.
DIESEL ENGINE
Fig. 28: Coolant Recover Container - Diesel
Courtesy of CHRYSLER LLC
1. Lower container (3) into engine compartment and connect coolant hose (2) at bottom of container (3).
2. Position container and install mounting bolt. Tighten to 3 N.m (40 lbs. in.).
3. Connect coolant bypass hose (1) to coolant recovery pressure container (3).
4. Refill cooling system. See Standard Procedure .
CAP, RADIATOR
Description
GAS ENGINE
1 - RETURN HOSE
2 - HOSE
3 - COOLANT CONTAINER
2009 Jeep Patriot Limited
2009 ENGINE Cooling - Compass & Patriot
a
Saturday, September 08, 2012 12:55:36 PM Page 34 © 2006 Mitchell Repair Information Company, LLC.
Fig. 29: Cooling System Pressure Cap
Courtesy of CHRYSLER LLC
The cooling system is equipped with a pressure cap that releases built up pressure, maintaining a range of 97-
124 kPa (14-18 psi).
There is also a vent valve (6) in the center of the cap. This valve also opens when coolant is cooling and
contracting, allowing coolant to return to radiator from coolant recovery container by vacuum through
connecting hose.If valve is stuck shut, the radiator hoses will be collapsed on cool down. Clean the vent
valve to ensure proper sealing when boiling point is reached.
DIESEL ENGINE
1 - OVERFLOW NIPPLE
2 - MAIN SPRING
3 - GASKET RETAINER
4 - STAINLESS-STEEL SWIVEL TOP
5 - RUBBER SEALS
6 - VENT VALVE
7 - RADIATOR
8 - FILLER NECK
2009 Jeep Patriot Limited
2009 ENGINE Cooling - Compass & Patriot
a
Saturday, September 08, 2012 12:55:36 PM Page 35 © 2006 Mitchell Repair Information Company, LLC.
Fig. 30: Radiator Pressure Cap
Courtesy of CHRYSLER LLC
All vehicles are equipped with a pressure cap. This cap releases pressure at some point within approximately
110 kPa (16 psi). The pressure relief point (in pounds) is engraved on top of the cap
The cooling system will operate at pressures slightly above atmospheric pressure. This results in a higher
coolant boiling point allowing increased radiator cooling capacity. The cap contains a spring-loaded pressure
relief valve. This valve opens when system pressure reaches the release range of approximately 110 kPa (16
psi).
A rubber gasket seals the radiator filler neck. This is done to maintain vacuum during coolant cool-down and to
prevent leakage when system is under pressure.
Operation
1 - NECK SEAL
2 - VACUUM VENT
3 - PRESSURE RATING
4 - PRESSURE VALVE
2009 Jeep Patriot Limited
2009 ENGINE Cooling - Compass & Patriot
a
Saturday, September 08, 2012 12:55:36 PM Page 36 © 2006 Mitchell Repair Information Company, LLC.
GAS ENGINE
Fig. 31: Radiator Pressure Cap
Courtesy of CHRYSLER LLC
The pressure cap allows the cooling system to operate at higher than atmospheric pressure. The higher pressure
raises the coolant boiling point; this allows increased radiator cooling capacity.
The secondary gasket in the cap seals the filler neck and the primary gasket seals the cooling system so that
vacuum can be maintained, allowing coolant to be drawn back into the radiator from the reserve container.
A vent valve in the center of the cap will remain shut as long as the cooling system is pressurized. As the
coolant cools, it contracts and creates a vacuum in cooling system. This causes the vacuum valve to open and
coolant in reserve/overflow tank to be drawn through connecting hose into radiator. If the vacuum valve is stuck
shut, or overflow hose is kinked, radiator hoses will collapse on cool-down.
1 - NECK SEAL
2 - VACUUM VENT
3 - PRESSURE RATING
4 - PRESSURE VALVE
2009 Jeep Patriot Limited
2009 ENGINE Cooling - Compass & Patriot
a
Saturday, September 08, 2012 12:55:36 PM Page 37 © 2006 Mitchell Repair Information Company, LLC.
DIESEL ENGINE
A vent valve in the center of the cap will remain shut as long as the cooling system is pressurized. As the
coolant cools, it contracts and creates a vacuum in cooling system. This causes the vacuum valve to open and
coolant in reserve/overflow tank to be drawn through connecting hose into radiator. If the vacuum valve is stuck
shut, or overflow hose is kinked, radiator hoses will collapse on cool-down.
Diagnosis and Testing
PRESSURE TESTING
Fig. 32: Radiator Cap Pressure Testing
Courtesy of CHRYSLER LLC
Dip the pressure cap in water. Clean any deposits off the vent valve or its seat and apply cap to end of the
Pressure Cap Test Adaptor that is included with the Cooling System Tester 7700. Working the plunger, bring
the pressure to 104 kPa (15 psi) on the gauge. If the pressure cap fails to hold pressure of at least 97 kPa (14
psi), replace the pressure cap.
If the pressure cap tests properly while positioned on Cooling System Tester 7700, but will not hold pressure or
vacuum when positioned on the filler neck. Inspect the filler neck and cap top gasket for irregularities that may
prevent the cap from sealing properly.
PRESSURE RELIEF TESTING
1 - PRESSURE CAP
2 - PRESSURE TESTER
CAUTION: The Cooling System Tester Tool is very sensitive to small air leaks that will
not cause cooling system problems. A pressure cap that does not have a
history of coolant loss should not be replaced just because it leaks slowly
when tested with this tool. Add water to the tool. Turn tool upside down
and recheck pressure cap to confirm that cap is bad.
2009 Jeep Patriot Limited
2009 ENGINE Cooling - Compass & Patriot
a
Saturday, September 08, 2012 12:55:36 PM Page 38 © 2006 Mitchell Repair Information Company, LLC.
The pressure cap upper gasket to filler neck seal can be checked by removing the overflow hose at the radiator
filler neck overflow nipple. Attach the radiator pressure tester to the filler neck overflow nipple, and pump air
into the system. The pressure cap upper gasket should relieve pressure at 69-124 kPa (10-18 psi), and hold
pressure at 55 kPa (8 psi) minimum.
There is no need to remove the pressure cap at any time except for the following purposes:
Check and adjust coolant freeze point
Refill system with new coolant
Conducting service procedures
Checking for leaks
Cleaning
CLEANING
Use only a mild soap to clean the pressure cap.
Inspection
INSPECTION
WARNING: If vehicle has been run recently, wait 15 minutes before removing cap.
Place a shop towel over the cap, and without pushing down, rotate it
counterclockwise to the first stop. Allow fluids to escape through the
overflow tube. When the system stops pushing coolant and steam into
the coolant recovery container and pressure drops, push down on the cap
and remove it completely. Squeezing the radiator inlet hose with a shop
towel (to check pressure) before and after turning to the first stop is
recommended.
WARNING: The warning words "do not open hot" on the pressure cap is a safety
precaution. When hot, the cooling system builds up pressure. To prevent
scalding or other injury, the pressure cap should not be removed while
the system is hot and/or under pressure.
2009 Jeep Patriot Limited
2009 ENGINE Cooling - Compass & Patriot
a
Saturday, September 08, 2012 12:55:36 PM Page 39 © 2006 Mitchell Repair Information Company, LLC.
Fig. 33: Cooling System Pressure Cap
Courtesy of CHRYSLER LLC
Hold the cap in your hand, top side up . The vent valve (6) at the bottom of the cap should not open. If the
valve opens, replace the cap. If the rubber seal (5) has swollen, preventing the valve from opening, replace the
cap.
Hold the cleaned cap in your hand, upside down. If any light can be seen between vent valve (6) and the rubber
seal (5), replace the cap.
A replacement cap must be of the type designed for a full pressure coolant systems. This design ensures coolant
return to the radiator.
COOLANT
Description
DESCRIPTION
GAS ENGINES
1 - OVERFLOW NIPPLE
2 - MAIN SPRING
3 - GASKET RETAINER
4 - STAINLESS-STEEL SWIVEL TOP
5 - RUBBER SEALS
6 - VENT VALVE
7 - THERMOSTAT HOUSING/ENGINE OUTLET CONNECTOR
8 - FILLER NECK
WARNING: Antifreeze is an ethylene glycol based coolant and is harmful if swallowed
or inhaled. If swallowed, drink two glasses of water and induce vomiting.
If inhaled, move to fresh air area. Seek medical attention immediately. Do
not store in open or unmarked containers. Wash skin and clothing
thoroughly after coming in contact with ethylene glycol. Keep out of reach
of children. Dispose of glycol based coolant properly, contact your
government agency for location of collection center in your area. Do not
open a cooling system when the engine is at operating temperature or hot
under pressure, personal injury can result. Avoid radiator cooling fan
when engine compartment related service is performed, personal injury
can result.
CAUTION: Use of Propylene Glycol based coolants is not recommended, as they
provide less freeze protection and less boiling protection.
2009 Jeep Patriot Limited
2009 ENGINE Cooling - Compass & Patriot
a
Saturday, September 08, 2012 12:55:36 PM Page 40 © 2006 Mitchell Repair Information Company, LLC.
The cooling system is designed around the coolant. The coolant must accept heat from engine metal, in the
cylinder head area near the exhaust valves and engine block. Then coolant carries the heat to the radiator where
the tube/fin radiator can transfer the heat to the air.
The use of aluminum cylinder blocks, cylinder heads, and water pumps requires special corrosion protection.
Mopar® Antifreeze/Coolant, 5 Year/100,000 Mile Formula (MS-9769), or the equivalent ethylene glycol based
coolant with hybrid organic corrosion inhibitors (called HOAT, for Hybrid Organic Additive Technology) is
recommended. This coolant offers the best engine cooling without corrosion when mixed with 50% Ethylene
Glycol and 50% distilled water to obtain a freeze point of -37°C (-35°F). If it loses color or becomes
contaminated, drain, flush, and replace with fresh properly mixed coolant solution.
The green coolant MUST NOT BE MIXED with the orange or magenta coolants. When replacing coolant the
complete system flush must be performed before using the replacement coolant.
DIESEL ENGINE
The cooling system is designed around the coolant. The coolant must accept heat from engine metal, in the
cylinder head area near the exhaust valves and engine block. Then coolant carries the heat to the radiator where
the tube/fin radiator can transfer the heat to the air.
The use of aluminum cylinder blocks, cylinder heads, and water pumps requires special corrosion protection.
Glysantin G 30-91 Antifreeze/Coolant, 5 Year/150,000 Mile Formula (ASTM D3306), or the equivalent
ethylene glycol based coolant. This coolant offers the best engine cooling without corrosion when mixed with
50% coolant and 50% distilled water to obtain a freeze point of -36°C (-34°F). It is dyed purple to distinguish
it's unique chemistry from traditional green and yellow silicate coolants. If it loses color or becomes
contaminated, drain, flush, and replace with fresh properly mixed coolant solution.
The purple coolant MUST NOT BE MIXED with the orange, green or magenta coolants. When replacing
coolant the complete system flush must be performed before using the replacement coolant.
Operation
CAUTION: Mopar® Antifreeze/Coolant, 5 Year/100,000 Mile Formula (MS-9769) may
not be mixed with any other type of antifreeze. Doing so will reduce the
corrosion protection and may result in premature water pump seal failure.
If non-HOAT coolant is introduced into the cooling system in an
emergency, it should be replaced with the specified coolant as soon as
possible.
CAUTION: Use of Propylene Glycol based coolants is not recommended, as they
provide less freeze protection and less boiling protection.
CAUTION: Glysantin G 30-91 Antifreeze/Coolant, 5 Year/150,00 Mile Formula (ASTM
D3306) may not be mixed with any other type of antifreeze. Doing so will
reduce the corrosion protection and may result in premature water pump
seal failure.
2009 Jeep Patriot Limited
2009 ENGINE Cooling - Compass & Patriot
a
Saturday, September 08, 2012 12:55:36 PM Page 41 © 2006 Mitchell Repair Information Company, LLC.
COOLANT
Coolant flows through the engine block absorbing the heat from the engine, then flows to the radiator where the
cooling fins in the radiator transfers the heat from the coolant to the atmosphere. During cold weather the
ethylene-glycol or coolant prevents water present in the cooling system from freezing within temperatures
indicated by mixture ratio of coolant to water.
Diagnosis and Testing
COOLANT CONCENTRATION TESTING
Coolant concentration should be checked when any additional coolant was added to system or after a coolant
drain, flush and refill. The coolant mixture offers optimum engine cooling and protection against corrosion
when mixed to a freeze point of -37°C (-34°F) to -46°C (-50°F). The use of a hydrometer or a refractometer can
be used to test coolant concentration.
A hydrometer will test the amount of glycol in a mixture by measuring the specific gravity of the mixture. The
higher the concentration of ethylene glycol, the larger the number of balls that will float, and higher the freeze
protection (up to a maximum of 60% by volume glycol).
A refractometer Tool 8286. See Special Tools will test the amount of glycol in a coolant mixture by measuring
the amount a beam of light bends as it passes through the fluid.
Some coolant manufactures use other types of glycols into their coolant formulations. Propylene glycol is the
most common new coolant. However, propylene glycol based coolants do not provide the same freezing
protection and corrosion protection and is not recommended.
COOLER, EGR
Description
DESCRIPTION
CAUTION: Do not mix types of coolant corrosion protection will be severely reduced.
2009 Jeep Patriot Limited
2009 ENGINE Cooling - Compass & Patriot
a
Saturday, September 08, 2012 12:55:36 PM Page 42 © 2006 Mitchell Repair Information Company, LLC.
Fig. 34: EGR Cooler
Courtesy of CHRYSLER LLC
The EGR cooler (7) cools recirculated exhaust gasses to reduce combustion temperature and a greater mass of
exhaust gases can thus be circulated. There is less nitrogen oxides as a result.
The EGR cooler (7) allows the engine and catalytic converter to reach their operating temperature quickly.
Removal
REMOVAL
1 - EGR COOLER TO EGR VALVE TUBE
2 - MOUNTING SCREWS
3 - EGR COOLER MOUNTING SCREW
4 - MOUNTING SCREW
5 - EGR COOLER BODY
6 - EGR COOLER MOUNTING NUT
7 - EGR COOLER
8 - INLET TUBES
9 - VACUUM CONTROL UNIT
10 -EGR COOLER TO EXHAUST MANIFOLD TUBE MOUNTING NUT
11 - EGR COOLER TO EXHAUST MANIFOLD TUBE
12 - MOUNTING SCREW
2009 Jeep Patriot Limited
2009 ENGINE Cooling - Compass & Patriot
a
Saturday, September 08, 2012 12:55:36 PM Page 43 © 2006 Mitchell Repair Information Company, LLC.
Fig. 35: EGR Cooler
Courtesy of CHRYSLER LLC
1. Remove engine cover. Refer to ( 09 - Engine - Removal) .
2. Drain cooling system. See Standard Procedure .
3. Remove EGR cooler coolant hoses (8).
4. Remove EGR cooler to exhaust manifold tube (11).
5. Remove EGR cooler to EGR valve tube (1).
6. Remove EGR cooler mounting nuts (6).
7. Remove EGR cooler (7).
8. Remove the bypass valve mounting screws (3).
9. Separate the bypass valve assembly from the EGR cooler body (5).
Installation
1 - EGR COOLER TO EGR VALVE TUBE
2 - MOUNTING SCREWS
3 - EGR COOLER MOUNTING SCREW
4 - MOUNTING SCREW
5 - EGR COOLER BODY
6 - EGR COOLER MOUNTING NUT
7 - EGR COOLER
8 - INLET TUBES
9 - VACUUM CONTROL UNIT
10 -EGR COOLER TO EXHAUST MANIFOLD TUBE MOUNTING NUT
11 - EGR COOLER TO EXHAUST MANIFOLD TUBE
12 - MOUNTING SCREW
2009 Jeep Patriot Limited
2009 ENGINE Cooling - Compass & Patriot
a
Saturday, September 08, 2012 12:55:36 PM Page 44 © 2006 Mitchell Repair Information Company, LLC.
INSTALLATION
Fig. 36: EGR Cooler
Courtesy of CHRYSLER LLC
1. Using a new gasket, position the bypass valve assembly to the EGR cooler body (5). Tighten screws to 10
N.m (88 in. lbs.).
2. Position EGR cooler (7) and install mounting screws. Tighten to 10 N.m (88 in. lbs.).
3. Install EGR cooler to exhaust manifold tube (11). Tighten bolts to 20 N.m (14 ft. lbs.) and nuts to 20 N.m
(14 ft. lbs.).
4. Install EGR cooler to EGR valve tube (1). Tighten bolts to 20 N.m (14 ft. lbs.).
5. Install coolant hoses.
6. Install vacuum line.
7. Fill cooling system. See Standard Procedure .
1 - EGR COOLER TO EGR VALVE TUBE
2 - MOUNTING SCREWS
3 - EGR COOLER MOUNTING SCREW
4 - MOUNTING SCREW
5 - EGR COOLER BODY
6 - EGR COOLER MOUNTING NUT
7 - EGR COOLER
8 - INLET TUBES
9 - VACUUM CONTROL UNIT
10 -EGR COOLER TO EXHAUST MANIFOLD TUBE MOUNTING NUT
11 - EGR COOLER TO EXHAUST MANIFOLD TUBE
12 - MOUNTING SCREW
2009 Jeep Patriot Limited
2009 ENGINE Cooling - Compass & Patriot
a
Saturday, September 08, 2012 12:55:36 PM Page 45 © 2006 Mitchell Repair Information Company, LLC.
8. Install engine cover. Refer to ( 09 - Engine - Installation) .
DRAINCOCK, RADIATOR
Removal
REMOVAL
Fig. 37: Draincock
Courtesy of CHRYSLER LLC
1. Remove the front passenger side wheel
2. Remove the front passenger side splash shield assembly from the wheelhouse. Refer to
Body/Exterior/SHIELD, Splash - Removal
3. Drain the cooling system. See Standard Procedure .
4. Open the draincock (2) by turning it counterclockwise until it stops.
5. Turn the draincock (2) back (clockwise) 1/8 turn.
6. Pull the draincock (2) from the radiator tank (1).
Installation
1 - RADIATOR TANK
2 - DRAINCOCK
CAUTION: Use of pliers on draincock is not recommended. Damage may occur to
radiator or draincock.
NOTE: It is not necessary to remove draincock during a routine coolant drain.
2009 Jeep Patriot Limited
2009 ENGINE Cooling - Compass & Patriot
a
Saturday, September 08, 2012 12:55:36 PM Page 46 © 2006 Mitchell Repair Information Company, LLC.
INSTALLATION
Fig. 38: Draincock
Courtesy of CHRYSLER LLC
1. Align draincock stem to radiator tank opening.
2. Push draincock (2) into the radiator tank opening.
3. Tighten the draincock (2) by turning clockwise until it stops.
4. Fill the cooling system. See Standard Procedure
5. Install front passenger side splash shield assembly to the wheelhouse area. Refer to
Body/Exterior/SHIELD, Splash - Installation
6. Install the front passenger side wheel
FAN, COOLING
Description
DESCRIPTION
The radiator cooling fans are dual-speed electric motor driven fans. The radiator fan assembly includes two
electric motors, two five blade fans, and a support shroud that is attached to the radiator. The radiator fans are
serviced as an assembly.
Operation
GAS ENGINE
1 - RADIATOR TANK
2 - DRAINCOCK
2009 Jeep Patriot Limited
2009 ENGINE Cooling - Compass & Patriot
a
Saturday, September 08, 2012 12:55:36 PM Page 47 © 2006 Mitchell Repair Information Company, LLC.
Radiator fan operation is controlled by the Totally Integrated Power Module (TIPM), with inputs from the
engine coolant temperature sensor, continuously variable transmission (CVT) oil temperature, and A/C head
pressure. The (TIPM) turns on the fan through either the high or low speed fan relay. The PCM provides a
ground to the relay's control circuit. The fan relays are located in the (TIPM). Refer to the label beneath the
(TIPM) cover for location of fan relays.
If the cooling fan is inoperative or a Diagnostic Trouble Code (DTC) related to fan control has been set. Refer
to DTC-Based Diagnostics/MODULE, Powertrain Control (PCM) - Diagnosis and Testing for diagnostic
procedures.
Removal
REMOVAL
Fig. 39: Radiator Fan Assembly
Courtesy of CHRYSLER LLC
1. Disconnect negative cable from battery.
2. Drain cooling system below upper radiator hose level. See Standard Procedure .
3. Remove radiator core support.
4. Disconnect upper radiator hose from radiator.
1 - RADIATOR FAN ELECTRICAL CONNECTOR
2 - BRACKET
3 - RADIATOR
WARNING: Do not open the radiator draincock with the system hot and under
pressure because serious burns from coolant can occur.
2009 Jeep Patriot Limited
2009 ENGINE Cooling - Compass & Patriot
a
Saturday, September 08, 2012 12:55:36 PM Page 48 © 2006 Mitchell Repair Information Company, LLC.
5. Remove wiring harness bracket (2).
6. Disconnect radiator fan electrical connector (1).
7. Remove the radiator fan assembly screws.
8. Detach radiator fan assembly from retaining clips.
9. Remove radiator fan by lifting up from the engine compartment.
Installation
INSTALLATION
Fig. 40: Radiator Fan Assembly
Courtesy of CHRYSLER LLC
1. Install the radiator fan assembly into J-clips.
2. Install radiator fan fasteners. Tighten all radiator fan retaining screws to 6 N.m (55 in. lbs.).
3. Install radiator crossmember. Refer to Body/Exterior/PANEL, Closure - Installation .
4. Install wiring harness bracket (2).
5. Connect radiator fan electrical connector (1).
6. Install upper radiator hose.
CAUTION: Care should be taken not to damage the radiator cooling fins and
tubes during fan removal.
1 - RADIATOR FAN ELECTRICAL CONNECTOR
2 - BRACKET
3 - RADIATOR
2009 Jeep Patriot Limited
2009 ENGINE Cooling - Compass & Patriot
a
Saturday, September 08, 2012 12:55:36 PM Page 49 © 2006 Mitchell Repair Information Company, LLC.
7. Connect negative battery cable.
8. Fill cooling system. See Standard Procedure .
HEATER, ENGINE BLOCK
Description
DESCRIPTION
Fig. 41: Engine Block Heater
Courtesy of CHRYSLER LLC
The cartridge type block heater is mounted in a bore at the rear of the block under the coolant adapter. The
block heater does not directly contact coolant. It heads the aluminum block.
The heater is powered by 110 Volt AC through a power cord and connector.
Operation
OPERATION
The block heater element is inserted into a bore in the engine block. When electrical power (110 volt A.C.) is
applied to the element, it creates heat. This heat is transferred to the aluminum engine block. This provides
easier engine starting and faster warm-up when vehicle is operated in areas having extremely low temperatures.
Diagnosis and Testing
1 - The Cartridge Type Block Heater
2 - Coolant Adapter
2009 Jeep Patriot Limited
2009 ENGINE Cooling - Compass & Patriot
a
Saturday, September 08, 2012 12:55:36 PM Page 50 © 2006 Mitchell Repair Information Company, LLC.
ENGINE BLOCK HEATER TESTING
If unit does not operate, trouble can be in either the power cord or the heater element. Test power cord for
continuity with a 110-volt voltmeter or 110-volt test light; test heater element continuity with an ohmmeter or
12-volt test light.
Removal
REMOVAL
Fig. 42: Air Cleaner Inlet
Courtesy of CHRYSLER LLC
1. Remove engine cover.
2. Remove air cleaner inlet.
2009 Jeep Patriot Limited
2009 ENGINE Cooling - Compass & Patriot
a
Saturday, September 08, 2012 12:55:36 PM Page 51 © 2006 Mitchell Repair Information Company, LLC.
Fig. 43: Block Heater 2.0/2.4L Engine
Courtesy of CHRYSLER LLC
3. Detach power cord plug from heater.
4. Remove retaining clip (1). Remove block heater assembly (2).
Installation
INSTALLATION
1. Thoroughly clean bore hole.
2. Insert block heater assembly into bore.
3. Install retaining clip.
4. Connect power cord to block heater.
1 - RETAINING CLIP
2 - BLOCK HEATER
2009 Jeep Patriot Limited
2009 ENGINE Cooling - Compass & Patriot
a
Saturday, September 08, 2012 12:55:36 PM Page 52 © 2006 Mitchell Repair Information Company, LLC.
Fig. 44: Air Cleaner Inlet
Courtesy of CHRYSLER LLC
5. Install air intake inlet.
6. Install engine cover.
PUMP, WATER
Description
GAS ENGINE
Fig. 45: Water Pump - Gas Engine
2009 Jeep Patriot Limited
2009 ENGINE Cooling - Compass & Patriot
a
Saturday, September 08, 2012 12:55:36 PM Page 53 © 2006 Mitchell Repair Information Company, LLC.
Courtesy of CHRYSLER LLC
The water pump (3) on the world engine is attached to the water pump adapter on the front of the cylinder
block.
The water pump is driven by the accessory drive belt. The water pump is connected to the water plenum by the
return tube.
Turbocharger equipped engines use a smaller diameter water pump pulley then the naturally asperated engine.
This allows increased coolant flow without pump cavitation.
Diagnosis and Testing
WATER PUMP
A quick flow test to determine if the water pump is working effectively is to check heater system for proper
operation. A defective pump will not provide an adequate flow of heated coolant through the system.
Another flow test to help determine water pump operation is as follows:
1. Remove cooling system pressure cap.
2. Remove a small amount of coolant from the system.
3. Start the engine and warm up until thermostat opens.
4. With the thermostat open and coolant level low, visually inspect for coolant flow. If flow is present, the
water pump is pumping coolant through the system.
Standard Procedure
COOLANT AIR EVACUATION
1 - ACCESSORY DRIVE BELT
2 - WATER PUMP PULLEY
3 - WATER PUMP
WARNING: DO NOT REMOVE THE COOLING SYSTEM PRESSURE CAP WITH THE
SYSTEM HOT AND UNDER PRESSURE BECAUSE SERIOUS BURNS
FROM COOLANT CAN OCCUR.
2009 Jeep Patriot Limited
2009 ENGINE Cooling - Compass & Patriot
a
Saturday, September 08, 2012 12:55:36 PM Page 54 © 2006 Mitchell Repair Information Company, LLC.
Fig. 46: Coolant Air Evacuation
Courtesy of CHRYSLER LLC
Evacuating or purging air from the cooling system involves the use of a pressurized air operated vacuum
generator. The vacuum created allows for a quick and complete coolant refilling while removing any airlocks
present in the system components.
NOTE: To avoid damage to the cooling system, ensure that no component would be
susceptible to damage when a vacuum is drawn on the system.
WARNING: ANTIFREEZE IS AN ETHYLENE GLYCOL BASE COOLANT AND IS
HARMFUL IF SWALLOWED OR INHALED. IF SWALLOWED, DRINK TWO
GLASSES OF WATER AND INDUCE VOMITING. IF INHALED, MOVE TO
FRESH AIR AREA. SEEK MEDICAL ATTENTION IMMEDIATELY. DO NOT
STORE IN OPEN OR UNMARKED CONTAINERS. WASH SKIN AND
CLOTHING THOROUGHLY AFTER COMING IN CONTACT WITH
ETHYLENE GLYCOL. KEEP OUT OF REACH OF CHILDREN. DISPOSE OF
GLYCOL BASED COOLANT PROPERLY. CONTACT YOUR DEALER OR
GOVERNMENT AGENCY FOR LOCATION OF COLLECTION CENTER IN
YOUR AREA. DO NOT OPEN A COOLING SYSTEM WHEN THE ENGINE IS
AT OPERATING TEMPERATURE OR HOT UNDER PRESSURE;
PERSONAL INJURY CAN RESULT. AVOID RADIATOR COOLING FAN
WHEN ENGINE COMPARTMENT RELATED SERVICE IS PERFORMED;
PERSONAL INJURY CAN RESULT.
WARNING: WEAR APPROPRIATE EYE AND HAND PROTECTION WHEN
PERFORMING THIS PROCEDURE.
NOTE: The service area where this procedure is performed should have a minimum
shop air requirement of 80 PSI (5.5 bar) and should be equipped with an air
2009 Jeep Patriot Limited
2009 ENGINE Cooling - Compass & Patriot
a
Saturday, September 08, 2012 12:55:36 PM Page 55 © 2006 Mitchell Repair Information Company, LLC.
1. Refer to the Chrysler Pentastar Service Equipment (Chrysler PSE) Coolant Refiller #85-15-0650 or
equivalent tool's operating manual for specific assembly steps.
2. Choose an appropriate adapter cone that will fit the vehicle's radiator filler neck or reservoir tank.
3. Attach the adapter cone (2) to the vacuum gauge (1).
Fig. 47: Vacuum Generator/Venturi Ball Valve
Courtesy of CHRYSLER LLC
4. Make sure the vacuum generator/venturi ball valve (3) is closed and attach an airline hose (2) (minimum
shop air requirement of 80 PSI/5.5 bar) to the vacuum generator/venturi (1).
5. Position the adaptor cone/vacuum gauge assembly into the radiator filler neck or reservoir tank. Ensure
that the adapter cone is sealed properly.
dryer system.
NOTE: For best results, the radiator should be empty. The vehicle's heater control
should be set to the heat position (ignition may need to be turned to the on
position but do not start the motor).
2009 Jeep Patriot Limited
2009 ENGINE Cooling - Compass & Patriot
a
Saturday, September 08, 2012 12:55:36 PM Page 56 © 2006 Mitchell Repair Information Company, LLC.
Fig. 48: Adaptor Cone/Vacuum Gauge Assembly
Courtesy of CHRYSLER LLC
6. Connect the vacuum generator/venturi (2) to the positioned adaptor cone/vacuum gauge assembly (1).
7. Open the vacuum generator/venturi ball valve.
8. Let the system run until the vacuum gauge shows a good vacuum through the cooling system. Refer to the
tool's operating manual for appropriate pressure readings.
9. Close the vacuum generator/venturi ball valve.
NOTE: Do not bump or move the assembly as it may result in loss of vacuum.
Some radiator overflow hoses may need to be clamped off to obtain
vacuum.
NOTE: If a strong vacuum is being created in the system, it is normal to see the
radiator hoses to collapse.
2009 Jeep Patriot Limited
2009 ENGINE Cooling - Compass & Patriot
a
Saturday, September 08, 2012 12:55:36 PM Page 57 © 2006 Mitchell Repair Information Company, LLC.
Fig. 49: Vacuum Generator/Venturi Ball Valve
Courtesy of CHRYSLER LLC
10. Disconnect the vacuum generator/venturi and airline from the adaptor cone/vacuum gauge assembly.
11. Wait approximately 20 seconds, if the pressure readings do not move, the system has no leaks. If the
pressure readings move, a leak could be present in the system and the cooling system should be checked
for leaks and the procedure should be repeated.
12. Place the tool's suction hose into the coolant's container.
13. Connect the tool's suction hose (1) to the adaptor cone/vacuum gauge assembly (2).
NOTE: Ensure there is a sufficient amount of coolant, mixed to the required
strength/protection level available for use. For best results and to assist
the refilling procedure, place the coolant container at the same height as
the radiator filler neck. Always draw more coolant than required. If the
coolant level is too low, it will pull air into the cooling system which could
result in airlocks in the system.
2009 Jeep Patriot Limited
2009 ENGINE Cooling - Compass & Patriot
a
Saturday, September 08, 2012 12:55:36 PM Page 58 © 2006 Mitchell Repair Information Company, LLC.
Fig. 50: Suction Hose's Ball Valve
Courtesy of CHRYSLER LLC
14. Open the suction hose's ball valve to begin refilling the cooling system.
15. When the vacuum gauge reads zero, the system is filled.
16. Close the suction hose's ball valve and remove the suction hose from the adaptor cone/vacuum gauge
assembly.
17. Remove the adaptor cone/vacuum gauge assembly from the radiator filler neck or reservoir tank.
18. With heater control unit in the HEAT position, operate engine with container cap in place.
19. After engine has reached normal operating temperature, shut engine off and allow it to cool. When engine
is cooling down, coolant will be drawn into the radiator from the pressure container.
20. Add coolant to the recovery bottle/container as necessary. Only add coolant to the container when the
engine is cold. Coolant level in a warm engine will be higher due to thermal expansion. Add
necessary coolant to raise container level to the COLD MINIMUM mark after each cool down period.
21. Once the appropriate coolant level is achieved, attach the radiator cap or reservoir tank cap.
Removal
GAS ENGINE
NOTE: On some remote pressurized tanks, it is recommended to stop filling when
the proper level is reached.
2009 Jeep Patriot Limited
2009 ENGINE Cooling - Compass & Patriot
a
Saturday, September 08, 2012 12:55:36 PM Page 59 © 2006 Mitchell Repair Information Company, LLC.
Fig. 51: Water Pump - Gas Engine
Courtesy of CHRYSLER LLC
1. Remove the accessory drive belt. See Removal .
2. Raise vehicle. Refer to Vehicle Quick Reference/Hoisting - Standard Procedure .
3. Remove accessory drive belt splash shield.
4. Drain cooling system. See Standard Procedure .
5. Remove screws attaching water pump pulley (1). Remove pulley (1).
6. Remove water pump mounting bolts (2).
7. Remove water pump (3).
DIESEL
1 - WATER PUMP
2 - MOUNTING BOLT
3 - WATER INLET TUBE NUTS
4 - INLET WATER TUBE
2009 Jeep Patriot Limited
2009 ENGINE Cooling - Compass & Patriot
a
Saturday, September 08, 2012 12:55:36 PM Page 60 © 2006 Mitchell Repair Information Company, LLC.
Fig. 52: Water Pump - 2.0L Diesel
Courtesy of CHRYSLER LLC
1. Remove timing chain. Refer to Engine/Valve Timing/BELT, Timing - Removal .
2. Remove water pump mounting bolts (1).
3. Remove water pump (2).
4. Remove O-ring from water pump.
Inspection
WATER PUMP
Replace water pump body assembly if it has any of these defects:
Cracks or damage on the body.
Coolant leaks from the shaft seal, evident by wet coolant traces on the pump body.
Loose or rough turning bearing.
Impeller rubs either the pump body or the engine block.
Impeller loose or damaged.
Sprocket or sprocket flange loose or damaged.
Disassembly
WATER PUMP - GAS ENGINE
1 - BOLT
2 - WATER PUMP
2009 Jeep Patriot Limited
2009 ENGINE Cooling - Compass & Patriot
a
Saturday, September 08, 2012 12:55:36 PM Page 61 © 2006 Mitchell Repair Information Company, LLC.
Fig. 53: Water Pump Pulley
Courtesy of CHRYSLER LLC
1. Remove the water pump assembly from the vehicle. See Removal
2. Discard the water pump outlet gasket (7).
3. Remove the three bolts (1) attaching the water pump pulley (2) to the water pump (4).
4. Remove the water pump pulley (2).
5. Remove the five bolts (3) attaching the water pump (4) to the water pump adapter (6).
6. Remove and discard the gasket (8).
7. Remove the water pump (4) and inspect carefully for any damage. See Inspection
Assembly
WATER PUMP - GAS ENGINE
2009 Jeep Patriot Limited
2009 ENGINE Cooling - Compass & Patriot
a
Saturday, September 08, 2012 12:55:36 PM Page 62 © 2006 Mitchell Repair Information Company, LLC.
Fig. 54: Water Pump Pulley
Courtesy of CHRYSLER LLC
1. Thoroughly clean all gasket mating surfaces before assembling.
2. Inspect water pump and components for any damage. See Inspection
3. Using bolts (3), install the water pump (4) and gasket (8) to the water pump adapter (6). Tighten the bolts
(3) to 22 N-m (16 lbs. ft.)
4. Using bolts (1), install the water pump pulley (2) to the water pump (4). Tighten the bolts (1) to 9 N-m
(80 lbs. in.)
5. Using bolts (5), install the water pump assembly and gasket to the engine block. Tighten the bolts to 24
N.m (18 lbs. ft.). See Cooling/Engine/PUMP, Water - Installation
6. Start the engine and check for leaks. See Diagnosis and Testing
Installation
GAS ENGINE
2009 Jeep Patriot Limited
2009 ENGINE Cooling - Compass & Patriot
a
Saturday, September 08, 2012 12:55:36 PM Page 63 © 2006 Mitchell Repair Information Company, LLC.
Fig. 55: Water Pump - Gas Engine
Courtesy of CHRYSLER LLC
1. Position water pump assembly (1) and gasket onto cylinder block.
2. Position water inlet tube (4) and gasket onto water pump (1).
3. Install mounting bolts (2). Tighten bolts to 24 N.m (18 ft. lbs.).
4. Install drive belt splash shield.
5. Lower vehicle.
6. Install accessory drive belt. See Installation .
7. Evacuate air and refill cooling system. See Standard Procedure
8. Check cooling system for leaks. See Diagnosis and Testing
DIESEL
1 - WATER PUMP
2 - MOUNTING BOLT
3 - WATER INLET TUBE NUTS
4 - INLET WATER TUBE
2009 Jeep Patriot Limited
2009 ENGINE Cooling - Compass & Patriot
a
Saturday, September 08, 2012 12:55:36 PM Page 64 © 2006 Mitchell Repair Information Company, LLC.
Fig. 56: Water Pump - 2.0L Diesel
Courtesy of CHRYSLER LLC
1. Clean the O-ring mating surfaces on water pump (2) and front of timing chain cover.
2. Install O-ring onto water pump (2).
3. Apply a small amount of petroleum jelly to lubricate O-ring.
4. Install water pump and mounting bolts. Tighten bolts (1) to mounting bolts to 24 N.m (18 ft. lbs.).
5. Install timing belt. Refer to Engine/Valve Timing/BELT, Timing - Installation .
6. Evacuate air and refill cooling system. See Standard Procedure
7. Check cooling system for leaks. See Diagnosis and Testing
RADIATOR, ENGINE COOLING
Description
DESCRIPTION
The radiator is a cross-flow type (horizontal tubes) with design features that provide greater strength, as well as
sufficient heat transfer capabilities to keep the engine coolant within operating temperatures.
The radiator has an aluminum core with plastic tanks. Although stronger than brass, plastic tanks are subject to
damage by impact. Always handle radiator with care.
Operation
OPERATION
1 - BOLT
2 - WATER PUMP
2009 Jeep Patriot Limited
2009 ENGINE Cooling - Compass & Patriot
a
Saturday, September 08, 2012 12:55:36 PM Page 65 © 2006 Mitchell Repair Information Company, LLC.
The radiator functions as a heat exchanger, using air flow across the exterior of the radiator tubes. This heat is
then transferred from the coolant and into the passing air.
Removal
GAS ENGINE
Fig. 57: Cooling Module Assembly
Courtesy of CHRYSLER LLC
1. Drain cooling system. See Standard Procedure .
2. Remove radiator fan. See Removal .
3. Disconnect lower radiator hose.
4. Remove fasteners attaching AC condenser to radiator. Reposition AC condenser.
5. Remove radiator assembly by lifting it up from the engine compartment. Care should be taken not to
damage the cooling fins and tubes during removal.
DIESEL
1 - UPPER RADIATOR CLOSURE PANEL
2 - COOLING MODULE
3 - RADIATOR FAN CONNECTOR
4 - LOWER RADIATOR CROSSMEMBER
WARNING: DO NOT OPEN THE RADIATOR DRAINCOCK WITH THE SYSTEM HOT
AND UNDER PRESSURE BECAUSE SERIOUS BURNS FROM COOLANT
CAN OCCUR.
2009 Jeep Patriot Limited
2009 ENGINE Cooling - Compass & Patriot
a
Saturday, September 08, 2012 12:55:37 PM Page 66 © 2006 Mitchell Repair Information Company, LLC.
Fig. 58: Cooling Module
Courtesy of CHRYSLER LLC
1. Disconnect negative battery cable.
2. Remove engine cover. Refer to Engine - Removal .
3. Remove air cleaner housing assembly. Refer to Engine/Air Intake System/BODY, Air Cleaner -
Removal .
4. Raise vehicle on hoist.
5. Drain cooling system. See Standard Procedure.
6. Disconnect radiator fan motor electrical connector.
7. Disconnect lower radiator hose.
8. Remove two lower fasteners attaching radiator fan shroud to radiator.
9. Disconnect Charger Air Cooler hoses from Charge Air Cooler.
10. Disconnect Charger Air Cooler from radiator.
1 - UPPER RADIATOR CROSSMEMBER
2 - COOLING MODULE
3 - RADIATOR FAN CONNECTOR
4 - LOWER RADIATOR CROSSMEMBER
WARNING: DO NOT OPEN THE RADIATOR DRAINCOCK WITH THE SYSTEM HOT
AND UNDER PRESSURE BECAUSE SERIOUS BURNS FROM COOLANT
CAN OCCUR.
NOTE: It is not necessary to discharge the air conditioning system to remove the
radiator.
2009 Jeep Patriot Limited
2009 ENGINE Cooling - Compass & Patriot
a
Saturday, September 08, 2012 12:55:37 PM Page 67 © 2006 Mitchell Repair Information Company, LLC.
11. Lower vehicle.
12. Remove grille.
13. Remove upper radiator hose from the radiator.
14. Remove remaining fasteners attaching radiator fan shroud to radiator.
15. Remove radiator fan/shroud assembly.
16. Remove remaining fasteners attaching AC condenser to radiator. Reposition AC condenser.
17. Unclip Charge Air Cooler from radiator remove radiator assembly by lifting it up from the engine
compartment. Care should be taken not to damage the cooling fins and tubes during removal.
Cleaning
CLEANING
Clean radiator fins are necessary for good heat transfer. The radiator and air conditioning fins should be cleaned
when an accumulation of debris has occurred. With the engine cold, apply cold water and compressed air to the
back (engine side) of the radiator to flush the radiator and/or A/C condenser of debris.
Inspection
INSPECTION
Inspect the radiator tanks for cracks, broken or missing fittings also inspect the joint where the tanks seam up to
the radiator core for signs of leakage and/or deteriorating seals.
Inspect radiator core for corroded, bent or missing cooling fins. Inspect the core for bent or damaged cooling
tubes.
Installation
GAS ENGINE
2009 Jeep Patriot Limited
2009 ENGINE Cooling - Compass & Patriot
a
Saturday, September 08, 2012 12:55:37 PM Page 68 © 2006 Mitchell Repair Information Company, LLC.
Fig. 59: Cooling Module Assembly
Courtesy of CHRYSLER LLC
1. Install the lower air seal to radiator.
2. Position radiator into mounting position.
3. Position A/C condenser against radiator. Hand start fasteners.
4. Install radiator fan/shroud assembly. Hand start fasteners.
5. Tighten all condenser fasteners to 8 N.m (70 in. lbs.).
6. Tighten all radiator fan fasteners to 6 N.m (55 in. lbs.).
7. Install fasteners attaching transmission oil cooler to radiator. Tighten fasteners to 8 N.m (70 in. lbs.).
8. Raise vehicle on hoist.
9. Connect the lower air seal to the side air seals.
10. Connect lower radiator hose. Align the hose and position the clamp so it will not interfere with engine
components.
11. Connect the radiator fan electrical connector.
12. Connect the power steering hoses.
13. Close radiator draincock.
14. Lower vehicle.
15. Connect upper radiator hose. Align the hose and position the clamp to prevent interference with the
engine or hood.
16. Install upper radiator closure panel and center brace. Refer to Body/Exterior/PANEL, Closure -
1 - UPPER RADIATOR CLOSURE PANEL
2 - COOLING MODULE
3 - RADIATOR FAN CONNECTOR
4 - LOWER RADIATOR CROSSMEMBER
2009 Jeep Patriot Limited
2009 ENGINE Cooling - Compass & Patriot
a
Saturday, September 08, 2012 12:55:37 PM Page 69 © 2006 Mitchell Repair Information Company, LLC.
Installation
17. Install grille.
18. Install battery tray and battery.
19. Connect positive battery cable. Connect negative battery cable.
20. Install air cleaner housing assembly.
21. Fill cooling system with coolant. See Standard Procedure .
22. Operate engine until it reaches normal operating temperature. Check cooling system for correct fluid
level.
DIESEL
Fig. 60: Cooling Module
Courtesy of CHRYSLER LLC
1. Lower radiator into mounting position and reconnect Charge Air Cooler to radiator. Tighten bolts to 8
N.m (70 lbs. in.).
2. Position A/C condenser against radiator. Hand start lower fasteners.
3. Install radiator fan/shroud assembly. Hand start upper fasteners and remaining side fasteners that hold AC
condenser.
1 - UPPER RADIATOR CROSSMEMBER
2 - COOLING MODULE
3 - RADIATOR FAN CONNECTOR
4 - LOWER RADIATOR CROSSMEMBER
NOTE: Care must be taken not to damage the radiator cooling fins and tubes during
installation.
2009 Jeep Patriot Limited
2009 ENGINE Cooling - Compass & Patriot
a
Saturday, September 08, 2012 12:55:37 PM Page 70 © 2006 Mitchell Repair Information Company, LLC.
4. Raise vehicle on hoist.
5. Connect charge air cooler hoses.
6. Install two remaining lower radiator fan shroud fasteners to radiator. Tighten fasteners to 6 N.m (55 in.
lbs.).
7. If equipped, install fasteners attaching transmission oil cooler to radiator. Tighten fasteners to 8 N.m (70
in. lbs.).
8. Connect lower radiator hose. Align the hose and position the clamp so it will not interfere with engine
components.
9. Connect the radiator fan motor electrical connector.
10. Close radiator draincock.
11. Lower vehicle.
12. Tighten radiator fan shroud fasteners to 6 N.m (55 in. lbs.).
13. Tighten AC condenser fasteners to 8 N.m (70 in. lbs.).
14. Install upper radiator hose. Align the hose and position the clamp to prevent interference with the engine
or hood.
15. Install grille.
16. Install air cleaner housing assembly. Refer to Engine/Air Intake System/BODY, Air Cleaner -
Installation .
17. Fill cooling system with appropriate coolant. See Standard Procedure .
18. Connect negative battery cable.
19. Operate engine until it reaches normal operating temperature. Check cooling system for correct fluid
level.
SENSOR, COOLANT TEMPERATURE
Description
GAS ENGINE
2009 Jeep Patriot Limited
2009 ENGINE Cooling - Compass & Patriot
a
Saturday, September 08, 2012 12:55:37 PM Page 71 © 2006 Mitchell Repair Information Company, LLC.
Fig. 61: ECT & Coolant Adapter
Courtesy of CHRYSLER LLC
There are two engine coolant sensors (ETC). One ETC (1) is located in the coolant adapter and one is (ECT)
sensor (1) threads into the cylinder block. New sensors have sealant applied to the threads.
Fig. 62: ECT Sensor
Courtesy of CHRYSLER LLC
1 - ETC
2 - COOLANT ADAPTER
1 - ECT
2009 Jeep Patriot Limited
2009 ENGINE Cooling - Compass & Patriot
a
Saturday, September 08, 2012 12:55:37 PM Page 72 © 2006 Mitchell Repair Information Company, LLC.
The ECT Sensor is a Negative Thermal Coefficient (NTC) Sensor. The resistance of the ECT Sensor changes as
coolant temperature changes. This results in different input voltages to the PCM. The PCM also uses the ECT
Sensor input to operate the radiator cooling fan(s), and send a message over the PCI bus to the instrument
cluster for temperature gauge operation.
Operation
OPERATION
The ECT sensor provides an input to the PCM. As temperature increases, resistance of the sensor decreases. As
coolant temperature varies, the ECT sensor resistance changes resulting in a different voltage value at the PCM
ECT sensor signal circuit. The ECT sensor provides input for various PCM operations. The PCM uses the input
to control air-fuel mixture, timing, and radiator fan on/off times.
Removal
GAS ENGINE
CYLINDER BLOCK MOUNTED
Fig. 63: ECT Sensor
Courtesy of CHRYSLER LLC
1. Disconnect negative battery cable.
2. Partially drain cooling system below level of ECT Sensor.
3. Disconnect ECT Sensor electrical connector.
4. Remove ECT Sensor.
COOLANT ADAPTER MOUNTED
1 - ECT
2009 Jeep Patriot Limited
2009 ENGINE Cooling - Compass & Patriot
a
Saturday, September 08, 2012 12:55:37 PM Page 73 © 2006 Mitchell Repair Information Company, LLC.
Fig. 64: ECT & Coolant Adapter
Courtesy of CHRYSLER LLC
1. Disconnect negative battery cable.
2. Partially drain cooling system below level of ECT Sensor (1). See Standard Procedure
3. Disconnect ECT Sensor electrical connector.
4. Remove ECT Sensor (1).
DIESEL ENGINE
1 - ETC
2 - COOLANT ADAPTER
2009 Jeep Patriot Limited
2009 ENGINE Cooling - Compass & Patriot
a
Saturday, September 08, 2012 12:55:37 PM Page 74 © 2006 Mitchell Repair Information Company, LLC.
Fig. 65: Thermostat And Sensor
Courtesy of CHRYSLER LLC
1. Disconnect negative battery cable.
2. Remove engine cover. Refer to Engine - Removal .
3. Partially drain coolant system below pressurized coolant recovery container. See Standard Procedure .
4. Unplug coolant temperature sensor electrical connector.
5. Remove coolant temperature sensor (5).
Installation
GAS ENGINE
COOLANT ADAPTER MOUNTED
1 - FUEL RAIL
2 - EGR VALVE
3 - POWER STEERING PUMP
4 - GENERATOR
5 - COOLANT TEMPERATURE SENSOR
6 - THERMOSTAT HOUSING
7 - FUEL RAIL PRESSURE SENSOR
NOTE: Capture any residual coolant that may flow.
2009 Jeep Patriot Limited
2009 ENGINE Cooling - Compass & Patriot
a
Saturday, September 08, 2012 12:55:37 PM Page 75 © 2006 Mitchell Repair Information Company, LLC.
Fig. 66: ECT & Coolant Adapter
Courtesy of CHRYSLER LLC
1. Install ECT Sensor (1). Make sure coolant sensor is locked in place
2. Reconnect ECT Sensor electrical connector.
3. Fill cooling system. See Standard Procedure .
4. Connect negative battery cable.
CYLINDER BLOCK MOUNTED
1 - ECT
2 - COOLANT ADAPTER
2009 Jeep Patriot Limited
2009 ENGINE Cooling - Compass & Patriot
a
Saturday, September 08, 2012 12:55:37 PM Page 76 © 2006 Mitchell Repair Information Company, LLC.
Fig. 67: ECT Sensor
Courtesy of CHRYSLER LLC
1. Install ECT Sensor. Tighten sensor to 19 N.m (168 in. lbs.).
2. Reconnect ECT Sensor electrical connector.
3. Fill cooling system. See Standard Procedure .
4. Connect negative battery cable.
DIESEL ENGINE
Fig. 68: Thermostat And Sensor
Courtesy of CHRYSLER LLC
1. Position and install coolant temperature sensor (5).
2. Connect coolant temperature sensor electrical connector.
1 - ECT
1 - FUEL RAIL
2 - EGR VALVE
3 - POWER STEERING PUMP
4 - GENERATOR
5 - COOLANT TEMPERATURE SENSOR
6 - THERMOSTAT HOUSING
7 - FUEL RAIL PRESSURE SENSOR
2009 Jeep Patriot Limited
2009 ENGINE Cooling - Compass & Patriot
a
Saturday, September 08, 2012 12:55:37 PM Page 77 © 2006 Mitchell Repair Information Company, LLC.
Fig. 69: Engine Coolant Temperature Sensor
Courtesy of CHRYSLER LLC
3. Refill coolant system to proper level with proper mixture of coolant. See Standard Procedure .
4. Install engine cover. Refer to Engine - Installation .
5. Connect negative battery cable.
6. Start engine and inspect for leaks.
THERMOSTAT
Description
DESCRIPTION
1 - RETAINING CLAMP
2 - ENGINE COOLANT TEMPERATURE SENSOR
WARNING: Use extreme caution when engine is operating. Do not stand in a
direct line with fan. Do not put your hands near pulleys, belts or fan.
Do not wear loose clothes.
2009 Jeep Patriot Limited
2009 ENGINE Cooling - Compass & Patriot
a
Saturday, September 08, 2012 12:55:37 PM Page 78 © 2006 Mitchell Repair Information Company, LLC.
Fig. 70: Thermostat
Courtesy of CHRYSLER LLC
The primary thermostat is located on the front of the water plenum in the thermostat housing/coolant inlet. The
thermostat has an air bleed vent located on its flange. The air bleed vent (1) and the locator dimple on
thermostat seal provide for proper positioning of thermostat in inlet housing.
The secondary thermostat is located in the cylinder head under the water plenum.
Operation
OPERATION
When the Engine is cold and both the primary and secondary thermostats are closed. The coolant will circulate
through the engine, heater system, and the bypass. The cooling system has no flow through the radiator
As the engine warms up, the primary thermostat will start to open at 82 °C ( 179 °F). Coolant will start to flow
through the radiator oil cooler and transmission cooler. Coolant will flow through the transmission oil cooler
only when the primary thermostat is fully open. The primary thermostat will fully open at 95 °C (203 °F).
1 - AIR BLEED
2 - SEAL
3 - RETURN SPRING
4 - PELLET CHAMBER
2009 Jeep Patriot Limited
2009 ENGINE Cooling - Compass & Patriot
a
Saturday, September 08, 2012 12:55:37 PM Page 79 © 2006 Mitchell Repair Information Company, LLC.
The secondary thermostat will start to open at 95 °C (203 °F). This will increase the coolant flow through the
cylinder block and cylinder head and the radiator. The secondary thermostat will fully open at 110 °C (230 °F).
If the thermostat is stuck open or allows coolant leakage through it, the engine will not operate at the proper
temperature for obtaining engine fuel efficiency, performance and emissions levels. If this condition occurs, a
diagnostic trouble code will be set and a MIL light will be turned on. Refer to the Powertrain Diagnostic article
for further information and diagnostics provided.
Diagnosis and Testing
ENGINE COOLANT THERMOSTAT
The thermostat is operated by a wax filled chamber (pellet) which is sealed. When heated coolant reaches a
predetermined temperature the wax pellet expands enough to overcome the closing spring and water pump
pressure, which forces the valve to open. Coolant leakage into the pellet will cause a thermostat to fail open. Do
not attempt to free up a thermostat with a screwdriver.
Thermostat diagnostics is included in Totally Integrated Power Module's (TIPM) programming for on-board
diagnosis. The malfunction indicator light (MIL) will illuminate and a diagnostic trouble code (DTC) will be set
when an "open too soon" condition occurs. Do not change a thermostat for lack of heater performance or
temperature gauge position, unless a DTC is present. For other probable causes. See Diagnosis and Testing .
Thermostat failing shut is the normal long term mode of failure, and normally, only on high mileage vehicles.
The temperature gauge will indicate this.
Removal
PRIMARY THERMOSTAT - GAS ENGINE
Fig. 71: Primary Thermostat - Gas Engine
Courtesy of CHRYSLER LLC
1 - COOLANT HOSE
2009 Jeep Patriot Limited
2009 ENGINE Cooling - Compass & Patriot
a
Saturday, September 08, 2012 12:55:37 PM Page 80 © 2006 Mitchell Repair Information Company, LLC.
1. Partially drain the cooling system. See Standard Procedure.
2. Remove the air filter housing. See Standard Procedure
3. Disconnect the coolant hose (1) from the inlet housing (2).
4. Remove inlet housing bolts (3).
5. Remove the thermostat assembly, and clean the sealing surfaces.
SECONDARY THERMOSTAT - GAS ENGINE
Fig. 72: Secondary Thermostat
Courtesy of CHRYSLER LLC
1. Partially drain cooling system. See Standard Procedure .
2. Remove the air filter housing. Refer to Engine/Air Intake System/BODY, Air Cleaner - Removal .
3. Disconnect coolant hoses (1) from rear of the coolant adapter (2).
4. Remove the radiator hose (3).
5. Remove the radiator hose (4) from the front of the coolant adapter (2).
6. Remove the coolant adapter mounting bolts.
7. Carefully slide the coolant adapter off the water pump inlet tube and remove the coolant adapter (2) and
the secondary thermostat.
2 - INLET HOUSING
3 - BOLT
1 - COOLANT HOSE (REAR)
2 - COOLANT ADAPTER
3 - RADIATOR HOSE
4 - RADIATOR HOSE (FRONT)
2009 Jeep Patriot Limited
2009 ENGINE Cooling - Compass & Patriot
a
Saturday, September 08, 2012 12:55:37 PM Page 81 © 2006 Mitchell Repair Information Company, LLC.
DIESEL ENGINE
Fig. 73: Thermostat Housing - Diesel
Courtesy of CHRYSLER LLC
1. Disconnect negative battery cable.
2. Remove engine cover. Refer to Engine - Removal .
3. Drain engine coolant below thermostat level using draincock only. See Standard Procedure.
4. Disconnect coolant temperature sensor electrical connector.
5. Remove coolant hoses and by-pass hose (1) from thermostat housing (2).
6. Loosen accessory drive belt and reposition generator. Refer to Electrical - Engine
Systems/Charging/GENERATOR - Removal .
7. Remove thermostat housing (2) and O-ring.
8. Clean all sealing surfaces.
Installation
PRIMARY THERMOSTAT - GAS ENGINE
1 - MOUNTING BOLT
2 - THERMOSTAT HOUSING
WARNING: Do not loosen the radiator cap with the cooling system hot and
pressurized. Serious burns from the coolant can occur.
2009 Jeep Patriot Limited
2009 ENGINE Cooling - Compass & Patriot
a
Saturday, September 08, 2012 12:55:37 PM Page 82 © 2006 Mitchell Repair Information Company, LLC.
Fig. 74: Primary Thermostat - Gas Engine
Courtesy of CHRYSLER LLC
1. Position thermostat into the water plenum, aligning air bleed with the location notch on inlet housing (2).
2. Install inlet housing (2) onto coolant adapter. Tighten bolts to 9 N.m (79 in. lbs.).
3. Connect coolant hose (1).
4. Install air filter housing.
5. Fill cooling system. See Standard Procedure .
SECONDARY THERMOSTAT - GAS ENGINE
1 - COOLANT HOSE
2 - INLET HOUSING
3 - BOLT
2009 Jeep Patriot Limited
2009 ENGINE Cooling - Compass & Patriot
a
Saturday, September 08, 2012 12:55:37 PM Page 83 © 2006 Mitchell Repair Information Company, LLC.
Manual reparacion Jeep Compass - Patriot Limited 2007-2009_Cooling

Contenu connexe

Tendances

Manuales de reparaciones jeep compass y patriot limited 2007-2009
Manuales de reparaciones jeep compass y patriot limited 2007-2009Manuales de reparaciones jeep compass y patriot limited 2007-2009
Manuales de reparaciones jeep compass y patriot limited 2007-2009Gustavo Castro
 
Manual reparacion Jeep Compass - Patriot Limited 2007-2009_Wiper washer
Manual reparacion Jeep Compass - Patriot Limited 2007-2009_Wiper washerManual reparacion Jeep Compass - Patriot Limited 2007-2009_Wiper washer
Manual reparacion Jeep Compass - Patriot Limited 2007-2009_Wiper washerGustavo Castro
 
Manual reparacion Jeep Compass - Patriot Limited 2007-2009__Trouble codes
Manual reparacion Jeep Compass - Patriot Limited 2007-2009__Trouble codesManual reparacion Jeep Compass - Patriot Limited 2007-2009__Trouble codes
Manual reparacion Jeep Compass - Patriot Limited 2007-2009__Trouble codesGustavo Castro
 
Ms.37. esquema electrico. version de idioma. edicion 1
Ms.37. esquema electrico. version de idioma. edicion 1Ms.37. esquema electrico. version de idioma. edicion 1
Ms.37. esquema electrico. version de idioma. edicion 1Maik700
 
Hyundai HD65, HD72, HD78 Electrical Troubleshooting Manual
Hyundai HD65, HD72, HD78 Electrical Troubleshooting Manual Hyundai HD65, HD72, HD78 Electrical Troubleshooting Manual
Hyundai HD65, HD72, HD78 Electrical Troubleshooting Manual Viktor
 
Interruptores das caixas ZF 16s 1485 1585 e 1685.pdf
Interruptores das caixas ZF 16s 1485 1585 e 1685.pdfInterruptores das caixas ZF 16s 1485 1585 e 1685.pdf
Interruptores das caixas ZF 16s 1485 1585 e 1685.pdfdriepaulin
 
101856639 apresentacao-sistema-eletrico-pc-2000
101856639 apresentacao-sistema-eletrico-pc-2000101856639 apresentacao-sistema-eletrico-pc-2000
101856639 apresentacao-sistema-eletrico-pc-2000paulo cesar
 
Manualdeesquemaeltricoscania 140115191538-phpapp01 (1)
Manualdeesquemaeltricoscania 140115191538-phpapp01 (1)Manualdeesquemaeltricoscania 140115191538-phpapp01 (1)
Manualdeesquemaeltricoscania 140115191538-phpapp01 (1)Angelo Silva
 
Esquema elétrico renault master 2.5
Esquema elétrico renault master 2.5Esquema elétrico renault master 2.5
Esquema elétrico renault master 2.5Junior Iung
 
Hyundai Elantra 2015.pdf
Hyundai Elantra 2015.pdfHyundai Elantra 2015.pdf
Hyundai Elantra 2015.pdfJuan334193
 
Codigos de falla todos
Codigos de falla todosCodigos de falla todos
Codigos de falla todosfhgrthdgtrs
 
Codigos de falhas volvo fh12 d12 a
Codigos de falhas volvo fh12 d12 aCodigos de falhas volvo fh12 d12 a
Codigos de falhas volvo fh12 d12 aEdivaldo Veronese
 
SQU OF68 Universal Car Emulator User Manual obdii365
SQU OF68 Universal Car Emulator User Manual obdii365SQU OF68 Universal Car Emulator User Manual obdii365
SQU OF68 Universal Car Emulator User Manual obdii365OBD365
 
ATSG-KIA-HYUNDAI -A4CF2-Tech-Guide.pdf
ATSG-KIA-HYUNDAI -A4CF2-Tech-Guide.pdfATSG-KIA-HYUNDAI -A4CF2-Tech-Guide.pdf
ATSG-KIA-HYUNDAI -A4CF2-Tech-Guide.pdfcccpizcalliponiente2
 
Vagcom tool 12.12
Vagcom tool 12.12Vagcom tool 12.12
Vagcom tool 12.12Jack Chen
 
Allison 1000-2000 Series Service Manual.pdf
Allison 1000-2000 Series Service Manual.pdfAllison 1000-2000 Series Service Manual.pdf
Allison 1000-2000 Series Service Manual.pdfRolandasPetkus
 

Tendances (20)

Manuales de reparaciones jeep compass y patriot limited 2007-2009
Manuales de reparaciones jeep compass y patriot limited 2007-2009Manuales de reparaciones jeep compass y patriot limited 2007-2009
Manuales de reparaciones jeep compass y patriot limited 2007-2009
 
Manual reparacion Jeep Compass - Patriot Limited 2007-2009_Wiper washer
Manual reparacion Jeep Compass - Patriot Limited 2007-2009_Wiper washerManual reparacion Jeep Compass - Patriot Limited 2007-2009_Wiper washer
Manual reparacion Jeep Compass - Patriot Limited 2007-2009_Wiper washer
 
Cvt trdg
Cvt trdgCvt trdg
Cvt trdg
 
Manual reparacion Jeep Compass - Patriot Limited 2007-2009__Trouble codes
Manual reparacion Jeep Compass - Patriot Limited 2007-2009__Trouble codesManual reparacion Jeep Compass - Patriot Limited 2007-2009__Trouble codes
Manual reparacion Jeep Compass - Patriot Limited 2007-2009__Trouble codes
 
Ms.37. esquema electrico. version de idioma. edicion 1
Ms.37. esquema electrico. version de idioma. edicion 1Ms.37. esquema electrico. version de idioma. edicion 1
Ms.37. esquema electrico. version de idioma. edicion 1
 
howo electrical system.pptx
howo electrical system.pptxhowo electrical system.pptx
howo electrical system.pptx
 
Hyundai HD65, HD72, HD78 Electrical Troubleshooting Manual
Hyundai HD65, HD72, HD78 Electrical Troubleshooting Manual Hyundai HD65, HD72, HD78 Electrical Troubleshooting Manual
Hyundai HD65, HD72, HD78 Electrical Troubleshooting Manual
 
Manual de diagnosticoacteon
Manual de diagnosticoacteonManual de diagnosticoacteon
Manual de diagnosticoacteon
 
Interruptores das caixas ZF 16s 1485 1585 e 1685.pdf
Interruptores das caixas ZF 16s 1485 1585 e 1685.pdfInterruptores das caixas ZF 16s 1485 1585 e 1685.pdf
Interruptores das caixas ZF 16s 1485 1585 e 1685.pdf
 
101856639 apresentacao-sistema-eletrico-pc-2000
101856639 apresentacao-sistema-eletrico-pc-2000101856639 apresentacao-sistema-eletrico-pc-2000
101856639 apresentacao-sistema-eletrico-pc-2000
 
030411es inyector bba[1]
030411es inyector bba[1]030411es inyector bba[1]
030411es inyector bba[1]
 
Manualdeesquemaeltricoscania 140115191538-phpapp01 (1)
Manualdeesquemaeltricoscania 140115191538-phpapp01 (1)Manualdeesquemaeltricoscania 140115191538-phpapp01 (1)
Manualdeesquemaeltricoscania 140115191538-phpapp01 (1)
 
Esquema elétrico renault master 2.5
Esquema elétrico renault master 2.5Esquema elétrico renault master 2.5
Esquema elétrico renault master 2.5
 
Hyundai Elantra 2015.pdf
Hyundai Elantra 2015.pdfHyundai Elantra 2015.pdf
Hyundai Elantra 2015.pdf
 
Codigos de falla todos
Codigos de falla todosCodigos de falla todos
Codigos de falla todos
 
Codigos de falhas volvo fh12 d12 a
Codigos de falhas volvo fh12 d12 aCodigos de falhas volvo fh12 d12 a
Codigos de falhas volvo fh12 d12 a
 
SQU OF68 Universal Car Emulator User Manual obdii365
SQU OF68 Universal Car Emulator User Manual obdii365SQU OF68 Universal Car Emulator User Manual obdii365
SQU OF68 Universal Car Emulator User Manual obdii365
 
ATSG-KIA-HYUNDAI -A4CF2-Tech-Guide.pdf
ATSG-KIA-HYUNDAI -A4CF2-Tech-Guide.pdfATSG-KIA-HYUNDAI -A4CF2-Tech-Guide.pdf
ATSG-KIA-HYUNDAI -A4CF2-Tech-Guide.pdf
 
Vagcom tool 12.12
Vagcom tool 12.12Vagcom tool 12.12
Vagcom tool 12.12
 
Allison 1000-2000 Series Service Manual.pdf
Allison 1000-2000 Series Service Manual.pdfAllison 1000-2000 Series Service Manual.pdf
Allison 1000-2000 Series Service Manual.pdf
 

En vedette

Manual reparacion Jeep Compass - Patriot Limited 2007-2009_Lights interior
Manual reparacion Jeep Compass - Patriot Limited 2007-2009_Lights interiorManual reparacion Jeep Compass - Patriot Limited 2007-2009_Lights interior
Manual reparacion Jeep Compass - Patriot Limited 2007-2009_Lights interiorGustavo Castro
 
Manual reparacion Jeep Compass - Patriot Limited 2007-2009_Cabin air filter
Manual reparacion Jeep Compass - Patriot Limited 2007-2009_Cabin air filterManual reparacion Jeep Compass - Patriot Limited 2007-2009_Cabin air filter
Manual reparacion Jeep Compass - Patriot Limited 2007-2009_Cabin air filterGustavo Castro
 
MANUAL DE IMPLEMENTACIÓN PROGRAMA 5S
MANUAL DE IMPLEMENTACIÓN PROGRAMA 5S MANUAL DE IMPLEMENTACIÓN PROGRAMA 5S
MANUAL DE IMPLEMENTACIÓN PROGRAMA 5S Gustavo Castro
 
Xj CHEROKEE manual do proprietario
Xj CHEROKEE manual do proprietarioXj CHEROKEE manual do proprietario
Xj CHEROKEE manual do proprietarioPaulo Zurro Fraysse
 
LA CONVERSION DEL EUNUCO ETIOPE
LA CONVERSION DEL EUNUCO ETIOPELA CONVERSION DEL EUNUCO ETIOPE
LA CONVERSION DEL EUNUCO ETIOPEJulio Tellez
 
Hype vs. Reality: The AI Explainer
Hype vs. Reality: The AI ExplainerHype vs. Reality: The AI Explainer
Hype vs. Reality: The AI ExplainerLuminary Labs
 

En vedette (8)

Manual reparacion Jeep Compass - Patriot Limited 2007-2009_Lights interior
Manual reparacion Jeep Compass - Patriot Limited 2007-2009_Lights interiorManual reparacion Jeep Compass - Patriot Limited 2007-2009_Lights interior
Manual reparacion Jeep Compass - Patriot Limited 2007-2009_Lights interior
 
Manual reparacion Jeep Compass - Patriot Limited 2007-2009_Cabin air filter
Manual reparacion Jeep Compass - Patriot Limited 2007-2009_Cabin air filterManual reparacion Jeep Compass - Patriot Limited 2007-2009_Cabin air filter
Manual reparacion Jeep Compass - Patriot Limited 2007-2009_Cabin air filter
 
MANUAL DE IMPLEMENTACIÓN PROGRAMA 5S
MANUAL DE IMPLEMENTACIÓN PROGRAMA 5S MANUAL DE IMPLEMENTACIÓN PROGRAMA 5S
MANUAL DE IMPLEMENTACIÓN PROGRAMA 5S
 
Xj CHEROKEE manual do proprietario
Xj CHEROKEE manual do proprietarioXj CHEROKEE manual do proprietario
Xj CHEROKEE manual do proprietario
 
Presentacion Final Arias Rosales T.G.I.
Presentacion Final Arias Rosales T.G.I.Presentacion Final Arias Rosales T.G.I.
Presentacion Final Arias Rosales T.G.I.
 
Felipe y el etíope
Felipe y el etíopeFelipe y el etíope
Felipe y el etíope
 
LA CONVERSION DEL EUNUCO ETIOPE
LA CONVERSION DEL EUNUCO ETIOPELA CONVERSION DEL EUNUCO ETIOPE
LA CONVERSION DEL EUNUCO ETIOPE
 
Hype vs. Reality: The AI Explainer
Hype vs. Reality: The AI ExplainerHype vs. Reality: The AI Explainer
Hype vs. Reality: The AI Explainer
 

Similaire à Manual reparacion Jeep Compass - Patriot Limited 2007-2009_Cooling

Chapter 20
Chapter 20Chapter 20
Chapter 20mcfalltj
 
Chapter 20
Chapter 20Chapter 20
Chapter 20mcfalltj
 
Yale b810 glp030 040 af lift truck service repair manual
Yale b810 glp030 040 af lift truck service repair manualYale b810 glp030 040 af lift truck service repair manual
Yale b810 glp030 040 af lift truck service repair manualfhjskemme
 
Yale b810 gp030 040 af lift truck service repair manual
Yale b810 gp030 040 af lift truck service repair manualYale b810 gp030 040 af lift truck service repair manual
Yale b810 gp030 040 af lift truck service repair manualfjksekmdme
 
Yale b810 gdp16 20 af lift truck service repair manual
Yale b810 gdp16 20 af lift truck service repair manualYale b810 gdp16 20 af lift truck service repair manual
Yale b810 gdp16 20 af lift truck service repair manualfjsjjdkemmde
 
Yale b810 glp16 20 af lift truck service repair manual
Yale b810 glp16 20 af lift truck service repair manualYale b810 glp16 20 af lift truck service repair manual
Yale b810 glp16 20 af lift truck service repair manualfhjsjkdmemm
 
Yale b810 gdp030 040 af lift truck service repair manual
Yale b810 gdp030 040 af lift truck service repair manualYale b810 gdp030 040 af lift truck service repair manual
Yale b810 gdp030 040 af lift truck service repair manualdueikdkmem
 
2 Cooling System Theory.ppt
2 Cooling System Theory.ppt2 Cooling System Theory.ppt
2 Cooling System Theory.pptAbhishekChavan77
 
How does Coolant Leak Affect the Performance of a Car
How does Coolant Leak Affect the Performance of a CarHow does Coolant Leak Affect the Performance of a Car
How does Coolant Leak Affect the Performance of a CarLouden Motorcar Services Inc
 
Volvo EC300D LR EC300DLR Excavator Service Repair Manual Instant Download.pdf
Volvo EC300D LR EC300DLR Excavator Service Repair Manual Instant Download.pdfVolvo EC300D LR EC300DLR Excavator Service Repair Manual Instant Download.pdf
Volvo EC300D LR EC300DLR Excavator Service Repair Manual Instant Download.pdfdai20nao
 
Volvo EC300D LR EC300DLR Excavator Service Repair Manual Instant Download.pdf
Volvo EC300D LR EC300DLR Excavator Service Repair Manual Instant Download.pdfVolvo EC300D LR EC300DLR Excavator Service Repair Manual Instant Download.pdf
Volvo EC300D LR EC300DLR Excavator Service Repair Manual Instant Download.pdffijsekkkdmdm3e
 
Volvo EC300D LR EC300DLR Excavator Service Repair Manual Instant Download.pdf
Volvo EC300D LR EC300DLR Excavator Service Repair Manual Instant Download.pdfVolvo EC300D LR EC300DLR Excavator Service Repair Manual Instant Download.pdf
Volvo EC300D LR EC300DLR Excavator Service Repair Manual Instant Download.pdftepu22753653
 
Volvo EC300D LR EC300DLR Excavator Service Repair Manual Instant Download.pdf
Volvo EC300D LR EC300DLR Excavator Service Repair Manual Instant Download.pdfVolvo EC300D LR EC300DLR Excavator Service Repair Manual Instant Download.pdf
Volvo EC300D LR EC300DLR Excavator Service Repair Manual Instant Download.pdff8iosedkdm3e
 

Similaire à Manual reparacion Jeep Compass - Patriot Limited 2007-2009_Cooling (20)

Chapter 20
Chapter 20Chapter 20
Chapter 20
 
Chapter 20
Chapter 20Chapter 20
Chapter 20
 
Ch04
Ch04Ch04
Ch04
 
Yale b810 glp030 040 af lift truck service repair manual
Yale b810 glp030 040 af lift truck service repair manualYale b810 glp030 040 af lift truck service repair manual
Yale b810 glp030 040 af lift truck service repair manual
 
Yale b810 gp030 040 af lift truck service repair manual
Yale b810 gp030 040 af lift truck service repair manualYale b810 gp030 040 af lift truck service repair manual
Yale b810 gp030 040 af lift truck service repair manual
 
Yale b810 gdp16 20 af lift truck service repair manual
Yale b810 gdp16 20 af lift truck service repair manualYale b810 gdp16 20 af lift truck service repair manual
Yale b810 gdp16 20 af lift truck service repair manual
 
Yale b810 glp16 20 af lift truck service repair manual
Yale b810 glp16 20 af lift truck service repair manualYale b810 glp16 20 af lift truck service repair manual
Yale b810 glp16 20 af lift truck service repair manual
 
Yale b810 gdp030 040 af lift truck service repair manual
Yale b810 gdp030 040 af lift truck service repair manualYale b810 gdp030 040 af lift truck service repair manual
Yale b810 gdp030 040 af lift truck service repair manual
 
Unit 4 cooling system
Unit 4 cooling systemUnit 4 cooling system
Unit 4 cooling system
 
Engine cooling system
Engine cooling systemEngine cooling system
Engine cooling system
 
Automotive cooling system
Automotive cooling systemAutomotive cooling system
Automotive cooling system
 
2 Cooling System Theory.ppt
2 Cooling System Theory.ppt2 Cooling System Theory.ppt
2 Cooling System Theory.ppt
 
How does Coolant Leak Affect the Performance of a Car
How does Coolant Leak Affect the Performance of a CarHow does Coolant Leak Affect the Performance of a Car
How does Coolant Leak Affect the Performance of a Car
 
Cooling system
Cooling systemCooling system
Cooling system
 
Cooling system
Cooling systemCooling system
Cooling system
 
Cooling system
Cooling systemCooling system
Cooling system
 
Volvo EC300D LR EC300DLR Excavator Service Repair Manual Instant Download.pdf
Volvo EC300D LR EC300DLR Excavator Service Repair Manual Instant Download.pdfVolvo EC300D LR EC300DLR Excavator Service Repair Manual Instant Download.pdf
Volvo EC300D LR EC300DLR Excavator Service Repair Manual Instant Download.pdf
 
Volvo EC300D LR EC300DLR Excavator Service Repair Manual Instant Download.pdf
Volvo EC300D LR EC300DLR Excavator Service Repair Manual Instant Download.pdfVolvo EC300D LR EC300DLR Excavator Service Repair Manual Instant Download.pdf
Volvo EC300D LR EC300DLR Excavator Service Repair Manual Instant Download.pdf
 

Dernier

How To Fix Mercedes Benz Anti-Theft Protection Activation Issue
How To Fix Mercedes Benz Anti-Theft Protection Activation IssueHow To Fix Mercedes Benz Anti-Theft Protection Activation Issue
How To Fix Mercedes Benz Anti-Theft Protection Activation IssueTerry Sayther Automotive
 
What Does The Engine Malfunction Reduced Power Message Mean For Your BMW X5
What Does The Engine Malfunction Reduced Power Message Mean For Your BMW X5What Does The Engine Malfunction Reduced Power Message Mean For Your BMW X5
What Does The Engine Malfunction Reduced Power Message Mean For Your BMW X5Bavarian Workshop
 
Call Girls in Malviya Nagar Delhi 💯 Call Us 🔝9205541914 🔝( Delhi) Escorts Ser...
Call Girls in Malviya Nagar Delhi 💯 Call Us 🔝9205541914 🔝( Delhi) Escorts Ser...Call Girls in Malviya Nagar Delhi 💯 Call Us 🔝9205541914 🔝( Delhi) Escorts Ser...
Call Girls in Malviya Nagar Delhi 💯 Call Us 🔝9205541914 🔝( Delhi) Escorts Ser...Delhi Call girls
 
如何办理麦考瑞大学毕业证(MQU毕业证书)成绩单原版一比一
如何办理麦考瑞大学毕业证(MQU毕业证书)成绩单原版一比一如何办理麦考瑞大学毕业证(MQU毕业证书)成绩单原版一比一
如何办理麦考瑞大学毕业证(MQU毕业证书)成绩单原版一比一ozave
 
ELECTRICITÉ TMT 55.pdf electrick diagram manitout
ELECTRICITÉ TMT 55.pdf electrick diagram manitoutELECTRICITÉ TMT 55.pdf electrick diagram manitout
ELECTRICITÉ TMT 55.pdf electrick diagram manitoutssjews46
 
Sales & Marketing Alignment_ How to Synergize for Success.pptx.pdf
Sales & Marketing Alignment_ How to Synergize for Success.pptx.pdfSales & Marketing Alignment_ How to Synergize for Success.pptx.pdf
Sales & Marketing Alignment_ How to Synergize for Success.pptx.pdfAggregage
 
John deere 425 445 455 Maitenance Manual
John deere 425 445 455 Maitenance ManualJohn deere 425 445 455 Maitenance Manual
John deere 425 445 455 Maitenance ManualExcavator
 
Rekha Agarkar Escorts Service Kollam ❣️ 7014168258 ❣️ High Cost Unlimited Har...
Rekha Agarkar Escorts Service Kollam ❣️ 7014168258 ❣️ High Cost Unlimited Har...Rekha Agarkar Escorts Service Kollam ❣️ 7014168258 ❣️ High Cost Unlimited Har...
Rekha Agarkar Escorts Service Kollam ❣️ 7014168258 ❣️ High Cost Unlimited Har...nirzagarg
 
FULL NIGHT — 9999894380 Call Girls In Jagat Puri | Delhi
FULL NIGHT — 9999894380 Call Girls In Jagat Puri | DelhiFULL NIGHT — 9999894380 Call Girls In Jagat Puri | Delhi
FULL NIGHT — 9999894380 Call Girls In Jagat Puri | DelhiSaketCallGirlsCallUs
 
Call Girls In Kotla Mubarakpur Delhi ❤️8448577510 ⊹Best Escorts Service In 24...
Call Girls In Kotla Mubarakpur Delhi ❤️8448577510 ⊹Best Escorts Service In 24...Call Girls In Kotla Mubarakpur Delhi ❤️8448577510 ⊹Best Escorts Service In 24...
Call Girls In Kotla Mubarakpur Delhi ❤️8448577510 ⊹Best Escorts Service In 24...lizamodels9
 
Vip Mumbai Call Girls Mumbai Call On 9920725232 With Body to body massage wit...
Vip Mumbai Call Girls Mumbai Call On 9920725232 With Body to body massage wit...Vip Mumbai Call Girls Mumbai Call On 9920725232 With Body to body massage wit...
Vip Mumbai Call Girls Mumbai Call On 9920725232 With Body to body massage wit...amitlee9823
 
John Deere 335 375 385 435 Service Repair Manual
John Deere 335 375 385 435 Service Repair ManualJohn Deere 335 375 385 435 Service Repair Manual
John Deere 335 375 385 435 Service Repair ManualExcavator
 
Hyundai World Rally Team in action at 2024 WRC
Hyundai World Rally Team in action at 2024 WRCHyundai World Rally Team in action at 2024 WRC
Hyundai World Rally Team in action at 2024 WRCHyundai Motor Group
 
Greenery-Palette Pitch Deck by Slidesgo.pptx
Greenery-Palette Pitch Deck by Slidesgo.pptxGreenery-Palette Pitch Deck by Slidesgo.pptx
Greenery-Palette Pitch Deck by Slidesgo.pptxzohiiimughal286
 
➥🔝 7737669865 🔝▻ narsinghpur Call-girls in Women Seeking Men 🔝narsinghpur🔝 ...
➥🔝 7737669865 🔝▻ narsinghpur Call-girls in Women Seeking Men  🔝narsinghpur🔝  ...➥🔝 7737669865 🔝▻ narsinghpur Call-girls in Women Seeking Men  🔝narsinghpur🔝  ...
➥🔝 7737669865 🔝▻ narsinghpur Call-girls in Women Seeking Men 🔝narsinghpur🔝 ...nirzagarg
 

Dernier (20)

How To Fix Mercedes Benz Anti-Theft Protection Activation Issue
How To Fix Mercedes Benz Anti-Theft Protection Activation IssueHow To Fix Mercedes Benz Anti-Theft Protection Activation Issue
How To Fix Mercedes Benz Anti-Theft Protection Activation Issue
 
What Does The Engine Malfunction Reduced Power Message Mean For Your BMW X5
What Does The Engine Malfunction Reduced Power Message Mean For Your BMW X5What Does The Engine Malfunction Reduced Power Message Mean For Your BMW X5
What Does The Engine Malfunction Reduced Power Message Mean For Your BMW X5
 
Call Girls in Malviya Nagar Delhi 💯 Call Us 🔝9205541914 🔝( Delhi) Escorts Ser...
Call Girls in Malviya Nagar Delhi 💯 Call Us 🔝9205541914 🔝( Delhi) Escorts Ser...Call Girls in Malviya Nagar Delhi 💯 Call Us 🔝9205541914 🔝( Delhi) Escorts Ser...
Call Girls in Malviya Nagar Delhi 💯 Call Us 🔝9205541914 🔝( Delhi) Escorts Ser...
 
Call Girls in Malviya Nagar Delhi 💯 Call Us 🔝9205541914 🔝( Delhi) Escorts Ser...
Call Girls in Malviya Nagar Delhi 💯 Call Us 🔝9205541914 🔝( Delhi) Escorts Ser...Call Girls in Malviya Nagar Delhi 💯 Call Us 🔝9205541914 🔝( Delhi) Escorts Ser...
Call Girls in Malviya Nagar Delhi 💯 Call Us 🔝9205541914 🔝( Delhi) Escorts Ser...
 
如何办理麦考瑞大学毕业证(MQU毕业证书)成绩单原版一比一
如何办理麦考瑞大学毕业证(MQU毕业证书)成绩单原版一比一如何办理麦考瑞大学毕业证(MQU毕业证书)成绩单原版一比一
如何办理麦考瑞大学毕业证(MQU毕业证书)成绩单原版一比一
 
ELECTRICITÉ TMT 55.pdf electrick diagram manitout
ELECTRICITÉ TMT 55.pdf electrick diagram manitoutELECTRICITÉ TMT 55.pdf electrick diagram manitout
ELECTRICITÉ TMT 55.pdf electrick diagram manitout
 
Sales & Marketing Alignment_ How to Synergize for Success.pptx.pdf
Sales & Marketing Alignment_ How to Synergize for Success.pptx.pdfSales & Marketing Alignment_ How to Synergize for Success.pptx.pdf
Sales & Marketing Alignment_ How to Synergize for Success.pptx.pdf
 
(INDIRA) Call Girl Nashik Call Now 8617697112 Nashik Escorts 24x7
(INDIRA) Call Girl Nashik Call Now 8617697112 Nashik Escorts 24x7(INDIRA) Call Girl Nashik Call Now 8617697112 Nashik Escorts 24x7
(INDIRA) Call Girl Nashik Call Now 8617697112 Nashik Escorts 24x7
 
John deere 425 445 455 Maitenance Manual
John deere 425 445 455 Maitenance ManualJohn deere 425 445 455 Maitenance Manual
John deere 425 445 455 Maitenance Manual
 
Rekha Agarkar Escorts Service Kollam ❣️ 7014168258 ❣️ High Cost Unlimited Har...
Rekha Agarkar Escorts Service Kollam ❣️ 7014168258 ❣️ High Cost Unlimited Har...Rekha Agarkar Escorts Service Kollam ❣️ 7014168258 ❣️ High Cost Unlimited Har...
Rekha Agarkar Escorts Service Kollam ❣️ 7014168258 ❣️ High Cost Unlimited Har...
 
FULL NIGHT — 9999894380 Call Girls In Jagat Puri | Delhi
FULL NIGHT — 9999894380 Call Girls In Jagat Puri | DelhiFULL NIGHT — 9999894380 Call Girls In Jagat Puri | Delhi
FULL NIGHT — 9999894380 Call Girls In Jagat Puri | Delhi
 
Call Girls In Kotla Mubarakpur Delhi ❤️8448577510 ⊹Best Escorts Service In 24...
Call Girls In Kotla Mubarakpur Delhi ❤️8448577510 ⊹Best Escorts Service In 24...Call Girls In Kotla Mubarakpur Delhi ❤️8448577510 ⊹Best Escorts Service In 24...
Call Girls In Kotla Mubarakpur Delhi ❤️8448577510 ⊹Best Escorts Service In 24...
 
Vip Mumbai Call Girls Mumbai Call On 9920725232 With Body to body massage wit...
Vip Mumbai Call Girls Mumbai Call On 9920725232 With Body to body massage wit...Vip Mumbai Call Girls Mumbai Call On 9920725232 With Body to body massage wit...
Vip Mumbai Call Girls Mumbai Call On 9920725232 With Body to body massage wit...
 
John Deere 335 375 385 435 Service Repair Manual
John Deere 335 375 385 435 Service Repair ManualJohn Deere 335 375 385 435 Service Repair Manual
John Deere 335 375 385 435 Service Repair Manual
 
Stay Cool and Compliant: Know Your Window Tint Laws Before You Tint
Stay Cool and Compliant: Know Your Window Tint Laws Before You TintStay Cool and Compliant: Know Your Window Tint Laws Before You Tint
Stay Cool and Compliant: Know Your Window Tint Laws Before You Tint
 
(INDIRA) Call Girl Surat Call Now 8250077686 Surat Escorts 24x7
(INDIRA) Call Girl Surat Call Now 8250077686 Surat Escorts 24x7(INDIRA) Call Girl Surat Call Now 8250077686 Surat Escorts 24x7
(INDIRA) Call Girl Surat Call Now 8250077686 Surat Escorts 24x7
 
Hyundai World Rally Team in action at 2024 WRC
Hyundai World Rally Team in action at 2024 WRCHyundai World Rally Team in action at 2024 WRC
Hyundai World Rally Team in action at 2024 WRC
 
Greenery-Palette Pitch Deck by Slidesgo.pptx
Greenery-Palette Pitch Deck by Slidesgo.pptxGreenery-Palette Pitch Deck by Slidesgo.pptx
Greenery-Palette Pitch Deck by Slidesgo.pptx
 
➥🔝 7737669865 🔝▻ narsinghpur Call-girls in Women Seeking Men 🔝narsinghpur🔝 ...
➥🔝 7737669865 🔝▻ narsinghpur Call-girls in Women Seeking Men  🔝narsinghpur🔝  ...➥🔝 7737669865 🔝▻ narsinghpur Call-girls in Women Seeking Men  🔝narsinghpur🔝  ...
➥🔝 7737669865 🔝▻ narsinghpur Call-girls in Women Seeking Men 🔝narsinghpur🔝 ...
 
Call Girls in Patel Nagar, Delhi 💯 Call Us 🔝9953056974 🔝 Escort Service
Call Girls in Patel Nagar, Delhi 💯 Call Us 🔝9953056974 🔝 Escort ServiceCall Girls in Patel Nagar, Delhi 💯 Call Us 🔝9953056974 🔝 Escort Service
Call Girls in Patel Nagar, Delhi 💯 Call Us 🔝9953056974 🔝 Escort Service
 

Manual reparacion Jeep Compass - Patriot Limited 2007-2009_Cooling

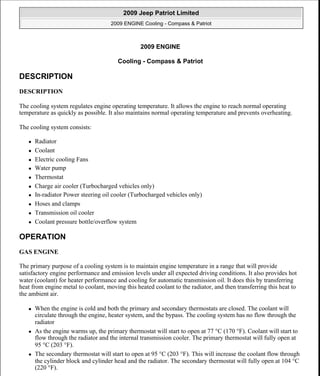
  • 1. 2009 ENGINE Cooling - Compass & Patriot DESCRIPTION DESCRIPTION The cooling system regulates engine operating temperature. It allows the engine to reach normal operating temperature as quickly as possible. It also maintains normal operating temperature and prevents overheating. The cooling system consists: Radiator Coolant Electric cooling Fans Water pump Thermostat Charge air cooler (Turbocharged vehicles only) In-radiator Power steering oil cooler (Turbocharged vehicles only) Hoses and clamps Transmission oil cooler Coolant pressure bottle/overflow system OPERATION GAS ENGINE The primary purpose of a cooling system is to maintain engine temperature in a range that will provide satisfactory engine performance and emission levels under all expected driving conditions. It also provides hot water (coolant) for heater performance and cooling for automatic transmission oil. It does this by transferring heat from engine metal to coolant, moving this heated coolant to the radiator, and then transferring this heat to the ambient air. When the engine is cold and both the primary and secondary thermostats are closed. The coolant will circulate through the engine, heater system, and the bypass. The cooling system has no flow through the radiator As the engine warms up, the primary thermostat will start to open at 77 °C (170 °F). Coolant will start to flow through the radiator and the internal transmission cooler. The primary thermostat will fully open at 95 °C (203 °F). The secondary thermostat will start to open at 95 °C (203 °F). This will increase the coolant flow through the cylinder block and cylinder head and the radiator. The secondary thermostat will fully open at 104 °C (220 °F). 2009 Jeep Patriot Limited 2009 ENGINE Cooling - Compass & Patriot 2009 Jeep Patriot Limited 2009 ENGINE Cooling - Compass & Patriot a Saturday, September 08, 2012 12:55:36 PM Page 1 © 2006 Mitchell Repair Information Company, LLC. a Saturday, September 08, 2012 12:55:40 PM Page 1 © 2006 Mitchell Repair Information Company, LLC.
  • 2. TURBOCHARGED ENGINE ONLY: the turbocharged engine has a single thermostat that starts to open at 90.5 °C (195 °F) and is fully open at 100 °C (212 °F). This is done to reduce resistance and increase flow. DIESEL Fig. 1: Cooling System Flow Courtesy of CHRYSLER LLC The water pump draws coolant from the radiator and delivers it to the engine block. The coolant travels through the engine block into the cylinder head. Coolant exits the engine at the thermostat. If the coolant temperature is less than 87°C (189°F) the thermostat directs all of the coolant back to the water pump. If the coolant temperature is between 87°C (189°F) and 102°C (216°F) the thermostat is in the mix mode and directs the coolant to the radiator and the water pump. If the coolant is greater than 102°C (216°F), the thermostat directs all of the coolant to the radiator. The thermostat also feeds excess coolant and bleeds air from the system through a hose leading to the coolant reservoir. The reservoir returns coolant to the inlet side of the water pump. A port and hose at the rear of the engine block provides coolant to the heater core. This coolant is returned to the engine at the intake side of the water pump. The oil cooler receives coolant directly from the engine block. A hose returns this coolant to the inlet side of the water pump. 1 - COOLANT RECOVERY PRESSURE CONTAINER 7 - WATER PUMP 2 - PRESSURE CAP 8 - THERMOSTAT HOUSING 3 - HEATER CORE 9 - RADIATOR 4 - AUXILIARY HEATER 10 - COOLANT DRAIN VALVE 5 - ENGINE 11 - SERVICE FILL VENT VALVE 6 - OIL COOLER 2009 Jeep Patriot Limited 2009 ENGINE Cooling - Compass & Patriot a Saturday, September 08, 2012 12:55:36 PM Page 2 © 2006 Mitchell Repair Information Company, LLC.
  • 3. DIAGNOSIS AND TESTING AERATION If coolant level drops below a certain point, aeration will occur drawing air into the water pump resulting in the following: High reading shown on the temperature gauge. Loss of coolant flow through the heater core. Corrosion in the cooling system. Transmission oil will become hotter (automatic transmission equipped vehicles). Water pump seal may run dry, increasing the risk of premature seal failure. Combustion gas leaks into the coolant can also cause the above problems. DEAERATION As air is removed from the cooling system, it gathers in the coolant recovery container. This pressure is released into the atmosphere through the pressure valve located in the radiator pressure cap when pressure reaches 96 - 124 kPa (14 - 18 psi). This air is replaced with coolant from the coolant recovery container. To effectively deaerate the system, multiple thermal cycles of the system may be required. FLOW CHECK To determine whether coolant is flowing through the cooling system, use one of the following procedures: If engine is cold, idle engine until normal operating temperature is reached. Then feel the upper radiator hose. If it is hot, coolant is circulating. Remove pressure cap when engine is cold, remove small amount of coolant. Idle engine until thermostat opens, you should observe coolant flow while looking down the filler neck. Once flow is detected install the pressure cap. LEAK TESTING NOTE: Deaeration does not occur at engine idle, higher engine speeds are required. Normal driving will deaerate cooling system. WARNING: Do not remove the cooling system pressure cap with the system hot and under pressure because serious burns from coolant can occur. WARNING: If vehicle has been run recently, wait 15 minutes before removing pressure cap. Place a shop towel over the cap, and without pushing down, rotate it counterclockwise to the first stop. Allow fluids to escape through the overflow tube. When the system stops pushing coolant and 2009 Jeep Patriot Limited 2009 ENGINE Cooling - Compass & Patriot a Saturday, September 08, 2012 12:55:36 PM Page 3 © 2006 Mitchell Repair Information Company, LLC.
  • 4. With engine not running, wipe the coolant filler neck sealing seat clean. The radiator should be full. Attach Tool 7700 or equivalent cooling system pressure tester to the coolant filler neck. Apply 104 kPa (15 psi) pressure. If the pressure drops more than 13 kPa (2 psi) in 2 minutes inspect all points for external leaks. All hoses, radiator and heater, should be moved while at 104 kPa (15 psi) since some leaks occur while driving due to engine movement, etc. If there are no external leaks after the gauge dial shows a drop in pressure, detach the tester. Start engine and run the engine to normal operating temperature in order to open the thermostat and allow the coolant to expand. Reattach the tester. If the needle on the dial fluctuates, it indicates a combustion leak and is usually a head gasket leak. If the needle on the dial does not fluctuate, race the engine a few times. If an abnormal amount of coolant or steam is emitted from the tailpipe, it may indicate a damaged head gasket, cracked engine block or cylinder head. There may be internal leaks which can be determined by removing the oil dipstick. If water globules appear intermixed with the oil, it will indicate an internal leak in the engine. If there is an internal leak, the engine must be disassembled for repair. COOLING SYSTEM steam into the coolant recovery container and pressure drops, push down on the cap and remove it completely. Squeezing the radiator inlet hose with a shop towel (to check pressure) before and after turning to the first stop is recommended. WARNING: With tool in place pressure builds up fast. Any excessive amount of pressure built up by continuous engine operation must be released to a safe pressure point. Never permit pressure to exceed 138 kpa (20 psi). CONDITION POSSIBLE CAUSE CORRECTION TEMPERATURE GAUGE READS LOW 1. Diagnostic Trouble Code (DTC) has been set indicating a stuck open engine thermostat. 1. Replace thermostat, if necessary. If a (DTC) has not been set, the problem may be with the temperature gauge. - 2. Engine Coolant Temperature Sensor. 2. Check connector at Engine Coolant Temperature Sensor. Repair as necessary. - 3. Inoperative temperature gauge. 3. Check gauge operation. Refer to Electrical/Instrument Cluster - Diagnosis and Testing . 4. Coolant level low during cold ambient temperature, accompanied by poor heater 4. Check coolant level in the coolant recovery/reserve container and the radiator. Inspect the system for 2009 Jeep Patriot Limited 2009 ENGINE Cooling - Compass & Patriot a Saturday, September 08, 2012 12:55:36 PM Page 4 © 2006 Mitchell Repair Information Company, LLC.
  • 5. - performance. leaks. Repair as necessary. Refer to WARNINGS in this service information before removing pressure cap. TEMPERATURE GAUGE READS HIGH OR ENGINE COOLANT WARNING LAMP ILLUMINATES. COOLANT MAY OR MAY NOT BE LOST FROM SYSTEM. 1. Trailer being towed, a steep hill being climbed, vehicle being operated in slow moving traffic, or engine idling during high ambient (outside) temperatures with air conditioning on. High altitudes could also cause these conditions. 1. This may be a temporary condition and repair is not necessary. Turn off the air conditioning and drive the vehicle without any of the previous conditions. Observe the temperature gauge. The gauge should return to the normal range. If the gauge does not return to the normal range, determine the cause of the overheating and repair. - 2. Inoperative temperature gauge. 2. Check gauge operation. Refer to Electrical/Instrument Cluster - Diagnosis and Testing . - 3. Is temperature warning lamp (if equipped) illuminating unnecessarily? 3. Check warning lamp operation. Refer to Electrical/Instrument Cluster - Diagnosis and Testing . - 4. Coolant low in recovery/reserve bottle and radiator? 4. Check for coolant leaks and repair as necessary. - 5. Pressure cap not installed tightly. If cap is loose, boiling point of coolant will be lowered. Also refer to the following step 6. 5. Tighten cap. - 6. Poor seals at pressure cap. 6. (a) Check condition of cap and cap seals. See Diagnosis and Testing . Replace cap if necessary. - - (b) Check condition of filler neck. If neck is warped or damaged, replace neck. - 7. Coolant level low in radiator, but not in coolant recovery/reserve bottle. This indicates the radiator is not drawing coolant from the coolant recovery/reserve bottle as the engine cools. As the engine cools, a vacuum is formed inside the cooling system. If the pressure cap seals are defective, or the 7. (a) Check condition of pressure cap and cap seals. Replace cap if necessary. - (b) Check condition of filler neck. Replace if damaged. - (c) Check condition of hose from filler neck to coolant container. It should be tight at both ends without any kinks or tears. Replace hose as necessary. (d) Check coolant recovery/reserve 2009 Jeep Patriot Limited 2009 ENGINE Cooling - Compass & Patriot a Saturday, September 08, 2012 12:55:36 PM Page 5 © 2006 Mitchell Repair Information Company, LLC.
  • 6. - cooling system has a leak, a vacuum cannot be formed. bottle and hose for blockage. Repair as necessary. - 8. Freeze point of coolant not correct. Mixture ratio may be too rich. 8. Check coolant concentration. See Diagnosis and Testing . Adjust glycol-to-water ratio as required. - 9. Coolant not flowing through system. 9. Check for coolant flow at filler neck with some coolant removed, engine warm, and thermostat open. Coolant should be observed flowing through filler neck. If flow is not observed, determine reason for lack of flow and repair as necessary. - 10. Radiator air seals missing or improperly installed. 10. Inspect air seals. Correct as necessary. - 11. Radiator or A/C condenser fins are dirty or clogged. 11. Clean obstruction from fins. - 12. Radiator core is plugged or corroded. 12. Replace or clean radiator. - 13. Fuel or ignition system problems. 13. Refer to the appropriate Powertrain Diagnostic Procedure service information. - 14. Dragging Brakes. 14. Inspect brake system and repair as necessary. Refer to Brakes - Diagnosis and Testing . - 15. Bug screen or other aftermarket accessory is being used causing reduced air flow. 15. Remove bug screen or accessory. - 16. Thermostat partially or completely closed. 16. Check thermostat operation and replace as necessary. See Diagnosis and Testing . - 17. Cooling fan not operating properly. 17. Check electric fan operation and repair as necessary. - 18. Cylinder head gasket leaking. 18. Check cylinder head gasket for leaks. See Diagnosis and Testing . - 19. Heater core leaking. 19. Check heater core for leaks. TEMPERATURE GAUGE READING IS INCONSISTENT (FLUCTUATES, CYCLES OR IS ERRATIC) 1. The gauge may cycle up and down. This is due to the cycling of the electric radiator fan. 1. A normal condition. No correction is necessary. If gauge cycling is the hot zone, check electric fan operation and repair as necessary. - 2. During cold weather operation with the heater blower in the high position, the gauge reading may drop slightly. 2. A normal condition. No correction is necessary. 3. Temperature gauge or 3. Check gauge operation. Refer to 2009 Jeep Patriot Limited 2009 ENGINE Cooling - Compass & Patriot a Saturday, September 08, 2012 12:55:36 PM Page 6 © 2006 Mitchell Repair Information Company, LLC.
  • 7. - Engine Coolant Temperature Sensor is defective or shorted. Electrical/Instrument Cluster - Diagnosis and Testing . - 4. Gauge reading rises when vehicle is brought to a stop after heavy use (engine still running). 4. A normal condition. No correction is necessary. The gauge should return to normal range after vehicle is driven. - 5. Gauge reading high after restarting a warmed-up (hot) engine. 5. A normal condition. No correction is necessary. The gauge should return to normal range after a few minutes of engine operation. - 6. Coolant level low in radiator (air will build up in the cooling system causing the thermostat to open late). 6. Check and correct coolant leaks. - 7. Cylinder head gasket leaking allowing exhaust gas to enter cooling system. This will cause thermostat to open late. 7. (a) Check for cylinder head gasket leaks using Tool C-3685-A Block Leak Tester or the equivalent. Repair as necessary. - (b) Check for coolant in the engine oil. Inspect for white steam emitting from exhaust system. Repair as necessary. - 8. Water pump impeller loose on shaft. 8. Check water pump and replace as necessary. - 9. Air leak on the suction side of water pump allows air to build up in cooling system. This will cause the thermostat to open late. 9. Locate leak and repair as necessary. PRESSURE CAP IS BLOWING OFF STEAM AND/OR COOLANT FLOWING INTO RECOVERY BOTTLE. TEMPERATURE GAUGE READING MAY BE ABOVE NORMAL, BUT NOT HIGH. COOLANT LEVEL MAY BE HIGH IN RECOVERY BOTTLE. 1. Pressure relief valve in pressure cap is defective. 1. Check condition of pressure cap and seals. See Diagnosis and Testing . Replace as necessary. COOLANT LOSS TO THE GROUND WITHOUT PRESSURE CAP BLOWOFF. GAUGE IS READING HIGH OR HOT. 1. Coolant leaks in radiator, cooling system hoses, water pump or engine. 1. Pressure test cooling system and repair as necessary. DETONATION OR PRE- IGNITION (NOT CAUSED BY IGNITION SYSTEM). GAUGE MAY OR MAY NOT BE 1. Engine overheating. 1. Check reason for overheating and repair as necessary. 2009 Jeep Patriot Limited 2009 ENGINE Cooling - Compass & Patriot a Saturday, September 08, 2012 12:55:36 PM Page 7 © 2006 Mitchell Repair Information Company, LLC.
  • 8. READING HIGH. - 2. Freeze point of coolant not correct. 2. Check the freeze point of the coolant. See Diagnosis and Testing . Adjust glycol-to-water ratio as required. HOSE OR HOSES COLLAPSE WHEN ENGINE IS COOLING 1. Vacuum created in cooling system on engine cool-down is not being relieved through coolant recovery/reserve system. 1. (a) Pressure cap relief valve stuck. See Diagnosis and Testing . Replace as necessary. - - (b) Hose between coolant recovery/reserve bottle and outlet connector is kinked. Repair as necessary. - - (c) Vent at coolant recovery/reserve bottle is plugged. Clean vent and repair as necessary. - - (d) Recovery/reserve bottle is internally blocked or plugged. Check for blockage and repair as necessary. RADIATOR FAN OPERATES ALL THE TIME 1. Malfunctioning electrical component or circuit. 1. Refer to appropriate Powertrain Diagnostic Procedures. Repair as necessary. 2. Check for low coolant level. 2. Repair as necessary. RADIATOR FAN WILL NOT OPERATE, GAUGE READING HIGH OR HOT 1. Fan motor defective. 1. Refer to appropriate Powertrain Diagnostic article for operation of the scan tool. Repair as necessary. - 2. Fan relay, powertrain control module (PCM) or engine coolant temperature sensor defective. 2. Refer to appropriate Powertrain Diagnostic article for operation of the scan tool. Repair as necessary. - 3. Blown fuse in power distribution center (PDC). 3. Determine cause for blown fuse and repair as necessary. NOISY FAN 1. Fan blade loose. 1. Replace radiator fan assembly. - 2. Fan blade striking a surrounding object. 2. Locate point of fan blade contact and repair as necessary. - 3. Air obstructions at radiator or A/C condenser. 3. Remove obstructions and/or clean debris from radiator and/or A/C condenser. - 4. Electric fan motor defective. 4. Replace radiator fan assembly. INADEQUATE AIR CONDITIONER PERFORMANCE (COOLING SYSTEM SUSPECTED) 1. Electric radiator fan not operating when A/C is on. 1. Refer to appropriate Powertrain Diagnostic article for operation of the scan tool. Repair as necessary. 2009 Jeep Patriot Limited 2009 ENGINE Cooling - Compass & Patriot a Saturday, September 08, 2012 12:55:36 PM Page 8 © 2006 Mitchell Repair Information Company, LLC.
  • 9. - 2. Radiator and/or air conditioning condenser is restricted, obstructed or dirty. 2. Remove restriction and/or clean as necessary. - 3. Radiator air seals missing or improperly installed. 3. Inspect air seals. Repair as necessary. - 4. Engine is overheating (heat may be transferred from radiator to A/C condenser). High underhood temperature due to engine overheating may also transfer heat to A/C components. 4. Correct overheating condition. Refer to this service information. INADEQUATE HEATER PERFORMANCE 1. Has a diagnostic trouble code (DTC) been set? 1. Refer to Powertrain Diagnostic Procedures. - 2. Coolant level low. 2. Check cooling system for leaks. Repair as necessary. - 3. Obstructions in heater hose fittings at engine. 3. Remove heater hoses at both ends and check for obstructions. Repair as necessary. - 4. Heater hose kinked. 4. Locate kinked area and repair as necessary. - 5. Water pump is not pumping coolant to heater core. When the engine is fully warmed up, both heater hoses should be hot to the touch. 5. See Diagnosis and Testing . Repair as necessary. HEAT ODOR 1. Various heat shields are used at certain components. One or more of these shields may be missing. 1. Locate missing shields and replace or repair as necessary. - 2. Is temperature gauge reading above the normal range? 2. Refer to the previous Temperature Gauge Reads High in these Diagnostic Charts. Repair as necessary. - 3. Is cooling fan operating correctly? 3. Repair as necessary. - 4. Has undercoating been applied to any unnecessary component. 4. Clean undercoating as necessary. - 5. Engine may be running rich causing the catalytic converter to overheat. 5. Refer to appropriate Powertrain Diagnostic article for operation of the scan tool. Repair as necessary. POOR DRIVEABILITY (THERMOSTAT POSSIBLY STUCK OPEN). GAUGE MAY BE READING LOW 1. Has a diagnostic trouble code (DTC ) been set? 1. Refer to the Powertrain Diagnostic Procedure service information for checking a DTC related to the thermostat. 2009 Jeep Patriot Limited 2009 ENGINE Cooling - Compass & Patriot a Saturday, September 08, 2012 12:55:36 PM Page 9 © 2006 Mitchell Repair Information Company, LLC.
  • 10. STANDARD PROCEDURE COOLANT LEVEL CHECK STEAM IS COMING FROM FRONT OF VEHICLE NEAR GRILLE AREA WHEN WEATHER IS WET, ENGINE IS WARMED UP, RUNNING, AND VEHICLE IS STATIONARY. TEMPERATURE GAUGE IS IN NORMAL RANGE. 1. During wet weather, moisture (snow, ice or rain condensation) on the radiator will evaporate when the thermostat opens. This opening allows heated water into the radiator. When the moisture contacts the hot radiator, steam may be emitted. This usually occurs in cold weather with no fan or airflow to blow it away. 1. Occasional steam emitting from this area is normal. No repair is necessary. COOLANT COLOR 1. Coolant color is not necessarily an indication of adequate corrosion or temperature protection. Do not rely on coolant color for determining condition of coolant. 1. Check the freeze point of the coolant. See Diagnosis and Testing . Adjust the glycol-to-water ratio as required. COOLANT LEVEL CHANGES IN COOLANT RECOVERY/RESERVE BOTTLE 1. Level changes are to be expected as coolant volume fluctuates with engine temperature. If the level in the bottle was between the FULL HOT and ADD marks at normal engine operating temperature, the level should return to within that range after operation at elevated temperatures. 1. A normal condition. No repair is necessary. 2009 Jeep Patriot Limited 2009 ENGINE Cooling - Compass & Patriot a Saturday, September 08, 2012 12:55:36 PM Page 10 © 2006 Mitchell Repair Information Company, LLC.
  • 11. Fig. 2: Coolant Level Courtesy of CHRYSLER LLC The coolant recovery/reserve system provides a quick visual method for determining the coolant level without removing the pressure cap. Simply observe, with the engine idling and warmed up to normal operating temperature, that the level of the coolant in the recovery/reserve bottle is between the FULL HOT and ADD marks. COOLING SYSTEM DRAINING 1. Position a clean collecting container under draincock location. 2. Without removing the pressure cap and with system not under pressure, turn draincock counterclockwise to open. 3. The coolant reserve bottle should empty first, then remove the pressure cap. 4. If coolant reserve bottle does not empty first: NOTE: Do not remove pressure cap for routine coolant level inspections. WARNING: Do not open the radiator draincock with the system hot and under pressure. Serious burns from coolant can occur. NOTE: Drain, flush, and fill the cooling system at the mileage or time intervals specified in the MAINTENANCE SCHEDULE. Refer to Vehicle Quick Reference/Maintenance Schedules - Description . If the solution is dirty, rusty, or contains a considerable amount of sediment; clean and flush with a reliable cooling system cleaner. Care should be taken in disposing of the used engine coolant from your vehicle. Check governmental regulations for disposal of used engine coolant. 2009 Jeep Patriot Limited 2009 ENGINE Cooling - Compass & Patriot a Saturday, September 08, 2012 12:55:36 PM Page 11 © 2006 Mitchell Repair Information Company, LLC.
  • 12. a. Check condition of the pressure cap and cap seals. b. Check for kinked or torn overflow hose from filler neck to reserve bottle. 5. Allow cooling system to drain completely. FILLING COOLING SYSTEM 1. Close radiator draincock. Hand tighten only. 2. Remove the cooling system pressure cap. Install Tool 8195 Filling Aid Funnel. 3. Use the supplied clip to pinch overflow hose. WARNING: Make sure engine cooling system is cool before removing pressure cap or any hose. The cooling system is pressurized when hot. Severe personal injury may result from escaping hot coolant. CAUTION: Do not use well water, or suspect water supply in cooling system. A 50/50 mixture of the recommended ethylene glycol and distilled water is recommended. For recommended coolant usage. Refer to Vehicle Quick Reference/Capacities and Recommended Fluids - Description . NOTE: For cooling system capacity. Refer to Vehicle Quick Reference/Capacities and Recommended Fluids - Specifications . NOTE: Be careful not to spill coolant on drive belts or the generator. NOTE: While filling the cooling system, pour coolant into the larger section of the Tool 8195, Filling Aid Funnel. 2009 Jeep Patriot Limited 2009 ENGINE Cooling - Compass & Patriot a Saturday, September 08, 2012 12:55:36 PM Page 12 © 2006 Mitchell Repair Information Company, LLC.
  • 13. Fig. 3: Filling Cooling System Courtesy of CHRYSLER LLC 4. Pour coolant into system until funnel is full. 5. Start engine and run at 1500 - 2000 rpm to force air bubbles out. 6. Remove clip from overflow hose and release excess coolant in funnel into coolant recovery container. 7. Install cooling system pressure cap. 8. Slowly fill coolant reserve/recovery bottle to at least the FULL HOT mark with the recommended coolant. It may be necessary to add additional coolant to the reserve/recovery bottle after three or four warm-up/cool down cycles to maintain coolant level between the FULL HOT and ADD marks. This is due to the removal of trapped air from the system. CLEANING/REVERSE FLUSHING CLEANING Drain the cooling system and refill with water. Run the engine with the radiator cap installed until the upper radiator hose is hot. Stop the engine and drain the water from system. If the water is dirty, fill the system with water, run the engine and drain the system. Repeat this procedure until the water drains clean. REVERSE FLUSHING Reverse flushing of the cooling system is the forcing of water through the cooling system. This is done using air pressure in the opposite direction of normal coolant flow. It is usually only necessary with very dirty systems with evidence of partial plugging. REVERSE FLUSHING RADIATOR Disconnect the radiator hoses from the radiator inlet and outlet. Attach a section of the radiator hose to the radiator bottom outlet fitting and insert the flushing gun. Connect a water supply hose and air supply hose to the flushing gun. Allow the radiator to fill with water. When the radiator is filled, apply air in short blasts. Allow the radiator to refill between blasts. Continue this reverse flushing until clean water flows out through the rear of the radiator cooling tube passages. 1 - SPECIAL TOOL 8195 FILLING AID FUNNEL 2 - PINCH OVERFLOW HOSE CAUTION: Coolant may leak out of the bottle overflow tube if filling too rapidly. CAUTION: Internal radiator pressure must not exceed 138 kPa (20 psi) as damage to radiator may result. 2009 Jeep Patriot Limited 2009 ENGINE Cooling - Compass & Patriot a Saturday, September 08, 2012 12:55:36 PM Page 13 © 2006 Mitchell Repair Information Company, LLC.
  • 14. REVERSE FLUSHING ENGINE Drain the cooling system. Remove the thermostat housing and thermostat. Install the thermostat housing. Disconnect the radiator upper hose from the radiator and attach the flushing gun to the hose. Disconnect the radiator lower hose from the water pump and attach a lead-away hose to the water pump inlet fitting. Connect the water supply hose and air supply hose to flushing gun. Allow the engine to fill with water. When the engine is filled, apply air in short blasts, allowing the system to fill between air blasts. Continue until clean water flows through the lead away hose. Remove the lead away hose, flushing gun, water supply hose and air supply hose. Remove the thermostat housing and install the thermostat. Install the thermostat housing with a replacement gasket. Refer to Thermostat Replacement. Connect the radiator hoses. Refill the cooling system with the correct antifreeze/water mixture. Refer to Vehicle Quick Reference/Capacities and Recommended Fluids - Description . Refer to Refilling the Cooling System. CHEMICAL CLEANING In some instances, use a radiator cleaner (Mopar® Radiator Kleen or equivalent) before flushing. This will soften scale and other deposits and aid flushing operation. INSPECTION INSPECTION After performing a cleaning/flush procedure, inspect all hoses, clamps and connections for deterioration and leaks. Inspect radiator and heater core for leaks. SPECIFICATIONS SPECIFICATIONS CAUTION: On vehicles equipped with a heater water control valve, be sure the heater control valve is closed (heat off). This will prevent coolant flow with scale and other deposits from entering the heater core. CAUTION: Follow manufacturers instructions when using these products. DESCRIPTION SPECIFICATIONS METRIC US 1.8L Engine* 6.8L 7.2 qts. 2.0L Engine* 6.8L 7.2 qts. 2.4L Engine* 6.8L 7.2 qts. 2009 Jeep Patriot Limited 2009 ENGINE Cooling - Compass & Patriot a Saturday, September 08, 2012 12:55:36 PM Page 14 © 2006 Mitchell Repair Information Company, LLC.
  • 15. TORQUE SPECIAL TOOLS SPECIAL TOOLS Fig. 4: Funnel - 8195 Courtesy of CHRYSLER LLC 2.0L Diesel Engine* 8.5L 8.0 qts. *(Includes heater and coolant recovery bottle filled to MAX level.) DESCRIPTION N.m Ft. Lbs. In. Lbs. Bolts, A/C Condenser to Radiator 5 - 44 Bolt, Automatic Belt Tensioner Pulley - Gas Engine 24 18 - Bolt Automatic Belt Tension Assembly 54 40 - Bolts, Charge Air Cooler to Radiator (Turbo Equipped) 5 - 44 Bolt, Coolant Recovery Bottle 4 - 35 Bolts, Coolant Adapter 18 13 - Bolts, Inlet housing to coolant adapter 11 8 97 Screw, bypass valve to radiator 5 - 44 Screw, bypass tube to EGR Cooler 10 7 89 Screw, transmission cooler to radiator 5 - 44 Engine Coolant Temperature Sensor - 19 14 - Pivot Bolt, Generator Mounting 54 40 - Locking Nut, Generator Mounting 54 40 - Screws, Transmission Cooler to Radiator 8 - 71 Bolts, Water Pump to Engine Block 24 18 - EGR Cooler to exhaust manifold tube nuts 20 15 - EGR Cooler to exhaust manifold tube bolts 20 15 - EGR to EGR valve tube bolts 20 15 - Bolts, Water Pump Inlet Tube to water pump housing - Gas Engine 24 18 - Bolts, Water Pump to Water Pump Adapter - Gas Engine 22 16 - Bolts, Water Pump Pulley to Water Pump - Gas Engine 9 - 80 2009 Jeep Patriot Limited 2009 ENGINE Cooling - Compass & Patriot a Saturday, September 08, 2012 12:55:36 PM Page 15 © 2006 Mitchell Repair Information Company, LLC.
  • 16. Fig. 5: Pliers, Hose Clamp - 8495A Courtesy of CHRYSLER LLC Fig. 6: Tester, Cooling System - 7700-A Courtesy of CHRYSLER LLC Fig. 7: Refractometer - 8286 Courtesy of CHRYSLER LLC Fig. 8: Disconnect, Trans Cooler Line - 8875A Courtesy of CHRYSLER LLC 2009 Jeep Patriot Limited 2009 ENGINE Cooling - Compass & Patriot a Saturday, September 08, 2012 12:55:36 PM Page 16 © 2006 Mitchell Repair Information Company, LLC.
  • 17. Fig. 9: DRB III Essential Kit - CH6010A Courtesy of CHRYSLER LLC ACCESSORY DRIVE BELT, SERPENTINE Description GAS ENGINE Fig. 10: Accessory Drive Belt Routing Courtesy of CHRYSLER LLC The accessory drive belt (2) is a serpentine type belt that is driven by the crankshaft pulley (6). The belt drives the A/C compressor, generator (3), power steering pump (1) and water pump (7). Belt tension is maintained by an automatic belt tensioner (8). DIESEL ENGINE 2009 Jeep Patriot Limited 2009 ENGINE Cooling - Compass & Patriot a Saturday, September 08, 2012 12:55:36 PM Page 17 © 2006 Mitchell Repair Information Company, LLC.
  • 18. Fig. 11: Accessory Belt Routing - Diesel Courtesy of CHRYSLER LLC The accessory drive belt (2) on the 2.2L Diesel engine is of the serpentine style. This belt is used to drive the generator (1), power steering pump (5), and the A/C compressor (4). Diagnosis and Testing ACCESSORY DRIVE BELT VISUAL DIAGNOSIS 2009 Jeep Patriot Limited 2009 ENGINE Cooling - Compass & Patriot a Saturday, September 08, 2012 12:55:36 PM Page 18 © 2006 Mitchell Repair Information Company, LLC.
  • 19. Fig. 12: Belt Wear Patterns Courtesy of CHRYSLER LLC When diagnosing serpentine accessory drive belts, small cracks that run across the ribbed surface of the belt from rib to rib (1), are considered normal. These are not a reason to replace the belt. However, cracks running along a rib (not across) (2) are not normal. Any belt with cracks running along a rib must be replaced. Also replace the belt if it has excessive wear, frayed cords or severe glazing. Refer to ACCESSORY DRIVE BELT DIAGNOSIS CHART for further belt diagnosis. NOISE DIAGNOSIS Noises generated by the accessory drive belt are most noticeable at idle. Before replacing a belt to resolve a noise condition, inspect all of the accessory drive pulleys for contamination, alignment, glazing, or excessive end play. ACCESSORY DRIVE BELT DIAGNOSIS CHART 1 - NORMAL CRACKS ON BELT 2 - NOT NORMAL CRACKS ON BELT CONDITION POSSIBLE CAUSES CORRECTION RIB CHUNKING (One or more ribs has separated from belt body) 1. Foreign objects imbedded in pulley grooves. 1. Remove foreign objects from pulley grooves. Replace belt. 2. Installation damage 2. Replace belt RIB OR BELT WEAR 1. Pulley misaligned 1. Align pulley(s) 2. Abrasive environment 2. Clean pulley(s). Replace belt if necessary 2009 Jeep Patriot Limited 2009 ENGINE Cooling - Compass & Patriot a Saturday, September 08, 2012 12:55:36 PM Page 19 © 2006 Mitchell Repair Information Company, LLC.
  • 20. 3. Rusted pulley(s) 3. Clean rust from pulley(s) 4. Sharp or jagged pulley groove tips 4. Replace pulley. Inspect belt. 5. Belt rubber deteriorated 5. Replace belt BELT SLIPS 1. Belt slipping because of insufficient tension 1. Inspect/Replace tensioner if necessary 2. Belt or pulley exposed to substance that has reduced friction (belt dressing, oil, ethylene glycol) 2. Replace belt and clean pulleys 3. Driven component bearing failure (seizure) 3. Replace component or bearing 4. Belt glazed or hardened from heat and excessive slippage 4. Replace belt. LONGITUDINAL BELT CRACKING 1. Belt has mistracked from pulley groove 1. Replace belt 2. Pulley groove tip has worn away rubber to tensile member 2. Replace belt GROOVE JUMPING (Belt does not maintain correct position on pulley) 1. Incorrect belt tension 1. Inspect/Replace tensioner if necessary 2. Pulley(s) not within design tolerance 2. Replace pulley(s) 3. Foreign object(s) in grooves 3. Remove foreign objects from grooves 4. Pulley misalignment 4. Align component 5. Belt cordline is broken 5. Replace belt BELT BROKEN (Note: Identify and correct problem before new belt is installed) 1. Incorrect belt tension 1. Replace Inspect/Replace tensioner if necessary 2. Tensile member damaged during belt installation 2. Replace belt 3. Severe misalignment 3. Align pulley(s) 4. Bracket, pulley, or bearing failure 4. Replace defective component and belt NOISE (Objectionable squeal, squeak, or rumble is heard or felt while drive belt is in operation) 1. Incorrect belt tension 1. Inspect/Replace tensioner if necessary 2. Bearing noise 2. Locate and repair 3. Belt misalignment 3. Align belt/pulley(s) 4. Belt to pulley mismatch 4. Install correct belt 5. Driven component induced vibration 5. Locate defective driven component and repair 6. System resonant frequency induced vibration 6. Vary belt tension within specifications TENSION SHEETING FABRIC FAILURE (Woven fabric on outside, 1. Tension sheeting contacting stationary object 1. Correct rubbing condition 2. Excessive heat causing woven 2. Replace belt 2009 Jeep Patriot Limited 2009 ENGINE Cooling - Compass & Patriot a Saturday, September 08, 2012 12:55:36 PM Page 20 © 2006 Mitchell Repair Information Company, LLC.
  • 21. Removal GAS ENGINE Fig. 13: Accessory Drive Belt Routing Courtesy of CHRYSLER LLC 1. Using a wrench, rotate accessory drive belt tensioner (8) counterclockwise until accessory drive belt (2) can be removed from pulleys (5 and 9). 2. Remove accessory drive belt (2). DIESEL circumference of belt has cracked or separated from body of belt) fabric to age 3. Tension sheeting splice has fractured 3. Replace belt CORD EDGE FAILURE (Tensile member exposed at edges of belt or separated from belt body) 1. Incorrect belt tension 1. Inspect/Replace tensioner if necessary 2. Belt contacting stationary object 2. Replace belt 3. Pulley(s) out of tolerance 3. Replace pulley 4. Insufficient adhesion between tensile member and rubber matrix 4. Replace belt 2009 Jeep Patriot Limited 2009 ENGINE Cooling - Compass & Patriot a Saturday, September 08, 2012 12:55:36 PM Page 21 © 2006 Mitchell Repair Information Company, LLC.
  • 22. Fig. 14: Accessory Belt Routing - Diesel Courtesy of CHRYSLER LLC 1. Raise vehicle on hoist. 2. Remove belt splash shield. 3. Using a wrench, rotate belt tensioner (8) clockwise until belt (6) can be removed from power steering pump pulley (4). Gently, release spring tension on tensioner (8). 4. Remove accessory drive belt (2). Cleaning CLEANING Clean all foreign debris from belt pulley grooves. The belt pulleys must be free of oil, grease, and coolants before installing the drive belt. Installation GAS ENGINE 2009 Jeep Patriot Limited 2009 ENGINE Cooling - Compass & Patriot a Saturday, September 08, 2012 12:55:36 PM Page 22 © 2006 Mitchell Repair Information Company, LLC.
  • 23. Fig. 15: Accessory Drive Belt Routing Courtesy of CHRYSLER LLC 1. Install the accessory drive belt (2) around all the pulleys except for the generator pulley (3). 2. Using a wrench, rotate accessory drive belt tensioner (8) counterclockwise until accessory drive belt (2) can be installed on the generator pulley (3). Release spring tension onto accessory drive belt (2). DIESEL NOTE: When installing drive belt on the pulleys, make sure that belt is properly routed and all V-grooves make proper contact with pulley grooves. 2009 Jeep Patriot Limited 2009 ENGINE Cooling - Compass & Patriot a Saturday, September 08, 2012 12:55:36 PM Page 23 © 2006 Mitchell Repair Information Company, LLC.
  • 24. Fig. 16: Accessory Belt Routing - Diesel Courtesy of CHRYSLER LLC 1. Install belt over all pulleys except for the power steering pump pulley (5). See Removal . 2. Using a wrench, rotate belt tensioner (8) clockwise until belt can be installed onto power steering pump pulley (5). Release spring tension onto belt. 3. Install belt splash shield. See Removal . 4. Lower vehicle from hoist. PULLEY, IDLER Removal REMOVAL NOTE: When installing accessory drive belt, be sure belt is routed around all accessories correctly. 2009 Jeep Patriot Limited 2009 ENGINE Cooling - Compass & Patriot a Saturday, September 08, 2012 12:55:36 PM Page 24 © 2006 Mitchell Repair Information Company, LLC.
  • 25. Fig. 17: Accessory Drive Belt Routing Courtesy of CHRYSLER LLC 1. Raise vehicle on hoist. 2. Remove belt splash shield. 3. Remove accessory drive belt (2). See Removal . 4. Remove idler pulley mounting bolt. Remove idler pulley (5 or 9). Installation INSTALLATION Fig. 18: Accessory Drive Belt Routing 2009 Jeep Patriot Limited 2009 ENGINE Cooling - Compass & Patriot a Saturday, September 08, 2012 12:55:36 PM Page 25 © 2006 Mitchell Repair Information Company, LLC.
  • 26. Courtesy of CHRYSLER LLC 1. Position pulley (5 or 9) in mounting position. Install idler pulley mounting bolt. Tighten bolt to 48 N.m (35 ft. lbs.). 2. Install accessory drive belt (2). See Installation . 3. Install belt splash shield. 4. Lower vehicle. TENSIONER, BELT Description DESCRIPTION The automatic belt tensioner maintains proper tension on the accessory drive belt. The tensioner pulley can be serviced separately. Removal GAS ENGINE Fig. 19: Splash Shield Courtesy of CHRYSLER LLC 2009 Jeep Patriot Limited 2009 ENGINE Cooling - Compass & Patriot a Saturday, September 08, 2012 12:55:36 PM Page 26 © 2006 Mitchell Repair Information Company, LLC.
  • 27. 1. Raise vehicle on hoist. 2. Remove belt splash shield (3). Fig. 20: Accessory Drive Belt Routing Courtesy of CHRYSLER LLC 3. Remove accessory drive belt. See Removal . 4. Remove accessory drive belt tensioner mounting bolt. Remove accessory drive belt tensioner (8). DIESEL ENGINE 1 - POWER STEERING PUMP 2 - ACCESSORY DRIVE BELT 3 - GENERATOR 4 - CRANKSHAFT PULLEY 5 - LOWER IDLER PULLEY 6 - CRANKSHAFT PULLEY 7 - WATER PUMP PULLEY 8 - ACCESSORY DRIVE BELT TENSIONER 9 - UPPER IDLER PULLEY 2009 Jeep Patriot Limited 2009 ENGINE Cooling - Compass & Patriot a Saturday, September 08, 2012 12:55:36 PM Page 27 © 2006 Mitchell Repair Information Company, LLC.
  • 28. Fig. 21: Accessory Belt Routing - Diesel Courtesy of CHRYSLER LLC 1. Remove accessory drive belt (2). See Removal . 2. Remove tensioner bracket mounting bolts. 3. Remove tensioner assembly from engine. 4. If idler pulley is to be replaced, remove pulley from tensioner. Installation GAS ENGINE 2009 Jeep Patriot Limited 2009 ENGINE Cooling - Compass & Patriot a Saturday, September 08, 2012 12:55:36 PM Page 28 © 2006 Mitchell Repair Information Company, LLC.
  • 29. Fig. 22: Accessory Drive Belt Routing Courtesy of CHRYSLER LLC 1. Position accessory drive belt tensioner (8) and install mounting bolt (1). Tighten bolt (1) to 24 N.m (212 in. lbs.). 2. Install accessory drive belt (2). See Installation . 2009 Jeep Patriot Limited 2009 ENGINE Cooling - Compass & Patriot a Saturday, September 08, 2012 12:55:36 PM Page 29 © 2006 Mitchell Repair Information Company, LLC.
  • 30. Fig. 23: Splash Shield Courtesy of CHRYSLER LLC 3. Install belt splash shield (3). 4. Lower vehicle. DIESEL ENGINE Fig. 24: Accessory Belt Routing - Diesel Courtesy of CHRYSLER LLC 1. Install tensioner pulley (7) and bolt, if removed. Tighten bolt to 27 N.m (20 ft. lbs.). 2. Install tensioner assembly (8) to engine and tighten bolt to 54 N.m (40 ft. lbs.). 3. Install accessory drive belt (2). See Installation . ENGINE BOTTLE, COOLANT RECOVERY Description 2009 Jeep Patriot Limited 2009 ENGINE Cooling - Compass & Patriot a Saturday, September 08, 2012 12:55:36 PM Page 30 © 2006 Mitchell Repair Information Company, LLC.
  • 31. GAS ENGINE The coolant recovery system consists of a coolant recovery container mounted to the RH inner wheel housing, a vent hose for the coolant recovery container, a hose connecting the container to the radiator neck, and a pressure cap. Operation GAS ENGINE The system works in conjunction with the cooling system pressure cap to utilize thermal expansion and contraction of the coolant to keep the coolant free of trapped air. The system provides space for expansion and contraction. Also, the system provides a convenient and safe method for checking and adjusting the coolant level at atmospheric pressure without removing the pressure cap. It also provides some reserve coolant to compensate for minor leaks and evaporation or boiling losses. DIESEL ENGINE The location of the container allows any air or vapor exceeding the pressure/vent cap rating to escape through the cap. Coolant flows through the container at all times during engine operation whether the engine is cold or at normal operating temperature. The coolant container is equipped with a pressure/vent cap. For more information. See Description Removal GAS ENGINE Fig. 25: Coolant Recovery Container Courtesy of CHRYSLER LLC 1 - MOUNTING BRACKET 2009 Jeep Patriot Limited 2009 ENGINE Cooling - Compass & Patriot a Saturday, September 08, 2012 12:55:36 PM Page 31 © 2006 Mitchell Repair Information Company, LLC.
  • 32. 1. Partially drain cooling system using the draincock only. See Standard Procedure . Drain system below level of the coolant recovery pressure container. 2. Remove the return hose (5) from the upper radiator hose tee (3). 3. Remove the coolant recovery bottle mount bolt (2) from the mounting bracket (1). 4. Disengage the coolant recovery container (6) from the washer reservoir bottle (4). 5. Remove the coolant recovery container (6). DIESEL ENGINE Fig. 26: Coolant Recovery Pressure Container Courtesy of CHRYSLER LLC 1. Partially drain cooling system using the draincock only. See Standard Procedure . Drain system below 2 - BOLT 3 - RADIATOR HOSE TEE 4 - WASHER RESERVOIR 5 - HOSE 6 - COOLANT RECOVERY CONTAINER 1 - COOLANT RECOVERY PRESSURE CONTAINER 2 - DASH PANEL 3 - COOLANT HOSE 4 - RETAINING BOLTS 5 - RETAINING NUT 2009 Jeep Patriot Limited 2009 ENGINE Cooling - Compass & Patriot a Saturday, September 08, 2012 12:55:36 PM Page 32 © 2006 Mitchell Repair Information Company, LLC.
  • 33. level of the coolant recovery pressure container. 2. Remove engine cover. 3. Disconnect hose and remove oil separator from top of valve cover. 4. Remove fuel filter heater and position aside. 5. Disconnect return hose at coolant recovery container (1). 6. Remove coolant recovery container mounting bolts bolt. 7. Lift container up at disconnect coolant hose from left side of coolant recovery container 8. Remove coolant recovery container from engine compartment. Installation GAS ENGINE Fig. 27: Coolant Recovery Container Courtesy of CHRYSLER LLC 1. Position the coolant recovery container (6) into the washer fluid reservoir (4). 2. Install the coolant recovery container mounting bolt (2). Tighten the mounting bolt to 4 N.m (35 in. lbs.). 3. Connect the hose (5) at the upper radiator tee (3). 4. Fill coolant recovery container to proper level. See Standard Procedure 1 - MOUNTING BRACKET 2 - BOLT 3 - RADIATOR HOSE TEE 4 - WASHER RESERVOIR 5 - HOSE 6 - COOLANT RECOVERY CONTAINER 2009 Jeep Patriot Limited 2009 ENGINE Cooling - Compass & Patriot a Saturday, September 08, 2012 12:55:36 PM Page 33 © 2006 Mitchell Repair Information Company, LLC.
  • 34. DIESEL ENGINE Fig. 28: Coolant Recover Container - Diesel Courtesy of CHRYSLER LLC 1. Lower container (3) into engine compartment and connect coolant hose (2) at bottom of container (3). 2. Position container and install mounting bolt. Tighten to 3 N.m (40 lbs. in.). 3. Connect coolant bypass hose (1) to coolant recovery pressure container (3). 4. Refill cooling system. See Standard Procedure . CAP, RADIATOR Description GAS ENGINE 1 - RETURN HOSE 2 - HOSE 3 - COOLANT CONTAINER 2009 Jeep Patriot Limited 2009 ENGINE Cooling - Compass & Patriot a Saturday, September 08, 2012 12:55:36 PM Page 34 © 2006 Mitchell Repair Information Company, LLC.
  • 35. Fig. 29: Cooling System Pressure Cap Courtesy of CHRYSLER LLC The cooling system is equipped with a pressure cap that releases built up pressure, maintaining a range of 97- 124 kPa (14-18 psi). There is also a vent valve (6) in the center of the cap. This valve also opens when coolant is cooling and contracting, allowing coolant to return to radiator from coolant recovery container by vacuum through connecting hose.If valve is stuck shut, the radiator hoses will be collapsed on cool down. Clean the vent valve to ensure proper sealing when boiling point is reached. DIESEL ENGINE 1 - OVERFLOW NIPPLE 2 - MAIN SPRING 3 - GASKET RETAINER 4 - STAINLESS-STEEL SWIVEL TOP 5 - RUBBER SEALS 6 - VENT VALVE 7 - RADIATOR 8 - FILLER NECK 2009 Jeep Patriot Limited 2009 ENGINE Cooling - Compass & Patriot a Saturday, September 08, 2012 12:55:36 PM Page 35 © 2006 Mitchell Repair Information Company, LLC.
  • 36. Fig. 30: Radiator Pressure Cap Courtesy of CHRYSLER LLC All vehicles are equipped with a pressure cap. This cap releases pressure at some point within approximately 110 kPa (16 psi). The pressure relief point (in pounds) is engraved on top of the cap The cooling system will operate at pressures slightly above atmospheric pressure. This results in a higher coolant boiling point allowing increased radiator cooling capacity. The cap contains a spring-loaded pressure relief valve. This valve opens when system pressure reaches the release range of approximately 110 kPa (16 psi). A rubber gasket seals the radiator filler neck. This is done to maintain vacuum during coolant cool-down and to prevent leakage when system is under pressure. Operation 1 - NECK SEAL 2 - VACUUM VENT 3 - PRESSURE RATING 4 - PRESSURE VALVE 2009 Jeep Patriot Limited 2009 ENGINE Cooling - Compass & Patriot a Saturday, September 08, 2012 12:55:36 PM Page 36 © 2006 Mitchell Repair Information Company, LLC.
  • 37. GAS ENGINE Fig. 31: Radiator Pressure Cap Courtesy of CHRYSLER LLC The pressure cap allows the cooling system to operate at higher than atmospheric pressure. The higher pressure raises the coolant boiling point; this allows increased radiator cooling capacity. The secondary gasket in the cap seals the filler neck and the primary gasket seals the cooling system so that vacuum can be maintained, allowing coolant to be drawn back into the radiator from the reserve container. A vent valve in the center of the cap will remain shut as long as the cooling system is pressurized. As the coolant cools, it contracts and creates a vacuum in cooling system. This causes the vacuum valve to open and coolant in reserve/overflow tank to be drawn through connecting hose into radiator. If the vacuum valve is stuck shut, or overflow hose is kinked, radiator hoses will collapse on cool-down. 1 - NECK SEAL 2 - VACUUM VENT 3 - PRESSURE RATING 4 - PRESSURE VALVE 2009 Jeep Patriot Limited 2009 ENGINE Cooling - Compass & Patriot a Saturday, September 08, 2012 12:55:36 PM Page 37 © 2006 Mitchell Repair Information Company, LLC.
  • 38. DIESEL ENGINE A vent valve in the center of the cap will remain shut as long as the cooling system is pressurized. As the coolant cools, it contracts and creates a vacuum in cooling system. This causes the vacuum valve to open and coolant in reserve/overflow tank to be drawn through connecting hose into radiator. If the vacuum valve is stuck shut, or overflow hose is kinked, radiator hoses will collapse on cool-down. Diagnosis and Testing PRESSURE TESTING Fig. 32: Radiator Cap Pressure Testing Courtesy of CHRYSLER LLC Dip the pressure cap in water. Clean any deposits off the vent valve or its seat and apply cap to end of the Pressure Cap Test Adaptor that is included with the Cooling System Tester 7700. Working the plunger, bring the pressure to 104 kPa (15 psi) on the gauge. If the pressure cap fails to hold pressure of at least 97 kPa (14 psi), replace the pressure cap. If the pressure cap tests properly while positioned on Cooling System Tester 7700, but will not hold pressure or vacuum when positioned on the filler neck. Inspect the filler neck and cap top gasket for irregularities that may prevent the cap from sealing properly. PRESSURE RELIEF TESTING 1 - PRESSURE CAP 2 - PRESSURE TESTER CAUTION: The Cooling System Tester Tool is very sensitive to small air leaks that will not cause cooling system problems. A pressure cap that does not have a history of coolant loss should not be replaced just because it leaks slowly when tested with this tool. Add water to the tool. Turn tool upside down and recheck pressure cap to confirm that cap is bad. 2009 Jeep Patriot Limited 2009 ENGINE Cooling - Compass & Patriot a Saturday, September 08, 2012 12:55:36 PM Page 38 © 2006 Mitchell Repair Information Company, LLC.
  • 39. The pressure cap upper gasket to filler neck seal can be checked by removing the overflow hose at the radiator filler neck overflow nipple. Attach the radiator pressure tester to the filler neck overflow nipple, and pump air into the system. The pressure cap upper gasket should relieve pressure at 69-124 kPa (10-18 psi), and hold pressure at 55 kPa (8 psi) minimum. There is no need to remove the pressure cap at any time except for the following purposes: Check and adjust coolant freeze point Refill system with new coolant Conducting service procedures Checking for leaks Cleaning CLEANING Use only a mild soap to clean the pressure cap. Inspection INSPECTION WARNING: If vehicle has been run recently, wait 15 minutes before removing cap. Place a shop towel over the cap, and without pushing down, rotate it counterclockwise to the first stop. Allow fluids to escape through the overflow tube. When the system stops pushing coolant and steam into the coolant recovery container and pressure drops, push down on the cap and remove it completely. Squeezing the radiator inlet hose with a shop towel (to check pressure) before and after turning to the first stop is recommended. WARNING: The warning words "do not open hot" on the pressure cap is a safety precaution. When hot, the cooling system builds up pressure. To prevent scalding or other injury, the pressure cap should not be removed while the system is hot and/or under pressure. 2009 Jeep Patriot Limited 2009 ENGINE Cooling - Compass & Patriot a Saturday, September 08, 2012 12:55:36 PM Page 39 © 2006 Mitchell Repair Information Company, LLC.
  • 40. Fig. 33: Cooling System Pressure Cap Courtesy of CHRYSLER LLC Hold the cap in your hand, top side up . The vent valve (6) at the bottom of the cap should not open. If the valve opens, replace the cap. If the rubber seal (5) has swollen, preventing the valve from opening, replace the cap. Hold the cleaned cap in your hand, upside down. If any light can be seen between vent valve (6) and the rubber seal (5), replace the cap. A replacement cap must be of the type designed for a full pressure coolant systems. This design ensures coolant return to the radiator. COOLANT Description DESCRIPTION GAS ENGINES 1 - OVERFLOW NIPPLE 2 - MAIN SPRING 3 - GASKET RETAINER 4 - STAINLESS-STEEL SWIVEL TOP 5 - RUBBER SEALS 6 - VENT VALVE 7 - THERMOSTAT HOUSING/ENGINE OUTLET CONNECTOR 8 - FILLER NECK WARNING: Antifreeze is an ethylene glycol based coolant and is harmful if swallowed or inhaled. If swallowed, drink two glasses of water and induce vomiting. If inhaled, move to fresh air area. Seek medical attention immediately. Do not store in open or unmarked containers. Wash skin and clothing thoroughly after coming in contact with ethylene glycol. Keep out of reach of children. Dispose of glycol based coolant properly, contact your government agency for location of collection center in your area. Do not open a cooling system when the engine is at operating temperature or hot under pressure, personal injury can result. Avoid radiator cooling fan when engine compartment related service is performed, personal injury can result. CAUTION: Use of Propylene Glycol based coolants is not recommended, as they provide less freeze protection and less boiling protection. 2009 Jeep Patriot Limited 2009 ENGINE Cooling - Compass & Patriot a Saturday, September 08, 2012 12:55:36 PM Page 40 © 2006 Mitchell Repair Information Company, LLC.
  • 41. The cooling system is designed around the coolant. The coolant must accept heat from engine metal, in the cylinder head area near the exhaust valves and engine block. Then coolant carries the heat to the radiator where the tube/fin radiator can transfer the heat to the air. The use of aluminum cylinder blocks, cylinder heads, and water pumps requires special corrosion protection. Mopar® Antifreeze/Coolant, 5 Year/100,000 Mile Formula (MS-9769), or the equivalent ethylene glycol based coolant with hybrid organic corrosion inhibitors (called HOAT, for Hybrid Organic Additive Technology) is recommended. This coolant offers the best engine cooling without corrosion when mixed with 50% Ethylene Glycol and 50% distilled water to obtain a freeze point of -37°C (-35°F). If it loses color or becomes contaminated, drain, flush, and replace with fresh properly mixed coolant solution. The green coolant MUST NOT BE MIXED with the orange or magenta coolants. When replacing coolant the complete system flush must be performed before using the replacement coolant. DIESEL ENGINE The cooling system is designed around the coolant. The coolant must accept heat from engine metal, in the cylinder head area near the exhaust valves and engine block. Then coolant carries the heat to the radiator where the tube/fin radiator can transfer the heat to the air. The use of aluminum cylinder blocks, cylinder heads, and water pumps requires special corrosion protection. Glysantin G 30-91 Antifreeze/Coolant, 5 Year/150,000 Mile Formula (ASTM D3306), or the equivalent ethylene glycol based coolant. This coolant offers the best engine cooling without corrosion when mixed with 50% coolant and 50% distilled water to obtain a freeze point of -36°C (-34°F). It is dyed purple to distinguish it's unique chemistry from traditional green and yellow silicate coolants. If it loses color or becomes contaminated, drain, flush, and replace with fresh properly mixed coolant solution. The purple coolant MUST NOT BE MIXED with the orange, green or magenta coolants. When replacing coolant the complete system flush must be performed before using the replacement coolant. Operation CAUTION: Mopar® Antifreeze/Coolant, 5 Year/100,000 Mile Formula (MS-9769) may not be mixed with any other type of antifreeze. Doing so will reduce the corrosion protection and may result in premature water pump seal failure. If non-HOAT coolant is introduced into the cooling system in an emergency, it should be replaced with the specified coolant as soon as possible. CAUTION: Use of Propylene Glycol based coolants is not recommended, as they provide less freeze protection and less boiling protection. CAUTION: Glysantin G 30-91 Antifreeze/Coolant, 5 Year/150,00 Mile Formula (ASTM D3306) may not be mixed with any other type of antifreeze. Doing so will reduce the corrosion protection and may result in premature water pump seal failure. 2009 Jeep Patriot Limited 2009 ENGINE Cooling - Compass & Patriot a Saturday, September 08, 2012 12:55:36 PM Page 41 © 2006 Mitchell Repair Information Company, LLC.
  • 42. COOLANT Coolant flows through the engine block absorbing the heat from the engine, then flows to the radiator where the cooling fins in the radiator transfers the heat from the coolant to the atmosphere. During cold weather the ethylene-glycol or coolant prevents water present in the cooling system from freezing within temperatures indicated by mixture ratio of coolant to water. Diagnosis and Testing COOLANT CONCENTRATION TESTING Coolant concentration should be checked when any additional coolant was added to system or after a coolant drain, flush and refill. The coolant mixture offers optimum engine cooling and protection against corrosion when mixed to a freeze point of -37°C (-34°F) to -46°C (-50°F). The use of a hydrometer or a refractometer can be used to test coolant concentration. A hydrometer will test the amount of glycol in a mixture by measuring the specific gravity of the mixture. The higher the concentration of ethylene glycol, the larger the number of balls that will float, and higher the freeze protection (up to a maximum of 60% by volume glycol). A refractometer Tool 8286. See Special Tools will test the amount of glycol in a coolant mixture by measuring the amount a beam of light bends as it passes through the fluid. Some coolant manufactures use other types of glycols into their coolant formulations. Propylene glycol is the most common new coolant. However, propylene glycol based coolants do not provide the same freezing protection and corrosion protection and is not recommended. COOLER, EGR Description DESCRIPTION CAUTION: Do not mix types of coolant corrosion protection will be severely reduced. 2009 Jeep Patriot Limited 2009 ENGINE Cooling - Compass & Patriot a Saturday, September 08, 2012 12:55:36 PM Page 42 © 2006 Mitchell Repair Information Company, LLC.
  • 43. Fig. 34: EGR Cooler Courtesy of CHRYSLER LLC The EGR cooler (7) cools recirculated exhaust gasses to reduce combustion temperature and a greater mass of exhaust gases can thus be circulated. There is less nitrogen oxides as a result. The EGR cooler (7) allows the engine and catalytic converter to reach their operating temperature quickly. Removal REMOVAL 1 - EGR COOLER TO EGR VALVE TUBE 2 - MOUNTING SCREWS 3 - EGR COOLER MOUNTING SCREW 4 - MOUNTING SCREW 5 - EGR COOLER BODY 6 - EGR COOLER MOUNTING NUT 7 - EGR COOLER 8 - INLET TUBES 9 - VACUUM CONTROL UNIT 10 -EGR COOLER TO EXHAUST MANIFOLD TUBE MOUNTING NUT 11 - EGR COOLER TO EXHAUST MANIFOLD TUBE 12 - MOUNTING SCREW 2009 Jeep Patriot Limited 2009 ENGINE Cooling - Compass & Patriot a Saturday, September 08, 2012 12:55:36 PM Page 43 © 2006 Mitchell Repair Information Company, LLC.
  • 44. Fig. 35: EGR Cooler Courtesy of CHRYSLER LLC 1. Remove engine cover. Refer to ( 09 - Engine - Removal) . 2. Drain cooling system. See Standard Procedure . 3. Remove EGR cooler coolant hoses (8). 4. Remove EGR cooler to exhaust manifold tube (11). 5. Remove EGR cooler to EGR valve tube (1). 6. Remove EGR cooler mounting nuts (6). 7. Remove EGR cooler (7). 8. Remove the bypass valve mounting screws (3). 9. Separate the bypass valve assembly from the EGR cooler body (5). Installation 1 - EGR COOLER TO EGR VALVE TUBE 2 - MOUNTING SCREWS 3 - EGR COOLER MOUNTING SCREW 4 - MOUNTING SCREW 5 - EGR COOLER BODY 6 - EGR COOLER MOUNTING NUT 7 - EGR COOLER 8 - INLET TUBES 9 - VACUUM CONTROL UNIT 10 -EGR COOLER TO EXHAUST MANIFOLD TUBE MOUNTING NUT 11 - EGR COOLER TO EXHAUST MANIFOLD TUBE 12 - MOUNTING SCREW 2009 Jeep Patriot Limited 2009 ENGINE Cooling - Compass & Patriot a Saturday, September 08, 2012 12:55:36 PM Page 44 © 2006 Mitchell Repair Information Company, LLC.
  • 45. INSTALLATION Fig. 36: EGR Cooler Courtesy of CHRYSLER LLC 1. Using a new gasket, position the bypass valve assembly to the EGR cooler body (5). Tighten screws to 10 N.m (88 in. lbs.). 2. Position EGR cooler (7) and install mounting screws. Tighten to 10 N.m (88 in. lbs.). 3. Install EGR cooler to exhaust manifold tube (11). Tighten bolts to 20 N.m (14 ft. lbs.) and nuts to 20 N.m (14 ft. lbs.). 4. Install EGR cooler to EGR valve tube (1). Tighten bolts to 20 N.m (14 ft. lbs.). 5. Install coolant hoses. 6. Install vacuum line. 7. Fill cooling system. See Standard Procedure . 1 - EGR COOLER TO EGR VALVE TUBE 2 - MOUNTING SCREWS 3 - EGR COOLER MOUNTING SCREW 4 - MOUNTING SCREW 5 - EGR COOLER BODY 6 - EGR COOLER MOUNTING NUT 7 - EGR COOLER 8 - INLET TUBES 9 - VACUUM CONTROL UNIT 10 -EGR COOLER TO EXHAUST MANIFOLD TUBE MOUNTING NUT 11 - EGR COOLER TO EXHAUST MANIFOLD TUBE 12 - MOUNTING SCREW 2009 Jeep Patriot Limited 2009 ENGINE Cooling - Compass & Patriot a Saturday, September 08, 2012 12:55:36 PM Page 45 © 2006 Mitchell Repair Information Company, LLC.
  • 46. 8. Install engine cover. Refer to ( 09 - Engine - Installation) . DRAINCOCK, RADIATOR Removal REMOVAL Fig. 37: Draincock Courtesy of CHRYSLER LLC 1. Remove the front passenger side wheel 2. Remove the front passenger side splash shield assembly from the wheelhouse. Refer to Body/Exterior/SHIELD, Splash - Removal 3. Drain the cooling system. See Standard Procedure . 4. Open the draincock (2) by turning it counterclockwise until it stops. 5. Turn the draincock (2) back (clockwise) 1/8 turn. 6. Pull the draincock (2) from the radiator tank (1). Installation 1 - RADIATOR TANK 2 - DRAINCOCK CAUTION: Use of pliers on draincock is not recommended. Damage may occur to radiator or draincock. NOTE: It is not necessary to remove draincock during a routine coolant drain. 2009 Jeep Patriot Limited 2009 ENGINE Cooling - Compass & Patriot a Saturday, September 08, 2012 12:55:36 PM Page 46 © 2006 Mitchell Repair Information Company, LLC.
  • 47. INSTALLATION Fig. 38: Draincock Courtesy of CHRYSLER LLC 1. Align draincock stem to radiator tank opening. 2. Push draincock (2) into the radiator tank opening. 3. Tighten the draincock (2) by turning clockwise until it stops. 4. Fill the cooling system. See Standard Procedure 5. Install front passenger side splash shield assembly to the wheelhouse area. Refer to Body/Exterior/SHIELD, Splash - Installation 6. Install the front passenger side wheel FAN, COOLING Description DESCRIPTION The radiator cooling fans are dual-speed electric motor driven fans. The radiator fan assembly includes two electric motors, two five blade fans, and a support shroud that is attached to the radiator. The radiator fans are serviced as an assembly. Operation GAS ENGINE 1 - RADIATOR TANK 2 - DRAINCOCK 2009 Jeep Patriot Limited 2009 ENGINE Cooling - Compass & Patriot a Saturday, September 08, 2012 12:55:36 PM Page 47 © 2006 Mitchell Repair Information Company, LLC.
  • 48. Radiator fan operation is controlled by the Totally Integrated Power Module (TIPM), with inputs from the engine coolant temperature sensor, continuously variable transmission (CVT) oil temperature, and A/C head pressure. The (TIPM) turns on the fan through either the high or low speed fan relay. The PCM provides a ground to the relay's control circuit. The fan relays are located in the (TIPM). Refer to the label beneath the (TIPM) cover for location of fan relays. If the cooling fan is inoperative or a Diagnostic Trouble Code (DTC) related to fan control has been set. Refer to DTC-Based Diagnostics/MODULE, Powertrain Control (PCM) - Diagnosis and Testing for diagnostic procedures. Removal REMOVAL Fig. 39: Radiator Fan Assembly Courtesy of CHRYSLER LLC 1. Disconnect negative cable from battery. 2. Drain cooling system below upper radiator hose level. See Standard Procedure . 3. Remove radiator core support. 4. Disconnect upper radiator hose from radiator. 1 - RADIATOR FAN ELECTRICAL CONNECTOR 2 - BRACKET 3 - RADIATOR WARNING: Do not open the radiator draincock with the system hot and under pressure because serious burns from coolant can occur. 2009 Jeep Patriot Limited 2009 ENGINE Cooling - Compass & Patriot a Saturday, September 08, 2012 12:55:36 PM Page 48 © 2006 Mitchell Repair Information Company, LLC.
  • 49. 5. Remove wiring harness bracket (2). 6. Disconnect radiator fan electrical connector (1). 7. Remove the radiator fan assembly screws. 8. Detach radiator fan assembly from retaining clips. 9. Remove radiator fan by lifting up from the engine compartment. Installation INSTALLATION Fig. 40: Radiator Fan Assembly Courtesy of CHRYSLER LLC 1. Install the radiator fan assembly into J-clips. 2. Install radiator fan fasteners. Tighten all radiator fan retaining screws to 6 N.m (55 in. lbs.). 3. Install radiator crossmember. Refer to Body/Exterior/PANEL, Closure - Installation . 4. Install wiring harness bracket (2). 5. Connect radiator fan electrical connector (1). 6. Install upper radiator hose. CAUTION: Care should be taken not to damage the radiator cooling fins and tubes during fan removal. 1 - RADIATOR FAN ELECTRICAL CONNECTOR 2 - BRACKET 3 - RADIATOR 2009 Jeep Patriot Limited 2009 ENGINE Cooling - Compass & Patriot a Saturday, September 08, 2012 12:55:36 PM Page 49 © 2006 Mitchell Repair Information Company, LLC.
  • 50. 7. Connect negative battery cable. 8. Fill cooling system. See Standard Procedure . HEATER, ENGINE BLOCK Description DESCRIPTION Fig. 41: Engine Block Heater Courtesy of CHRYSLER LLC The cartridge type block heater is mounted in a bore at the rear of the block under the coolant adapter. The block heater does not directly contact coolant. It heads the aluminum block. The heater is powered by 110 Volt AC through a power cord and connector. Operation OPERATION The block heater element is inserted into a bore in the engine block. When electrical power (110 volt A.C.) is applied to the element, it creates heat. This heat is transferred to the aluminum engine block. This provides easier engine starting and faster warm-up when vehicle is operated in areas having extremely low temperatures. Diagnosis and Testing 1 - The Cartridge Type Block Heater 2 - Coolant Adapter 2009 Jeep Patriot Limited 2009 ENGINE Cooling - Compass & Patriot a Saturday, September 08, 2012 12:55:36 PM Page 50 © 2006 Mitchell Repair Information Company, LLC.
  • 51. ENGINE BLOCK HEATER TESTING If unit does not operate, trouble can be in either the power cord or the heater element. Test power cord for continuity with a 110-volt voltmeter or 110-volt test light; test heater element continuity with an ohmmeter or 12-volt test light. Removal REMOVAL Fig. 42: Air Cleaner Inlet Courtesy of CHRYSLER LLC 1. Remove engine cover. 2. Remove air cleaner inlet. 2009 Jeep Patriot Limited 2009 ENGINE Cooling - Compass & Patriot a Saturday, September 08, 2012 12:55:36 PM Page 51 © 2006 Mitchell Repair Information Company, LLC.
  • 52. Fig. 43: Block Heater 2.0/2.4L Engine Courtesy of CHRYSLER LLC 3. Detach power cord plug from heater. 4. Remove retaining clip (1). Remove block heater assembly (2). Installation INSTALLATION 1. Thoroughly clean bore hole. 2. Insert block heater assembly into bore. 3. Install retaining clip. 4. Connect power cord to block heater. 1 - RETAINING CLIP 2 - BLOCK HEATER 2009 Jeep Patriot Limited 2009 ENGINE Cooling - Compass & Patriot a Saturday, September 08, 2012 12:55:36 PM Page 52 © 2006 Mitchell Repair Information Company, LLC.
  • 53. Fig. 44: Air Cleaner Inlet Courtesy of CHRYSLER LLC 5. Install air intake inlet. 6. Install engine cover. PUMP, WATER Description GAS ENGINE Fig. 45: Water Pump - Gas Engine 2009 Jeep Patriot Limited 2009 ENGINE Cooling - Compass & Patriot a Saturday, September 08, 2012 12:55:36 PM Page 53 © 2006 Mitchell Repair Information Company, LLC.
  • 54. Courtesy of CHRYSLER LLC The water pump (3) on the world engine is attached to the water pump adapter on the front of the cylinder block. The water pump is driven by the accessory drive belt. The water pump is connected to the water plenum by the return tube. Turbocharger equipped engines use a smaller diameter water pump pulley then the naturally asperated engine. This allows increased coolant flow without pump cavitation. Diagnosis and Testing WATER PUMP A quick flow test to determine if the water pump is working effectively is to check heater system for proper operation. A defective pump will not provide an adequate flow of heated coolant through the system. Another flow test to help determine water pump operation is as follows: 1. Remove cooling system pressure cap. 2. Remove a small amount of coolant from the system. 3. Start the engine and warm up until thermostat opens. 4. With the thermostat open and coolant level low, visually inspect for coolant flow. If flow is present, the water pump is pumping coolant through the system. Standard Procedure COOLANT AIR EVACUATION 1 - ACCESSORY DRIVE BELT 2 - WATER PUMP PULLEY 3 - WATER PUMP WARNING: DO NOT REMOVE THE COOLING SYSTEM PRESSURE CAP WITH THE SYSTEM HOT AND UNDER PRESSURE BECAUSE SERIOUS BURNS FROM COOLANT CAN OCCUR. 2009 Jeep Patriot Limited 2009 ENGINE Cooling - Compass & Patriot a Saturday, September 08, 2012 12:55:36 PM Page 54 © 2006 Mitchell Repair Information Company, LLC.
  • 55. Fig. 46: Coolant Air Evacuation Courtesy of CHRYSLER LLC Evacuating or purging air from the cooling system involves the use of a pressurized air operated vacuum generator. The vacuum created allows for a quick and complete coolant refilling while removing any airlocks present in the system components. NOTE: To avoid damage to the cooling system, ensure that no component would be susceptible to damage when a vacuum is drawn on the system. WARNING: ANTIFREEZE IS AN ETHYLENE GLYCOL BASE COOLANT AND IS HARMFUL IF SWALLOWED OR INHALED. IF SWALLOWED, DRINK TWO GLASSES OF WATER AND INDUCE VOMITING. IF INHALED, MOVE TO FRESH AIR AREA. SEEK MEDICAL ATTENTION IMMEDIATELY. DO NOT STORE IN OPEN OR UNMARKED CONTAINERS. WASH SKIN AND CLOTHING THOROUGHLY AFTER COMING IN CONTACT WITH ETHYLENE GLYCOL. KEEP OUT OF REACH OF CHILDREN. DISPOSE OF GLYCOL BASED COOLANT PROPERLY. CONTACT YOUR DEALER OR GOVERNMENT AGENCY FOR LOCATION OF COLLECTION CENTER IN YOUR AREA. DO NOT OPEN A COOLING SYSTEM WHEN THE ENGINE IS AT OPERATING TEMPERATURE OR HOT UNDER PRESSURE; PERSONAL INJURY CAN RESULT. AVOID RADIATOR COOLING FAN WHEN ENGINE COMPARTMENT RELATED SERVICE IS PERFORMED; PERSONAL INJURY CAN RESULT. WARNING: WEAR APPROPRIATE EYE AND HAND PROTECTION WHEN PERFORMING THIS PROCEDURE. NOTE: The service area where this procedure is performed should have a minimum shop air requirement of 80 PSI (5.5 bar) and should be equipped with an air 2009 Jeep Patriot Limited 2009 ENGINE Cooling - Compass & Patriot a Saturday, September 08, 2012 12:55:36 PM Page 55 © 2006 Mitchell Repair Information Company, LLC.
  • 56. 1. Refer to the Chrysler Pentastar Service Equipment (Chrysler PSE) Coolant Refiller #85-15-0650 or equivalent tool's operating manual for specific assembly steps. 2. Choose an appropriate adapter cone that will fit the vehicle's radiator filler neck or reservoir tank. 3. Attach the adapter cone (2) to the vacuum gauge (1). Fig. 47: Vacuum Generator/Venturi Ball Valve Courtesy of CHRYSLER LLC 4. Make sure the vacuum generator/venturi ball valve (3) is closed and attach an airline hose (2) (minimum shop air requirement of 80 PSI/5.5 bar) to the vacuum generator/venturi (1). 5. Position the adaptor cone/vacuum gauge assembly into the radiator filler neck or reservoir tank. Ensure that the adapter cone is sealed properly. dryer system. NOTE: For best results, the radiator should be empty. The vehicle's heater control should be set to the heat position (ignition may need to be turned to the on position but do not start the motor). 2009 Jeep Patriot Limited 2009 ENGINE Cooling - Compass & Patriot a Saturday, September 08, 2012 12:55:36 PM Page 56 © 2006 Mitchell Repair Information Company, LLC.
  • 57. Fig. 48: Adaptor Cone/Vacuum Gauge Assembly Courtesy of CHRYSLER LLC 6. Connect the vacuum generator/venturi (2) to the positioned adaptor cone/vacuum gauge assembly (1). 7. Open the vacuum generator/venturi ball valve. 8. Let the system run until the vacuum gauge shows a good vacuum through the cooling system. Refer to the tool's operating manual for appropriate pressure readings. 9. Close the vacuum generator/venturi ball valve. NOTE: Do not bump or move the assembly as it may result in loss of vacuum. Some radiator overflow hoses may need to be clamped off to obtain vacuum. NOTE: If a strong vacuum is being created in the system, it is normal to see the radiator hoses to collapse. 2009 Jeep Patriot Limited 2009 ENGINE Cooling - Compass & Patriot a Saturday, September 08, 2012 12:55:36 PM Page 57 © 2006 Mitchell Repair Information Company, LLC.
  • 58. Fig. 49: Vacuum Generator/Venturi Ball Valve Courtesy of CHRYSLER LLC 10. Disconnect the vacuum generator/venturi and airline from the adaptor cone/vacuum gauge assembly. 11. Wait approximately 20 seconds, if the pressure readings do not move, the system has no leaks. If the pressure readings move, a leak could be present in the system and the cooling system should be checked for leaks and the procedure should be repeated. 12. Place the tool's suction hose into the coolant's container. 13. Connect the tool's suction hose (1) to the adaptor cone/vacuum gauge assembly (2). NOTE: Ensure there is a sufficient amount of coolant, mixed to the required strength/protection level available for use. For best results and to assist the refilling procedure, place the coolant container at the same height as the radiator filler neck. Always draw more coolant than required. If the coolant level is too low, it will pull air into the cooling system which could result in airlocks in the system. 2009 Jeep Patriot Limited 2009 ENGINE Cooling - Compass & Patriot a Saturday, September 08, 2012 12:55:36 PM Page 58 © 2006 Mitchell Repair Information Company, LLC.
  • 59. Fig. 50: Suction Hose's Ball Valve Courtesy of CHRYSLER LLC 14. Open the suction hose's ball valve to begin refilling the cooling system. 15. When the vacuum gauge reads zero, the system is filled. 16. Close the suction hose's ball valve and remove the suction hose from the adaptor cone/vacuum gauge assembly. 17. Remove the adaptor cone/vacuum gauge assembly from the radiator filler neck or reservoir tank. 18. With heater control unit in the HEAT position, operate engine with container cap in place. 19. After engine has reached normal operating temperature, shut engine off and allow it to cool. When engine is cooling down, coolant will be drawn into the radiator from the pressure container. 20. Add coolant to the recovery bottle/container as necessary. Only add coolant to the container when the engine is cold. Coolant level in a warm engine will be higher due to thermal expansion. Add necessary coolant to raise container level to the COLD MINIMUM mark after each cool down period. 21. Once the appropriate coolant level is achieved, attach the radiator cap or reservoir tank cap. Removal GAS ENGINE NOTE: On some remote pressurized tanks, it is recommended to stop filling when the proper level is reached. 2009 Jeep Patriot Limited 2009 ENGINE Cooling - Compass & Patriot a Saturday, September 08, 2012 12:55:36 PM Page 59 © 2006 Mitchell Repair Information Company, LLC.
  • 60. Fig. 51: Water Pump - Gas Engine Courtesy of CHRYSLER LLC 1. Remove the accessory drive belt. See Removal . 2. Raise vehicle. Refer to Vehicle Quick Reference/Hoisting - Standard Procedure . 3. Remove accessory drive belt splash shield. 4. Drain cooling system. See Standard Procedure . 5. Remove screws attaching water pump pulley (1). Remove pulley (1). 6. Remove water pump mounting bolts (2). 7. Remove water pump (3). DIESEL 1 - WATER PUMP 2 - MOUNTING BOLT 3 - WATER INLET TUBE NUTS 4 - INLET WATER TUBE 2009 Jeep Patriot Limited 2009 ENGINE Cooling - Compass & Patriot a Saturday, September 08, 2012 12:55:36 PM Page 60 © 2006 Mitchell Repair Information Company, LLC.
  • 61. Fig. 52: Water Pump - 2.0L Diesel Courtesy of CHRYSLER LLC 1. Remove timing chain. Refer to Engine/Valve Timing/BELT, Timing - Removal . 2. Remove water pump mounting bolts (1). 3. Remove water pump (2). 4. Remove O-ring from water pump. Inspection WATER PUMP Replace water pump body assembly if it has any of these defects: Cracks or damage on the body. Coolant leaks from the shaft seal, evident by wet coolant traces on the pump body. Loose or rough turning bearing. Impeller rubs either the pump body or the engine block. Impeller loose or damaged. Sprocket or sprocket flange loose or damaged. Disassembly WATER PUMP - GAS ENGINE 1 - BOLT 2 - WATER PUMP 2009 Jeep Patriot Limited 2009 ENGINE Cooling - Compass & Patriot a Saturday, September 08, 2012 12:55:36 PM Page 61 © 2006 Mitchell Repair Information Company, LLC.
  • 62. Fig. 53: Water Pump Pulley Courtesy of CHRYSLER LLC 1. Remove the water pump assembly from the vehicle. See Removal 2. Discard the water pump outlet gasket (7). 3. Remove the three bolts (1) attaching the water pump pulley (2) to the water pump (4). 4. Remove the water pump pulley (2). 5. Remove the five bolts (3) attaching the water pump (4) to the water pump adapter (6). 6. Remove and discard the gasket (8). 7. Remove the water pump (4) and inspect carefully for any damage. See Inspection Assembly WATER PUMP - GAS ENGINE 2009 Jeep Patriot Limited 2009 ENGINE Cooling - Compass & Patriot a Saturday, September 08, 2012 12:55:36 PM Page 62 © 2006 Mitchell Repair Information Company, LLC.
  • 63. Fig. 54: Water Pump Pulley Courtesy of CHRYSLER LLC 1. Thoroughly clean all gasket mating surfaces before assembling. 2. Inspect water pump and components for any damage. See Inspection 3. Using bolts (3), install the water pump (4) and gasket (8) to the water pump adapter (6). Tighten the bolts (3) to 22 N-m (16 lbs. ft.) 4. Using bolts (1), install the water pump pulley (2) to the water pump (4). Tighten the bolts (1) to 9 N-m (80 lbs. in.) 5. Using bolts (5), install the water pump assembly and gasket to the engine block. Tighten the bolts to 24 N.m (18 lbs. ft.). See Cooling/Engine/PUMP, Water - Installation 6. Start the engine and check for leaks. See Diagnosis and Testing Installation GAS ENGINE 2009 Jeep Patriot Limited 2009 ENGINE Cooling - Compass & Patriot a Saturday, September 08, 2012 12:55:36 PM Page 63 © 2006 Mitchell Repair Information Company, LLC.
  • 64. Fig. 55: Water Pump - Gas Engine Courtesy of CHRYSLER LLC 1. Position water pump assembly (1) and gasket onto cylinder block. 2. Position water inlet tube (4) and gasket onto water pump (1). 3. Install mounting bolts (2). Tighten bolts to 24 N.m (18 ft. lbs.). 4. Install drive belt splash shield. 5. Lower vehicle. 6. Install accessory drive belt. See Installation . 7. Evacuate air and refill cooling system. See Standard Procedure 8. Check cooling system for leaks. See Diagnosis and Testing DIESEL 1 - WATER PUMP 2 - MOUNTING BOLT 3 - WATER INLET TUBE NUTS 4 - INLET WATER TUBE 2009 Jeep Patriot Limited 2009 ENGINE Cooling - Compass & Patriot a Saturday, September 08, 2012 12:55:36 PM Page 64 © 2006 Mitchell Repair Information Company, LLC.
  • 65. Fig. 56: Water Pump - 2.0L Diesel Courtesy of CHRYSLER LLC 1. Clean the O-ring mating surfaces on water pump (2) and front of timing chain cover. 2. Install O-ring onto water pump (2). 3. Apply a small amount of petroleum jelly to lubricate O-ring. 4. Install water pump and mounting bolts. Tighten bolts (1) to mounting bolts to 24 N.m (18 ft. lbs.). 5. Install timing belt. Refer to Engine/Valve Timing/BELT, Timing - Installation . 6. Evacuate air and refill cooling system. See Standard Procedure 7. Check cooling system for leaks. See Diagnosis and Testing RADIATOR, ENGINE COOLING Description DESCRIPTION The radiator is a cross-flow type (horizontal tubes) with design features that provide greater strength, as well as sufficient heat transfer capabilities to keep the engine coolant within operating temperatures. The radiator has an aluminum core with plastic tanks. Although stronger than brass, plastic tanks are subject to damage by impact. Always handle radiator with care. Operation OPERATION 1 - BOLT 2 - WATER PUMP 2009 Jeep Patriot Limited 2009 ENGINE Cooling - Compass & Patriot a Saturday, September 08, 2012 12:55:36 PM Page 65 © 2006 Mitchell Repair Information Company, LLC.
  • 66. The radiator functions as a heat exchanger, using air flow across the exterior of the radiator tubes. This heat is then transferred from the coolant and into the passing air. Removal GAS ENGINE Fig. 57: Cooling Module Assembly Courtesy of CHRYSLER LLC 1. Drain cooling system. See Standard Procedure . 2. Remove radiator fan. See Removal . 3. Disconnect lower radiator hose. 4. Remove fasteners attaching AC condenser to radiator. Reposition AC condenser. 5. Remove radiator assembly by lifting it up from the engine compartment. Care should be taken not to damage the cooling fins and tubes during removal. DIESEL 1 - UPPER RADIATOR CLOSURE PANEL 2 - COOLING MODULE 3 - RADIATOR FAN CONNECTOR 4 - LOWER RADIATOR CROSSMEMBER WARNING: DO NOT OPEN THE RADIATOR DRAINCOCK WITH THE SYSTEM HOT AND UNDER PRESSURE BECAUSE SERIOUS BURNS FROM COOLANT CAN OCCUR. 2009 Jeep Patriot Limited 2009 ENGINE Cooling - Compass & Patriot a Saturday, September 08, 2012 12:55:37 PM Page 66 © 2006 Mitchell Repair Information Company, LLC.
  • 67. Fig. 58: Cooling Module Courtesy of CHRYSLER LLC 1. Disconnect negative battery cable. 2. Remove engine cover. Refer to Engine - Removal . 3. Remove air cleaner housing assembly. Refer to Engine/Air Intake System/BODY, Air Cleaner - Removal . 4. Raise vehicle on hoist. 5. Drain cooling system. See Standard Procedure. 6. Disconnect radiator fan motor electrical connector. 7. Disconnect lower radiator hose. 8. Remove two lower fasteners attaching radiator fan shroud to radiator. 9. Disconnect Charger Air Cooler hoses from Charge Air Cooler. 10. Disconnect Charger Air Cooler from radiator. 1 - UPPER RADIATOR CROSSMEMBER 2 - COOLING MODULE 3 - RADIATOR FAN CONNECTOR 4 - LOWER RADIATOR CROSSMEMBER WARNING: DO NOT OPEN THE RADIATOR DRAINCOCK WITH THE SYSTEM HOT AND UNDER PRESSURE BECAUSE SERIOUS BURNS FROM COOLANT CAN OCCUR. NOTE: It is not necessary to discharge the air conditioning system to remove the radiator. 2009 Jeep Patriot Limited 2009 ENGINE Cooling - Compass & Patriot a Saturday, September 08, 2012 12:55:37 PM Page 67 © 2006 Mitchell Repair Information Company, LLC.
  • 68. 11. Lower vehicle. 12. Remove grille. 13. Remove upper radiator hose from the radiator. 14. Remove remaining fasteners attaching radiator fan shroud to radiator. 15. Remove radiator fan/shroud assembly. 16. Remove remaining fasteners attaching AC condenser to radiator. Reposition AC condenser. 17. Unclip Charge Air Cooler from radiator remove radiator assembly by lifting it up from the engine compartment. Care should be taken not to damage the cooling fins and tubes during removal. Cleaning CLEANING Clean radiator fins are necessary for good heat transfer. The radiator and air conditioning fins should be cleaned when an accumulation of debris has occurred. With the engine cold, apply cold water and compressed air to the back (engine side) of the radiator to flush the radiator and/or A/C condenser of debris. Inspection INSPECTION Inspect the radiator tanks for cracks, broken or missing fittings also inspect the joint where the tanks seam up to the radiator core for signs of leakage and/or deteriorating seals. Inspect radiator core for corroded, bent or missing cooling fins. Inspect the core for bent or damaged cooling tubes. Installation GAS ENGINE 2009 Jeep Patriot Limited 2009 ENGINE Cooling - Compass & Patriot a Saturday, September 08, 2012 12:55:37 PM Page 68 © 2006 Mitchell Repair Information Company, LLC.
  • 69. Fig. 59: Cooling Module Assembly Courtesy of CHRYSLER LLC 1. Install the lower air seal to radiator. 2. Position radiator into mounting position. 3. Position A/C condenser against radiator. Hand start fasteners. 4. Install radiator fan/shroud assembly. Hand start fasteners. 5. Tighten all condenser fasteners to 8 N.m (70 in. lbs.). 6. Tighten all radiator fan fasteners to 6 N.m (55 in. lbs.). 7. Install fasteners attaching transmission oil cooler to radiator. Tighten fasteners to 8 N.m (70 in. lbs.). 8. Raise vehicle on hoist. 9. Connect the lower air seal to the side air seals. 10. Connect lower radiator hose. Align the hose and position the clamp so it will not interfere with engine components. 11. Connect the radiator fan electrical connector. 12. Connect the power steering hoses. 13. Close radiator draincock. 14. Lower vehicle. 15. Connect upper radiator hose. Align the hose and position the clamp to prevent interference with the engine or hood. 16. Install upper radiator closure panel and center brace. Refer to Body/Exterior/PANEL, Closure - 1 - UPPER RADIATOR CLOSURE PANEL 2 - COOLING MODULE 3 - RADIATOR FAN CONNECTOR 4 - LOWER RADIATOR CROSSMEMBER 2009 Jeep Patriot Limited 2009 ENGINE Cooling - Compass & Patriot a Saturday, September 08, 2012 12:55:37 PM Page 69 © 2006 Mitchell Repair Information Company, LLC.
  • 70. Installation 17. Install grille. 18. Install battery tray and battery. 19. Connect positive battery cable. Connect negative battery cable. 20. Install air cleaner housing assembly. 21. Fill cooling system with coolant. See Standard Procedure . 22. Operate engine until it reaches normal operating temperature. Check cooling system for correct fluid level. DIESEL Fig. 60: Cooling Module Courtesy of CHRYSLER LLC 1. Lower radiator into mounting position and reconnect Charge Air Cooler to radiator. Tighten bolts to 8 N.m (70 lbs. in.). 2. Position A/C condenser against radiator. Hand start lower fasteners. 3. Install radiator fan/shroud assembly. Hand start upper fasteners and remaining side fasteners that hold AC condenser. 1 - UPPER RADIATOR CROSSMEMBER 2 - COOLING MODULE 3 - RADIATOR FAN CONNECTOR 4 - LOWER RADIATOR CROSSMEMBER NOTE: Care must be taken not to damage the radiator cooling fins and tubes during installation. 2009 Jeep Patriot Limited 2009 ENGINE Cooling - Compass & Patriot a Saturday, September 08, 2012 12:55:37 PM Page 70 © 2006 Mitchell Repair Information Company, LLC.
  • 71. 4. Raise vehicle on hoist. 5. Connect charge air cooler hoses. 6. Install two remaining lower radiator fan shroud fasteners to radiator. Tighten fasteners to 6 N.m (55 in. lbs.). 7. If equipped, install fasteners attaching transmission oil cooler to radiator. Tighten fasteners to 8 N.m (70 in. lbs.). 8. Connect lower radiator hose. Align the hose and position the clamp so it will not interfere with engine components. 9. Connect the radiator fan motor electrical connector. 10. Close radiator draincock. 11. Lower vehicle. 12. Tighten radiator fan shroud fasteners to 6 N.m (55 in. lbs.). 13. Tighten AC condenser fasteners to 8 N.m (70 in. lbs.). 14. Install upper radiator hose. Align the hose and position the clamp to prevent interference with the engine or hood. 15. Install grille. 16. Install air cleaner housing assembly. Refer to Engine/Air Intake System/BODY, Air Cleaner - Installation . 17. Fill cooling system with appropriate coolant. See Standard Procedure . 18. Connect negative battery cable. 19. Operate engine until it reaches normal operating temperature. Check cooling system for correct fluid level. SENSOR, COOLANT TEMPERATURE Description GAS ENGINE 2009 Jeep Patriot Limited 2009 ENGINE Cooling - Compass & Patriot a Saturday, September 08, 2012 12:55:37 PM Page 71 © 2006 Mitchell Repair Information Company, LLC.
  • 72. Fig. 61: ECT & Coolant Adapter Courtesy of CHRYSLER LLC There are two engine coolant sensors (ETC). One ETC (1) is located in the coolant adapter and one is (ECT) sensor (1) threads into the cylinder block. New sensors have sealant applied to the threads. Fig. 62: ECT Sensor Courtesy of CHRYSLER LLC 1 - ETC 2 - COOLANT ADAPTER 1 - ECT 2009 Jeep Patriot Limited 2009 ENGINE Cooling - Compass & Patriot a Saturday, September 08, 2012 12:55:37 PM Page 72 © 2006 Mitchell Repair Information Company, LLC.
  • 73. The ECT Sensor is a Negative Thermal Coefficient (NTC) Sensor. The resistance of the ECT Sensor changes as coolant temperature changes. This results in different input voltages to the PCM. The PCM also uses the ECT Sensor input to operate the radiator cooling fan(s), and send a message over the PCI bus to the instrument cluster for temperature gauge operation. Operation OPERATION The ECT sensor provides an input to the PCM. As temperature increases, resistance of the sensor decreases. As coolant temperature varies, the ECT sensor resistance changes resulting in a different voltage value at the PCM ECT sensor signal circuit. The ECT sensor provides input for various PCM operations. The PCM uses the input to control air-fuel mixture, timing, and radiator fan on/off times. Removal GAS ENGINE CYLINDER BLOCK MOUNTED Fig. 63: ECT Sensor Courtesy of CHRYSLER LLC 1. Disconnect negative battery cable. 2. Partially drain cooling system below level of ECT Sensor. 3. Disconnect ECT Sensor electrical connector. 4. Remove ECT Sensor. COOLANT ADAPTER MOUNTED 1 - ECT 2009 Jeep Patriot Limited 2009 ENGINE Cooling - Compass & Patriot a Saturday, September 08, 2012 12:55:37 PM Page 73 © 2006 Mitchell Repair Information Company, LLC.
  • 74. Fig. 64: ECT & Coolant Adapter Courtesy of CHRYSLER LLC 1. Disconnect negative battery cable. 2. Partially drain cooling system below level of ECT Sensor (1). See Standard Procedure 3. Disconnect ECT Sensor electrical connector. 4. Remove ECT Sensor (1). DIESEL ENGINE 1 - ETC 2 - COOLANT ADAPTER 2009 Jeep Patriot Limited 2009 ENGINE Cooling - Compass & Patriot a Saturday, September 08, 2012 12:55:37 PM Page 74 © 2006 Mitchell Repair Information Company, LLC.
  • 75. Fig. 65: Thermostat And Sensor Courtesy of CHRYSLER LLC 1. Disconnect negative battery cable. 2. Remove engine cover. Refer to Engine - Removal . 3. Partially drain coolant system below pressurized coolant recovery container. See Standard Procedure . 4. Unplug coolant temperature sensor electrical connector. 5. Remove coolant temperature sensor (5). Installation GAS ENGINE COOLANT ADAPTER MOUNTED 1 - FUEL RAIL 2 - EGR VALVE 3 - POWER STEERING PUMP 4 - GENERATOR 5 - COOLANT TEMPERATURE SENSOR 6 - THERMOSTAT HOUSING 7 - FUEL RAIL PRESSURE SENSOR NOTE: Capture any residual coolant that may flow. 2009 Jeep Patriot Limited 2009 ENGINE Cooling - Compass & Patriot a Saturday, September 08, 2012 12:55:37 PM Page 75 © 2006 Mitchell Repair Information Company, LLC.
  • 76. Fig. 66: ECT & Coolant Adapter Courtesy of CHRYSLER LLC 1. Install ECT Sensor (1). Make sure coolant sensor is locked in place 2. Reconnect ECT Sensor electrical connector. 3. Fill cooling system. See Standard Procedure . 4. Connect negative battery cable. CYLINDER BLOCK MOUNTED 1 - ECT 2 - COOLANT ADAPTER 2009 Jeep Patriot Limited 2009 ENGINE Cooling - Compass & Patriot a Saturday, September 08, 2012 12:55:37 PM Page 76 © 2006 Mitchell Repair Information Company, LLC.
  • 77. Fig. 67: ECT Sensor Courtesy of CHRYSLER LLC 1. Install ECT Sensor. Tighten sensor to 19 N.m (168 in. lbs.). 2. Reconnect ECT Sensor electrical connector. 3. Fill cooling system. See Standard Procedure . 4. Connect negative battery cable. DIESEL ENGINE Fig. 68: Thermostat And Sensor Courtesy of CHRYSLER LLC 1. Position and install coolant temperature sensor (5). 2. Connect coolant temperature sensor electrical connector. 1 - ECT 1 - FUEL RAIL 2 - EGR VALVE 3 - POWER STEERING PUMP 4 - GENERATOR 5 - COOLANT TEMPERATURE SENSOR 6 - THERMOSTAT HOUSING 7 - FUEL RAIL PRESSURE SENSOR 2009 Jeep Patriot Limited 2009 ENGINE Cooling - Compass & Patriot a Saturday, September 08, 2012 12:55:37 PM Page 77 © 2006 Mitchell Repair Information Company, LLC.
  • 78. Fig. 69: Engine Coolant Temperature Sensor Courtesy of CHRYSLER LLC 3. Refill coolant system to proper level with proper mixture of coolant. See Standard Procedure . 4. Install engine cover. Refer to Engine - Installation . 5. Connect negative battery cable. 6. Start engine and inspect for leaks. THERMOSTAT Description DESCRIPTION 1 - RETAINING CLAMP 2 - ENGINE COOLANT TEMPERATURE SENSOR WARNING: Use extreme caution when engine is operating. Do not stand in a direct line with fan. Do not put your hands near pulleys, belts or fan. Do not wear loose clothes. 2009 Jeep Patriot Limited 2009 ENGINE Cooling - Compass & Patriot a Saturday, September 08, 2012 12:55:37 PM Page 78 © 2006 Mitchell Repair Information Company, LLC.
  • 79. Fig. 70: Thermostat Courtesy of CHRYSLER LLC The primary thermostat is located on the front of the water plenum in the thermostat housing/coolant inlet. The thermostat has an air bleed vent located on its flange. The air bleed vent (1) and the locator dimple on thermostat seal provide for proper positioning of thermostat in inlet housing. The secondary thermostat is located in the cylinder head under the water plenum. Operation OPERATION When the Engine is cold and both the primary and secondary thermostats are closed. The coolant will circulate through the engine, heater system, and the bypass. The cooling system has no flow through the radiator As the engine warms up, the primary thermostat will start to open at 82 °C ( 179 °F). Coolant will start to flow through the radiator oil cooler and transmission cooler. Coolant will flow through the transmission oil cooler only when the primary thermostat is fully open. The primary thermostat will fully open at 95 °C (203 °F). 1 - AIR BLEED 2 - SEAL 3 - RETURN SPRING 4 - PELLET CHAMBER 2009 Jeep Patriot Limited 2009 ENGINE Cooling - Compass & Patriot a Saturday, September 08, 2012 12:55:37 PM Page 79 © 2006 Mitchell Repair Information Company, LLC.
  • 80. The secondary thermostat will start to open at 95 °C (203 °F). This will increase the coolant flow through the cylinder block and cylinder head and the radiator. The secondary thermostat will fully open at 110 °C (230 °F). If the thermostat is stuck open or allows coolant leakage through it, the engine will not operate at the proper temperature for obtaining engine fuel efficiency, performance and emissions levels. If this condition occurs, a diagnostic trouble code will be set and a MIL light will be turned on. Refer to the Powertrain Diagnostic article for further information and diagnostics provided. Diagnosis and Testing ENGINE COOLANT THERMOSTAT The thermostat is operated by a wax filled chamber (pellet) which is sealed. When heated coolant reaches a predetermined temperature the wax pellet expands enough to overcome the closing spring and water pump pressure, which forces the valve to open. Coolant leakage into the pellet will cause a thermostat to fail open. Do not attempt to free up a thermostat with a screwdriver. Thermostat diagnostics is included in Totally Integrated Power Module's (TIPM) programming for on-board diagnosis. The malfunction indicator light (MIL) will illuminate and a diagnostic trouble code (DTC) will be set when an "open too soon" condition occurs. Do not change a thermostat for lack of heater performance or temperature gauge position, unless a DTC is present. For other probable causes. See Diagnosis and Testing . Thermostat failing shut is the normal long term mode of failure, and normally, only on high mileage vehicles. The temperature gauge will indicate this. Removal PRIMARY THERMOSTAT - GAS ENGINE Fig. 71: Primary Thermostat - Gas Engine Courtesy of CHRYSLER LLC 1 - COOLANT HOSE 2009 Jeep Patriot Limited 2009 ENGINE Cooling - Compass & Patriot a Saturday, September 08, 2012 12:55:37 PM Page 80 © 2006 Mitchell Repair Information Company, LLC.
  • 81. 1. Partially drain the cooling system. See Standard Procedure. 2. Remove the air filter housing. See Standard Procedure 3. Disconnect the coolant hose (1) from the inlet housing (2). 4. Remove inlet housing bolts (3). 5. Remove the thermostat assembly, and clean the sealing surfaces. SECONDARY THERMOSTAT - GAS ENGINE Fig. 72: Secondary Thermostat Courtesy of CHRYSLER LLC 1. Partially drain cooling system. See Standard Procedure . 2. Remove the air filter housing. Refer to Engine/Air Intake System/BODY, Air Cleaner - Removal . 3. Disconnect coolant hoses (1) from rear of the coolant adapter (2). 4. Remove the radiator hose (3). 5. Remove the radiator hose (4) from the front of the coolant adapter (2). 6. Remove the coolant adapter mounting bolts. 7. Carefully slide the coolant adapter off the water pump inlet tube and remove the coolant adapter (2) and the secondary thermostat. 2 - INLET HOUSING 3 - BOLT 1 - COOLANT HOSE (REAR) 2 - COOLANT ADAPTER 3 - RADIATOR HOSE 4 - RADIATOR HOSE (FRONT) 2009 Jeep Patriot Limited 2009 ENGINE Cooling - Compass & Patriot a Saturday, September 08, 2012 12:55:37 PM Page 81 © 2006 Mitchell Repair Information Company, LLC.
  • 82. DIESEL ENGINE Fig. 73: Thermostat Housing - Diesel Courtesy of CHRYSLER LLC 1. Disconnect negative battery cable. 2. Remove engine cover. Refer to Engine - Removal . 3. Drain engine coolant below thermostat level using draincock only. See Standard Procedure. 4. Disconnect coolant temperature sensor electrical connector. 5. Remove coolant hoses and by-pass hose (1) from thermostat housing (2). 6. Loosen accessory drive belt and reposition generator. Refer to Electrical - Engine Systems/Charging/GENERATOR - Removal . 7. Remove thermostat housing (2) and O-ring. 8. Clean all sealing surfaces. Installation PRIMARY THERMOSTAT - GAS ENGINE 1 - MOUNTING BOLT 2 - THERMOSTAT HOUSING WARNING: Do not loosen the radiator cap with the cooling system hot and pressurized. Serious burns from the coolant can occur. 2009 Jeep Patriot Limited 2009 ENGINE Cooling - Compass & Patriot a Saturday, September 08, 2012 12:55:37 PM Page 82 © 2006 Mitchell Repair Information Company, LLC.
  • 83. Fig. 74: Primary Thermostat - Gas Engine Courtesy of CHRYSLER LLC 1. Position thermostat into the water plenum, aligning air bleed with the location notch on inlet housing (2). 2. Install inlet housing (2) onto coolant adapter. Tighten bolts to 9 N.m (79 in. lbs.). 3. Connect coolant hose (1). 4. Install air filter housing. 5. Fill cooling system. See Standard Procedure . SECONDARY THERMOSTAT - GAS ENGINE 1 - COOLANT HOSE 2 - INLET HOUSING 3 - BOLT 2009 Jeep Patriot Limited 2009 ENGINE Cooling - Compass & Patriot a Saturday, September 08, 2012 12:55:37 PM Page 83 © 2006 Mitchell Repair Information Company, LLC.