Mise-en-scene introduction and study guide
•
6 j'aime•2,105 vues

A study/revision guide that introduces film students to (or reminds them of) mise-en-scene. 33 pages of activities, commentary, analysis and screenshots, all designed by an experienced film studies teacher and senior examiner. This guide, which is perfect as a unit of work, homework booklet or as a revision guide, can be purchased for just £2.50 at: https://www.tes.com/teaching-resource/-12009989 and can then be easily printed and handed out to students.

Recommandé
Contenu connexe
Tendances
Tendances (20)
Similaire à Mise-en-scene introduction and study guide
Similaire à Mise-en-scene introduction and study guide (20)
Plus de Ian Moreno-Melgar
Plus de Ian Moreno-Melgar (20)
Dernier
Dernier (20)
Mise-en-scene introduction and study guide
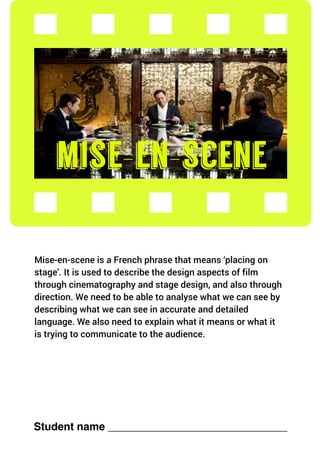
- 1. mise-en-scene Student name ______________________________ Mise-en-scene is a French phrase that means ‘placing on stage’. It is used to describe the design aspects of film through cinematography and stage design, and also through direction. We need to be able to analyse what we can see by describing what we can see in accurate and detailed language. We also need to explain what it means or what it is trying to communicate to the audience.
- 2. Mise-en-scene is a French phrase that means ‘placing on stage’. It is used to describe the design aspects of film through cinematography and stage design, and also through direction. To analyse and discuss mise-en-scene we need to identify and analyse 5 main areas; settings and props, position of people and objects, costume, hair and make-up, facial expression and body language and lighting and colour. Each aspect of mise-en-scene has two meanings to it; the explicit details and the implicit suggestions. For example: what is the prop he is holding? Explicitly, we can see that the prop is a gun. What is the meaning behind it though? What does the use of it in the film tell the audience? Well, implicitly, we know that this person is either going to want to kill someone or protect himself from someone or something. The prop of a gun therefore implicitly that there will be violence.
- 3. EXPLICIT (describe what you can see) IMPLICIT (where this is set and how you worked that out) EXPLICIT (describe what you can see) IMPLICIT (where this is set and how you worked that out) DEFINITION: The setting of a whole film or a key scene is vital. These, often without anything being said verbally, tell us where the film or scene is set and who lives there. It also helps to establish when the film is set and what country, time of day or even what planet the film is set on. This is why you will often see a new scene begin with an extreme long shot that shows the audience where the story is going to take place. These, called establishing shots, are a simple and brief way of telling an audience where the film or scene is set. TASK: Look closely at the establishing shots below. For each, aim to explain the explicit details first: describe what can we see. Then, consider the implicit meaning-where/when is this film set, and in one sentence explain where/when you think this film is set, explaining why you came to that ideas in as much detail as possible. setting:
- 4. EXPLICIT (describe what you can see) IMPLICIT (where this is set and how you worked that out) EXPLICIT (describe what you can see) IMPLICIT (where this is set and how you worked that out) EXPLICIT (describe what you can see) IMPLICIT (where this is set and how you worked that out) EXPLICIT (describe what you can see) IMPLICIT (where this is set and how you worked that out)
- 5. Setting is just as useful when we see an interior (indoor) shot. It helps an audience to not only learn about where and when a film or scene is set but also help the audience to learn about a character or a situation. TASK: When analysing setting, you need to first of all describe what you can see and then work out what that setting suggests about the film and the characters in that scene. EXPLICIT: How would you describe this location? IMPLICIT: Who do you think lives there? What kind of person? EXPLICIT: How would you describe this location? IMPLICIT: Who do you think lives there? What kind of person? What is happening? Why?
- 6. EXPLICIT: How would you describe this location? IMPLICIT: What is the situation here? How can you tell? EXPLICIT: How would you describe this location? IMPLICIT: What is happening here? How can you tell? What situation may be happening?
- 7. DEFINITION: Props, or to give them their full name, theatrical property, are the objects in a scene that help to make a scene appear realistic. They can help to make somewhere look old or new, busy or quiet or just show us what is happening. Props can be almost any item that is included in a scene, such as food, furniture or photos but they can also be items that people use or things that people own. As with most aspects of film language, props can work on two levels-the explicit description of what we can see, but also the implicit suggestion of what the props suggest. For this reason, a setting may have been carefully created so that it includes a specific set of props to suggest what the person in the person or people in the scene is like, such as in these screenshots below. TASK: Look closely at the shot below. Paying close attention to the props, firstly explicitly describe what props you can see and then implicitly analyse what the props suggest about the character or scene. The huge number of props in this screenshot from NINE makes it clear that this is a film studio. The props here help to show that the scene tales place in a local corner shop in SHAUN OF THE DEAD. In this shot from FROM RUSSIA WITH LOVE, props not only show that this is an ornate and luxurious setting, but also that the character is intelligent and calm: playing competitive chess in front of a crowd but happy to relax and smoke a cigarette as he does so. This screen capture from TAXI DRIVER shows how props can tell is that the scene takes place in a messy, shop, but also that this character is violent and carries a gun. props:
- 8. Describe what props you can see in screenshot number 1 on the left. Describe what props you can see in screenshot number 2 on the right. What does screenshot number 1 tell us about Tony Stark, based on just the props you can see? Look at his desk and the things we see on there. What does it tell us about him as a person? Be sure to explain why you think that, using your answers form the top right hand box as evidence. Screen shot 2 gives us a better view of the workshop. From this we can learn what kinds of things Tony Stark likes because of the props used. What hobbies does he have and can you describe what he is like as a person based on what props are being used in the scene? Be sure to explain why you think that, using your answers form the top left-hand box as evidence.
- 9. DEFINITION: The position of objects and people is important as it helps to tell us about people, props and the world in which the film takes place. Put at it’s most basic, someone, or something, close to the front of the screen suggests importance or power. The further away they are and the less central they are, the less important they are. Of course, every person and prop on screen is important in some way-that’s why they’ve been included in the scene, so the key is to first explicitly describe where someone/something is and then to analyse what the implicit suggestion is of them being in that place is. TASK: Look closely at the cube below. Imagine that the front is the screen and that the ‘cube’ area behind it is the world of the film (if it helps, imagine a stage like in a theatre. Then, use the words below to accurately label the blank cube. This will allow you to explain positions in film studies accurately. Front | Middle | Back | Left | Right | Top | Bottom SCREEN position of objects & people TASK 1.Below is a screenshot. There are two people in the screenshot. Firstly, describe, using the words above, where they are. 2. Next, try to analyse why they are where they are. Consider what the reasons might be and why we need to have two people in two very different positions in the frame.
- 10. 1 2 3 2
- 11. 1 2 TASK: Now that you know where and how to label where someone or something is in a scene, complete the table below. The first column focuses on the explicit description of the scenes, using the screenshots on the previous page. The other columns help you to analyses why the people and objects are where they are for a reason. Finally, the last column helps you to combine these ideas into one detailed explanation of each shot.
- 12. 3 4
- 13. costume, make-up & hair: DEFINITION: These three things tend to be analysed together when looking at mise-en-scene. To clarify- costumes are clothes, hair is obvious and make up are the products used to help make a character look a certain way. It does not just mean things like lipstick or eye shadow, it can be used to create scars or cuts, to make a character look pale, to create a creepy looking character or to help someone appear to be warm and kind. Johnny Depp for example is an actor who uses costume, hair and make up to really help create a detailed, authentic and interesting character. What does the use of hair, costume and make up tell the audience about this character? TASK: Begin by describing what you can see and then analyse what these things tell us about the character. Consider colour, materials and special effects in the make up. Then, analyse what you think this implicitly suggests about the character. Explicit: Implicit:
- 14. EXPLICIT: IMPLICIT: TASK: Costume doesn’t always have to be a dramatic thing. For each screen shot below, again describe what you can see (the explicit) and then describe what the costume tells us about that character/s: EXPLICIT: IMPLICIT: Costume can also signify change in a character. For this screenshot, explain what the change in costume tells us about how the character has changed. Around the image, describe what the character is like based on their costume and then describe how the costume has changed and what that tells us about the person and how they have changed. EXPLICIT: IMPLICIT:
- 15. 5 1 TASK: Pay careful attention to each character below. Study how each of them looks and first of all, use the space around the characters on these page to annotate what you notice. Then, using the table on the next page, describe how each looks referring to colour, shape, size and style of costume. Finally, explain what you think that character will be like based on your ideas and descriptions. 1 2 3 56 7 4
- 17. facial expression & body language DEFINITION: Facial expressions and body language are key components of mise-en-scene that are often overlooked. A good actor can quickly and effortlessly informs the audience about their thoughts and feelings with a simple lift of an eyebrow, a turn on their heels or a shrug of their shoulders. This can also establish a mood or atmosphere for a scene and then from this, our reaction to the film. This can seem quite complicated but it doesn’t need to be. When considering and analysing facial expression and body language, consider two main things: 1; are the actors using their face to try and communicate something and 2; are they using their body to try and communicate something? The idea then, is that we are trying to learn about a person feels just by the use of their body and face, rather than by the words that may or may not be using. When combined with camera angles and shot sizes, these key aspects of mise-en- scene can tell us a lot about what is happening. The best thing to do for both facial expression and body language is to just to describe what you can see. However, to do this we need to use some specific language. TASK: Using dictionaries, look up the words below and write down the definition of each. Then, aim to use in a sentence to help describe how someone could look in a film. dominant Definition: In a sentence: proximity Definition: In a sentence: subservient Definition: In a sentence: exaggerated Definition: In a sentence: gesture Definition: In a sentence: mannerism Definition: In a sentence: expression Definition: In a sentence: portray Definition: In a sentence: posture Definition: In a sentence:
- 18. TASK: Using the words from the previous page and by using as many adjectives and verbs as you can, first of all describe each of the images in terms of just their facial expression and body language. Be as specific as possible to explain how the character looks.
- 19. TASK: Using the words from the previous pages and by using as many adjectives and verbs as you can, first of all describe each of the images in terms of just their facial expression and body language. Then, identify what camera angle or shot size it is. Finally, take a guess and try to explain what you think is happening in each of these screenshots by considering facial expression, body language, costume, make-up and the props. (This should be at least 4 sentences per image to really explain what is going on and how you worked that out.)
- 22. Notice how this screen shot doesn’t have lots of very dark areas created by shadows. This is because of the use of fill light. The faces here are clear to see and nice and bright. This is how a key light works. The back light has also created a nice ‘glow’ around their hair and bodies-due to the back light. The key light, as the name suggests, is the most important and shines directly on the subject. It’s the light that creates the main mood or feeling. The fill light also shines on the subject, but from a side angle. It balances the key light and removes harsh shadows. The back light shines on the subject from behind. It gives the subject a rim of light around them, serving to separate the subject from the background and highlighting contours. lighting & colour DEFINITION: Lighting helps to create the mood and atmosphere of a scene. Having read the script and worked with the rest of the crew, the director will decide what they want the audience to feel when watching a scene or the whole film. One way of creating a specific mood or atmosphere by changing the lighting and the colours used. For example, a director might put people or objects in darkness to surprise the audience. They might decide to use lighting to ‘shine’ on specific objects that are significant or use colour can to emphasise someone or something.Finally, lighting can traditionally used to create emotion, atmosphere or to ‘date’ a scene. Traditionally, films which were shot indoors in studios, used “three-point” lighting. This style of lighting allows the images to be carefully manipulated in 3 different ways.
- 23. If you do spot a screenshot or clip which features3 or 4 point lighting, try to say so and aim to point out where and why the lights are/what they’re doing. TASK: Tryonthescreenshotbelowbydrawingarrowswhereyouthinkeachofthe4mainlightscouldbeshining. Off-camera, a background light has really helped to light up the scene in the background so that we can see where the scene is taking place. “Four-point” lighting is created by adding another camera called a background light. The background light is placed behind the subject. Unlike the other three lights, which illuminate foreground elements like actors and props, it illuminates background elements, such as walls or outdoor scenery. This technique can be used to make sure a background is really clear such as, to draw more attention to the background. It also helps to make a scene look more natural allowing the audience to see clearly into the distance.
- 24. Trying to describe lighting then can be difficult. If it’s not easy to pick out individual lights, instead focus on describing the explicit lighting style and then the implicit meaning behind why that style of lighting was used. Use the guide below to then analyse each of the screenshots. LIGHTING FROM DIFFERENT ANGLES Under lighting This is when the key light is placed below the character or object on screen. Top lighting Is when the key light is placed above the character or object. This will help highlight the features of that person or object. Back lighting Is where the key light is placed behind the subject. However, not all films can be shot in a studio or lit by 3 or 4 main lights. Sometimes films have to be creative and even at night time scenes need to be lit in a certain way. TASK: For these 3 examples, what are the lighting directions? EXPLICIT: Label where the key lighting is coming from. IMPLICIT: Why you think the key light is pointed there? What affect does it achieve? How does it make the audience feel?
- 25. TIME OF DAY Linked to the idea of brightness, the time of day in a scene can also help to create mood or feeling in a film. A bright, sunny film shot in the day generally makes a scene feel happy and cheery. A scene which takes place at night is likely to be very dark and creates uncertainty. This means that scenes that are at night time are generally miserable, sad and uncomfortable. Scenes which take place during sunrise and sunset look warm and inviting. This makes them look like an enjoyable place to be and generally suggest love and optimism. BRIGHTNESS One of the easiest things to identify in lighting is the brightness of the scene or film overall. This is straight forward to identify and also analyse. If a scene is well-lit we would describe it as bright.If a scene is dark and under-lit we would say that it looks dull. These are the explicit references to the overall look of the scene. The implicit analysis then is that bright scenes generally represent happiness and darker scenes suggest unhappiness. This idea also applies to time of day. BRIGHT DULL
- 26. SHADOWS AND SILHOUETTES Shadows, areas covered by darkness that aren’t easy to see, are used in films in many ways. Whilst a traditional 3 or 4 point lighting set up shadows are mostly removed, but sometimes using shadows can instead be a powerful way to create mood, atmosphere or suggest something about a character or location. For example, as shadows generally obscure things, shadows create drama and if someone has a lot of shadows on them, it can make a person look suspicious. This is because shadows hide details and information, whether part of someone’s face, a key part of a scene or an interesting prop - hiding something or someone can create surprise. Of course, the opposite is true for scenes and characters that don’t have many shadows on them; these scenes have nothing to hide and show the audience that everything is ok. These scenes are comfortable and want us to feel welcome in them. As well as this, these characters have nothing to hide. A person or object who is completely dark is said to be in silhouette. These are often created to hide people or objects to create surprise or tension.
- 27. LOW KEY LIGHTING Low-key (or hard) lighting This is where the lighting is more towards the greyer and darker scale, where there is a good deal of shadow, and where the key light is less bright and does not dominate. TASK: 1. How would you describe the mood or atmosphere here? 2. How do you think the audience is supposed to feel looking at this screenshot? 3. Looking at the colours here, what do they remind you of or make you think of? EXPLICIT: Describe the lighting here. Try to use key words learned over the last few pages. IMPLICIT: Describe why you think the lighting looks like this. What is it trying to make us think of. Now try to analyse the screenshot below using the space either side. Focus on describing the explicit lighting and the implicit reasons for it.
- 28. HIGH KEY LIGHTING High key (or soft) lighting This is where the scene is lit evenly and brightly. It allows the audience to see everything clearly and without there being any dark spots or parts in the frame. TASK: 1. How would you describe the mood or atmosphere here? 2. How do you think the audience is supposed to feel looking at this screenshot? 3. Looking at the colours here, what do they remind you of or make you think of? EXPLICIT: Describe the lighting here. Try to use key words learned over the last few pages. IMPLICIT: Describe why you think the lighting looks like this. What is it trying to make us think of or make us feel? Now try to analyse the screenshot below using the space either side. Focus on describing the explicit lighting and the implicit reasons for it.
- 29. LIGHTING ANALYSIS TASK: For each of the screenshots below, answer the same 4 questions and aim to do so in one complete paragraph. 1. How would you describe the lighting? 2. What is the mood of each scene? How does the lighting create mood? 3. What does the lighting tell you about the characters? 4. How is the lighting trying to make the audience react or feel?
- 31. COLOUR Under normal circumstances, our eyes adjust rapidly and we usually don't notice differences – unless we look for them – but cinematographers will often adjust for colour. They’re generally looking to do two things; either make a scene look hot or cold or to tell us how people feel. Consider the colour chart above. Notice how the colours on the left are ‘warmer’ and the colours on the left are ‘cooler’. If the colour of a scene seems important, do the usual two things: explain the EXPLICIT and refer to the main colour/s. Then, analyse the IMPLICIT and explain why those colours are used-what are they trying to tell us or make us feel? The screenshot on the left is much ‘warmer’ than the ‘cool’ shot on the right. Why? What is the possible reason? What does the scene want us to feel or understand? You might want to consider other aspects of film language, but aim to analyse colour more than anything else, thinking about what the film wants the audience to feel or learn about the characters or the location. TASK: Using the spaces below each image, analyse the EXPLICIT colour/temperature and then analyse the IMPLICIT reason why it’s been used.
- 33. mise-en-scene analysis Having now analysed each aspect of mise-en-scene individually, now take a look at the images below and aim to analyse how they use ALL aspects of mise-en-scene to create meaning for an audience. TASK: For each image, do the same two things-identify the EXPLICIT, the main, most important aspects of mise-en-scene. Then, analyse the IMPLICIT; try to explain what these features of mise-en-scene are trying to tell us about the characters, the location, the mood or even the story. Try to explain where/when the film is set or what the genre of the film could be, based just on the mise-en-scene. The size of the boxes gives you an indication of how much you need to write.