1. Registration in eTwinning
Registration in the eTwinning directory involves:
Becoming a member of a group of European teachers who are interested
in getting in touch to start collaborative work.
Being able to access a virtual platform called eTwinning desktop, using
tools that will allow us to create and manage eTwinning projects.
Being able to take part in the online training modules.
Starting or taking part in eTwinning groups and teacher communities as a
place to exchange ideas, information and experiences and discuss
common topics.
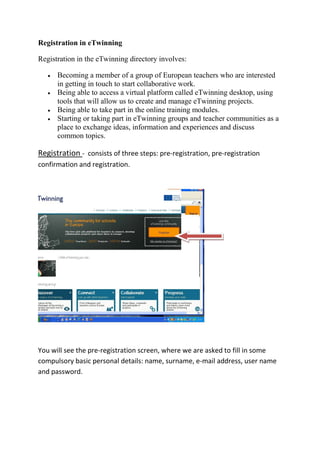
Registration - consists of three steps: pre-registration, pre-registration
confirmation and registration.
You will see the pre-registration screen, where we are asked to fill in some
compulsory basic personal details: name, surname, e-mail address, user name
and password.
2. Should the user name have already been taken, a message would pop up,
asking us to choose another one. It is important to remember the user name
and password, as you will be using them frequently.
Pre-registration confirmation
Once we have clicked 'Send', the pre-registration data will be saved and we will
receive an e-mail at the address we provided.
Within this e-mail, there is a link to confirm pre-registration.
MPORTANT: Your e-mail server may classify the confirmation message as 'spam'. If, after a
few minutes, you still have not received it.
Registration
When clicking on the link we received by e-mail, we can see another window
where we must fill in several forms:
3. Step 1: Information about your school. In this section we will be asked
to provide data about our school.
Our school can already be registered in eTwinning, if another colleague
has previously done it. The first information we are asked to give are
data about our country, county and city:
We can now see a list of all the schools registered in the eTwinning programme in that town.
Should our school be one of them, we can then click on 'This is my school' and that will take
us to step 2.
4. If not, we can click on a button at the bottom of the list, 'Click here to register a
new school', and we will see a form where we are asked about our school.
5. The data to be provided are: institutional name, address, city, postcode (not
compulsory), school code (not compulsory), telephone number (not
compulsory), e-mail, website (not compulsory) and the full name and e-mail of
the Headmaster or Head of Studies of our school.
Some of these data are compulsory but we may not know them. After
registration it is possible to modify anything, so in this case we could use false
data in the registration and then change them to the real data when we find out
what they are.
Step 2: Information about you. In this step we can see a form asking us
about our position at the school, the subjects we teach and whether we
wish the eTwinning news newsletter to be sent to our e-mails.
6. Step 3: Twinning preferences. In this form, we are asked questions about the
topics we are interested in and to make a brief description about our
preferences.
The fields in this form are:
eTwinning project kit. We must remember that these kits have projects
prepared to be practiced with straight away, which would help with the
creation of the project.
Ideas for an eTwinning project. It is advisable to express these ideas in all
the languages you can speak in to your partner, as they will be reading
them. Should this take up too much space, write them in your favourite
language and add a short summary in the other languages.
Fields of knowledge for the project. Some subjects should be chosen so
that our preferences are concisely specified.
Languages to be used in the project.
7. Age range of the students taking part in the project.
Step 4: Preview and confirmation. In this step we have all the information we
added in the previous steps, also allowing us to modify any incorrect data.
8. If the data are correct, click 'Send'. If any data were wrong, we could click
'Modify' in the corresponding step.
Once the data are confirmed in Step 4, we will have completed our registration
in eTwinning and a message will come up to confirm it.
From now on, we can access the 'eTwinning Desktop' virtual space by using the
user name and password used in the registration process.
The eTwinning desktop
he eTwinning desktop is a virtual platform that allows us to manage our
participation in eTwinning.
The main functions of the eTwinning desktop are:
Manage our profile. We can edit information used for our registration in
eTwinning, both for ourselves and for our school.
Partner search. The idea is to find one or more European teachers who
have the profile we are looking for to start an eTwinning project.
Manage the existing projects. Once we are working on one or more
projects, we will be able to see news about them, access their work
environment, etc.
9. Access to the eTwinning desktop.
Once we have confirmed our registration in eTwinning, we will get a username
and a password to access the eTwinning Desktop.
Sections in the Desktop.
At the top of the eTwinning Desktop we can see several tabs that allow us to
access each of the sections .
Homepage
The Homepage appears when we access the Desktop. It provides some direct
links to the most important sections in the Desktop.
10. 1. Selection tabs. They allow us to change from one section to another.
2. Personal profile. This area is reserved to add a photo that can be seen by other
eTwinning users.
3. Welcome message.
4. Editing the teachers' profile. You can change personal and school information,
preferences and/or add our photos or photos of our school.
5. Close session. To exit the Desktop.
6. Inbox. Direct link to the inbox, showing us if we have any new messages.
7. Important announcement from the Central Support Service.
8. News from NSS. You will see a list of news published by your NSS to inform all
users of the most relevant news taking place in the eTwinning actions.
9. Notifications. A list of notifications received. This box shows the messages from
eTwinners.
10. Groups. The eTwinning groups are communities of teachers focusing on a common
topic of interest.
11. Learning events. They are training activities for teachers, - between one and two
weeks long - dealing with different subjects at different levels.
12. Teachers' rooms. These spaces are created by users to informally discuss certain
topics of interest.
News. Located on the top right corner of all tabs. Various messages are
displayed:
11. Contacts. It tells us whether anyone has asked us to be their contact (we
can accept or decline the offer), or whether anyone has accepted being our
contact (we will have previously sent them a request).
Projects. It tells us about news in the projects we are working on (new
users, cancellations, etc.).
At the top of the window you will see Subscribe and Manage
notifications.
By clicking on Manage notifications, users can subscribe to their Contact
Diary and the Teachers’ Rooms. They will be informed each time a contact
writes a message in their Diary and also when a member writes a new message
in each Teachers’ Room they are registered in.
12. Whenever we click on “Subscribe”, users will receive a daily email with a
summary of all the notifications, including the answers to their own Diary.
Profile
This section in the eTwinning Desktop offers information about the user (school,
languages, contacts, their eTwinning career…) and it allows them to modify the
data they used when they registered in the eTwinning desktop, both regarding
personal and school data, preferences and a photo gallery of the partner and the
school.
1. Selection tabs. They allow us to change from one section to another. In
this case, we would be in the 'Profile' section.
2. Photo to identify the registered teacher.
13. 3. About me. Some information about the user (school, city, country,
languages...).
4. My life in eTwinning. This section shows the eTwinning events we are
involved in. For instance, someone who includes us in their contacts, registration
in a project, etc.
I am available for an eTwinning project No Yes
I am available for a Comenius project No Yes
You must choose YES in the first one so that teachers from other countries can
find and contact you to start a project; if you don't tick it, you will not appear in
the Partner search engine and therefore will not be found by other European
partners who may have the same project ideas as you. You will be missing out
on a lot of opportunities.
5. eTwinning and I. My diary. In this section we can include interesting
messages or news that can be read by other eTwinning users visiting our profile.
We can also leave notes on other users' notice boards and they can leave us
messages too.
6. My contacts. It shows a list of my contacts - teachers you have chosen
through the search engine and who have accepted becoming your contacts - and
who have recently been active. At the bottom you can see the link to add new
contacts and also see the other user's contacts.
7. My Projects. A list of active projects led by the teacher. The bottom
links allow us to create a new project and see all the projects the teacher has
taken part in. Both links take us to the Projects tab.
Editing the user profile
This section in the eTwinning Desktop allows us to modify the data used to
register in the eTwinning directory, both personal data and data about our
school, preferences and the gallery with our photos and photos of our school.
14. 1. Selection tabs. They allow us to change from one section to another. In this
case, we would be in the 'Profile' section.
2. Profile options: Personal. The school. Preferences. Photo gallery. This
area is reserved to modify the data the user inserted when he/she registered in
the eTwinning platform. The idea is to state who we are, the way we are or
we work, interests, hobbies and any other information about our personality
we want other eTwinning users to know.
2.1. Personal.
The teacher's data. We can see our personal information in the centre of the
screen and modify those that are wrong. Remember that the username cannot
be changed. You can change the password and email address, as well as other
important data. Should you have modified any of them, click on the 'Save
information' button and the data will be changed.
Would you like to receive the eTwinning Newsletter? It is an online monthly
magazine publishing the most important events taking place in different
15. countries, as well as the Central Support Service (courses, workshops,
campaigns, etc.). Register and you will learn new and interesting ideas.
Do you wish to receive news by email? When a general circumstance affects the
entire eTwinning community, if this option is activated, you will receive an alert
via email. The email address used is the one provided by the user when
registering in the platform.
2.2. Schools.
1.- Vertical drop-down menu of the schools we have worked in and the school
we are at now. Once we have chosen a school, at the bottom you will see
information about it and the subjects the teacher is imparting.
2.- Adding a new school. You should only modify your school data if they are
wrong or they have changed. If we have changed schools, we must add the new
one.
IMPORTANT!
If once you have registered in eTwinning you change schools, you must not
modify the data of your previous school. If you do that, you will be changing all
the registers of all the teachers associated to that school. What you should do is
add a new school. The process is the same as in the registration form; first you
have to look for it in a list and, if it does not appear, register it.
Once you have done this, tick the schools as active or inactive (if you are
sharing the school, you can keep more than one as active).
16. 2.3. Preferences.
This is a form with a short description of our preferences. In this section we can
explain basic information about what we want to do in eTwinning: if we want to
use a project kit, fields of work, languages, students' ages and, especially,
provide a short description of our project expectations. If you change any of
these data, click again on 'Save information'.
Photo gallery-Image management
Whenever a potential partner accesses our profile to learn more about us, if they
can see our photo and images of our school, they may get a better impression of
what we are like.
We can add images to two galleries from our profile:
Teacher's gallery, where we can include our own images.
School gallery, where we can include images of our school .
When we access the profile of an eTwinning user, we can see their photo
on the left (if they have uploaded more than one photo to the gallery, we
17. can browse through them). If we click on the school name, we can see
photos of it.
How to add an image to the 'Teacher's gallery' ? We would have to go through
the same process to add an image to the 'School gallery'. The first step would be
to click on 'Upload a photo'.
1. Click on 'Search’ and look for the image you wish to add to the gallery.
Maximum size is 4MB.
2. In 'title', we must add a title (compulsory).
3. In 'Short description' we can add a short text describing the image
(compulsory).
4. It offers the possibility of only showing this image to eTwinning users
or to anyone who visits the CSS website. Choose the option you prefer.
5. Click on 'Submit' to upload the image.
This is the result:
18. We can see that the image we selected in the gallery. This way, we can add as
many images as we like. When we choose an image, we will see several options:
Default picture. By ticking this box, we can make this our default image, which means it will
be the first image shown in our profile when other users check it.
Edit picture. By clicking here we can modify the title, the description and the place where
the image will be seen.
Delete picture. If you wish to delete the image, click here.
The usual process is to add an image to the teacher's gallery and make it the default image.
Therefore, eTwinning users who check our profile can see what we look like.
19. Projects
This section allows us to manage the projects we are already working on, as well
as start other new ones.
1. Selection tabs. They allow us to change from one section to another. In this
case, we would be in the 'Projects' section.
2. Projects. It briefly describes a series of actions that can be carried out in
the projects from this area (invite new members, request a Quality Label, etc.).
3. Open. Closed. Pending. By clicking on each section, we will see a list of
the eTwinning projects we are working on, those that are closed and those that
are pending approval.
For each project we can see the following information:
Our photo, if we have uploaded it.
Name of the project and registration date.
Project quality labels. The Quality Label is a special reward to the best
eTwinning projects. The Quality Label can be requested from this section.
Actions. Here we can see links to register new members, modify certain
aspects of the project, access TwinSpace, etc.
4. Search. We can search for an eTwinning project by description, topic,
age and/or language.
5. Creating a new project. This link takes us to a form to register a new
project.
20. Finding partners
The first step to be taken after registering in eTwinning is to find a partner to
agree on a project with. To find a partner who can adapt to our expectations, the
eTwinning Desktop offers its users the 'Finding partners' section. In this section
we can see two useful tools to search: search per key word and the partner
search forum.
1. Selection tabs. They allow us to change from one section to another. In
this case, we would be in the 'Finding partners' section.
2. Quick search. Search per key word. It allows us to search for other
eTwinning users by using some key words (it can be used to look directly
for someone we already know, name, surname, school...).
3. Advanced search. It allows us to filter words per fields (position at the
school, country, region, subject, etc.)
21. 4. Forum. It allows us to read other users' messages, where they explain
their project ideas and invite us to take part. We can also leave a message
stating our preferences for a future project or the profile of the teacher we
are looking for. Perhaps this is the best resource to find a partner if we do
not know one already. Note that it is organised into sections according to
the ages of the students taking part in the project, as well as another more
specific one to search for partners to start a school association within a
Comenius action.
5. Are you interested in using an eTwinning kit? If you tick this box, a
vertical drop-down list will appear, showing all the kits available in the
NSS site, which can become an idea and/or inspiration for a future
project.
6. Available for an association in another Comenius action? If you tick
this box, the list of teachers that appears after the search will show those
who have ticked “available for a Comenius project.
7. Available for an eTwinning project? If you tick this box, the list of
teachers that appears after the search will show those who registered in
the eTwinning platform.
Partner search
In order to start an eTwinning project, you must find one or more partners
whose profile is similar to your project expectations.
In some cases, a partner is a teacher from another country we already happen to
know. But in most cases we must search and find teachers from other countries
who wish to work with us.
Search keywords
One of the options given in the eTwinning Desktop is to look for partners using
keywords, such as the partner's name, the school or any other word that appears
in the profile.
This method is especially useful when we already know someone and we wish
to find them.
22. In order to do this kind of search, follow these steps:
In the eTwinning Desktop, access the section Find partners. Do a quick search
for a teacher called Antonella. Once this word has been typed in, click on
Search.
We will see a list of schools and eTwinning users featuring the word Antonella.
23. Several data are shown for each eTwinning user: links to their profile and their
school, project languages, project topics, nationality of the school and a link to
invite them to be our contact
If we are looking for partners through this system, we should check the profile
to learn more about them and, if they match our requirements, invite them to
become our contact (or even contact them directly by email).
We can also carry out an advanced search by filtering some of the search fields
(position in the school, country, subject, language, etc.). For instance, we can
search for all those people who are going to work on Art in English.
25. Partner search forum
It is a forum where teachers registered in eTwinning make project proposals,
they express their preferences for languages or topics, etc., in order to find a
partner who matches their profile requirements.
The forum is especially useful when we do not know anyone in the platform and
we want to find a partner who wants to start a project with us.
The best thing to do is to read the last messages written in the forum: if any of
them match our ideas or we think they are interesting, we can reply to the
message and get in touch with whoever wrote it; also, if none of them match our
expectations, we can leave a new message in the forum and wait for someone to
reply.
If you wish to leave a message in the Forum, bear in mind that:
You must not make your expectations too clear. The idea is to slowly
build the project according to the proposals we get.
You must use a language that can be understood by all potential users
who may read the message. English is normally used, but you may also
use another language. Users can delete their own messages.
To access the Partner Search Forum, follow these steps:
1. In the eTwinning Desktop, access the Forum module, on the top right
corner of the Find Partners tab.
2. Choose the age category of the students you are going to work with. Try
with the 16-19 age group.
26. You will see this image:
3. At the bottom you can see the discussion lines and the data for each
discussion line or topic: subject, last message, author and number of answers
generated with the first entry.
27. 4. To read the messages in one line, click on the title.
5. You will see the messages in each line and the answers received until then,
together with information about the author. To the right of each entry you will
see two icons that will allow you to reply to a message and write a quote.
Creating a new discussion line or topic
Should none of the messages in the Forum seem interesting to us, we can create
a new discussion line. In this second case, we only have to wait for someone to
answer: we can get messages in the actual Forum, proposals to become other
users' contacts or internal messages.
A.- To start a new discussion line in the forum, click on the central right area
button that says create message. There is a form where we have to fill in several
fields. Once you have done that, click at the bottom on 'Post your message'.
28. The best way to find a partner using this tool is to start reading the last messages
included in the Forum. Should one of them match your expectations, you should
do two things:
Visit the teacher profile and carefully analyze the information on him/her and
his/her school. Using the icon we can send a private e-mail to his/her
internal mailbox.
• If according to the information contained in the profile we consider that he/she
is a possible contact we can invite him/her to be part of "My contacts". In this
way we will have his/her information for contacts at a later date.
29. • Answering the message from the Forum. To do this we must fill out the form
mentioned above.
You can see all your messages and the replies that have been posted by clicking
on the link that appears in the box at the top right of the page "List all my
messages".
Inbox
You may have realised that all the tabs in the Desktop show the same icon: an
envelope representing internal mail in the platform. It allows you to send
messages to other users who have registered in eTwinning, who will normally
be those we have registered as Contacts or whom we wish to include in that list.
Once you have added to your contacts anyone matching the profile you are
looking for, you can start a conversation with them by email in order to decide
about those aspects of the project you are about to begin.
You can access the 'Inbox' from any tab of the Desktop by clicking on the
envelope icon.
http://www.etwinning.es/apls/cursos/curso_en/index.php/Documents_3.c:_Deskt
op
http://creativecommons.org/licenses/by-nc-sa/3.0/