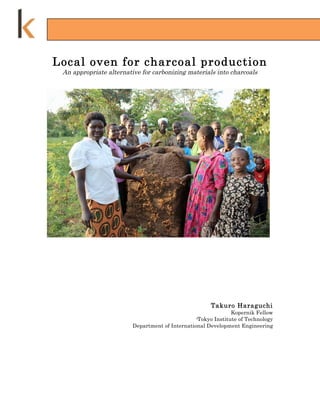
1. Local oven for charcoal production
An appropriate alternative for carbonizing materials into charcoals
Takuro Haraguchi
Kopernik Fellow
-Tokyo Institute of Technology
Department of International Development Engineering
2. Contents
1. Introduction 3p
2. Collection 4p
2.1 Bricks 4p
2.2 Mud 4p
3. Building the oven 6p
3.1 Theory 6p
3.2 Let’s build up 7p
3.3 Covering outside of the oven 12p
4. How to use it 16p
4.1 Putting materials inside. 16p
4.2 Lighting the fire 16p
4.3 Cooling down 16p
4.4 Taking out charcoal 17p
5. Supplem ent 18p
5.1 Making a better structure 18p
5.2 Lowering the cost to build an oven 18p
2
3. 1. Introduction
While managing the charcoal project in Kenya, which uses technology
developed by MIT D-lab that allow the production of charcoal from
agricultural, I faced several problems.
One of the biggest hurdles for beneficiaries who were willing to get involved
with the project was the initial cost of getting a drum, a necessary equipment
for carbonization of agricultural waste under D-lab’s technology. That is
because many of the participants live in impoverished villages and are not in
a position to meet even some basic needs, and thus cannot afford to get a
drum which cost 1,700Ksh (16.63 USD 1). Furthermore, they have to go
towns to obtain it, making it even more inaccessible. Initially, I tried to
manage the situation by using a loan model. This model consists of providing
a loan and getting it repaid after 6 months from the profits of producing and
selling charcoal. After 6 months however, when I came back to Kenya, I
realized that they could not generate enough income from the charcoal project
because several problems resulted in an underproduction of charcoal. At the
same time, I received many requests from people in village to become
beneficiaries of this project, although ultimately they were unable to
participate because of the cost of the drums. Therefore, from the initial
process of this project, it is evident that we must provide alternative ways to
get involved with this project. It is important to consider accessibility for the
poor when introducing a technology.
A key word and possible solution to tackle this issue is “Localization”. There
are many local technologies that are still unknown. There is a possibility to
combine ideas from local technologies and our idea to solve the problem. One
example is using an oven with bricks to substitute for the drums, which I will
explain in the next section. Many villages in western Kenya uses bricks that
are made from soil by local people, which means that bricks are accessible
and cheaper.
1 I converted Kenyan currency to USD by this ratio USD/KES = 0.00978, 13th Oct 2011
3
4. 2. Collection
Before creating an oven, you have to prepare two materials: bricks and binder,
which are available at villages, eliminating the necessity to go to towns to
collect materials.
2.1 Bricks
Brick is a fundamental material to develop this structure. Of course, you can
modify it to the oven design you want to make. But, I would like to show a
basic model of this structure here.
First you have to access a place where you get baked bricks. You will use
about 100 bricks. So, cost of getting bricks is about 500Ksh(4.86 USD)
because the cost per brick is just 5 Ksh.
2.2 Mud
It is very important to think about binder connecting bricks and making them
into a very strong structure. So, what we can use locally is soil. Actually,
people in villages already know how to make good mud from soil.
People in villages use mud
for building their houses.
4
5. 2.2.1 Making mud
The first step is to dig up
soil by spade and add water.
After that, you mix it with
water by using spade and
stepping on it by foot until
mud reaches a consistency
that is well mixed and
sticky.
2.2.2 Fermentation
After making mud, we
devise it to be stickier by
fermentation. First, you
collect mud in one place like
the photo to the left.
Second, you cover it by plastic paper for more than 3 days.
After 3 days, the mud is stickier. And you can know that the mud was indeed
fermented from simply detecting the smell emanating from the mud.
5
6. 3. Building the oven
After collecting the above two materials, now you can develop a local oven.
3.1 Theory
Before actual construction, I would like to explain 4 structural requirements
that enable us to get good charcoal.
-1: A hole from which we put agricultural waste in it.
Before starting to carbonize, agricultural waste must be inside a structure
and so you need a hole from which you will place the materials inside..
-2: Holes from which the waste will catch fire.
After putting the materials inside, you need to ignite them from bottom holes.
-3: No hole from which heat can escape.
After burning, you cover all holes so that you can stop providing oxygen while
maintaining high temperature and pressure.
-4: Places from which to take charcoal out.
After cooling down, you can get charcoal from those places.
With these requirements in mind, we designed the following oven.
6
7. 3.2 Let’s build up
We can divide this structure into three parts: bottom structure, middle
structure and top structure. And, you need to add mud between bricks
from now to connect each other without removable bricks that I
am going to talk about at 3 rd layer.
3.2.1 The first and second layer (Bottom structure)
To meet the requirement number two, we devise the first and second layer to
accommodate holes from which we can supply burning material to fuel the
fire.
- First layer
There are spaces between bricks (see Figure 1 and Figure 1a below) which
are equal to the size of the bricks so we can insert bricks to cover this space
and prevent heat from running away during the cool down process. .
Figure 1 Figure 1a
- Second layer
From this point on, I would
like to explain step by step.
First, you put 6 bricks on
top of the first layer as
shown in red to the left on
figure 2.
Figure 2
7
8. Figure 2a Figure 2b
For step #2, you put another 8 bricks on the top and bottom, which are
drawn again in red thick lines on Figure 2a. Figure 2b shows the actual
layout.
The last step for the second layer
is to fill 6 spaces by splitting
bricks so that they fit into the
small spaces around the
perimeter. These small spaces are
shown by the 6 rectangles drawn
in red thick lines on Figure 2c.
Figure 2c
Figure 2d shows the
complete second layer.
Figure 2d
8
9. 3.2.2 The third, fourth, fifth and six layer (Middle structure)
After completing the second layer, it is now time to build up the structure
around the edge. For step #1 of the third layer, you will need to pile up 12
bricks on top of the edge of the second layer (see the green rectangles on
Figure 3 below).
- Third layer
Figure 3
For step #2, you fill 4
spaces by splitting bricks as
you did with the second
layer to fit into the gaps.
The 4 squares that are
painted in darker green on
Figure 3a mark these 4
gaps that need to be filled.
Figure 3a
9
10. Please look at Figure 3b to
the left. The two darker
green squares indicate the
2 bricks that will become
removable bricks. You must
not attach mud on the
edges of these removable
bricks.
Figure 3b
- Fourth layer
For the fourth layer, you pile up bricks in the same exact way as the third
layer. Please be careful that there are 4 removable bricks in total on
third layer and fourth layer and not to attach mud on these
removable bricks.
- Fifth layer.
On the fifth layer, pay extra attention to the removable bricks on the third
and fourth layer. You will have to pile up bricks on top of them, but the
structure must be stable even when you take out the removable bricks. The
key to creating this stability is the two bricks right above the removable
bricks—they must be supporting each other. You can achieve this by
connecting the sides of these two bricks and make them lock. Refer to the
instructions and diagrams below.
Figure 5 Figure 5a (aerial view)
10
11. Figure 5b
Figure 5 shows the side of the oven where the removable bricks are clearly
visible. To achieve this, you must make a secure connection of the 2 bricks
on the 5th layer right above the removable bricks (shown in orange on
Figure 5a). Figure 5b shows a side view of the oven thus far. Note the circle
drawn on the 5th layer on Figure 5b; that’s where the 2 bricks above the
removable bricks (shown in blue) need to be connected.
- Sixth layer
For the sixth layer, pile the bricks as you did in the fifth layer.
3.2.3 Seventh, eighth and ninth layer (Top layer)
For the seventh to ninth layers, you begin to make the hole on top. The
perimeter of the bricks must gradually taper with each layer as illustrated in
the diagrams below.
- Seventh layer - Eighth layer
Figure 7 Figure 8
11
12. - Ninth layer
Figure 9
3.3 Covering outside of the oven
3.3.1 First cover (Before being dried)
After building up,
you have to cover
holes on the surface
by mud. The trick of
attaching mud is to
pelt it on the surface
instead of applying.
Figure 10
12
13. 3.3.2 Second cover (after being dried)
The purpose of second cover is to cover small
holes that still exist after drying the first time,
mostly because some mud falls down in the
process of drying due to wind or rain (see figure
11). So, after first round of drying, find small
holes on the surface that will allow matter to
seep inside and cover them by pelting mud
again.
Figure 11
3.3.3 Third cover (after being dried again)
The purpose of the third cover is to cover cracks. You will notice that
there are many cracks on the surface after the mud becomes dry (see
figure 12 below). So what you should do is to cover again, but this
time use another type of mud that does prevent cracks from
occurring: a mixture of mud and cow dung are normally used for
building up foundation and wall of house in villages, and will suit
this purpose as well. You can see how that mixture works after it
dries on figure 12a.
Figure 12
13
14. Can you see the
difference? There are no
cracks on the surface of
this wall. By using this
mixture, we eliminated
cracks because the
mixture of mud and cow
dung is so sticky that
cracks do not appear even
after being dried.
Figure 12a
3.3.4 Preparing mixture of mud and cow dung
You put soil on cow dung and add water.
Figure 13 Figure 13a
Then mix it together.
Figure 14 Figure 14a
And unlike with mud, apply and do not pelt this mixture on the structure.
14
15. Figure 15 Figure 15a
And your oven is now finished! If you don’t cover the oven with this mixture
as a final step, it will fail to make good charcoal because heat will escape
through cracks and holes, as seen on figure 16 below.
Figure 16
15
16. 4. How to use the oven
4.1 Putting materials inside
This process is the same as using a drum. You put it in until it is full. One
difference here is the size of the container. This oven is 1.5 times bigger than
a regular sized drum so that more materials are needed to fill the oven.
4.2 Lighting the fire
Similar to when using a
drum, you have to insert
materials to burn (fuel)
from the four holes that are
located at the bottom.
Figure 17
4.3 Cooling down
Once the fire is large enough to reach top of this structure, cover the hole on
the top and 4 holes on the bottom to prevent oxygen from getting inside and
heat from escaping.
- Covering the hole on the top
Do it the same way as you would with a drum by placing an ion sheet and
putting soil on it.
- Covering 4 holes on the bottom
A significant difference of the stove compared to a drum is that it attaches
on the ground. If we use a drum, we remove stones on the bottom and put
them on the ground before sealing the bottom edges and the top of the drum
with sand. With the stove, however, you place four bricks into these holes
instead to cover up the oven, and then you seal it tight with sand. The
result will look similar to Figure 18 below.
16
17. Figure 18
4.4 Taking out charcoal
After you confirm that the bricks are not hot, then it is safe to take out
charcoal from inside. First, you take out the removable bricks from both sides,
as shown below.
Figure 19
17
18. Then remove the charcoal
inside with your hands.
Figure 20
18
19. 5. Supplements
5.1 Making a better structure
A drawback stated by beneficiaries about this oven is that the holes on the
first (floor) layer are so big that carbonized materials fall down very easily. So,
they came up with a solution to prevent materials from falling down by
putting iron mesh, regularly used for grilling meats, on those holes to capture
the fallen, carbonized materials.
5.2 Lowering the cost to build an oven
One way to bring the price of this oven down is to use unbaked bricks, which
are 2 Ksh per brick, lowering the total cost to 200Ksh. You may think that
unbaked bricks will not support the structure as strongly as baked ones;
however, the process of carbonizing materials with fire will essentially bake
the bricks because the process is the same for baking bricks from mud. Thus,
the more you use the oven, the more firm and stronger the oven will become,
making the 200ksh alternative oven a more viable possibility.
If you have any questions or suggestion, please let me know.
takuro.haraguchi@gmail.com
Takuro Haraguchi
Kopernik Fellow
Tokyo Institute of Technology
Department of International Development Engineering
19