
Recommandé
Contenu connexe
Tendances
Tendances (20)
En vedette
En vedette (18)
Similaire à Progression 4 digipak
Similaire à Progression 4 digipak (20)
Plus de laurenamyharriman
Plus de laurenamyharriman (19)
Dernier
Dernier (20)
Progression 4 digipak
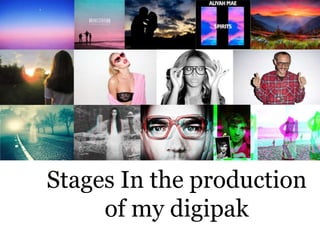
- 1. Stages In the production of my digipak
- 2. I began creating my digipak by creating the base colour of the panels. I selected white as I believe all other colours stand out above this. I also selected my photograph that I had produced from a Terry Richardson style photo combined with a Holgaart effect. I did this at this stage as this also had a white background that matched all the other panels. I did this by using the select feature, cropping out bits I didn’t need and shaping it appropriately using CTRL+T with shift to prevent it becoming distorted.
- 3. In this next stage I added the font to the front cover of my digipak. I used three copies of the same fonts (done using the duplication feature). However, I varied the colours of these fonts with one to match each colour used in the shadowing of the image. I did this using the colour select tool. I shaped it appropriately and placed it in the left hand top corner of the panel, leaving some negative space which ensured that the image and text stood out and was the main focal point of the panel.
- 4. After this I added all relevant information to the spine of the digipak, including the catalogue number inclusive partly of the name of the record label and a combination of numbers. I also included the name of the artist and the album title, so that if the digipack were to be displayed and shelved, the audience would be able to see this vital information which is a major factor in an individual purchasing the item.
- 5. The next step was to include my second image in the inside cover. For this panel I used the same techniques as in the first such as the select feature and CTRL+T to shape it correctly. I chose a slightly more lighthearted photograph than the one used on the front cover as I intended to include a thank you message to all of Luna’s co-workers and fans, therefore it required something friendly and approachable. I chose to use the same effect-Holgaart- on this as I believe to include a normal image would totally clash with the front cover and also it helped to create consistency throughout the digipak. I placed this image in the right hand corner, so
- 6. After this I added the text as intended as mentioned on the previous slide. I placed this in a central positioning to fit the negative space most effectively. I made the font relatively small but still easily readable. This also ensured that the font did not deter attention from the image, the centre of visual interest.
- 7. The next step was to fill up the two remaining inside panels. Feedback suggested that I did not want too many images throughout my digipak and therefore I was advised to include the lyrics in these blank spaces. To begin with, I designed spaces around which the font could fit. I divided the different sections with a series of lines, mainly corresponding to the colours used in the images in the digipak. This was apart from the four black lines that I used to make the rectangles clearer, more visible and bolder.
- 8. After this, I added the lyrics for two of the shorter songs into the central regions of the digipak. I aligned these to be central and placed them inside the dividing lines. I used a font that corresponded with that on the back cover and four other panels apart from
- 9. After this I added the 6 remaining song lyrics into the left and right designated spaces. I aligned these to the left and placed them within the dividing lines. I used the grid that is available on Photoshop to make sure that everything was in line. I also made sure the spacing of these were identical with the panel using the grid function.
- 10. I then added the barcode and the production company logo to the back cover of the digpak. I also included here the price of the CD underneath the barcode. I placed these in the bottom right hand side of the panel to try and place them out
- 11. Next I added the track listings down the left hand side of the back cover, keeping this information separated from the barcode and logo in order to ensure it had a clear and structured layout on the panel. I also added the legal information required on the bottom right hand side of the panel. I used the same font as I did for the lyrics and the thankyou message, however for the track listings capitalised it in order to make it bolder and stand out more.
- 12. Finally, I added the coloured CD template. I chose to put this in black as I wanted the font (the title of the album) to stand out clearly above this and I believed it looked most effective in black. This colour corresponds with the majority of the font used, as well as the black dividers on the lyric panels and the logo on the back cover.