Good Stuff Happens in 1:1 Meetings: Why you need them and how to do them well
How to Convert MP4 to MOV on Mac
1. How to Convert MP4 to MOV on Mac
Presently, it’s quite pervasive for someone to have at least one Apple device or software, such
things are so popular and bring us much joy in digital world. Many people would like to use their
Apple gadgets as multimedia station for enjoying various media. There’re chances that you
need to transfer and play videos in travel, on the way, in party and etc. However, we just forget
that Apple devices may not be compatible with many formats including the most popular Mp4
(Partially), FLV and more. In order to carry the portable MP4 files with your iPhone, iPad, iPod
and more, you will need to convert them to MOV – Apple’s own developed media format. We
hence introduce a robust MP4 to MOV converter for Apple users to remove the barrier of
compatibility and improve their multimedia experience.
If your system is Windows, please download Video Converter for Windows.
The Video Converter not merely converts videos for Mac, but extracts music from videos,
supports conversion of up to 100 popular video formats and lets you customizes videos by
configuring the settings and adding visual effects.
Step 1 Load MP4 Files for MP4 to MOV Conversion
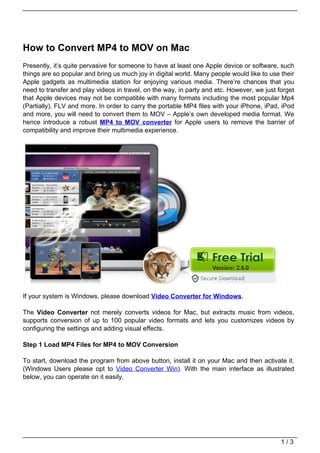
To start, download the program from above button, install it on your Mac and then activate it.
(Windows Users please opt to Video Converter Win). With the main interface as illustrated
below, you can operate on it easily.
1/3
2. To load files, just go for ”File” – “Add Video/Audio files” and then load source MP4 files from
your local drive. You may also drag and drop them to the converter. Once you are done, you
can find all source files display with detailed info (Video thumbnail, brief desc, output files and
etc) in rows.
Step 2 Configure MP4 to MOV Conversion
In this step, you will need to solve the output profiles. Check into the row of each imported
video, and then click “Output Format” which is in thumbnail view and could be found on the
right side. When you see the profile list as shown in the image below, you can choose
“Common Video” – “MOV”. But if you want to convert for specific device, just go to “Apple
Devices” and choose from iPhone, iPad, Apple TV and more.
2/3
3. Tips: Video Converter Mac also supplies helpful editing functions include crop, trim, video effect
and more. Such options can be found in “File” > “Edit”. And once you have finished your video
editing, don’t forget to preview it in main interface before moving to conversion. Also, if you are
not satisfied with the editing results, you may delete the video clips from current interface and
reload them.
Step 3 Start MOV Conversion
After the above steps, check your videos again and then hit “Convert” (Bottom-right) to start
processing, which may take a few while depending on your file size and output resolution. You
can switch to other tasks during this time and resume to converter when it reminds you. With the
latest technology of speed improvement, you will receive freshly converted files within minutes.
Now you can enjoy videos on Apple devices without limitations.
3/3
Powered by TCPDF (www.tcpdf.org)