Regression analysis: Simple Linear Regression Multiple Linear Regression
Production diary
1. Production Diary
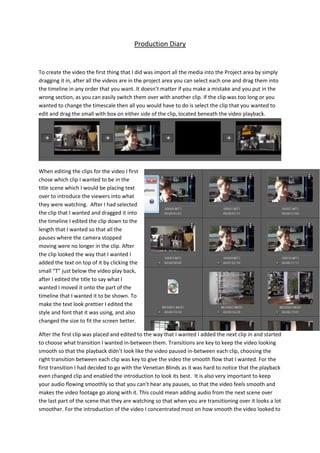
To create the video the first thing that I did was import all the media into the Project area by simply
dragging it in, after all the videos are in the project area you can select each one and drag them into
the timeline in any order that you want. It doesn’t matter if you make a mistake and you put in the
wrong section, as you can easily switch them over with another clip. If the clip was too long or you
wanted to change the timescale then all you would have to do is select the clip that you wanted to
edit and drag the small with box on either side of the clip, located beneath the video playback.
When editing the clips for the video I first
chose which clip I wanted to be in the
title scene which I would be placing text
over to introduce the viewers into what
they were watching. After I had selected
the clip that I wanted and dragged it into
the timeline I edited the clip down to the
length that I wanted so that all the
pauses where the camera stopped
moving were no longer in the clip. After
the clip looked the way that I wanted I
added the text on top of it by clicking the
small “T” just below the video play back,
after I edited the title to say what I
wanted I moved it onto the part of the
timeline that I wanted it to be shown. To
make the text look prettier I edited the
style and font that it was using, and also
changed the size to fit the screen better.
After the first clip was placed and edited to the way that I wanted I added the next clip in and started
to choose what transition I wanted in-between them. Transitions are key to keep the video looking
smooth so that the playback didn’t look like the video paused in-between each clip, choosing the
right transition between each clip was key to give the video the smooth flow that I wanted. For the
first transition I had decided to go with the Venetian Blinds as it was hard to notice that the playback
even changed clip and enabled the introduction to look its best. It is also very important to keep
your audio flowing smoothly so that you can’t hear any pauses, so that the video feels smooth and
makes the video footage go along with it. This could mean adding audio from the next scene over
the last part of the scene that they are watching so that when you are transitioning over it looks a lot
smoother. For the introduction of the video I concentrated most on how smooth the video looked to
2. make sure that all the clips went well together and created the best finished product. I think that the
introduction to the video is the most important part as it is usually the deciding point for whether or
not he is going to continue watching. To improve the quality and how all the intro clips looked I
changed the brightness and contrast of each of them, I was also considering adding some lens flares
to some of the clips but after testing with them for a while I couldn’t get any that suited the clips
that I was using.
In the effects tab there are all sorts of
different styles or effects that you could
add to your project depending on how you
wanted it to look in the end. The effects
varied for advanced users to beginners like
me, you didn’t have to choose the hardest
effects to use to make your project look its
best. A simple editing of the brightness and
contrast is what I used the most and
thought made the clips turn out a lot better
than I had expected them to. If we had
decided to do some green screen work to
change the background into something
more interesting than it would be very easy
to edit in this software as they have their
own special effect just for editing green
screen clips. Once you have chosen which
effect that you want to use on your clip it
has its own separate menu for the different
levels of the effect that you wanted to
happen to your clip.
While you are editing you clips there is a small playback window
in the top left hand corner where you can see exactly what you
are doing when editing the clip. There is a play button along with
all the other basics to navigate your way through the project
which you are editing. This is very helpful and saves a lot of time
rendering the clip out each time just to see how the last effect
that you added looks.
There are two different ways that you can view your project on
and change around the times of where you want the clips to be played, they are called “Timeline”
and “Sceneline”. Both are useful for different reasons, for example if you were just starting to create
your video and wanted to place the clips in the order that they are going to be played. Once you
have added all the clips that you want then you would usually switch over into the timeline to edit
them in more detail as you would then have multiple layers to edit from. From the timeline you
would usually add all the music and separate audio in as there are two individual layers to add them
to. Once you have added the audio there is number of different effects that you can add to you file,
the most popular one usually is Audio Mixer. You can change all the different volume settings so that
3. you can remove some of the background noise and make some people louder than others, it is a
great tool to use and is easy to navigate around.
Unlike drag-to-Timeline editing, three-point editing allows you to use both source clip and sequence
In and Out points to specify the duration of a source clip and where it should be placed in a
sequence. Rolling and ripple edits enable you to cut the clip down into a smaller size with just one
click, unlike the normal way where it would take multiple clicks. For the transitions I decided to try
and keep it simple while also trying to make the video look as smooth as possible, as I didn’t want
anyone to notice when the video changed onto another clip. This was possible to do by using the
right transitions in the right places, this was achieved by using the slide transition when the camera
was moving side to side and a small fade out when the camera was static for example in an
interview. The transition between clips was also made smoother by using a small bit of the audio
from the next clip while the other clip is finishing up, this made the video look a lot smoother and
the transitions became a lot smoother when I did that. I added a transition to every clip as I thought
it was key to making the final product look how I wanted it to. After I had added all the transitions
onto the end of all the clips, all I had to do after that was make sure that all the transitions looked
right and that they all flowed smoothly after each other. To do this I had to just play around with all
the settings on each of the different transition to try and make the video look as smooth as possible.
For the final product we ended up not using any still images, as we thought that it would slow down
the video which we didn’t want to do as we wanted the video to flowing smoothly throughout. After
all the editing was done and I was happy with the final product I just rendered the video out so that
I could view it on a larger screen without the video pausing every once in a while to load the video
up. After I had rendered the video out it gave me time to look at what I had done wrong with the
video and what I thought that I should change, as the video playback was very smooth and was in its
best quality. After watching the video back a number of times I found out some small parts which I
4. thought that I could change to make the video look a lot smoother. After the small changes had been
made I rendered it out again to make sure that the video was finally ready.