Ean13 barcode software ver 1.0
•Télécharger en tant que PPT, PDF•
1 j'aime•701 vues

This software solution to print EAN13 barcode labels using any printer : Laser or barcode printers . Link with any database Save Multiple Design for labels Easy to use
![EAN13 Barcode ? An EAN-13 barcode ( European Article Number ) is a 13 digit (12 data and 1 check) barcode standard which is a superset of the original 12-digit Universal Product Code (UPC) system developed in the United States.[1] The EAN-13 barcode is defined by the standards organization GS1. The EAN-13 barcodes are used worldwide for marking products often sold at retail point of sale. The numbers encoded in EAN-13 bar codes are product identification numbers, which are also called Japanese Article Number (JAN) in Japan. All the numbers encoded in UPC and EAN barcodes are known as Global Trade Item Numbers (GTIN), and they can be encoded in other GS1 barcodes. EAN-13 Barcode](data:image/gif;base64,R0lGODlhAQABAIAAAAAAAP///yH5BAEAAAAALAAAAAABAAEAAAIBRAA7)
Recommandé
Contenu connexe
Tendances
Tendances (19)
Similaire à Ean13 barcode software ver 1.0
Similaire à Ean13 barcode software ver 1.0 (20)
Dernier
Dernier (20)
Ean13 barcode software ver 1.0
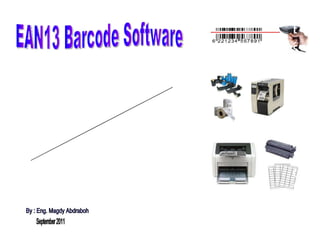
- 1. EAN13 Barcode Software EAN13 Barcode Software By : Eng. Magdy Abdraboh September 2011 Print EAN13 Barcode Labels using any windows printer
- 2. EAN13 Barcode ? An EAN-13 barcode ( European Article Number ) is a 13 digit (12 data and 1 check) barcode standard which is a superset of the original 12-digit Universal Product Code (UPC) system developed in the United States.[1] The EAN-13 barcode is defined by the standards organization GS1. The EAN-13 barcodes are used worldwide for marking products often sold at retail point of sale. The numbers encoded in EAN-13 bar codes are product identification numbers, which are also called Japanese Article Number (JAN) in Japan. All the numbers encoded in UPC and EAN barcodes are known as Global Trade Item Numbers (GTIN), and they can be encoded in other GS1 barcodes. EAN-13 Barcode
- 4. Check before starting Check before starting Recommended PC Specifications : Windows XP Pro SP2 512MB RAM 1 GB Hard Disk Drive 1024x768 Screen resolution Software : Microsoft .NET Framework 2.0 Printer Driver for your printer Administrative Tools Data Sources (ODBC)
- 5. Creating User DSN – Part 1 Steps to create a System DSN in Windows XP Operating System Environment :- 1) Select and click “Control Panel” option and choose and double click “Administrative Tools”. 2) Within “Administrative Tools” options select and double click Data Sources (ODBC) option. Note- Choosing Data Sources (ODBC) takes to the ODBC Data Source Administrator which has options in tabs like “User DSN”, “System DSN”, “File DSN”, “Drivers”, “Tracing”, ”Connection Pooling” and “About”. 3) Choose “User DSN” option and click “Add” button. Choosing “User DSN” and clicking “Add” shows a list of drivers from where appropriate driver can be selected to enable connection to the requisite data source. 4) Click the appropriate database driver corresponding to type of database being used and finally click “Finish” button. Creating User DSN in Windows XP Operating System Environment
- 6. Creating User DSN – Part 2 5) In next option screen, specify the “data source name” (DSN”). The DSN can be any name and preferably should be meaningful and referring to the project and name of database being used. This DSN name will be used in application program for connection to the corresponding database. It is advisable to fill in “Description” text box to describe the “DSN”. 6) Next click “Select” option in “Database “ panel to select the appropriate database to be used corresponding to the DSN. Note : Other options in “Database panel ” besides “Select” options, are “Create”, “Repair” and “Compact”. 7) Finally click OK to finish the process of creating the “User DSN”. Creating User DSN in Windows XP Operating System Environment
- 8. Login Enter Password then login
- 9. Design Label - Part 1 Label design screen : Design Name , DSN , Table , Search field , Page Layout and Label Layout
- 10. Design Label - Part 2 Enter all necessary values then Generate Design
- 11. Generate Design Press OK to Generate Label’s Design with name : Sample 1
- 12. Save Label Layout Now you have Label’s Design with name : Sample 1 – Press Exit to return
- 13. Print Labels
- 14. Select Label Design Select Label’s Design name : Sample 1
- 15. Edit Label’s Fields Edit Field name , Data Type , Font name , Font Size , X pos , Y Pos and rotation
- 16. Select Item Select Items from Search Field
- 17. Update Data Select Items from Search Field
- 18. Ready to Print Preview Now you have Data
- 19. Show Label Enter Quantity and Press Show Label for Print Preview
- 20. Select Printer Select The printer and Press OK for Print Preview
- 21. Label’s Print Preview The Program will start for Print Preview
- 22. Print label or Close Print Preview You Can Print or Close the Print preview Screen
- 23. Save Label Design Press Save Label Design to Save Label Layout under Design Name
- 24. Thank you Thank You