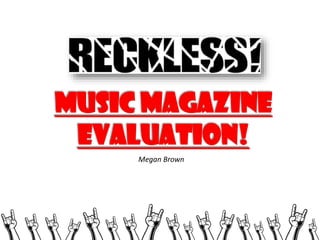
5. Target Audience
&
Genre!
When researching on what genre to base my magazine on, I noticed that there was not
many rock magazines for teenagers. As the only other magazine that has this audience
and genre is ‘KERRANG!’, therefore I thought that it would be a good idea to use
‘KERRANG!’ for a rough guide line for my magazine. However, due to both music
magazines being the same genre and audience, I decided to base the music on
popular chart rock music.
6. Competitor Magazines!
Once I had chosen what genre and target audience to base my magazine on, I
decided to identify three competitor magazines with similar genres. I decided to
research magazines with the same genres, so that I could identify popular
conventions used in their magazines and use similar ideas for my magazine.
Therefore, I chose; KERRANG, NME and Metal Hammer. All three magazines are based
on the rock genre, however they have different target audiences, I decided to use
these so I could see how the magazines differ from each other to attract their
audience. I analysed each issues’ front page, contents page and also a feature
article double page to see these differences.
7. Analysing & evaluation!
When researching the competitor magazines, I had to consider how they used a range
of different pictures, the angles of these photos as well as the angle of the text and also
the layout, to appeal to their target audiences. As well as this , I made sure I took into
consideration the conventions they use and the denotations and connotations of all the
font cover’s mise-en-scene. By doing this I was able to pull out ideas they use, that
would work well on my magazine.
8. In WHAT WAYS DOES YOUR MEDIA
PRODUCT USE, DEVELOP OR
CHALLENGE FORMS AND
CONVENTIONS OF REAL MEDIA
PRODUCTS?
9. FRONT COVER!
As well as the main
feature photograph, this
magazine has three
other photo’s to add to
this care free attitude
and appeal to more
people by showing
them who else is
featuring in the
magazine.
I primarily directed my magazine
around “KERRANG!”, therefore I
manipulated the conventions they use
on their magazine and developed them
into mine.
Due to the magazine being popular
and well known, it means that not all
the masthead needs to be visible.
Therefore artists can be the main
focus point on the front cover and
shows their importance. This also
creates a 3D effect of the man
jumping out of the page, by him
holding the prop of a megaphone, it
looks as if he is shouting and gives
the magazine a loud look to it. The
masthead also has a carefree feel to
it due to the lines which run through
the text, this suggest s that the
audience has a care free attitude.
To further emphasize the care
free attitude, this section of the
magazine looks as if it has been
ripped out of the page. It also
allows there to be more plugs on
the magazine with out it looking
cluttered as it breaks it up from
the rest of the magazine.
11. MASTHEAD!
I decided to use the same idea of their being cracks in the masthead, however to develop
the convention I made them wider and bolder to make them more visible. I also made
sure that the lines are random and stop at start at different parts of the masthead, I
decided to do this as it gives it a laid back look to it and doesn’t look uniform. I utilised
their idea of using an exclamation mark at the end of the masthead, to make it come
across loud and in your face. I made sure that the font is simple, as it allows the cracks in
the text to stand out and be the main focus rather than the font.
12. BACKGROUND!
I initially started off with having a plain red background, however, it
looked too simplistic for this care free, reckless look I wanted to
achieve. Therefore I used inspiration from the “KERRANG!” magazine to
change the background and add in a faint print. However, I developed
the background so that looks as if they are stepping out of the light, this
mise-en-scene is therefore effective as it shows the bands importance
and popularity.
13. PLUGS AND PUFFS!
RECKLESS!
KERRANG!
I decided to use their idea of having a border around the plugs as it stands out on the
page and therefore catches peoples eyes. As the box is yellow is contrasts well from
the vibrant red background, which makes it look effective. I decided to use
alliteration on the plug as it sounds catchy and would draw in attention, it also
doesn’t give to much away about what the article is about and therefore could entice
the reader to buy the magazine to find out. Due to the colloquial language I have
used here, it clearly shows who the target audience is and would relate to the
teenage audience as it comes across as friendly and chatty.
14. PHOTOS!
I have decided to add two extra photos onto the front cover, to make it
appear busy and loud and to appeal to my young target audience. It
also shows the other artists featuring in the magazine and could
increase the sales of the magazine as, you can see who else is
featuring on the magazine without having to stop and read the
contents page. I decided to only have two extra photos unlike
“KERRANG” who have three, as I didn’t want it to appear cluttered,
hence I developed the convention they used to suit my magazine.
15. FRONT COVER!
The sell “WE’RE STILL BREAKING THE DOORS DOWN”
and “THE HEAVY METAL BIBLE” are the only conventions used promote the
magazine on the front cover. This makes the photo the main focal point of
the front cover and it gives the impression that having Metallica featuring
in the magazine is enough to persuade the public to buy it.
The masthead is bold and eye catching due to the dark red colour;
it uses up a lot space and is very noticeable not just because of
the size but also the uniqueness of the style. The “Metal” which is
inside of the H is the only text that is at a jaunty angle compared to
the other very straight blocky text, this makes it very recognisable
and different to the other mastheads on other magazines.
The photo of Metallica also hides some of the masthead, this
shows that the brand “Metal Hammer” is well known and
popular enough to not have to show the entire masthead. It
could also suggest that Metallica are too important and
successful to have their picture covered, this gives the photo
a three dimensional effect and fits in with the live theme the
front cover has.
The bright, white colour of the cross draws attention to
Metallica as he is standing next to it and it contrasts from
the other dark colours they have used on the front cover.
The eye catching bright white colour also lights up his
face, to give the effect of his face glowing. This is ironic as
white gives the connotation of purity and innocence;
however his facial expression contradicts this.
17. This issue of metal hammer is a lot stripped back
compared to my magazine and only uses one sell to
promote the main article in the magazine. From this it is
clear to see that the magazine has an older audience, who
do not have to be enticed and persuaded to buy the
magazine. Due to this I made sure that my magazine was
the opposite of stripped back and therefore would appeal
to my young audience.
The main photo is of a live performance of Metallica, this gives a
clear insight into what it would be like to see Metallica. Similarly
I decided that for one of my smaller photos, I too would use a
photo of a live performance of Arcade Fire. This not only makes it
look appealing as it is a different type of photo, it could also draw
people in to find out what Arcade Fire are like when performing
at a gig, as they are touring this year and therefore could
increase the sale of the magazine.
18. colours!
Likewise I also used the same colours ‘METAL HAMMER” use, for my magazine; black, red and white. I decided to
use these colours as they are common colours music magazines use and therefore it is conventional to do
so. However, I challenged this by also using yellow as well as red, black and white, this brightened up the
magazine and added to the busy look which would therefore attract the attention of the care free audience
I was targeting. I mainly used the yellow to colour in the boarders of the plugs and puffs and as a result
this stood out on the page due to the brightness, this means that the most important parts on the front
cover which are persuading the audience to purchase it, are highlighted.
19. FRONT COVER!
The masthead blends in with the rest
of the front cover and does not
particularly stand out on the page; this
could be due to the fact that NME is a
big known brand, so therefore the
masthead does not need to be the
main topic of the magazine. It is a very
simple masthead but yet recognizable
in the shops due to its harsh red
colour.
The picture is taken at
a low angle, so it looks like
the band is looking down on
the reader which makes them
look paramount. All four
members of the band are
pulling straight faces this
mise-en-scene indicates that
they are serious about their
craft and are not messing
around.
The member on the far rights hand
action resembles a gun, this shows
that they mean business, this idea is
backed up by the plug “TAKE AIM”
and cover line “BACK WITH A BANG”
which instantly makes you think of a
gun. This gives the magazines front
page a serious tone and the mode of
address is informative.
The magazine has used identical
fonts on the front cover, this
typography creates a formal
appearance and it makes it look
organised. However although the
fonts are the same, some texts are
bolder than others; this means that
they stand out and appear loud,
some are also in a different colours
to exaggerate their importance and
to catch the readers eye. All of the
text is aligned to flush right on the
page; this makes the feature article
photograph the main vocal point of
the cover.
21. I utilised their idea of light being behind
the artists to suggest importance and
popularity, as the lights could represent
the flash on peoples cameras taking
photos of them. However, I developed the
convention by not literally using a light
but using the background to represent it.
This made sure that the feature article
photograph was the main focus point on
the magazine and also made the
background more striking which added to
my chaotic theme.
I also used a low angle camera
shot for my feature article
photograph like NME have used,
as it indicates high status and
suggests that the artists are
intimating. This is fits in with the
genre of the music magazine
(rock) as many rock artists are
seen as intimidating and moody.
This moody emotion is seen
through their straight facial
expression.
22. PUFFS!
I took inspiration for putting my puff in a circle from NME, as they too use a
conventional shape to put their puff in. This separates the puff from the rest of the
text on the front cover and therefore draws attention to it. By using a shape it adds
to the busy look I have tried to establish and used up any negative space that would
have been there.
23. Contents page!
The text is split into columns
and sectioned off by
subheadings, this organised
appearance of the contents
page makes it easy to read
and find out which article is
where.
The page numbers are all in red which
contrast from the white background
making them stand out and the thick
black border of the subheadings is an
effective way of sectioning off each part
making it look appealing and carrying
on out this organised look.
The captions used also create
a comic tone to the contents
page such as “nice hair, bro”
and “PLEASE DON’T STAND ON
OUT CAPTIONS, KELLIN. IT’S
MEAN.” these captions create
light hearted humour and
shows that the magazine is not
serious like other rock
magazines are.
The magazine has a running head
which starts on the contents page;
each heading of the page is the
same as the sub heading used to
section up the contents page. This
makes it easy to navigate around
the magazine and also makes it
look uniform and professional.
However the rock theme is also
carried out, as not only is it black
which connotes danger but it also
gives the impression that it has
been scratched and looks worn,
this mirrors the readers care free
attitude.
The contents page uses a chatty
mode of address to communicate
with the reader. The language used
on the captions of the photos are
slightly colloquial, as they use
words such as “bro”, this shows that
they are trying to relate to the
younger audience and makes it
sound informal and chatty.
25. Editors letter & running head!
I decided to put a editors letter in my magazine, as
it emphasizes who the target audience is, as I have
used colloquial and informal language throughout
such as “epic”. It also tells the reader other artists
that are featuring in the magazine which is
informative.
I used a running head on my contents page as
it is a popular convention in music magazines
as seen in “KERRANG!”, due to the shape I have
used for it, it appears loud and fun, which
breaks it up from the organised formal
columns I have used and therefore relates to
the younger target audience. It also used up
any negative space and added colour.
26. Contents page!
The first page out of the three is about the main articles
featuring in that edition of Metal Hammer. The main
picture is of Metallica who also featured on the feature
article photograph. The page number is in white unlike the
other page numbers that are in red and also has a bigger
font size, this shows that it is vital that everyone knows
what page they are on as they are the main article
The first page also has three smaller photos of the main
articles featuring in that edition, however these pictures
are not of the artists they are screenshots of the pages.
They may have done this to give a preview of what the
page looks like so when looking for that article the
reader knows what they are looking for. It also means
that people picking it up in the shop may be more
persuaded to buy it gives them a quick preview of what
the main articles look like without having to flick
through the magazine to find them.
The overall layout of the contents pages look organised and are easy
to read due to the text and pictures being separated into different
columns and boxes. It gives the overall tone of the magazine a serious
impression as it uses harsh colours such as black and red and there
are no jokes or colloquial language like other rock magazines
sometimes have. This shows that the target audience are for people of
the older audience who are fans of the stereotypical heavy rock music.
28. Telegraphy!
Due to the older target audience of the magazine, I did not use as many ideas from the “METAL
HAMMER” magazine, than I did for the others. However, because of this again I made sure that
my contents page looked different to the “METAL HAMMER” one.
However, I did develop their idea of using a different colour for the page number for the main
feature article. This makes it stand out from the rest of the page numbers on the contents
page, which is important so people can easily find out where the main article is in the
magazine.
29. Contents page!
The contents page has the similar layout to
a newspaper, this is due to the columns
that separate the text and photos giving it
an organised and clutter free look. This
idea is also supported by the font title
“INSIDE THIS WEEK”, it uses parallel font to
one which a newspaper would use.
It is made obvious to the reader which
are the main articles from the giant red
numbers which are also surrounded by a
white box to emphasize their importance
and so that they stand out from the page.
They have made a pattern of making
the sell Bold and then normal and
then Bold and so on. This gives the
magazine a rhythm and a beat which
relates back to music. It also ties in
with the front cover where the lights
used on the arrows used two
different colours one after another
as well.
The contents page uses lots of
colours to make it look eye
catching which gives it a fun
tone; there are also lots of
pictures used to break up the
text, so it does not look dull
and boring. All of the pictures
are straight and aligned apart
from the Franz Ferdinand
picture, this could suggest
that it is more important than
the others as the band also
feature on the feature article
photograph..
The main focus point of
the contents page is the
subscribe to NME
advertisement, as it is the
only section on the
contents page that uses a
bright red background
(apart from the page
numbers). It allows NME
to promote their
magazine and use up any
negative space that
would have been there.
31. LAYOUT & filler!
I used a similar layout to NME for my contents page by using columns to split up the text, this makes it look
organised on the page and therefore easier to find out where each article is located in the magazine. The columns
also allow the text to be distributed evenly on the page and doesn’t make it look cluttered. I made the lines of my
columns a lot bolder and thicker compared to NME, as it adds to the loud theme conveyed throughout.
Again I took inspiration from
NME, as when finishing off my
contents page, I was left with
some negative space, I decided
to use a filler as not only does it
fill up any space that would have
been there, it also adds colour to
the page due to the harsh red
and still keeps with the colour
scheme. It could also add sale to
my magazine as it tells people
how they can subscribe to
“RECKLESS”.
32. DOUBLE PAGe!
The circles behind the picture
which add to the bright background,
give the impression that they are
sound waves; the same visual image
used on the front cover. The circles
also act as a template for the
headline and standfirst as the text
mirrors the shape of the circle. The
fact that the text is at a jaunty angle
is very unique and portrays a laid
back tone to the article. Due to the
text mirroring the shape of the
circle it conveys that the text is
being shouted out by Kellin, this is
supported by his facial expression..
The article uses many
pictures to use up any
negative space and to also
show the reader that they are
fun and entertaining as the
action shots of them give the
impression that they don’t
take life too seriously. As well
as photos they also use fillers
to use up any negative space,
which also gives a comic tone
to the magazine due to the
subject of the fillers.
The feature article
has carried on the
same busy theme
from the front
cover, this is seen
through the bright
daring colour they
have chose for the
background;
purple.
The article talks a lot about
the bands success and
includes many statistics to
show the reader how they are
slowly becoming more
famous, which gives the
article an informative mode of
address, it also gives the
impression that the magazine
are selling the band and are
therefore selling the
magazine as “rock’s newest
heroes” are featuring in it.
34. RUNNING HEAD!
Following on from the contents page, I decided to also use a running head for the double page. This navigation element
guides the reader, as when people are flicking through the magazine they can easily find the feature article. I have
ensured that it is in a bright red box, so that it is visible for readers, which has also kept with the house style of the rest
of the magazine. Which is also seen the KERRANG magazine,
35. DOUBLE PAGe!
From the taboo language
used such as “Germans
losing their shit” and the
photograph of one of the
members swearing it is
clear to see that the target
audience is for older
people and shows that the
band have attitude which
illustrates that they are a
typical rock group.
The gold boarder around the
article suggests wealth and
gives royal connotations, in
addition it gives the article a
sophisticated look. The gold drop
caps used not only keep with the
colour scheme, but it is also clear
for the reader to see where the
leading paragraph starts as they
stand out from the page.
Moreover it keeps with the house
style and separates up the
different sections and subjects in
the article, which is conventional
and effective.
The pull quotes also
have the logo of the
band above them, this
portrays that they
have come directly
from the mouths of
the band and
therefore makes the
reader trust the
article
The article is predominantly photos
which makes it look interesting as it
gives a visual insight into their tour
in Germany, rather than just writing
about it like most articles normally
do. This means that the text does not
look over bearing and too much to
read. Because the photos are at
different scales as well as different
angles, it means that it looks there
are a lot less photos than eight on
the double page, which therefore is
very effective as it does not look
cluttered
37. filler!
To use up any negative space, I decided to use a filler. This not only breaks up the article, but it also adds colour
to the page due to the harsh red shape fill. This is a very popular magazine convention and can be on any
subject. As seen in “METAL HAMMER’’s their filler is about the bands home country, whereas my filler is about
the different albums KOLTED have had.
38. Double page!
The main photograph is of the
band standing next to a wall,
this ties in with the phrase
used in the stand first “writing
is definitely not on the wall”.
This gives it a visual image
and the wall also has
connotations of a barrier and
a hurdle, which also links in
with the main article about
them getting over their
disputes with each other.
The photographs
separate the text up
which makes it less
daunting and
intimidating to look at
due to the lengthy
article. They also use
drop caps to separate
the different sections in
the article, which is a
very common
convention in
magazines.
The article is very detailed and lets
the reader know exactly how the
band were feeling and the
emotions they were going through.
Due to this in-depth article it makes
it sound like a story and has
therefore a very informative mode
of address, this idea of the article
being a story is also seen through
the colloquial language used. The
colloquial language used is
highlighted in the pull quotes, for
example “I DON’T GIVE A FUCK ABOUT
MOST POP”.
Following on from this they have
carried on the appearance of the
magazine looking like an
newspaper from the contents
page, this is not only seen
through the drop caps and the
fact that the text is separated
into columns (which makes it
look organised and neat), but
also the black and white large
photograph of them spread out
on the third and fourth page. It
may have this newspaper look to
it as it is a weekly magazine not a
monthly magazine.
40. BACKGROUND!
I decided to do a similar thing as to what NME have done, I linked the background and the pull quote together.
This means that the background therefore has a deeper meaning and links with the rest of the article, which
conveys professionalism. The pull quote I have used; seen above, links in with the arrows used for the
background, as the pull quote uses words such as “right direction”, not only does this therefore mean the
background has a meaning it also adds colour and chaos to the page.
42. RESEARCH SURVEY!
Once I had finished analysing the different competitor
magazines, by looking at the most popular conventions
and always keeping my target audience in mind as to
what would appeal to them. I designed a questionnaire
of 13 questions and gave them to 26 people who fit the
criteria my magazine was aimed at; teenagers
between the ages of 15-18, who are interested in rock
music. The questions I asked each had a purpose and
helped me to understand and take into consideration
what details and conventions my target audience
liked. This feedback from the surveys therefore
ensured that my magazine would appeal to my target
audience. Below are some of the results I collected;
DO YOU LIKE THE IDEA
OF A RUNNING HEAD?
FONTS USED ON THE
FRONT COVER
Different
(14)
Same
(12)
10
0
20
40
14
WHICH TITLE DO YOU
PREFER?
8%
No (4)
Yes (22)
12
16
Royalty
19%
King Of Rock
73%
Reckless
43. AUDIENCE SURVEY RESULTS!
From the research I carried
out, it shows that 19 out of 26
people I asked, preferred the
title “RECKLESS”. This could
be due to the young target
audience I have and
therefore compared to the
other titles suggested
“Royalty” and “King Of Rock”,
Reckless is more informal.
When asking about
whether to use different
fonts on the front cover,
88% of the people said
that they would prefer
different fonts. This
suggests that they want
the magazine to appear
loud and chaotic.
The most popular colour
scheme with 54% was; red,
black and white. This was not
surprising as these colours
are very conventional in music
magazines. However I also
used yellow in my magazine, to
highlight important parts and I
believed that the colours
would reflect the laidback and
light-hearted attitude of my
target audience.
Following on from this,
the loud and chaotic idea
is also seen when asking
if they would prefer a
busy or sparse front
cover, 19 out of the 26
agreed on having a busy
front cover.
When asking my audience on
what tone of the magazine
would best appeal to them, 18
out of the 26 asked, said that
they would prefer to have a
comic tone. This could be due to
the age of the audience as they
don't want to be reading a
serious formal magazine.
Therefore I made sure that the
magazine was jocular as I
could make it.
Lastly, the most popular plug
from the questionnaire was,
“BLINK-182’S BANGING
BANTER!”. This conveys that
their attention is pulled in by
short, sharp phrases. It could
also be as a result of the
colloquial language used;
“BANTER”. As well as this, I have
used an exclamation mark on
the end which could show
links in with the loud idea.
44. What have you learnt about
technologies from the
process of constructing this
product?
45. FROM PLAN TO PRODUCTION!
Before designing my front cover on Photoshop elements, I prepared a rough sketch on a piece of paper of what I
wanted the cover to look like. This enabled me to create a basic layout and to record any ideas that I thought would
work well. It also meant that when creating the real product on Photoshop it acted as a rough guideline to keep me on
track. I then transferred this into Photoshop and as you can see from the pictures below, I made lots of adjustments,
such as the positioning of the some of the plugs.
As well as using the rough sketch as a basic guideline, I also used the issue of “KERRANG!” (the issue that I previously
analysed) as an inspiration when designing the front cover. It uses a variety of different colours, fonts and also the
angle of the text, which appeals to my target audience, as it conveys a loud and hectic vibe.
46. CREATING MY MASTHEAD!
I started the process of making my masthead by deciding on what font to use. I wanted something simple, so that the cracks
throughout the masthead would be the main attraction and your eyes would not be drawn away from this by using a fancy
font. It took me some time to finally come to a decision on what font to use as there were so many to chose from, however in
the end I went with “GENUINE”. This font as you can see is straightforward which was perfect for the look I was creating. I
also avoided using a glow, drop shadow or a bevel on the text to make it look as simplistic as it can be.
47. CREATING MY MASTHEAD!
Once decided on the font the next step was the
colour of the text, I had not decided on my
background yet so I was unsure on what colour
to use. However, after researching different
magazines, I found that black was a popular
choice of colour for mastheads and stood out
off the page the best.
Finally, once I established the colour and font, I experimented with
the eraser tool to create the carefree look to my masthead. I started
off by using a large brush size, however this didn’t look as effective
as I hoping it to look. Therefore, I kept reducing the size of the brush
until I was happy with the effect. As from the screenshot below, it
took a few attempts until I was happy with the masthead.
I was pleased with the masthead in the end as it gives the
impression of a laid back, carefree look which mirrors the attitude
of my target audience.
48. CONSTRUCTING MY FRONT COVER!
The next step of creating my front cover was taking the feature article photograph. I made sure that the models
I used were wearing the correct clothing; black leather jackets, black trousers and a white top and red
lipstick. All of which creates the mise-en-scene of rock chicks. I then made sure that they were standing
against a white backdrop so it made it easier when it came to cutting them out.
I initially used the photograph on the left hand side, however when looking at it on the computer I decided that
the photograph was not focused, which gave a sense of unprofessionalism and also the gap between two
of the models was to big.
So I then decided to arrange to do another photo shoot, this time taking into consideration the errors I
previously made, by using a tri pod and making sure that I was happy with the position of the models.
50. CONSTRUCTING MY FRONT COVER!
Once I had taken my photograph, I created a blank
file on Photoshop with the adjusted width of
20.5cm and the height of 29.2cm and then
uploaded my picture on Photoshop. After this I
used the quick selection tool to cut out the
background of the photograph.
Any rough edges on the photo were then
eliminated by using the eraser tool. It was
particularly difficult when cutting around
the their hair, as you could see the light
shining through the strands, therefore I had
to use the eraser to smooth over and cut out
any parts that did not look right.
Once I had finished editing the photo, I then
dragged it across to my magazine template.
51. CREATING MY background!
The next step was deciding on a background.
Again this took some time as there was a wide
range to choose from. I went with the red as not
only does it fit in with my colour scheme, I also
thought that it looked effective as the models
are wearing red lipstick and the black
masthead stands out from this colour.
After putting the block colour in I thought that it looked too simple and
plain. Therefore I looked at the different textures to choose from
on Photoshop and decided to use the “sun burst” effect. I thought
that this texture was effective as it looks as if they are stepping
out of the light and gives the connotation of success and
popularity.
52. CONSTRUCTING MY FRONT COVER!
However, I still was not 100% happy with the effect, so I played around with the brightness and intensity of the
texture until I was happy. As seen below this took a few attempts,
53. CONSTRUCTING MY FRONT COVER!
I then began building my magazine up from the basic template. Firstly, I added in my
plugs and puffs which I had already decided on. I used “Britannic bold” for the
plugs, as it was simple and blocky which meant that it was not the main
attraction on the page. I decided to use the colour red for the name of the artist
featuring in the magazine so that it caught the viewers attention and then the
rest of the plug in black.
However due to the plug being the same colour as the models jackets it was not very
visible and clear as to what it said. That’s when I decided to put the text in a
yellow box, which also brought colour to the front cover and went with the two
yellow strips on the page.
I used different fonts for each plug to make it appear
care free and visual for the audience. I used “Britannic
Bold” for the “WIN” plug and also chose on putting it in
a circle to make it more appealing and stand out from
the rest of the magazine (which I made by using the
circle tool), as the puff is used to boost the magazines
status. I used “Blackoak Std” for the “PLUS!” puff and lastly
“Postino Std” for the “EXCLUSIVE” puff. All these puffs I
used would help to attract the audiences interest and
therefore increase the sales of the magazine.
54. CONSTRUCTING MY FRONT COVER!
The next step in assembling my magazine was
putting in the artists name that was featuring
in the magazine; KOLTED. I started off by
choosing the font “Hobo Std” and then
decided that due to the loud and chaotic vibe
I was trying to create I needed to edit the text.
I decided to use a shadow around the text
which was achieved by using the style
settings on Photoshop and used the drop
shadow tool. I went with the colour red as it
goes with the colour scheme contrasts from
the black leather jackets. I used a size 6 for
the drop shadow, a distance of 19 and 75%
opacity.
The next step was an outer glow to exaggerate the
shadow and achieve the loud vibe, I used an
outer glow of size 84 and again 75% opacity.
This made the drop shadow appear stronger
and gives a 3D affect.
I then used a stroke of size 7 and opacity of 100%,
to finalise the text and make it look bold.
I used the skew tool to achieve the slanted look of
the title which makes it more striking and
played around with this tool until I was happy
with it.
Lastly I put a pattern in the text which created
individuality.
55. CONSTRUCTING MY FRONT COVER!
I used a similar font for my cover line as to the title of the
artist featuring on the magazine so that the two link
together. I used the font “Gill Sans Ultra Bold Condensed”
and also put the text in italic so that it gave it a slight
slant. I then used the stroke tool in the style settings and
used size 4 this time instead of 7, as I wanted the title to be
bolder compared to the cover line.
The final step of producing my finished front cover was to add in the
photographs. I created another blank file and uploaded my photo
to it, I again used the quick selection tool to delete the
background and then dragged the photo onto my front cover. I
then used the rectangle tool and created a rectangle and filled it
with a light blue colour. This made the photo stand out and added
extra colour to the page. I positioned the photo so that the head
was peaking out of the top of the box to give it a 3D look.
I then added a second photo to the front cover, as it used up a lot of
negative space and adds to the chaotic theme.
56. FROM PLAN TO PRODUCTION!
Once I had completed the front cover of my magazine, I moved onto planning and designing my contents page.
Similarly, like I drew for the front cover, I also produced a rough sketch to act as a guideline for when completing the
contents page. As well as this I used an NME contents page to collect ideas that I could use for my magazine. I
decided to use a single page rather than a double page, as not only was this too time consuming for the amount of
time we were given to complete the magazines, but due to my magazine being a weekly magazine rather than a
monthly one it means that it would have less information in it, hence the smaller contents page.
57. CONSTRUCTING MY contents page!
I started off by transforming the brief sketch of the
contents page onto Photoshop. I decided during the
process of transforming the contents page that the
layout was too complicated and looked unorganised.
This is when I decided to alter the page to make it
look more simple, so that when people are wanting to
find a specific article they can with ease.
Once I had the basic template of my contents page, I then
started to design my running head. I decided to design a
shape to put it in as, I didn’t want it too look dull on the page
and I wanted it to appeal to my young target audience. I
produced the shape by using the straight line tool, and
decided to individually drawn the lines.
INSIDE THIS
WEEK
1.
2.
3.
4.
However, as seen to the left hand side, I did not look as bold
and effective as I wanted it to look. To solve this I decided to
do another layer of the lines, which gave it a 3D look.
58. CONSTRUCTING MY contents page!
The next step was adding the details to the page, such as the sell and the short snippet of the article. I used the
same font for each sell which was “Segoe Print” and for the text below I used the “Georgia” font. I then used a
different font of “Goudy Old Style” for the editors letter. I decided to have different font for each section of text, as
it contributed to the busy theme I conveyed on the front cover.
After I had put the text on the contents page, I then added the page numbers. I used the font “Stencil” which gave the look of
house numbers, I then used the rectangle tool to put a rectangle around the numbers which made it more visual.
59. CONSTRUCTING MY contents page!
When nearing the end of my contents page, there was a lot of excess negative space on the top left hand corner of
the page. To solve this I decided to create a filler, by using a the rectangle tool and text, I designed a
subscription box. It also added colour to the page and solved the problem of filling up the left hand corner of
the page.
60. FROM PLAN TO PRODUCTION!
Finally, I drew a rough sketch of what I wanted the double page to look like. I decided to draw a basic outline
of what I wanted the double page to look like, without going into too much detail as I was still unsure on
what I wanted the page to contain. I then transferred the basic outline onto Photoshop and started to
build it up.
This time I did not follow one magazine in particular, instead, from the research I had collected previously I
took inspiration from various double pages and combined the ideas gathered into my own double page.
61. CONSTRUCTING MY double page!
Once I had put the basic template onto the page, I then transferred the photo of the band onto it. I decided to edit the photo
so that the background was black and white, but the models were in colour. I completed this by turning one photo of the
band black and white, as seen below. Then I uploaded another photograph of the band in a blank page and used the
quick selection tool to get rid of the background so that I was just left with the models.
62. CONSTRUCTING MY double page!
I then dragged the photo across onto the main double page and aligned the photograph up with the black and white
version. Any rough edges on the photograph were smoothed down by the eraser tool, to make sure that it
looked professional. I then changed the contrast and brightness of the photograph, to add more light and
exaggerate the effect, as the picture was not very bright.
63. CONSTRUCTING MY double page!
I then put in the columns for the article and made sure that
they were equal width by putting the grid tool on. I
added in my text and made sure that fit in the columns
without having to use a small font and squeeze it in.
Once I had completed this I added in the other text
such as the standfirst, drop cap and pull quote.
The next stage was creating my logo. I decided to create a
logo for the band as when researching double pages, I
thought that it looked professional and shows that the
speech has come direct from them. I decided to make the
logo on paint and then import it onto Photoshop. I made it by
using straight lines from the shape tool and also the
lightening shape, as seen above.
64. CONSTRUCTING MY double page!
After having completed the double page, I noticed that the page looked dull and did not convey the loud theme, which was
previously used on both the front cover and the contents page. Therefore I decided to use a background to resolve this
predicament, I used the colour yellow to keep with the colour scheme and make it appear chaotic. By using a shape
instead of a block colour I feel that it looked unique. I created this background by first choosing the colour and then
trying out different shapes, until I found the correct one.
65. Front cover analysis &
conventions!
The masthead itself is
effective as it creates a
carefree laid back feel to
the magazine, due to the
random cracks.
The plugs are flushed to
both the right and left
hand side of the page, I
decided to use both sides
of the page as I thought
that it was most suitable
for my feature
photograph and because
of the results from the
questionnaires, which
showed that my target
audience prefers the
plugs to be on both sides.
I decided to use short, sharp plugs
so that they are straight to the
point and by using alliteration and
colloquial language it relates to
I used a number of different puffs to boost the
the young target audience. magazines status and therefore persuade the audience
to buy it. I also used a different font for each one to
catch the attention of the audience.
I put the photograph on top of
the masthead so that it conveys
that they are more important
and it also suggests that the
magazine is known enough not
to have to show the full
masthead.
The name of the band and the
cover line are the main focal
point of the magazine, due to the
large bold font and the slanted
text. This would entice the
audience as the cover line is
ambiguous and they would want
to find out what it means by this.
The strip which contains the
other artists featuring in the
magazine, is effective as it may
draw in a bigger audience, as
people have different music
references. It also adds another
colour to the predominantly red
and black cover.
66. CONTENTS PAGE analysis &
conventions!
The filler which is a
subscription box is
effective as it shows how
the reader can save
money and therefore it
promotes the magazine to
people who have a budget.
It was also a very popular
convention used when I
researched different
contents pages.
I used a sell for the contents
page as it gives a short
snippet of what the article
will be about and conveys the
tone of the article.
I used a different colour; red, for
the feature article page numbercompared to the other page
numbers which are in yellow, so
it is clear to the audience which
page the main article will be on.
I used a running head as it is
a very common convention
used in music magazines and
also makes the contents
page appear busy and loud.
As well as this it uses up a lot
of negative space that would
have been there.
The numerous pictures
make it visually appealing
and also show what artist is
featuring in the magazine
without them having to read
the text.
I decided to put a editors letter
on my contents page, as the
colloquial language used such
as “you lot”, creates a chatty and
personal mode of address.
Which clearly shows that the
magazine is targeted at a young
audience and would therefore
appeal to them.
67. DOUBLE PAGE analysis &
conventions!
I decided to use a
background that
would link with the
page in some way. I
thought that the
bright colour linked
with the loud theme
and it also ties in
with the pull quote I
have used, as the
arrows resemble,
them going in the
“right direction”, I
though that this was
effective and made
my magazine look
professional.
I decided on making
Mollie (center) the main
singer in the band and I
tried to portray this in the
photos by always putting
her in the middle of the
photos and also in the text
she answers the majority
of the questions.
I decided on using
a running head so
that it is clear
what page the
feature article is
on and it is also
helpful for the
viewer when
flicking through
the page.
The filler not
only gets rid of
any excess
negative space,
but it also
brings colour to
the page.
I tried to relate to my
young target audience
by using colloquial
language such as “epic”
and “awesome”, both of
which create a chatty
mode of address.
I decided to use a smaller photo which I took on another photo
shoot, as it breaks up the article and seeing as my magazine is
aimed at a young audience, they do not want a predominantly
text based article. It also shows the bands fun side due to the
faces they are pulling, which was important as in other photos
they are pulling serious faces as seen in the main photo.
68. How does your media
product represent
particular social
groups?
69. Social groups are groups of people that share a common
social relation. My magazine targets a young social
group, that have a laidback and carefree attitude. This is
reflected in the magazine’s busy and bold layout,
creating a chaotic vibe, which would therefore appeal
to the young social group and also seen in the
masthead, due the cracks in the design, attracting a
recalcitrant audience. As well as this I used young
models throughout my magazine, to attract people of
the similar age.
I made sure that my magazine was unisex, so that I had a
larger audience base. This is seen through the use of
the unisex colours and both male and female artists
featuring in the magazine.
I mainly aimed my magazine at middle class people, due to
it being a weekly magazine, this means that they can
afford a copy each week. However, I made sure that it
was also feasible to a lower class audience, by
providing a monthly subscription box, with a discount
offer as well.
70. Pricing Of Magazine!
One of the questions asked for my questionnaire was about the pricing of the magazine. Due to my
magazine being weekly instead of monthly the prices are a lot lower compared to magazines like
“METAL HAMMER”, which are usually priced around £4-5.00. I decided to research weekly
magazines to see how the prices vary and to decide on the three price brackets my target
audience can choose from and found that magazines are usually priced around £2.00. I therefore
decided to use the following price ranges in my question;
How much money are you willing to pay
for the weekly magazine?
£1.00-1.50
£1.50-2.00
£2.00-2.50
71. Pricing Of Magazine!
From the results collected, 5 people said that they would pay £1.001.50, 9 people said £1.50-2.00 and 12 people said that they would pay
£2.00-2.50, making this the most popular price range. I believe that
these prices are all very genuine and although the £2.00-2.50 was the
most popular price range, I have to take into consideration the rest of
the audience who did not agree on this. As a result I will use £2.00 as
the starting market price for my magazine and there is also a
subscription box for those who may find this too pricey, giving them
32% off the total price of the magazines for a years subscription.
£2.00-2.50
£1.50-2.00
£1.00-1.50
£2.00
£2.00
£2.00
£2.00
72. What kind of media
institution might
distribute your media
product and why?
73. Bauer Media Group, is an multinational
media company headquartered in
Hamburg, Germany which operates in 16
countries worldwide and as well as other
music magazines they publish KERRANG.
Due to KERRANG, being very similar to my
magazine, I thought that this company is
more likely to publish my magazine, due to
the success that KERRANG has had. By
having a company to publish my magazine
instead of doing it myself, it will save a lot
of money on things like the advertisement
and printing of the magazine. In addition
due to the company having cross media
ownership, it means there is a wider
distribution; as the markets into which the
media text can be distributed are
increased, meaning a bigger audience and
therefore a bigger profit. The success of
KERRANG and other music magazines such
as Q, persuaded me to use this company, as
hopefully my magazine too would be a well
known brand. I am hoping to distribute my
magazine in common super stores such as
ASDA, Tesco and other local newsagents, all
of which are common places to buy
magazines and therefore people can easily
access and purchase the magazine.
http://www.bauermedia.co.uk/brands/kerrang
74. Looking back at your
preliminary task,
what do you feel you
have learnt in the
progression from it to
the full product?
75. The first media task we were asked to complete was a student magazine for the fellow students
at our school. We were not given a specific demographic and could choose how
conventional or unconventional we wanted our magazine to be. Using Photoshop Elements
8.0, we were then told to design a front cover and contents page. With a brief introduction on
the basic tools, it was then up to us to get use to navigating around the software and
broadening our skills as we did so, so that when it came to our real product of making the
music magazine we had a rough idea on how to use the tools to the best to our abilities.
76. STUDENT MAGAZINE EVALUATION!
I went with a black and red colour
scheme (so that the magazine does
not only appeal to one gender) and
I felt that the vibrant red
background of the magazine
makes the black text stand out and
more noticeable compared to
other magazines, that use a more
neutral coloured background for
their front covers, therefore I
decided to be unconventional and
unique in this sense. Red is also
one of the colours that is
associated with our school.
The typography also has the effect
ink being smudged, which ties
in with the school theme of the
magazine and the would appeal
to the young audience.
The lack of complex words and more
informal phrases such as “Who Will
Win?”creates a chatty mode of
address and therefore communicates
with the young audience.
I think that this is clear that my
magazine is aimed at year seven
students, or those who are new
to the school as the feature
article photograph is a picture of
a young boy. His uniform is smart
and therefore represents the
school in a positive way, as well
as this he is smiling in the
photograph creating a warm and
welcoming image.
77. STUDENT MAGAZINE EVALUATION!
This first media product we had to produce was where I learnt
and practiced how to cut out the photograph from the
background. As seen below you can see the improvement
and progression between the two photographs, the music
magazine photograph having a much smoother and
rounded edge in comparison to the school magazine
which has rougher edges. Therefore making the school
magazine before has helped me to practice and perfect
this skill.
78. FRONT COVER COMPARISON!
My masthead here is far to small and there is a large
gap between the photograph and the masthead.
Which means that not only does it not look
professional, it also means that there is a lot of
negative space on the page.
However after my research I found that it was
conventional to have the masthead across the
entire width of the page or in the top left hand
corner. As well as doing this, I positioned the
photograph over the masthead.
79. FRONT COVER COMPARISON!
The plugs are not very visible and are
hard to read, due to the overlapping of the
text and the photo and also the colour of
the text is too similar to the colour of the
students blazer.
To overcome this I put the plugs
in a box, which therefore makes
them easier to read and also
adds colour to the page.
80. STUDENT MAGAZINE EVALUATION!
I decided to carry on the red and black theme from
the front cover, as well as this I decided to
have a bold title. I was pleased with the
relaxed tone the page conveyed as it was
quite plain but included everything a
magazine should have, without it looking
overcrowded.
The list of what the magazine featured made it
look organised and easy to read. The extra
sentence briefly explaining about that article, is
very conventional as many other magazines
also do this to inform the reader on the topic of
the article.
The photograph is also another common convention
in magazines and it also informs the reader that the
magazine is not primarily directed at one particular
gender by having a photograph of a girl, as there is a
photograph of a boy on the front cover.
81. CONTENTS PAGE COMPARISON!
I only used one photograph for the
contents page on my student
magazine, which made it look both
dull and boring. The photograph
also looks misplaced and random
as it is not connected to any text
nor has a page number by it.
In comparison to my music magazine, I
over came this by having three
photographs and making sure that the
audience was able to know what pages
these artists were featuring on, by having
the page number next to it.
82. CONTENTS PAGE COMPARISON!
The title here is plain and does not follow
the house style of the magazine. It does
not look visually appealing and therefore
I now know that it would not appeal to a
young audience.
To learn from my previous mistakes,
I decided to use a running head to
make sure that it conveys an
attractive/chaotic page and
therefore appeal to my young target
audience.
83. From looking at the two magazines I produced, there is a clear difference and improvement from the
student magazine to the music magazine. The student magazine allowed me to manage my time
effectively and to help me practice using certain tools that I was not aware of previous to the task, for
example the magnetic lasso tool.
This meant I felt more confident when producing my music magazine as I had, had some previous
practice. At the start of the two tasks my skills and knowledge of Photoshop Elements was poor,
especially with being able to cut the background out from the image, however, by the end of this
task I was able to do this with ease and as seen on the double page on the music magazine, I was
even able to play around with the background using tools the programme had to offer to me, to the
best to my ability.