SlideShare une entreprise Scribd logo
1  sur  7
Add bullets to text
j
then press F5 or click Slide Show > From Beginning to start the course.
In the message bar, click Enable Editing,
If the videos in this course don’t play, you may need to
download QuickTime or just switch to PowerPoint 2013.
5 61 2 3 4
Course summary Help
1/3 videos
Add bullets to text Closed captions
Summary Feedback HelpAdd bullets Make changes Use slide masters
5:272:29 5:11
Press F5 to start, Esc to stop
In PowerPoint, add bullets to a list of text items to emphasize key points of information.For a list to be most effective, you’ll keep it moderate in length, and the list items will be brief and
scannable.
Another aspect of lists concerns their formatting—font size,line spacing, margins, indentation of bullets and text, and bullet type.So, as you create bulleted lists, think of their effectiveness in terms of both what they say and how they look.Let’s go over some list basics.All the content layouts in PowerPoint include bulleted-list formatting.To remove the bullets or add them, you select the content placeholder and click Bullets on the Home tab.To add a new item and drop down another level, press Enter, and click Increase List Level.Or, press Enter+Tab.To move an item up one level, place the insertion point at the start of the text and click Decrease List Level.Or: Press Shift+TabBe careful in your use of text levels. For example, this Agenda list, with first- and second-level itemsis much easier for an audience to take in if you limit it to the top-level points, as in the list here.As you create a list, you’ll want to work with how it looks.If you want a certain theme, apply it early on so you know what its list styles look like.Then make other adjustments.To learn more, see the other movies in this course, called Change font size, line spacing, and indentationand Change list formatting on the slide master.Up next: Change font size, line spacing, and indentation.
5 61 2 3 4
Course summary Help
2/3 videos
Add bullets to text Closed captions
Summary Feedback Help
Press F5 to start, Esc to stop
We’ve created a bulleted list for our Agenda slide. Now we’ll make some changes to its look and formatting.Since I want to apply a different theme to the presentation, I’ll do that first.Let’s click Design and choose this theme, called Facet.That applies different styles and formatting to the list. So, now those are in place up front.This theme uses a small font size for the text. Let’s increase it.I’ll select the placeholder, click Home > Font Size, and choose 24.This font size is easier to see and makes use of the space on the slide.Note that if you want to change the font size for every list in the presentation, you should change it on the
slide master.
We’ll work with the slide master in Movie 3, Change list formatting on the slide master.We’ve increased the font size; let’s also increase the line spacing. To do that, I’ll select the placeholderand on the Home tab, I click Line Spacing, where I see that the current setting is 1.0, or single spaced.And I see a preview of other settings. I don’t want quite so much spacing as 1.5. Let’s open Line Spacing
Options.
This includes settings for indentation as well as spacing.Under Spacing, the list is set to Single, but I can add space incrementally in the Before box.I’ll change this from 10 pts. to 20 and click OK.So, I’ve added a bit more space to the single spacing, but it’s not quite as much as the 1.5 spacing.Now, because we’ve changed font size and line spacing,I want to mention AutoFit, which can affect both of these types of formatting.To demonstrate AutoFit, I’ll add one more item to this list. Watch closely as I type it: “Our support.”See how the list adjusted when I started typing? It got more compressed. It’ll continue to do so with each
additional item.
That’s the result of AutoFit; it adjusts line spacing and font size to fit all list items into the placeholder.We’ll delete this last item.Because you may not want the auto-fitting, whenever it happens, this control appears, called AutoFit
Options.
Let’s click it.To undo the autofitting, I click Stop Fitting Text to This Placeholder. The line spacing returns to what it was.I prefer that, so I’ll leave the auto-fitting undone. And let’s say I want to turn off AutoFit altogether.I click the control again and click Control AutoCorrect Options.In the AutoCorrect dialog box, I uncheck Autofit body text to placeholder, and click OK.AutoFit is now off until I turn it back on.Next, I want to move the list to the right a little bit, to balance out the slide more.To do that, I’ll increase its left margin.I right-click the text placeholder and click Format Shape. Then, I click Size & Properties, and Text Box.In the Left margin box, I’ll change the setting from .1” to 1”.The text moves to the right as I press the Up Arrow for the box.I’ll close the Format Shape pane.The new margin moves the list over nicely.Now, if you ever need to adjust the space between the text and bullets, a great way is to use tab markers on
the ruler.
To display the ruler, click View, and check Ruler.Now, let’s say I want to increase the space between text and bullets: I’ll select the text,and on the ruler, find this upper tab on the bottom of the ruler.I drag the tab, and the dotted line shows where the text’s left indent will be.To move the bullets, I drag the tab at the top of the ruler.Now, note that if my list has more than one text level,I need to select the level of text I want to adjust, and then move the tabs.My Agenda list now looks the way I want it to.Up next: We’ll change list formatting on the slide master.
Add bullets Make changes Use slide masters
5:272:29 5:11
5 61 2 3 4
Course summary Help
3/3 videos
Add bullets to text Closed captions
Summary Feedback Help
Press F5 to start, Esc to stop
In this presentation, we want to change the list formatting everywhere, not just on one or two slides.So, we’ll make all our changes on the slide master. To open the slide master, click View > Slide Master.To change all bulleted lists, we’ll select the slide master thumbnail—the one at the top—and change formatting for the list placeholder and text, here.That will affect the bulleted list formatting in each of the master layouts.We’ll make changes similar to those we made in Movie 2: Change font size, line spacing, and indentation.And we’ll also change the type of bullet we’re using.Let’s start with font size.Because this is the slide master, we see the font size, spacing, and bullet for each level of text.To change the font size for the top level, I’ll select that line, click Home,and look in the Font Size box, which shows a font size of 18.I’ll open the list and change it to 24.Notice that the bullet size increases in proportion to the font size.I also want to increase the font size for second-level text, so I’ll select it and choose 20.I won’t worry about the next three levels of text because I don’t use those.Let’s see how the larger font sizes look on the slides. I’ll click Normal to switch to Normal view.The Agenda slide shows just the top level text with the larger font,and the next slide, Our values, shows the second-level text, as well.Let’s look at the other lists.I like the larger font sizes, but I think we should increase the line spacing as well. Let’s go back to the Slide
Master.
I’ll click View > Slide Master and select the slide master thumbnail.Selecting the text placeholder, I’ll click Home > Line Spacing. The list is currently set at 1.0, or single
spacing.
To increase line spacing for just the top-level text, I’ll click in that line,and click Line Spacing > Line Spacing Options.Under Spacing, in the Before box, I’ll increase the spacing, from 10 points to 20, and click OK.So, with this increase, a list of top-level text, like the Agenda list, will change from single spacing, shown
here,
to slightly more than single spacing, which will look like this.Note that I haven’t changed the line spacing for the other text levels.So, in a list like this, the second-level text keeps its original spacing,but there’s a bit more space above the top-level text.I like that.Now, on the slide master,lets add more space on the left margin of the list by right-clicking the placeholder and clicking Format
Shape.
Then, we click Size & Properties > Text Box, and in the Left margin box, increase the number, from .1”
to .5”.
As I increase the number, the list moves to the right. So, all lists in the presentation will now have more
space on the left.
Let’s close the Format Shape pane.Now, let’s have fun with the type of bullet we’re using for the list. I’ll zoom in for a closer look.The theme has a green arrow for a bullet. I like it, but I could choose something else if I wanted.To see other options, I’ll select the placeholder, and click the arrow next to Bullets, on the Home tab.As we point to these alternative bullet styles, we see how they would look.For more choices, click Bullets and Numbering. I’d like something different, so I’ll click Picture.This gives me the option to browse for a picture file of my own or to search for one on the web.I’ll click Office.com and type “web bullets.” Then I’ll click Search.Here’s a lime-green sphere, perfect for the theme I’m using. I’ll select it and click Insert.The new picture bullet is inserted on the slide master, in various sizes to match each text level.I’ll zoom back out.We’re finished with our changes to the slide master,so let’s click Normal and look at the various bulleted lists with the new formatting.Changes to look for include increased line spacing between top-level items;a bigger left margin; and the new picture bullet.As I look through all the slides, I see the changes reflected in every type of list. I like the improvements.Now it’s clear how much the slide master helps when I want to change bulleted list formatting for all my lists.For more information, see the Course Summary, and experiment on your own.
Add bullets Make changes Use slide masters
5:272:29 5:11
Help Course summary
Press F5 to start, Esc to stop
Course summary—Add bullets to text
Summary Feedback Help
5 61 2 3 4
Add bullets Make changes Use slide masters
5:272:29 5:11
Add bullets or numbers to text
Use bullets or numbers to present lots of text or a
sequential process in a PowerPoint 2013 presentation.
1. On the View tab, in the Presentation Views
group, click Normal.
2. On the left-hand side of the PowerPoint window,
click a slide thumbnail that you want to add
bulleted or numbered text to.
3. On the slide, select the lines of text in a text
placeholder or table that you want to add bullets
or numbering to.
4. On the Home tab, in the Paragraph group, click
Bullets or Numbering.
• To change all lines of text, select the outline of
the text object, and then apply the bullet or
numbering.
• To increase or decrease the indent, to change
spacing between a bullet or number and the
text, to change the style, color, or size of
bullets or numbers, to manually change the
number that you want to start from, and so
on, see Adjust the indent in a bulleted or
numbered list on the ruler.
Keyboard shortcuts
• To increase a list level: Tab+Enter.
• To decrease a list level: Shift+Tab.
Manage text in a placeholder
by using AutoFit
If you add more text to a body text placeholder than
the placeholder can contain, your text automatically
resizes to a smaller font so that all of the text will fit
in the placeholder. This automatic text resizing is
called AutoFit. To turn AutoFit off and allow text to
move beyond the placeholder border, click the
AutoFit Options button, which appears next to the
placeholder, and then click Stop Fitting Text to This
Placeholder. To turn AutoFit back on, click the
AutoFit Options button, and then click AutoFit Text to
Placeholder.
See also
• Use slide masters to customize a
presentation
• Apply and change a theme
• More training courses
• Office Compatibility Pack
Check out more courses
Help Course summary
Press F5 to start, Esc to stop
Rating and comments
Thank you for viewing this course!
Please tell us what you think
Summary Feedback Help
5 61 2 3 4
Add bullets Make changes Use slide masters
5:272:29 5:11
Help Course summary
Press F5 to start, Esc to stop
Help
Summary Feedback Help
5 61 2 3 4
Using PowerPoint’s video controls
Going places
Stopping a course
If you download a course and the videos don’t play
get the PowerPoint Viewer. the QuickTime
player upgrade to PowerPoint 2013
Add bullets Make changes Use slide masters
5:272:29 5:11

Contenu connexe

Plus de Mustansir Dahodwala (20)

Welcome and Opening Speech
Welcome and Opening SpeechWelcome and Opening Speech
Welcome and Opening Speech
 
Anchoring structure
Anchoring structure Anchoring structure
Anchoring structure
 
Anchoring structure
Anchoring structure Anchoring structure
Anchoring structure
 
Microsoft Office Excel 2013 Tutorials 24- Working with Dropdown lists
Microsoft Office Excel 2013 Tutorials 24- Working with Dropdown listsMicrosoft Office Excel 2013 Tutorials 24- Working with Dropdown lists
Microsoft Office Excel 2013 Tutorials 24- Working with Dropdown lists
 
Microsoft Office Excel 2013 Tutorials 14- Understanding and Using cell refer...
Microsoft Office Excel 2013 Tutorials 14- Understanding and Using  cell refer...Microsoft Office Excel 2013 Tutorials 14- Understanding and Using  cell refer...
Microsoft Office Excel 2013 Tutorials 14- Understanding and Using cell refer...
 
Microsoft Office Excel 2013 Tutorial 4-Creating array formulas
Microsoft Office Excel 2013 Tutorial 4-Creating array formulasMicrosoft Office Excel 2013 Tutorial 4-Creating array formulas
Microsoft Office Excel 2013 Tutorial 4-Creating array formulas
 
Care for Elderly
Care for ElderlyCare for Elderly
Care for Elderly
 
English Portfolio
English Portfolio English Portfolio
English Portfolio
 
Monopoly rules
Monopoly rulesMonopoly rules
Monopoly rules
 
Hello there
Hello thereHello there
Hello there
 
Happy birthday Card
Happy birthday CardHappy birthday Card
Happy birthday Card
 
Happy Birthday School Card
Happy Birthday School CardHappy Birthday School Card
Happy Birthday School Card
 
GTA San cheats
GTA San cheatsGTA San cheats
GTA San cheats
 
Core Values
Core ValuesCore Values
Core Values
 
Flower
Flower Flower
Flower
 
Fake Children Money
Fake Children MoneyFake Children Money
Fake Children Money
 
Book Review
Book ReviewBook Review
Book Review
 
Gift Card
Gift CardGift Card
Gift Card
 
Birthday Card
Birthday CardBirthday Card
Birthday Card
 
Social Studies Portfolio
Social Studies PortfolioSocial Studies Portfolio
Social Studies Portfolio
 

Dernier

Dubai Call Girls Wifey O52&786472 Call Girls Dubai
Dubai Call Girls Wifey O52&786472 Call Girls DubaiDubai Call Girls Wifey O52&786472 Call Girls Dubai
Dubai Call Girls Wifey O52&786472 Call Girls Dubaihf8803863
 
Unveiling Insights: The Role of a Data Analyst
Unveiling Insights: The Role of a Data AnalystUnveiling Insights: The Role of a Data Analyst
Unveiling Insights: The Role of a Data AnalystSamantha Rae Coolbeth
 
Al Barsha Escorts $#$ O565212860 $#$ Escort Service In Al Barsha
Al Barsha Escorts $#$ O565212860 $#$ Escort Service In Al BarshaAl Barsha Escorts $#$ O565212860 $#$ Escort Service In Al Barsha
Al Barsha Escorts $#$ O565212860 $#$ Escort Service In Al BarshaAroojKhan71
 
Kantar AI Summit- Under Embargo till Wednesday, 24th April 2024, 4 PM, IST.pdf
Kantar AI Summit- Under Embargo till Wednesday, 24th April 2024, 4 PM, IST.pdfKantar AI Summit- Under Embargo till Wednesday, 24th April 2024, 4 PM, IST.pdf
Kantar AI Summit- Under Embargo till Wednesday, 24th April 2024, 4 PM, IST.pdfSocial Samosa
 
VIP High Class Call Girls Jamshedpur Anushka 8250192130 Independent Escort Se...
VIP High Class Call Girls Jamshedpur Anushka 8250192130 Independent Escort Se...VIP High Class Call Girls Jamshedpur Anushka 8250192130 Independent Escort Se...
VIP High Class Call Girls Jamshedpur Anushka 8250192130 Independent Escort Se...Suhani Kapoor
 
April 2024 - Crypto Market Report's Analysis
April 2024 - Crypto Market Report's AnalysisApril 2024 - Crypto Market Report's Analysis
April 2024 - Crypto Market Report's Analysismanisha194592
 
Invezz.com - Grow your wealth with trading signals
Invezz.com - Grow your wealth with trading signalsInvezz.com - Grow your wealth with trading signals
Invezz.com - Grow your wealth with trading signalsInvezz1
 
Ravak dropshipping via API with DroFx.pptx
Ravak dropshipping via API with DroFx.pptxRavak dropshipping via API with DroFx.pptx
Ravak dropshipping via API with DroFx.pptxolyaivanovalion
 
VIP High Profile Call Girls Amravati Aarushi 8250192130 Independent Escort Se...
VIP High Profile Call Girls Amravati Aarushi 8250192130 Independent Escort Se...VIP High Profile Call Girls Amravati Aarushi 8250192130 Independent Escort Se...
VIP High Profile Call Girls Amravati Aarushi 8250192130 Independent Escort Se...Suhani Kapoor
 
Delhi Call Girls CP 9711199171 ☎✔👌✔ Whatsapp Hard And Sexy Vip Call
Delhi Call Girls CP 9711199171 ☎✔👌✔ Whatsapp Hard And Sexy Vip CallDelhi Call Girls CP 9711199171 ☎✔👌✔ Whatsapp Hard And Sexy Vip Call
Delhi Call Girls CP 9711199171 ☎✔👌✔ Whatsapp Hard And Sexy Vip Callshivangimorya083
 
100-Concepts-of-AI by Anupama Kate .pptx
100-Concepts-of-AI by Anupama Kate .pptx100-Concepts-of-AI by Anupama Kate .pptx
100-Concepts-of-AI by Anupama Kate .pptxAnupama Kate
 
Brighton SEO | April 2024 | Data Storytelling
Brighton SEO | April 2024 | Data StorytellingBrighton SEO | April 2024 | Data Storytelling
Brighton SEO | April 2024 | Data StorytellingNeil Barnes
 
BabyOno dropshipping via API with DroFx.pptx
BabyOno dropshipping via API with DroFx.pptxBabyOno dropshipping via API with DroFx.pptx
BabyOno dropshipping via API with DroFx.pptxolyaivanovalion
 
VIP Call Girls in Amravati Aarohi 8250192130 Independent Escort Service Amravati
VIP Call Girls in Amravati Aarohi 8250192130 Independent Escort Service AmravatiVIP Call Girls in Amravati Aarohi 8250192130 Independent Escort Service Amravati
VIP Call Girls in Amravati Aarohi 8250192130 Independent Escort Service AmravatiSuhani Kapoor
 
定制英国白金汉大学毕业证(UCB毕业证书) 成绩单原版一比一
定制英国白金汉大学毕业证(UCB毕业证书)																			成绩单原版一比一定制英国白金汉大学毕业证(UCB毕业证书)																			成绩单原版一比一
定制英国白金汉大学毕业证(UCB毕业证书) 成绩单原版一比一ffjhghh
 
Beautiful Sapna Vip Call Girls Hauz Khas 9711199012 Call /Whatsapps
Beautiful Sapna Vip  Call Girls Hauz Khas 9711199012 Call /WhatsappsBeautiful Sapna Vip  Call Girls Hauz Khas 9711199012 Call /Whatsapps
Beautiful Sapna Vip Call Girls Hauz Khas 9711199012 Call /Whatsappssapnasaifi408
 
Mature dropshipping via API with DroFx.pptx
Mature dropshipping via API with DroFx.pptxMature dropshipping via API with DroFx.pptx
Mature dropshipping via API with DroFx.pptxolyaivanovalion
 
Week-01-2.ppt BBB human Computer interaction
Week-01-2.ppt BBB human Computer interactionWeek-01-2.ppt BBB human Computer interaction
Week-01-2.ppt BBB human Computer interactionfulawalesam
 

Dernier (20)

Dubai Call Girls Wifey O52&786472 Call Girls Dubai
Dubai Call Girls Wifey O52&786472 Call Girls DubaiDubai Call Girls Wifey O52&786472 Call Girls Dubai
Dubai Call Girls Wifey O52&786472 Call Girls Dubai
 
Unveiling Insights: The Role of a Data Analyst
Unveiling Insights: The Role of a Data AnalystUnveiling Insights: The Role of a Data Analyst
Unveiling Insights: The Role of a Data Analyst
 
Al Barsha Escorts $#$ O565212860 $#$ Escort Service In Al Barsha
Al Barsha Escorts $#$ O565212860 $#$ Escort Service In Al BarshaAl Barsha Escorts $#$ O565212860 $#$ Escort Service In Al Barsha
Al Barsha Escorts $#$ O565212860 $#$ Escort Service In Al Barsha
 
Kantar AI Summit- Under Embargo till Wednesday, 24th April 2024, 4 PM, IST.pdf
Kantar AI Summit- Under Embargo till Wednesday, 24th April 2024, 4 PM, IST.pdfKantar AI Summit- Under Embargo till Wednesday, 24th April 2024, 4 PM, IST.pdf
Kantar AI Summit- Under Embargo till Wednesday, 24th April 2024, 4 PM, IST.pdf
 
VIP High Class Call Girls Jamshedpur Anushka 8250192130 Independent Escort Se...
VIP High Class Call Girls Jamshedpur Anushka 8250192130 Independent Escort Se...VIP High Class Call Girls Jamshedpur Anushka 8250192130 Independent Escort Se...
VIP High Class Call Girls Jamshedpur Anushka 8250192130 Independent Escort Se...
 
April 2024 - Crypto Market Report's Analysis
April 2024 - Crypto Market Report's AnalysisApril 2024 - Crypto Market Report's Analysis
April 2024 - Crypto Market Report's Analysis
 
Invezz.com - Grow your wealth with trading signals
Invezz.com - Grow your wealth with trading signalsInvezz.com - Grow your wealth with trading signals
Invezz.com - Grow your wealth with trading signals
 
Ravak dropshipping via API with DroFx.pptx
Ravak dropshipping via API with DroFx.pptxRavak dropshipping via API with DroFx.pptx
Ravak dropshipping via API with DroFx.pptx
 
VIP High Profile Call Girls Amravati Aarushi 8250192130 Independent Escort Se...
VIP High Profile Call Girls Amravati Aarushi 8250192130 Independent Escort Se...VIP High Profile Call Girls Amravati Aarushi 8250192130 Independent Escort Se...
VIP High Profile Call Girls Amravati Aarushi 8250192130 Independent Escort Se...
 
Delhi Call Girls CP 9711199171 ☎✔👌✔ Whatsapp Hard And Sexy Vip Call
Delhi Call Girls CP 9711199171 ☎✔👌✔ Whatsapp Hard And Sexy Vip CallDelhi Call Girls CP 9711199171 ☎✔👌✔ Whatsapp Hard And Sexy Vip Call
Delhi Call Girls CP 9711199171 ☎✔👌✔ Whatsapp Hard And Sexy Vip Call
 
100-Concepts-of-AI by Anupama Kate .pptx
100-Concepts-of-AI by Anupama Kate .pptx100-Concepts-of-AI by Anupama Kate .pptx
100-Concepts-of-AI by Anupama Kate .pptx
 
Brighton SEO | April 2024 | Data Storytelling
Brighton SEO | April 2024 | Data StorytellingBrighton SEO | April 2024 | Data Storytelling
Brighton SEO | April 2024 | Data Storytelling
 
BabyOno dropshipping via API with DroFx.pptx
BabyOno dropshipping via API with DroFx.pptxBabyOno dropshipping via API with DroFx.pptx
BabyOno dropshipping via API with DroFx.pptx
 
Delhi 99530 vip 56974 Genuine Escort Service Call Girls in Kishangarh
Delhi 99530 vip 56974 Genuine Escort Service Call Girls in  KishangarhDelhi 99530 vip 56974 Genuine Escort Service Call Girls in  Kishangarh
Delhi 99530 vip 56974 Genuine Escort Service Call Girls in Kishangarh
 
VIP Call Girls in Amravati Aarohi 8250192130 Independent Escort Service Amravati
VIP Call Girls in Amravati Aarohi 8250192130 Independent Escort Service AmravatiVIP Call Girls in Amravati Aarohi 8250192130 Independent Escort Service Amravati
VIP Call Girls in Amravati Aarohi 8250192130 Independent Escort Service Amravati
 
E-Commerce Order PredictionShraddha Kamble.pptx
E-Commerce Order PredictionShraddha Kamble.pptxE-Commerce Order PredictionShraddha Kamble.pptx
E-Commerce Order PredictionShraddha Kamble.pptx
 
定制英国白金汉大学毕业证(UCB毕业证书) 成绩单原版一比一
定制英国白金汉大学毕业证(UCB毕业证书)																			成绩单原版一比一定制英国白金汉大学毕业证(UCB毕业证书)																			成绩单原版一比一
定制英国白金汉大学毕业证(UCB毕业证书) 成绩单原版一比一
 
Beautiful Sapna Vip Call Girls Hauz Khas 9711199012 Call /Whatsapps
Beautiful Sapna Vip  Call Girls Hauz Khas 9711199012 Call /WhatsappsBeautiful Sapna Vip  Call Girls Hauz Khas 9711199012 Call /Whatsapps
Beautiful Sapna Vip Call Girls Hauz Khas 9711199012 Call /Whatsapps
 
Mature dropshipping via API with DroFx.pptx
Mature dropshipping via API with DroFx.pptxMature dropshipping via API with DroFx.pptx
Mature dropshipping via API with DroFx.pptx
 
Week-01-2.ppt BBB human Computer interaction
Week-01-2.ppt BBB human Computer interactionWeek-01-2.ppt BBB human Computer interaction
Week-01-2.ppt BBB human Computer interaction
 

Microsoft Office Powerpoint 2013 Tutorial- Adding Bullet to Texts

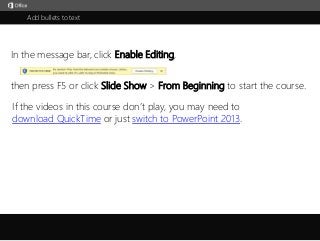
  • 1. Add bullets to text j then press F5 or click Slide Show > From Beginning to start the course. In the message bar, click Enable Editing, If the videos in this course don’t play, you may need to download QuickTime or just switch to PowerPoint 2013.
  • 2. 5 61 2 3 4 Course summary Help 1/3 videos Add bullets to text Closed captions Summary Feedback HelpAdd bullets Make changes Use slide masters 5:272:29 5:11 Press F5 to start, Esc to stop In PowerPoint, add bullets to a list of text items to emphasize key points of information.For a list to be most effective, you’ll keep it moderate in length, and the list items will be brief and scannable. Another aspect of lists concerns their formatting—font size,line spacing, margins, indentation of bullets and text, and bullet type.So, as you create bulleted lists, think of their effectiveness in terms of both what they say and how they look.Let’s go over some list basics.All the content layouts in PowerPoint include bulleted-list formatting.To remove the bullets or add them, you select the content placeholder and click Bullets on the Home tab.To add a new item and drop down another level, press Enter, and click Increase List Level.Or, press Enter+Tab.To move an item up one level, place the insertion point at the start of the text and click Decrease List Level.Or: Press Shift+TabBe careful in your use of text levels. For example, this Agenda list, with first- and second-level itemsis much easier for an audience to take in if you limit it to the top-level points, as in the list here.As you create a list, you’ll want to work with how it looks.If you want a certain theme, apply it early on so you know what its list styles look like.Then make other adjustments.To learn more, see the other movies in this course, called Change font size, line spacing, and indentationand Change list formatting on the slide master.Up next: Change font size, line spacing, and indentation.
  • 3. 5 61 2 3 4 Course summary Help 2/3 videos Add bullets to text Closed captions Summary Feedback Help Press F5 to start, Esc to stop We’ve created a bulleted list for our Agenda slide. Now we’ll make some changes to its look and formatting.Since I want to apply a different theme to the presentation, I’ll do that first.Let’s click Design and choose this theme, called Facet.That applies different styles and formatting to the list. So, now those are in place up front.This theme uses a small font size for the text. Let’s increase it.I’ll select the placeholder, click Home > Font Size, and choose 24.This font size is easier to see and makes use of the space on the slide.Note that if you want to change the font size for every list in the presentation, you should change it on the slide master. We’ll work with the slide master in Movie 3, Change list formatting on the slide master.We’ve increased the font size; let’s also increase the line spacing. To do that, I’ll select the placeholderand on the Home tab, I click Line Spacing, where I see that the current setting is 1.0, or single spaced.And I see a preview of other settings. I don’t want quite so much spacing as 1.5. Let’s open Line Spacing Options. This includes settings for indentation as well as spacing.Under Spacing, the list is set to Single, but I can add space incrementally in the Before box.I’ll change this from 10 pts. to 20 and click OK.So, I’ve added a bit more space to the single spacing, but it’s not quite as much as the 1.5 spacing.Now, because we’ve changed font size and line spacing,I want to mention AutoFit, which can affect both of these types of formatting.To demonstrate AutoFit, I’ll add one more item to this list. Watch closely as I type it: “Our support.”See how the list adjusted when I started typing? It got more compressed. It’ll continue to do so with each additional item. That’s the result of AutoFit; it adjusts line spacing and font size to fit all list items into the placeholder.We’ll delete this last item.Because you may not want the auto-fitting, whenever it happens, this control appears, called AutoFit Options. Let’s click it.To undo the autofitting, I click Stop Fitting Text to This Placeholder. The line spacing returns to what it was.I prefer that, so I’ll leave the auto-fitting undone. And let’s say I want to turn off AutoFit altogether.I click the control again and click Control AutoCorrect Options.In the AutoCorrect dialog box, I uncheck Autofit body text to placeholder, and click OK.AutoFit is now off until I turn it back on.Next, I want to move the list to the right a little bit, to balance out the slide more.To do that, I’ll increase its left margin.I right-click the text placeholder and click Format Shape. Then, I click Size & Properties, and Text Box.In the Left margin box, I’ll change the setting from .1” to 1”.The text moves to the right as I press the Up Arrow for the box.I’ll close the Format Shape pane.The new margin moves the list over nicely.Now, if you ever need to adjust the space between the text and bullets, a great way is to use tab markers on the ruler. To display the ruler, click View, and check Ruler.Now, let’s say I want to increase the space between text and bullets: I’ll select the text,and on the ruler, find this upper tab on the bottom of the ruler.I drag the tab, and the dotted line shows where the text’s left indent will be.To move the bullets, I drag the tab at the top of the ruler.Now, note that if my list has more than one text level,I need to select the level of text I want to adjust, and then move the tabs.My Agenda list now looks the way I want it to.Up next: We’ll change list formatting on the slide master. Add bullets Make changes Use slide masters 5:272:29 5:11
  • 4. 5 61 2 3 4 Course summary Help 3/3 videos Add bullets to text Closed captions Summary Feedback Help Press F5 to start, Esc to stop In this presentation, we want to change the list formatting everywhere, not just on one or two slides.So, we’ll make all our changes on the slide master. To open the slide master, click View > Slide Master.To change all bulleted lists, we’ll select the slide master thumbnail—the one at the top—and change formatting for the list placeholder and text, here.That will affect the bulleted list formatting in each of the master layouts.We’ll make changes similar to those we made in Movie 2: Change font size, line spacing, and indentation.And we’ll also change the type of bullet we’re using.Let’s start with font size.Because this is the slide master, we see the font size, spacing, and bullet for each level of text.To change the font size for the top level, I’ll select that line, click Home,and look in the Font Size box, which shows a font size of 18.I’ll open the list and change it to 24.Notice that the bullet size increases in proportion to the font size.I also want to increase the font size for second-level text, so I’ll select it and choose 20.I won’t worry about the next three levels of text because I don’t use those.Let’s see how the larger font sizes look on the slides. I’ll click Normal to switch to Normal view.The Agenda slide shows just the top level text with the larger font,and the next slide, Our values, shows the second-level text, as well.Let’s look at the other lists.I like the larger font sizes, but I think we should increase the line spacing as well. Let’s go back to the Slide Master. I’ll click View > Slide Master and select the slide master thumbnail.Selecting the text placeholder, I’ll click Home > Line Spacing. The list is currently set at 1.0, or single spacing. To increase line spacing for just the top-level text, I’ll click in that line,and click Line Spacing > Line Spacing Options.Under Spacing, in the Before box, I’ll increase the spacing, from 10 points to 20, and click OK.So, with this increase, a list of top-level text, like the Agenda list, will change from single spacing, shown here, to slightly more than single spacing, which will look like this.Note that I haven’t changed the line spacing for the other text levels.So, in a list like this, the second-level text keeps its original spacing,but there’s a bit more space above the top-level text.I like that.Now, on the slide master,lets add more space on the left margin of the list by right-clicking the placeholder and clicking Format Shape. Then, we click Size & Properties > Text Box, and in the Left margin box, increase the number, from .1” to .5”. As I increase the number, the list moves to the right. So, all lists in the presentation will now have more space on the left. Let’s close the Format Shape pane.Now, let’s have fun with the type of bullet we’re using for the list. I’ll zoom in for a closer look.The theme has a green arrow for a bullet. I like it, but I could choose something else if I wanted.To see other options, I’ll select the placeholder, and click the arrow next to Bullets, on the Home tab.As we point to these alternative bullet styles, we see how they would look.For more choices, click Bullets and Numbering. I’d like something different, so I’ll click Picture.This gives me the option to browse for a picture file of my own or to search for one on the web.I’ll click Office.com and type “web bullets.” Then I’ll click Search.Here’s a lime-green sphere, perfect for the theme I’m using. I’ll select it and click Insert.The new picture bullet is inserted on the slide master, in various sizes to match each text level.I’ll zoom back out.We’re finished with our changes to the slide master,so let’s click Normal and look at the various bulleted lists with the new formatting.Changes to look for include increased line spacing between top-level items;a bigger left margin; and the new picture bullet.As I look through all the slides, I see the changes reflected in every type of list. I like the improvements.Now it’s clear how much the slide master helps when I want to change bulleted list formatting for all my lists.For more information, see the Course Summary, and experiment on your own. Add bullets Make changes Use slide masters 5:272:29 5:11
  • 5. Help Course summary Press F5 to start, Esc to stop Course summary—Add bullets to text Summary Feedback Help 5 61 2 3 4 Add bullets Make changes Use slide masters 5:272:29 5:11 Add bullets or numbers to text Use bullets or numbers to present lots of text or a sequential process in a PowerPoint 2013 presentation. 1. On the View tab, in the Presentation Views group, click Normal. 2. On the left-hand side of the PowerPoint window, click a slide thumbnail that you want to add bulleted or numbered text to. 3. On the slide, select the lines of text in a text placeholder or table that you want to add bullets or numbering to. 4. On the Home tab, in the Paragraph group, click Bullets or Numbering. • To change all lines of text, select the outline of the text object, and then apply the bullet or numbering. • To increase or decrease the indent, to change spacing between a bullet or number and the text, to change the style, color, or size of bullets or numbers, to manually change the number that you want to start from, and so on, see Adjust the indent in a bulleted or numbered list on the ruler. Keyboard shortcuts • To increase a list level: Tab+Enter. • To decrease a list level: Shift+Tab. Manage text in a placeholder by using AutoFit If you add more text to a body text placeholder than the placeholder can contain, your text automatically resizes to a smaller font so that all of the text will fit in the placeholder. This automatic text resizing is called AutoFit. To turn AutoFit off and allow text to move beyond the placeholder border, click the AutoFit Options button, which appears next to the placeholder, and then click Stop Fitting Text to This Placeholder. To turn AutoFit back on, click the AutoFit Options button, and then click AutoFit Text to Placeholder. See also • Use slide masters to customize a presentation • Apply and change a theme • More training courses • Office Compatibility Pack
  • 6. Check out more courses Help Course summary Press F5 to start, Esc to stop Rating and comments Thank you for viewing this course! Please tell us what you think Summary Feedback Help 5 61 2 3 4 Add bullets Make changes Use slide masters 5:272:29 5:11
  • 7. Help Course summary Press F5 to start, Esc to stop Help Summary Feedback Help 5 61 2 3 4 Using PowerPoint’s video controls Going places Stopping a course If you download a course and the videos don’t play get the PowerPoint Viewer. the QuickTime player upgrade to PowerPoint 2013 Add bullets Make changes Use slide masters 5:272:29 5:11