
Recommandé
Contenu connexe
En vedette
En vedette (20)
Similaire à Why Save Wai Project Guide
Similaire à Why Save Wai Project Guide (20)
Dernier
Dernier (20)
Why Save Wai Project Guide
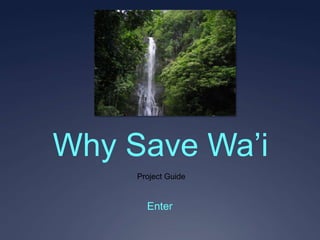
- 1. Why Save Wa’i Project Guide Enter
- 2. Introduction Requirements Project Activities Why Save Wa’i Wiki References
- 3. Introduction Introduction In Ancient Hawaii, land was subdivided into pie-shaped pieces from the tops of mountains to the sea, following the boundaries of streams. They called this Ahupua’a. Wai, or fresh water, was the most sacred part of the “pie”. It was the Requirements job of the konohiki to manage it. It was sacred, the source of life. But do we treat it with the same respect today?Hawaii’s water supply is in crisis. Think of this project as your chance to become the konohiki. Create a 21 st Project Century Ahupua’a! Activities Why Save Wa’i Wiki References Figure 2
- 4. Requirements Introduction Traditionally and today, where does fresh water come from in Hawaii, how do we use it in daily life, and why is it an important resource to conserve? Requirements You will answer this question by researching online, collaborating with classmates, and participating in classroom activities and field Project trips. You will need: Access to a computer with DSL Internet connection Activities Digital camera Blogging Permission Form Why Save Wa’i Wiki Pens and paper for note taking, or computer software such as WORD References Your own PB Wiki page
- 5. Project Introduction The goal of this project is for you to work in teams to present a podcast. What’s that? The word is a combination of the terms “broadcast” and “iPod”. It’s basically your own radio show! Requirements It will contain information on water resource management in Hawaii. Project Project steps: Review class wiki Activities Brainstorm on daily discussion questions in the discussion forum Use links in the wiki sidebar to research topics Why Save Wa’i Wiki Participate in in-class activities References Create your own podcast
- 6. Activities Introduction Activity #1: Making Water Requirements Activity #2: At Home Water Project Detective Activity #3: Make a Mini Water Activities Cycle Why Save Wa’i Wiki Activity #4: Cleaning Dirty Water References Figure 3
- 7. Activity #1: Making Water Water is a chemical. It’s made of two gases, hydrogen and oxygen. You can make hydrogen and oxygen join to form water. Here’s how. You will need: *a birthday candle *a plate *a clear drinking glass *a match or lighter 1. Set the birthday candle on the plate and light it. 2. Cover the burning candle with the clear glass. 3. When the candle goes out, look closely at the inside of the glass. What do you see? The tiny drops of liquid inside the glass are water! The hydrogen in the candle joined with the oxygen in the air to form water. The candle flame went out when all of the oxygen in the air inside the glass was used up. Wood, paper, natural gas, heating oil, and gasoline all contain hydrogen, which joins with the oxygen in the air as they burn. Do you think burning any of these fuels will form water?
- 8. Activity #2: At Home Water Detective You can save several gallons of water every day with one simple action. You will need: the sink where you brush your teeth a large bucket or other container that will fit under the faucet a measuring cup your toothbrush toothpaste 1. Put the empty bucket under the faucet. 2. Brush your teeth like you always do, BUT LEAVE THE WATER RUNNING. 3. Turn off the water when you finish brushing. 4. Pour the water from the bucket into the measuring cup, until it is empty. Write down the number of cups you used to brush your teeth. 5. Look at the chart to find out how many cups are in a quart. Divide the number of cups of water you collected in the bucket by this number to find out how many quarts of water would have gone down the drain if you hadn't caught it in the bucket. How many quarts are in a gallon? Did you collect more than a gallon of water in the bucket while you brushed? The next time you brush your teeth: 1. Put the empty bucket under the faucet. 2. Brush your teeth like you always do, except this time, turn off the faucet when you are not using the water to wet or rinse your toothbrush. 3. Measure the water in the bucket like you did before. 4. How much water would have gone down the drain if you hadn't caught it in the bucket? 5. Subtract the amount of water collected when you turned off the faucet while brushing from the amount of water collected when you let the water run. This is how much water you save by turning off the water while you brush your teeth! 6. Multiply this amount by the number of times you brush your teeth in a day to see how much water you can save, all by your self, every day, with the simple action of turning off the faucet! 7. Write your findings in the discussion forum of the class wiki.
- 9. Activity #3: Make a Miniature Water Cycle You’ve seen that water can be a liquid, a gas, or a solid. Outside, water is always changing from liquid to gas and back again. This process is called the water cycle. You can see how the water cycle works. The sun’s heat makes water evaporate from streams, lakes, rivers, and oceans. The water vapor rises. When it reaches cooler air, it condenses to form clouds. When the clouds are full of water, or saturated, they release some of the water as rain. You will need: * a large metal or plastic bowl * a pitcher or bucket * a sheet of clear plastic wrap * a dry ceramic mug (like a coffee mug) * a long piece of string or large rubber band * water 1. Put the bowl in a sunny place outside. 2. Using the pitcher or bucket, pour water into the bowl until it is about ¼ full. 3. Place the mug in the center of the bowl. Be careful not to splash any water into it. 4. Cover the top of the bowl tightly with the plastic wrap. 5. Tie the string around the bowl to hold the plastic wrap in place. 6. Watch the bowl to see what happens. Post your observations in the discussion forum of our class wiki.
- 10. Activity #4: Cleaning Dirty Water One of the steps in making lake water clean and pure is called filtration. How does it work? You will need: a paper towel scissors a funnel clean sand (from the beach or the sandbox) 2 clear glasses or jars a spoon water dirt from the back yard 1. Cut a circle from the paper towel. Fold it in half, then in half again. 2. Open the folded circle a little to make a paper cone. 3. Put the cone inside the funnel and set the funnel in one of the glasses or jars. 4. Fill the cone with clean sand. 5. Fill the other jar with water. Add 3 or 4 spoonfuls of dirt to the water and stir it. 6. Slowly pour the muddy water into the sand in the funnel. 7. Look at the water coming out of the funnel. The funnel filled with sand is a filter. What happened to the dirt as the muddy water passed through the filter? Is the water in the bottom jar clear? Or is it still a little bit muddy? If it still looks muddy, the dirt particles were small enough to pass through the spaces between the sand in the filter. That’s why more than one kind of filtration is used at the water treatment plant. Do you think your sand filter would remove germs from the water? (Hint: how big are germs?)
- 11. References Cover. Waterfall Along the Road to Hana, Maui, Hawaiian Islands. (2008). Note: From “Road to Hana, Maui“ by Mastery of Maps, 2008. Retrieved from http://www.flickr.com/photos/masteryofmaps/2534917866/ . Made available under Creative Commons License. Figure 1. Drops of Water. (2009). Note: From “MaheashNelanka’sPhotostream” by MaheashNelanka, 2009. Retrieved from http://www.flickr.com/photos/14884820@N06/3647001883/. Made available under Creative Commons License. Figure 2. Damon collection, Huewai, Bishop Museum, Honolulu. (2007). Note: From “Bishop Museum Online’sPhotostream” by Bishop Museum Online, 2007. Retrieved from http://www.flickr.com/photos/bishop_museum/1339144100/ . Made available under Creative Commons License. Figure 3. 1_Litre_Ohia. (2009). Note: From “Hawaiian Springs Water’s Photostream” by Hawaiian Springs Water, (2009). Retrieved from http://www.flickr.com/photos/hawaiiansprings/4070347072/. Made available under Creative Commons License. Figure 4. Water Crisis – Concept Panels. (2009). Note: From “Ranranland’sPhotostream” by ranranland, 2009. Retrieved from http://www.flickr.com/photos/ranranland/4008280602/. Made available under Creative Commons License. Figure 5. Rainbow Over the Ridge. (2007). Note: From “2composers’ Photostream” by 2composers, 2007. Retrieved from http://www.flickr.com/photos/schuberts/878207478/. Made available under Creative Commons license.