SlideShare une entreprise Scribd logo
1  sur  37
BANDAGING
Roller bandaging
• Roller bandages are made from strips of different material of varying length and
width according to part to which they are applied.
• Uses:
1. To cover and retain dressing and splints in position
2. To provide support
3. To restrict movement
4. To prevent and control hemorrhage
• Rules:
1. Use a tightly rolled bandage of correct width
2. Always stand in front of the patient except in capelin bandage Bandage a limb in
the position in which it is to remain
4. Pad the axilla or groin when bandaging this parts
5. Hold the bandage with the head uppermost and apply the outer surface of the
bandage to the part
6. The bandaging should be no loose and too tight
• 1. Simple spiral
• 2. Reverse spiral
• 3. Figure of eight
• 4. Spica
• Simple spiral: the bandage is applied obliquely round the part, each turn cover two
third of the proceeding one, and the edged being kept parallel.
Ex finger and wrist bandage
• Reverse spiral: a spiral bandage in which the oblique turns are reversed at each turn
in order better to adapt to the part.
• Figure of eight bandage: a bandage applied alternatively to two parts of a limb above
and below the joints in such a way that the turn describe the figure of eight.
• Spica: a bandage applied to the body and the first part of a limb or to the hand a
finger which overlap slightly in a V to resemble an ear of grain.
Ex spica of hip, shoulder, groin, foot.
• Shoulder bandage:
Pad the axilla and anchor by several circular turns around upper arm
Carry across back to arm pit of opposite site then across chest obliquely to top of
primary turns
Carry around arm under arm pit and upward towards shoulder Continue until
entire shoulder is covered
Secure with adhesive tapes.
• Hip bandage:
Place the out side of the bandage on the inner site of the thigh above 6
inches below the groin
Carry the bandage horizontally round the limb and a make four ascending
reverse spiral turns round the thigh
Carry the bandage from within outward ov3er the front of the groin and a
upward the hip and a back passing over the prominence of the hip bone on the
opposite site
Bring the bandage down, over the abdomen to the outer side of the thigh
and repeat the figure of eight around the body and a thigh until hip is covered
and secure.
Figure of eight of foot and ankle:
Anchor just above ankle, bring bandages obliquely across in step to base of large
toe with turnaround base of toes
Continue obliquely across in step to point of beginning
Repeat procedure, leaving exposed with turn ascending until arch in step are
covered
Terminate at starting point and secure.
Thumb bandage:
Back of the thumb is uppermost take two turns round the wrist and carry the
bandage over the back of the thumb
Wrap the wrist and repeat the first loop
Attach the end of bandage to the diagonal strip to the other
Check the circulation and secure the bandage at the wrist
Finger bandage:
Anchor bandage at wrist, bring over back of hand and make one complete turn at
place of injured finger, spiral turn to tip of finger to hold dressing
Make another spiral turn back to base of finger
Complete bandage with figure of eight progressing from tip to finger base.
Terminate the circular turn around wrist and secure.
• Stump bandage:
place the base of the bandage well upon the inside of the stump the point hanging
downwards
draw the point over the stump and cross the ends in front over the point
carry the bandage over the centre of stump to the same level behind holding the
turns back front with the thumb and fingers of the other hand
Repeat the recurrent turns over the ends of the stump first and on the stump left on
the right side of original turn and secure
• Crossed bandage of one eye
Anchor the bandage with circular turn round the head and bring
obliquely down across back of head
Bring under ear on site of injured eye and obliquely up across chick
bone to bridge of nose, joining primary turn continue and repeat
procedure each turn overlapping over the upper two third of proceeding
turn until eye is
covered
Apply circular turn around head and secure
Ear bandage:
Lay the outer surface of the bandage against the forehead and carry the bandage
round the head in one circular turn, bandage away from the ear
Towards the sound site carry the bandage around to the back of the head,
lowdown in the nape of the neck, repeat this and secure.
• Bandage of Jaw:
Start bandage in front of ear, bring over top of head and under jaw , make several
turns as needed
Anchor vertical bandaging by making several horizontalturns around head
Reinforce both loops with strips of adhesive placed in direction of loops and
secure with tape across the front of the chin.
• Breast bandage:
Take three inch bandage in starting below the breast to be covered
and away from it towards carry the twice round waist
Bring the bandage up under the breast to be supported over the
opposite shoulder obliquely down across the
• back or under the arm and covering two third of previous turn and
secure
• Capelin bandage:
Tie two bandage together with square knot
Place knot at back head and bring both rolls forward above ear
Cross bandage at centre of forehead, roll number one upward over the centre of
the scalp, bring roll number
one over top of head to nape of neck and a roll number
Triangle bandage
• Triangle bandage – A triangle shaped bandage , made by cutting a piece of calico
100 cm2 from corner to corner as to give two bandages.
• Three borders :- one base and two sides.
• Three corners :- one point and two ends
1. As a whole cloth spread it out fully.
2. As a broad bandage, fold it.
3. As a narrow bandage , fold broad bandage once again.
4. As a smaller size bandage, when needed, size reduced half of the original.
5. For bandaging scalp, forehead, chest, shoulder, elbow, hip and groin, knee, stump
Abdominal binder – It is a wide, flat piece of fabric that is secured around the trunk to
support the abdomen or dressings.
 First place the center of the binder at the level of client’s waist line on his back.
Wrap the ends of binder snuggly over the client’s abdomen and secure it with Velcro
strapes.
 The binder is secured at bottom first, working upward.
 nursing alerts regarding abdominal binder
 Important to check the position of the binder frequently.
 Binder could move up and inhibit respiration or could slip down and lose its
effectiveness.
.
Method of applying breast bandage
• Breast bandage to support one breast- Take a 3 inch bandage, start
below the breast to be covered nad working away from it towards the
sound side, carry the bandage twice round the waist.
• Bring the bandage up, under the breast to be supported. over the
opposite shoulder obliquely down across the back or under arm and
once more around the waist, on covering two third of previous turns
Conti..
• To support both breasts –
• Start with two circular turns round the waist.
• Starting under the right breast, bring bandage up, over the left
shoulder, obliquely down across the back and across the front of the
waist horizontally
• Carry the bandage under the left arm, up across back to the right
shoulder and down across the chest, under the left breast.
• These turns repeated.
T BANDAGE
• T bandage is t shaped, consisting of two strips of flannel, about 4
inches wide, stitched together in the form of a T.
• The horizontal strip (long) is passed round the body and vertical strip
is passed up between the legs.
• It is then pinned to horizontal strip.
1. Any rectal dressing.
2. Perineal dressing.
3. Used to hold a perineal pad in place for incontinent or menstruating
female client.
4. Hydrocele
Many tail bandage
• Many tail bandage – It is a bandage which consist of a number of
strips or tails of cotton material, four to six inches wide and of
sufficient length to encircle the part (8 inches)
The center band of bandage is placed under the patient’s back, applied
from below upwards.
One tail being brought across the body at a time and held in position by
a tail from the opposite side.
All the remaining tails should be applied as the first tail.
The last tail is brought obliquely downwards and secured with a safety
pin.
TRANSPORTATION OF INJURED
General principles of safe transportation of injured person
1. Never move an injured unless a help is not readily available.
2. Leave casuality undisturbed send for help & provide first aid on the
spot
3. Move the fried casualty as soon as possible without harming yourself
from fire, falling debris & poisonous gases.
CONTI..
• 4. Method of transport depends on
a. The nature and severity of injury
b. The number of helpers.
c. Facilities.
d. Te casualty’s build
e. Distance to be covered
f. Route to be travelled
CONTI..
• 1. Never attempt to move a seriously injured casuality on your own,
instead arrange for an ambulance.
• 2. Whenever possible the positon in which the casualty is found or
has been placed should not be changed & the general condition
watched carefully throughout.
Aim to transport
• To enable the casualty to reach the destination without detoriation or
discomfort.
Various one man method of transport
• Carrying in hand or cradle- this can be done in less weight or in a child
carrying minor wound. the injured person should be carried from the
below of shoulder in one hand and the knee with hands.
• Human crutch- In this, first aider himself stands near the injured
holding his waist clothes support, Lift him with his another hand and
pt around the first aids neck and take hi by support. The casualty may
be given additional support if he is conscious with a walking stick or
staff.
Fireman’s Lift
• In this keep the injured person standing . Hold one of his hand and
keep your other hand under the two legs at the knee area.
• Hold one of the leg over the knee and carry him on your back or
make the injured person sit on the same height.
• bend before him keeping your back at his face. now ask him to fold
his legs around your waist and hands around your shoulders and carry
him slowly. It is also called as PICK A _ BACK.
• This method is used to move a conscious or unconscious child or a
light weight adult when you need to help a hand free.
Principle of lifting of casualty
• To lift the casualty use most powerful muscles of your body ( the
thigh hip and shoulder muscles)
• - The leg should be kept as close to your body as possible. - Keep your
back straight and head erect & bend at knees and hold the casualty
close to your body using your shoulders to support the leg. - Use
whole hand to strengthen the grip.
• - If it is too heavy gently slowly slide the casualty without injuring
yourself and present the casualty more damage to the injured area.
Two man casualty carrier
• Four handed seat- both the helper form a chair type seat by catching
wach adult wrist . Both helpers catch the wrist with the left wrist of
othe radn vice versa.After forming a seat the helpers sit behind the
injured person and ask him to sit and put both of his hands around
the two man helpers.Now the helper towards the right hand, should
start with the right foot and the left helper should start with the left
foot . this is usually done in conscious casualty.
• Two handed seat- This method is used to carry a casualty who is unable to
assist the bearers or if his hand is fractured and cannot hold the helpers on
its own.Both the helpers face are towards each other. Hold the casualty by
one hand from the chestline. Now they lift him slightly and catch each
other sfingers by inserting hands from the middle portion of his thighs. The
left side helpers keep his palms towards the upper side and the right side
helpers should keep his palm towards the downside by forming shape of
hook with the help of fingers. Both should catch a handkerchief or some
clothe tightly. Now , both the helpers should start walking slowly without
passing the other under the middleof the thigh and grasp each others
wrists. Rise together r step off with the outside feet and walk with ordinary
pace
• For and a ft carry- Do not use if you cannot grasp casualty wrists.
Supporting the casualty on both sides
• - Chair method
• - A casualty carried in wheel chair
• - Blanket Lift
• - Improvised method
Types of stretchers
• 1. Standard stretchers
• 2. Closing the stratchers
• 3. The scoop or orthopaedic stretcher
• 4. Utila folding stretcher
• 5. Pole & canvas stretcher
• 6. Neil Robertson Stretcher
• 7. Improvised stretchers
how to load a stretcher
• 5 people required, 4 to lift the injured and 1 to move the stretcher.
• Fold the canvas sheet and make three complete folds from the top
and four from the bottom.
• Slide the folded canvas under the casualty through the hollow of his
back and lift the injured.
steps of blanket lift
1. Two bearer’s should stand facing each other on either side of
casualty’s trunk and the two face each other at his lower limbs.
2. The two edges of the blanket may be rolled tightly up, against his
side.
3. With back straight, squat and grasp the blanket with your palms
downwards and fingers at the inner side of the rolled blanket edge.
4. Then carefully load the casualty on the stretcher.
Manual lift for a fractured spine.
• Do not move the casualty unless absolutely necessary.
• The 5 helpers, 3 on one side and 2 on other side, kneel.
• The team of 2 should place their arms on the casualty‘s far side.
• They turn the casualty towards them, using log roll.
• The team of 2 holders will insert their arms under the casualty
between helpers 2 & 4 and 4& 6.
Technique of loading and unloading
ambulance.
• 4 people, 1 inside the ambulance, other 3 one on either side of the
stretcher, one at the end will load the ambulance.
• 1 bearer takes the hold of the handles at the back and another at
head. The bearer at the back gently withdraws the stretcher, others
will support the injured and unload the ambulance.
CARDIO-PULMONARY RESUSCITATION
• Definition :- “CARDIO-PULMONARY RESUSCITATION is a series of first
aid procedures, including recognition and treatment of circulatory
and respiratory arrest, capable of maintaining life until advance life
support is available.”
Schafer method
• It is prone pressure method of artificial respiration in which the victim
is placed face downward pressure then being rhythmically applied
with hands to the lower part of thorax. the first aider kneels on both
knee just below victims hip joint then place his hand of the loin
causality, one on each side then the backbone with wrist almost
touching and thumb apart. Now the first aider has to lean slowly
forwarded without banding elbow and knee for allow the weight to
communicated loin of the patient. This results compress abdomen
against the ground and up against diaphragm. Air is thus forced out of
lungs and expiration. Now the first aider will release the pressure by
doing so abdominal organs will fall back and diaphragm will drop and
induce inspiration. This two faces taken 5 seconds 12 times in minute.
Sylvester method
• it is a method of artificial respiration in which the subject is laid on his
/her back and air is expelled from lungs by pressing the arm over the
chest and fresh air drawn in by putting the arm above the head.
• place casualty on firm surface clear the mouth beneath shoulders to
raise them sufficiently for head to be tilted back in open airway
position. Kneel at casualty head grasp the wrist ad cross them over on
the lower chest keeping them lower clear of abdomen. Even pressure
with the holder nelson method for 2 seconds. Release the pressure,
after 4 sequences check for heart beat if normal continue method
until breathing restore

Contenu connexe

Similaire à BANDAGING.pptx

The BANDAGING for First Aid Provider and Health care Personel
The BANDAGING for First Aid Provider and Health care PersonelThe BANDAGING for First Aid Provider and Health care Personel
The BANDAGING for First Aid Provider and Health care PersonelSankappa Gulaganji
 
FIRST-AID-DRESSING-BANDAGES (1).pptx
FIRST-AID-DRESSING-BANDAGES (1).pptxFIRST-AID-DRESSING-BANDAGES (1).pptx
FIRST-AID-DRESSING-BANDAGES (1).pptxAbhishek Verma
 
What are fractures
What are fracturesWhat are fractures
What are fracturesEskH1ddeN
 
What are fractures
What are fracturesWhat are fractures
What are fracturesEskH1ddeN
 
bandaging-140511011904-phpapp02.pptx
bandaging-140511011904-phpapp02.pptxbandaging-140511011904-phpapp02.pptx
bandaging-140511011904-phpapp02.pptxfernandopajar1
 
Bandages and its types
Bandages and its typesBandages and its types
Bandages and its typesHNBGU
 
What are stretchers
What are stretchersWhat are stretchers
What are stretchersEskH1ddeN
 
What are stretchers
What are stretchersWhat are stretchers
What are stretchersEskH1ddeN
 
bandaging-140511011904-phpapp02.pdf
bandaging-140511011904-phpapp02.pdfbandaging-140511011904-phpapp02.pdf
bandaging-140511011904-phpapp02.pdfOWAIS sheikh
 
Bandaging and dressing
Bandaging and dressingBandaging and dressing
Bandaging and dressingDepEd
 

Similaire à BANDAGING.pptx (20)

Bandaging
BandagingBandaging
Bandaging
 
The BANDAGING for First Aid Provider and Health care Personel
The BANDAGING for First Aid Provider and Health care PersonelThe BANDAGING for First Aid Provider and Health care Personel
The BANDAGING for First Aid Provider and Health care Personel
 
Bandaging
BandagingBandaging
Bandaging
 
FIRST-AID-DRESSING-BANDAGES (1).pptx
FIRST-AID-DRESSING-BANDAGES (1).pptxFIRST-AID-DRESSING-BANDAGES (1).pptx
FIRST-AID-DRESSING-BANDAGES (1).pptx
 
What are fractures
What are fracturesWhat are fractures
What are fractures
 
What are fractures
What are fracturesWhat are fractures
What are fractures
 
Bandaging.pptx
Bandaging.pptxBandaging.pptx
Bandaging.pptx
 
bandaging-140511011904-phpapp02.pptx
bandaging-140511011904-phpapp02.pptxbandaging-140511011904-phpapp02.pptx
bandaging-140511011904-phpapp02.pptx
 
Bandages and its types
Bandages and its typesBandages and its types
Bandages and its types
 
first aid
first aidfirst aid
first aid
 
Bandaging
BandagingBandaging
Bandaging
 
What are stretchers
What are stretchersWhat are stretchers
What are stretchers
 
What are stretchers
What are stretchersWhat are stretchers
What are stretchers
 
bandaging-140511011904-phpapp02.pdf
bandaging-140511011904-phpapp02.pdfbandaging-140511011904-phpapp02.pdf
bandaging-140511011904-phpapp02.pdf
 
ppt on Bandaging
ppt on Bandagingppt on Bandaging
ppt on Bandaging
 
Binder Bandages.pptx
Binder Bandages.pptxBinder Bandages.pptx
Binder Bandages.pptx
 
Desmurgy (1)
Desmurgy (1)Desmurgy (1)
Desmurgy (1)
 
Desmurgy
DesmurgyDesmurgy
Desmurgy
 
Trangular Bandagers.pptx
Trangular Bandagers.pptxTrangular Bandagers.pptx
Trangular Bandagers.pptx
 
Bandaging and dressing
Bandaging and dressingBandaging and dressing
Bandaging and dressing
 

Dernier

General Principles of Intellectual Property: Concepts of Intellectual Proper...
General Principles of Intellectual Property: Concepts of Intellectual  Proper...General Principles of Intellectual Property: Concepts of Intellectual  Proper...
General Principles of Intellectual Property: Concepts of Intellectual Proper...Poonam Aher Patil
 
SOC 101 Demonstration of Learning Presentation
SOC 101 Demonstration of Learning PresentationSOC 101 Demonstration of Learning Presentation
SOC 101 Demonstration of Learning Presentationcamerronhm
 
HMCS Max Bernays Pre-Deployment Brief (May 2024).pptx
HMCS Max Bernays Pre-Deployment Brief (May 2024).pptxHMCS Max Bernays Pre-Deployment Brief (May 2024).pptx
HMCS Max Bernays Pre-Deployment Brief (May 2024).pptxEsquimalt MFRC
 
UGC NET Paper 1 Mathematical Reasoning & Aptitude.pdf
UGC NET Paper 1 Mathematical Reasoning & Aptitude.pdfUGC NET Paper 1 Mathematical Reasoning & Aptitude.pdf
UGC NET Paper 1 Mathematical Reasoning & Aptitude.pdfNirmal Dwivedi
 
Graduate Outcomes Presentation Slides - English
Graduate Outcomes Presentation Slides - EnglishGraduate Outcomes Presentation Slides - English
Graduate Outcomes Presentation Slides - Englishneillewis46
 
2024-NATIONAL-LEARNING-CAMP-AND-OTHER.pptx
2024-NATIONAL-LEARNING-CAMP-AND-OTHER.pptx2024-NATIONAL-LEARNING-CAMP-AND-OTHER.pptx
2024-NATIONAL-LEARNING-CAMP-AND-OTHER.pptxMaritesTamaniVerdade
 
Holdier Curriculum Vitae (April 2024).pdf
Holdier Curriculum Vitae (April 2024).pdfHoldier Curriculum Vitae (April 2024).pdf
Holdier Curriculum Vitae (April 2024).pdfagholdier
 
Beyond_Borders_Understanding_Anime_and_Manga_Fandom_A_Comprehensive_Audience_...
Beyond_Borders_Understanding_Anime_and_Manga_Fandom_A_Comprehensive_Audience_...Beyond_Borders_Understanding_Anime_and_Manga_Fandom_A_Comprehensive_Audience_...
Beyond_Borders_Understanding_Anime_and_Manga_Fandom_A_Comprehensive_Audience_...Pooja Bhuva
 
Jual Obat Aborsi Hongkong ( Asli No.1 ) 085657271886 Obat Penggugur Kandungan...
Jual Obat Aborsi Hongkong ( Asli No.1 ) 085657271886 Obat Penggugur Kandungan...Jual Obat Aborsi Hongkong ( Asli No.1 ) 085657271886 Obat Penggugur Kandungan...
Jual Obat Aborsi Hongkong ( Asli No.1 ) 085657271886 Obat Penggugur Kandungan...ZurliaSoop
 
The basics of sentences session 3pptx.pptx
The basics of sentences session 3pptx.pptxThe basics of sentences session 3pptx.pptx
The basics of sentences session 3pptx.pptxheathfieldcps1
 
Towards a code of practice for AI in AT.pptx
Towards a code of practice for AI in AT.pptxTowards a code of practice for AI in AT.pptx
Towards a code of practice for AI in AT.pptxJisc
 
ICT role in 21st century education and it's challenges.
ICT role in 21st century education and it's challenges.ICT role in 21st century education and it's challenges.
ICT role in 21st century education and it's challenges.MaryamAhmad92
 
On National Teacher Day, meet the 2024-25 Kenan Fellows
On National Teacher Day, meet the 2024-25 Kenan FellowsOn National Teacher Day, meet the 2024-25 Kenan Fellows
On National Teacher Day, meet the 2024-25 Kenan FellowsMebane Rash
 
Sociology 101 Demonstration of Learning Exhibit
Sociology 101 Demonstration of Learning ExhibitSociology 101 Demonstration of Learning Exhibit
Sociology 101 Demonstration of Learning Exhibitjbellavia9
 
Fostering Friendships - Enhancing Social Bonds in the Classroom
Fostering Friendships - Enhancing Social Bonds  in the ClassroomFostering Friendships - Enhancing Social Bonds  in the Classroom
Fostering Friendships - Enhancing Social Bonds in the ClassroomPooky Knightsmith
 
Wellbeing inclusion and digital dystopias.pptx
Wellbeing inclusion and digital dystopias.pptxWellbeing inclusion and digital dystopias.pptx
Wellbeing inclusion and digital dystopias.pptxJisc
 
Jamworks pilot and AI at Jisc (20/03/2024)
Jamworks pilot and AI at Jisc (20/03/2024)Jamworks pilot and AI at Jisc (20/03/2024)
Jamworks pilot and AI at Jisc (20/03/2024)Jisc
 
NO1 Top Black Magic Specialist In Lahore Black magic In Pakistan Kala Ilam Ex...
NO1 Top Black Magic Specialist In Lahore Black magic In Pakistan Kala Ilam Ex...NO1 Top Black Magic Specialist In Lahore Black magic In Pakistan Kala Ilam Ex...
NO1 Top Black Magic Specialist In Lahore Black magic In Pakistan Kala Ilam Ex...Amil baba
 
Micro-Scholarship, What it is, How can it help me.pdf
Micro-Scholarship, What it is, How can it help me.pdfMicro-Scholarship, What it is, How can it help me.pdf
Micro-Scholarship, What it is, How can it help me.pdfPoh-Sun Goh
 
ICT Role in 21st Century Education & its Challenges.pptx
ICT Role in 21st Century Education & its Challenges.pptxICT Role in 21st Century Education & its Challenges.pptx
ICT Role in 21st Century Education & its Challenges.pptxAreebaZafar22
 

Dernier (20)

General Principles of Intellectual Property: Concepts of Intellectual Proper...
General Principles of Intellectual Property: Concepts of Intellectual  Proper...General Principles of Intellectual Property: Concepts of Intellectual  Proper...
General Principles of Intellectual Property: Concepts of Intellectual Proper...
 
SOC 101 Demonstration of Learning Presentation
SOC 101 Demonstration of Learning PresentationSOC 101 Demonstration of Learning Presentation
SOC 101 Demonstration of Learning Presentation
 
HMCS Max Bernays Pre-Deployment Brief (May 2024).pptx
HMCS Max Bernays Pre-Deployment Brief (May 2024).pptxHMCS Max Bernays Pre-Deployment Brief (May 2024).pptx
HMCS Max Bernays Pre-Deployment Brief (May 2024).pptx
 
UGC NET Paper 1 Mathematical Reasoning & Aptitude.pdf
UGC NET Paper 1 Mathematical Reasoning & Aptitude.pdfUGC NET Paper 1 Mathematical Reasoning & Aptitude.pdf
UGC NET Paper 1 Mathematical Reasoning & Aptitude.pdf
 
Graduate Outcomes Presentation Slides - English
Graduate Outcomes Presentation Slides - EnglishGraduate Outcomes Presentation Slides - English
Graduate Outcomes Presentation Slides - English
 
2024-NATIONAL-LEARNING-CAMP-AND-OTHER.pptx
2024-NATIONAL-LEARNING-CAMP-AND-OTHER.pptx2024-NATIONAL-LEARNING-CAMP-AND-OTHER.pptx
2024-NATIONAL-LEARNING-CAMP-AND-OTHER.pptx
 
Holdier Curriculum Vitae (April 2024).pdf
Holdier Curriculum Vitae (April 2024).pdfHoldier Curriculum Vitae (April 2024).pdf
Holdier Curriculum Vitae (April 2024).pdf
 
Beyond_Borders_Understanding_Anime_and_Manga_Fandom_A_Comprehensive_Audience_...
Beyond_Borders_Understanding_Anime_and_Manga_Fandom_A_Comprehensive_Audience_...Beyond_Borders_Understanding_Anime_and_Manga_Fandom_A_Comprehensive_Audience_...
Beyond_Borders_Understanding_Anime_and_Manga_Fandom_A_Comprehensive_Audience_...
 
Jual Obat Aborsi Hongkong ( Asli No.1 ) 085657271886 Obat Penggugur Kandungan...
Jual Obat Aborsi Hongkong ( Asli No.1 ) 085657271886 Obat Penggugur Kandungan...Jual Obat Aborsi Hongkong ( Asli No.1 ) 085657271886 Obat Penggugur Kandungan...
Jual Obat Aborsi Hongkong ( Asli No.1 ) 085657271886 Obat Penggugur Kandungan...
 
The basics of sentences session 3pptx.pptx
The basics of sentences session 3pptx.pptxThe basics of sentences session 3pptx.pptx
The basics of sentences session 3pptx.pptx
 
Towards a code of practice for AI in AT.pptx
Towards a code of practice for AI in AT.pptxTowards a code of practice for AI in AT.pptx
Towards a code of practice for AI in AT.pptx
 
ICT role in 21st century education and it's challenges.
ICT role in 21st century education and it's challenges.ICT role in 21st century education and it's challenges.
ICT role in 21st century education and it's challenges.
 
On National Teacher Day, meet the 2024-25 Kenan Fellows
On National Teacher Day, meet the 2024-25 Kenan FellowsOn National Teacher Day, meet the 2024-25 Kenan Fellows
On National Teacher Day, meet the 2024-25 Kenan Fellows
 
Sociology 101 Demonstration of Learning Exhibit
Sociology 101 Demonstration of Learning ExhibitSociology 101 Demonstration of Learning Exhibit
Sociology 101 Demonstration of Learning Exhibit
 
Fostering Friendships - Enhancing Social Bonds in the Classroom
Fostering Friendships - Enhancing Social Bonds  in the ClassroomFostering Friendships - Enhancing Social Bonds  in the Classroom
Fostering Friendships - Enhancing Social Bonds in the Classroom
 
Wellbeing inclusion and digital dystopias.pptx
Wellbeing inclusion and digital dystopias.pptxWellbeing inclusion and digital dystopias.pptx
Wellbeing inclusion and digital dystopias.pptx
 
Jamworks pilot and AI at Jisc (20/03/2024)
Jamworks pilot and AI at Jisc (20/03/2024)Jamworks pilot and AI at Jisc (20/03/2024)
Jamworks pilot and AI at Jisc (20/03/2024)
 
NO1 Top Black Magic Specialist In Lahore Black magic In Pakistan Kala Ilam Ex...
NO1 Top Black Magic Specialist In Lahore Black magic In Pakistan Kala Ilam Ex...NO1 Top Black Magic Specialist In Lahore Black magic In Pakistan Kala Ilam Ex...
NO1 Top Black Magic Specialist In Lahore Black magic In Pakistan Kala Ilam Ex...
 
Micro-Scholarship, What it is, How can it help me.pdf
Micro-Scholarship, What it is, How can it help me.pdfMicro-Scholarship, What it is, How can it help me.pdf
Micro-Scholarship, What it is, How can it help me.pdf
 
ICT Role in 21st Century Education & its Challenges.pptx
ICT Role in 21st Century Education & its Challenges.pptxICT Role in 21st Century Education & its Challenges.pptx
ICT Role in 21st Century Education & its Challenges.pptx
 

BANDAGING.pptx

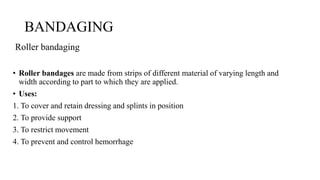
  • 1. BANDAGING Roller bandaging • Roller bandages are made from strips of different material of varying length and width according to part to which they are applied. • Uses: 1. To cover and retain dressing and splints in position 2. To provide support 3. To restrict movement 4. To prevent and control hemorrhage
  • 2. • Rules: 1. Use a tightly rolled bandage of correct width 2. Always stand in front of the patient except in capelin bandage Bandage a limb in the position in which it is to remain 4. Pad the axilla or groin when bandaging this parts 5. Hold the bandage with the head uppermost and apply the outer surface of the bandage to the part 6. The bandaging should be no loose and too tight • 1. Simple spiral • 2. Reverse spiral • 3. Figure of eight • 4. Spica
  • 3. • Simple spiral: the bandage is applied obliquely round the part, each turn cover two third of the proceeding one, and the edged being kept parallel. Ex finger and wrist bandage • Reverse spiral: a spiral bandage in which the oblique turns are reversed at each turn in order better to adapt to the part. • Figure of eight bandage: a bandage applied alternatively to two parts of a limb above and below the joints in such a way that the turn describe the figure of eight.
  • 4. • Spica: a bandage applied to the body and the first part of a limb or to the hand a finger which overlap slightly in a V to resemble an ear of grain. Ex spica of hip, shoulder, groin, foot. • Shoulder bandage: Pad the axilla and anchor by several circular turns around upper arm Carry across back to arm pit of opposite site then across chest obliquely to top of primary turns Carry around arm under arm pit and upward towards shoulder Continue until entire shoulder is covered Secure with adhesive tapes.
  • 5. • Hip bandage: Place the out side of the bandage on the inner site of the thigh above 6 inches below the groin Carry the bandage horizontally round the limb and a make four ascending reverse spiral turns round the thigh Carry the bandage from within outward ov3er the front of the groin and a upward the hip and a back passing over the prominence of the hip bone on the opposite site Bring the bandage down, over the abdomen to the outer side of the thigh and repeat the figure of eight around the body and a thigh until hip is covered and secure.
  • 6. Figure of eight of foot and ankle: Anchor just above ankle, bring bandages obliquely across in step to base of large toe with turnaround base of toes Continue obliquely across in step to point of beginning Repeat procedure, leaving exposed with turn ascending until arch in step are covered Terminate at starting point and secure. Thumb bandage: Back of the thumb is uppermost take two turns round the wrist and carry the bandage over the back of the thumb Wrap the wrist and repeat the first loop Attach the end of bandage to the diagonal strip to the other Check the circulation and secure the bandage at the wrist
  • 7. Finger bandage: Anchor bandage at wrist, bring over back of hand and make one complete turn at place of injured finger, spiral turn to tip of finger to hold dressing Make another spiral turn back to base of finger Complete bandage with figure of eight progressing from tip to finger base. Terminate the circular turn around wrist and secure.
  • 8. • Stump bandage: place the base of the bandage well upon the inside of the stump the point hanging downwards draw the point over the stump and cross the ends in front over the point carry the bandage over the centre of stump to the same level behind holding the turns back front with the thumb and fingers of the other hand Repeat the recurrent turns over the ends of the stump first and on the stump left on the right side of original turn and secure
  • 9. • Crossed bandage of one eye Anchor the bandage with circular turn round the head and bring obliquely down across back of head Bring under ear on site of injured eye and obliquely up across chick bone to bridge of nose, joining primary turn continue and repeat procedure each turn overlapping over the upper two third of proceeding turn until eye is covered Apply circular turn around head and secure
  • 10. Ear bandage: Lay the outer surface of the bandage against the forehead and carry the bandage round the head in one circular turn, bandage away from the ear Towards the sound site carry the bandage around to the back of the head, lowdown in the nape of the neck, repeat this and secure. • Bandage of Jaw: Start bandage in front of ear, bring over top of head and under jaw , make several turns as needed Anchor vertical bandaging by making several horizontalturns around head Reinforce both loops with strips of adhesive placed in direction of loops and secure with tape across the front of the chin.
  • 11. • Breast bandage: Take three inch bandage in starting below the breast to be covered and away from it towards carry the twice round waist Bring the bandage up under the breast to be supported over the opposite shoulder obliquely down across the • back or under the arm and covering two third of previous turn and secure
  • 12. • Capelin bandage: Tie two bandage together with square knot Place knot at back head and bring both rolls forward above ear Cross bandage at centre of forehead, roll number one upward over the centre of the scalp, bring roll number one over top of head to nape of neck and a roll number
  • 13. Triangle bandage • Triangle bandage – A triangle shaped bandage , made by cutting a piece of calico 100 cm2 from corner to corner as to give two bandages. • Three borders :- one base and two sides. • Three corners :- one point and two ends
  • 14. 1. As a whole cloth spread it out fully. 2. As a broad bandage, fold it. 3. As a narrow bandage , fold broad bandage once again. 4. As a smaller size bandage, when needed, size reduced half of the original. 5. For bandaging scalp, forehead, chest, shoulder, elbow, hip and groin, knee, stump
  • 15. Abdominal binder – It is a wide, flat piece of fabric that is secured around the trunk to support the abdomen or dressings.  First place the center of the binder at the level of client’s waist line on his back. Wrap the ends of binder snuggly over the client’s abdomen and secure it with Velcro strapes.  The binder is secured at bottom first, working upward.  nursing alerts regarding abdominal binder  Important to check the position of the binder frequently.  Binder could move up and inhibit respiration or could slip down and lose its effectiveness. .
  • 16. Method of applying breast bandage • Breast bandage to support one breast- Take a 3 inch bandage, start below the breast to be covered nad working away from it towards the sound side, carry the bandage twice round the waist. • Bring the bandage up, under the breast to be supported. over the opposite shoulder obliquely down across the back or under arm and once more around the waist, on covering two third of previous turns
  • 17. Conti.. • To support both breasts – • Start with two circular turns round the waist. • Starting under the right breast, bring bandage up, over the left shoulder, obliquely down across the back and across the front of the waist horizontally • Carry the bandage under the left arm, up across back to the right shoulder and down across the chest, under the left breast. • These turns repeated.
  • 18. T BANDAGE • T bandage is t shaped, consisting of two strips of flannel, about 4 inches wide, stitched together in the form of a T. • The horizontal strip (long) is passed round the body and vertical strip is passed up between the legs. • It is then pinned to horizontal strip. 1. Any rectal dressing. 2. Perineal dressing. 3. Used to hold a perineal pad in place for incontinent or menstruating female client. 4. Hydrocele
  • 19. Many tail bandage • Many tail bandage – It is a bandage which consist of a number of strips or tails of cotton material, four to six inches wide and of sufficient length to encircle the part (8 inches) The center band of bandage is placed under the patient’s back, applied from below upwards. One tail being brought across the body at a time and held in position by a tail from the opposite side. All the remaining tails should be applied as the first tail. The last tail is brought obliquely downwards and secured with a safety pin.
  • 20. TRANSPORTATION OF INJURED General principles of safe transportation of injured person 1. Never move an injured unless a help is not readily available. 2. Leave casuality undisturbed send for help & provide first aid on the spot 3. Move the fried casualty as soon as possible without harming yourself from fire, falling debris & poisonous gases.
  • 21. CONTI.. • 4. Method of transport depends on a. The nature and severity of injury b. The number of helpers. c. Facilities. d. Te casualty’s build e. Distance to be covered f. Route to be travelled
  • 22. CONTI.. • 1. Never attempt to move a seriously injured casuality on your own, instead arrange for an ambulance. • 2. Whenever possible the positon in which the casualty is found or has been placed should not be changed & the general condition watched carefully throughout.
  • 23. Aim to transport • To enable the casualty to reach the destination without detoriation or discomfort.
  • 24. Various one man method of transport • Carrying in hand or cradle- this can be done in less weight or in a child carrying minor wound. the injured person should be carried from the below of shoulder in one hand and the knee with hands. • Human crutch- In this, first aider himself stands near the injured holding his waist clothes support, Lift him with his another hand and pt around the first aids neck and take hi by support. The casualty may be given additional support if he is conscious with a walking stick or staff.
  • 25. Fireman’s Lift • In this keep the injured person standing . Hold one of his hand and keep your other hand under the two legs at the knee area. • Hold one of the leg over the knee and carry him on your back or make the injured person sit on the same height. • bend before him keeping your back at his face. now ask him to fold his legs around your waist and hands around your shoulders and carry him slowly. It is also called as PICK A _ BACK. • This method is used to move a conscious or unconscious child or a light weight adult when you need to help a hand free.
  • 26. Principle of lifting of casualty • To lift the casualty use most powerful muscles of your body ( the thigh hip and shoulder muscles) • - The leg should be kept as close to your body as possible. - Keep your back straight and head erect & bend at knees and hold the casualty close to your body using your shoulders to support the leg. - Use whole hand to strengthen the grip. • - If it is too heavy gently slowly slide the casualty without injuring yourself and present the casualty more damage to the injured area.
  • 27. Two man casualty carrier • Four handed seat- both the helper form a chair type seat by catching wach adult wrist . Both helpers catch the wrist with the left wrist of othe radn vice versa.After forming a seat the helpers sit behind the injured person and ask him to sit and put both of his hands around the two man helpers.Now the helper towards the right hand, should start with the right foot and the left helper should start with the left foot . this is usually done in conscious casualty.
  • 28. • Two handed seat- This method is used to carry a casualty who is unable to assist the bearers or if his hand is fractured and cannot hold the helpers on its own.Both the helpers face are towards each other. Hold the casualty by one hand from the chestline. Now they lift him slightly and catch each other sfingers by inserting hands from the middle portion of his thighs. The left side helpers keep his palms towards the upper side and the right side helpers should keep his palm towards the downside by forming shape of hook with the help of fingers. Both should catch a handkerchief or some clothe tightly. Now , both the helpers should start walking slowly without passing the other under the middleof the thigh and grasp each others wrists. Rise together r step off with the outside feet and walk with ordinary pace
  • 29. • For and a ft carry- Do not use if you cannot grasp casualty wrists. Supporting the casualty on both sides • - Chair method • - A casualty carried in wheel chair • - Blanket Lift • - Improvised method
  • 30. Types of stretchers • 1. Standard stretchers • 2. Closing the stratchers • 3. The scoop or orthopaedic stretcher • 4. Utila folding stretcher • 5. Pole & canvas stretcher • 6. Neil Robertson Stretcher • 7. Improvised stretchers
  • 31. how to load a stretcher • 5 people required, 4 to lift the injured and 1 to move the stretcher. • Fold the canvas sheet and make three complete folds from the top and four from the bottom. • Slide the folded canvas under the casualty through the hollow of his back and lift the injured.
  • 32. steps of blanket lift 1. Two bearer’s should stand facing each other on either side of casualty’s trunk and the two face each other at his lower limbs. 2. The two edges of the blanket may be rolled tightly up, against his side. 3. With back straight, squat and grasp the blanket with your palms downwards and fingers at the inner side of the rolled blanket edge. 4. Then carefully load the casualty on the stretcher.
  • 33. Manual lift for a fractured spine. • Do not move the casualty unless absolutely necessary. • The 5 helpers, 3 on one side and 2 on other side, kneel. • The team of 2 should place their arms on the casualty‘s far side. • They turn the casualty towards them, using log roll. • The team of 2 holders will insert their arms under the casualty between helpers 2 & 4 and 4& 6.
  • 34. Technique of loading and unloading ambulance. • 4 people, 1 inside the ambulance, other 3 one on either side of the stretcher, one at the end will load the ambulance. • 1 bearer takes the hold of the handles at the back and another at head. The bearer at the back gently withdraws the stretcher, others will support the injured and unload the ambulance.
  • 35. CARDIO-PULMONARY RESUSCITATION • Definition :- “CARDIO-PULMONARY RESUSCITATION is a series of first aid procedures, including recognition and treatment of circulatory and respiratory arrest, capable of maintaining life until advance life support is available.”
  • 36. Schafer method • It is prone pressure method of artificial respiration in which the victim is placed face downward pressure then being rhythmically applied with hands to the lower part of thorax. the first aider kneels on both knee just below victims hip joint then place his hand of the loin causality, one on each side then the backbone with wrist almost touching and thumb apart. Now the first aider has to lean slowly forwarded without banding elbow and knee for allow the weight to communicated loin of the patient. This results compress abdomen against the ground and up against diaphragm. Air is thus forced out of lungs and expiration. Now the first aider will release the pressure by doing so abdominal organs will fall back and diaphragm will drop and induce inspiration. This two faces taken 5 seconds 12 times in minute.
  • 37. Sylvester method • it is a method of artificial respiration in which the subject is laid on his /her back and air is expelled from lungs by pressing the arm over the chest and fresh air drawn in by putting the arm above the head. • place casualty on firm surface clear the mouth beneath shoulders to raise them sufficiently for head to be tilted back in open airway position. Kneel at casualty head grasp the wrist ad cross them over on the lower chest keeping them lower clear of abdomen. Even pressure with the holder nelson method for 2 seconds. Release the pressure, after 4 sequences check for heart beat if normal continue method until breathing restore