7. 7
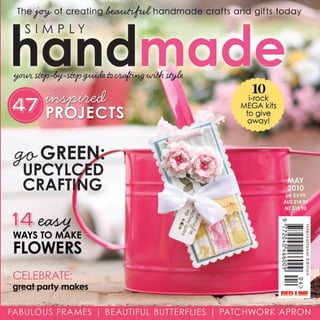
4......................On the Cover
8.....................Editor’s Letter
11........................Giveaways
66.....................Subscriptions
Sew your fabric scraps together to make a one-of-a-kind
patchwork apron a little girl will love.
Create cheery, sewing-optional banners (in felt or fabric)
for any occasion.
16
33
40
50
68
84
90
102
118
Bloom & Grow
1-2-3: Banners to Celebrate
Springtime Décor
You've Been Framed!
Birthday
How It’s Made: Patchwork Apron
Going Green
Boutique
Inside out
8. 8
editor’s
l e t t e r
In THE coming months we will move from the chilliness
of March into the warm beginnings of Summer. The flowers
are starting to bloom, with the trees sprouting leaves, the
first buds burst to blossom. This issue is packed with projects
that feel like the freshness of spring!
We have birds, butterflies and felt flowers a plenty! If you
love flowers then check out page 20 and create your own
sumptuous bouquet. If birds are your passion, the vintage
bird in a jar on page 44 will delight you. We just absolutely
LOVE the butterfly collection frame on page 50. There is so
much to make that I am sure that like me you will be raring
to create!
We would like to see what you have been making and
share it with our readers, email your projects to michelle.
grant@redlinepublications.co.uk
Happy springtime,
Michelle
"Marking
the change of
seasons is good
for our souls . . ."
9.
10.
11. Simply Handmade are pleased to be
able to offer an amazing giveaway from
Imaginisce. The fabulous new i-rock tool will
hit the shelves in June – be amongst the first
to get one by entering this give away. We
have ten of these wonderful tools to give
away along with an amazing creative kit to
get you started. To find out more about the
beautiful ranges by Imaginisce check out
www.imaginisce.co.uk
The Prize
i-rock tool
i-rock Hot Rocks Compact
i-rock Stencils Kit
i-rock Glam Rocks
To Love and Cherish Paper kit
To Enter
Send an email to handmade@
redlinepublications.co.uk with your name,
postcode and contact number. You will
be entered into the free prize draw with
a chance of winning the great goodies
donated by this issue’s sponsor.
Terms and conditions
1. To enter you must provide your name, email and mobile number via email to handmade@redlinepublications.co.uk. You
must be a resident in the UK, Australia or New Zealand and be 18 years old or over. 2. Multiple entries will be accepted and
entered in to the prize draw. 3. Prize draw to take place on 1st June 2010. Entries received after that date will not be entered.
4. You will be notified if you have been successful via email and then the sponsor will send you the items that you have won.
5. The prizes are non-transferable and no cash alternative will be offered. 6. Redline Publications Ltd cannot accept
responsibility for entries lost or delayed in transmission whether by text, email or otherwise. Under no circumstances Redline
Publications be for any losses, damages, costs or expenses arising from or in any way connected with any errors, defects,
interruptions, malfunctions or delays in the prize draw or any prize connected with the draw excludes liability, to the fullest
extent permitted by law for any loss or damage caused to the winner and/or companion arising out of this prize. 7. Entry into
the competition signifies acceptance of these rules. Redline Publications Ltd reserves the right to amend competition terms at
any time. These terms will be governed by English law.
Giveaways
over£600
worthof
prizesto
giveaway!
12. 12
This issue we
are bringing you
some more of our
favourites. If you
have a ‘thing
you love’ then
let us know and
we can feature it
here. michelle.
grant@redline
publications.
co.uk
things we love...
1 As a fan of all tools and gadgets we were keen
to get our hands on the fantastic i-top tool by
Imaginsce. The tool makes customised brads, the
perfect way to create embellishments that match
you projects perfectly. The tool can be used with
paper, fabric, photos and much more. The i-top tool
can also create customised magnets too!
The tool is easy to use and the punches are an ideal
extra to make the whole process less fiddly. Visit the
website and check out the tutorials and the idea
gallery to see the beautiful projects that you can
create with your i-top. www.imaginsce.com
2 We just love the beautiful
vintage bling by Bazzill
Basics. The favourite amongst
scrapbookers for cardstock
Bazzill continue to diversify
their lines. The vintage buttons
are an ideal element to adorn
any project, everything from a
knitted jumper to a scrapbook
album. With 12 different
varieties to choose from you
will be spoiled for choice! www.
bazzillbasics.com
13. 13
3 Copic marker pens are a must-
have for any serious crafter who likes
colouring – especially rubber stamping
enthusiasts! The markers are alcohol-based,
fast drying and acid-free. Better still, the colours
can be mixed on the surface, or layered over
each other for professional blending. Traditionally
used by fine artists, the pens are becoming a
favourite for crafters. With such a comprehensive colour
choice they really do have every colour you could ever want!
If you want professional looking coloured projects these are the
pens for you. Also because they are alcohol based they will dry
on almost any surface. www.copic.com
4 We really love all the gorgeous shabby chic vintage items in the lines by Jenni
Bowlin Studio. The favourite has to be these cute and versatile bingo cards. With over 40
different designs you will be able to find one that matches your project perfectly. They
lend themselves well to being altered and embellished. The larger ones are sold singly
and measure 5”x7”, the minis come in sets and measure 2.5”x3.5”. If you like Jenni’s look
why not also check out her monthly kits. www.jennibowlin.com
We would love
to show some of
your favourite
finds, bargains
and treasures.
Why not email us
and tell us what
you have found!
handmade@
redline
publications.
co.uk
14. 14
Spring really is here! Whilst blog-watching this month, flowers is everywhere. They vary in design and are
being made from a real mix of materials, from paper to fabric, to cupcake cases and old sweatshirts!
The flowers created are suitable for so many projects from fashion to home decor and everything in between.
1 Stephanie Ackerman has been
inspiring us all with distressed
paper roses.
www. homegrownhospitality.typepad.
com
2 Deena Ziegler has been jazzing
up clothes with simple felt flowers,
buttons and sequins.
www.deenaziegler.typepad.com
3 Wendy Vecchi has been
creating beautiful grunge board
foliage with her lovely stamps.
www.studio490art.blogspot.com
4 Tim Holtz has been making
quick and easy canvas flowers
with the new Distress Inks.
www.timholtz.typepad.com
5 Emma Trout has been altering
and dressing up the ‘color me
crazy’ range of flowers from
Petaloo.
www.scrapsofmymind.blogspot.com
TOP trends
See page 20 for our tutorial
on how to make your own
handmade flower.
1
2
4
5
3
15.
16. 16
Flower Wall Hanging
by courtney kelley
Bloom & Grow Anything and everything to do with flowers, from stamped florals
to altered flower pots, from appliquéd roses to wall art, felt/ribbon
flowers, and everything in between.
17. 17
Hanging is 8 x 6”
Patterned paper: Studio
Calico; Staple, paint:
Making Memories; Hemp
cord: DMC; Fabric:
Moda; Buttons: Autumn
Leaves; Die cut ticket:
Jenni Bowlin Studio;
Stamps: Prima; Ink:
Ranger; Poly-fill, beads,
hole punch: Craft supply;
Wooden flower: Plaid;
Other: Sand paper
1 Cover each petal with paper by
spraying the petal with adhesive, setting
patterned paper on top, smoothing out
the bubbles then cutting around the petal
with a sharp knife. Sand the edges down
and ink them brown.
2 Stamp “bingo” and a notebook pattern
on the petals using a light-coloured ink.
3 Hand cut an oval from patterned
fabric; stitch the oval to a cardstock oval
the same size. Before stitching all the way
around, stuff it with poly-fill.
4 Stitch two buttons to the middle of the
fabric oval, then glue the entire oval piece
to the centre of the flower.
5 Paint wooden beads and string them
onto hemp cord, tying knots around each
grouping. Staple a die cut ticket onto the
hemp cord between some of the beads.
6 Punch a hole on both sides of the flower
then knot each end of the hemp cord
through the holes to create a hanging.
This hanging is
the perfect size
for a girl’s room
door hanger – for
personalization,
you can swap out
the buttons with
a name tag.
19. 19
1 Cover a piece of chipboard with
white cardstock and die cut it into a
scalloped tag; ink the edges.
2 Mat a floral fabric block on blue
cardstock, then attach it to the
scalloped cardstock tag.
3 Stitch three ¾” wide strips of
patterned fabrics onto the bottom of
the floral fabric piece and place die cut
scalloped-edge felt strips at the top of
the fabric strips.
4 Stamp leaves and stems on the top of
the floral fabric piece.
Leave this hanger
out after the season
ends; its pretty
colour scheme and
cheery flowers
will bring a
bright spot to
your year-
round décor.
Card is 3 x 6 ¼”
Cardstock: Bazzill Basics, The Paper Company; Ribbon: Michaels; String: Papertrey Ink; Felt: Lupin.etsy.com;
Fabric: Fabric supply; Chipboard mat: Craft supply; Pearls, jewels: Kaisercraft; Stamps: Autumn Leaves
(leaves, stem), Papertrey Ink (sentiment); Ink: Tsukineko; Die cut machine: Cuttlebug by Provo Craft flower
dies by Provo Craft and Sizzix, Small Tag die by Sizzix, scalloped tag die by Spellbinders (die cut from felt)
5 Layer concentric flowers die cut
from felt and pearls on the tops of
the flower stems.
6 Knot ribbon around the middle of
the card and tie the ends in a bow.
7 Die cut a tag from cream
cardstock, stamp a sentiment on
the tag, embellish the sentiment with
jewels and tie the tag to the ribbon
bow using string.
8 To finish, thread ribbon loops
through the top of the card to make
a hanging.
21. 21
Box is 3 ¼ x 2 ½”
Box: Cough drops container; Cardstock: Prism; Ribbon: American Crafts; Flowers: Prima; Fabric:
FabricLand; String: We R Memory Keepers; Acrylic tag: Tim Holtz; Stamps: Cornish Heritage
Farms; Ink: StazOn; Glitter spray: Glimmer Mist by Tattered Angels; Clear glaze: Glossy Accents
by Ranger; Corner rounder: Martha Stewart Crafts
If you smudge
your stamping
or don’t get
the placement
right on your
first try, you
can remove the
ink with StazOn
stamp cleaner and
restamp.
1 Stamp a script background on the lid of
a small white box using permanent ink,
then stamp a quotation on the inside
of the box.
2 Adhere a cluster of leaves to the
left side of the box lid and add a fabric
flower to the top of the cluster.
3 Stamp "Mother" on a piece of green
cardstock, adhere it to the back of an
acrylic tag using a clear glaze; trim the
excess and tie to the flower using string.
4 To finish, glue ribbon around the edge of
the box.
BOX
22. 1
32
22
1 Cut white cotton into strips 1 ½” wide and
about 3-4’ long. Spritz all over with a glitter
spray, like Glimmer Mist by Tattered Angels.
2 Fold the fabric in half, wrong sides
together, and press.
3 Starting at one end, roll the fabric up.
Bunch it in some spots as you go to add
variety.
4 Stab-stitch the raw edges together at the
bottom until the rose is held together securely.
You can change the
intensity of the colour
by adjusting how much
mist you spray on.
FLOWER
23. 5
6
4
23
5 Sew a running stitch along one edge of a
1 ½ x 8 ½” piece of velvet ribbon. Pull tight
to form a circle (you’ll have an opening in
the middle).
6 Hot glue a circle of coordinating felt on
the wrong side of the ribbon to cover the
opening.
To coordinate your circle
of felt to the flower,
simply spray white felt
with the same shade of
Glimmer Mist.
7 Adjust the “petals” of the rose to get it
looking how you want, then hot glue or sew it
in place on the right side of the ribbon.
25. 25
Seal the edges
of your flower
petals with a
clear glaze, or
by heating them
with a flame or
embossing gun.
26. 26
Flowers are about 5 ½” across
Headband: Goody; Satin: Fabric supply; Felt,
beads: Craft supply
1 Cut 4-6 concentric circles from satin,
with the largest being about 5 ½”.
2 Using a hand-held lighter (or candle
flame, or heat embossing gun), heat
the edges of each circle until they melt
slightly and curl.
3 Starting with the base (largest) circle,
hot glue the circles together, large to
small.
1
32
27. 27
Glue a felt circle to the back of
the base flower (either before or
after gluing it to the headband)
to give the flower more support.
4 Glue rhinestones or beads to the
centre of the topmost flower.
5 Hot glue the flower to a headband.
5
4
29. 29
To get the placement of your flower
just right, put the headband on,
decide where you want the flower,
then take the headband off and hot
glue the flower in place.
30. 1
30
Headband is 5 ¼ x 5 ¾”
Patterned paper, flourish transparency, decorative
brad, crocheted flower, felt trim: GCD Studios;
Headband: Beauty supply
1 Make ¾” angled pleats on a 3” wide strip
of floral paper to create a circle; glue a
punched floral paper circle to the back
of the circle for stability.
2 Distress the edges of the paper circle
by folding up the outside edge of each
pleat.
31. 3
4
2
31
3 Set a butterfly brad through the centre
of a crocheted flower.
4 Layer a flourish transparency and the
crocheted flower in the centre of the
pleated paper flower.
5 Measure and cut a piece of felt trim as long
as a headband, back it with patterned paper
then hot glue it to the headband.
6 Hot glue the flower embellishment to the
headband.
32.
33. 33
If you’re looking for a way to set an extra-special mood for someone’s
birthday, this is it! A sweet triangle banner will lend a festive air to any
room; make several and hang them across the ceiling, or simply attach
them to a shelf or mantle. Keep it simple with felt triangles, or go all out
with fabric and topstitching – turn the page to see which version best
suits you.
by Kate ryskamp
Banners are 6 x 8 ½”
Felt, fabric: Fabric supply; Ric rac: Close To My Heart, vintage; Iron-on adhesive: HeatnBond;
Other: Sewing machine, thread
BANNERS
TO
CELEBRATE
34. 34
1 Cut triangles from sheets of felt, using the template on page 117.
2 Use tacky glue to adhere the felt triangles to ric rac or other ribbon.
1
VERSION 1: Felt Banner
35. 35
2
1
Add big felt letters to spell
someone’s name if it’s their
birthday, or any other sentiment
you want to put front and centre.
36. 36
1 Cut a rectangle of HeatnBond, then a piece of decorative fabric just larger, and then
a piece of coordinating lining fabric just larger than that. (Keeping the fabric larger than
the fusible interfacing will help keep the adhesive from getting on your iron.)
2 Follow the HeatnBond or iron-on adhesive instructions and iron the three pieces together.
3 Cut out triangles from the layered pieces, either freehand or using a template.
4 Stitch along a piece of ric rac, catching the triangles as you go. Pin the triangles in place
before you stitch if you need to.
2
VERSION 2: Fused Fabric Banner
37. 37
2
43
1
To make this a no-sew banner,
simply use tacky glue to adhere
the triangles to the ric rac.
38. 38
1 Cut triangles from decorative fabric and lining fabric.
2 Place right sides together and stitch around the triangle, leaving a 1 ½” opening
along the top edge.
3 Clip the tip of the triangle and turn right side out; press.
4 Topstitch around the two long edges of the triangle.
5 Stitch along a piece of ric rac, catching the triangles as you go. (Pin the triangles
in place before you stitch if you need to.)
3
VERSION 3: Topstitched Fabric Banner
This pretty fabric banner is
durable and long-lasting.
If both sides will be visible,
forego the lining fabric
and sew decorative fabric
triangles together.
41. 41
Frames are 4 ¼” square
Frames: Michaels; Nest, eggs: Floralsupply.com; Patterned paper:
Jenni Bowlin Studio; Metal keys, twill: Vintage; Velvet ribbon: Maya
Road; Flowers: Prima; Floss: DMC; Buttons: Making Memories; Die
cut tags: K & Company; Ink: Ranger; Paint: Kaisercraft
1 Remove the glass and frame backings from
each of three gold frames. Paint the frames with
one coat of white paint.
2 Cut out sheet music paper to fit the frames, and glue
to the backings.
3 Arrange flowers, keys, ribbon, or a nest and eggs in
the centre of each of the papers.
4 Ink the edges of three die cut sentiment tags and tuck
them into each embellishment.
5 Put the frame pieces back together to finish.
When the paint
is almost dry, use
your finger to rub
some of it off; the
original colour
will show through,
giving your
frames a vintage
look.
43. 43
Box is 14 ¾ x 5 x 6”
Box: Michaels; Patterned paper, chipboard (flowers, letters, tag), journaling
spots, glitter: Pink Paislee; Flowers: Prima; Jewels: Martha Stewart Crafts;
Paint: Plaid; Glitter glue: Stickles by Ranger; Adhesive machine: Xyron 900;
Dowels, moss, fluffy chicks, floral foam: Craft supply
This box would make a lovely table
centrepiece for Easter dinner, but
is also wonderful for everyday
springtime décor.
1 Paint a wooden CD container
using cream paint; let dry and
place floral foam and Spanish
moss inside.
2 Paint chipboard flowers using
a variety of springtime colours.
Sprinkle clear glitter on the paint
before it dries. Once dry, apply
a clear glaze over the glittered
flowers. Repeat the glittering and
glazing to create a thick coat.
3 Glue the flowers to the tips
of several dowels, glue glittered
chipboard leaves to the middle
of the dowels, and set the dowels
deep inside the floral foam.
4 Cover a large chipboard label
with woodgrain paper; cut off the
excess with a craft knife. Embellish
the border with jewels and a line
of blue glitter glue.
5 Add a chipboard tag,
chipboard letters, a die cut tag
embellished with glitter glue, and
flowers to the large label.
6 Glue the entire piece to
the front of the box to finish.
45. 45
1 Wash and dry an empty jam jar.
2 Cut out botanical and bird motifs from patterned paper; add
glitter glue to the pieces and let dry.
3 Glue a strip of cardboard to the back of the bird paper piece,
allowing the piece to stand in the jar without gluing it down.
4 Glue the remaining paper pieces to the outside of the jar.
5 Cut two flowers, freehand, from vintage sheet music and layer
on top of the jar. Cut two 2” circles from patterned paper, fold
each in fourths and glue the middle creases to the top of the jar.
Use your fingers to press and puff the flowers when the glue has
dried. Add a small millinery flower to the centre.
6 Embellish the edges of the jar lid with ribbon and trim.
Jar is 2 ½ x 3 ½”
Jar: Craft supply; Patterned paper, ribbon: Webster’s Pages; Flowers:
Prima; Glitter glue: Stickles by Ranger; Other: Vintage sheet music paper
This jar was
inspired by
Emeline’s childhood
experience of
catching butterflies
in jars so she could
examine them
close-up. With this
project, you don’t
need to worry about
letting anything
go… or poking
holes in the lid.
47. 47
1 Squeeze some pink alcohol ink onto an
acrylic butterfly, let dry.
2 Hold the butterfly with pliers (or a similar
tool) and heat it up with an embossing gun.
3 Bend the butterfly wings while the acrylic is
warm; let cool.
4 Punch a butterfly from patterned paper
(or use a die cut), bend the wings and glue
to the acrylic butterfly. Add jewels for the
Frame is 9 ¼ x 11”
Frame, ribbon: Scarlet Lime; Patterned paper: Kaisercraft; Lace: Craft supply; Acrylic butterflies: Pageframe Designs;
Jewels: Heidi Swapp; Chipboard letters: Doodlebug Design; Ink: Ranger; Glitter spray: Glimmer Mist by Tattered Angels
bodies. Repeat steps 1-4 to create several
butterflies.
5 Spray your frame with coloured glitter
spray; once dry, add a lace bow.
6 Adhere butterfly patterned paper to the
frame backing piece and add “Spring”
letter stickers; replace.
7 Glue the acrylic butterflies to the frame
to finish.
49. 49
Frames are 7 ½” square
Frames: Hobby Lobby;
Patterned paper: Jillibean Soup;
Chipboard birds: Magistical
Memories; Embossing punch:
EK Success; Twigs: Craft supply;
Other: Sandpaper
1 Cut chipboard to fit
inside a frame; cover it
with patterned paper.
2 Punch strips of
patterned paper with a
zigzag punch, bend up
the edges and dab ink on
the bent parts. Adhere the
punched strips to the inside
edges of the frame.
3 Trace a chipboard
bird on the back of a
patterned paper block
and cut it out; attach the
bird paper to the front of
the chipboard bird and
smooth the edges with
sandpaper.
4 Add the bird to the
inside of the frame using
several layers of foam
adhesive.
5 Glue a twig underneath
the bird using a hot glue
gun, then adhere cut out
paper leaves and flowers
to the twig.
Magistical Memories offers
these chipboard birds
attached to chipboard
branches, so if you
don’t want to use
a real twig, you
will still be able to recreate
this adorable project.
50. 50
Butterfly Frame
BY nancy doreen
Framed!You've been We love fixed-up antique frames, framed pieces that
you’ve made, and decorated frames.
51. 51
Nancy says, “I love
the look of classic
butterfly collections,
but I don’t have the
heart to hurt any
actual butterflies. So
I came up with an
easy, harmless way
to make my own
collection using
pretty paper and an
altered frame.”
1 Remove the glass and backing from a frame.
2 Using even strokes, spray paint the frame white. Let the
frame dry thoroughly, and sand over a few places to distress.
3 Spray a coat of crackle paint and let the frame dry.
4 Adhere damask paper to the frame backing, then arrange
cut-out paper butterflies onto the damask paper using foam
adhesive; bend the wings around a paint brush for a pop-out
effect.
5 Trim sentiments from patterned paper (or type up your own)
and glue them below each paper butterfly.
Frame is 12 ¼ x 10 ¼”
Frame: Vintage; Patterned paper: GCD Studios; Spray paint: Color Place;
Other: Sandpaper
53. 53
Frame is 8 x 10”
Frames: Vintage; Patterned paper: Bam Pop; Ribbon,
staples, chipboard letters, paint: Craft supply; Glitter glue:
Stickles by Ranger
1 Find a small frame that fits inside a
larger frame, then paint both using bright
coordinating colours. Let the frames dry.
2 Cut out birds from patterned paper and
detail them with a touch of glitter glue.
3 Cut a piece of bird and cloud paper to
fit the small frame; embellish with gold and
coloured glitter glue.
If you can’t find two frames that fit inside each other, try
painting a single, wide frame two different colours instead.
4 Adhere the cut out birds to the piece of
bird and cloud paper using foam adhesive
and place inside the frame; place “fly”
chipboard letters on the bottom right
corner.
5 Take the backing out of the large frame,
set the smaller frame inside the large
frame, and replace the large frame’s
backing.
6 Staple ribbon to a square scrap of
chipboard and tape it securely to the
back of the frame to hang.
idea
55. 55
Frame is 16 ½ x 20 ½”
Frame: Ikea; Patterned paper: My Mind’s Eye; Die cut machine:
Silhouette by QuicKutz; Poster paper: Craft supply; Permanent adhesive:
Xyron 5” Creative Station
1 Choose a few coordinating
papers to die cut letters from.
2 Die cut the letters “Together
Forever” from your chosen papers
using a Silhouette and a font you
like.
3 Apply adhesive to the letters
using a Xyron Creative Station,
and place the letters on a piece
of posterboard cut to fit inside a
frame. Use a ruler to keep your
letters straight.
4 Place the posterboard paper
inside the frame and hang.
Choose any word or short
phrase you love – a name
would look great, too.
Die cut 2-3 versions of
each letter from different
papers. This will give you
options to play around
with as you go, and allow
you to make an extra
poster to give as a gift.
57. 57
1 Paint a frame turquoise,
let dry, and adhere a
piece of floral paper to
the back of the frame.
2 Stack several small
cupcake liners together,
fringe the edges of the
liners with scissors, and
place a button in the
centre; glue the entire
stack to the right side of
the frame.
3 Embellish the edges
of the frame with buttons,
then glue a chipboard
deer to the inside of
the frame.
Frame is 5 ¼ x 7 ½”
Frame, cupcake liners: Craft supply; Patterned paper, chipboard deer: Sassafras;
Buttons: Vintage; Paint: Americana
Bree loves to up-cycle frames from vintage and thrift
stores – as you go thrifting, look at the shape of things
and try to imagine them in a different colour or finish.
tip:
Accenting a frame
is a perfect way to
show off those one-
of-a-kind buttons.
59. 59
Kate created the heart closure on
this frame by trimming a coat
hanger with wire cutters and
bending it into a heart with pliers.
60. 60
Frame is 7 x 6”
Frame, lace, spray
paint, batting: Craft
supply; Cardstock,
embellishments:
Close To My Heart;
Fabric: Moda; Other:
Metal hanger
1 Spray paint a vintage frame and let it dry.
2 Cut out hearts from decorative fabric and batting.
3 Sandwich each of the hearts cut from batting between two fabric hearts, right sides facing
out. Pin in place and stitch together around the edges.
4 Make 5-7 hearts and line them up. Overlap each heart slightly at the edges and zigzag stitch
them together.
5 Glue a photo to each heart and add a small embellishment and several strips of journaling.
Sew on some scrunched up vintage lace for added texture.
6 Once you have finished embellishing your strip of hearts, insert a piece of cardstock into your
61. 61
painted frame. Glue the left heart into the centre of the frame. Now when you fold up the strip
of hearts (accordion style), you should have a stack of hearts in the centre of your frame.
7 Bend a hanger into a heart shape using wire cutters and pliers. Use another part of the
hanger to bend and form a small hook.
8 Drill a hole on the left side of the frame to insert the hook. Bend the hanger on the backside
and glue in place.
9 To keep the wire heart in place on the right side of the frame, sew a long skinny tube of fabric
and run a small strip of elastic through it. Pull it through the cardstock on the right side, loop it
through the wire heart and secure on the back with glue or tape.
10 Pull the wire heart over and hold in place with the hook.
63. 63
1 Paint a frame with two layers of white paint; allow the
paint to dry between coats.
2 Place a chipboard frame and a chipboard flourish on the
glass of the frame.
3 Arrange number stickers around the border of the frame,
then spray sealant on the stickers to make the artwork more
permanent.
Frame is 5 ¼ x 7”
Frame: Craft supply; Letter stickers, chipboard (flourish, frame): American
Crafts; Paint: Making Memories; Sealant: Claudine Hellmuth
This gender-neutral
frame would fit right
in with just about
any child’s room
décor, and would
be a cute way to
incorporate a number
or letter motif.
take
note
65. 65
Frame is 11 ½” square
Frame: Ikea; Patterned paper: Cosmo
Cricket, Daisy D's; Chipboard: Cosmo
Cricket (clothesline), Jillibean Soup
(corrugated letters), Maya Road
(letters), Pink Paislee (scroll); Paint:
Making Memories; Spray paint: Maya
Road; Clothespins, flashcard: Vintage
1 Remove the glass and backing
from a black frame, distress the
edges by sanding, and apply a
few strokes of red acrylic paint
around the edges.
2 Cover the bottom half of the
frame backing with clothesline
paper and the top half with a
vintage flashcard.
3 Lightly sand the black
corrugated chipboard letters,
then arrange them with red
painted chipboard letters to
spell “Somebody please do the
laundry.”
4 Trace a chipboard scroll on
the back of gingham paper, cut
out and glue to the chipboard
scroll.
5 Add a chipboard clothesline
to the scroll.
6 Hot glue clothespins
to opposite sides of
the frame and clip the
chipboard scroll in place.
7 Replace the frame
backing and hang.
The positive and negative
chipboard letters of
"laundry" aren't
just cutely chaotic,
they also stretch your
crafting pounds.
66. 68
Cupcake Birthday
by KATE RYSKAMP
BirthdayParty decorations, special gifts, invitations, cards, and thank yous.
67. Card is 5 x 6¼”
Patterned paper: 7 Gypsies, American Crafts, Close To My Heart, Heidi Grace Designs, Scenic Route Paper
Co.; Buttons: Vintage; Brads, flowers, stickers, stamps, ink: Close To My Heart; Ribbon: Close To My Heart, craft
supply; Fabric: Marcus Fabrics; Felt, popsicle sticks: Craft supply; Glitter glue: Stickles by Ranger; Punches:
Fiskars, Marvy Uchida
1 Using the templates on page 81,
cut the base and cupcake bottom
from cardstock and the frosting from
patterned paper.
2 Fold the base back at the bottom
and top, as indicated by the dashed
lines.
3 Print party information and adhere it
to the base, between the two folds.
4 Emboss lines into the bottom of the
cupcake front. Embellish the top with
glitter glue, a flower, a tag, and a stick
pin.
5 Glue the cupcake bottom to the
bottom fold of the base and the frosting
to the top fold of the base. Your card
will open frosting first, then the bottom
opens down to reveal the base piece
and the party info.
69
Cupcake Card:
69. Crown is 4 ½” tall
71
1 Fold one sheet of craft felt in half.
2 Trace the crown shape (using the
template on page 80) on the folded felt
and cut out both layers.
3 Repeat so you have two crown
pieces.
4 Layer the crowns together and
topstitch around the edges, twice if
desired.
For a fun gathering
activity, make crowns for
each guest and let them
glue jewels and sequins
to their own crowns.
take
note
Crown: 5 Add buttons, jewels, and ribbon to
the crown.
6 Measure on a child’s head and add
3-5” elastic lace to the back; stitch
around both sides.
71. 73
For
step-by-step
instructions
on how to
make this
colourful
birthday
banner, go
to page 42.
Cupcake toppers:
Toppers are 2” across
1 Create the topper bases by punching
scalloped circles from coordinating papers.
2 Punch smaller circles to add another
layer.
3 Embellish the centres with stamps, jewels,
brads, and flowers.
4 Adhere popsicle sticks to the back of the
bases.
75. 77
Cups are 3 ¼ x 2”
Cupcake wrapper templates: The Cutting Café; Cardstock: Bazzill Basics, Papertrey Ink; Patterned paper: Doodlebug
Design; Ribbon: Papertrey Ink, Michaels; Jewels: 3 Birds Design, Doodlebug Design; Letter stickers: Adornit; Label stamp, ink:
Papertrey Ink; Scalloped scissors: Fiskars (large), Provo Craft (small); Die cut machine: Cuttlebug by Provo Craft (Nestabilities
Labels One by Spellbinders); Clothespins: Loew Cornell; Party cups: Wilton
1 Download a cupcake wrapper template
from thecuttingcafe.typepad.com (click on
“Cupcake Wrappers” on the left menu). Print
the inside wrapper on the back of patterned
paper and the outside wrapper on the back
of cardstock. Cut out, using scalloped scissors
for the top edges.
2 Layer the two wrappers and stitch them
together, just below the scalloped edge of
the cardstock wrapper.
These cups can do
double duty at many
occasions – filled
with a sweet treat,
they make a perfect
place card to let
your guests know
where to sit; then
they can take the
cups home as
party favours
afterward.
3 Adhere the stitched wrapper around a
party cup; the edges will overlap.
4 Wrap ribbon around the middle of the cup
and tie the ribbon into a knot.
5 Die cut a label from white cardstock, stamp
a label in the middle and add a name with
letter stickers. Glue a jewel to the top.
6 Fasten the label to the top of the treat cup
using a mini clothespin.
7 Fill up the cup with your favourite treat.
77. 79
1 Take apart a chipboard album and use each page as an
invitation.
2 Cover one side of the invitation with floral paper and doodle
around the border. Print party information, cut into strips, and
adhere.
3 Add flourish paper to the bottom of the other side and
doodle around the border.
4 Cut a frosting-shaped piece of polka dot paper, doodle
around the border, and adhere it to the top of the invitation.
5 Apply letter stickers spelling the recipient’s name at the
bottom of the frosting paper.
6 Srunch up the middle of a rectangle of tulle, tie it with string,
and glue it to the top of the invitation; glue a ballerina in the
middle.
Invitations are 3 ½ x 3 ¾
Chipboard cupcake album: Maya Road; Patterned paper: My Mind's Eye, Pink Paislee;
Tulle: Fabric supply; Ballerina charms: Cake supply; Letter stickers: Pink Paislee; Pens:
Sharpie, Uni-Ball Signo; Decorative scissors: Fiskars
The front of
this invitation
is so adorable
it could
double as
room décor for
the recipients;
just add some
ribbon to
hang.
take
note
79. 81
Cards are 4 x 5 ½”
Cardstock: Core’dinations, Jillibean Soup; Patterned paper:
Jillibean Soup; Brads: American Crafts, Making Memories;
Cupcake stamp: Stampin’ Up! (Simple Birthday Thanks); Ink:
Tsukineko; Die cut machine: Wizard by Spellbinders (Sizzix
embossing folders)
1 Cut several note cards from kraft cardstock and
emboss a textured background on them.
2 Stamp a cupcake/note on kraft cardstock, cut it
out, and adhere the piece to the bottom of the note
card.
3 Stamp the cupcake again on patterned paper
and red cardstock; cut out the pieces and set brads
through the frosting. Adhere the pieces on the top of
the sentiment using foam adhesive.
The details on
this card are
darling –
there’s a
little bit of
distressing
on the cherry
to make it look
dimensional
and delicious.
81. 83
Frame is 7 ¾ x 8”,
Card is 4 ¾ x 6 ¾”
Frame: Provo Craft; Cardstock: The
Paper Company; Patterned paper:
Bo Bunny; Floss: DMC; Ribbon:
Michaels; Buttons: Darice; Jewels:
Prima; Stickers: Making Memories,
Scenic Route Paper Co.; Stamps: Bo
Bunny, Close To My Heart; Glitter glue:
Stickles by Ranger; Border punch:
Martha Stewart Crafts; Decorative
scissors: Fiskars; Fonts: Lucinda
Handwriting, Monotype Corsiva
Frame
1 Working quickly so it doesn’t dry, apply a thin
coat of decoupage to the front of a wooden
frame and lay facedown on a piece of green
patterned paper. Smooth out any bubbles and
trim the excess (including the window) with a craft
knife.
2 Sand the edges to make them smooth; ink them
brown.
3 Stamp flourishes in brown on the top right and
bottom left corners.
4 Stamp flowers and butterflies on shimmery green
cardstock; cut out. Decorate them with glitter glue.
5 Cluster the stamped pieces over the flourishes,
along with jeweled flourishes and a bow with a
button.
Card
1 Make a card base from kraft cardstock;
round the top right corner.
2 Stamp the same flourishes that you used
on the frame on a block of green patterned
paper.
3 Layer blocks of green paper and plaid
paper, round the top right corners, and
adhere them on the card front.
4 Punch brown paper with a scalloped
border punch and layer two pieces at the
bottom.
5 Tie pink ribbon in a bow around the
bottom and stitch on a button. Stamp and
cut out another butterfly and more flowers
then adhere them on the card below a
sticker sentiment.
Curl the edges of the
flowers and the wings
of the butterflies down
around a thin dowel or
a pencil to give your
stamped pieces more
dimension.
83. Little girls can’t
wait to grow up –
and helping out in the
kitchen is an all-time
favourite grown-up
activity. Help her dress
the part with this darling
patchwork apron,
pieced together with
scraps from your stash
and some bias tape.
Setting the rows at angles
gives the apron a fun
twist; you may just need
to make a matching one
for yourself.
85
84. Patchwork Apron
86
Fabric, bias tape (3 yards): Fabric supply; Other: Scissors,
sewing machine, rotary cutter, pins
This colourful
apron is a great
way to utilize small
pieces of fabric that
you just don't have
the heart to throw
out!
85. 2 3
4
87
1 Cut (49) 3” squares of fabric in various
colours.
2 Place two squares right sides together and
sew down one side with a 3/8” seam. Press the
seams open.
3 Sew another square to one of the squares,
continuing until you have a row. Press all seams
open.
4 Create 1 row of 4, 1 row of 5, 3 rows of 6, and 2
rows of 7.
86. 88
6 7
8
For added durability, quilt along
some of the patchwork lines
before sewing on your bias tape.
Patchwork Apron
5 Sew the rows together in the order pictured on
page 95. Press seams open when you’re done.
6 Trace apron front on your lining fabric and cut.
7 Match up, wrong sides facing, and pin
together.
8 Beginning at one top corner, sew bias tape
around the sides and bottom edges of the apron
(but not across the top).
87. 89
9
11
10
9 Cut a 17 x 3” piece of lining fabric and sew
four squares to each short end. Press seams open.
10 Fold waistband in half, right sides facing, and
sew along the long open end, leaving a space
in the centre open (on the lining fabric), large
enough to fit the apron inside. Turn and press.
11 Trim off the excess fabric at the top of the
apron. Centre the waistband on the front of the
apron (sandwiching the apron inside), pin in
place. Topstitch around the waistband to finish
and enclose the apron front.
88. Going GREEN
90
Things to Do Notebook
BY EMELINE SEET
Beautiful projects that incorporate recycled materials,
whether it’s junk mail, the packaging from your favourite
scrapbook product, or something else.
89. 91
Because the binding
on this notebook is
removable, you can add
more paper bag pages to
this notebook.
Notebook is 4 x 6”
Transparency: Hambly Studios; Paper clip: Craft supply; Stickers: American Crafts, Love,
Elsie, Sassafras; Paint: Making Memories; Corner rounder: Round-It-All by Zutter; Binding
tool: Bind-It-All by Zutter
1 Layer two pieces of cardboard together, round the right corners,
and embellish the front piece of cardboard with a transparency, paint,
a flower embellishment, and stickers.
2 Cut several pages of notebook paper from brown paper bags and
round the right corners of each piece; place the pages between the
cardboard pieces.
3 Use a binding tool to punch holes on the left edge of the notebook,
set a binding wire through the holes, and close the binding wire.
4 Embellish the pages with a tab sticker and a paper clip.
take
note
91. 93
Embellishments are 1” across
Cardstock: Packaging from various products; Book print:
Vintage; Floss: DMC; Buttons: Craft supply; Punches: EK
Success (hearts), Martha Stewart Crafts (starburst)
1 Punch starbursts from product packaging and
hearts from book pages, then adhere them together.
2 Stitch buttons to the middle of the punched hearts.
These embellishments
would look great on
journals, cards, layouts,
magnets, and more. You can
use virtually any scraps you
have from other crafting to
make these.
93. Your past home décor adventures can come in handy –
any leftover fabric or wallpaper samples can easily be
made into fabulous cards.
Card is 6” square
Cardstock: Bazzill Basics; Patterned
paper: My Little Shoebox; Ribbon: May
Arts; String: Martha Stewart Crafts;
Punches: EK Success (scalloped circle),
Stampin’ Up! (border); Wallpaper
samples, book print: Vintage
1 Punch the left edge of a lined
paper block using a notebook
border punch, then stitch it to
the front of a kraft card base.
2 Punch several scalloped
circles from book print paper.
Arrange the circles, a rectangle
of floral wallpaper, and some
lace on the card front and
stitch everything in place.
3 Cut out a bird and flowers
from another piece of
wallpaper and stitch the pieces
to the front of the card.
4 Stitch French knots in the
centre of each of the flowers.
95
95. 97
Turn a thrifted women’s sweater into a cute
pair of baby leggings and a skirt.
For a tutorial on how to add a gusset to the
crotch (very helpful if baby’s still in nappies),
visit our blog (northridgemedia.net/blogs/
simplyhandmade) and click on “Tutorials.”
96. 98
1 3
13
Sweater (women’s medium): Thrift store
Leggings:
1 Lay sweater flat and cut the arms off at the
armpit, straight across (parallel with the cuff),
following the fabric line.
2 Cut approximately 3-4” down on the seam
of each arm.
3 Pin the arms together and serge. This forms
the crotch seam.
Skirt:
1 Lay sweater flat and cut a rectangle through
both front and back layers, approximately 1-2”
in from each side, depending on the size of skirt
you want. You will have two rectangles, with the
bottom edge of the sweater being the bottom
edge of your skirt.
2 Turn right sides together and serge the short
edges together.
97. 99
2 3
64
If you don’t have a
serger, stitch a straight
line to hold the seam
and zigzag stitch the
edges to finish.
3 Cut a strip from the remaining pieces
(above where you just cut, from the back of
the sweater if the front is decorative) that is
about the width of the sweater and 2-3” tall.
Fold in half, wrong sides together. This is your
waistband.
4 Pin the waistband to the top of the skirt so
the open ends face up and line up with the top
of the skirt. The short ends should meet in the
back, overlapping just slightly. You will need to
pleat the skirt as you go.
5 Serge the waistband to the skirt, leaving
about 1-2” open at the back to insert elastic.
Stretch your waistband a bit as you serge
since it is a different length than the skirt.
6 Wrap elastic around the child’s waist,
snug but not stretching. Cut it just to fit and
insert through the waistband. Sew the ends
of the elastic together, making it about ½”
shorter.
7 Serge the waistband closed.
98. 100
Happy Banner
by TERRI DAVENPORT
This corrugated cardboard is from a mailer; what a great way to put it
to good use! And the kraft backdrop would look great with any colour
scheme.
99. 101
Banner is 27 x 9”
Ric rac, hole punch: Craft supply; Floss: DMC; Felt: Kunin; Other: Corrugated cardboard
1 Create a triangle template from scrap cardstock, then use it to cut
five triangles from corrugated cardboard.
2 Cut out “Happy” letters from felt and stitch each letter to a
cardboard triangle using red floss.
3 Punch holes through the top corners of each triangle.
4 Use embroidery floss to stitch along a piece of ric rac then thread
the ric rac through the holes at the top of each triangle to hang.
100. 102
Skull Cozies by ELISA KAMMERDIENER
To create the cozy on the right,
fold the felt side over in step
3 and fold your pieces in half
with felt sides together in step 6.
Boutique You’d see these things on boutique shelves – here,
we walk you through how to make them yourself.
101. 103
Cozy is 3 x 5”
Felt, fabric, button: Fabric supply; Floss: DMC
1 Using the templates on page 117,
cut out felt pieces and blanket stitch
around the edges.
2 Pin a 12 x 3” piece of fabric and a
12 x 3” piece of felt together.
3 On each short end, fold the fabric
side over ½”; fold it over again ½”
and sew it in place with two lines of
stitching. Fold in the end of the pink
felt strip before sewing the back top
border down.
4 Cover a button with your lining fabric.
(If you don’t have a button-covering
tool, look for them online or at craft and
hobby stores; or you can simply use a
regular button.)
5 Stitch a felt skull, a heart, and a
covered button to the felt.
6 Fold the entire piece in half, fabric
sides together, and blanket stitch around
the edges.
103. 105
If you don’t have these
cute tiles, adhere any
small embellishment to
this bracelet, and cover it with
clear glaze to achieve a shiny finish.
Bracelet is 3 ¾ x 1”
Acrylic bracelet: Creative Imaginations;
Tiles: KI Memories
1 Adhere a different tile to each
section of an acrylic bracelet.
105. 107
Tracey couldn’t use magnets on her stainless steel
fridge, so she came up with this project to give
her daughters a place to play with magnets.
106. 108
Magnetic board is 18 x 11 ½”
Cookie sheet, chipboard sheets, paint primer, spray paint: Craft supply; Patterned paper, journaling spots, stickers:
Jillibean Soup; Cookie cutter, present frame: Making Memories; Stick pin: Maya Road; Ribbon: Michaels; Flowers:
Bazzill Basics; Felt: Sassafras; Chipboard: American Crafts, Bo Bunny, Cosmo Cricket, Pink Paislee; Acrylic (arrow, owl):
Clear Scraps; Baubles: Stamping Bella; Jewels: Kaisercraft, Prima; Charms: Melissa Frances, My Little Bit of Whimsy;
Stamps: myStamp BOX, Sassafras, Unity Stamp Company; Ink: StazOn; Embossing powder: Stampendous!; Marker:
Sharpie; Clear glaze: Glossy Accents by Ranger
1, 2
107. 109
Create an entire alphabet by following these steps for each letter:
1 Add a letter sticker or chipboard letter to a small die cut journaling spot or punched shape.
2 Embellish the journaling spot with a charm, jewels, or sticker (something that coordinates with
the letter). 3 Cover the entire journaling spot with clear glaze and let it dry completely. 4 Glue
a chipboard square and a magnet to the back of the journaling spot.
4
3
108. 110
Alter the cookie sheet:
1 Spray paint a metal cookie sheet with white primer, let dry. Spray with a coat of white paint,
adding coats if necessary. 2 Glue several skinny strips of red patterned paper around the
inside edge of a cookie sheet. 3 Stamp a design in green around the bottom edge. 4 Place
the magnets on the cookie sheet to display.
2
43
1
111. 113
Turn the page for a
simple how to, or
search online for
button-making
tutorials. To score
a set of these very
buttons (and a
variety of other
styles), visit Tessa’s
Etsy shop:
tessaann.etsy.com.
112. 114
3
2
4
Buttons are 1" across
Clay: Fimo; Glossy sealant: Craft supply; Other: Parchment
paper, craft knife, embossing tool, awl, paintbrush
1 Punch a 1” circle from cardstock to use
as a button template.
2 Roll your base colour of clay out to
slightly less than 1/8” thickness. Lay the
circle on top and cut around it with a craft
knife. This is your button.
3 Roll blue clay out to the same thickness.
Draw or trace a flower using the fine end of an
embossing tool.
4 Cut out the design using a craft knife.
5 Smooth the edges with your fingers.
6 Follow steps 3-5 to make a green heart.
113. 115
9
5 7
We used Diamond Glaze here,
which works great for decorative
buttons, such as on a purse or bag.
For buttons that you plan to wash,
look for a waterproof sealant.
This is also a fun way to
make pins and hairclips;
just leave off the holes
and glue them to the
appropriate backing.
7 Layer the heart, flower, and button together
and pierce two holes through the centre with
an awl or your embossing tool.
8 Bake the clay according to directions on the
package.
9 Apply clear sealant to the button using a
small paintbrush; let dry.
117. 119
Card is 5” square
Cardstock: Bazzill Basics; Patterned paper:
BasicGrey; Ribbon: Offray; Stamps: Purple
Onion Designs (sentiment), Target (letters);
Punches: BasicGrey (notch), Fiskars (border)
1 Create a tri-fold card from kraft
cardstock.
2 Cover the top flap with floral paper,
then punch the bottom edge of the
top flap using a border punch.
3 Adhere a damask die cut and a
butterfly die cut on the right side of the
top card flap.
4 On the inside portion of the card,
punch notches that will hold the corners
of a gift card.
5 Close the card and wrap polka dot
ribbon around the middle.
6 To finish, stamp a sentiment on the
bottom right corner of the card base.
119. 121
1 Add a lined paper piece to a pink cardstock
block; distress the edges and adhere the entire
piece to a light pink card base.
2 Apply a border rub on and a rub on sentiment to
the bottom of the lined paper piece.
3 Stitch a dimensional heart sticker to pink
cardstock, cut it out, and layer it on the left side of
the card.
4 Mat another lined paper block on pink cardstock,
apply a rub on sentiment and a border rub on to the
top of the lined paper, then adhere the entire piece
to the inside of the card base.
Card is 4 ¼” square
Cardstock:
Core’dinations;
Patterned paper, rub
ons: Little Yellow Bicycle;
Dimensional heart sticker:
American Crafts
121. 123
1 Cut two pieces of tan cardstock into
connected circles, then cut scalloped
circles from polka dot paper and kraft
cardstock.
2 Sandwich the scalloped circle pieces
between the connected circle pieces to
create a card base.
3 Adhere jewels on the border of the
tan circle on the card front.
4 Cover three chipboard flowers with
various patterned papers, add clear
paint to the flowers, and attach them to
the front of the card.
Card is 5 ¼ x 4 ½”
Cardstock: Bazzill Basics; Patterned paper: Cosmo Cricket; Paper flowers, leaf: Prima; Flowers: Handmade
from yarn and floss; Chipboard flowers: ColorBox; Jewels: Darice; Buttons: Favourite Findings, craft supply;
Paint, glitter spray: Shimmerz; Font: Unknown
5 Crochet flowers from yarn and
floss and set them on the chipboard
flowers along with buttons.
6 Tuck a leaf behind the left side of
the large chipboard flower.
7 Print a sentiment on a cream
cardstock strip, stitch around the
border, and adhere the sentiment to
the inside of the card.
8 Spray glitter on paper flowers, then
adhere the flowers and jewels to the
right of the sentiment.
123. Card is 5 ½ x 4 ¼”
Cardstock: Bazzill Basics; Patterned paper, jewels: Doodlebug Design; Transparency: ShortCuts; Stickers: Creative
Imaginations, Doodlebug Design, Making Memories; Border punch: Stampin’ Up!; Corner rounder: EK Success
1 Round the corners of a floral paper block
and attach it to the inside of a transparency
card base.
2 Make a photo corner from cherries paper,
punch the longest edge using a border
punch, and add the photo corner to the
bottom right edge of the card base.
3 Round the top corners of a cream
cardstock piece, apply letter stickers and a
cherries sticker to the centre, and place the
entire piece on the left side of the card.
4 Knot ribbon around the bottom edge of
the cream cardstock block and set letter
stickers on the ribbon.
5 Round the top corners of a cream
cardstock piece and place stickers on the
cardstock; add the cardstock block to
the inside of the card, behind the cream
cardstock block on the card front.
125
125. 127
1 Mat a red patterned paper block on green cardstock; adhere
it to a brown shimmery card base.
2 Add white cardstock to the inside of a metal tag rim, thread
ribbon through the top of the tag, and attach a button to the
bow using string.
3 Print an owl onto white cardstock, then cut it out; place a
heart on the owl and adhere the owl to the tag using foam
adhesive.
4 Attach the tag to the front of the card.
5 Apply a “thinking of you” rub on to the bottom right edge of
a white cardstock block and attach the cardstock block to the
inside of the card base.
Card is 3 ¾ x 5 ½”
Cardstock: Bazzill Basics, LCI Paper Co., Target; Patterned paper:
Cosmo Cricket; Tag, heart: Making Memories; Ribbon: Offray; Button:
Buttons Galore & More; Rub on sentiment: Pebbles; Digital owl: The Rusty
Leaf (Little Hooty Owl brushes), therustyleaf.com
126.
127.
128. This issue is all about the kids!
Craft projects for boys & girls
n For the nursery – beautiful
projects for your baby!
n Once upon a time... perfect
gifts for your Prince or Princess
n Quick easy quiet books
and MUCH MORE!
Don’t miss the
June issue of
Simply Handmade
On sale 27 may