Recycled Holiday Cards Craft Ideas
•Télécharger en tant que PPTX, PDF•
1 j'aime•615 vues

Don't throw out your holiday cards yet. I have a few ideas on how to recycle them and create cute embellishments and projects for next year. Save a tree, save some money....and make something your own.

Recommandé
Contenu connexe
Tendances
Tendances (20)
En vedette
En vedette (20)
Similaire à Recycled Holiday Cards Craft Ideas
Similaire à Recycled Holiday Cards Craft Ideas (20)
Dernier
Dernier (20)
Recycled Holiday Cards Craft Ideas
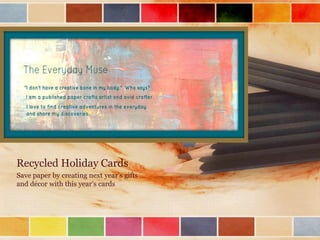
- 1. Recycled Holiday Cards Save paper by creating next year’s gifts and décor with this year’s cards
- 2. Recycling Holiday Cards Each year I receive so many beautiful cards for the Holidays. In addition, I LOVE post-Christmas sales on stationery and other crafty supplies. Here are some ideas on how you can utilize this year’s cards for future gift giving. A lot of these are kid-friendly…..great for a snow day. And you are saving paper from being wasted. Here are some ideas:
- 3. Gift Tags and Garland You will need: • Holiday cards • Scissors – plain and decorative • Raffia, ribbon, twine • Hole Punch • Glue • Shipping/price tags (from office supply store) • Index cards / jar tops – any shape you may want to use as a cutting template
- 4. Gift Tags and Garland Supplies
- 5. Gift Tags and Garland Steps • Choose image you want to use, for round shapes I like jar tops • Center your jar top around image, draw and cut out • Use hole punch on top of image (not too close to the edge so it doesn’t rip) • Thread raffia/twine/ribbon through hole. • That’s it – you can change it up by cutting out with decorative scissors for a different look
- 6. Gift Tags and Garland
- 7. Gift Tags and Garland
- 8. Gift Tags and Garland
- 9. Gift Tags and Garland (other ideas)
- 10. Gift Tags and Garland HINT: Using decorative scissors will give you a totally different look
- 11. Gift Tags and Garland HINT: Instead of using as gift tags, string them together for a fun garland for the tree or to decorate around the house. Great project for the kids to help with.
- 12. Gift Tags and Garland Using pre-made shipping or price tags from the office supply store makes quick and easy work out of creating your own gift tags. Position the tags around the images you want to capture and mark the reserve side of the card with an x. Glue down the labels, cut around and you are done. Great if you like your gift packaging with a theme.
- 13. Gift Tags and Garland – Precut labels
- 14. Gift Tags and Garland • There are some cards that the entire card can be cut up to create various sizes of gift tags. And it doesn’t matter how you cut them out….each tag/each image works on its own but creates a beautiful theme for your gift giving.
- 15. Gift Tags and Garland
- 16. Recipe Cards • I love gathering up family recipes for the holidays and here is a cute way to make your own. • You will need: • Holiday Cards/index cards • Ribbon • Recipe blanks (download for free from the internet) • Scissors/glue • Plastic box
- 17. Recipe Cards
- 18. Recipe Cards • Lay out index card on to holiday card to insure you cut out the imagery you want. • Glue card on to front of index card and recipe blank on back. • HINT: Use heavier card stock when printing and laminate if possible.
- 19. Recipe Cards
- 20. Recipe Cards
- 21. Recipe Cards • Wrap in ribbon or raffia for a quick hostess gift.
- 22. Recipe Cards • To make your presentation even a little more ooh and aah, use an inexpensive plastic box. Wrap your cards in tissue paper and apply some decorative tape and ribbon.
- 23. Recipe Cards
- 24. Postcards • Use this year’s cards as postcards for next year. • Look up the sizing requirements on usps.com for postcards to insure you make the correct size. • Free downloads of postcard blanks are available on a google search. • Lay out, cut out and you have cute postcards to send next year. • HINT: If you have, print postcard blank on heavier cardstock for durability.
- 25. Postcards Cut out card to size Cut out postcard blank to size Send off your postcard to Santa!
- 26. Sachets • I fell in love with this card design during my annual post-Christmas shopping craziness. • They felt very Victorian to me so I thought they would be adorable filled with potpourri.
- 27. Sachets • For each sachet you will need: • -2 copies of each card • -Scissors/glue/ribbon/pins • -Potpourri (Christmas after shopping great deals here too!)
- 28. Sachets Supplies
- 29. Sachets Steps • Glue together , back to back, two of the cards. • Glue around the sides and the bottom, leaving the top open. • While drying, poke pinholes around the cards – pick places where the holes won’t be too noticeable. • Punch a hole through the tops of each. • Fill with potpourri and thread ribbon through the top. • As an added gift, give the person additional potpourri so they can refill it.
- 30. Sachets
- 31. Sachets
- 32. DIY ART • Some cards are just so beautiful I want to treat them like little pieces of art. • For this example you will need: • -Blank Canvas • -Card • -2 complementary background papers • -Scissors/glue/ribbon
- 33. DIY ART Supplies
- 34. DIY ART • Cut out first background paper and glue onto canvas front.
- 35. DIY ART • Glue card onto second background paper and cut out (leave approximately ½” around each of the sides
- 36. DIY ART • Add the card with the background paper to your canvas
- 37. DIY ART • Glue ribbon onto the back of canvas and you have an easy way to create some home art to give or keep for yourself.
- 38. From my family to yours, may your New Year be filled with health, joy, and creative opportunities. Thank you for reading my blog and please send me any ideas for projects and I would love to incorporate them. Remember, we all are creative in our way and look for the beauty in the everyday. Patti Hodder PattiStudio
- 39. With just a couple simple supplies, you can create one-of-a-kind cards and gifts for your friends and family. The only limit is your imagination! For more ideas and hints on bringing creativity into your daily life visit my blog, “The Everyday Muse” @ www.pattistudioblog.blogspot.com. FOLLOW ME! WWW.PINTEREST.COM/PHSTUDIO WWW.FACEBOOK.COM/PATTISTUDIO WWW.TWITTER.COM/PATTISTUDIO