
Recommandé
Contenu connexe
Tendances
Tendances (20)
En vedette
Similaire à PEShare.co.uk Shared Resource
Similaire à PEShare.co.uk Shared Resource (20)
Plus de peshare.co.uk
Plus de peshare.co.uk (20)
PEShare.co.uk Shared Resource
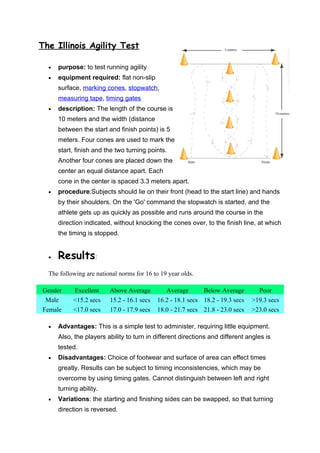
- 1. The Illinois Agility Test • purpose: to test running agility • equipment required: flat non-slip surface, marking cones, stopwatch, measuring tape, timing gates • description: The length of the course is 10 meters and the width (distance between the start and finish points) is 5 meters. Four cones are used to mark the start, finish and the two turning points. Another four cones are placed down the center an equal distance apart. Each cone in the center is spaced 3.3 meters apart. • procedure:Subjects should lie on their front (head to the start line) and hands by their shoulders. On the 'Go' command the stopwatch is started, and the athlete gets up as quickly as possible and runs around the course in the direction indicated, without knocking the cones over, to the finish line, at which the timing is stopped. • Results: The following are national norms for 16 to 19 year olds. Gender Excellent Above Average Average Below Average Poor Male <15.2 secs 15.2 - 16.1 secs 16.2 - 18.1 secs 18.2 - 19.3 secs >19.3 secs Female <17.0 secs 17.0 - 17.9 secs 18.0 - 21.7 secs 21.8 - 23.0 secs >23.0 secs • Advantages: This is a simple test to administer, requiring little equipment. Also, the players ability to turn in different directions and different angles is tested. • Disadvantages: Choice of footwear and surface of area can effect times greatly. Results can be subject to timing inconsistencies, which may be overcome by using timing gates. Cannot distinguish between left and right turning ability. • Variations: the starting and finishing sides can be swapped, so that turning direction is reversed.
- 2. The Sit & Reach Test The basic outline of the sit and reach test is described below. Some of the more popular variations are described in more detail above. • equipment required: sit and reach box (or alternatively a ruler can be used, and a step or box) • description / procedure: This test involves sitting on the floor with legs stretched out straight ahead. Shoes should be removed. The soles of the feet are placed flat against the box. Both knees should be locked and pressed flat to the floor - the tester may assist by holding them down. With the palms facing downwards, and the hands on top of each other or side by side, the subject reaches forward along the measuring line as far as possible. Ensure that the hands remain at the same level, not one reaching further forward than the other. After some practice reaches, the subject reaches out and holds that position for at one-two seconds while the distance is recorded. Make sure there are no jerky movements. • scoring: The score is recorded to the nearest centimeter or half inch as the distance reached by the hand. Some test versions use the level of the feet as the zero mark, while others have the zero mark 9 inches before the feet. There is also the modified sit and reach test which moves the zero mark depending on the arm and leg length of the subject. The table below gives you a general guide for expected scores (in cm and inches) for adults using zero at the level of the feet (otherwise add 23cm or nine inches). There are also examples of some actual athlete results.
- 3. men women cm inches cm inches super > +27 > +10.5 > +30 > +11.5 excellent +17 to +27 +6.5 to +10.5 +21 to +30 +8.0 to +11.5 good +6 to +16 +2.5 to +6.0 +11 to +20 +4.5 to +7.5 average 0 to +5 0 to +2.0 +1 to +10 +0.5 to +4.0 fair -8 to -1 -3.0 to -0.5 -7 to 0 -2.5 to 0 poor -20 to -9 -7.5 to -3.5 -15 to -8 -6.0 to -3.0 very poor < -20 < -7.5 < -15 < -6.0 table source: based on personal experience • validity: This tests only measures the flexibility of the lower back and hamstrings, and is a valid measure of this. • reliability: The reliability will depend on the amount of warm-up allowed, and whether the same procedures are followed each time. Most norms are based on no previous warm-up, though the best results will be achieved after a warm up or if the test is proceeded by a test such as the endurance test which can act as a warm up. If a warm up is used, it is important to have a standardized warm up and test order and repeat it for each test. • advantages: The sit and reach test is a common test of flexibility, and is easy and quick test to perform. If using the standard procedure, there is a lot of data for comparison. • disadvantages: Variations in arm, leg and trunk length can make comparisons between individuals misleading. This test is specific to the range of motion and muscles and joints of the lower back and hamstrings, and may not be relevant to other part of the body. The Vertical Jump Test
- 4. This procedure describes the method used for directly measuring the vertical jump height jumped. There are also timing systems that measure the time of the jump and from that calculate the vertical jump height. • equipment required: measuring tape or marked wall, chalk for marking wall (or Vertec or jump mat). • procedure (see also variations below): the athlete stands side on to a wall and reaches up with the hand closest to the wall. Keeping the feet flat on the ground, the point of the fingertips is marked or recorded. This is called the standing reach height. The athlete then stands away from the wall, and leaps vertically as high as possible using both arms and legs to assist in projecting the body upwards. The jumping technique can or cannot use a countermovement (see vertical jump technique). Attempt to touch the wall at the highest point of the jump. The difference in distance between the standing reach height and the jump height is the score. The best of three attempts is recorded. • variations: The vertical jump test can also be performed using a specialized apparatus called the Vertec. The procedure when using the Vertec is very similar to as described above. Jump height can also be measured using a jump mat which measures the displacement of the hips. To be accurate, you must ensure the feet land back on the mat with legs nearly fully extended. Vertical jump height can also be measured using a timing mat. The vertical jump test is usually performed with a counter movement, where there is bending of the knees immediately prior to the jump. The test can also be performed as a squat jump, starting from the position of knees being bent. Other test variations are to perform the test with no arm movement (one hand on hip, the other raised above the head) to isolate the leg muscles and reduce the effect of variations in coordination of the arm movements. The test can also be performed off one leg, with a step into the jump, or with a run-up off two feet or one foot, depending on the relevance to the sport involved. For more details see vertical jump technique.
- 5. scoring: The jump height is usually recorded as a distance score. The table below provides a ranking scale for adult athletes based on my observations, and will give a general idea of what is a good score. For more information, see a selection of vertical jump test results. It is also possible to convert jump height into a power or work score. males males females females rating (inches) (cm) (inches) (cm) excellent > 28 > 70 > 24 > 60 very good 24 – 28 61-70 20 - 24 51-60 above average 20 - 24 51-60 16 - 20 41-50 average 16 - 20 41-50 12 - 16 31-40 below average 12 - 16 31-40 8 - 12 21-30 poor 8 - 12 21-30 4-8 11-20 very poor <8 < 21 <4 < 11 • advantages: this test is simple and quick to perform. • disadvantages: technique plays a part in maximizing your score, as the subject must time the jump so that the wall is marked at the peak of the jump. • comments: The jump height can be affected by how much you bend your knees before you jump, and the effective use of the arms. The test is also sometimes incorrectly spelled as the "Sergeant" or "Sargent" Test. • history: This method described above for measuring a person's vertical jump height is sometimes known as a Sargent Jump, named after Dudley Sargent, who was one of the pioneers in American physical education. The 12 Minute Cooper Run
- 6. The Cooper 12 minute run is a popular maximal running test of aerobic fitness. There are several other variations of running/walking tests. • purpose: to test aerobic fitness (the ability of the body to use oxygen to power it while running) • equipment required: flat oval or running track, marking cones, recording sheets, stop watch. description / procedure: Place markers at set intervals around the track to aid in measuring the completed distance. Participants run for 12 minutes, and the total distance covered is recorded. Walking is allowed, though the participants must be encouraged to push themselves as hard as they can. • scoring: There are several equations that can be used to estimate VO 2max (in ml/kg/min) from the distance score (a formula for either kms or miles): VO2max = (35.97 x miles) - 11.29. VO2max = (22.351 x kilometers) - 11.288 Age Excellent Above Average Average Below Average Poor Male 13-14 >2700m 2400-2700m 2200-2399m 2100-2199m <2100m Females 13-14 >2000m 1900-2000m 1600-1899m 1500-1599m <1500m Males 15-16 >2800m 2500-2800m 2300-2499m 2200-2299m <2200m Females 15-16 >2100m 2000-2100m 1700-1999m 1600-1699m <1600m Males 17-19 >3000m 2700-3000m 2500-2699m 2300-2499m <2300m Females 17-20 >2300m 2100-2300m 1800-2099m 1700-1799m <1700m The table also gives general guidelines for interpreting the results of this test for young people. These results are based on a few sources and are only approximate values.
- 7. • target population: This test can be modified to be suitable for most populations. For those who are unfit or unable to run, there are similar walking tests that can be performed. • validity: Cooper (1968) reported a correlation of 0.90 between VO2max and the distance covered in a 12 min walk/run. • reliability: the reliability of this test would depend on practice, pacing strategies and motivation level. There should be good reliability if these issues are addressed. • advantages: large groups can be tested at once, and it is a very cheap and simple test to perform. • disadvantages: practice and pacing is required, and performance on this test can be affected greatly by motivation. • variations / modifications: The test can also be conducted by running on a treadmill for 12 minutes, set to level 1 (1 percent) incline to mimic outdoor running. There are many variations of the walk / run test. A very similar test is the Balke 15 minute run. 30m Sprint Test
- 8. Speed is the maximum rate at which a person is able to move his/her body over a specific distance. In human performance terms it refers to the speed of co-ordinated joint actions and whole body movements. In some cases it may be applicable to talk about limb speed but this is difficult to assess and most sports rely on movement of the whole body over a distance, so tests for this are included here. 30m Sprint Test Equipment: 30m tape measure, stopwatch. Target Population: Sprinters, jumpers, games players or anyone who is injury free. Advantages: Poor reactions and starting technique let down result. Disadvantages: Subject to timing errors. Procedure: Mark out 30 metres accurately on a flat, non-slip surface. Using a standing start, run from the start line as quickly as possible to the finish line. Have someone start the run and time it to the 100th/sec. Flying Start 30m Sprint Test Equipment: 40 m tape measure, stopwatch. Target Population: Games players or anyone who is injury free. Advantages: Gives an idea of speed regardless of reaction time. Disadvantages: Subject to timing errors. Procedure: Mark out a 40 metre run with a 'timing' startline 10 m into the run. Using a standing start run the 40 m as quickly as possible. Have someone start the run and time it from the 10 m line to the 40 m line, so a flying 30 m time is gained. Time (secs) for 30 m flying sprint Males Females Rating <4.0 <4.5 Excellent 4.2-4.0 4.6-4.5 Good 4.4-4.3 4.8-4.7 Average 4.6-4.5 5.0-4.9 Fair >4.6 >5.0 Poor
- 9. Standing Long Jump Test (Broad Jump) The Standing long jump, also called the Broad Jump, is a common and easy to administer test of explosive leg power. It is one of the Standing Long Jump Equipment
- 10. fitness tests in the NFL Combine. The standing long jump was also once an event at the Olympic Games, and is also an event in Sports Hall competitions in the UK. purpose: to measure the explosive power of the legs • equipment required: tape measure to measure distance jumped, non-slip floor for takeoff, and soft landing area preferred. Commercial Long Jump Landing Mats are also available. The take off line should be clearly marked. • procedure: The athlete stands behind a line marked on the ground with feet slightly apart. A two foot take-off and landing is used, with swinging of the arms and bending of the knees to provide forward drive. The subject attempts to jump as far as possible, landing on both feet without falling backwards. Three attempts are allowed. • scoring: The measurement is taken from take-off line to the nearest point of contact on the landing (back of the heels). Record the longest distance jumped, the best of three attempts. The table below gives a rating scale for the standing long jump test for for 15 to 16 year old athletes: Gender Excellent Above average Average Below average Poor Male > 2.01m 2.00 - 1.86m 1.85 - 1.76m 1.75 - 1.65m < 1.65m Female >1.66m 1.65 - 1.56 1.55 - 1.46m 1.45 - 1.35m < 1.35cm • variations / modifications: A long jump landing pit may be used instead of a hard surface, which enables the subject to confidently put more effort into the jump, and to extend the legs further in front of the body for landing. This technique also allows those with greater skill to score longer jumps, which is undesirable if you are trying to test for leg power only. Generally longer distances should be achieved with this technique, so the norm table above would not be accurate. The Eurofit Test recommends using a graduated mat for ease of recording jump distance on the landing surface. • advantages: this test is simple and quick to perform, requiring minimal equipment. • disadvantages: there is some skill component in this test.
- 11. • comments: Falling or stepping backward after the landing will result in measurement to that point of contact rather than where the feet first touched. Some subjects will try to use a step at take-off, which is not allowed. The World Record for the standing long jump is held by Norwegian Arne Tvervaag, who jumped 3.71 meters.