Basics of computer applications
•Télécharger en tant que PPT, PDF•
15 j'aime•2,758 vues

The document provides an overview of computer basics including definitions, components, characteristics, history and evolution of computers. It discusses the components of a computer system including input, processing, output, memory and storage. It describes the four generations of computers from vacuum tubes to microchips. It also summarizes the types, symptoms and prevention of computer viruses.

Recommandé
Contenu connexe
Tendances
Tendances (20)
En vedette
En vedette (20)
Similaire à Basics of computer applications
Similaire à Basics of computer applications (20)
Dernier
Dernier (20)
Basics of computer applications
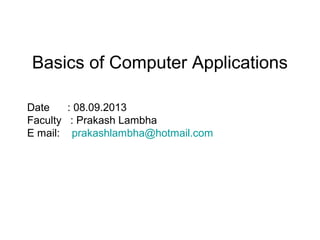
- 1. Date : 08.09.2013 Faculty : Prakash Lambha E mail: prakashlambha@hotmail.com Basics of Computer Applications
- 2. CONTENTS • Overview • Introduction to Computers – Characteristics of Computers – History/Evolution – Generation Of Computers
- 3. Introduction To Computers • Definition: • Its an electronic Device that is used for information Processing. • Computer.. Latin word.. compute • Calculation Machine • A computer system includes a computer, peripheral devices, and software
- 4. Introduction To Computers • Accepts input, processes data, stores data, and produces output • Input refers to whatever is sent to a Computer system • Data refers to the symbols that represent facts, objects, and ideas • Processing is the way that a computer manipulates data • A computer processes data in a device called the central processing unit (CPU)
- 5. Introduction To Computers • Memory is an area of a computer that holds data that is waiting to be processed, stored, or output • Storage is the area where data can be left on a permanent basis • Computer output is the result produced by the computer • An output device displays, prints or transmits the results of processing
- 7. Introduction To Computers Computer Performs computations and makes logical decisions Millions / billions times faster than human beings Computer programs Sets of instructions for which computer processes data Hardware Physical devices of computer system Software Programs that run on computers
- 8. • Definition: • Introduction To Computer Software • Operating system • Problem solving Techniques • Computer Prog ramming languages • Computer Threats
- 9. Introduction To Computers • Capabilities of Computers • Huge Data Storage • Input and Output • Processing
- 10. Introduction To Computers • Characteristics of Computers • High Processing Speed • Accuracy • Reliability • Versatility • Diligence • Storage • Dumb Machine • No Emotions
- 11. Introduction To Computers History Of Computers
- 12. • Before the 1500s, in Europe, calculations were made with an abacus Invented around 500BC, available in many cultures (China, Mesopotamia, Japan, Greece, Rome, etc.) • In 1642, Blaise Pascal (French mathematician, physicist, philosopher) invented a mechanical calculator called the Pascaline • In 1671, Gottfried von Leibniz (German mathematician, philosopher) extended the Pascaline to do multiplications, divisions, square roots: the Stepped Reckoner None of these machines had memory, and they required human intervention at each step
- 13. • In 1822 Charles Babbage (English mathematician, philosopher), sometimes called the “father of computing” built the Difference Engine • Machine designed to automate the computation (tabulation) of polynomial functions (which are known to be good approximations of many useful functions) – Based on the “method of finite difference” – Implements some storage • In 1833 Babbage designed the Analytical Engine, but he died before he could build it – It was built after his death, powered by steam
- 14. The Mark I Computer (1937-1944) – Automatic Sequence Controlled Calculator – First fully automatic calculating machine – Professor Howard Aiken [Harvard University / IBM]
- 15. The atanasoff Computer (1935 - 1942) – First electronic computer – Dr. John Vincent Atanasoff
- 16. The ENIAC (1943 - 1946) – The Electronic Numerical Integrator And Calculator – Moore School of Electrical Engineering, University of Pennsylvania, USA
- 17. The EDSAC (1947 - 1949) – Electronic Delay Storage Automatic Computer – Cambridge University, UK
- 18. The UNIVAC I (1951) – Universal Automatic Computer I – Census Bureau, USA
- 19. Introduction To Computers Generations of Computers
- 20. Introduction To Computers • Generation of Computers • First Generation (1946-59) • Second Generation(1957-64) • Third Generation(1965-70) • Fourth Generation(1970-90) • Fifth Generation(1990 till date)
- 21. Introduction To Computers Generation 0: Mechanical Calculators Generation 1: Vacuum Tube Computers Generation 2: Transistor Computers Generation 3: Integrated Circuits Generation 4: Microprocessors
- 22. Introduction To Computers First Generation Second Gen. Third Gen. Fourth Gen. Technology Vacuum Tubes Transistors Integrated Circuits (multiple transistors) Microchips (millions of transistors) Size Filled Whole Buildings Filled half a room Smaller Tiny - Palm Pilot is as powerful as old building sized computer
- 23. Introduction To Computers Some Pictures…..
- 24. Generation 1 : ENIAC The ENIAC (Electronic Numerical Integrator and Computer) was unveiled in 1946: the first all-electronic, general-purpose digital computer
- 25. The use of binary In the 30s Claude Shannon (the father of “information theory”) had proposed that the use of binary arithmetic and boolean logic should be used with electronic circuits The Von-Neumann architecture CPU Memory I/O System
- 27. Generation 3: Integrated Circuits Seymour Cray created the Cray Research Corporation Cray-1: $8.8 million, 160 million instructions per seconds and 8 Mbytes of memory
- 28. Generation 4: VLSI Improvements to IC technology made it possible to integrate more and more transistors in a single chip SSI (Small Scale Integration): 10-100 MSI (Medium Scale Integration): 100- 1,000 LSI (Large Scale Integration): 1,000- 10,000 VLSI (Very Large Scale Integration): >10,000Microprocessors
- 29. Generation 5? The term “Generation 5” is used sometimes to refer to all more or less “sci fi” future developments Voice recognition Artificial intelligence Quantum computing Bio computing Nano technology Learning Natural languages
- 31. Classification Of Computers • In the past computers were classifieds as, – microcomputers – minicomputers – mainframes and – Supercomputers • Today all computers used microprocessors as their CPU. – Palms – Laptop PCs – Desktop PCs – Workstations • Based on interconnected computers we can classify them – Distributed computers – Parallel computers
- 32. Microcomputer • First generation computers • Very small memory – 256 bytes to 1 Kb RAM
- 33. Microcomputers
- 34. Minicomputer
- 35. Minicomputers
- 36. Mainframe
- 37. Mainframes
- 38. Mainframes
- 39. Supercomputer • Fastest computers available at any given time • Used to solve problems, which require intensive numerical computations. – numerical weather prediction – designing supersonic aircrafts – design of drugs • On an average 1016 calculations.
- 40. • Weight: 5000 pounds -20000 pounds • Several million – billion $
- 41. Supercomputer • RIKEN's MDGrape-3 is the first machine to break the petaflop barrier -- that's 1 quadrillion calculations (floating-point operations, to be specific) per second • MDGrape-3 is designed for pharmaceutical research, specifically molecular dynamics simulation.
- 42. Supercomputer • Consisting of 24 CPU • Each chip has a maximum processing speed of 230 gigaflops (one billion operations per second) • $9 million
- 43. Supercomputers
- 44. Supercomputers
- 45. Recent Classification – Palmtops – Laptops – Desktops – Workstations • Based on the mode of use.
- 46. Palmtop / Simputer • Can be held in the palm • Accepts handwritten inputs using electronic pen • Touchscreen • Small disk storage • Can be connected to a network • Used as phone, fax, email machine • Operating systems like apple ios, windows CE
- 48. Laptop • Also known as notebook computers • Weight around 2 kgs • Keyboard, flat screen, Pentium processor, color display • Runs on different OS • CDROM • Hard disk from 40 GB to 1 TB • RAM of 256 MB to 4GB • Can be connected to a network
- 49. Applications of laptop • Word processing • Spreadsheet computing • Pharmaceutical calculations & computing
- 52. Workstation • More powerful providing processor speeds about 10 times that of PCs. • Larger RAM • Larger hard disk • Normally run on UNIX OS • X Windows • Can form a network of commuter
- 53. Workstations
- 54. Workstations
- 55. Applications of computers in Pharmacy • Right now computers and pharmacy go hand in hand. – Drug and patient database management; – Order entry systems; – Drug information; – Billing; – Purchasing; – Automated dispensing units;
- 56. Applications of computers in Pharmacy • If you have a background in both health care and computers/computer science you will be a hot product. • Today we can exchange health information and provide services across geographic, time and social boundaries.
- 57. Health informatics • Combination of information science, computer science, and health care. – Deals with the resources, devices, and methods required to optimize the acquisition (gaining), storage, retrieval, and use of information in health and biomedicine. • Tools include – computers – clinical guidelines – formal medical terminologies – information and communication systems.
- 58. Health informatics • Applied to the areas of – Nursing – clinical care – Dentistry – Pharmacy – public health and – (bio)medical research
- 59. Computer-aided design of drugs • computer-aided design (CAD) • Further refinement of new drug design and production. • With the availability of powerful computers and sophisticated graphics software, it is possible for the medicinal chemist to design new molecules and evaluate their effectiveness.
- 60. Presentations • Field relies on complex definitions of conditions and procedural techniques. – use the computer to show your medical students PowerPoint presentations – simplify the large amounts of text often needed in medical science. – visual presentations. – video data of medical policies or procedures – slide shows of diseases or traumas and their treatments.
- 61. Papers • In medical research study, – use the computer to write your findings – format a paper for publication – find relevant studies on the Internet – print posters for medical conferences
- 62. Simulations • involves hands-on work, – need to practice procedures before they do the procedure for real on a patient. – Use computer programs that simulate • surgery • other procedures to meet this need
- 63. Informational Storage • Computers can store massive amounts of data. • Use a computer or personal digital assistant to take and store notes on any patients you may see as you go on supervised rounds. • Easier to find the medical information you need when discussing the patient – reduces the physical amount of papers and texts.
- 64. Testing and Self Evaluation • To take tests on medical subjects or to quiz yourself on medical data. – you can get immediate feedback and do not need to depend on your instructor
- 65. Drug Information Services • Pharmaceutical companies provide – updated, relevant information on the efficacy of drug – safety and quality of drug • Drug information database system to manage various information generated during development of new products and after launch of the products. • Incorporated into an on-line network system – can be directly accessed by thousands of
- 66. INFORMATION SYSTEM IN THE PHARMACEUTICAL INDUSTRY • An information system (IS) – information technology – people's activities using that technology • To support operations, management, and decision- making. • Implementation of information management technologies can – greatly enhance their chances for success by reducing their time-to-market – enhancing efficiency in their production runs.
- 67. Computer Virus
- 68. Computer Virus • Software programs written by someone that needs to get a life • Can range from being a annoyance to causing major destruction and recovery time • Software packages can be infected
- 69. Computer Virus • A virus is a small piece of software that hide in another programs that executes. • 2 main characteristics of viruses It must execute itself. It must replicate itself. • By this it can be placed into main memory.
- 70. Types of Infection • VIRUSES • E-MAIL VIRUSES • WORMS • TROJAN HORSES
- 71. Viruses • Virus attached to a program such as spreadsheet. • Each time the spreadsheet program runs, the virus runs too and replicate itself.
- 72. E-mail Viruses • Moves around in e-mail messages • Usually replicate itself by automatically mailing itself to dozens of people in the victim’s email address book. • Example “MELISSA VIRUS” • Example “I LOVE YOU VIRUS”
- 73. WORMS • Small piece of software that uses computer networks and security holes to replicate itself. • Copy of the worm scans the network for another machine that has a specific security hole. • Copy itself to the new machine using the security hole and start replicating. • Example “CODE RED”
- 74. Trojan Horses • A simple computer program • It claim to be a game • Erase your hard disk • No way to replicate itself.
- 75. Classification – File infector virus • Infect program files – Boot sector virus • Infect the system area of a disk – Master boot record virus • infect disks in the same manner as boot sector viruses. The difference between these two virus types is where the viral code is located. – Multi-partite virus • infect both boot records and program files – Macro virus • infect data files. Examples: Microsoft Office Word, Excel, PowerPoint and Access files
- 76. Virus Languages • ANSI COBOL • C/C++ • Pascal • VBA • Unix Shell Scripts • JavaScript • Basically any language that works on the system that is the target
- 77. Symptoms of Infection • Programs take longer to load than normal. • Computer’s hard drive constantly runs out of free space. • The floppy disk drive or hard drive runs when you are not using it. • New files keep appearing on the system and you don’t know where it come frm.
- 78. Symptoms of Infection • Strange sounds or beeping noises come from the computer. • Strange graphics are displayed on your computer monitor. • Unable to access the hard drive when booting from the floppy drive. • Program sizes keep changing.
- 79. Protection / Prevention • You need to basically to do four steps to keep your computer and your data secure: 1. Get the latest Anti-Virus Software. 2. Make sure you have the latest security patches and hot fixes using Windows Update. 3. Use a Host-Based Firewall. 4. BACKUP your Important Files.
- 80. Elimination / Removal • Scanner software - “shield” software – Scans all data coming into a computer system – Looking for known or suspected viruses – Known viruses are detected by some recognizable “character string” in the virus computer code. – Detected whenever the virus program tries to do something weird • Typical packages: McAfee, Dr. Solomon, etc
- 81. Elimination / Removal • Cleaner software - can try to restore infected files back to a useable state. • Requires booting from a clean, write protected floppy disk May take a lot of time.
- 82. Elimination / Removal • Detection software - detects the presence of a virus on an infected disk Typical Software: McAfee, Avast, Avira, BitDefender etc.
- 83. Conclusion • Be aware of the new infections out there. • Take precaution measures. • Always backup your data. • Keep up-to-date on new Anti virus software. • Simply avoid programs from unknown sources.
- 84. Operating System • OS is a collection of programs that control all hardware and other resources in the computer system. – Windows, UNIX, LINUX, MAC OS
- 85. Features • File Management • Basic Application programs • Memory Management • Device Management • Process Management • System Clock – Time stamping • Interface between user & computer • Other Tools – Control panel, disk defragment, backup utility
- 86. Evolution of OS: Major Phases Technical Innovations Operating Systems Open Shop The idea of OS IBM 701 open shop (1954) Batch Processing Tape batching, First-in, first-out scheduling. BKS system (1961) Multi- programming Processor multiplexing, Indivisible operations, Demand paging, Input/output spooling, Priority scheduling, Remote job entry Atlas supervisor (1961), Exec II system (1966)
- 87. Evolution of OS (contd..): Timesharing Simultaneous user interaction, On-line file systems Multics file system (1965), Unix (1974) Concurrent Programming Hierarchical systems, Extensible kernels, Parallel programming concepts, Secure parallel languages RC 4000 system (1969), 13 Venus system (1972), 14 Boss 2 system (1975). Personal Computing Graphic user interfaces OS 6 (1972) Pilot system (1980) Distributed Systems Remote servers WFS file server (1979) Unix United RPC (1982) 24 Amoeba system (1990)
- 88. Batch Processing • Processing same type of jobs batch together and execute at a time. – (BATCH- a set of jobs with similar needs) • Users submit jobs to a central place where these jobs are collected into a batch – subsequently placed on an input queue at the computer where they will be run.
- 89. Batch Processing • The user has no interaction with the job during its processing. – The computer’s response time is the turnaround time - the time from submission of the job until execution is complete, and the results are ready for return to the person who submitted the job. • Common Input devices were card readers and tape drives.
- 90. Multi Programming Processing • Multiprogramming is a technique to execute number of programs simultaneously by a single processor. • In Multiprogramming, number of processes reside in main memory at a time. • The OS picks and begins to executes one of the jobs in the main memory.
- 91. Multi Programming Processing • If any I/O wait happened in a process, then CPU switches from that job to another job. • Hence CPU in not idle at any time. – Advantages: – Efficient memory utilization – Throughput increases – CPU is never idle, so performance increases.
- 92. Time Sharing Processing • Time sharing, or multitasking, is a logical extension of multiprogramming. • Multiple jobs are executed by switching the CPU between them. • In this, the CPU time is shared by different processes, so it is called as “Time sharing Systems”.
- 93. Time Sharing Processing • Time slice is defined by the OS, for sharing CPU time between processes. – Examples: Multics, Unix, etc.,
- 94. Real Time Processing • Designed to support execution of tasks within specific wall clock time constraints. • Use of RTOS is mostly limited to dedicated applications – industrial control systems, weapon systems and online systems. • RTOS is managing the resources so that a particular operation executes in precisely the same amount of time every time it occurs.
- 95. Network OS • The Software that enhances a basic Operating System by adding Networking Features. – Novell Netware, – WINDOWS NT • A networked computing system is a collection of physical interconnected computers. • The OS contains provisions for handling communication and transfer of program and data among the other computers
- 96. Distributed OS • Consists of a number of computers that are connected and managed • They automatically share the job processing load among the constituent computers. • Looks to its users like an ordinarily centralized operating system but runs on multiple independent CPU’s.
- 97. Operating System • The Operating System is the System Software that makes the Computer work. • Operating System is Software that acts as an interface between user and the hardware. • Operating system is software that will make your computer boot up and run. • Ex. Windows, Linux Application Program • Application software is the software that you install onto your Operating System. • application software is designed to perform a specific task such as for accounting work. • Application software is a program that will run on a functional operating system. • Ex. Tally, MS Word
- 98. Windows OS • Converts the plain character – based user interface provided by DOS into a graphical user interface (GUI). • Makes the use of computer easy as user are not require to remember or type commands. – Instead, users can click the little picture (icon) that represent commands to run programs.
- 99. Windows OS • It provides multi – tasking capabilities to pc. – depends on the amount of RAM available in your pc. • Unlike DOS, windows can use different fonts; – i.e. different shape and size of characters can be displayed and printed.
- 100. The Desktop • The screen that you see on starting windows is called the desktop. • The desktop provides the interface between you and applications you can run on your PC or the documents you can work with. – Consist of one or more icons and a taskbar. • An icon is a small graphical picture that represents a document file, application, folder (directory), device (e.g. printer), etc. • Each icon has a text label.
- 101. The Desktop • A long horizontal bar at the bottom of the screen is called as task bar. – Consist of a start button on the extreme left and the current time in the extreme right. • Though the taskbar display at the bottom of the screen, you can even place it at the top, left or right of the screen.
- 102. Windows Explorer • Enables you to see the folder and files in your computer in a hierarchical structure. • Can also help you to copy or move contents of one folder to another folder. • Can also create new folder or delete existing folder or files.
- 103. Recycle Bin • Recycle bin holds the items you delete. • After deleting item, if you realize that you made mistake and want to get it back, you can use Recycle bin. • You can restore all items back to original locations by clicking restore all. • If you want to restore selected items, select the require items and then choose restore command from file menu or from the right click menu.
- 104. Recycle Bin • If you want to get detail about any item in Recycle bin, select the item and Recycle bin displays it in the window. • For additional details, use file, properties command or properties command from right click menu. • The number of items the Recycle bin hold is limited by the hard disk space allocated to it by windows.
- 105. My Documents • Convenient location to store documents, spreadsheets, presentations, databases, and other commonly used files. – Many programs use this location by default to open and save files. • Available on start menu – you can also create short cut to it on desktop for faster access.
- 106. Disk Defragmentation • Process of consolidating fragmented files on your computer’s hard disk. • Fragmentation happens to hard disk over time as you – Save – change or – delete files. • The changes that you save to a files are stored at location on the hard disk that’s different from the original file.
- 107. Disk Defragmentation • Additional changes are saved even more locations. – Over a time, both the files and the hard disk it self become fragmented, and your computer slows down as it has to look in many different places to open a file. • Disk defragmenter is a tool that rearranges the data on your hard disk and reunites fragmented files so your computer can run more efficiently.
- 108. MS Word Word processing • Refers to typing, editing and formatting of any kind of document, which could be a letter, memorandum, balance sheet or something similar. – Word processing simply processes words, i.e. textual information. • Different from conventional typing in many ways.
- 109. MS Word • The document is not printed while it is being keyed in. – However its image is displayed on the video display unit. • The user, who is typing the document, can verify the correctness of document that is displayed on the computer screen.
- 110. MS Word • If user finds any mistake while typing or later, he can easily correct mistake. • The current word processors are very powerful.
- 111. Features • Adjustable page size and margin. • Printing selected text in boldface, italic or underline. • Printing selected text in subscript and superscript style. • Changing font and style of letters of selected text. • Right justifying paragraphs.
- 112. Features • Adjustable line and character spacing. • Moving selected text to another location within the document or another document. • Facility to define headers and footers. • Facility to create footnotes and endnotes.
- 113. Features • Facility to create multiple column text. • Index and table of contents generation. • Spelling and grammar checking. • Thesaurus.
- 114. Advantages • It helps in printing error free documents in desire format. • Any number of copies of document can be printed without retyping, – all the printouts look like a first copy. • It also provides checking and correcting grammar. You can also use thesaurus.
- 115. Advantages • It will provide special features like – boldface, – underline, – different fonts and size of character, – centring of text, – adjustable margin and tabs. • It allows moving a block of text, say a paragraph, from first page to some another page.
- 116. Components • The first toolbar is called as standard toolbar and next toolbar is called as formatting toolbar. • The standard toolbar contains tools to – open, – save, – close and – print documents.
- 117. Components • The formatting toolbar contains buttons to apply formatting attributes, such as – bold, – italics, – underline etc. • The line below the toolbar is called as ruler bar. It shows the area available for typing. The ruler also helps you to set and clear tab stop positions.
- 118. Components • The window below the ruler bar is called the document window to type text. • On the right side and bottom of the document window, word shows scroll bars. • The last line of the word window is called the status bar. – Word displays useful information, such as • current page • section number, • the current position of cursor, • time, • status of insert/overtype mode
- 119. Find & Replace • You can quickly search for every occurrence of a specific word or phrase. For that you have to follow following steps: – On the Edit menu, click Find. – In the find what text box, enter the text what you want to search for.
- 120. Find & Replace – Select any other options that you want. – To select all instances of specific word or phrase at once, select the highlight all items found in check box, and select which portion of the document you want to search in by clicking highlight all items found in list. – Click find next or find all. To cancel a search in progress, press ESC.
- 121. Find & Replace • You can automatically replace text – for example, you can replace ‘Word’ with ‘Excel’ then perform following steps – On Edit menu, click Replace. – In the find what box, enter the text that you want to search for. – In replace with box, enter the replacement text. – Click find next, replace or replace all.
- 122. Find & Replace • You can search for and replace or remove character formatting. – For example, find a specific word or phrase and change the font colour, or find specific formatting such as bold and remove or change it. • On the Edit menu, click Find. • If you don't see the Format button, click More.
- 123. Find & Replace • In the Find what box, do one of the following: • To search for text without specific formatting, enter the text. • To search for text with specific formatting, enter the text, click Format, and then select the formats you want.
- 124. Find & Replace • To search for specific formatting only, delete any text, click Format, and then select the formats you want. • Select the Highlight all items found in check box to find all instances of the word or phrase, and then select which portion of the document you want to search in by clicking in the Highlight all items found in list. • Click Find All. All instances of the word or phrase are highlighted.
- 125. Templates • In a business environment, most of the correspondence is repetitive in nature. E.g. • Sales Letter • Invoice • Product Details
- 126. Templates • A template can store predefine text , page setup, auto text entries, style etc. • New document based on template, – automatically puts all text and other definitions stored in the template in the new document. • Then you can enter additional text in the document and save it.
- 127. Template • New document, it is always based on some template. • ^N uses new blank document template. • We can select some templates to create new document. • Can also create our own template
- 128. Macro • If you perform task repeatedly in word, you can automate the task by using macro. • Series of word commands and instructions – grouped together as a single command to accomplish a task automatically. • Example
- 129. Macro • To speed up routine editing and formatting. • To combine multiple commands – inserting table with a specific size and borders, and with a specific number of rows and columns. • To automate a complex series of task.
- 130. Macro • Two ways for you to create a macro. – the macro recorder – the visual basic editor. • If you give a new macro the same name as existing built in command in word, the new macro actions will replace the existing actions.
- 131. Recording Macro • The macro recorder. – Word records a macro as a series of word commands in visual basic for applications. • While you are recording a macro, – pause the recording – stop the recording when you want.
- 132. Recording Macro • Use the mouse to click the commands and options, – but the macro recorder doesn’t record mouse movements in a document window. • You must use keyboard to record the actions.
- 133. Edit Macro • Make corrections, • Remove unnecessary steps • Add any instruction in macro – open macro in visual basic editor. • To edit any macro you have to perform following steps :
- 134. Edit Macro • Open tool menu, point to Macro, and then click macros. • In the macro name box, click the name of the macro you want to edit. • Click edit button.
- 135. Delete Macro • Open tool menu, point to Macro, and then click macros. • In the macro name box, click the name of the macro you want to delete. • Click delete button.
- 136. Bookmark • A location or section of text that you name and identify for future reference. • Use bookmark to identify text that you want to revise at a later time. – Instead of scrolling through the document to locate the text, you can go using bookmark dialog box
- 137. Show Bookmark • If you assigned to an item, – the bookmarks appears in brackets[] on the screen. • If assign bookmark to a location, – bookmark appears as an I – beam.
- 138. Comments • User can comment on your document in forms of balloons. • To respond to a comment you need to select it and type your response in the balloon.
- 139. Protect Document • Unwanted changes & comments • Restrict they types of changes that reviewers can make to document – Formatting Restrictions – Editing Restrictions • Set password to restrict the use of document
- 140. Formatting Restrictions • Limit formatting to a selection of styles • No other types of formatting in the document will be allowed other than selected formatting.
- 141. Editing Restrictions • Allowed only the selected type of editing. – Read Only – Filling in forms – Comments – Track changes
- 142. MS-EXCEL
- 143. Spreadsheets • What’s a spreadsheet / worksheet? – Spreadsheets are computer programs designed to organize data and show relationships between various pieces of data. – Businesses found them more useful than word processing.
- 144. Spreadsheets • How they work: – They use cells to contain information (Data) – Every cell has an address with a letter and a number. – Simple formulas can then be used to set up relationships between the cells.
- 145. A1 B3 E7
- 146. Advantages • The result are accurate. • The worksheet can be quite big in size and any part of it can be viewed or edited. • Data entered in the worksheet can be formatted in several ways to give it professional look.
- 147. Advantages • Several mathematical, trigonometric, financial and statistical functions are built in. • Data can also be viewed in the forms of graph. • The worksheet is saved in electronic file. This file can be retrieved and modified later. If required.
- 148. Advantages • An existing worksheet or any part of it can be merged with any existing or new worksheet. • Easily and quickly produce reports and get answer to ‘what if’ questions. • The information stored in a worksheet can be transfer to another software programs. Such as word, FoxPro etc.
- 149. MS EXCEL • Excel is an integrated electronic worksheet program developed by Microsoft. • It includes worksheet, graph and database management.
- 150. Features 1. Date and time related function. 2. Manipulation of character data. 3. Database management. 4. Keyboard macros to automate task. 5. Drawing toolbar to create graphics. 6. Each worksheet can have multiple sheets.
- 151. Components of Excel • The next line of excel window is menu bar. • There are two bars below menu bar is called as toolbar. • The next line below toolbar is formula bar. – Excel uses the formula bar to display information, such as address of active cell, contents or the formula entered in the current cell. • The area below formula bar is called the work space or worksheet area.
- 152. Components of Excel • The workspace area is a grid of rows and columns. – It has a border on top and on the left. This border is called the worksheet frame. • The letters along the top border designate columns and numbers along the side border designate rows. • At the bottom left of the worksheet frame, you can find few tabs sheet1, sheet2 etc. in fact workbook file contains a number of sheets.
- 153. Rows & Columns • A worksheet is made up of row and column. • It contains 256 columns and 65,536 rows. • The excel worksheet is more then 7 meters wide and 400 meters long.
- 154. Rows & Columns • It can store information equivalent to approximately more then 32000 A-4 size sheet in single worksheet. • Row numbering in excel is straightforward i.e. first row is called row1 and so on. • The first 26 columns are called referred by letters A to Z. the 27’th column is called row AA, 28’th column AB and so on.
- 155. Cell & Cell Address • The area formed by the intersection of row and column is called as cell. • The cell is the smallest unit in the worksheet that is used to store the data. • The cell is referred by its column –row number.
- 156. Cell & Cell Address • The cell in the top left corner of the worksheet that is the active (current) cell is referred by ‘A1’. Similarly cell below A1 is called A2. • Each cell in the worksheet has a unique address. • The cell address is very important in the worksheet as it is used in formula to refer a particular cell.
- 157. Active Cell • Thick border around one of the cells. This cell is called as the active cell or current cell. • Any data that you type is stored in the active cell. – You can make any cell of the worksheet by using keyboard or mouse. • When you click mouse on the cell in the worksheet, excel makes that cell active.
- 158. Active Cell • Excel shows the border around active cell, this border is also called as cell pointer. • At a time only cell can be active.
- 159. Information in the worksheet • After selecting cell, if you see the extreme left of the status bar, – it will display ‘Ready’. • Excel uses these area to – display status of operation in progress – brief instruction of the selected command. • ‘Ready’ indicates the excel is ready to accept data for the active cell or to execute a command.
- 160. Worksheet editing • ‘Ready’ is called the mode indicator. – Depending on the operation you are doing, excel display mode as indicator. • You can enter two types of data in the worksheet – constant values and formulas. • A constant value is a fixed value that you type directly in that cell. – It can be number or text.
- 161. Editing in Worksheet • When you enter formula in a cell • excel calculates the result of that formula and displays the result in the cell. • A formula may be referred to one or more cells in the worksheet • Hence its results may changes if the values of those cell changes. • The maximum length of a text entry can be 32000 character. • i.e. each cell of the worksheet can hold a maximum of 32000 character.
- 162. Editing in Worksheet • There are three buttons in the middle part of formula bar. • The left button is called as cancel button • The middle button is called as conform button. • The right button is use to enter built in function in the cell. • After entering correct text you have to press ‘Enter’ key or press confirm button to ask excel to accept the entered value or formula in cell. • If you press ‘Esc’ key or click cancel button to cancel the entry.
- 163. Editing Formula To enter formula in excel, you have to perform following steps : 1. Select the cell in which you have to enter the formula. 2. Type the formula in formula bar. Remember that formula is always start with ‘=‘.
- 164. Editing Formula • For example, if you want to • add the number which you have enter in B4 and B5 • Type ‘= B4 + B5’ and press Enter or click the confirm button in the formula bar. • Excel display the result in the B8 cell immediately.
- 165. Advantage of Formula • The facility of changing figure in the worksheet and immediately viewing their effect on the worksheet
- 166. Range • In excel, a range is any rectangular area in the worksheet. • A range may include just single cell, a number of consecutive cells in the rows and column. • A range may include cell from multiple rows and columns. However it must form a rectangle in order to be valid.
- 167. • A range is specifying its first and last cell. E.g. • Range from B5 to B12 then it can be specified as B5:B12 , B5.B12 , B5..B12. • when a range includes multiple rows and columns, the opposite corner cells are used to specify it. E.g. • range from B5 to D17 then it can be specified as B5:D17 , B5.D17 , D17:B5.
- 168. The sum is a built in function that calculates the sum of a range of number. E.g. ‘=sum(B5 : B8)’ If you start your function with @ in the, it automatically converts @ to =. E.g. if you enter ‘@sum(B5 : B8)’ then to automatically convert it into ‘=sum(B5 : B8)’. While entering function, do not press spacebar otherwise you may get an error message.
- 169. Conditional formatting : A format such as cell shading or font color, that excel automatically applies to cells if a specified condition is true. To add conditional formatting on particular cell you have to perform following steps : 1. Select the cell for which you want to add the conditional formatting. 2. On format menu, click conditional formatting. Excel opens conditional formatting dialog box.
- 170. Functions : 1) Sum :- The sum function calculates the sum of values in a list. You have already used the sum function in the following format : 1. Sum(C8 : G8) 2. Sum(profit) 3. sum(10,20,30,40) 4. Sum(A1:G3,25,27) 5. Sum(A1:A3,B1:B3) 6. Sum(profit , sales) 7. Sum(profit , 12, 15) 8. Sum(profit, A1:C1, 10)
- 171. The list used with sum can include up to 30 values or ranges in any sequence. 2) Min :- It is used to find out the minimum value in the list of values. 1. Min(10,20,30,40) 2. Min(A1:G3,25,27) 3. Min(A1:A3,B1:B3) 4. Min(profit , sales) 5. Min(profit , 12, 15) 6. Min(profit, A1:C1, 10)
- 172. Similarly, if you want to find out maximum number from range or multiple of range then you can use max function. And to find out average form single range or multiple of range or constant value then you can use average function.
- 173. Today :- If you want to enter current date in the cell. The functions to enter the current date are TODAY. ‘=TODAY()’ Excel displays the current date in the format dd/mm/yy in cell A1.
- 174. Now :- The NOW function is used to display the current date, time or both date and time in a cell. ‘=NOW()’. If you see ‘####’ in the cell, increase the column width.
- 175. DAYS360 : • Returns the number of days between two dates based on a 360-day year (twelve 30-day months), Syntax • DAYS360(start date, end date, method) • If start date occurs after end date, DAYS360 returns a negative number.
- 176. UPPER : Converts text to uppercase. Syntax :- UPPER(text) Text is the text you want converted to uppercase. Text can be a reference or text string. LOWER : Converts all uppercase letters in a text string to lowercase. Syntax LOWER(text) Text is the text you want to convert to lowercase. LOWER does not change characters in text that are not letters.
- 177. Round : The round function rounds off a number to the specified number of decimal places. E.g. the cell A14 contains 1456.5863, ‘=ROUND(A14,0)’ entered in some other cell round off the value in cell A14 to a whole number and displays 1457. 1. ROUND(A14,1) – 1456.6 2. ROUND(A14,2) – 1456.59 3. ROUND(A14,3) – 1456.586
- 178. You can also round off a number to tens, hundreds and so on by using a negative number with decimal places. E.g. 1. ROUND(-56789,-2) – 56800 2. ROUND(56789,-3) – 57000 3. ROUND(A14,-3) – 1000 IF : - We need to use flexible formulas several times in our day to day life. E.g. 1)If the gross total value of items purchased by customer is more then Rs. 500, he / she is entitle to 15% discount, otherwise 10%. 2)If a guest stays in a hotel for three or more days, he/she is entitled to a 10% discount, however there are no discount for stay of less then 3 days.
- 179. Syntax : IF(condition, true value, false value) This function checks for condition. If the condition is evaluated as true, it returns true value, else when condition is false, it returns false value. E.g. =IF(B4>=4000,0.15,0.2) Excel check for the contents of cell B4. if it contains a value that is more than or equal to 4000, it display the true value. i.e. 0.15. Otherwise, excel displays the false value. i.e. 0.2.
- 180. To display character text as a result, enclose it within quotes. E.g. =IF(B4>=4000,”equal to or more then 4000”,”less then 4000”) To display a value or formula as result, do not use quotes. E.g. =IF(B4>=4000, B4*10, B4*100) This formula displays the result of ‘B4*10’ if condition is true, otherwise it displays the result of ‘B4*100’.
- 181. SUMIF : Adds the cells specified by a given criteria. Syntax SUMIF(range, criteria, sum range) Range is the range of cells that you want evaluated by criteria. Cells in each range must be numbers or names, arrays, or references that contain numbers. Blank and text values are ignored. Criteria is the criteria in the form of a number, expression, or text that defines which cells will be added. For example, criteria can be expressed as 32, "32", ">32", or "apples".
- 182. Sum range are the actual cells to add if their corresponding cells in range match criteria. If sum range is omitted, the cells in range are both evaluated by criteria and added if they match criteria. E.g. =SUMIF(A2:A5,">160000",B2:B5) : Sum of the commissions for property values over 160,000 (63,000) A B 1 Property Value Commission 2 100,000 7,000 3 200,000 14,000 4 300,000 21,000 5 400,000 28,000
- 183. =SUMIF(A2:A5,">160000") : - Sum of the property values over 160,000 (900,000). =SUMIF(A2:A5,"=300000",B2:B3) :- Sum of the commissions for property values equal to 300,000 (21,000). COUNTIF : Counts the number of cells within a range that meet the given criteria. Syntax : COUNTIF(range, criteria) Range is one or more cells to count, including numbers or names, arrays, or references that contain numbers. Blank and text values are ignored.
- 184. Criteria is the criteria in the form of a number, expression, cell reference, or text that defines which cells will be counted. For example, criteria can be expressed as 32, "32", ">32", "apples", or B4. =COUNTIF(A2:A5,"apples") : - Number of cells with apples in the first column above (2). =COUNTIF(A2:A5,A4) :- Number of cells with peaches in the first column above (1) A B 1 Data Data 2 Apples 32 3 Oranges 54 4 Peaches 75 5 apples 86
- 185. =COUNTIF(A2:A5,A3)+COUNTIF(A2:A5,A2) :- Number of cells with oranges and apples in the first column above (3) =COUNTIF(B2:B5,">55") :- Number of cells with a value greater than 55 in the second column above (2) =COUNTIF(B2:B5,"<>"&B4) :- Number of cells with a value not equal to 75 in the second column above (3) =COUNTIF(B2:B5,">=32") - COUNTIF(B2:B5,">85") :- Number of cells with a value greater than or equal to 32 and less than or equal to 85 in the second column above (3).
- 186. • LOG function – Returns the logarithm of a number to the base you specify. • Syntax =LOG(number, [base]) – Number Required. The positive real number for which you want the logarithm. – Base Optional. The base of the logarithm. If base is omitted, it is assumed to be 10.
- 187. • =LOG(10) • =LOG(10) • =LOG(86, 2.7182818)
- 188. • SQRT function – Returns a positive square root. • Syntax – SQRT(number) • Number Required. The number for which you want the square root.
- 190. • STDEV function – Estimates standard deviation based on a sample. The standard deviation is a measure of how widely values are dispersed from the average value (the mean). • Syntax – STDEV(number1,[number2],...)
- 191. STDEV uses the following formula: where x is the sample mean AVERAGE(number1,number2,…) and n is the sample size.
- 193. T.TEST function
- 194. • Syntax – T.TEST(array1,array2,tails,type) • Array1 Required. The first data set. • Array2 Required. The second data set. • Tails Required. Specifies the number of distribution tails. If tails = 1, T.TEST uses the one- tailed distribution. If tails = 2, T.TEST uses the two- tailed distribution. • Type Required. The kind of t-Test to perform.
- 197. • F.TEST function – Returns the result of an F-test, the two-tailed probability that the variances in array1 and array2 are not significantly different. – Use this function to determine whether two samples have different variances. • For example, given test scores from public and private schools, you can test whether these schools have different levels of test score diversity.
- 198. • Syntax – F.TEST(array1,array2) • Array1 Required. The first array or range of data. • Array2 Required. The second array or range of data.
- 199. • The arguments must be either numbers or names, arrays, or references that contain numbers. • If an array or reference argument contains text, logical values, or empty cells, those values are ignored; however, cells with the value zero are included. • If the number of data points in array1 or array2 is less than 2, or if the variance of array1 or array2 is zero, F.TEST returns the #DIV/0! error value.
- 201. • CHISQ.TEST function – Returns the test for independence. – CHISQ.TEST determines whether the experimentally determined data fits the results expected from theory or not.
- 202. • Syntax – CHISQ.TEST(actual_range,expected_range) – Actual_range Required. The range of data that contains observations to test against expected values. – Expected_range Required. The range of data that contains the ratio of the product of row totals and column totals to the grand total.
- 203. Example • You give some medicine to a group of 400 people. – Cured people: 290 – Not cured people: 110 • We expect a 3/4 : 1/4 ratio. • We need to calculate the expected numbers;
- 204. • This is done by multiplying the total cured by the expected cured. • This we expect – 400 * 3/4 = 300 cured – 400 * 1/4 = 100 non-cured.
- 205. • Thus, for cured, obs = 290 and exp = 300. For non-cured, obs = 110 and exp = 100. • Now it's just a matter of plugging into the formula: – CHISQ.TEST(actual_range,expected_range) – CHISQ.TEST(A1:A2,B1:B2)
- 206. Analysis of Variance (Anova) • We are often interested in determining whether the means from more than two populations or groups are equal or not. • To test whether the difference in means is statistically significant we can perform analysis of variance (ANOVA).
- 207. • A researcher theorizes that first-born children are more intelligent than other children. • A sample of 50 first-born children is found to have an average IQ of 105. • Based on this result, are firstborn children significantly more intelligent than the general population?
- 208. • To add the Anova Data Analysis function to Excel, – opening Excel – clicking on the Office button at the top left of the screen. – At the bottom of the drop down menu, click on the’ Excel Options’ button. • The Excel Options window will open. In the column on the left, – click on the Add-Ins heading. – On the right side of the window, scroll down to Inactive Application Add-Ins and click on ‘Analysis ToolPak’ to select it. – click the Go Button.
- 209. • An ‘Add-Ins’ window will open. – Click in the checkbox next to ‘Analysis ToolPak’ – click the OK button. Note: Another window may open that says Excel can’t run the add-in until you install the feature. Click Yes. • Click on the Data tab and the Anova Data Anaylsis function will appear in the Anaylsis group on the right side of the ribbon.
- 210. Graphs • Better call them a chart. • Excel supports many types of charts. – Line Graph – Histogram / Scatter – Pie – Chart – Etc • To insert them, use insert menu.
- 211. Line Graph
- 212. Histogram • Representation of a frequency distribution by means of rectangles whose widths represent class intervals and whose areas are proportional to the corresponding frequencies.
- 214. Pie Chart
- 216. Chart Features • Labelling of Axis
- 218. Chart Features • Plot Area
- 219. Security Protecting a workbook with password : To prevent unauthorized access to your workbook file, you can assign password to it. Excel supports two type of passwords – (a) A password is required to open workbook file and (b) a password is require to change the workbook. So you can use define either or both passwords for any workbook file.
- 220. MS Power Point What is power point ? Power point is presentation software that can help you to quickly create effective ‘side based’ presentation. The presentation consist of slides. Each slide can have text and graphics. The program can help you to create the following type of presentations.
- 221. Slides 1. Black and white transparencies for the overhead projector. 2. Colour transparencies for the overhead projector. 3. 35mm slides for the slide projector. 4. Video slides. 5. A self running slide show at a trade show kiosk. 6. Printed hand-out.
- 222. Slides 7. Detailed speaker’s notes. 8. Printed outline of the presentation.
- 223. Starting PowerPoint and Opening Presentations • Presentation – a group of slides, usually related by a theme, that contain text, charts, drawings or graphic images • Slide – an individual screen in a presentation or slide show • Slide show – a full-screen version of a presentation
- 224. Starting PowerPoint and Opening Presentations (cont’d) • When you first start PowerPoint, you are prompted to create a new presentation or open an existing presentation • The default presentation view is Normal view, which combines three of PowerPoint’s views in separate panes: – Slide view – Outline view – Notes view
- 225. Exploring Toolbars and Menus • Toolbars – Contain buttons that represent shortcuts for commonly used features – By default, the Standard and Formatting toolbars appear on the same row – A floating toolbar is a toolbar that is not docked to an edge of the application window
- 226. Exploring Toolbars and Menus (cont’d) • Menus – Contain commands you execute to perform tasks – When you first display a menu, the default commands display – You can expand the menu to display additional commands
- 227. Working with Slides in Different Views • The available views are: – Normal view – displays a slide pane, outline pane and notes pane – Outline view – displays the presentation titles and text in an outline format – Slide view – displays a slide pane and an outline pane – Slide Sorter view – displays all slides in miniature form in one window – Slide Show – displays the current presentation as a slide show
- 228. Closing Presentations and Exiting PowerPoint • To close a presentation, click on the close button in the menu bar • To exit PowerPoint, click on the close button in the application title bar
- 230. Creating New Presentations • You can use the New Slide dialog box to select an AutoLayout or select a blank layout and create your own design • AutoLayout – a pre-designed slide layout that can contain placeholders for text, charts, bullets and graphics • Placeholders – dotted outlines on a new slide that reserve space for objects that can be placed on the slide
- 231. Adding Text to Slides • Most AutoLayouts contain placeholders for entering text, such as: – Titles – Subtitles – Other objects • You can: – Click in a placeholder to add text (or simply begin typing if it is the first placeholder on the slide) – Double-click in a placeholder to add an object
- 232. Adding New Slides and Changing Slide Layouts • Slides you add will follow the currently selected slide • To add new slides to a presentation: – Click on the New Slide button in the Standard toolbar – Select a slide layout – Click on the OK button
- 233. Adding New Slides and Changing Slide Layouts (cont’d) • To change the layout of a slide: – Click on the Slide Layout button in the Standard toolbar (or click on Format, Slide Layout) – Select a slide layout – Click on the OK button
- 234. Selecting Text • You must select text before you can modify it • To select text, you can: – Click and drag over text to select it – Select a word by double-clicking on it – Select an entire paragraph by triple-clicking anywhere in the paragraph – Click on the slide icon in the Outline pane to select the entire slide
- 235. Inserting Text Boxes • You can insert a text box to add text outside of an AutoLayout placeholder • To insert a text box: – Click on the Text Box tool in the Drawing toolbar – In the Slide pane, click on the slide and start typing or – Click and drag to draw the dimensions of the text box, then start typing
- 236. Inserting Text Boxes (cont’d) • When you select a text box, sizing handles display around its border – Sizing handles – small squares that appear at the corners and along the sides of a selected object • You can resize a text box by dragging one of its sizing handles • You can move a text box by dragging its border to a new position on the slide
- 237. Saving Presentations • Use the Save As dialog box to: – Specify where the presentation file will be saved – Give the presentation a name – Change the name of an existing presentation • Use the Save button in the Standard toolbar to save an existing presentation
- 239. Modifying Slides • You can modify existing presentations by: – Adding new slides • insert a new slide in the desired location • PowerPoint will automatically renumber all the slides following the new slide – Rearranging slides • Click and drag a slide (in Normal and Slide Sorter views) to move it to another location • Click and drag slide text (in Outline view) to move it to another location
- 240. Modifying Slides (cont’d) – Copying slides • Press and hold CTRL • Click and drag a slide to create a copy in another location • Release CTRL – Deleting slides • Select a slide • Press DEL
- 241. Moving and Copying Text • To copy text: – Use the Clipboard – copy text to the Clipboard, then paste the text from the Clipboard at the location of the insertion point • The Clipboard can store a maximum of 12 items at one time • The Clipboard toolbar displays if two or more items reside in the Clipboard • If the Clipboard toolbar is full and you copy another item to it, the first text item you copied will be removed
- 242. Moving and Copying Text (cont’d) • To copy text (cont’d): – Use drag and drop - press and hold CTRL, drag the selected text from one location and drop it into another • To move text: – Use the Office Clipboard - cut text to the Office Clipboard, then paste it to a new location – Use Drag and Drop - drag the selected text from one location and drop it into another
- 243. Deleting Text • To delete text: – Select the text you want to delete – Press DEL
- 244. Finding and Replacing Text • To find and replace text: – Display the Replace dialog box – Specify the text you want to replace – Specify the replacement text – Specify whether to match case and/or to replace whole words only (both are optional) – Click on the Find Next button to proceed to the next occurrence of the search text – Click on the Replace button to replace the current occurrence of the search text – Click on the Replace All button to replace all occurrences of the search text
- 245. Modifying Bullets • To change bullet characters: – Display the Bulleted card of the Bullets and Numbering dialog box – Select the desired default bullet style, or – Display the Bullet dialog box and assign a character as a bullet style • To use graphic bullets: – Display the Picture Bullet dialog box – Select the desired graphic bullet
- 246. Using Numbers in Slides • You can automatically number items on slides: – Arabic numerals – Roman numerals – Uppercase letters – Lowercase letters • To apply numbers to slide text: – Display the Numbered card of the Bullets and Numbering dialog box – Select a built-in number style • When you copy, move or delete numbered items, the numbers automatically recalculate
- 247. Formatting Text
- 248. Changing Text Attributes • Attributes – features of text that you can modify, such as font, font size, font style and color – Font – a family of characters with a distinctive and consistent design that gives the text in a presentation a unique look – Font Style – characteristic such as bold, italic and underline that can be applied to text – Font Size – the height of a character in a specific font, measured in points (an inch contains 72 points)
- 249. Changing Text Attributes (cont’d) • To change attributes: – Display the Font dialog box and specify the desired attributes for the selected text or – Use buttons in the Formatting and Drawing toolbars to apply the desired attributes to selected text
- 250. Changing Text Attributes (cont’d) • To replace fonts throughout a presentation: – Display the Replace Font dialog box – Specify the name of the font you want to replace – Specify the name of the replacement font – Click on the Replace button • Any other text attributes previously applied to text will not be affected
- 251. Changing Text Alignment • To change text alignment: – Click anywhere within a text box – Click on the Align Left button to align the text to the left – Click on the Align Right button to align the text to the right – Click on the Center button to center the text – Click on Format, Alignment, Justify to justify the text
- 253. Previewing Slides • You can preview slides to see how they look before you print in: – Grayscale or – Black and White • Black and White view – shows what a color slide looks like when printed on a non-color printer
- 254. Printing Slides and Changing Slide Orientation • You can print: – All slides in a presentation – Selected slides – A range of slides – The current slide • You can specify: – Landscape orientation – the slide is wider than it is tall – Portrait orientation – the slide is taller than it is wide
- 255. Printing Handouts • You can print handouts as sheets containing 2, 3, 4, 6 or 9 slides per page • To print handouts: – Display the Print dialog box – Display the Print what drop-down list, then click Handouts – Specify the number of slides per page and a horizontal or vertical order – Click the OK button
- 256. Slide transition effect : After you have created and edited your slides, you can run slide show. Slide show can show all or selected slide one after another on computer screen. To give professional look to your slide show, you can use various transition effects when the next slide replaces the previous slide. The various transition effects supported by power point include box in, box out, blinds, vertical, random, uncover, wipe etc.
- 257. • You can select a different transition effect for any or all slides of your presentation. To define any transition effect for any slide perform following steps : 1) Select the slide sorter view. 2) Select the slide for which you have to define the transition effect. 3) Click the transition button in the slide sorter toolbar and power point displays the slide transition dialog box. To select transition effect, click the effect drop down arrow. Then power point displays the various transition effects supported by it. Click the desired transition effect and power point displays it in the sample picture in the dialog box.
- 258. • Beside effect, you can also select the transition speed through slow, medium and fast radio buttons. • If you want power point automatically advance to the next slide after a specified time, click the automatically after check box and enter the required time in seconds box. • If you want to produce sound effect during slide transition choose it through the sound drop down box. • To apply the defined transition effect to current slide, click the apply button. • If you want to apply the current transition to the entire presentation, click the ‘apply to all’ button in the slide transition dialog box.
- 259. Running a slide show : To run a slide show for the current presentation, click the slide show button in the lower left corner of the window. Or you can choose view, slide show command. By default, power point start the presentation starting from the first slide. You can set up the slide show by using setup show command from slide show menu. It displays a dialog box, you can select the range of slides that you want to show as well as if you want to advance slide manually or using automatic timing. When power point runs slide show. It uses entire screen to display the slide. If you define slide timing then it displays next slide after specified time. Otherwise click the mouse or press pgdn or N to display next slide.
- 260. • If you want to display previous slide, press pgup or P. • While slide is running, you can use mouse pointer as pointer. You can convert this into electronic pen by using pen command from shortcut menu. Then you can drag mouse to highlight any area of the screen. • To display shortcut menu while running slide show, right click the mouse anywhere on the slide. • The shortcut menu also includes other command to move forward or backward, or jump to specific slide. • If you want to automatically advance the slide after a specified time, you can record slide advance timings. • The rehearse timing command from slide show menu enables you to record the slide timing.
- 261. • In this mode, you can run the slide show, and manually advance to the next slide. • Go through entire presentation and power point keeps on recording the time you spent on each slide. • At the end of the show, if you like, power point can record these timing as slide advance timing.
- 262. Custom Animation • With PowerPoint you can have items on a slide enter and exit. • This is achieved using custom animation.
- 263. Noun Modifiers A noun is sometimes used to describe another noun. For example: shopcoffeebookdonut Noun Modifier • A noun modifier is never plural. Noun • The second noun is more general than the first. a roses garden
- 264. To make this kind of slide, first insert your text boxes and images onto the slide. donut book coffee shop
- 265. Add the entrances and the exits. donut book coffee shop Go to custom animation. On the right, you will see the Custom Animation Box.
- 266. donut book coffee shop Select the first text or image you want to animate. Click on Add Effect. Choose the type of effect you like.
- 267. donut book coffee shop Do this for all of the items. If you want two items to appear at the same time, select the second item and Click Start With Previous.
- 268. donut book coffee shop Notice the list of items in the Custom Animation box. The mouse means the effect starts on the click of the mouse. The green star means it’s an entrance.
- 269. donut book coffee shop You can easily change, remove, or reorder animations.
- 270. donut book coffee shop For this lesson, we need to add some exits. When book enters, coffee must exit and when donut enters, book must exit. (The orange star means exit.)
- 271. Finally, put the items where you want them.
- 272. MS-Access
- 273. Database Concepts: • Data is a valuable resource to any business • It can be names, addresses, phone numbers, dates, SSN, etc. • Organizing, Storing, Maintaining, Retrieving, and Sorting - critical activities • Data should be organized to facilitate the above mentioned
- 274. MS Access • Microsoft Program • Part of the Microsoft Office suite • Used to create relational database management system (RDMS) – consists of multiple tables, each storing specific information – relates information from one table to another – One-to-many relationships are the power behind a relational database • Query the database to find information • Enter information into forms • Display results in reports
- 275. Basics of Access • The key window in Access is known as the ‘database window’. • Seven objects can be launched from this window: – Tables – Queries – Forms – Reports – Pages – Macros – Modules • These objects, in turn, become their own windows.
- 276. Basics of Access • The smallest piece of information in a database is called a field – customer name • A group of related fields is called a record – customer name, address, phone number • A table is a collection of records about a particular subject – customers • A relational database consists of a set of related tables – Customers and Orders and Products
- 277. Basics of Access • Primary Key – A field used to uniquely identify each record – Every table in a database must have a primary key defined • Composite Key – More than one field used in combination to uniquely identify each record • Foreign Key – A field (in one table) that is related to a primary key in another table within the same database.
- 278. Basics of Access • Queries – A subset of table information – Similar to filter or find operation within table • searches for records according to specified criteria and displays these records – Also like a sort operation • can change the order of records – Differs from filter and sort in that a query can be run against several tables
- 279. Basics of Access • Forms – Used to easily view, enter, and change data directly in a table – retrieves the data from one or more tables, and displays it on the screen – also display pictures and other objects – can contain a button that prints, opens other objects, or otherwise automates tasks • Reports – Used to analyze your data or present it a certain way
- 280. Data Types • Text • Memo • Numbers – Byte – Integer – Long integer – Single – Double • Date/time • Currency • AutoNumber • Boolean – Yes/no – True/False – 1/0 • OLE Objects • Hyperlink • Lookup Wizard
- 281. Create a Database in MS Access 2007 and up • Click on the round Office button • Choose New from the drop-down menu • In Create Blank Database window specify the database name • Click Create
- 282. Create Table • Using Wizard • Design View – Specify field names – Data types – Properties – Determine a primary key – Save the table
- 283. Access Tables • Design view – Table structure is created and may be edited • Datasheet view – Display table content in spreadsheet-like grid, – Used for entering, editing or deleting data from tables
- 285. What is MS Paint MS Paint is a tool used to simulate a canvas and paintbrush on a home or personal computer. It can be used to paint different things including scenery, self-portraits, and police sketches. It allows to an artist to create realistic paintings without the chance of spilling messy paint all over the place. Easy to use for adults, children, and a few
- 286. What is MS Paint MS Paint is a tool used to simulate a canvas and paintbrush on a home or personal computer. It can be used to paint different things including scenery, self-portraits, and police sketches. It allows to an artist to create realistic paintings without the chance of spilling messy paint all over the place. Easy to use for adults, children, and a few species of professionally trained apes.
- 287. History of MS Paint MS Paint was created entirely by Bill Gates when he was only 11 years old. Bill was assigned a class project from his teacher which involved painting a picture. Having been recently unemployed, Bill's parents were unable to afford the costly paints required for the project. Bill saved up his allowance and bought an IBM PS2 computer from a garage sale and wrote the very first version of MS Paint for Windows 3.11
- 288. Basic MS Paint Tools Pencil Tool – Used to draw one pixel at a time. Simulates a #2 pencil (which most of you should be familiar with as artists.) Paint Brush – Used to fill in multiple pixels at a time. Different patterns can be chosen. This tool must become your best friend.
- 289. More Basic MS Paint Tools Eraser – Erases part of the picture, usually due to a mistake. Remember, a good artist never makes a mistake, so you probably won't need this very much. Fill Bucket – This tool fills in an open space with paint. Don't be afraid to use this tool a lot, the computer's paint supply never runs out on modern computers!
- 290. Advanced MS Paint Tools Line Tool – This tool allows the artist to create a straight line from one point to another. Squiggly Line Tool – This makes a line just like the Line Tool only more squiggly. Circle – Creates several pixels, all equidistant from one central point. Also used for ovals. Hint: heads are made out of these shapes! Square – Creates a square and/or rectangle. Which one is up to you.
- 291. Additional MS Paint Features MS Paint gives you the power to save and load pictures from before. You may 'print' your painting out on a sheet of paper so that it looks exactly like any other painting. Color mode supported. The window can be minimized so that you may do other tasks with your computer while working on a piece of artwork.
- 292. Microsoft Outlook
- 293. Introduction • Microsoft Outlook is a personal information manager from Microsoft, available as a part of the Microsoft Office suite. • Although often used mainly as an email application, it also includes a calendar, task manager, contact manager, note taking, a journal and web browsing.
- 294. Technology and Tools • Microsoft Outlook Basics to Manage Your Days – E-mail management – Calendar management – Task management
- 295. Create an account • An e-mail account must be created before sending/receiving e-mail. • Follow these steps to create an e-mail account: – Select Tools. – Select Account Settings. – Press the New button to begin the new account process. – Check the box to manually configure server information.
- 296. Create an account • Creating an Internet account: – Press the Internet E-mail account button and press Next. – Enter your name and e-mail address then choose an account type. – Provide server and logon information and press Next. – Press Next. – Press Finish on the Congratulations screen.
- 297. Create an e-mail message • Follow these steps to create an e-mail message: – Ensure Mail is selected in the Navigation Pane. – Press New on the Standard toolbar. – Enter recipient addresses; separate multiple addresses with semicolons. – Enter a subject line. – Type the body of your e-mail. – Press Send to send the message.
- 298. Formatting an e-mail message Plain text is often the best format for sending e-mail When bold text, italics, bullets, or other styles are required, use the Office ribbon’s Message tab (above) or the Format Text tab. If the Formatting selections appear grayed out, change the message format on the Options tab.
- 299. Add an e-mail signature Include contact information in each message. Use e-mail signatures to avoid repetitively typing the same copy. Add a vCard to make it easy for a recipient to add you as a contact.
- 300. Junk e-mail • Use Outlook 2007’s Junk E- mail filter to automatically reduce unwanted messages. • To enable Junk E-mail filters: – Select Actions. – Select Junk E-mail. – Press Junk E-mail Options. – Select the appropriate filtering option from the resulting menu.
- 301. Junk e-mail • Low sends the most obvious junk messages directly to the Junk E-mail folder. • High increases the chance that some valid messages may be sent to the Junk E-mail folder. • Safe Lists Only offers the ability to receive e-mail only from specified parties. • Additional checkboxes adjust Outlook 2007’s filters by automatically deleting suspected junk messages and deactivating active message links.
- 302. Junk e-mail • Spam may still arrive in the Inbox – Right-click such e-mails, select Junk E-mail, and select Add Sender to Blocked Senders List. • Valid messages may be marked spam – Right-click such e-mails, select Junk E-mail, and select Mark As Not Junk.
- 303. Automatic Download Settings • Outlook 2007’s Automatic Picture Download Settings specify how images appear in messages. • To adjust the default settings: – Select Tools. – Select Trust Center. – Select Automatic Downloads
- 304. Automatic Download Settings • You can also specify settings directly from within an e-mail message. • Right-click the information box. • Specify whether Outlook 2007 should: – Download Pictures – Change Automatic Download Settings – Add Sender To Safe Senders List – Add Sender’s Domain To Safe Senders List
- 305. Safe Senders List • Displaying images makes many e-mail messages readable. • Adding valid senders and valid senders’ domains to the Safe Senders List helps ensure their messages arrive properly in your Inbox.
- 306. Safe Recipients • View and edit safe recipients the same way – Select Actions. – Select Junk E-mail. – Select Junk E-mail Options. – Select the Safe Recipients tab. • Safe Recipients is typically used for discussion lists.
- 307. Rules and Alerts Use Rules and Alerts to compose automatic responses. Create standard response messages and save them as Outlook 2007 templates. Leverage Rules and Alerts to further organize your e-
- 308. Managing Contacts • Contacts is an electronic address book. • Add a new contact by selecting Contacts in the Navigation Pane and pressing New. • Using Contacts helps eliminate typing errors when addressing e- mail messages.
- 309. Managing Calendars • Calendar is an electronic appointment book. • Create a new appointment by selecting Calendar in the Navigation Pane and pressing New.
- 310. Managing Calendars • Appointments you create are automatically added to your Calendar. • You may accept appointments from others. • Alternatively, you may reject an appointment or tentatively accept it.
- 311. Managing Tasks • Tasks provides an electronic To Do list. • To create a new Task: – Highlight Tasks in the Navigation Pane. – Select New from the Standard toolbar. – Provide the relevant information. • Sort Tasks by right-clicking any column heading and selecting Arrange By and
- 312. Adobe Acrobat Reader
- 313. What is a PDF file? PDF (Portable Document Format) is a file format that has captured all the elements of a printed document as an electronic image that you can view, navigate, print, or forward to someone else.
- 314. PDF File • PDFs are useful if you want to maintain the graphic appearance of your document, e.g. magazine articles, charts, or brochures. • A PDF file contains one or more page images, where you can zoom in on or out from. You can also move forward and backward. It is almost like reading a book
- 315. Portable Document Format (.pdf) • Portable Document Format (PDF) has become the standard for electronic document distribution worldwide. • PDF is a universal file format that preserves all the fonts, formatting, graphics, and color of any source document, regardless of the application and platform used to create it.
- 316. Adobe Acrobat Reader • Adobe Acrobat Reader is free software that lets you view and print Adobe Portable Document Format (PDF) files on all major computer platforms. • Anyone with internet access can go to Adobe.com and download Acrobat Reader in order to view and print out .pdf files
- 317. Adobe Acrobat Reader • PDF file will look exactly as you intended — with layout, fonts, links, and images intact.
- 318. How Can I Look At a PDF File? Double-click on the pdf file to open it in Adobe Acrobat Reader. Here are some tasks you can accomplish: Search for a specific word or phrase. You can search in the current file or all pdf files in a particular directory Improve reading by zooming in and out. Use the hand to move the file around. Capture data from a PDF file. Use Select to highlight text to paste into another document or, Take a snapshot to paste as an image Print or Email your PDF file
- 319. Why PDF? (Advantages) • Portability • Preservation of visual formatting and layout • Ideal format for long documents intended for printing • Easy to produce compared to HTML • Documents can be secured against editing
- 320. Examples of PDF use • Technical documents and manuals • Reports, especially with complex layouts, graphs, charts etc. • Forms, meant for print or online delivery • Scanners and other hardware that output PDF • Print and design industry • Large and/or complex documents published on web sites
- 322. Adobe Professional • Adobe Acrobat is a set of application software developed by Adobe Systems to view, create, manipulate, print and manage files in Portable Document Format (PDF). • Adobe Acrobat Professional is designed for individuals who need robust software to create and publish PDF documents, often for business or graphic design purposes.
- 323. Adobe Professoinal
- 324. Features of Adobe Pro • Configuring Adobe Acrobat Distiller X • Creating a PDF with Automatic Bookmarks • Bookmarking PDF Files Manually • Printing to a PDF • Inserting Pages in a PDF Document • Replacing Pages in a PDF Document • Adding the Title and Product ID Number to the Document Summary Tab • Adding Security to a PDF File • Saving a PDF File
- 325. Acrobat Professional have a dedicated 'Combine Files' menu option in the 'File' menu. It's easy to use and powerful, allowing you to C reate pdf files.
- 326. Create a PDF from a blank page • With the PDF Editor feature, you can create a PDF from a blank page rather than beginning with a file. • This process can be useful for creating relatively small PDFS or blank pages for insertion into an existing PDF file.
- 328. Place an image or object
- 329. Creating new PDF • Move or edit an Object • Place Image • Set Clip • Delete Clip • Flip Horizontal, Flip Vertical • Edit Image, Edit Object Once a pdf is created, it can be used universally without editing permissions.
- 330. Chemdraw
- 331. Introduction • ChemDraw is a molecule editor developed by the cheminformatics company CambridgeSoft. • ChemDraw is, along with Chem3D and ChemFinder, part of the ChemOffice suite of programs and is available for Macintosh and Microsoft Windows.
- 333. Features • Chemical structure to name conversion • Chemical name to structure conversion • NMR spectrum simulation (1H and 13C) • Mass spectrum simulation • Structure cleanup • An extensive collection of templates, including style templates for most major chemical journals. • Export to SVG • Export to PDF
- 334. File Format • The native file formats for ChemDraw are the binary CDX and the preferred XML based CDXML formats. • ChemDraw also can import from, and export to, MOL, SDF, and SKC chemical file formats.
Notes de l'éditeur
- Jakljsdfkl asjdklaj fdajljalskdjlajsdf\ asdfkafdjfkj
- Technology allows the virtual work environment to exist. Let’s take a look at Microsoft Outlook, an application that is available to you. It can help you to work more efficiently by helping you manage your time and stay organized. Microsoft Outlook is not just a vehicle for e-mail. This application contains many features to help organize and prioritize your e-mail, calendar appointments, and tasks.
- Before you can send e-mail in Outlook 2007, you must create an account. While your network administrator or Internet Service Provider registers and configures the actual e-mail address (such as yourname@) and domain name (as in yahoo.com), you need to configure Outlook 2007 to receive the messages sent to your e-mail address. To create an e-mail account in Outlook 2007, select Tools from the menu bar and select Account Settings. Doing so opens the Account Settings manager (shown here). Press the New button to open the New Account wizard. In some cases Outlook 2007 can configure your server settings for you, although this may work best in environments using Exchange 2007. Manually configuring settings is a simple process none the less.
- For this example, assume you were creating an account to work with your broadband Internet provider at home. Most ISPs support POP3 accounts, so press the Internet Email account radio button and press Next. You’ll see an Internet E-mail Settings dialog box (shown). Enter your name and the e-mail address in the User Information section. Provide the server and logon information (provided by your administrator or ISP) and any additional settings (again, as provided by your administrator or ISP), and press Next. Press Finish, and the new e-mail account is created. You can verify the new account was created by pressing Tools from the menu bar and selecting Account Settings. Press the Change button. The new e-mail account options will appear in the Internet E-Mail settings window and can be modified. Once the account is created, you can create and send e-mail messages.
- Ensure Mail is selected in the Navigation Pane and press New on the Standard toolbar. If the Navigation Pane is not appearing, press the Alt and F1 keys simultaneously to make it appear. A new e-mail message, complete with the Formatting toolbar displayed, will appear. Enter the recipient’s e-mail address in the To field. Should you wish to send copies of the message to additional recipients, enter their addresses in the To or CC fields; separate multiple e-mail addresses with a semicolon. You can also choose to send a copy of the message to another recipient but hide the recipient’s e-mail address from others. To do so, enter the e-mail address you wish to hide in the BCC field. If the BCC field doesn’t appear by default, you can display it by pressing View on the menu bar and selecting BCC. You can provide a subject line for the e-mail message in the Subject field and type your message in the body of the e-mail. Should you maintain multiple e-mail accounts, press the Accounts button to ensure the appropriate e-mail account is used to send the message. The message will be sent from the account you select from the Account drop-down menu. When the message is complete, send it to the recipients you specified by pressing the Send button.
- Often all that’s required for an effective e-mail message is straightforward text. On other occasions, you may wish to send a professionally formatted message. Use the Formatting toolbar (shown) to dress up text and improve the message’s appearance. If the Formatting toolbar’s icons appear grayed out or disabled, it’s likely because the message format is set to Plain Text. Change the format by pressing Format on the menu bar and selecting HTML or Rich Text, as shown. Using the Formatting toolbar, you can change font type and font size and specify bold, italic, and underline styles. You can also specify that text be justified left, centered, or justified right. Just highlight the appropriate passages and press the respective icon. Should you need to use bullets to list several items or create a numbered list, select the appropriate icon from the toolbar. Specify any required indentation using the indent buttons (each time you press one of the two indent buttons, the text will move a predetermined distance in the direction you specify). Should you wish to separate thoughts or create sections, press the Insert Horizontal Line icon. As with so many things, a little goes a long way when formatting a message. Take care to minimize formatting features to help highlighted text stand out and keep from creating e-mail messages that are too “busy.” Remember, too, that any recipients having their default e-mail format set as Plain Text will not see any specially formatted text in your message.
- Many professionals include their title, company, street address, telephone numbers, and even Web address at the end of each e-mail they send. Don’t type that information every time you send an e-mail; create an e-mail signature instead. Outlook 2007 stores such information in a signature file. You can specify that the signature be used each time you send a message as well as indicate whether you wish for the signature to be used when you reply to a message. Follow these steps to create an e-mail signature: Select the Signatures object from the Message tab. Select Signatures. In the Signatures And Stationary window, press the E-mail Signature tab and press the New button. Enter a name for the new signature, and press OK. Enter the text for your signature in the text box on the Signatures And Stationary window. When you are finished entering the text, you can format it using the options above the entry box. At the top of the window, select the default signature and when to apply it. Specify whether you wish to include your vCard (an electronic business card that makes it easy for a recipient to add you as a contact) with each message you send. Press OK.
- Often you’ll receive unsolicited e-mail messages. You can help prevent large amounts of so-called spam by being selective in who you provide with your e-mail address. Don’t post your e-mail address to public forums on the Internet, and be careful not to give your e-mail address to just any firm on the Web. Even if you’re fastidious in safeguarding your e-mail address, it’ll ultimately make its way to some less-than-honorable marketers. When it does, you’ll begin receiving unwanted e-mail. Reputable firms typically honor unsubscribe requests (look at the bottom of most commercial e-mail messages for accompanying unsubscribe information). Disreputable organizations, however, monitor unsubscribe requests to track which e-mail addresses remain current and then send additional spam to those addresses. Your best bet is to filter the messages you do not need to prevent future solicitation. But in many cases you’ll be stuck with e-mail you don’t want. Outlook 2007 includes a Junk E-mail filter you can leverage to eliminate unwanted messages before they even hit your Inbox. Ensure the Junk E-mail filter is enabled by selecting Actions, selecting Junk E-mail, and pressing Junk E-mail Options. The Junk E-mail Options dialog box will open. View the Options tab and select any option but the first (No Automatic Filtering) to enable the Junk E-mail filter.
- Select Low if you wish to move only the most obvious junk messages to the Junk E-mail folder. Select High to lower the threshold at which e-mail is considered junk. If, after selecting Low, you continue receiving large amounts of junk e-mail in your Inbox, try the High option. Just be sure that if you select High you regularly check the Junk E-mail folder to ensure desired messages aren’t being labeled junk by mistake. You can also elect to choose the Safe Lists Only option. When selecting Safe Lists Only, only e-mail from people and domains you’ve listed in the Safe Senders List or Safe Recipients List will be delivered to your Inbox. There are four checkboxes at the bottom of the Junk E-mail Options tab. These options allow the following actions: Send junk e-mail directly to deleted items Disable links in suspected junk e-mail Warn about suspicious domain names in e-mail messages Postmark outgoing messages to help other mail clients distinguish legitimate mail from junk mail. Links in individual e-mail messages can be turned on by right-clicking the information bar that will appear in messages that contain links. The same is true of embedded images.
- Junk messages Outlook 2007 mistakenly believes are valid may still clear the Junk E-mail filter and land in the Inbox. When they do, right-click the e-mail message in the Inbox, select Junk E-mail, and select Add Sender To Blocked Senders List. A dialog box will appear stating that the sender of the message has been added to the Blocked Senders List and that the message will be moved to the Junk E-mail folder. Outlook 2007 will then automatically block any future messages from the same sender. Sometimes you may have the opposite problem, in which Outlook 2007 marks a valid e-mail message as junk and places it in the Junk E-mail folder. When this situation occurs, right-click the message in the Junk E-mail folder, select Junk E-mail, and select Mark As Not Junk (grayed out here, as this message has already been marked as Not Junk). The Mark As Not Junk dialog box will appear. By default, the Always Trust E-mail From “sender’s_domain” box will be checked. You can also elect to select the checkbox to instruct Outlook 2007 to always trust e-mail sent from the sender’s domain. Once you press OK, Outlook 2007 will move the message to your Inbox and display any images contained within the e-mail.
- Outlook 2007 maintains other security protections to prevent offensive content from appearing and malicious code from automatically running when receiving a message. You may adjust Outlook 2007’s default Automatic Picture Download Settings at any time. Select Tools, select Trust Center, then select Automatic Downloads. The Automatic Download Settings screen appears (as shown here). Select the first checkbox (Don’t Download Pictures Or Other Content Automatically In HTML E-mail or RSS Feeds) to prevent pictures contained in HTML formatted email or RSS feeds from downloading automatically. Select the second and third checkboxes if you wish to permit downloads from senders and recipients specified in the Safe Senders and Safe Recipients Lists and to permit downloads from Web sites listed in the Trusted Zone security zone. The third check box allows you to automatically download images from Web sites in the trusted sites list of your Web browser. Checking boxes four and five allow you to permit downloads in RSS feeds (a new Outlook 2007 feature covered in another session) and SharePoint discussion lists (valid if you have access to a SharePoint server). The final checkbox will produce a warning about downloaded content when you reply, forward, or edit e-mail messages.
- You can also specify settings directly from within an e-mail message in your Inbox. Right-click the Outlook 2007 information box (shown here in red) that appears at the top of an e-mail message to change settings. Doing so opens a pop-up menu that typically presents the following options: Download Pictures Change Automatic Download Settings Add Sender To Safe Senders List Add Sender’s Domain (@example.com) to Safe Senders List You can select Change Automatic Download Settings to configure the settings discussed on the last slide. Other options are available, too. For example, you can instruct Outlook 2007 on how to manage the current message. Notice that when messages with images arrive in your Inbox, by default, Outlook 2007 usually blocks the pictures from appearing (as shown here). Select Download Pictures from the pop-up menu to display the e-mail message’s images.
- Here’s the same message (below) after instructing Outlook 2007 to display the pictures. The images now appear, making this specific e-mail much more user-friendly. As you can see from the subject line, Outlook 2007 originally marked this message as spam. If you wish to accept such future e-mails from the sender, right-click the Outlook 2007 information box and select Add Sender To Safe Senders List. Should you wish to receive all future communications from the company, select Add Sender’s Domain (@example.com) To Safe Senders List. All e-mail messages originating from that company’s Internet domain, and not just the sender of this specific e-mail, will then be passed directly to your Inbox. You can view your blocked senders and safe senders lists by selecting Actions | Junk E-mail | Junk E-mail Options, and selecting the respective tab (either Safe Senders or Blocked Senders). You can manually add or edit entries using the provided buttons on the respective dialog boxes (shown here in the top screenshot).
- You can view and edit your Safe Recipients list the same way. Select Actions, select Junk E-mail, select Junk E-mail Options, and select the Safe Recipients tab. Like the Safe Senders list, the Safe Recipients list specifies messages that are not junk. Unlike the Safe Senders list, which bases message validity on the sender’s address, the Safe Recipients list bases validity on the address to which messages are sent. The Safe Recipients feature is typically used to ensure you receive messages from an e-mail discussion list to which you’ve subscribed.
- If you receive much e-mail that can be answered with a single pre-prepared message, leverage Outlook 2007’s ability to generate automatic responses. Use Rules and Alerts to compose a customized message to specific e-mails you receive. First, you must create the standard response you wish to send recipients. To create the actual response template, press New, and create the message you wish to send as your automatic response (leaving the To address blank). When you’re done, press Save As from the Office menu (in the top left corner of the message window, bearing the Office logo), choose Outlook 2007 Template as the Save As type, provide a filename, and press Save. Now you’re ready to create the rule. Ensure Mail is selected in the Navigation Pane, select Tools from the menu bar, and select Rules and Alerts. (The Rules and Alerts management screen is shown here at top.) Press New Rule to open the Rules Wizard (shown here at bottom). Using the wizard, you can create a rule from a template or from a blank rule. For this example, select the Start From A Blank Rule radio button and press Next. Select the checkbox for With Specific Words In The Subject and click the Specific Words Link in the Step 2 box, specify your words, press Add, and press OK. Press Next and select the box for Reply Using A Specific Template and specify a template in the Step 2 window. Apply any exceptions and select Next. Specify a name for the rule and press Finish. You can also use Outlook 2007’s rule templates to move messages, such as those from an important customer or your supervisor, to a location you specify. The combinations of rules and alerts are virtually endless, but by experimenting with the wizard you can create rules that help ensure you see important messages immediately and save time by eliminating the need to respond to the same inquiry repeatedly.
- One of Outlook 2007’s most popular features is Contacts. Think of it as an electronic address book. Outlook 2007 can store a vast amount of information about clients, colleagues, family members, coworkers, suppliers, vendors, and anyone else whose contact information you wish to keep. Select Contacts from the Navigation Pane to access the feature. To create a new Contact, select File | New from the menu bar or press the New button on the Standard toolbar. An Untitled Contact appears. Enter the information you wish to include for the contact and press Save and Close. The contact will now appear in the Contacts list. Using Contacts helps eliminate typing mistakes when addressing e-mail messages, as you can press the To button in e-mail messages and select a recipient from the resulting Select Names entries (which is populated using your default Contacts file). Should you receive a vCard in an e-mail message, you can simply drag-and-drop the card to the Contacts display button in the Navigation Pane and Outlook 2007 will automatically add the contact for you. Contacts enables users to sort entries alphabetically, by category, by company, by location, or even by a customized view. When you need to update an entry, just select the contact, select the field needing updating, and make the change. Press Save and Close to store the changes. Delete contacts by right-clicking on a contact and pressing Delete. Contacts are also used to invite others to meetings. Let’s explore Calendars next.
- Think of Outlook 2007’s Calendar as an electronic planner. Calendar stores appointments by categories you specify. These categories are color-coded (shown at top). If no category is specified or a previous version of Outlook 2007 is used, the busy indicator is blue in color and out of office is purple. These colors are still used in the scheduling calendar. Press Calendar in the Navigation Pane to open the feature. To schedule an appointment, select the appropriate month in the Navigation Pane and select the date; then, either highlight the time, right-click the highlighted time span and select New Appointment, or press the New button on the Standard toolbar. A new Untitled Appointment will appear (as shown in the bottom picture of the slide). Provide the appropriate information and list the attendees for the meeting or event. If Outlook 2007 is connected to an Exchange server, you can check other invitees’ schedules (to confirm they’re free) using the Scheduling tab. Use the Recurrence button to set a regularly recurring meeting. Specify reminders by checking the Reminder checkbox and specifying when attendees should receive an alert for the impending event. Selecting the All Day Event checkbox automatically schedules the appointment for the entire day. Use the Show Time As drop-down box to specify whether Calendar should display the scheduled time as being free, tentative, busy, or out of the office. When you’ve provided all the information for the appointment, press Save and Close.
- If you create an appointment for yourself, the item will automatically be added to your Calendar. When you receive appointment requests from others, you’ll see several options including Accept, Tentative, and Decline. Select the appropriate choice and, based on your selection, the appointment will be declined or accepted and added to your Calendar. If you tentatively accept an appointment, it will appear with a striped border within your Calendar (as opposed to blue or purple).
- Outlook 2007 also offers a powerful electronic To Do list. Tasks supports creating To Do lists that help you track specific projects. To use Tasks, select Tasks from the Navigation Pane. Select New from the Standard toolbar, and you’ll see a new Untitled Task (as displayed here). Enter a subject, specify start and due dates, indicate the priority, and set the status, as well as any reminders, categories, and the percent of the project that’s complete. You can also link a task to a contact, mark the task as private, and provide additional information (including billing information, mileage data, and other details) using the Details tab. Tasks you perform each day, week, or month can be set to recur using the Recurrent button. Should you choose, you can assign tasks to others using the Assign Task button. Once you’ve entered all the appropriate information, press Save and Close, and Outlook 2007 will add the task to your Task list. You can sort Tasks a number of ways. Right-click any column heading to access the sorting menu. Additional fields can be added by clicking Field Chooser and specifying fields you wish for Tasks to display. When a Task is complete, highlight the respective Task and press delete. Alternatively, you can edit a Task at any time by double-clicking it, making the changes you require, and pressing Save and Close.