Moodle Introduction - Develop Your Own Online Course Today.
•
8 j'aime•1,394 vues

Moodle introduction: develop your own online course today; preconference at Online Educa by Pieter van der Hijden (pvdh@sofos.nl) en Hans de Zwart (hans@ned-moove.nl); Ned-Moove (Nederlandstalige Moodle Vereninging) (www.ned-moove.nl); Sofos Consultancy; Berlin, 3 December 2008.

Recommandé
Contenu connexe
Similaire à Moodle Introduction - Develop Your Own Online Course Today.
Similaire à Moodle Introduction - Develop Your Own Online Course Today. (20)
Plus de Pieter van der Hijden
Plus de Pieter van der Hijden (20)
Dernier
Dernier (20)
Moodle Introduction - Develop Your Own Online Course Today.
- 1. Online Educa Berlin 3 December 2008 Preconference Moodle Introduction: Develop Your Own Online Course Today Trainers: Pieter van der Hijden & Hans de Zwart. 2008 - Pieter van der Hijden (pvdh@sofos.nl) - This work is licensed under a Creative Commons Attribution- Noncommercial-Share Alike 3.0 Unported License.
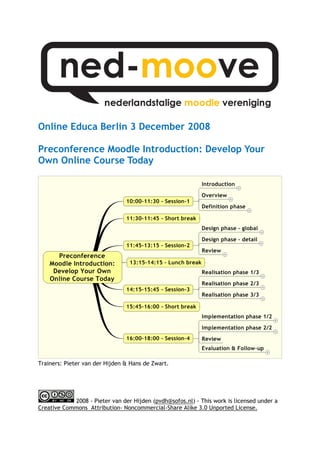
- 2. Online Educa Berlin 2008 Preconference Moodle Introduction www.ned-moove.nl Contents 10:00-11:30 - Session-1 .................................................................................3 Introduction ...........................................................................................3 Organisation ........................................................................................3 Trainers .............................................................................................3 Exercise .............................................................................................4 Overview ...............................................................................................5 The original course(s) .............................................................................5 This preconference ................................................................................5 Virtual Learning Environment ....................................................................6 Definition phase.......................................................................................8 Synopsis .............................................................................................8 Meta data ...........................................................................................8 Exercise .............................................................................................9 11:30-11:45 - Short break ............................................................................ 11 11:45-13:15 - Session-2 ............................................................................... 11 Design phase - global ............................................................................... 11 Synopsis ........................................................................................... 11 Exercise ........................................................................................... 11 Design phase - detail ............................................................................... 15 Detail design ...................................................................................... 15 Exercise ........................................................................................... 22 Review................................................................................................ 22 Exercise ........................................................................................... 22 13:15-14:15 - Lunch break............................................................................ 23 14:15-15:45 - Session-3 ............................................................................... 23 Realisation phase 1/3 .............................................................................. 23 Synopsis ........................................................................................... 23 Exercise ........................................................................................... 23 Realisation phase 2/3 .............................................................................. 23 Assets .............................................................................................. 23 Sources ............................................................................................ 24 Realisation phase 3/3 .............................................................................. 26 Exercise ........................................................................................... 26 15:45-16:00 - Short break ............................................................................ 30 16:00-18:00 - Session-4 ............................................................................... 30 Implementation phase 1/2 ........................................................................ 30 Synopsis ........................................................................................... 30 Course testing .................................................................................... 30 Exercise ........................................................................................... 32 Implementation phase 2/2 ........................................................................ 32 Scales .............................................................................................. 32 Review................................................................................................ 32 Evaluation & Follow-up ............................................................................ 33 Evaluation ......................................................................................... 33 Follow-up ......................................................................................... 33 2-12-2008 2
- 3. Online Educa Berlin 2008 Preconference Moodle Introduction www.ned-moove.nl 10:00-11:30 - Session-1 Introduction Organisation Ned-Moove This preconference is brought to you by Ned-Moove, the Dutch Moodle Association. This association has members and organises events and other activities in The Netherlands, Flandres (Belgium) and Suriname. Your trainers Pieter van der Hijden and Hans de Zwart both are members of the Ned-Moove board. Website: www.ned-moove.nl Contact: info@ned-moove.nl Moodle Moodle is a course management system (CMS) - a free, Open Source software package designed using sound pedagogical principles, to help educators create effective online learning communities. You can download and use it on any computer you have handy (including webhosts), yet it can scale from a single-teacher site to a University with 200,000 students. Website: moodle.org Contact: Moodle partners, Moodle community, Ned-Moove Trainers Pieter van der Hijden • Management consultant on organisation and ICTs with Sofos Consultancy (www.sofos.nl), working in The Netherlands and Suriname • Secretary of the Ned-Moove board (www.ned-moove.nl) • Contact: pvdh@sofos.nl Hans de Zwart • E-Learning consultant with Stoas Learning (www.stoas.nl) • Chairman of the Ned-Moove board (www.ned-moove.nl) • Contact : hans@hansdezwart.info 2-12-2008 3
- 4. Online Educa Berlin 2008 Preconference Moodle Introduction www.ned-moove.nl Exercise Login and change your password • We created an account for you on http://www.ned-moove.nl. • The facilitators will give you a 2-digit number, e.g. 12. This implies that your login name is: oeb12, your firstname is firstname12, your lastname is lastname12 and your e-mail address is email12@ned-moove.nl. In any case your password is changeme. • Log in on http://www.ned-moove.nl, use the appropriate login name and password. • The system will ask you to change your password. You may use the new password you prefer. The system keeps it secret and stores it in a scrambled way. Even the system administrator cannot decypher it. Update your profile • Once you have logged in, click on your fullname at the upper right corner of the screen. • The system displays your personal profile. • Click on Edit Profile; the system willl display a form you can update. • Replace the firstname, lastname and e-mail address by your real firstname, lastname and e- mail address. • Fill in your City and your Country. • Fill in the Description field. Give a on line description of yourself, e.g. your position. Note, that this information might be public. • Upload a picture of yourself, if you have one at hand. • Click the Update Profile button. Offered and Wanted • At http://www.ned-moove.nl we created a course to support this OEB Moodle Intro preconference. • Once you have logged in and have updated your profile, click on the OEB Moodle Intro course. • The system displays the home page of the course. Note, that it consists of three columns. The centre column is subdivided into sections. It starts with a general section (without number) and continues with a series of numbered sections. Go to the first section: Introduction and click on the offered/wanted forum. • The offered/wanted forum contains two questions. Click on one of them, answer the question by composing and sending a reply. Do the same for the other question. • Once you have answered both questions, you may browse this forum to read the responses by the other participants. If you want to comment, feel free to give a Reply to a Reply. 2-12-2008 4
- 5. Online Educa Berlin 2008 Preconference Moodle Introduction www.ned-moove.nl Overview The original course(s) This preconference See the frontpage of this handout. 2-12-2008 5
- 6. Online Educa Berlin 2008 Preconference Moodle Introduction www.ned-moove.nl Virtual Learning Environment Education Production Process Supporting Software Systems Moodle User Interface 2-12-2008 6
- 7. Online Educa Berlin 2008 Preconference Moodle Introduction www.ned-moove.nl Course Components 2-12-2008 7
- 8. Online Educa Berlin 2008 Preconference Moodle Introduction www.ned-moove.nl Definition phase Synopsis The first phase of the course development process is the definition phase. At the end of this phase it must be clear which quot;problemquot; this development process is going to solve and in which direction a quot;solutionquot; will be created. During this phase, the educational requirements for the course are specified. Which is the learning challenge the course is focused on? Which are the characteristics of the learners? How much support should the online course offer to the participants? Is it really a distance course or not? Further, the course developer has to explore the organisational context of the online support. What is more appropriate, synchronous or asynchronous activities? In fact, the definition phase leads to the first draft of the metadata of your course. Meta data Sooner or later, educational institutes will have hundreds of courses online. To use them in an efficient and effective way, descriptions of the online courses will find their way to search engines, catalogues and a variety of listings. These metadata, data on data, have been standardised. One such a standard is the IMS Learning Resource Meta-Data Information Model, an open standard published by the IMS Global Learning Consortium. In our training we use a subset of the IMS Meta-Data model. Here is a limited subset of that model. Title: Topic: Language: Aggregation level: (choose one) single component / supporting materials / complete distance course Version: Contributors: Role Entity (name / organization) Date Format: Moodle v 1.9 course Intended user role: Student Context: Difficulty: Typical learning time: Copyright and other restrictions: 2-12-2008 8
- 9. Online Educa Berlin 2008 Preconference Moodle Introduction www.ned-moove.nl Exercise Update the settings of your course • We created an empty course for you. It is called quot;Moodle Intro - Empty Course nnquot; where nn has to be replaced by the 2 digit number the trainers have given you before. You have the teacher role for this course. • Go to your own course. • The system displays the home page of your course. We have filled in a few details already. However, most of the page is still empty. • Go to the left column: Administration block: Settings. • The system displays the course settings form. • Do not change the course category. • Replace the full name of the course by the title of your own choice. • Replace the short name of the course a short name or code you prefer. This short name will be used as quot;breadcrumbquot; at the top of each page, i.e. a hyperlink to return directly to the home page of your course. • Enter a short description your course (preferably one sentence only) in the summary field. • Set the number of weeks/topic to the actual number of topics in your course. • Do not change any other fields. • Save your changes. • The system displays the course home page again. Fill in the metadata • At the top of the centre column of your course, we created an entry called quot;metadata (for teachers only). Note that this entry appears dimmed. It is only visible for the teacher(s) of this course, i.e. you! • When you click the entry, the system displays a web page containing an empty metadata form. • Click on quot;Update this resourcequot; to open the form for editing. Do not forget to save your changes. Fill in course and section title(s) • Go to the home page of your course. Note, that the title of your course is not shown there. This is a matter of the appearance theme used. • Enter the course title manually. 1. Click on the quot;quot;Turn editing onquot; button (upper right corner). 2. At the top of the centre column, below the words quot;Topic overviewquot;, click the edit icon (small picture of hand with pencil). 3. The system displays an editing field. 4. Fill in the name of your course. Select the text and set the text style to quot;Heading-1quot;. 5. Save the changee. 2-12-2008 9
- 10. Online Educa Berlin 2008 Preconference Moodle Introduction www.ned-moove.nl • Enter the title of one of your sections. 1. If you did not already before: Click on the quot;quot;Turn editing onquot; button (upper right corner). 2. The centre column contains a sequence of empty sections. Go to the section you want to give a title and click its edit icon (small picture of hand with pencil). 3. The system displays an editing field. 4. Fill in the name of this section. Select the text and set the text style to quot;Heading- 2quot;. 5. Save the changes. 2-12-2008 10
- 11. Online Educa Berlin 2008 Preconference Moodle Introduction www.ned-moove.nl 11:30-11:45 - Short break 11:45-13:15 - Session-2 Design phase - global Synopsis The second phase of the course development process is the design phase. The results of the definition phase form its starting point. At the end of this phase the course has to be specified completely. Other people (programmers, graphic designers, text writers) have enough information to be able to really build it. The design is tested for internal consistency and for a consistent application of the definition phase results. Designing an online course is not a mechanical process. Numerous questions have to be dealt with. To give a short impression: • what is really needed to fulfil the mission of the course? • what is needed to accommodate a variety of learning styles? • what is needed to compensate for the drawbacks of asynchronous learning? • what should be fixed as part of the online course, what should flexible in the hand of the teacher during course delivery? Exercise Specify educational activities • Look at the quot;course story board formquot;. This form is a tool to design a whole course. One sheet has room for 1-5 topics containing 1-5 items each. If this is not enough, use more copies of the form. • Place a yellow sticker in the left cell of each row. Write the title of the topic on it. • Now, fill each topic with 1-5 activities (red, yellow, or green stickers). • Choose a colour for each student activity (see table below) • Write on the upper half of each sticker: the activity plus the eventual subtopic. It is important to concentrate on what you want to happen, not on how you are going to use Moodle, e.g. Reading O'Brien, Chapter 5. • Compare your quot;global designquot; with your peers. Change it when appropriate. Colour Meaning Examples (from student point of view) Red Individual activities Reading, working individually, being tested individually. Yellow Synchronous group Synchronous activity, either offline (face-to-face activities meeting) or online (like chat). Green Asynchronous group Asynchronous group activity, like working activities collectively, communicating, presenting, receiving feedback, testing. 2-12-2008 11
- 12. Online Educa Berlin 2008 Preconference Moodle Introduction www.ned-moove.nl Bind to Moodle activities • Link each educational activity to one or more Moodle activities. Use the following mind map to search for possible links. Write your solution in the lower half of the stickers. Student Task File Web Web Assi Chat Choi Foru Glos Hot Jour Less Quiz SCO Surv Wiki Wor Pag Link gn- ce m sa- Pota nal on RM ey k- e men ry - to shop t reading x x x x x communica- x x x ting working x x x x x individually working x x x x x collectively presenting x x x receiving x x x x x x x x x feedback testing x x x x x 2-12-2008 12
- 13. Online Educa Berlin 2008 Preconference Moodle Introduction www.ned-moove.nl Review course design Now, review your course design: • For the resources: add a symbol to indicate whether: • the resource is home-made, • the resource is purchased elsewhere. • For the green and yellow activities: add a symbol to indicate: • plenary activities, • separated subgroup activities, • visible subgroup activities. 2-12-2008 13
- 14. Online Educa Berlin 2008 Preconference Moodle Introduction www.ned-moove.nl Story board form 2-12-2008 14
- 15. Online Educa Berlin 2008 Preconference Moodle Introduction www.ned-moove.nl Design phase - detail Detail design Forum There are several different types of forum to choose from: • A single simple discussion - is just a single topic, all on one page. Useful for short, focussed discussions. • Standard forum for general use - is an open forum where any one can start a new topic at any time. This is the best general-purpose forum. • Each person posts one discussion - Each person can post exactly one new discussion topic (everyone can reply to them though). This is useful when you want each student to start a discussion about, say, their reflections on the week's topic, and everyone else responds to these. • Q And A Forum - The Q & A forum requires students to post their perspectives before viewing other students' postings. After the initial posting, students can view and respond to others' postings. This feature allows equal initial posting opportunity among all students, thus encouraging original and independent thinking. The options for quot;Force everyone to be subscribed?quot; (= to receive e-mail notifications) are: • No • Yes, initially • Yes, forever • No subscriptions allowed The options for RSS feed for this activity are: • None • Discussions • Posts 2-12-2008 15
- 16. Online Educa Berlin 2008 Preconference Moodle Introduction www.ned-moove.nl 2-12-2008 16
- 17. Online Educa Berlin 2008 Preconference Moodle Introduction www.ned-moove.nl 2-12-2008 17
- 18. Online Educa Berlin 2008 Preconference Moodle Introduction www.ned-moove.nl Assignment 2-12-2008 18
- 19. Online Educa Berlin 2008 Preconference Moodle Introduction www.ned-moove.nl Choice The options for quot;publish resultsquot; are: • Do not publish results to students. • Show results to a student after they answer. • Show results to students only after the choice is closed. • Always show results to students. 2-12-2008 19
- 20. Online Educa Berlin 2008 Preconference Moodle Introduction www.ned-moove.nl 2-12-2008 20
- 21. Online Educa Berlin 2008 Preconference Moodle Introduction www.ned-moove.nl Chat The options for quot;Repeat sessionsquot; are: • Don't publish any chat times. • No repeats - publish the specified time only. • At the same time every day. • At the same time every week. 2-12-2008 21
- 22. Online Educa Berlin 2008 Preconference Moodle Introduction www.ned-moove.nl Exercise • Look at your storyboard form for a forum activity. If you found one, fill in the detail form for that activity. • Do the same for an assignment activity, a chat activity, and a choice activity. Review Exercise Assignment • Go to the Moodle Intro course. • Make the assignment in Section 1. Choice • Go to the Moodle Intro course. • Fill in the Choice in Section 1. 2-12-2008 22
- 23. Online Educa Berlin 2008 Preconference Moodle Introduction www.ned-moove.nl 13:15-14:15 - Lunch break 14:15-15:45 - Session-3 Realisation phase 1/3 Synopsis The realisation phase follows the design phase. Now, the real construction of the course (finally) can start. It consists of programming course activities as well as creating or purchasing content materials and all kinds of components like pictures, animations, and video fragments. Finally, all these pieces have to be fit together in the course.This has to be tested, both by the developers and by other people, e.g. a sample of the intended audience. In the case of asynchronous learning, the course activities and content documents are the only links between the distant learner and the institute. It is therefore very important that course materials are visually appealing and attractive. Exercise • Go to your own course. • Create the forum, you prepared before. • Create the assignment, you prepared before. • Create the choice, you prepared before. • Create the chat, you prepared before. Realisation phase 2/3 Assets Assets are the multimedia used in our course materials: • sounds • graphics and animations • pictures • video clips • etc. All these assets have to be created or acquired. Two documents could be of great value: a Style Guide or Art Bible, and the Master Asset List. The first document could be a guide at institutional level describing the rules and policies for online course development (and delivery). It includes samples of any artwork used in courses. When the document focuses on artwork, it is also called the Art Bible, the reference book you use (and may have made yourself) for all asset production or acquisition. One topic to be dealt with in these documents is the standard naming convention for all assets. The Master Assets List contains an exhaustive list of all the art work and other assets you will include in your course. It is recommended to develop such a list in Excel as a spreadsheet can be sorted easily on various fields. Relevant fields are: 2-12-2008 23
- 24. Online Educa Berlin 2008 Preconference Moodle Introduction www.ned-moove.nl • ID-# - a sequence number, just as unique identifier, especially useful in database applications, • name - name according to the standard naming convention, • caption - short title, • format - file type and other relevant technical details, • size - file size, • author/source - author or source of the asset, • creation date, • version, • used - location(s) in the course where this asset will be used, • status - e.g. ordered, draft, final. Sources OpenLearn (OU) The Open University OpenLearn environment 2-12-2008 24
- 25. Online Educa Berlin 2008 Preconference Moodle Introduction www.ned-moove.nl MIT Open Courseware JISC Catalogue Further Education Collections Catalogue 2-12-2008 25
- 26. Online Educa Berlin 2008 Preconference Moodle Introduction www.ned-moove.nl Realisation phase 3/3 Exercise Design a wiki 1/2 • A wiki is a web site (set of web pages) created with easy tools (no programming required) that can be worked on collaboratively. • You can create a wiki that you fill and modify yourself; the students only can browse and read it. You also can create a single wiki that all students may extend and change, or one for each subgroup or even for every single student. In total Moodle can handle 3 different types that can be used in 3 different modes. The type will be fixed when you create a wiki, the mode maybe changed when needed. There are three wiki types: Teacher, Groups, Student. In addition, like any activity, the wiki has the Moodle group modes: quot;No Groupsquot; quot;Separate Groupsquot; and quot;Visible Groupsquot;. This leads to the following matrix of nine possibilities: No Groups Separate Groups Visible Groups Teacher There is only one There is one wiki for There is one wiki for wiki which only the every group which every group which teacher can edit. just the teacher can just the teacher can Students can view edit. Students can edit. Students can the contents. view the wiki of view the wikis for all their group only. groups. Groups There is only one There is one wiki per There is one wiki per wiki. The teacher group. Students can group. Students can and all students can view and edit the change the wiki of view and edit this wiki of their own their own group only. wiki. group only. They can view the wikis for all groups. Student Every student has Every student has Every student has their own wiki which their own wiki, which their own wiki, which only they and their only they and their only they and their teacher can view and teacher can edit. teacher can edit. edit. Students can view Students can view the wikis of other the wikis of all other students in their students in the group. course. Unless the group mode has been forced by the course settings, it can be set with the groups icons on the course home page after the wiki has been created. A teacher can always edit every wiki in the course. • Review your course story board and mark all the places where you want to include a wiki with a small round sticker, marked W. • Fill in the specifications for your first wiki. 2-12-2008 26
- 27. Online Educa Berlin 2008 Preconference Moodle Introduction www.ned-moove.nl 2-12-2008 27
- 28. Online Educa Berlin 2008 Preconference Moodle Introduction www.ned-moove.nl Design a wiki 2/2 • Apart from designing a wiki, by specifying its type and mode and other global characteristics, it is also needed to design the structure of the intended content. • Of course, you can offer your students an empty wiki and let them work from scratch. However, in many cases it helps them if you have structured the content already: 1. by creating a set of empty pages (title only) and their interrelations, 2. by filling certain pages with a format like some headings. • Often the preferred structure for a wiki is the hierarchy. The wiki is then set-up as a book with chapters, subchapters, etc. • However, you are completely free in the way you structure a wiki. Examples: 1. The wiki offers a walk through a visual representation of the knowledge domain of a course. 2. The wiki describes the countries of Europe. Each country has its own page. The pages of neighbour countries are linked. Try to travel from Germany through all countries and back while visiting each country only once. 3. The wiki describes the stakeholders of a certain topic, e.g. the stakeholders regarding educational innovation at your institute. All stakeholders have their own pages. Give them a short description and use links to other stakeholders when appropriate. 4. The wiki describes the rooms of a building you know well (your house?). Each room has its own page. The pages of rooms connected by doors are linked. Once you have constructed this building, another person could try to te-engineer the underlying map. 5. The wiki describes a 2D or 3D matrix. Each cell has its own page. Navigating is possible through adjacent cells/pages in all directions. • Design a wiki by making a drawing of all the pages involved and their interrelations. • Take an empty page. Use little stickers (or draw rectangles) to represent wiki pages; use pencil lines to represent page links. • As an example you may try to design a wiki for the countries of Europe. Only Neigbouring countries will be interconnected by hyperlinks. Source: Google Maps. 2-12-2008 28
- 29. Online Educa Berlin 2008 Preconference Moodle Introduction www.ned-moove.nl Create a wiki • Go to your own course and create the wiki you prepared before. • Once you have filled in the initial wiki form and saved the sessions, the system creates an empty wiki (one empty page only) for you. • On a wiki page, you can create a new page by entering the title of that page between square brackets. As soon as you have saved the current page, the system displays it with the title of the new page in bold, followed by a clickable question mark. If you click the question mark, the system creates the new page for you. • On a wiki page, you can create a link to another page by entering the title of that page between square brackets. 2-12-2008 29
- 30. Online Educa Berlin 2008 Preconference Moodle Introduction www.ned-moove.nl 15:45-16:00 - Short break 16:00-18:00 - Session-4 Implementation phase 1/2 Synopsis The realisation phase ends with the creation of the master copy of the new course. Now it is time to really organise the effective and efficient use of the course. It has to be reproduced for use in other institutes and/or published for use by students. This phase ends when the course passes acceptance tests by the client organisation, by the intended users (staff) and by the organisational unit that will be responsible for the systems management. The success or failure of an online course depends heavily on information and communication technology. In this phase the online course has to be transferred to the organisation that is going to exploit it. This requires technical documentation, an acceptance test and possibly training sessions. Course testing Procedure Once a course is almost finished, it has to be tested in various ways. The system test looks at the course as a technical product. The system test is followed by an acceptance test. Then the course is tested from the point of view of future users. Testing is more than looking at the computer screen and trying out a few options. Testing is, or at least it should be, a systematic activity that has to be planned in advance, executed according to the plan and well documented. The test plan / test log form is a tool for testing. In fact it is a double form. The left part is intended to specify the test plan: all activities that have to be carried out to test the course as well as the expected results. The right part is intended to log the test results. Each line in the test plan corresponds with the same line in the test log. The test log indicates that the test has been executed and describes its results. Eventually follow-up activities are necessary. They normally will be followed by a repetition of some of the earlier tests. • Fill in the following test form. Describe the activities needed to test your course. Describe them in such a way that another person could execute the real testing. 2-12-2008 30
- 31. Online Educa Berlin 2008 Preconference Moodle Introduction www.ned-moove.nl Test Plan / Test Log Form 2-12-2008 31
- 32. Online Educa Berlin 2008 Preconference Moodle Introduction www.ned-moove.nl Exercise • Go to your own course. • In the left column, Administration block, click Assign Roles. • Now, assign the role of student to 2 other workshop participants. • Other participants may assign the role of student in their courses to you. Look at the Courses block in the left column of your course. It will show the courses you have access to. Click on them and have a look. Implementation phase 2/2 Scales Background Teachers can create new custom scales to be used in a course for any grading activities. The name of the scale should be a phrase that identifies it clearly: this will appear in scale- selection lists, as well as on context-sensitive help buttons. The scale itself is defined by an ordered list of values, ranging from negative to positive, separated by commas. For example: Disappointing, Not good enough, Average, Good, Very good, Excellent! Scales should also include a good description of what it means and how it is expected to be used. This description will appear in help pages for teachers and students. Finally, there may be one or more quot;Standardquot; scales defined on your site by the system administrator. These will be available in all courses. Exercise • Specify a scale to be used for grading your students. • Name of the scale: • Values from negative to positive: • • • • • • • • Explanation: Review • Which questions have not been answered until now? • • • 2-12-2008 32
- 33. Online Educa Berlin 2008 Preconference Moodle Introduction www.ned-moove.nl • • • • Evaluation & Follow-up Evaluation • Go to the Moodle Intro course. • Go to Section 4. • Go to the Evaluation Forum and give your reply to the three postings there. Follow-up Moodle at Online Educa: • Four different official Moodle partners (CV&A Consulting from Spain, eLeDia - eLearning im Dialog from Germany, MediaTouch 2000 srl from Italy and Stoas Learning from the Netherlands) are be exhibiting in Gardenlounge 2, E147 and E148. They will have Moodle demonstrations all day. • There are two Moodle sessions on Friday 5 December 2008 titled: Make Mine a Moodle! (part 1 and part 2). The first part will focus on a couple of global implementations (including Shell’s) and the second part will have more audience participation. Moodle on the Internet • Moodle international community at http://moodle.org: download the software, get free support, access to documentation, register of Moodle sites all over the world. Moodle books: • Using Moodle; teaching with the popular open source course management system; 2nd edition; Jason Cole and Helen Foster; O'Reilly Community Press, 2007. • Moodle Administration; an administrator's guide to configuring, securing, customizing, and extending Moodle; Alex Büchner; PACKT Publishing, 2008. • and more Moodle in Dutch speaking countries: • Ned-Moove (www.ned-moove.nl) stands for Nederlandstalige Moodle Vereniging, the Dutch Moodle Association with members and activities in The Netherlands, Belgium/Flandres and Suriname (South America). 2-12-2008 33