Contenu connexe
Similaire à Adega modular (20)
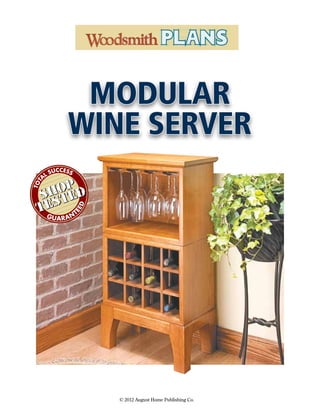
Adega modular
- 2. Weekend Project
One thing that really attracted me to this wine rack is
its modular design. Besides the great stand-alone proj-
ect you see above, it’s just as easy to expand it into the
wine server or buffet that are described later.
But it isn’t just for storing wine. You can use it as a
foundation for a number of storage options. Building
two or more of these basic units allows you to com-
bine them in different ways. For starters, you can
stack them one on top of another, or arrange them
side by side — you can even do a combination of
both if you’d like. By adding a new base for support
or altering the interior design, you can change the
function and appearance significantly.
The most interesting part of this countertop wine
rack is the interlocking gridwork of dividers that
separates the bottles of wine. At first glance, it looks
like a puzzle you might find in a toy store. But unlike
those puzzles, this grid is really quite easy to make
and assemble. And since the dividers aren’t glued
together, finishing all the parts is a snap.
But before you get to finishing the divider assembly,
you’ll need to build the case and base that holds it.
This simple project is functional, stylish, and easy to build. It’s the
basis for even bigger and more versatile wine storage.
Wine Rack
1 WoodsmithPlans.com WS15722 © 2012 August Home Publishing Co. All Rights Reserved.
countertop
- 3. The basic component of the wine
cabinet is a 3/4" plywood case.
You’ll be able to use this case as a
building block for different stor-
age options because of its adapt-
able design. You can see what I’m
talking about in the drawing and
details above.
case joinery. The joinery for the case
is a simple tongue and dado, but
the key to the design is where the
dadoes are located. You’ll notice
that the top and bottom dadoes are
different distances from the ends of
each side (detail ‘c’).
What this does is recess the bot-
tom to provide a space for a posi-
tioning plate that’s used when
stacking another case on top. (You
can see how this works by referring
to page 8). At the top, the panel sits
proud to allow for some hardwood
edging that will cover up the plys,
as in detail ‘c.’
Once you’ve cut the dadoes in the
side panels (A), you can rabbet the
ends of the top and bottom panels (B,
C) to fit. Then, before assembling
the case, cut a rabbet along the back
edge of the top and sides to accept
the 1/4" plywood back that’ll be
added later (detail ‘b’).
For a simple and reliable way to
square things up when you assem-
ble the case, check out the Shop Tip
in the box below.
Panel Edging & Trim. With the case
assembled, you’re ready to add the
panel edging (D) that covers up the
plys on the top and bottom of the
sides, like you see in detail ‘c.’ Then
you can add the trim pieces (E, F).
You’ll notice in the drawing above
that the top and side trim form a lip
to keep the dividers in place, while
the bottom trim is flush with the
bottom panel (detail ‘a’).
Top. Next, you can make the top
(G). After cutting a 3/8" bevel along
all four edges, just screw it in place.
G
F
F
E
E
D
D
D
D
C
NOTE: Case panels are
" plywood. Case top
is 1"-thick hardwood
#/4
CASE SIDE
PANEL
CASE SIDE
PANEL
PANEL EDGING
( " x " stock)!/8 #/4
CASE TOP
PANEL
(11 x 16 )%/8
TOP
CASE BOTTOM
PANEL
SIDE
FRONT
TRIM
SIDE
FRONT
TRIM
BOTTOM
FRONT
TRIM
TOP
FRONT
TRIM
Drill and countersink
from below for #6 x 1 "
Fh woodscrew
!/4
19!/8
2
2
12%/8
1
16%/8
10#/4
13%/16
11
13(/16
17%/8
B
A
A
FRONT SECTION VIEW
G
D
D
#/8" bevel
around
perimeter
of top
#/32"
chamfer
!/4
!/4
!/4
%/8
!/4
#/8
#/4
TOP
CASE TOP
PANEL
C
B
A
c.
SIDE
SECTION VIEW
E
C
1
!/4
!/2
!/4
!/4a.
SIDE SECTION VIEW
G
E
#/8"
bevel
#/8"
bevel
TOP
FRONT
TRIM
#/32" chamfer
#/4
!/4
%/8
Side
rabbet
B
A
b.
Clamping
squares
90°
90°
Edging
Sandpaper
ShopTip:ASquare&SmoothCase
Square the Case. L-shaped corner
clamping squares (drawing at left)
ensure a 90° corner joint.
Edge Strip Sanding Block. The
simple sanding block shown below
eliminates the possibility of cut-
ting into the plywood veneer when
sanding the edging strip.
assemble the
Case
2 WoodsmithPlans.com WS15722 © 2012 August Home Publishing Co. All Rights Reserved.
- 4. making the
Dividers
CENTER
VERTICAL SLAT
VERTICAL SLAT
3#/4
3!/2
11#/4
1
2
3!/2
4&/8
!/2
J
H
Slat Bottom Notches. Cut notches at the
bottom of the vertical front and back slats as
well as the vertical center slats.
Notches. Notch the top of the vertical front
and back, vertical center slats, and top and
bottom of horizontal slats.
Horizontal Slat Center Notch. Finally, cut the
center notches of each of the horizontal slats at
the centerline of the slat.
!/2"dado
blade
3!/2
H
Aux. fence
3#/4
!/2" dado
blade
Top
notch
H
Aux. fence
backs up cut
!/2"dado
blade
Center
notches
Miter
gauge
HORIZONTAL
SLAT
I
3#/4
END
VIEW
!/2
1
H
a.
How-To: InterlockingNotches
At first glance, the divider assem-
bly shown at right appears more
difficult to build than it actually
is. But it’s really nothing more
than making a few different size
slats and then cutting identical
notches in each one.
Solid Assembly. The notches are
the key to forming a solid assembly
when you fit the dividers together.
For a good, tight fit, you’ll need
to accurately locate and size each
notch. But don’t worry, there are
a couple tips to ensure that every-
thing comes out just right.
Cutting the Notches. The table saw
and a dado blade make quick work
of cutting identically sized notches.
You can learn more about getting a
perfect fit between the notches and
slats by making a test notch and
then planing your stock to match.
To ensure that the locations of all
the notches shown in the drawing
at right are consistent, it’s a good
idea to make a reference mark on
the bottom of each slat before you
start. You can see how I did below.
You’ll also see a couple other
handy tips in the drawings for
cutting clean, crisp notches — like
backing up the workpiece with an
auxiliary fence to prevent chipout.
Another good tip to help accurately
reference the bottom of each slat is
to use the rip fence as a stop.
I know, you’re usually told not
to use the rip fence and the miter
gauge at the same time. But the
cuts you make for each notch
don’t go all the way through the
workpiece — so it’s okay to do
this, it’s perfectly safe.
Divider Assembly. Once you have all
the notches cut, assemble the divid-
ers and make a test fit in the case.
After making any “tweaks” for a
smooth sliding fit, disassemble the
dividers and set them aside until
you’re ready to apply a finish.
All that’s left to do at this point to
complete the wine rack is build the
baseandaddthebackthatkeepsthe
divider assembly in place.
HORIZONTAL
SLAT
16
3#/4
4&/8
3#/4
!/2
1
3!/2 3!/2
I
3!/2
FRONT VERTICAL SLATS
BACK
VERTICAL
SLATS
HORIZONTAL
SLAT
CENTER
VERTICAL
SLAT
CENTER VERTICAL SLATS
HORIZONTAL
SLAT
NOTE: Slats are made
from hardwood
planed to fit notches
J
J
I
I
I
H
H
3 WoodsmithPlans.com WS15722 © 2012 August Home Publishing Co. All Rights Reserved.
- 5. The wine rack sits on a base made
by wrapping hardwood aprons
around a plywood panel. This
provides a stable support for set-
ting the rack on a countertop, a
tabletop, or anywhere else you
might want to locate it.
Aprons. I started on the base by
cutting the front/back (K) and side
aprons (L) to final width. But I left
them a little long. This way, I could
cut them for a perfect fit later.
To join the aprons to the panel,
you’llneedtocutagroovealongthe
top inside edge of each apron (see
drawing above). Then to match the
look of the front trim, chamfer the
top outside edge of each apron, like
you see in detail ‘a.’
Base Panel. The next step is to cut
the base panel (M) to final size. Then
cut a rabbet along each edge of the
panel, sneaking up on the fit until
thetonguejustslipsintothegrooves
you cut in the aprons.
To completethebase,allyouneed
to do is miter each apron piece,
“wrap” it around the base panel,
and then glue it in place.
Attach the Base.Attaching the base
to the case is just a matter of screw-
ing it from the bottom, as shown in
details ‘a’ and ‘b’ above. Just don’t
tighten the screws too much. Since
you don’t need the positioning
plates for the wine rack, tightening
the screws too much can pull the
bottom down and bow the case.
ADD the back. All that’s left to com-
plete the wine rack is to cut the back
panel (N) to size from 1/4" plywood.
The back is held in place with
screws, but no glue. This way, you
can remove it any time you’d like.
Apply the finish. Before attaching
the back, you’ll want to apply a fin-
ish to all the parts. Then, reassemble
the dividers and slip it in place (see
photobelow).Finally,screwtheback
on and you’re ready to slip your
wine bottles in place.
BACK PANEL
17#/8
2
!/4
!/2
!/4
N
13%/16
NOTE: Back panel is
made from " plywood!/4
{ Installing the Dividers. Since the dividers are not glued
together it’s easy to apply the finish. And after assembly,
they slide straight into the case from the back.
SIDE
SECTION VIEW
#6 x "
Fh
woodscrew
#/4
Top
panel
Bottom
panel
BACK
PANEL
N
a.
M
L
L
K
K
Case
1#/4
1#/4
#8 x 1 "
Fh woodscrew
!/2
SIDE
APRON
BASE PANEL
(11" x 17")
FRONT
APRON
BACK
APRON
NOTE: Rails are made from
"hardwood, base panel
is made from "plywood
#/4
#/4
1218
FRONT
SECTION VIEW
#8 x 1 "
Fh woodscrew
!/2
!/4"
chamferCase
side
SIDE
APRON
BASE PANEL
2
!/2
#/16
!/4
!/4
M
L
a.
SIDE
SECTION
VIEW
K
Case front
trim
FRONT
APRON
BASE PANEL
#/16
M
b.
completing the
Base
4 WoodsmithPlans.com WS15722 © 2012 August Home Publishing Co. All Rights Reserved.
- 6. modular
Wine Server
Designer Series Project
Inmanyprojects,thefirstthing
you have to do is decide on the
size. For example, with a bed-
room dresser, you can build a
small version or a larger style.
Either way, once you’ve com-
pleted it, you can’t change it.
But that’s not the case with this
modular wine server.
Here, I started small using
a pair of cases from the coun-
tertop wine rack as a building
block.After adding a base and
some wineglass holders, I had
a “complete” project.
But if your home needs a
change or your wine collection
grows, this server can grow
right along with it. You can
evenrearrangethelayoutofthe
inside of the cases. For some
inspiration, take a look at the
photos on the following pages.
5 WoodsmithPlans.com WS15722 © 2012 August Home Publishing Co. All Rights Reserved.
- 7. Cases can be
fitted with wine-
glass holders,
drawers, or
shelves
Solid wood top features
beveled-edge detail
Removable
plywood back
allows insert
to be slipped
in place
Shelf pin holes
for optional shelf
Interlocking insert
holds up to 12
bottles of wine
Sturdy, knock-down base
can be easily modified
to make a wide buffet,
see photo at right
Heavy-duty legs
are laminated
for extra strength
Chamfer on base
matches bevel
on top
Plywood plates
register cases
for stacking
Hardwood edging
disguises plywood edge
Make wineglass holders
yourself (see page 11) or
buy them
OVERALL DIMENSIONS: 19!/8”W x 12%/8”D x 36!/8"H
Server features
easy-to-cut
tongue and
dado joinery
FRONT SECTION VIEW - BASE
The wine server can be expanded to
make a larger buffet. To find out how
to do this, turn to page 10.
>
Glass holders
cradle base
of wine glasses
FRONT SECTION VIEW - TOP
6 WoodsmithPlans.com WS15722 © 2012 August Home Publishing Co. All Rights Reserved.
- 8. F
F
D
D
C
C
B
B
B
B
A
A
A
A
A
A
LEG
FACE
LEG
FACE
LEG
FACE
LEG
FILLERS
LEG
FILLERS
SIDE
RAIL
LEG
FILLERS
CROSS TIE
CROSS TIE
BACK
RAIL
FRONT
RAIL
8
6!/2
3
2!/4
NOTE: Leg faces and fillers, rails, and
cross ties are made from "-thick hardwood#/4
2!/2
2
11
6
Although the main parts of the wine
server are the two plywood cases,
the real key to this modular system
is the knock-down base.
As I mentioned before, every-
thing about this project is designed
to let you customize it any way you
want — and still be able to change
it later. The base is no exception.
If you take a look at the drawing
above, you can see that this is no
ordinary construction.
The advantage of the base is, if
you want to convert the server into
something larger down the road,
you can.All you’ll need to do at that
point is make a set of long rails and
a new base panel.
Before tackling the base, it’s a
good idea to build the cases and top.
This way, you can fine-tune the base
for a perfect match. To build those,
take a look at the detailed instruc-
tions starting on page 1.
The challenge to building the
base is to make it sturdy when it’s
assembled, and still be easy to take
apart. To do that, I built the base
in three sections — two hardwood
ends, and a plywood middle sec-
tion. All it takes to disassemble it is
to remove a few screws.
End Assemblies. Depending on the
size of the project, the base will
have to support a fair of amount of
weight. That’s the job of the ends.
C
CROSS
TIE
Front leg
assembly
Back
leg
assembly
12b.
FRONT
SECTION VIEW
F
D
C
B LEG FILLERS
SIDE RAIL
!/2
1!/4 !/4
!/4
#/4
!/4
CROSS TIE
a.
Cut Dadoes. On an extra-large blank (four leg
faces per blank), cut dadoes for the cross tie. This
will ensure that the dadoes will line up.
Top Dado. Without changing the fence,
insert a plywood spacer to cut the upper
dado for the base panel.
Bevel the Blank. Angle the blade 45° to rip the
faces to size. After making one cut, flip the piece
end-for-end and make the second cut.
Aux.
fence
Leg faces blank
Dado
blade
Leg faces blankClamp
plywood
spacer
to fence
#/4"
Leg face blank
Bevel rip
face to
width
Tilt blade 45°
END VIEW
1!/4
!/4
!/4
a. a.
45°
3a.
building the
Knock-Down Base
How-To:Leg Construction
7 WoodsmithPlans.com WS15722 © 2012 August Home Publishing Co. All Rights Reserved.
- 9. The parts that make up each end
interlock for solid support.
Heavy-Duty Legs. It starts with the
legs, as you can see in the draw-
ing on page 7. The outside faces of
the legs are mitered around a thick
filler. The boxes that run along the
bottom of pages 7 and 8 shows
how they’re made.
Connecting the legs at each end
is a cross tie that slips into dadoes
cut in the leg faces. A side rail
is then glued to the cross tie (as
seen in details ‘a’ and ‘b’ on page
7). The result is a rigid unit that
won’t flex under pressure. All that
remains for the base is to connect
the two end assemblies.
Completing the base. The way the
ends are joined is similar to the
way the legs are connected to each
other. But there’s an important dif-
ference. It starts with a plywood
panel that has tongues cut along all
four edges to fit in the upper dado
cut in the legs, as shown in details
‘b’ and ‘c’ at right.
The difference is that instead of
gluing the plywood panel in place,
I attached it with screws, as you can
see in the drawing. Using screws
makes the base easy to take apart
and reuse for a larger project in the
future. (All you need to make is a
largerplywoodpanelandnewfront
and back rails.)
The front and back edges of the
base are covered by a pair of hard-
wood rails. Besides covering the
plywood edges, the rails prevent
the base from sagging. Just be sure
to glue the rails to the base only.
Assembly. Finally, you can stack
the cases on the base. To keep them
from sliding around, I screwed a 1/4"
plywood plate to both the
base and lower case (details
‘a’ and ‘b’).
Glue Up Leg Faces. A waxed, rab-
beted key and spacer keeps the leg
faces square as they are glued up.
Glue in Leg Fillers. Next, glue leg fill-
ers to the faces to complete the blank.
Then square up the edges.
Cut to Shape. Use the tem-
plate at right to cut the leg,
then sand it smooth.
LEG
FACE
LEG FILLERS
LEG
FACE
B
A
A
Cut to waste
side
of curve
A
A Rabbeted
key block
Scrap
block
LEG CURVE TEMPLATE
ENLARGE 200%
2
2
G
G
F
F
E
PLATE
BACK
RAIL
FRONT RAIL
PLATE
BASE PANEL
(11" X 17")
NOTE: Cleats are made from "
plywood, base panel is made from
" plywood. Rails are made from
"-thick hardwood
!/4
#/4
#/4
Case
Leg
assembly
Leg
assembly
Drill and
countersink
holes for
#6 x " Fh
woodscrew
%/8
Drill and
countersink
holes for
#8 x 1 " Fh
woodscrews
!/4
Case
16!/8 10#/4
2
2
21#/4
1#/4
#/4
12
G
G
F
F
E
PLATE
BACK
RAIL
FRONT RAIL
PLATE
BASE PANEL
(11" X 17")
NOTE: Cleats are made from "
plywood, base panel is made from
" plywood. Rails are made from
"-thick hardwood
!/4
#/4
#/4
Case
Leg
assembly
Leg
assembly
Drill and
countersink
holes for
#6 x " Fh
woodscrew
%/8
Drill and
countersink
holes for
#8 x 1 " Fh
woodscrews
!/4
Case
16!/8 10#/4
2
2
21#/4
1#/4
#/4
12
FRONT
SECTION VIEW
G
E
PLATE
#/16
Leg
assembly
c.
SIDE
SECTION VIEW
G
F
E
FRONT
RAIL
PLATE
#8 x 1
Fh woodscrew
!/4
Bottom
front
trim
Leg
assembly
!/4
!/4 !/2
b.
G
PLATE
Case top
panel
Case bottom
panel
#6 x " Fh woodscrew%/8
FRONT SECTION
VIEW
(Stacked Cases)
a.
8 WoodsmithPlans.com WS15722 © 2012 August Home Publishing Co. All Rights Reserved.
- 10. Now that the base is complete, all
that remains is to outfit the inside
of the cases. In addition to the wine
bottle divider shown on page 3, the
drawings on this page show you
four other options — wineglass
holders, two different shelves, and
a drawer. Since the backs of the
cases are only screwed on, it’s easy
to install one option and switch to
another down the road.
wineglass holders. The wineglass
holders are designed to cradle the
base of the glasses, as in detail ‘a’
above. Making the holders is a sim-
ple table saw task. To find out how,
turn to page 11. Pre-made holders
are also available.
Two Shelves. The second option to
consider is adding a shelf. But in
order to do that, you’ll need to drill
some holes in the case to hold the
shelf support pins. I drilled three
columns of holes to accommodate
two shelf sizes. In the drawing
above, you can see each shelf is
nothing more than a small plywood
panel with some edging.
Finally, you can add a drawer,
which is detailed below.
FRONT SECTION VIEW
HH
HALF
GLASS
HOLDER
GLASS
HOLDER
!/8
Drill and countersink
holes for #6 x 1 "
Fh woodscrews
!/2
!/4
#/4
2#/4 1!!/16
1!/8
Case top
panel
FRONT
SECTION VIEW
KI
Case
side
Shelf
pin !/2
!/4
b.
N
N
P
P
M
L
DRAWER
GUIDE
DRAWER
BACK
3" drawer
pull
#6 x " Fh
woodscrew
%/8
NOTE: Drawer front
is "-thick hardwood.
Sides, back, and drawer
guides are "-thick
stock. Drawer bottom
is " plywood
#/4
!/2
!/4
DRAWER
FRONT
DRAWER
SIDE
15
2!/2
10!/2
15!/2
DRAWER BOTTOM
(10" x 15")
10#/4
1
DRAWER
SIDE
O
FRONT
SECTION
VIEW
N
P
!/2
!/4
!/4
!/4
!/4
ply.
#/16
1!#/16
1
1
DRAWER
SIDE
O
c.
TOP VIEW
N
L
!/2
!/4
#/4
!/4 !/2
DRAWER
SIDE
DRAWER
FRONT
a.
TOP VIEW
N
M!/2
!/4
!/4
DRAWER
SIDE
DRAWER
BACK
b.
For the wine server, I built a pretty simple drawer box
with a sturdy, locking rabbet at the front and simpler,
tongue and dado at the back (details ‘a’ and ‘b’). Before
assembling the drawer, I cut a centered groove in each
side. The sides ride on drawer guides that have a lip
along the bottom edge, as shown in detail ‘c.’ Once
installed, the guide is hidden by the case’s front trim.
Option:HangingDrawer
K
J
J
I
H H
H
H
GLASS
HOLDER
FULL SHELF
(10 " x 16")!/2
SHELF EDGING
SHELF
EDGING
HALF SHELF
(6"x 16")
HALF
GLASS HOLDER
NOTE: Shelves are made from
"plywood. Edging is "-thick
hardwood. Glass holder is
1"-thick hardwood
#/4 !/4
NOTE: To make
glass holders,
see page 11
2#/4 1!!/16
1
1
4 " from
bottom panel
!/2
Shelf
pin
10#/4
1 1
a.
adding a
Shelf or Glass Holders
9 WoodsmithPlans.com WS15722 © 2012 August Home Publishing Co. All Rights Reserved.
- 11. Plates keep stacked
cases in place
The biggest advantage of the wine
server is that the individual cases can
be adapted to different configurations.
The same goes for its size.
The photo at right and the draw-
ing below show a larger “buffet” ver-
sion. Besides adding four additional
cases (how you arrange the inside is
up to you), all you’ll need to do is make
a few new parts. First, you’ll need a
new, longer hardwood top. Then make
an extended plywood base and a pair
of front and back rails. The dimensions
for these are shown below. The end leg
assemblies remain the same.
Like the server, the buffet version
uses 1/4" plywood plates to keep each
of the cases in place (detail below).
Server to Buffet
10 WoodsmithPlans.com WS15722 © 2012 August Home Publishing Co. All Rights Reserved.
- 12. Remove Waste. Avoid pinching waste
between the blade and the fence, or the
waste becomes a potential missile.
Taper Cut. Set the fence at 5⁄8" and raise the blade
to 1" high and at a 7° angle to make the first cuts
for the wineglass hangers.
Make End Hangers. The cut to make
the end hangers is off-center to give you
enough wood to screw into.
Although you can buy wineglass
hangers from commercial sources,
you are limited in the choices of
wood the hangers are made from.
Since our cabinet was built out of
cherry,wedecidedtomakeourown
hangers out of cherry to match.
NO JIG REQUIRED. As you can see in
the How-To section below, all that’s
really required to make both the
single-sided and the double-sided
hangers — other than some 1"-thick
stock — is a table saw.
My goal was to make the angles
of the hangers fit the wineglass
stemware. First, I set my table saw
fence, raised the saw blade to the
right height, and angled the blade,
as you can see in detail ‘a’ below. I
then ran all the stock through.
After the first cuts were made,
I flipped all but two of the stock
pieces end-over-end and ran them
through the saw setup again. The
remaining two stock pieces will
eventually become the end hangers
(thus, single-sided), so they only
need one side cut.
I then lowered the blade and
re-set the angle to 90°. After
adjusting the fence, I ran all the
stock through to remove the
waste. Then, I turned all but the
two end pieces around and ran
them through this saw setup (see
middle drawing below). Be care-
ful not to put too much pressure
alongside the fence, or the blank
might tip and lift off the saw table.
SAFETY NOTE. When removing waste
from a “notch” type of cut, make
sure the waste is on the outside of
the saw blade (see middle drawing
below). Otherwise, the waste may
get pinched between the saw blade
and the fence and shoot back at you
like a missile.
CUTTING END HANGERS. You can’t
just cut a two-sided hanger down
the middle to get the end pieces,
because you wouldn’t have enough
wood to drive a screw into it. To
complete the end pieces, I set the
saw fence to cut away the waste off
the center line, as in the drawing
below on the far right.
a.
How-To: WineglassHangers
Making the Hangers
11 WoodsmithPlans.com WS15722 © 2012 August Home Publishing Co. All Rights Reserved.
- 13. 12 WoodsmithPlans.com WS15722 © 2012 August Home Publishing Co. All Rights Reserved.
Countertop Wine Rack
Materials, Supplies, & Cutting Diagram
K
D
E F
K
G
A B
C
M
A
N
I
J J J
H
H
H
H
H
H
I I I
G G
L
L
#/4" x 5" - 36" Cherry (1.3 Bd. Ft.)
#/4" - 24" x 48" Cherry Plywood !/4" - 24" x 24" Cherry Plywood
1" x 5" - 60" Cherry (2.6 Bd. Ft.)
!/2 !/2" x 6 " - 72" Cherry (3.3 Sq. Ft.)
!/2 !/2" x 6 " - 60" Cherry (2.7 Sq. Ft.)
A Case Side Panels (2) #/4 ply. - 11 x 13%/16
B Case Top Panel (1) #/4 ply. - 11 x 16%/8
C Case Bottom Panel (1) #/4 ply. - 10#/4 x 16%/8
D Side Panel Edging (4) !/8 x #/4 - 11
E Case Top/Bottom Front Trim (2) !/2 x 1 - 17%/8
F Case Sides Front Trim (2) !/2 x 1 - 13(/16
G 21x1)1(poT %/8 - 19!/8
H Divider Front/Back Vertical Slats (6) !/2 x 2 - 11#/4
I Divider Horizontal Slats (4) !/2 x 4&/8 - 16
J Divider Center Vertical Slats (3) !/2 x 4&/8 - 11#/4
K Base Front/Back Aprons (2) #/4 x 2 - 18
L Base Side Aprons (2) #/4. x 2 - 12
M Base Panel (1) #/4 ply. - 11 x 17
N Back Panel (1) !/4 ply. - 13%/16 x 17#/8
• (6) #8 x 1!/2" Fh Woodscrews
• (12) #6 x #/4" Fh Woodscrews
- 14. 13 WoodsmithPlans.com WS15722 © 2012 August Home Publishing Co. All Rights Reserved.
Modular Wine Server
A Leg Faces (8) #/4 x 3 - 8
B Leg Fillers (12) #/4 x 2!/4 - 6!/2
C Cross Ties (2) #/4 x 2!/2 - 11
D Side Rails (2) #/4 x 2 - 6
E Base Panel (1) #/4 ply. - 11 x 17
F Front/Back Rails (2) #/4 x 2 - 12
G Plates (2) !/4 ply. - 10#/4 x 16!/8
H Glass Holders (5) 1 x 2#/4 - 10#/4
I Full Shelf (1) #/4 ply. - 10!/2 x 16
J Shelf Edging (1 Per Shelf) !/4 x #/4 - 16
K Half Shelf (1) #/4. ply. - 6 x 16
L Drawer Front (1) #/4 x 2!/2 - 15!/2
M Drawer Back (1) !/2 x 2!/2 - 15
N Drawer Sides (2) !/2 x 2!/2 - 10!/2
O Drawer Bottom (1) !/4. ply. - 10 x 15
P Drawer Guides (2) !/2 x 1!#/16 - 10#/4
• (6) #8 x 1!/4" Fh Woodscrews
• (8) #6 x %/8" Fh Woodscrews
• (6 Per Optional Drawer) #6 x %/8" Fh Woodscrews
• (15) #6 x 1!/2" Fh Woodscrews For Glass Holders
• (4 Per Optional Shelf) !/4" Spoon-style Shelf Pins
• (1 Per Optional Drawer) 3"Drawer Pull w/Screws
Materials, Supplies, & Cutting Diagram
A
C D F
D F
L
J
B B B B
E
K
I
G
G
O
B B B B
B B B B
A
H
H
N N M P P
H H
H
C
A
A
A
A
A
A
#/4" - 24" x 48" Cherry Plywood
!/4" - 24" x 48" Cherry Plywood
#/4 !/2" x 7 " - 60" Cherry (3.2 Bd. Ft.)
#/4" x 7" - 36" Cherry (1.8 Bd. Ft.)
1" x 6" - 36" Cherry (1.9 Bd. Ft.)
!/2" x 3" - 60" Cherry (1.3 Sq. Ft.)
- 15. It won’t take a lot of hardware to
build the wine server. Besides
some screws, you’ll need a few
other things. The shelf pins
(22765) and drawer pull (30066)
came from Rockler. You should
be able to find similar items avail-
able locally as well.
If you don’t plan on making the
wineglass molding, you can pur-
chase some from Rockler. The
number is 22210 for a 36” piece.
One thing to know, however, is
that it’s only available in red oak.
mail
order
sources
Woodsmith Store
800-444-7527
Rockler
800-279-4441
rockler.com
Project Sources
14 WoodsmithPlans.com WS15722 © 2012 August Home Publishing Co. All Rights Reserved.